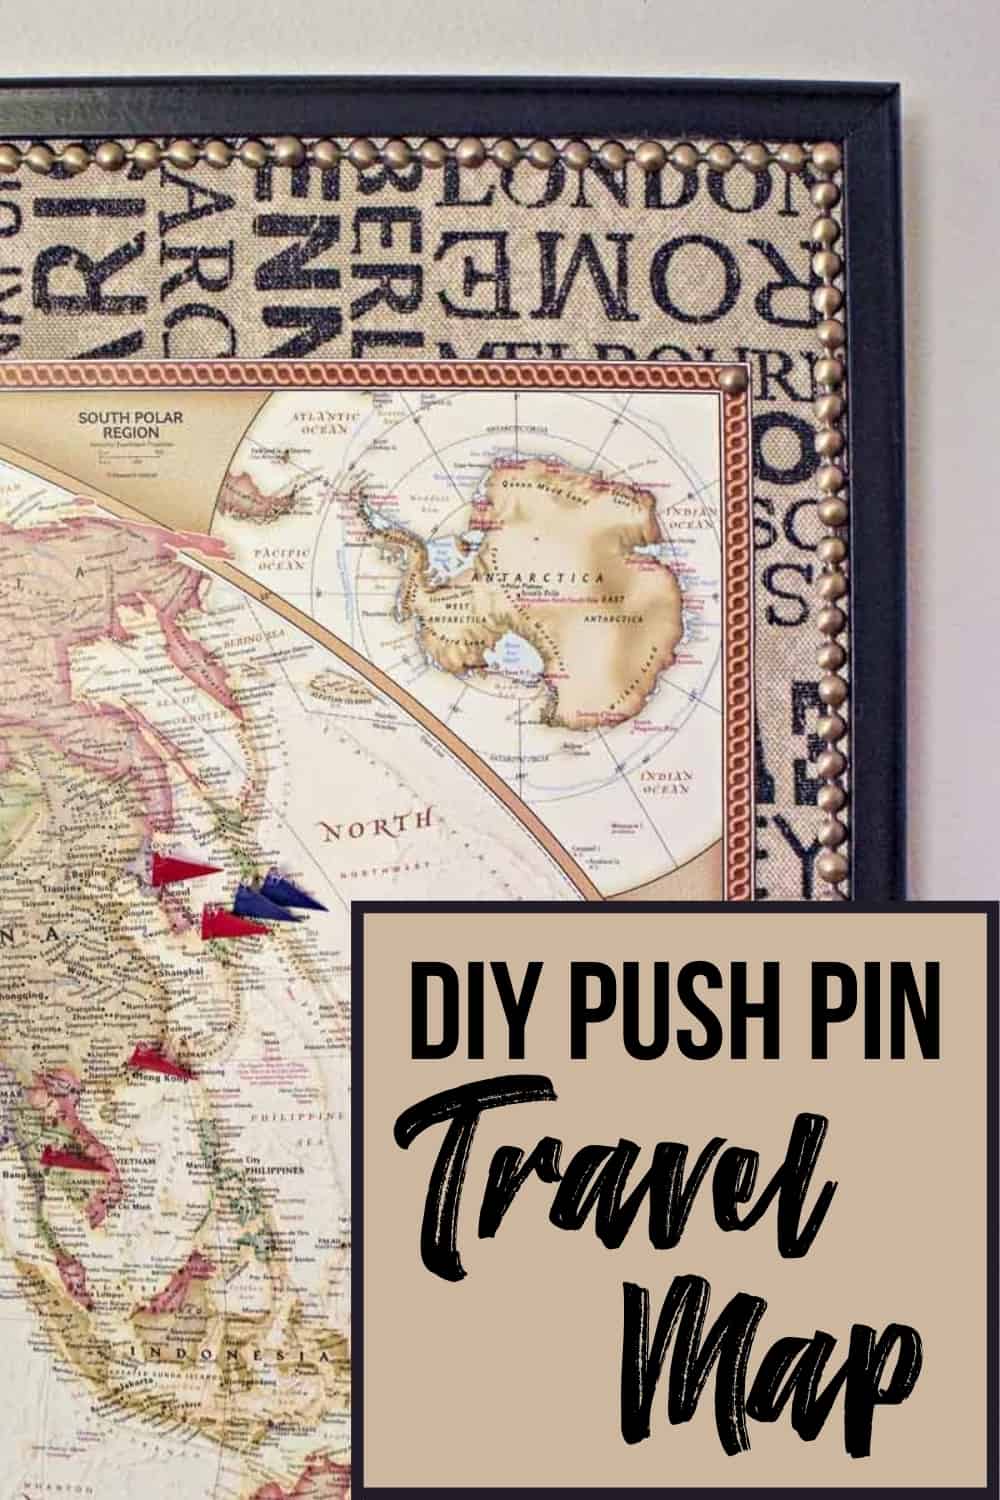
Transform a drab bulletin board into a DIY push pin travel map to keep track of all your adventures! Dress it up with fabric and fancy trim to display in your home office!

We didn't travel far from home when I was growing up. It wasn't until college that I was bitten by the travel bug, hard. Now I want to go to all. the. places! Even our son loves to go on adventures, and would rather stay in a hotel than in his own bed.
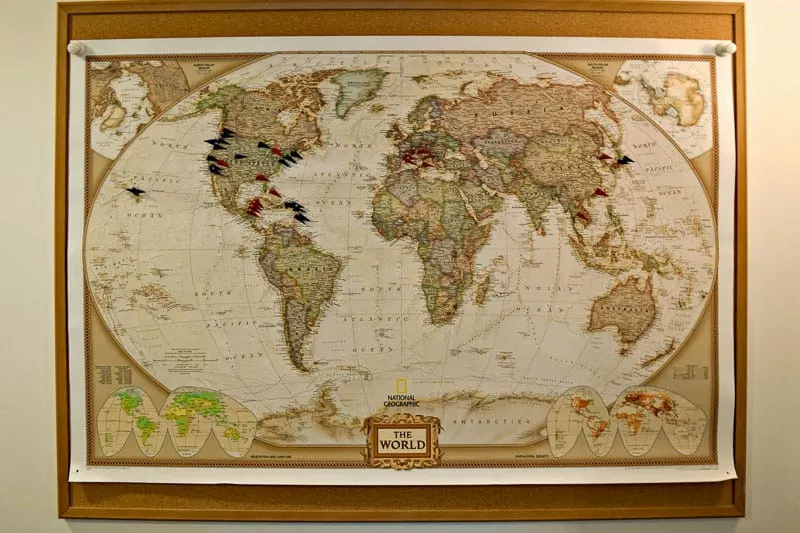
We've been keeping track of our travels on a big world map mounted on a bulletin board with colored flags to pinpoint each location. But all the neutral colors were looking a bit bland, and the corners were starting to curl from the missing push pins at the bottom.

While we won't be doing any traveling anytime soon thanks to the pandemic, we've been planning where we want to go when this whole thing is over. We're dreaming big, and no destination is off the table! Australia and New Zealand, we're coming to you soon! 🙂
In the meantime, it's time to give this blah map a new look!
Materials Needed for DIY Push Pin Travel Map
- World map
- We have this National Geographic map which clearly marks cities with a dot for easy pinning.
- If you're more of a domestic traveler, here are some nice maps of the United States.
- Large cork bulletin board
- This one is similar to mine. You want the cork board to be slightly larger than your map.
- Fabric
- I used this travel-themed one. You can find lots of similar options here or here.
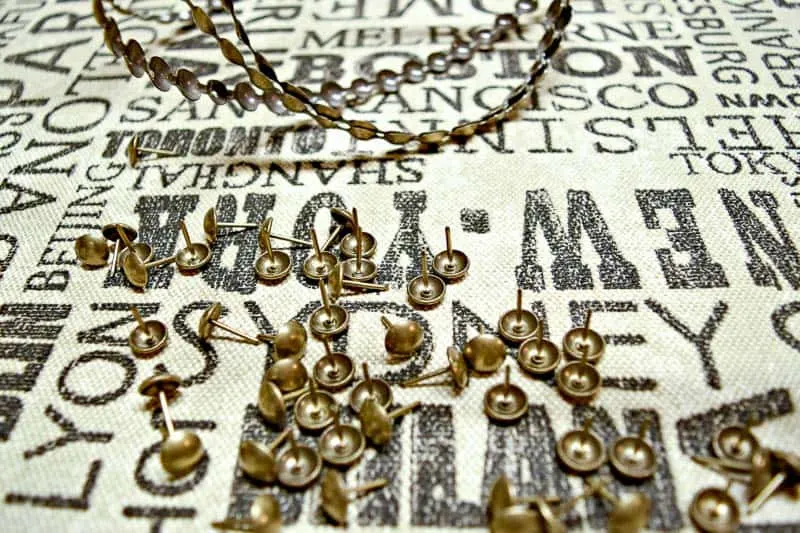
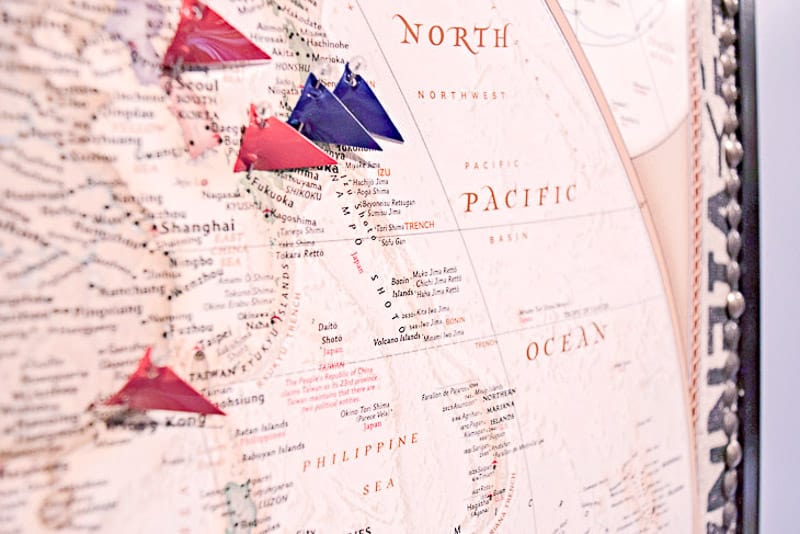
- Map pins
- I use various colored flags to indicate where different members of our family have traveled. Red for my husband and I together, and blue for our whole family. You could use another color to indicate where you would like to go in the future.
- Spray adhesive
- Rotary cutter
- Paint
- Painter's tape
- Nailhead trim (optional)
- I used the antique gold color, and 5 yards was the perfect amount for my project.
How to make a push pin travel map
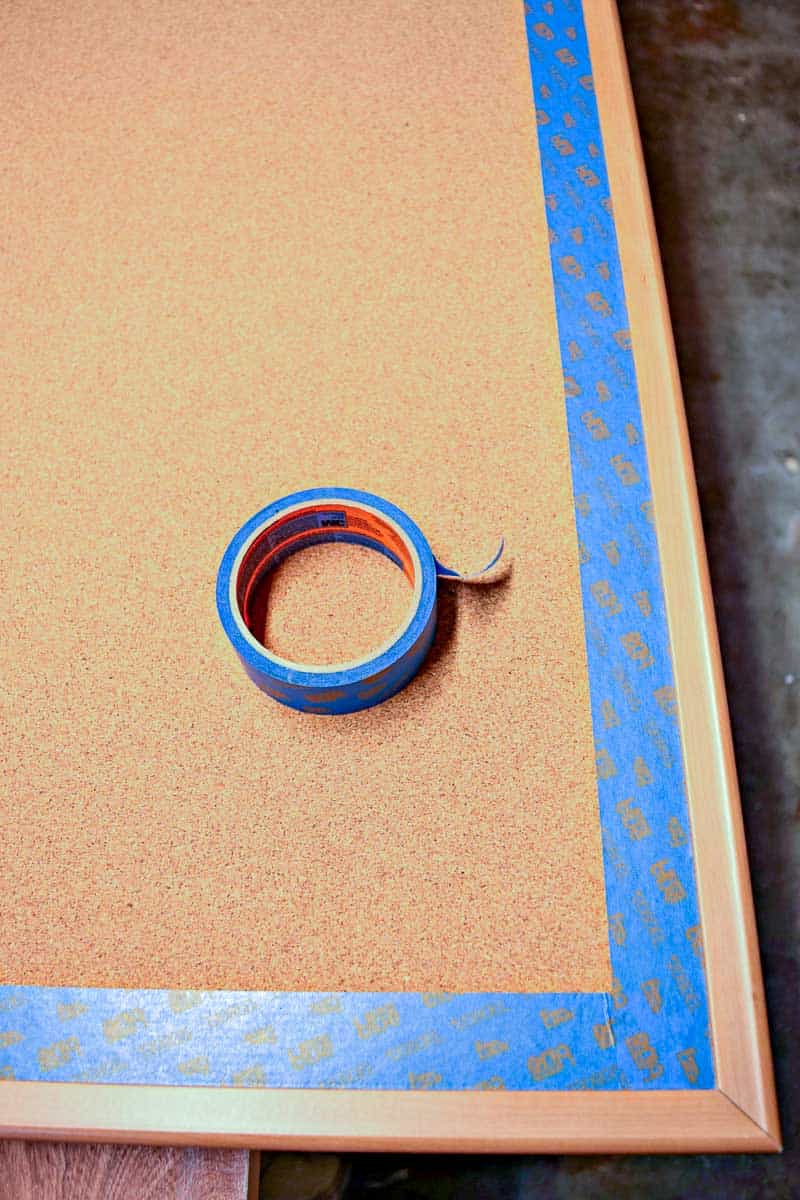
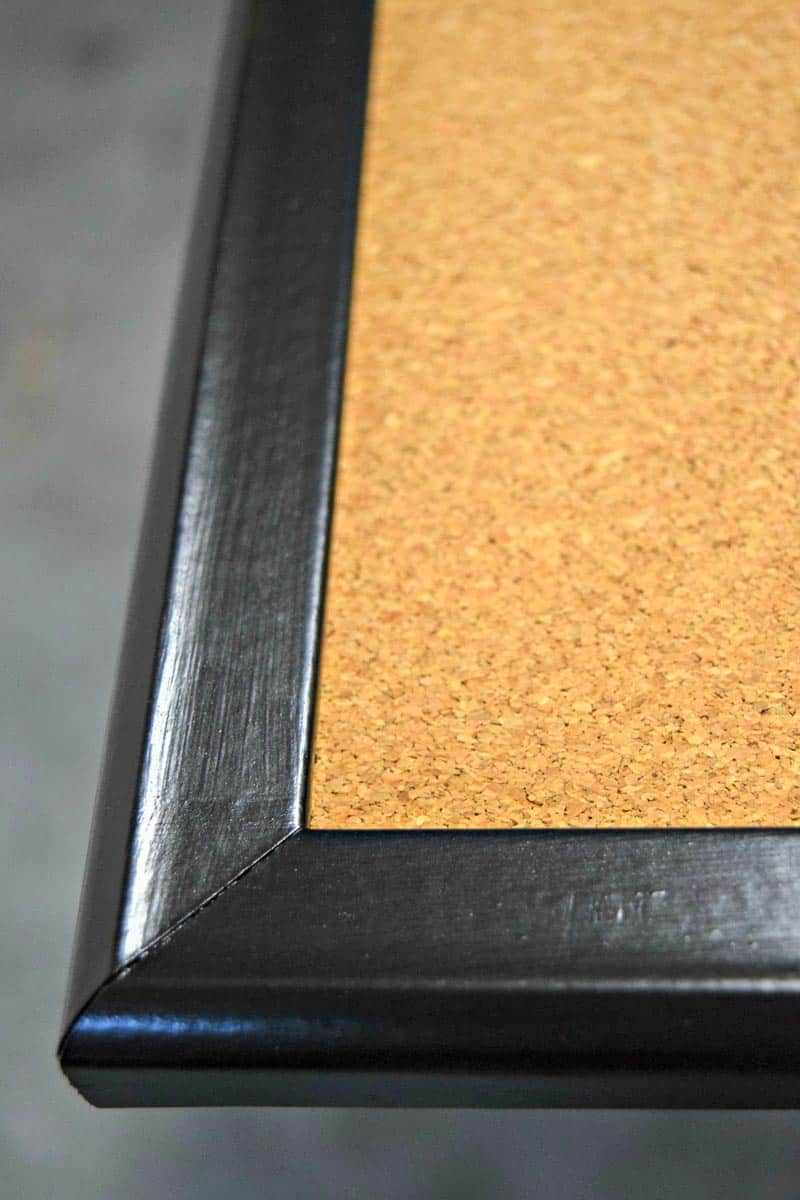
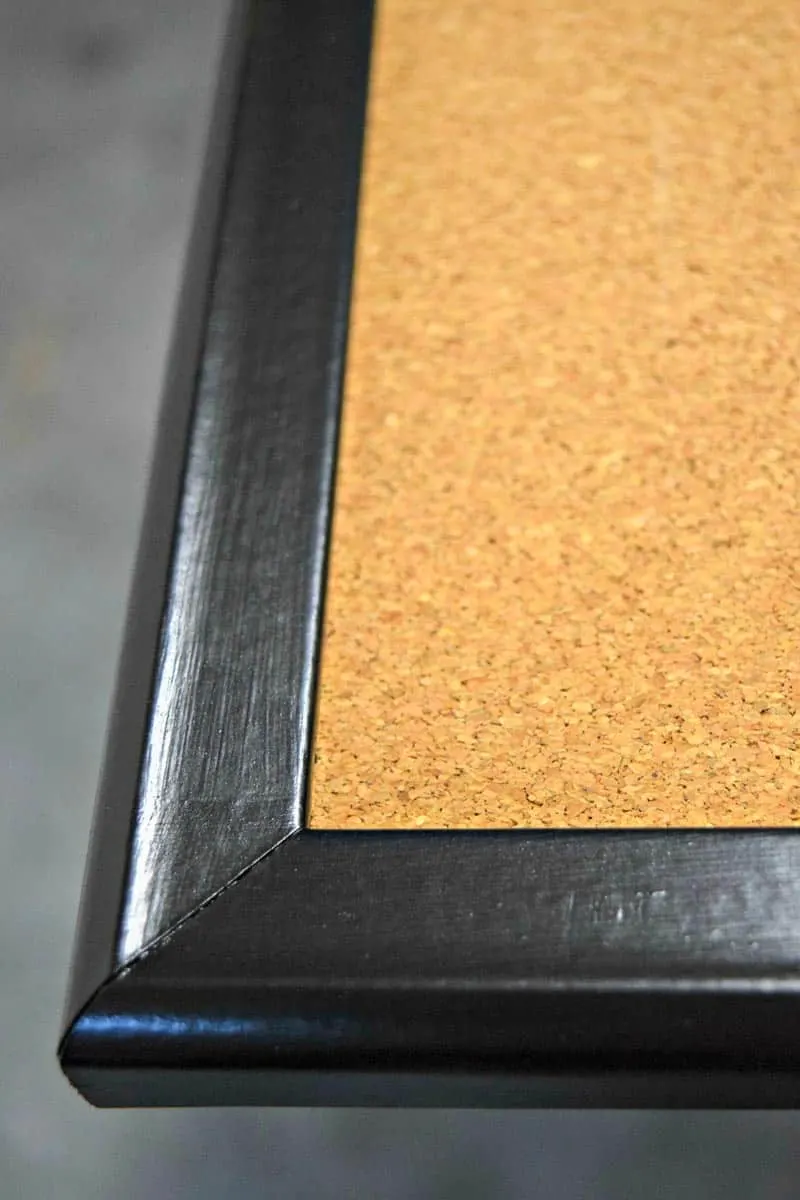
Paint the frame
After removing the pins and map, I was left with a boring brown cork board with an even more boring frame. I wanted a bit more contrast, so I taped off the inside edge of the frame on the cork with painter's tape. Then give the wood a light sanding, just to scuff up the surface and make it easier for the paint to adhere.
Apply two coats of paint to the frame. Much better!
Add fabric backing
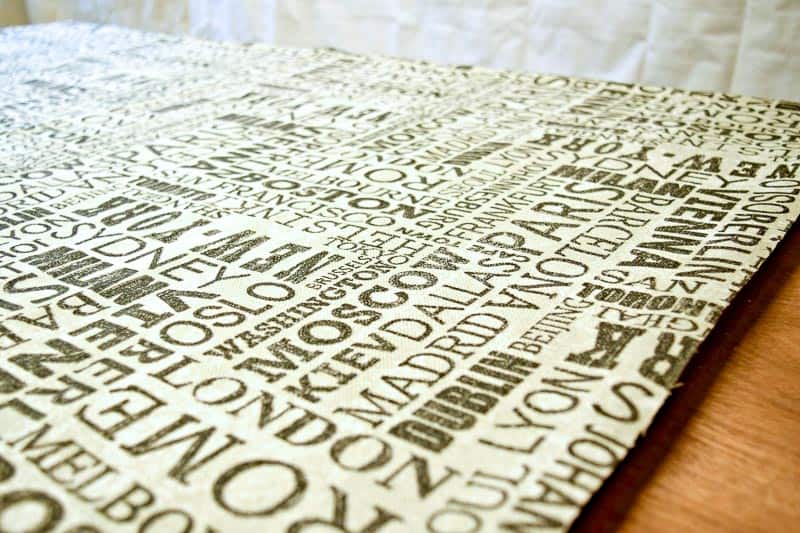
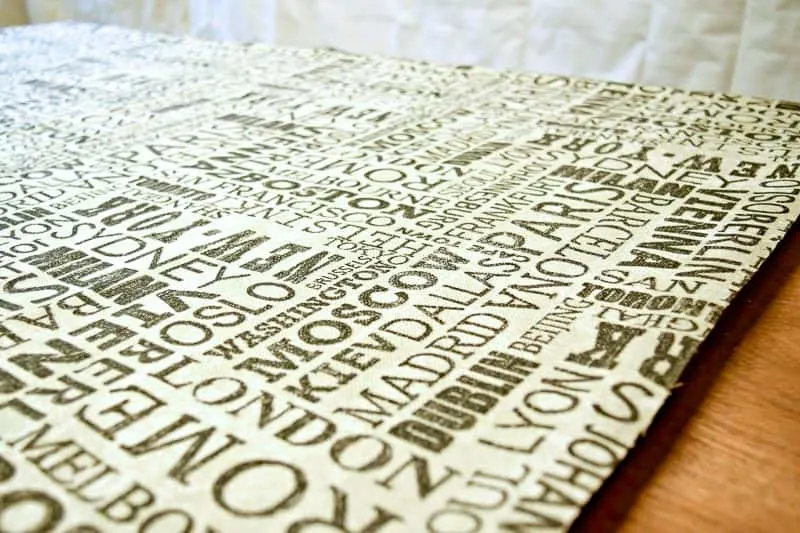
Fabric is a great way to change up a boring bulletin board. It doesn't show pin holes like decorative paper does, and you can change it up whenever you want!
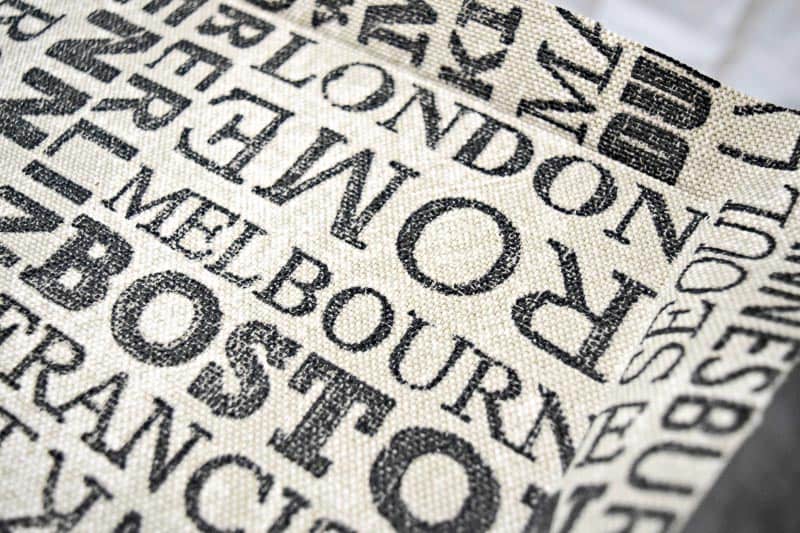
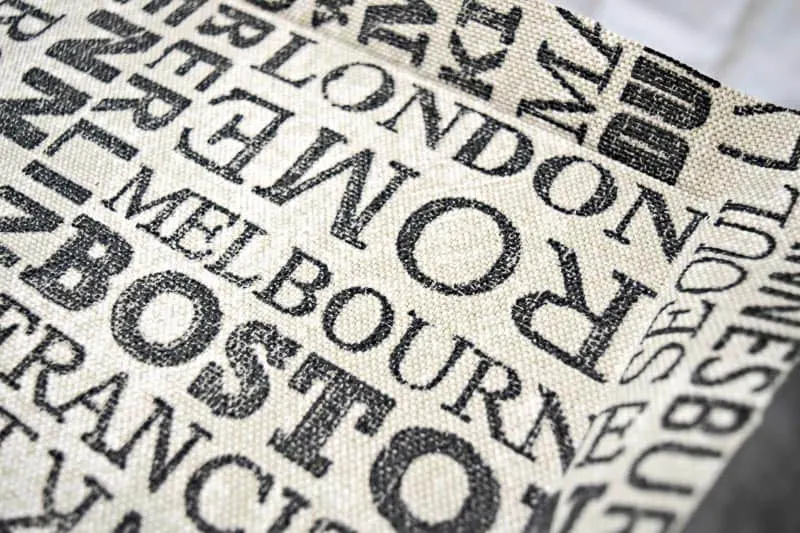
I had a yard and a half of this city themed fabric left over from my sewing days. It has a burlap texture, so it wasn't going to work for the throw pillows I had envisioned. But it was perfect for this project!
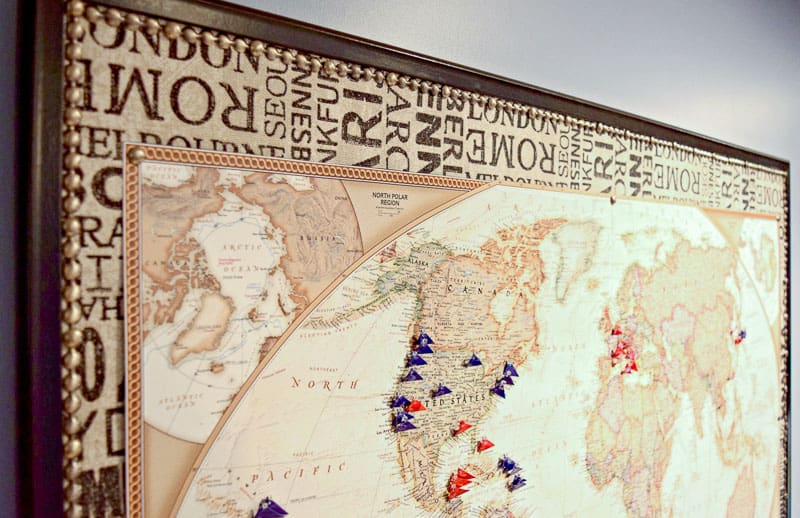
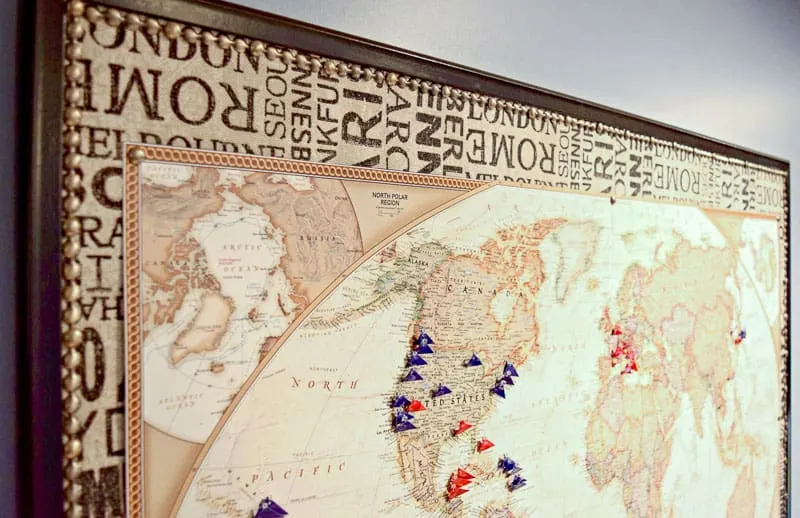
Place the fabric on top of the bulletin board. Trim off the excess, leaving just enough overlap to cover the frame.
Now flip the fabric over and spray the back generously with the spray adhesive. This particular adhesive is repositionable, making it easy to move the fabric around and get the words lined up exactly as I wanted. Once it's in place, press the fabric down and crease the edges and corners around the inside of the frame.
Use a rotary cutter right up against the edge of the frame to trim away the excess fabric. Be careful not to press down too hard or you'll cut straight through the cork!


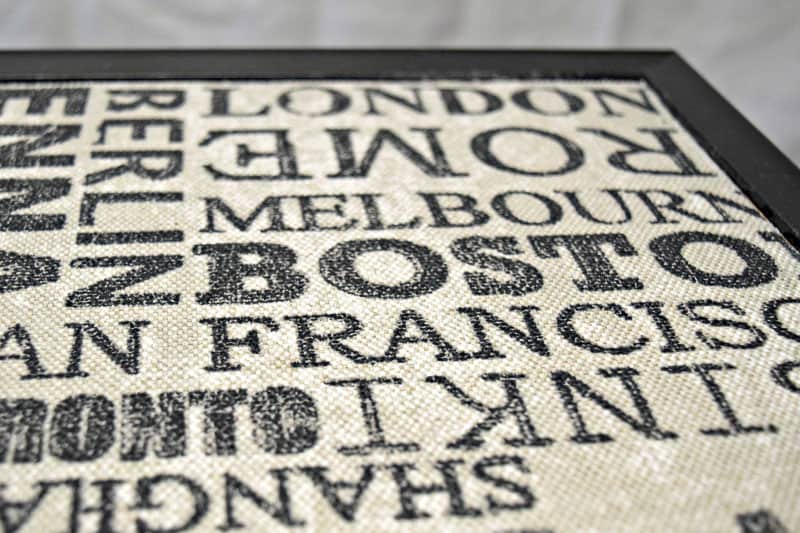
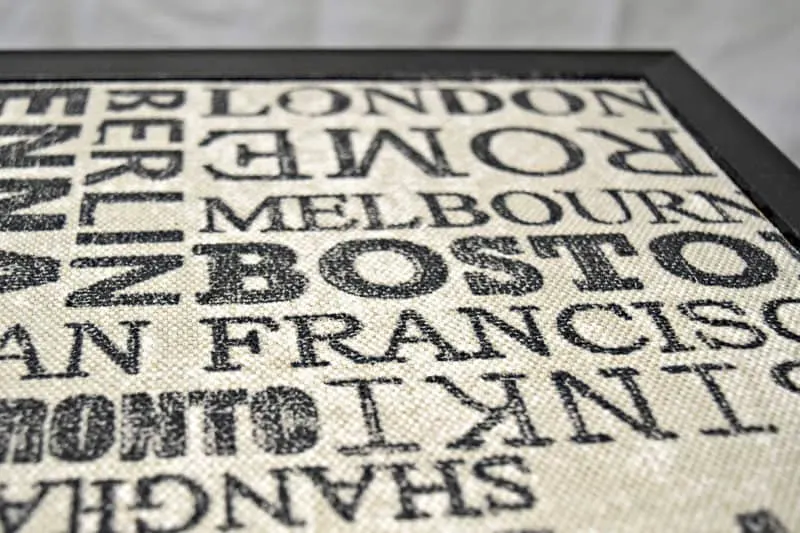
Adding the fabric totally transformed the look of the bulletin board! You can leave it just like this, but I was worried the adhesive would eventually lose its hold and the fabric would fall off.
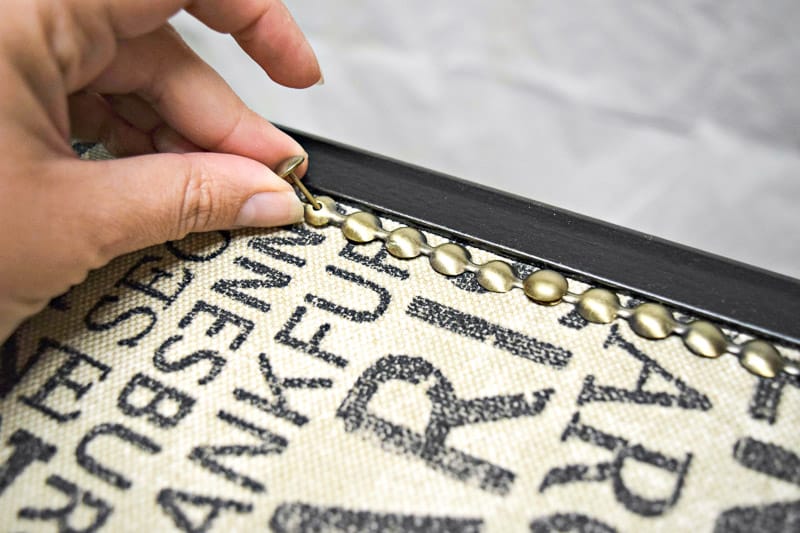
Add nailhead trim (optional)
This upholstery nailhead trim was the perfect addition to take my project up a notch. It was super easy to attach, too. It comes on a roll, with additional nail heads that are used just like thumbtacks on a bulletin board!

To secure the trim to the board, simply insert a nailhead pin into the hole in the trim. On furniture, you would use a hammer to do this, but it goes in easily with just your finger here.

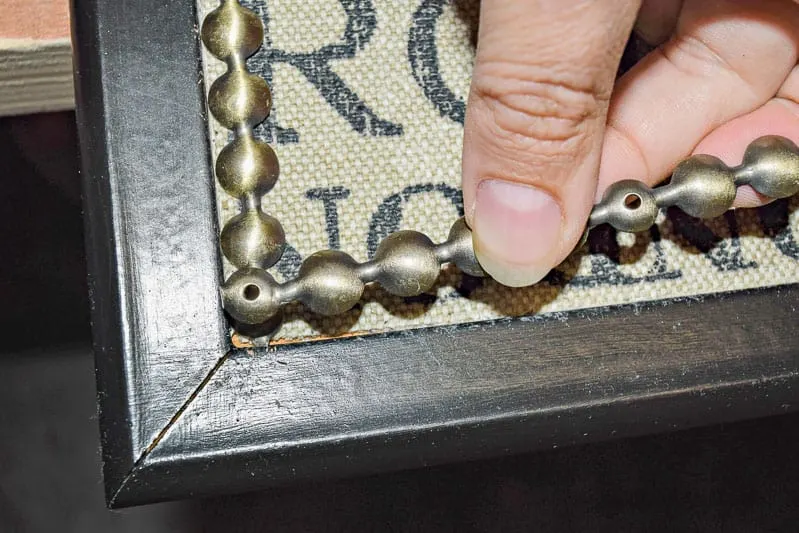
At the corners, I snipped off the excess with cutting pliers. The dimensions of my bulletin board matched up perfectly with the holes of the nailhead trim. I just overlapped the holes at the corners and covered them with a pin.

Attach the paper map to the board
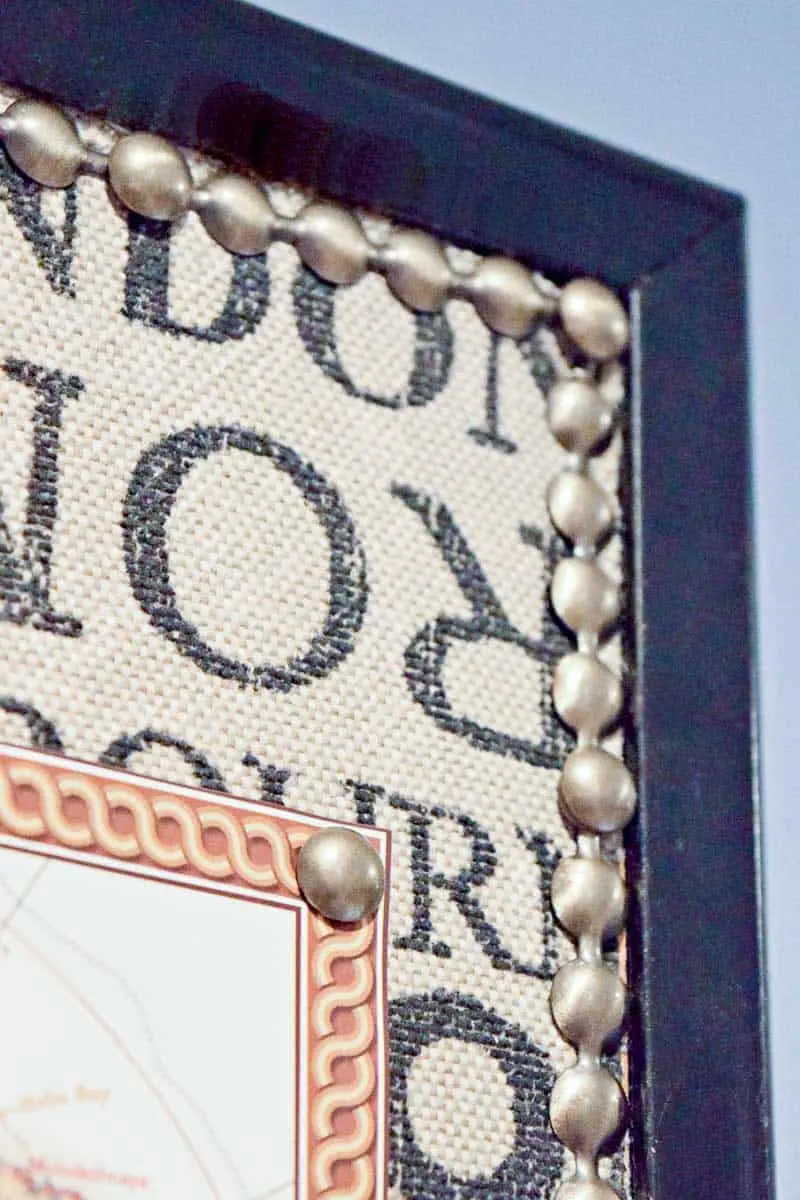
The edges of my paper map were starting to curl, so I trimmed away the white border. It also made the map coordinate better with the fabric behind it. I had extra nailhead pins, so I used them to secure the map to the board at the corners.

Add colored flags to mark your travels
The flag pins were inserted back into their original locations. The red pins are for places my husband and I visited before our son was born, and the blue ones are for family trips.

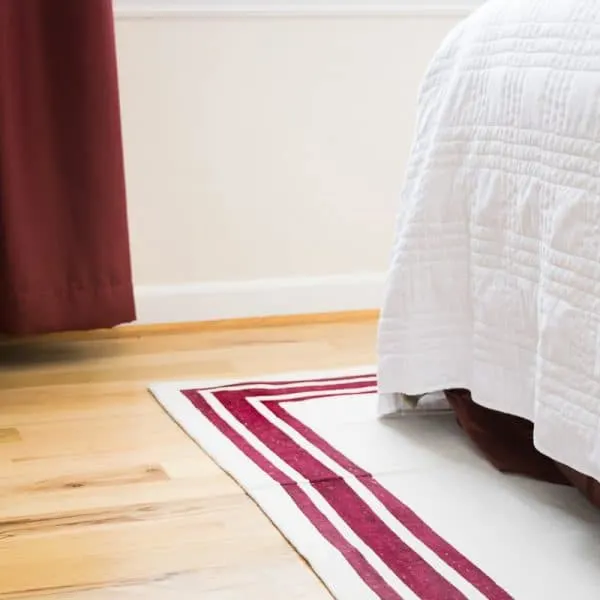
What a transformation! It's hard to believe this is the same drab bulletin board. The fabric backing and metal border really elevate it from a plain and boring cork board to a beautiful DIY push pin travel map!
Want your own push pin travel map, but don't want to DIY it? Here's a similar framed map with cork backing I found on Amazon here. You can choose your own frame color, and it even provides you with the pins!
Check out these other easy DIY projects!

Laurie
Thursday 28th of July 2016
Love this! My daughter and her husband are currently traveling the world. This would be a great way for us to keep up with where she is and where they have been. Thanks so much for sharing! Pinning
melanie
Wednesday 27th of July 2016
These travel board would make a lovely wedding gift for a couple who loves to travel!
New York Roofing
Monday 25th of July 2016
This DIY project is awesome to try. And, it will motivate us to plan more trips. Your travel board is looking fantastic.
Dara
Monday 25th of July 2016
This is awesome!
Sam@Raggedy Bits
Tuesday 19th of July 2016
This turned out fab!! I love the fabric that you used!
The Handyman's Daughter
Tuesday 19th of July 2016
Thanks Sam! I was so excited to finally have a good use for it!