Organize any drawer with these simple DIY drawer dividers! You can use foam board or plywood with adhesive divider holders for a custom fit.

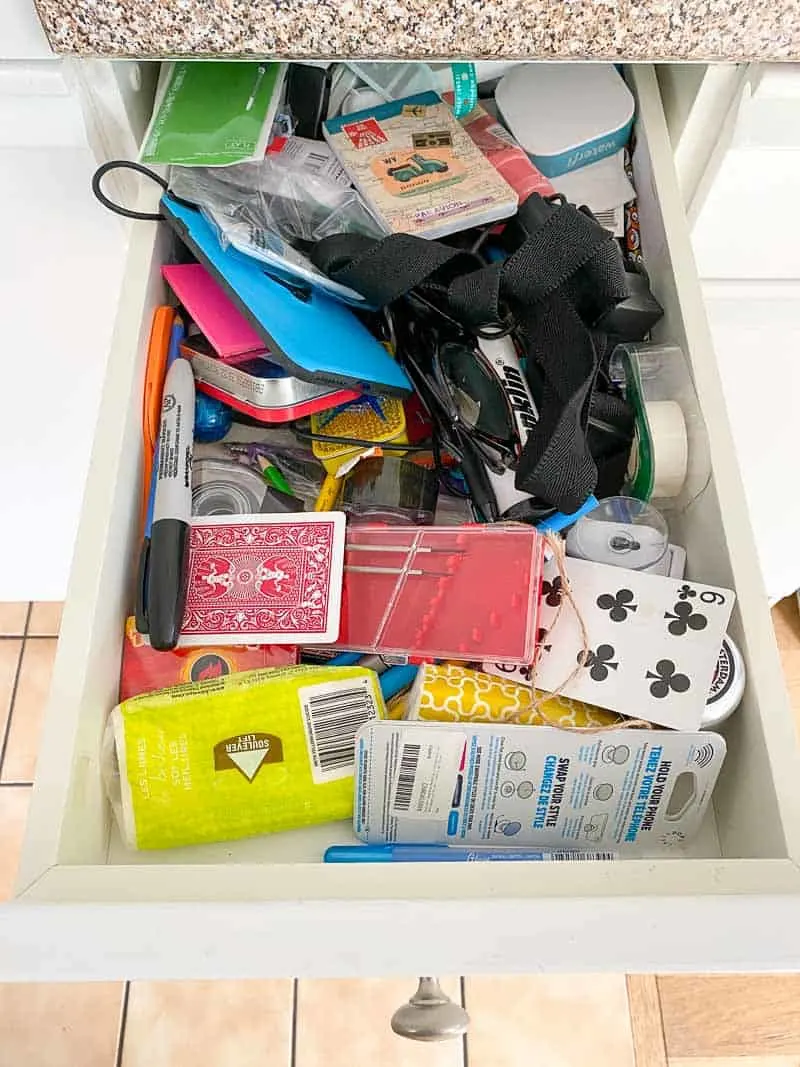
To stay organized, there should be a place for everything and everything in its place, right? That's easier said than done! Our drawers are jam packed full of junk, making it almost impossible to find what you're looking for (please tell me you have a drawer like this too!)

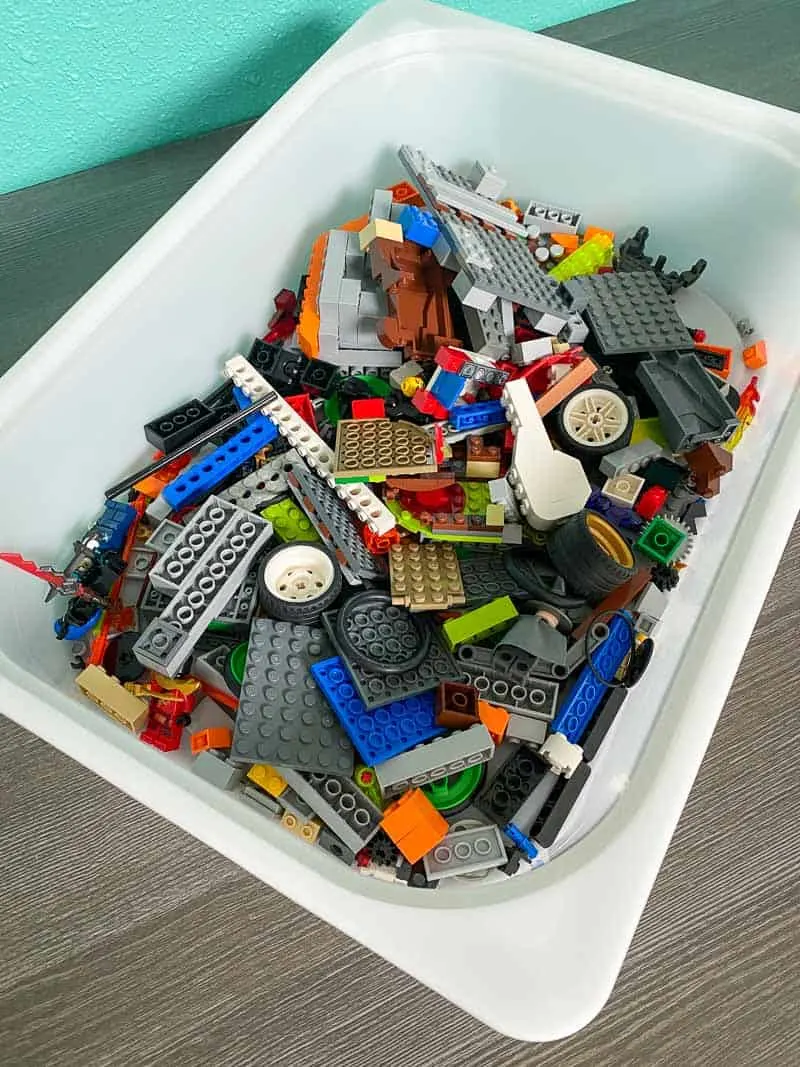
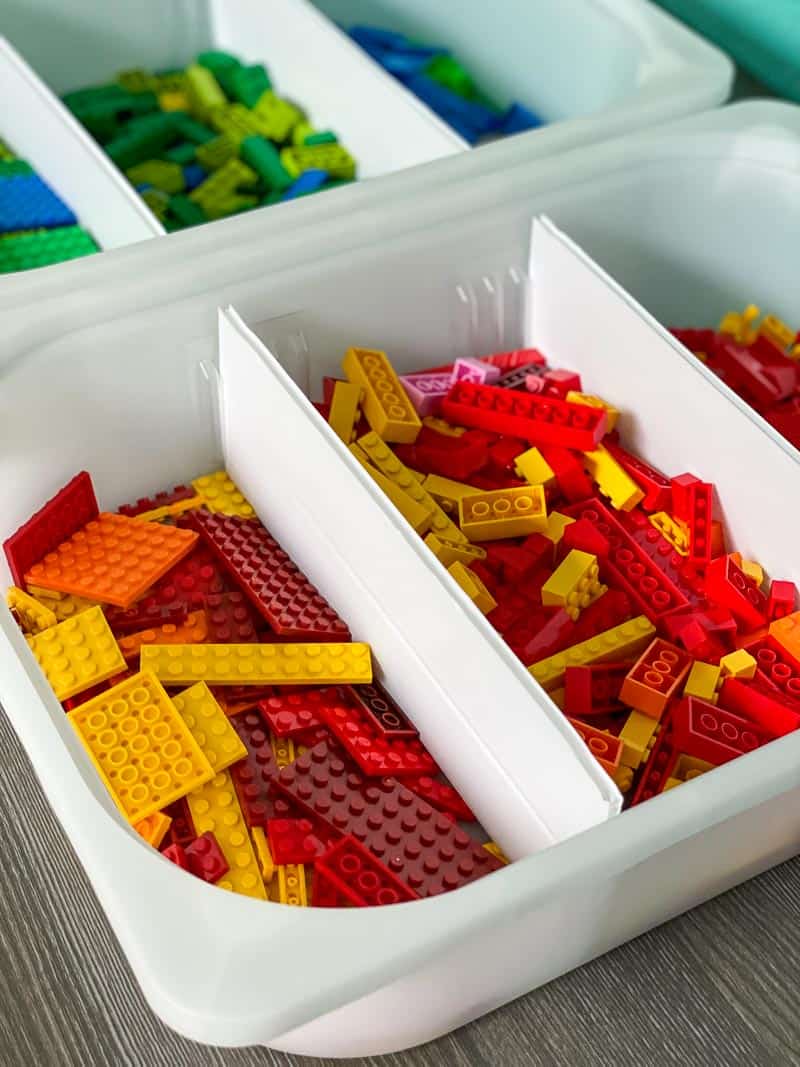
My son's giant Lego collection is even worse! He'll spend hours pawing through the bins in his Lego table looking for the right piece for his latest creation. He wants to be a Lego set designer when he grows up, so it's time to start teaching him better organization habits now!

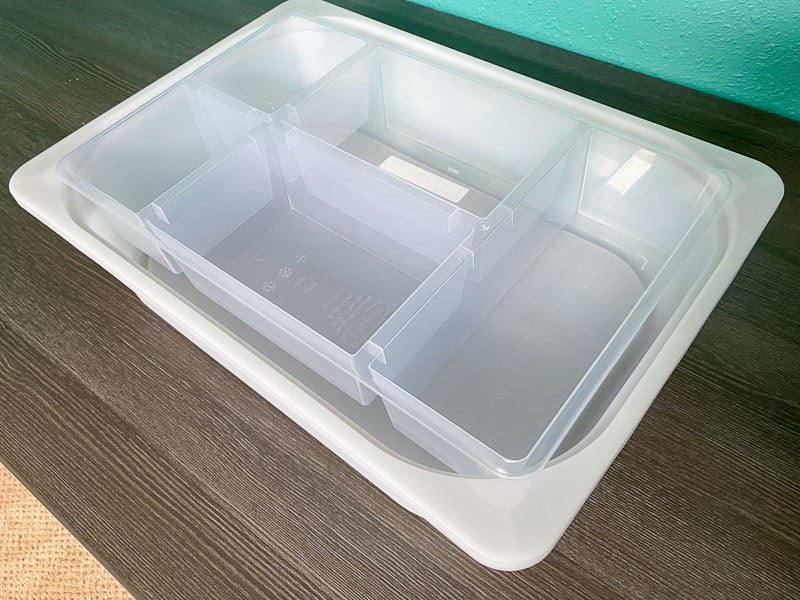
These IKEA Trofast bins are a great way to get organized, but the rounded corners make it almost impossible to find dividers that will fit. I tried these clear plastic inserts, but putting a square box into a rounded bin leaves a lot of wasted space.

I've made wooden box dividers before, but the process is time consuming and difficult to customize on the fly. If he ends up with way more brick pieces than flat pieces of a certain color, there's no way to expand a section to fit the extra parts without messing up the rest of the box.

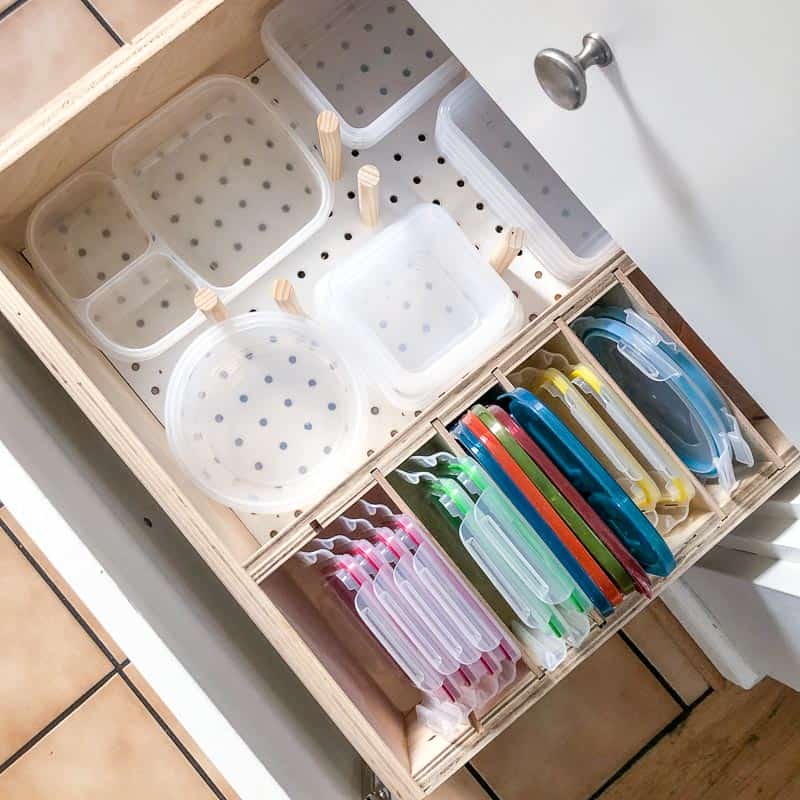
In the kitchen, I built this drawer organizer for all our plastic containers. It works well for that purpose, but it's a little too bulky for basic utensils and measuring cups. And it's way too heavy for these plastic bins.

After a bunch of research and failed attempts, I came up with a method for making drawer dividers in minutes! You only need a few basic supplies, and no power tools are necessary. This will work for almost any shallow drawer, bin or box, so you could use them all over the house! Here's how to do it!

Don't forget to check out this list of DIY drawer organizer ideas for more inspiration!
This post contains affiliate links for your convenience. Purchases made through these links may earn me a small commission at no additional cost to you. Please visit my disclosures page for more information.
Supplies Needed for DIY Drawer Dividers
- 3/16" foam core board or plastic corrugated sign board
- You could also use thick cardboard, but it's not as sturdy.
- ¼" plywood would be better for silverware drawers or other heavy items that might shift when the drawer is closed.
- Adhesive drawer divider holders
- Cutting mat
- Razor knife
- Scissors
- Ruler
- Tape measure
Recommended materials for Drawer dividers
I tested out a few different materials to see which one worked best for this project. I plan to organize all my drawers with this method, but the materials I use will depend on what I'm storing inside.
Plastic Corrugated Sign Board or Foam Core Board
I used plastic corrugated sign board for these dividers, because it's light, sturdy and easy to cut. Plus, I had some left over from one of my son's school projects! You could also use thick foam core board for another lightweight alternative.
These materials are best for lightweight items that won't bend the boards when the drawer is slammed shut. Lego pieces, craft supplies and other small items would work great.
Wood
¼" plywood or solid wood is recommended for kitchen drawers that contain heavy items like cooking utensils or silverware. The force from closing the drawer will cause lighter materials to bend and pop out of their holders.
These ¼" wood strips can be found in the project panel area of your local home improvement store. You can cut them to the length you need without power tools by using a miter box and a handheld saw.
Cardboard
Cardboard could work in a pinch, but it's not particularly stiff. Once it bends, you're stuck with wonky dividers! Cardboard would work better if you want to make a grid with lots of smaller compartments, because the intersecting pieces would give it more stability.
How to Make Drawer Dividers
Measure the drawer interior
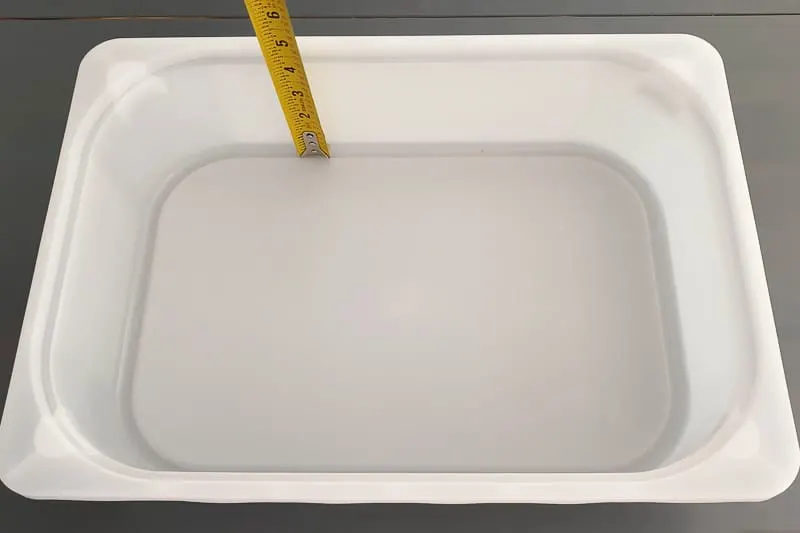
Decide which direction you want your dividers to go, then measure across the interior.

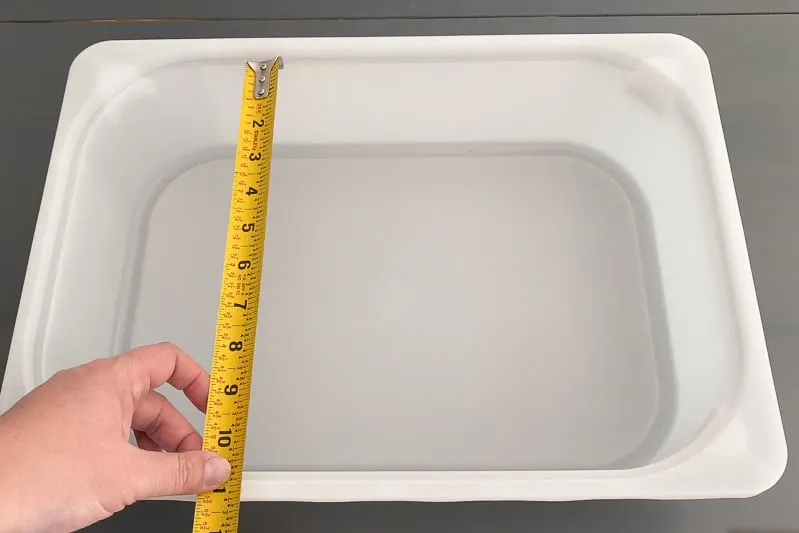
Also measure the depth of the drawer. If you have really deep drawers, you might want to double up on the divider holders to keep them from tipping.

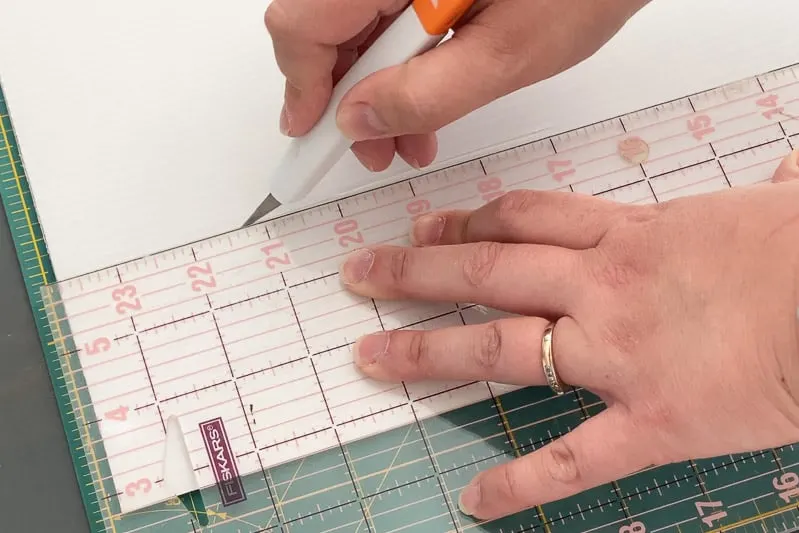
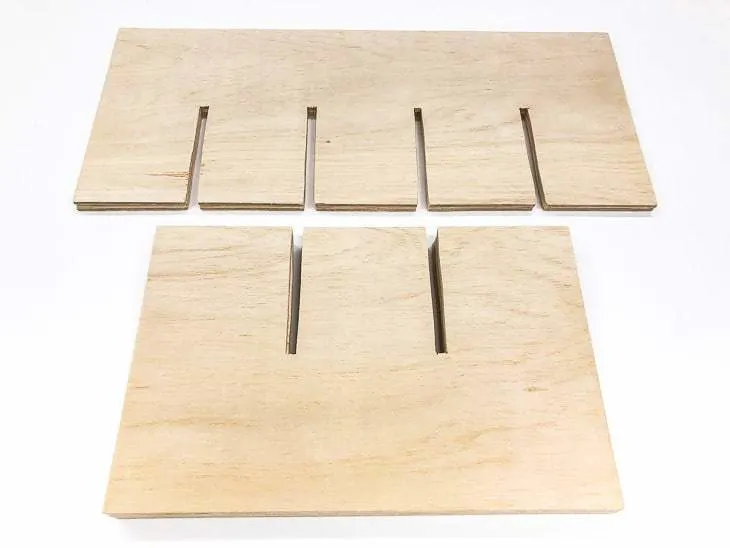
Cut the divider to fit
Lay your divider material on top of a cutting mat (or a scrap of cardboard), and mark out the dimensions with a ruler. Use a utility knife and a straight edge to cut out the divider. I tried scissors, but it bent the material and created permanent creases.

Cut the divider holders
You could apply these divider holders to the full length of the drawer, but you'll run out quickly if you have multiple drawers to organize. I knew I wasn't going to adjust the size of each section much, so I cut them into three slot strips instead.

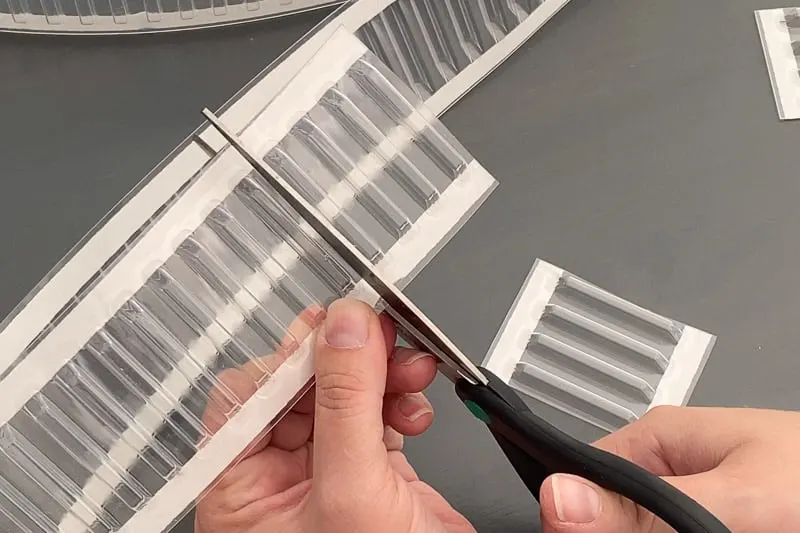
The only tricky part about working with these smaller sections is lining them up straight, but I found a quick way to tackle that problem.
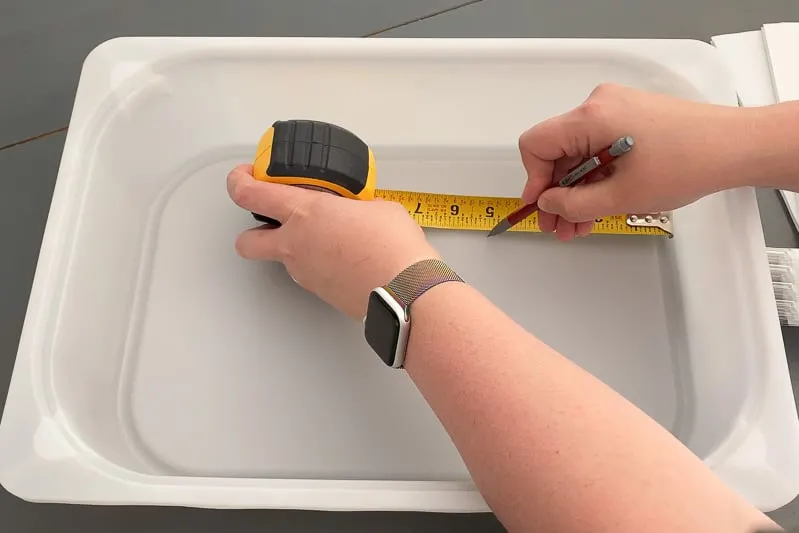
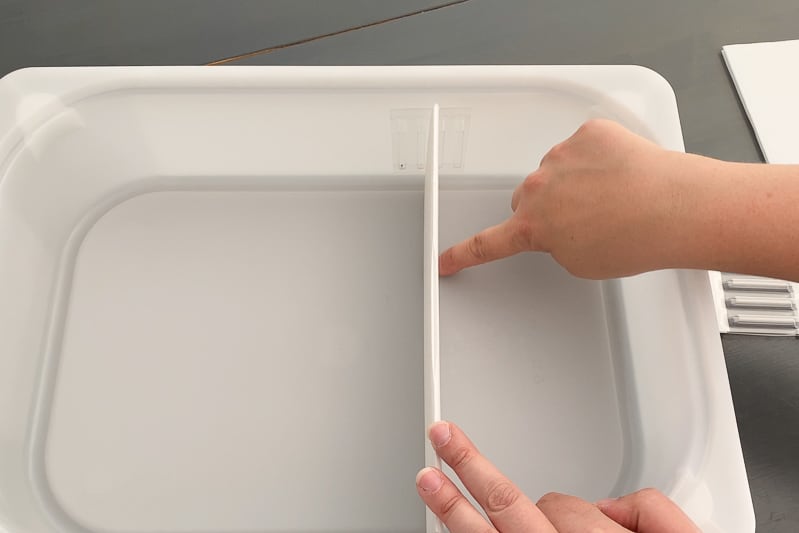
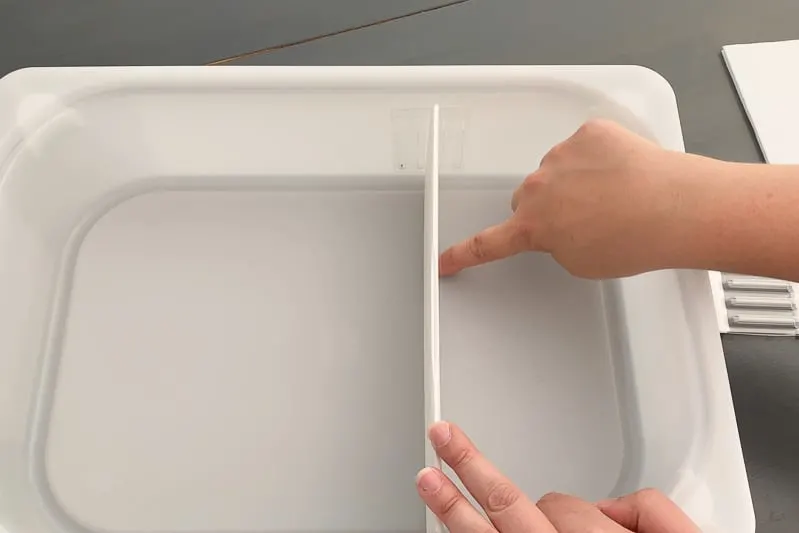
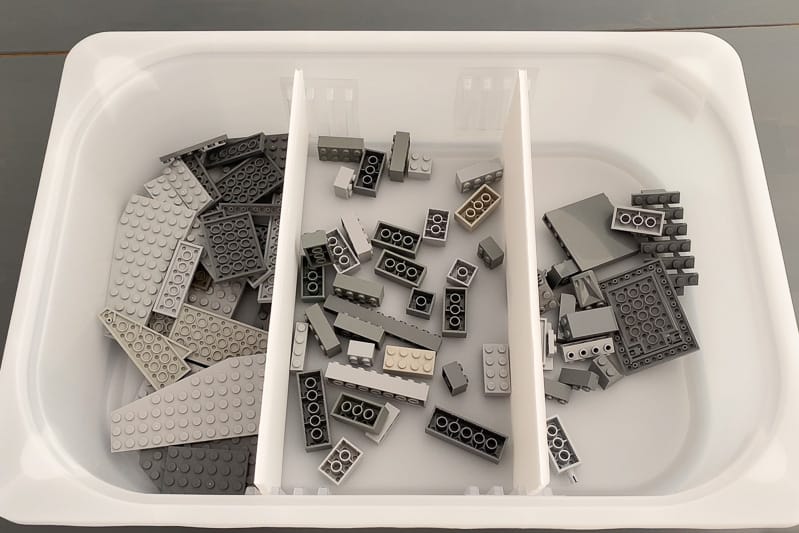
Stick the divider holders to the drawer
Since I was dealing with curved sides, I couldn't measure straight out from the corners. Instead, I marked 5" from the ends onto the bottom of the drawer.

Then I peeled the paper backing off the divider holder and inserted one end of the divider into the center slot. Lower them both into the drawer where the divider lines up with the markings on the bottom. Once you have everything where you want it, press on the adhesive to stick it into place.


Take out the divider, then repeat for the other end. Bend the holder slightly as you lower it into position so the adhesive doesn't stick on the way down!
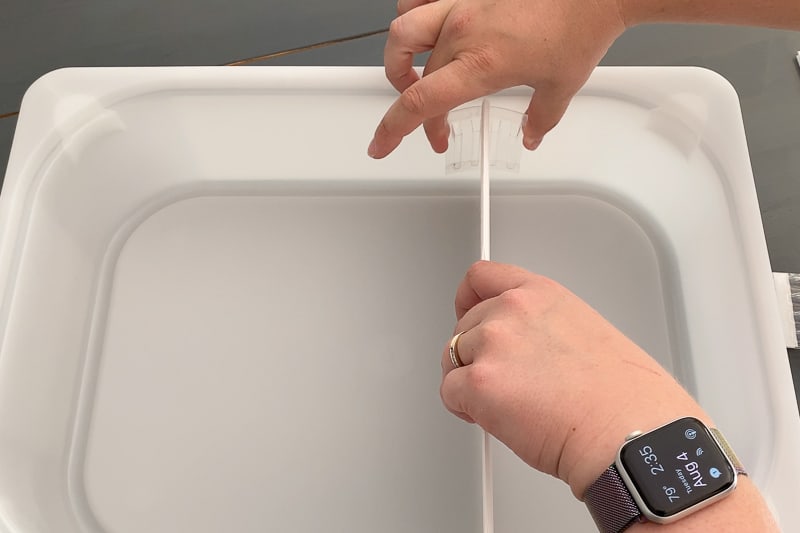

Make sure the divider lines up with the markings on the bottom of the drawer. Then test to see if it can slide into the neighboring slots easily. If it's too tight, just trim a little off the end of the divider with scissors.
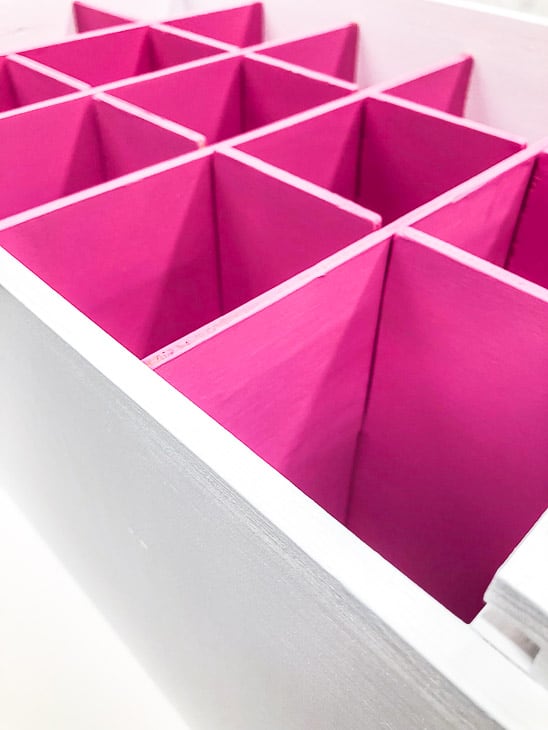
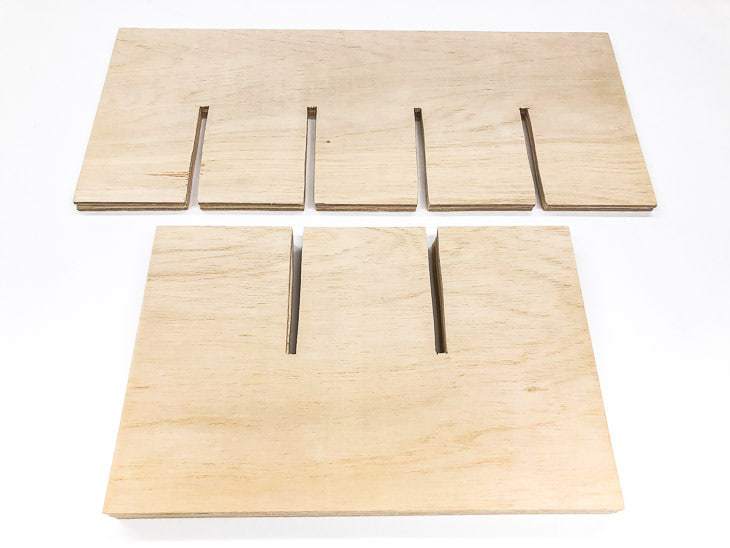
Repeat the process for the other dividers. You can even add ones going in the other direction by cutting out notches where the pieces cross, like I did with these box dividers.
Get organized with your new drawer dividers!
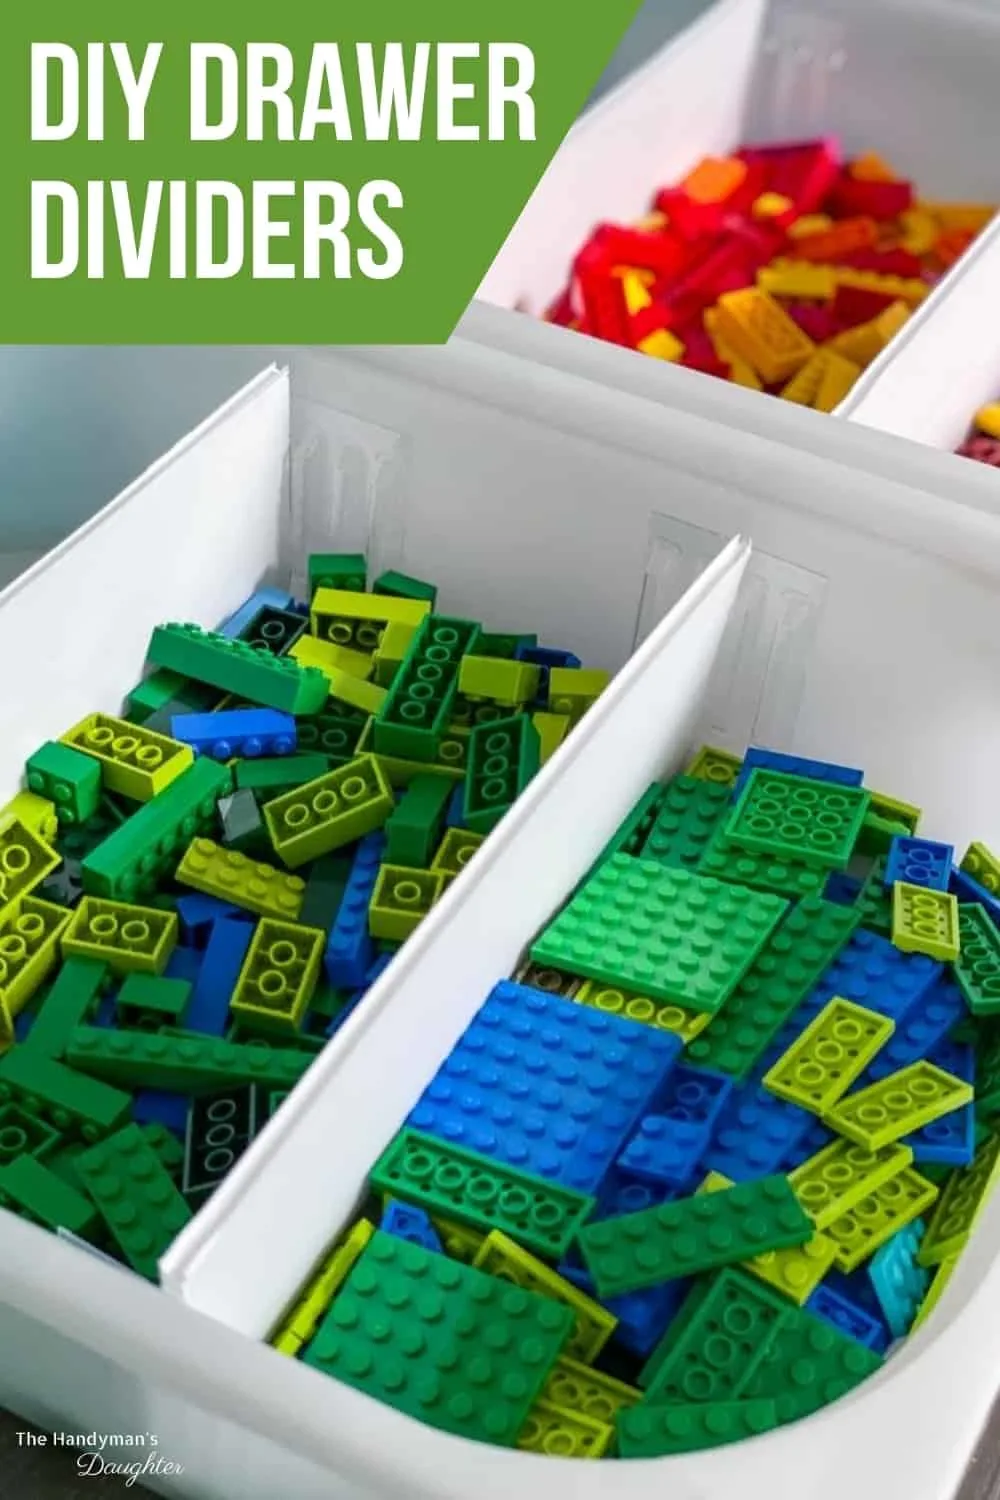
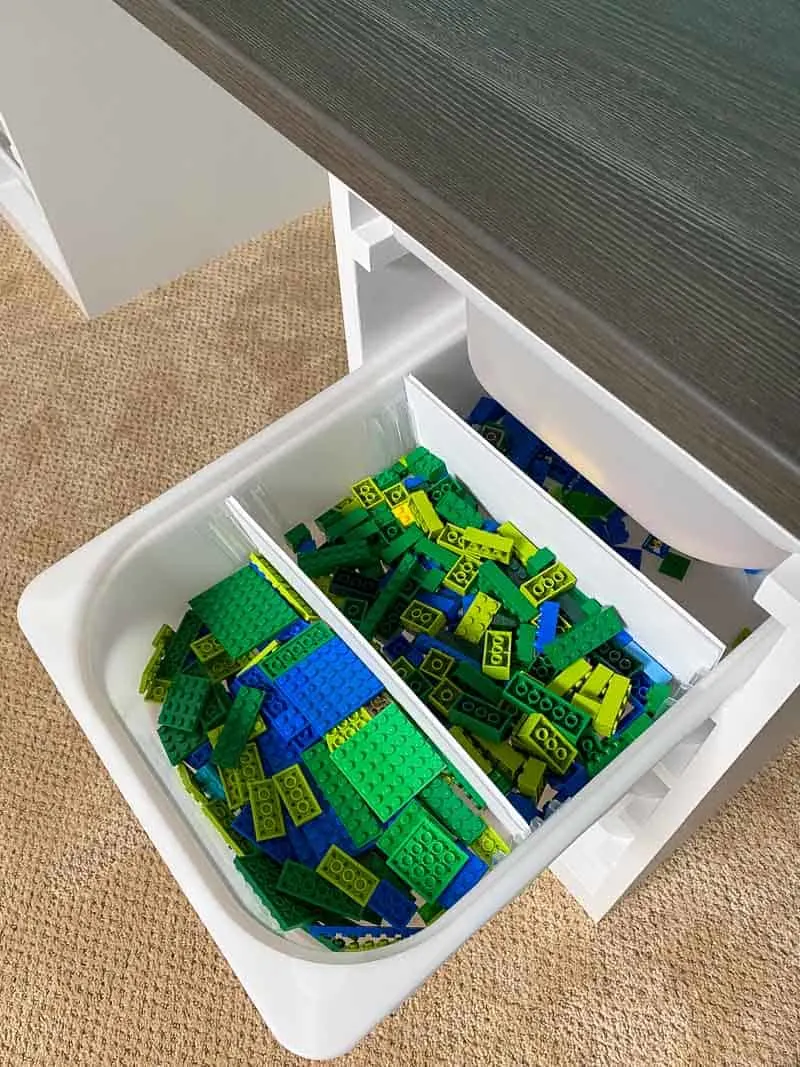
I was pleasantly surprised at how well these drawer dividers hold up, even with small parts like Lego! My son can easily sort the pieces by size and color, all within the same bin. If one section is getting a little full, he can slip the divider over a slot or two to give it more space.
It only took me a few minutes to install drawer dividers in all these bins. Then I decided to be a nice mom and give him a head start on sorting. Ha! This is as far as I got before I couldn't take it anymore! It's a work in progress...

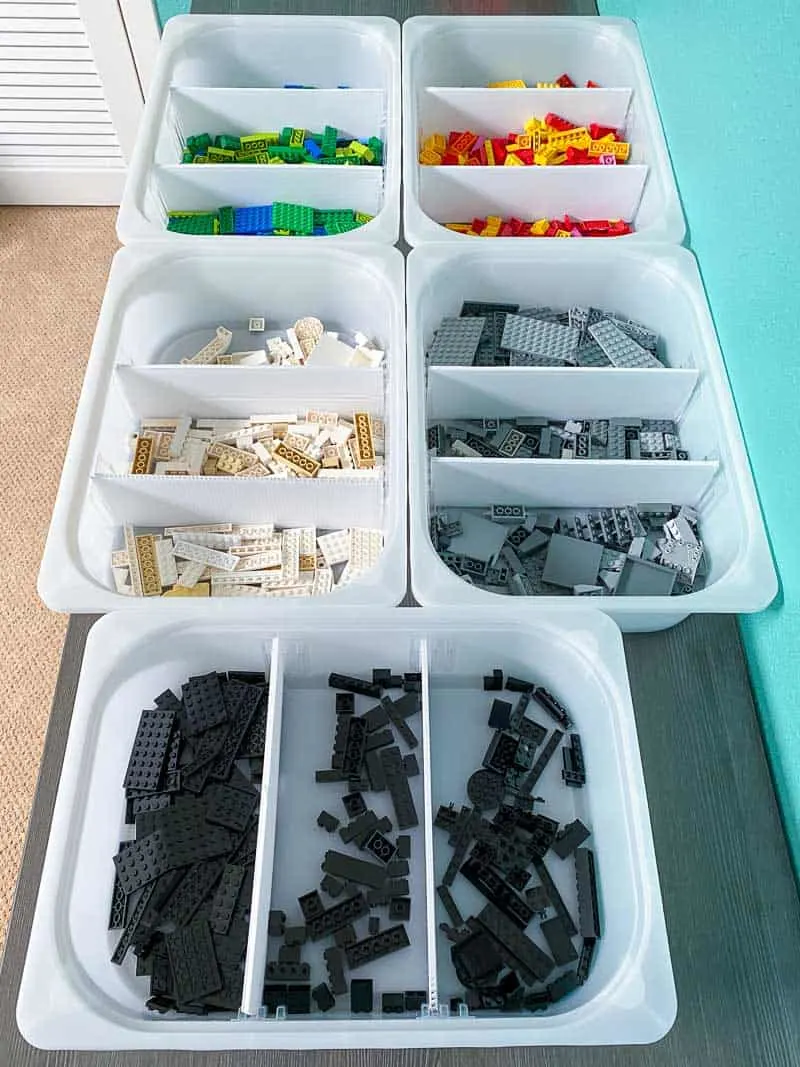
These bins are going into his new Lego desk. Check out all that beautiful organization!

I hope this tutorial helps you clear out the clutter and get those drawers organized!
Check out these other storage and organization ideas!
Sandra
Wednesday 12th of August 2020
Thank you for this post! Those plastic sticky dividers are such a great solution. I've been racking my brain on how best to divide up some Ikea storage drawers. Now if I could only get my 12 year-old to jump on the organizing bandwagon.