Tired of a jumbled mess of plastic containers and mismatched lids? Make this DIY tupperware organizer to keep everything organized!

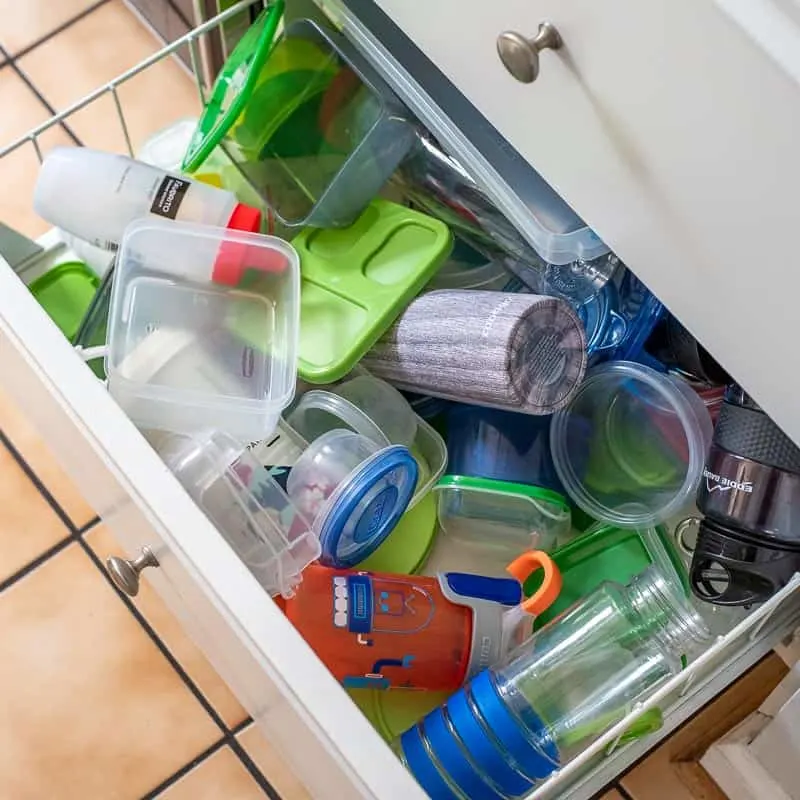
I'm on a mission to organize our kitchen! We're trying to cook more at home, but it's such a chore when you can't find the right container and lid to store leftovers. Our drawer was a total mess!

This post contains affiliate links for your convenience. Purchases made through these links may earn me a small commission at no additional cost to you. Please visit my disclosures page for more information.
Most of those containers don't even have a matching lid anymore (where did they all go???), so I decided to toss almost the entire collection and start fresh. This new set is BPA-free and each piece has a color-coded lid that locks in place.
But before I dumped them all in the drawer, I decided to clear out some space in my lumber cart to build this DIY tupperware drawer organizer out of scrap plywood. I had everything I needed on hand, so this project was basically free!
Not the woodworking type? Try these simple DIY drawer dividers that don't need any tools to make, or try one of these other easy drawer organizer ideas!


Materials needed for DIY tupperware organizer
- Two 1x6 boards
- I made mine out of plywood, but the dimensions are the same.
- You might be able to use a single 1x6 board if your drawer is slightly smaller than mine.
- One 2'x4' sheet of ¼" plywood
- One ⅝" diameter wooden dowels
- One 2'x2' sheet of pegboard
- You can get real fancy and use this wooden pegboard and pegs made specifically for drawers. I just used leftover pegboard from my workshop!
- 1 ½" hanger bolts
- ¼" wing nuts
- 1 ¼" pocket hole screws
- Pocket hole jig
- Wood glue
- Drill
- Table saw
DIY Drawer Organizer Instructions
Download the Woodworking Plans
Before you start, don't forget to download the DIY drawer organizer plans! Click the box below to get them delivered straight to your inbox.
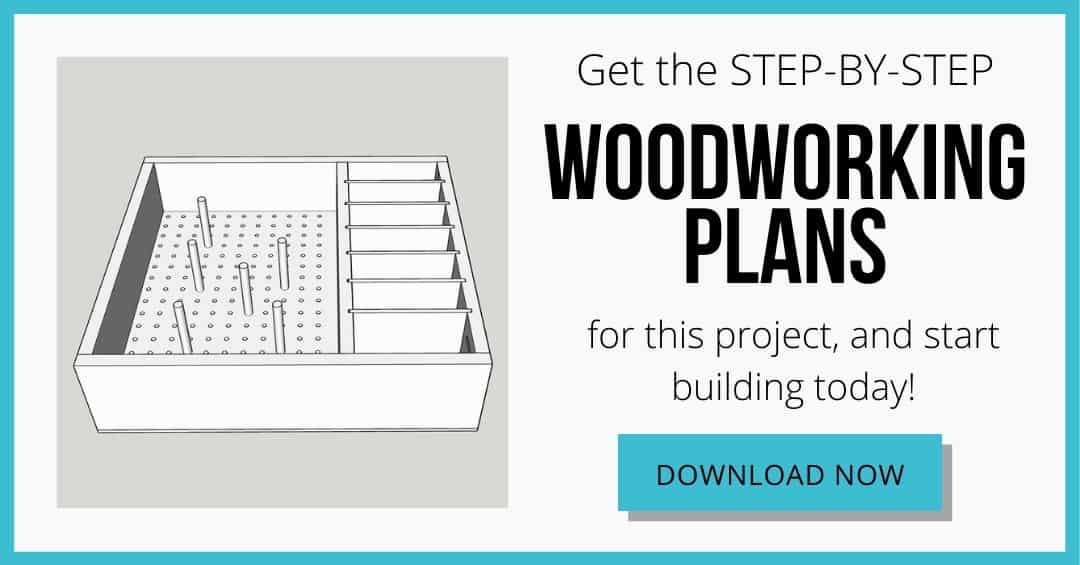
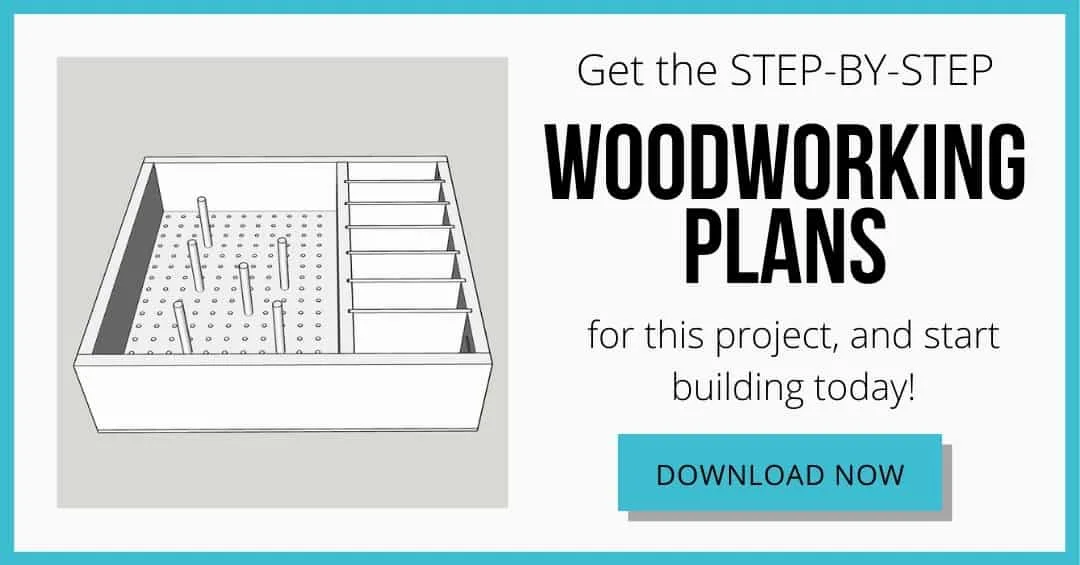
Keep in mind that your drawer will probably have different dimensions! Print out the plans then customize the length and width to fit your space.
Watch the Video
Check out the video of the entire build process on my YouTube channel, and don't forget to subscribe for more videos like this one!
Cut the Boards to Size
I used scrap plywood for this project, but 1x6 boards will be easier for most people to work with. Cut the boards as follows:
- Cut 2 pieces to the same width (right to left) as the inside of the drawer.
- Cut 3 pieces to the same length (front to back) as the inside of the drawer MINUS 1 ½"
We'll get to the plywood bottom and dividers later on.
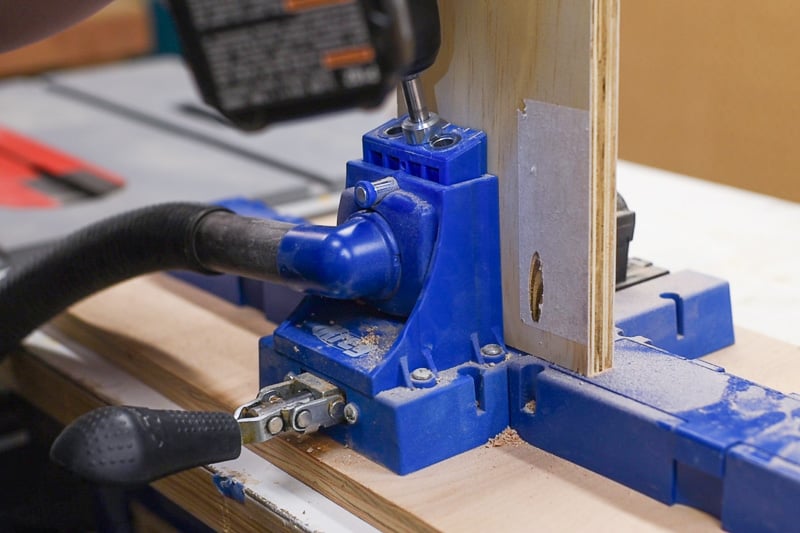
Drill Pocket Holes
Each of the shorter boards gets two pocket holes at both ends. If you don't have a pocket hole jig, you can attach the sides with countersunk screws.

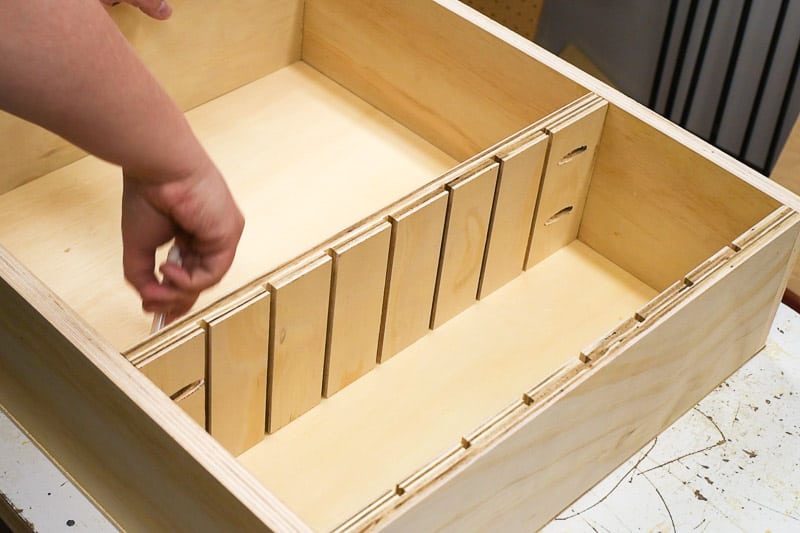
Cut the Grooves for the Dividers
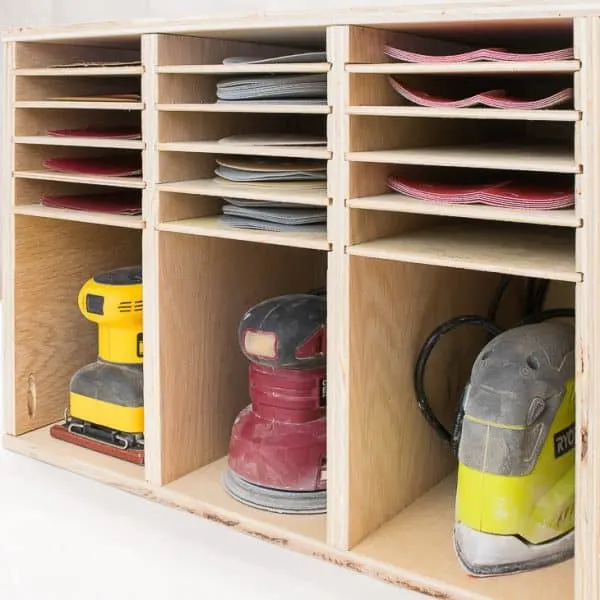
I wanted to sort the lids by size, similar to how I organize my sandpaper storage, but vertically instead of horizontally.

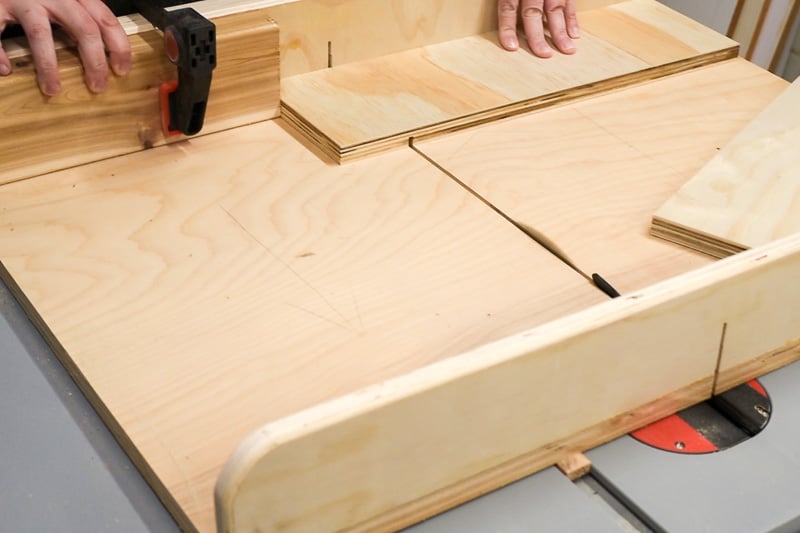
At the table saw, I set the height of the blade so it would cut halfway through the plywood boards. You could also install a dado blade to save yourself a few cuts, but I didn't want it to cut a wider groove in my crosscut sled!

Then I clamped a stop block to my crosscut sled at the position of the first slot, just below the pocket holes. Slide one of the side pieces up to the stop block, then cut the first groove.
Repeat with the other piece before moving the stop block, so both sides are identical.
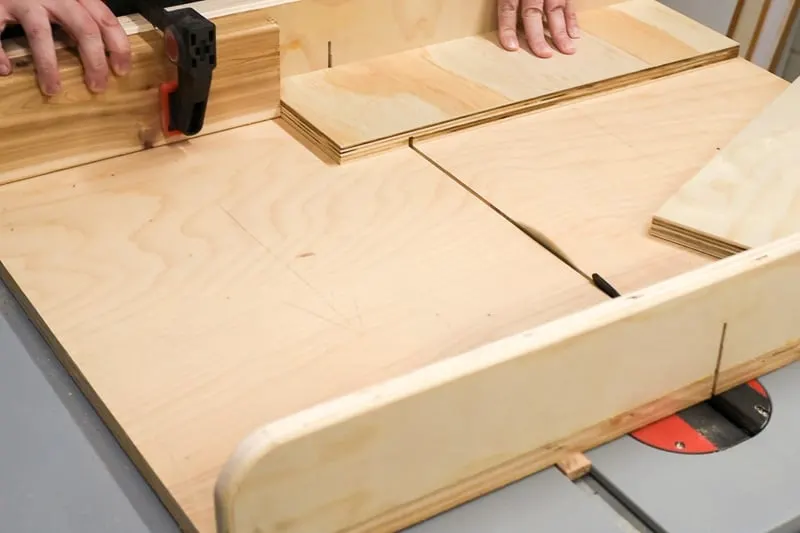
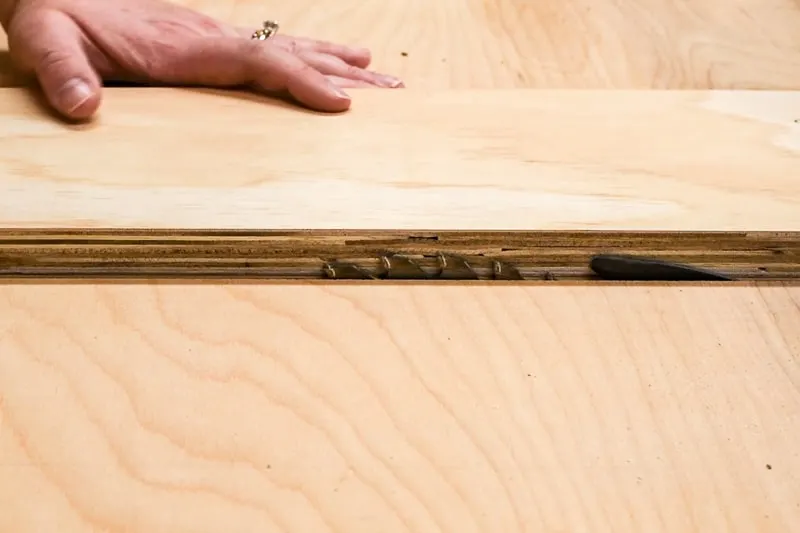
The table saw blade isn't wide enough to cut a ¼" groove in one pass, so move the stop block over slightly and cut both pieces again. Test the fit with ¼" plywood.
Now move the stop block over a couple inches, and repeat the process until all the slots are cut. I had seven grooves in total.
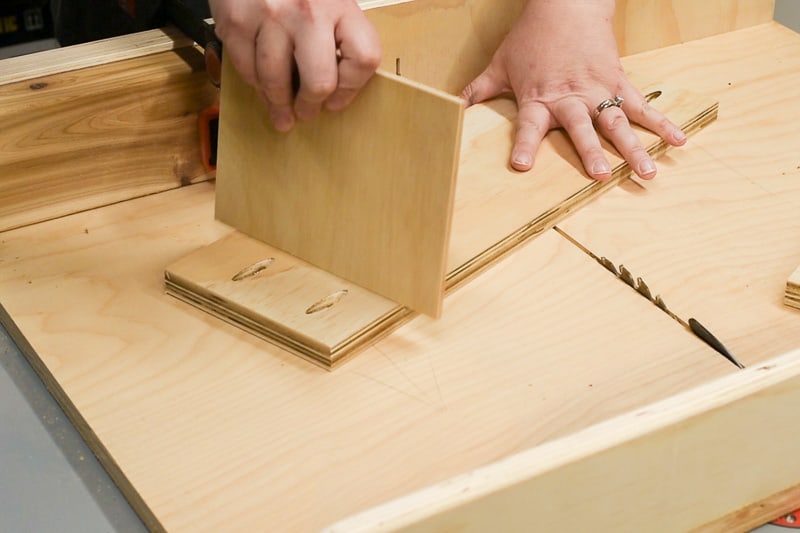
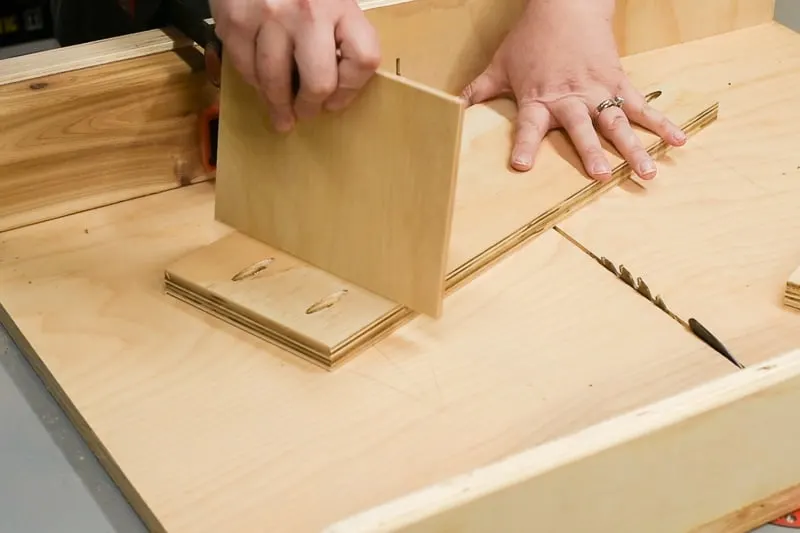
Cut the Drawer Dividers and Test Fit
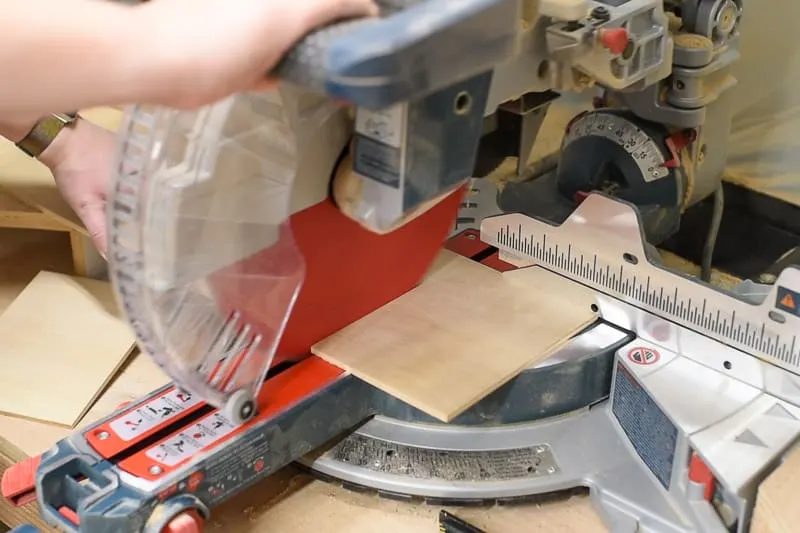
Cut a 5 ½" wide strip from the ¼" plywood sheet. Measure the widest lid, then add ½" to that dimension (for the part that will fit into the grooves). Cut the ¼" plywood strip into dividers with the miter saw.

Place the two sides with the grooves next to each other, and test the fit of the dividers. They should slide in place easily, but without a lot of wiggle room.
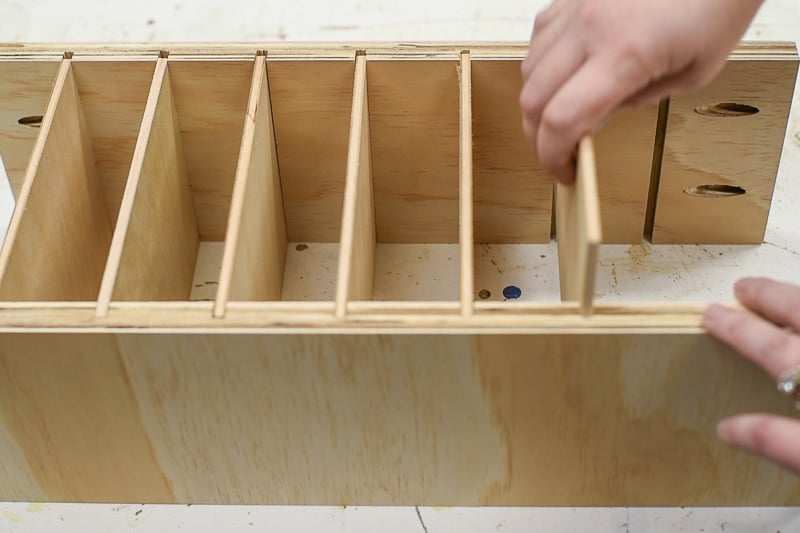

You should also test to see how well the lids fit in between the dividers. I ended up trimming ½" off the length to give me more room for the containers on the other side.
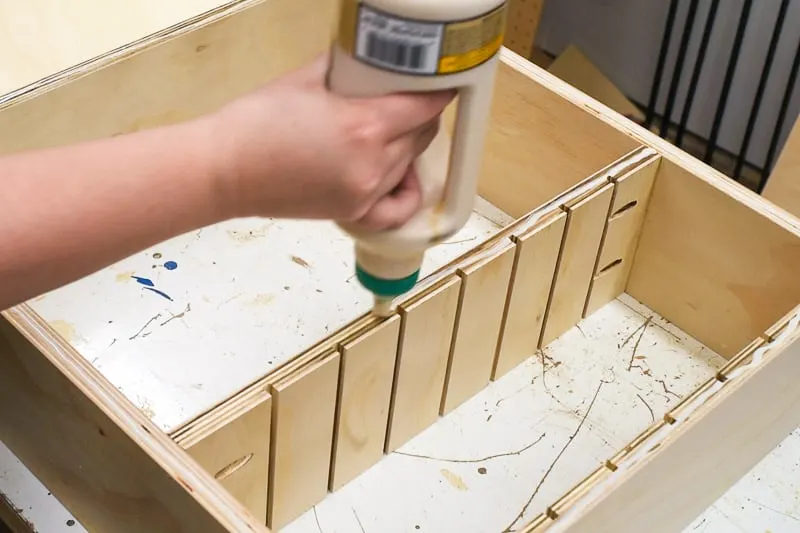
Assemble the Drawer Organizer Box
Apply wood glue to one end of the grooved pieces, and screw it to one of the longer pieces with 1 ¼" pocket hole screws.
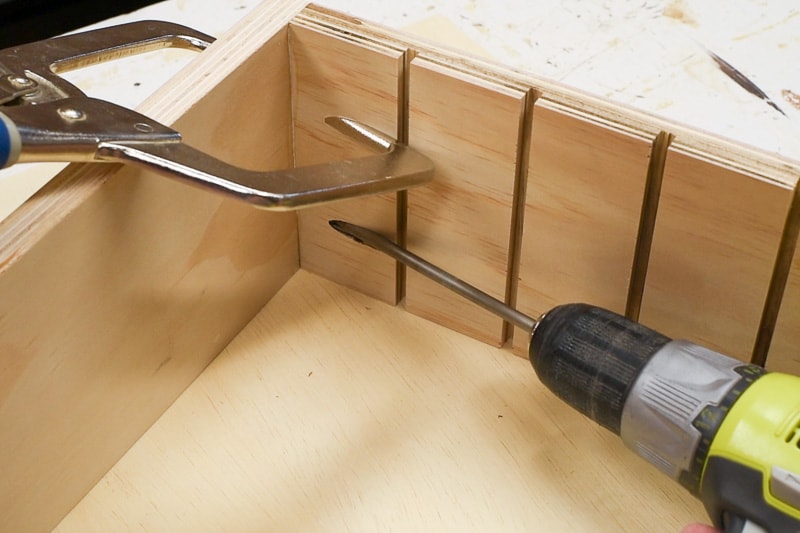

Next, insert one of the dividers in a groove in the attached side, then place the other grooved side in the other end. Check for square, and mark the position with a pencil.

Now remove the divider, apply wood glue to the end, and screw it into place at the marked position.

The other short board attaches to the end the same way. Then apply wood glue to the other ends of the boards and screw them into the other longer board.
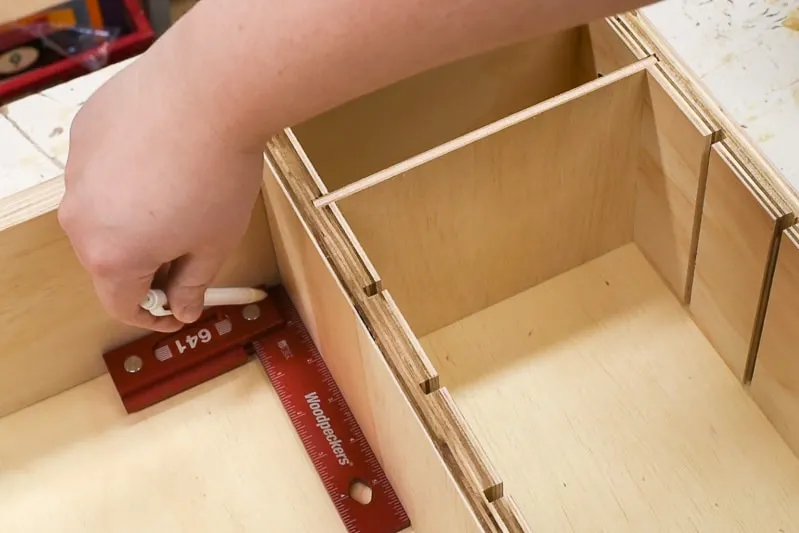
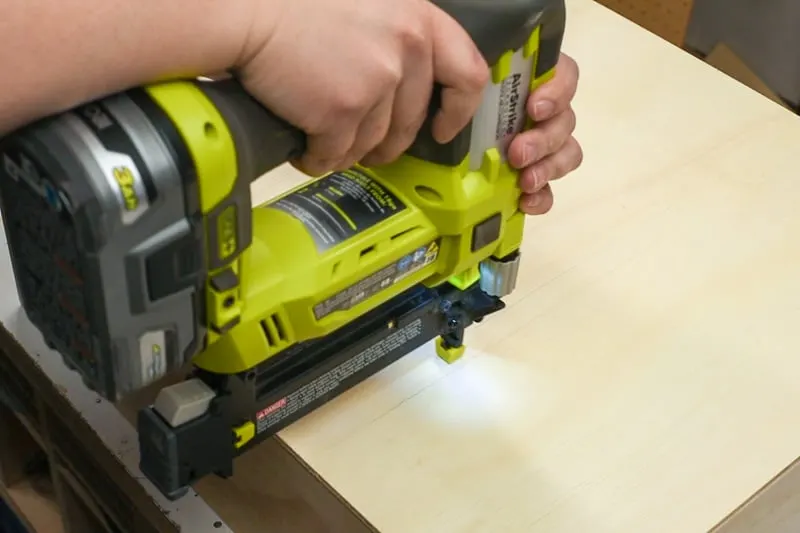
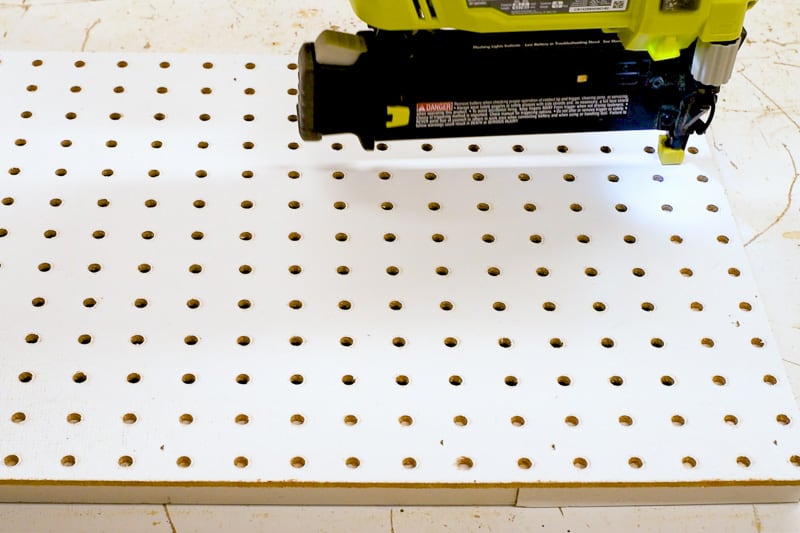
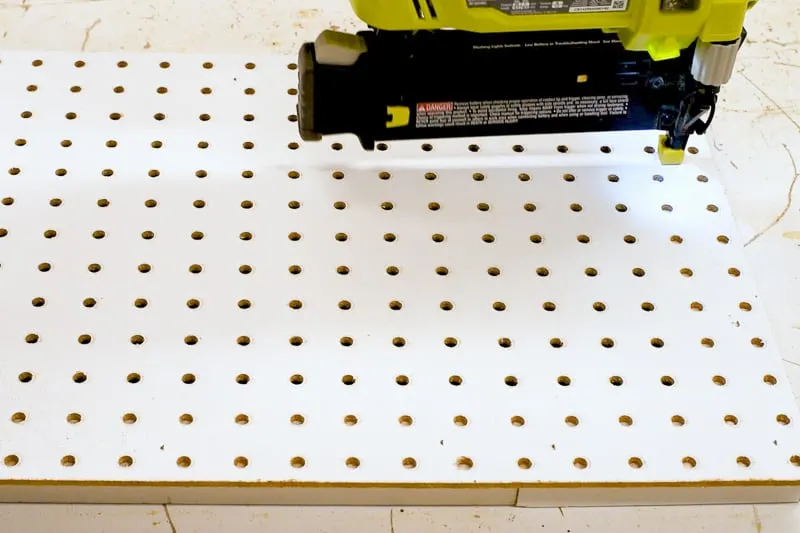
Attach the Bottom
Measure the assembled box and cut a piece of ¼" plywood to match those dimensions. Place the box on top of the bottom and mark the position of the middle piece on the plywood.

Apply wood glue around the edge of the entire box, then place the bottom on top of it with the markings facing up.

Attach the bottom to the box with nails or screws. The markings make it easy to see where the middle piece is so you can hit it accurately.

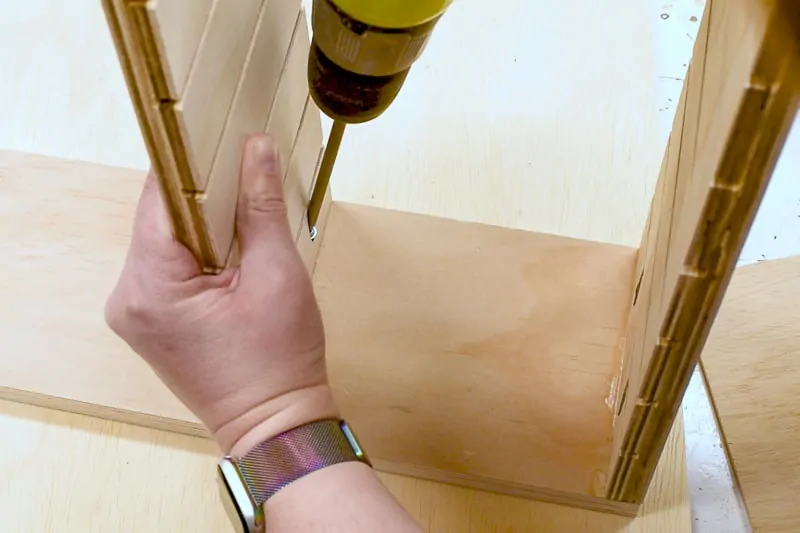
Make the Pegboard Bottom and Pegs
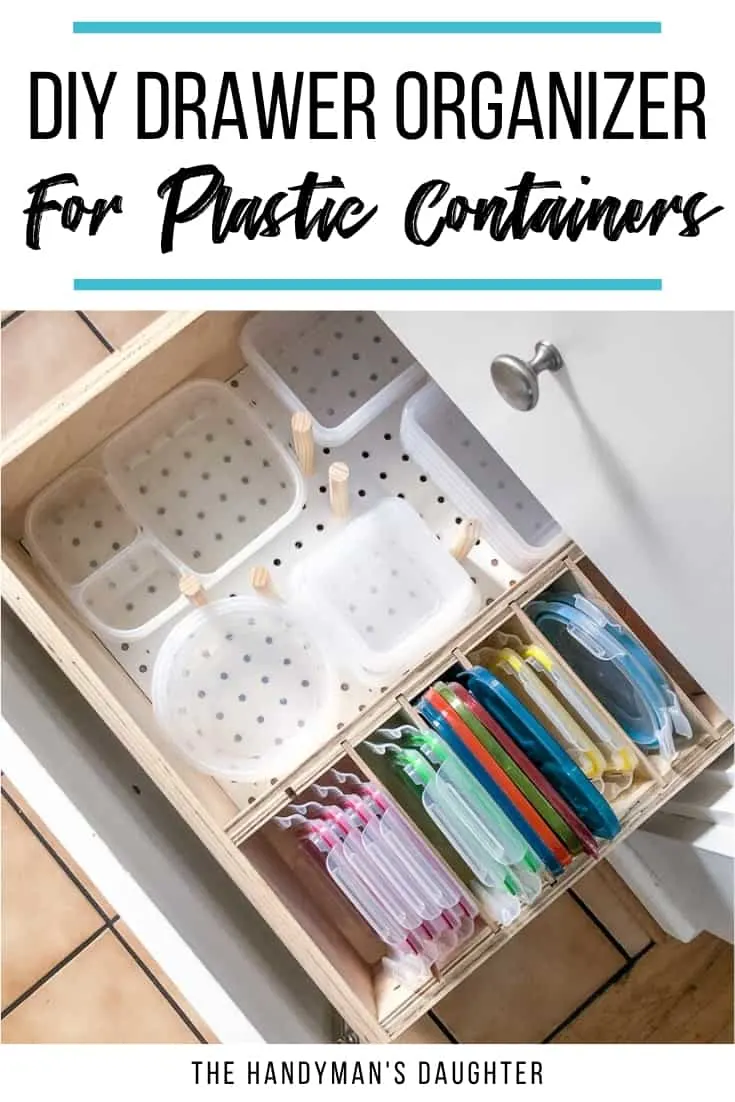
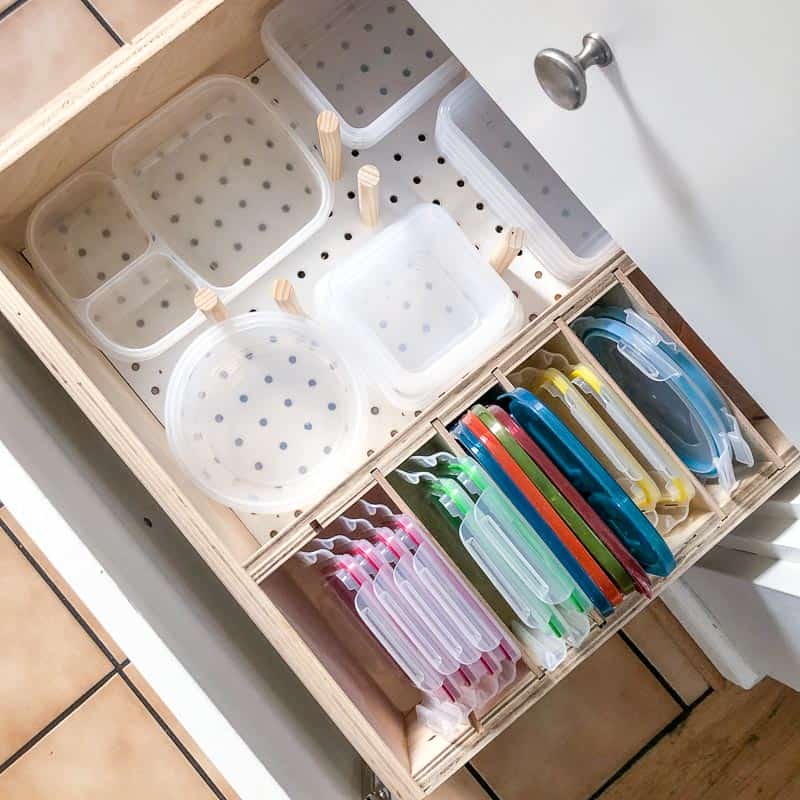
Usually, as soon as you slam the drawer closed, all those tupperware containers turn into a jumbled mess! I wanted to make a system that uses wooden dowels to keep all the different sizes separate and easy to spot at a glance.
Rev-a-Shelf makes these nice wooden pegboards and pegs for organizing your drawer, but at a whopping $50 a pop! I had a big piece of pegboard that I removed from the workshop wall a couple months ago, so I decided to save myself some money and make one myself!


Cut the pegboard to the size of the larger side of the drawer organizer, as well as some scrap 1x2 boards to go around the perimeter. The 1x2 pieces will elevate the pegboard so you can screw the pegs securely in place from underneath.
Apply wood glue to the bottom of each piece and place them around the outside edge of the underside of the pegboard.
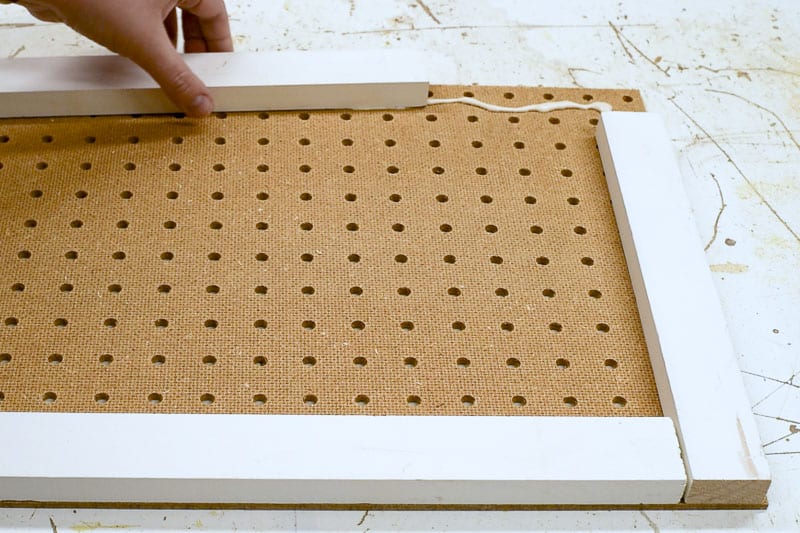
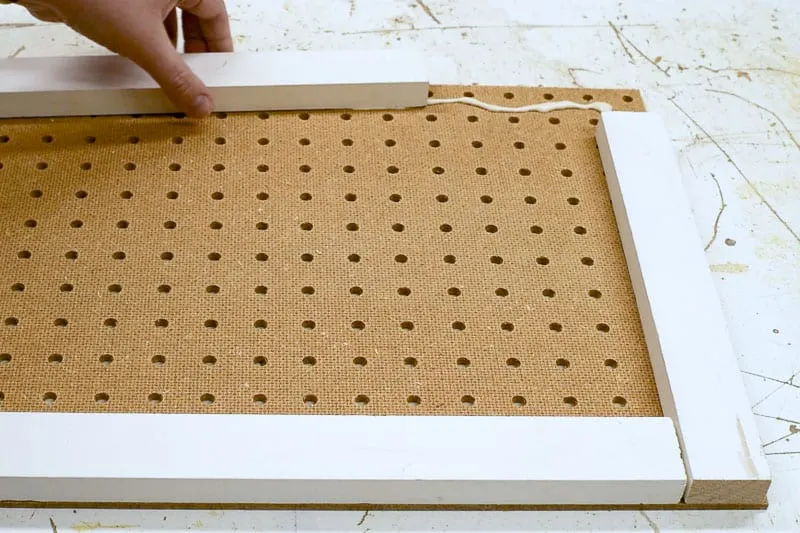
If you're impatient like me, you can also nail them in place from the top.
The pegs are ⅝" dowels cut down to the height of the drawer. Insert the pointy end of the hanger bolts into the end of each dowel. You can learn more about how to install hanger bolts here!


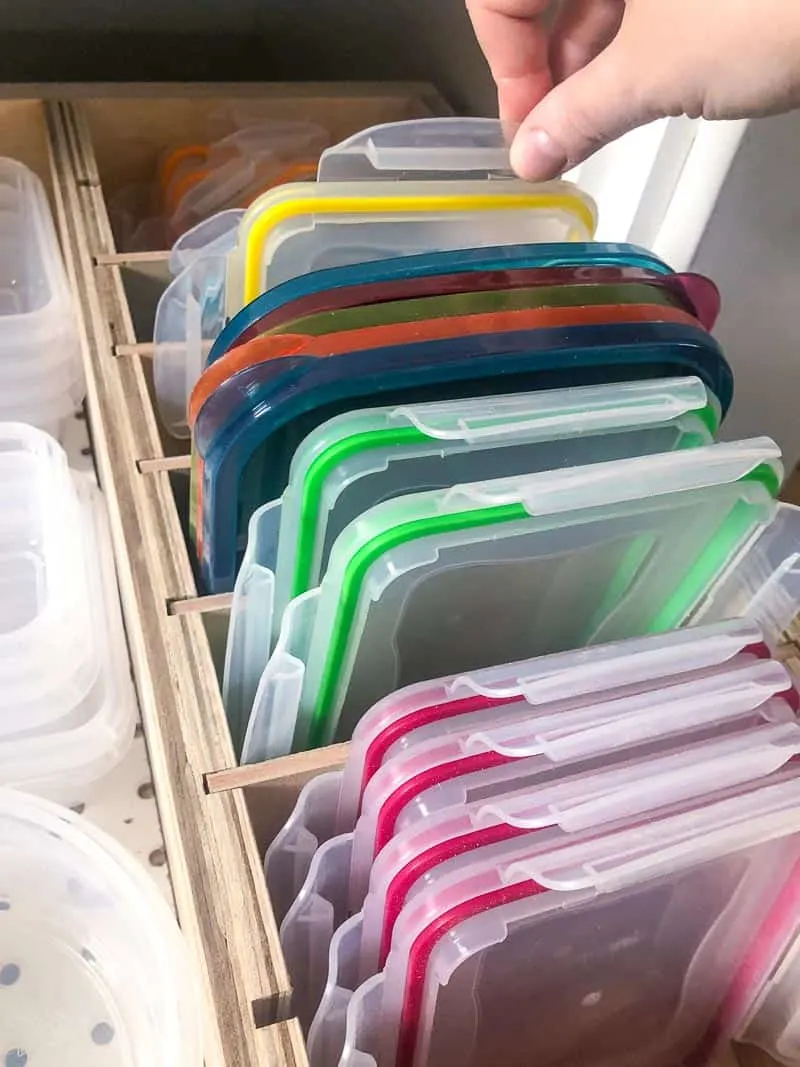
Arrange your tupperware containers on the pegboard, and place the pegs in the holes around the outside of each one. Once you have the placement the way you want it, use ¼" diameter wing nuts to secure each peg in place from underneath.
Now just slide the pegboard into the organizer and load it up!

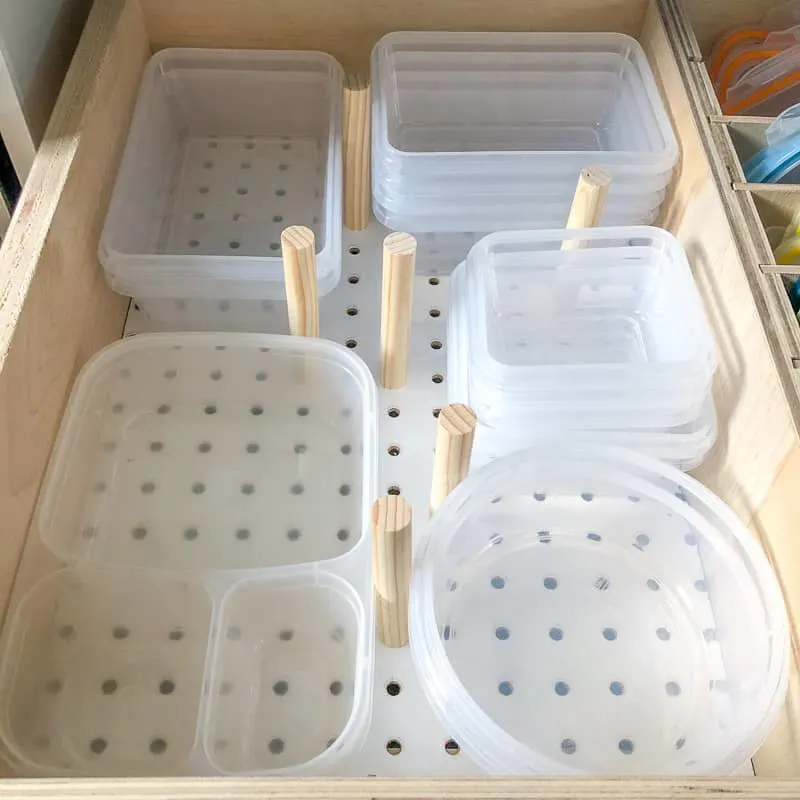
I just love how easy it is to keep all my plastic containers and lids organized now! No more rummaging around in a mess of pieces looking for a matching set of Tupperware!
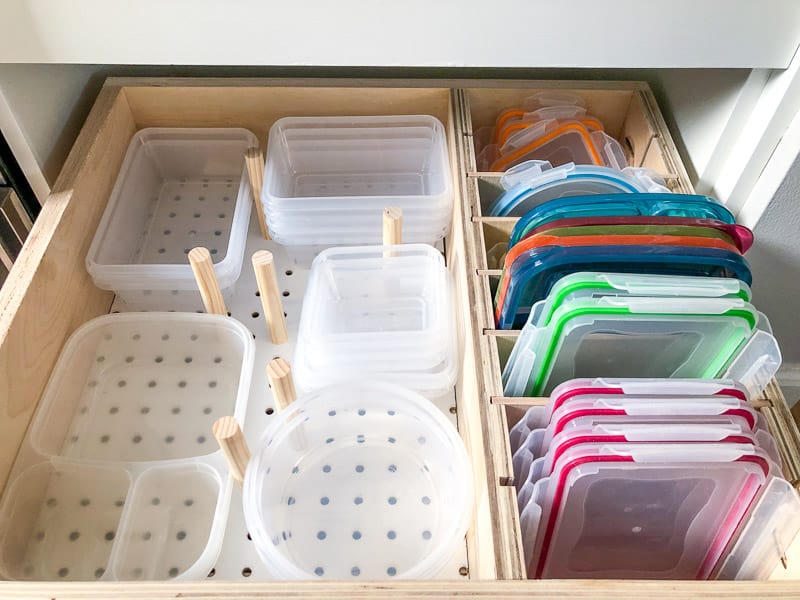

All the lids have their own slot, and they're color coded so it's easy to figure out where they belong.

Even when you slam the drawer shut, all the pieces stay put! I realized after I sorted all of them that I need to order more lunchbox containers because I have lots of lids and only a couple bottoms! Where do they all go???

One drawer down, the rest of the kitchen to go! I'm planning to make another insert for the foil, wrap and plastic bags (and all those water bottles that lost their home to this organizer), and yet another for the kitchen knives and cooking utensils. Stay tuned for more woodworking plans to organize all your kitchen drawers!
Check out these other organizing ideas!
Dan Hopkins
Thursday 19th of March 2020
Is there a way to print this without the pictures? I have no internet in my shop.
Vineta
Thursday 19th of March 2020
You can download the free plans as a PDF. It will give you all the dimensions you need to build it in the shop!