Create your own luxurious DIY upholstered headboard with a wood frame! This easy tutorial will show you how to make it yourself with standard lumber. Get the free woodworking plans and start building!
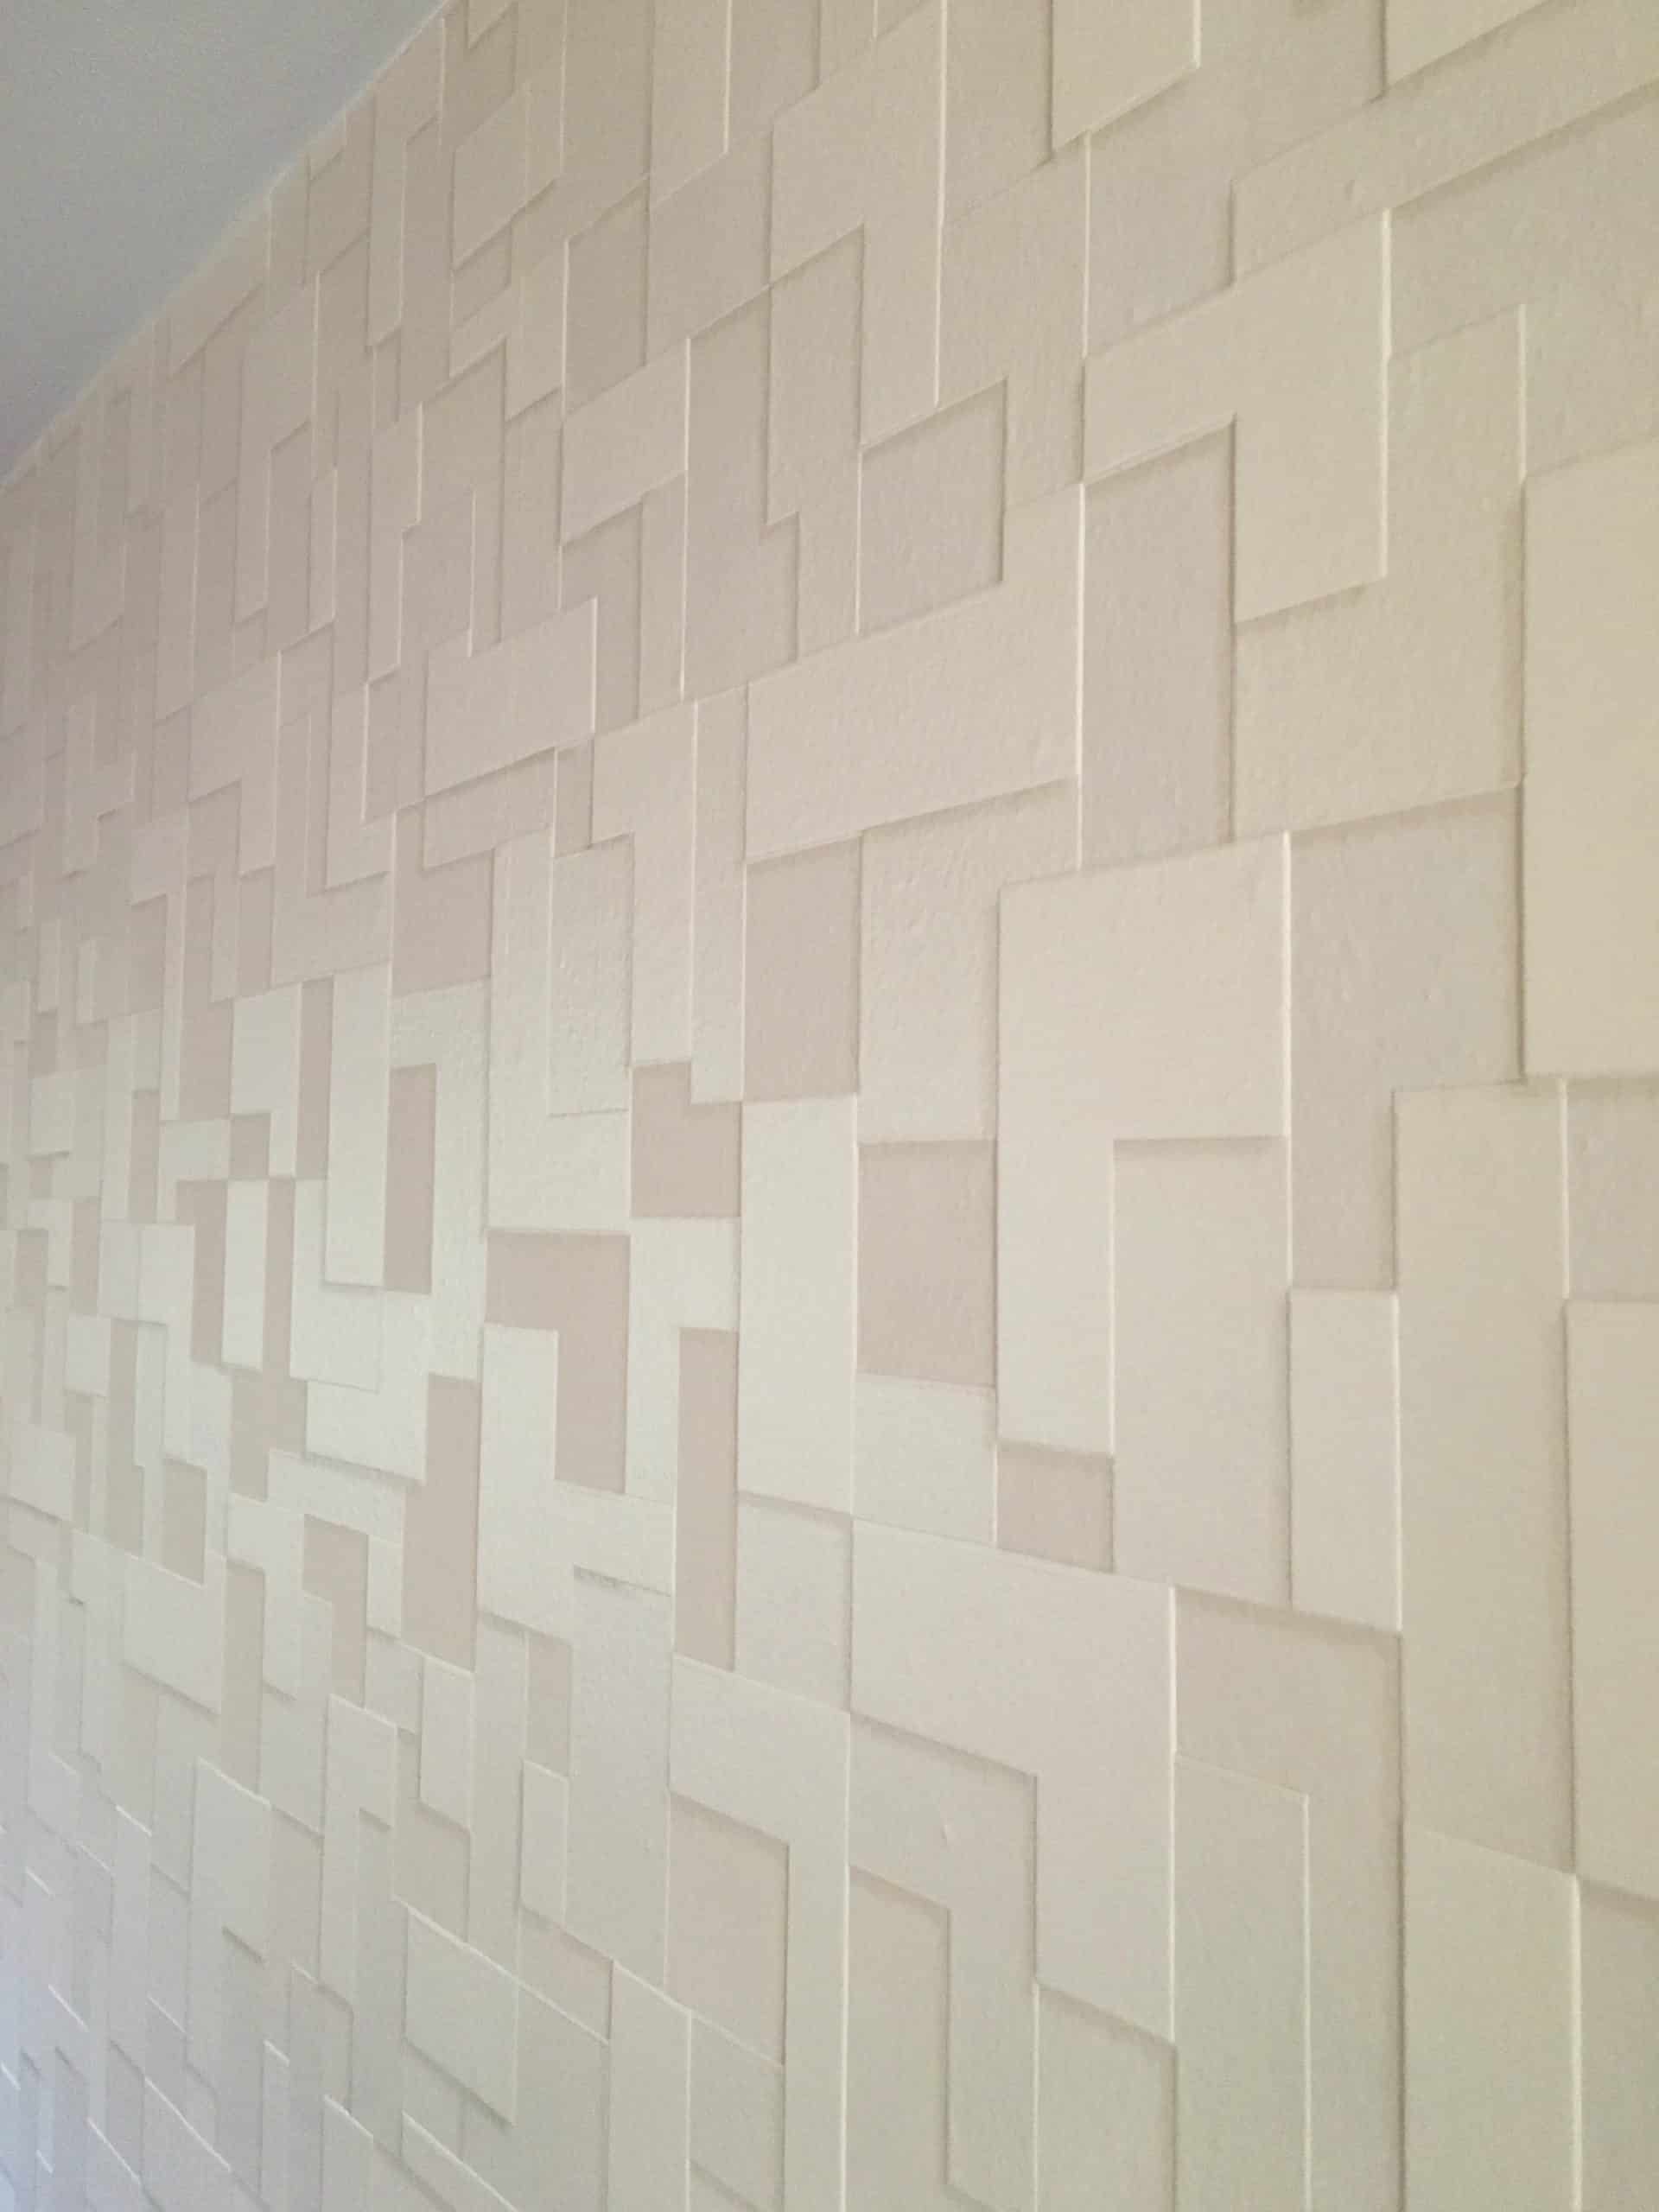
After completing the textured wallpaper accent wall in our master bedroom, we desperately needed a headboard to protect it. The raised pattern of the wallpaper could easily be crushed or scratched, and it also needed something to break up the giant wall of squares and rectangles.

Luckily, the good people at Leather Hide Store offered me a scrumptious piece of leather to use in one of my DIY projects. The timing could not have been more perfect! A gorgeous upholstered headboard is just what I needed for our master bedroom makeover!
Not quite the headboard you were looking for? Check out these other DIY headboard ideas for more inspiration!
This post is sponsored by Leather Hide Store and contains affiliate links for your convenience. Purchases made through these links may earn me a small commission at no additional cost to you. You can read more about how this site earns money on my disclosures page.
Materials needed
- Fabric or leather as wide as the bed
- 1" thick foam mattress pad
- Spray adhesive
- Heavy duty stapler and ⅜" staples
- 1 sheet of ½" plywood
- Two 1 x 4 boards
- Two 2 x 2 boards
- Two 2 x 3 boards
- Kreg Jig
- 2 ½" pocket hole screws
- 1" pocket hole screws
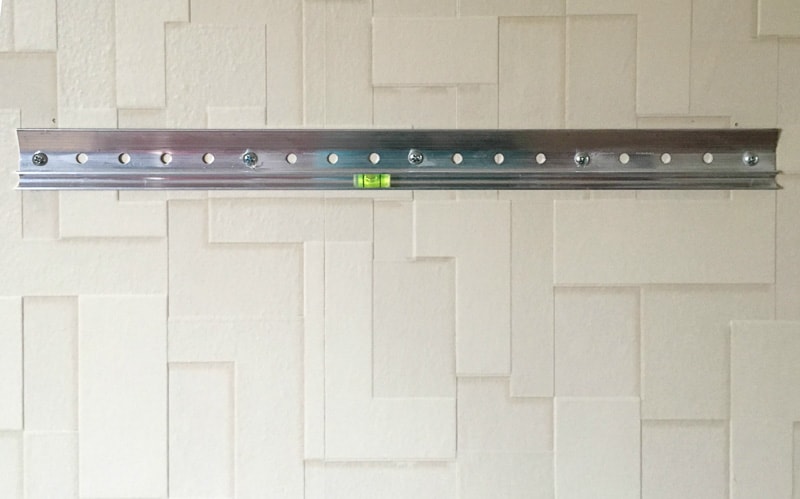
- French cleat (mine is rated for 200 pounds)
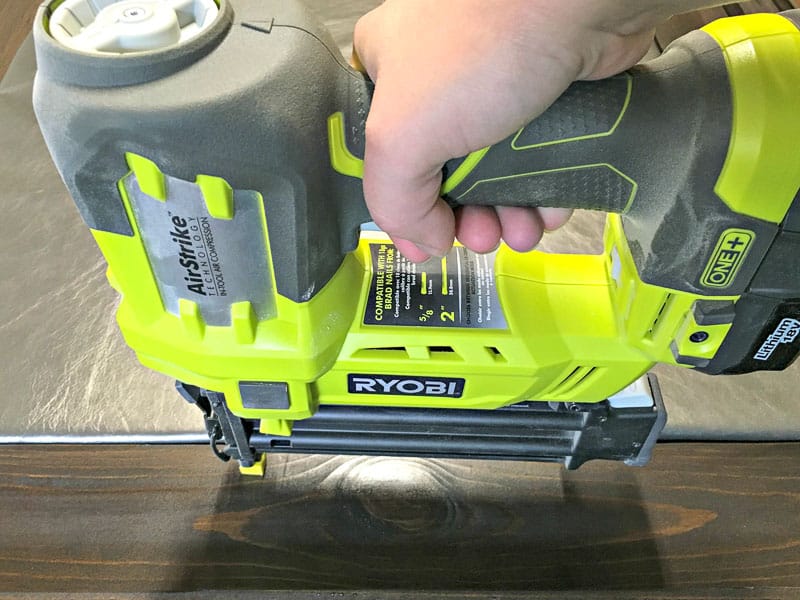
- Brad nailer and 1" brad nails
Download the free woodworking plans
It was a little difficult to get photos of the building process when the headboard is this big! The woodworking plans include 3D models of each step, so hopefully it's more clear and easier to follow along. Download it for free here!
Cut the fabric
Leather is a little harder to work with than fabric, because it comes in an organic shape instead of a standard rectangle. I needed a piece that was at least four feet by two feet, so I looked at the grids for various leather remnants to find the right one for my project.
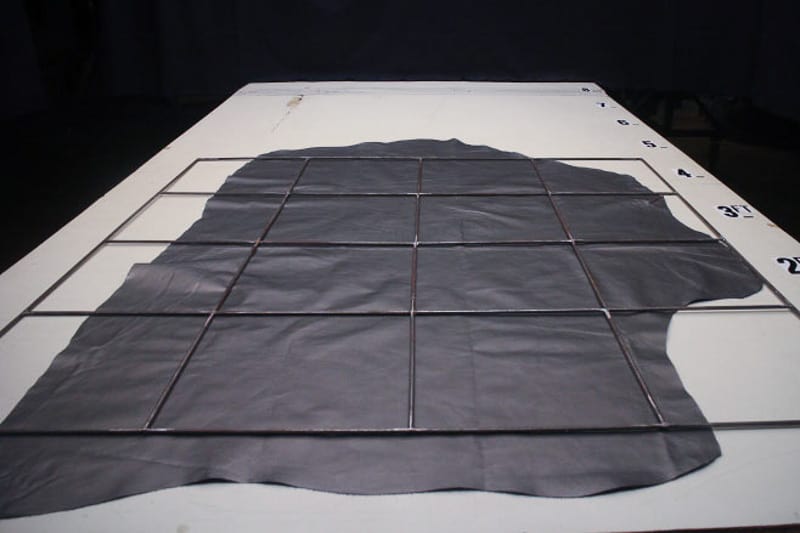
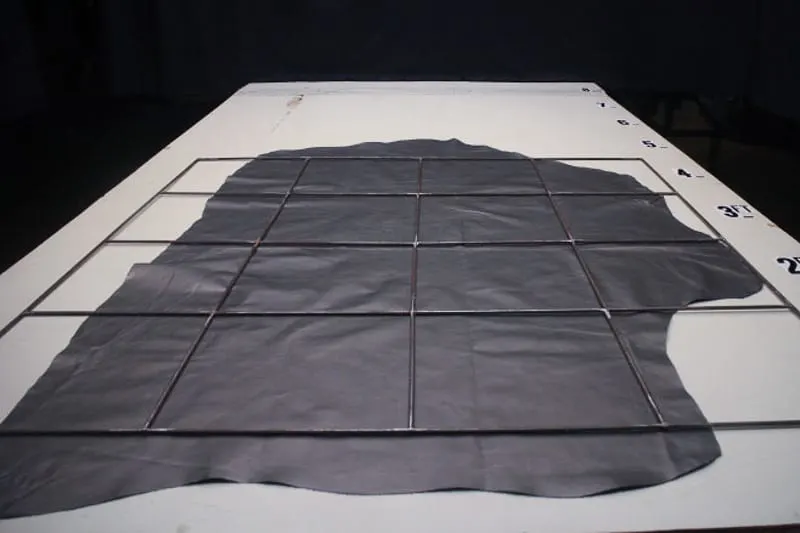
Lay out your fabric or leather on a flat surface, then mark out the shape of the headboard with a chalk wheel. If your fabric has a pattern, make sure it doesn't get cut off awkwardly around the outside edge. I cut out a 27" x 54" rectangle for my queen size headboard.
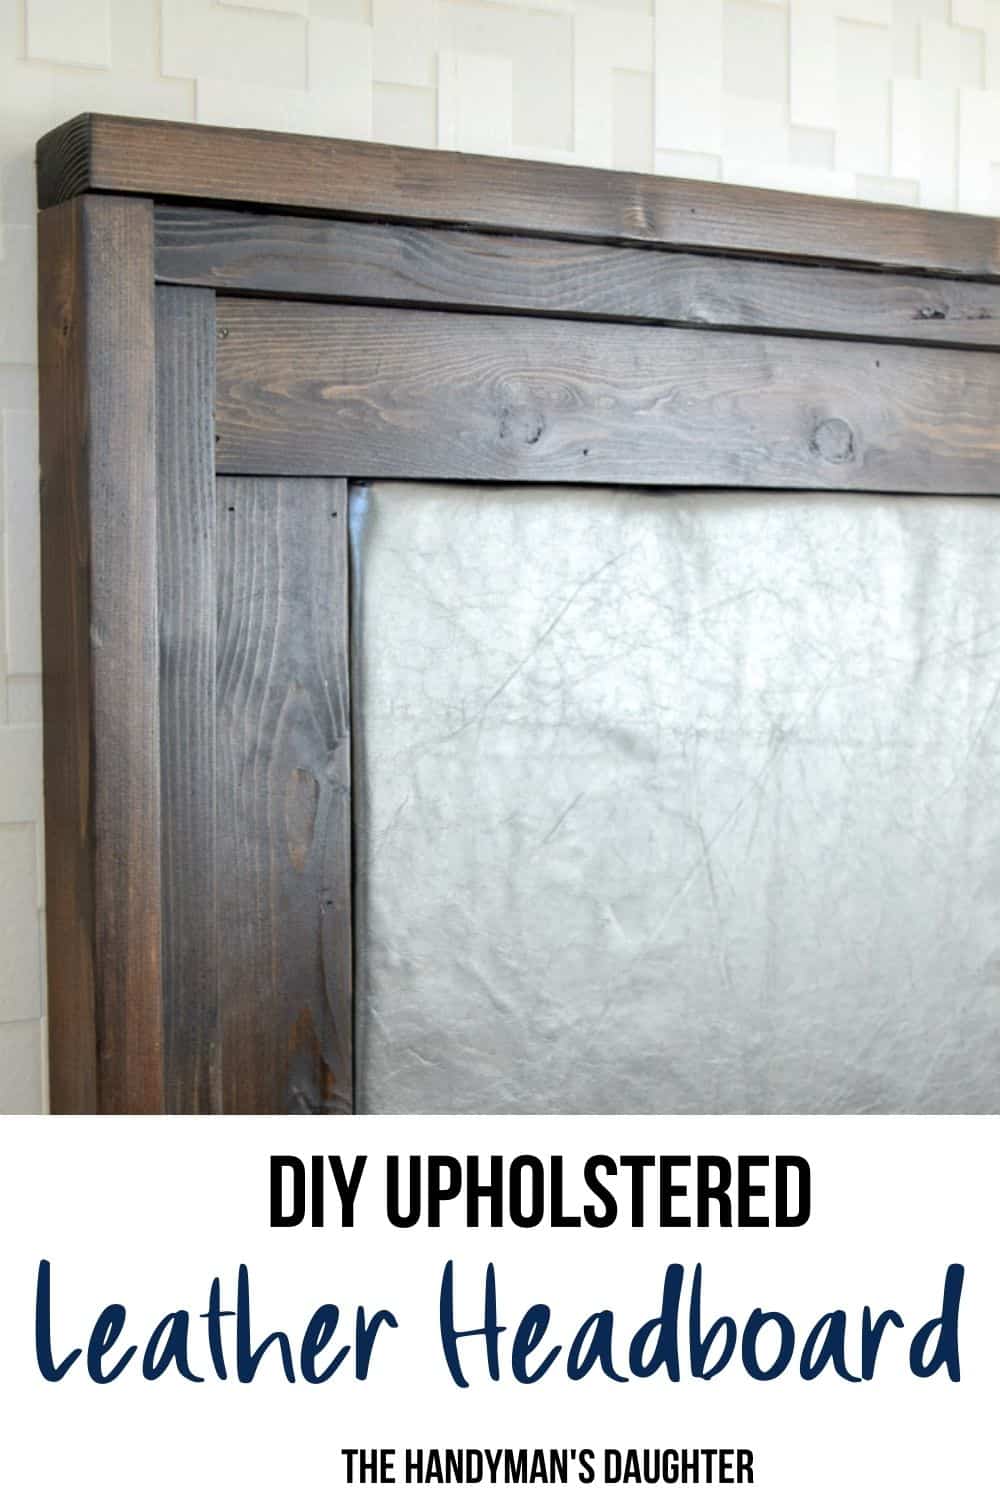
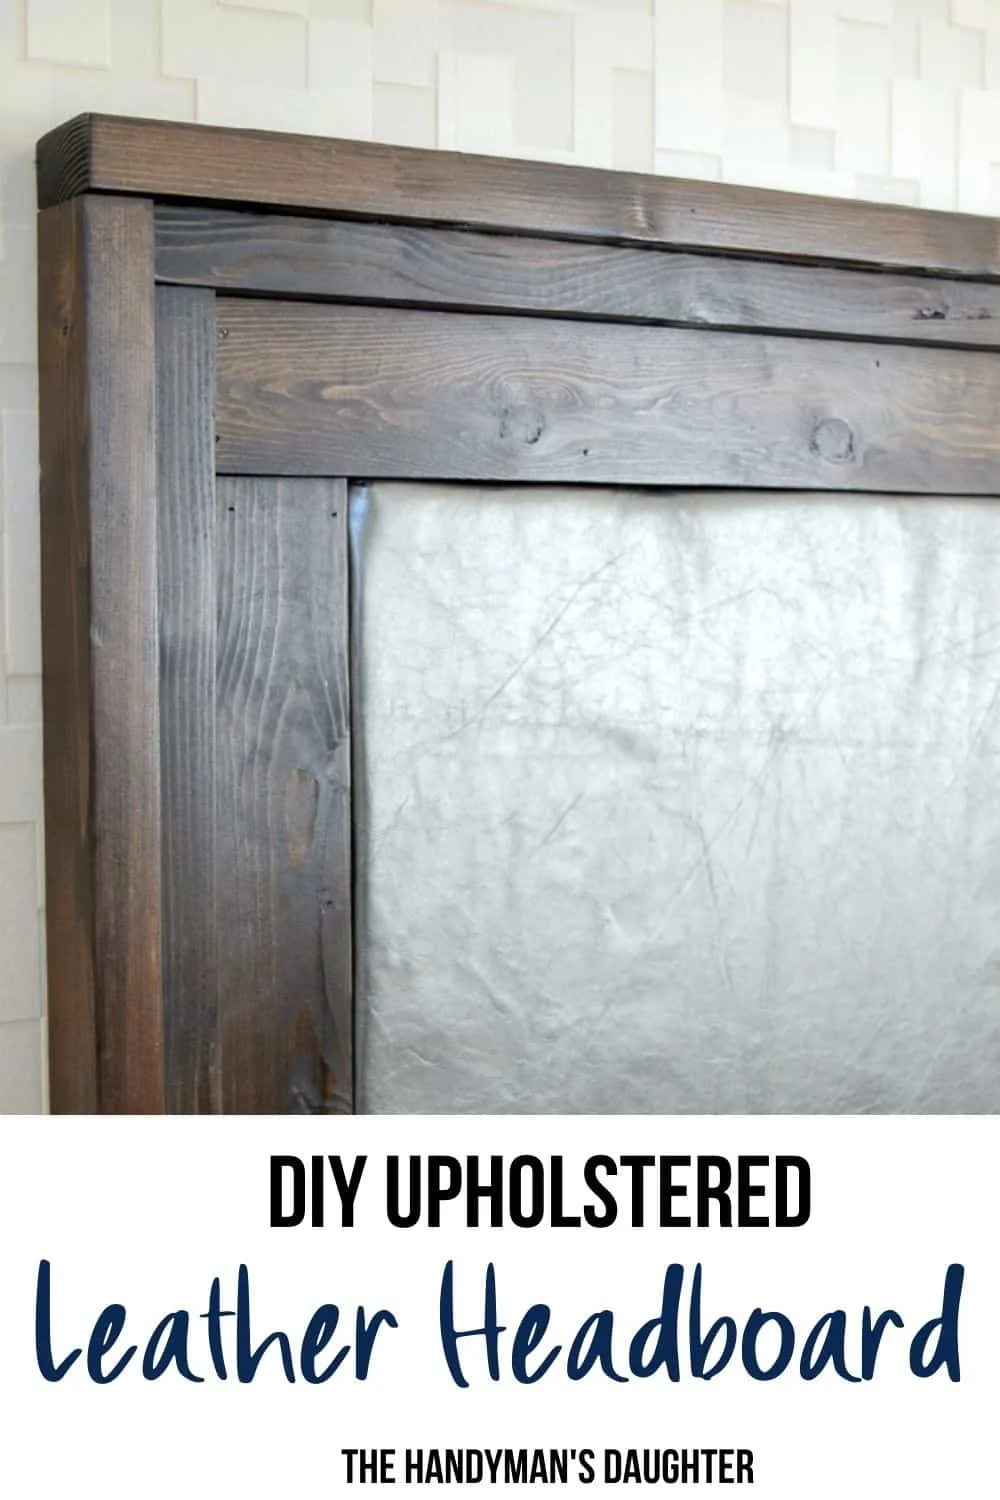
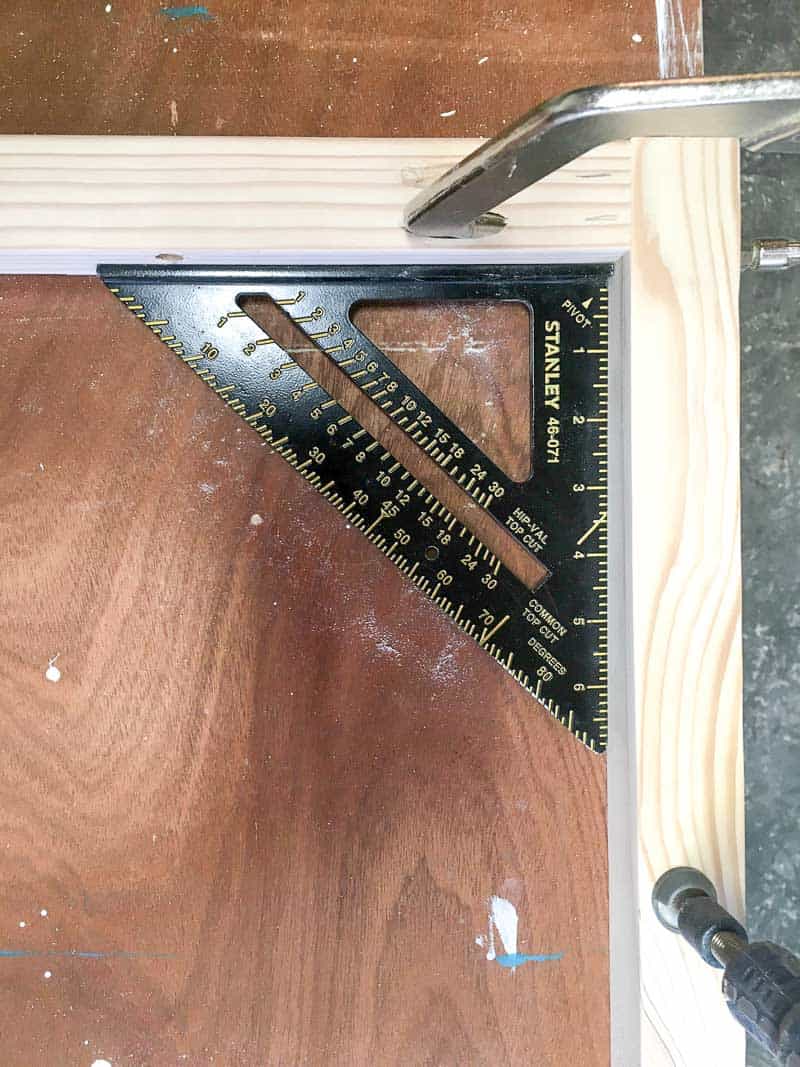
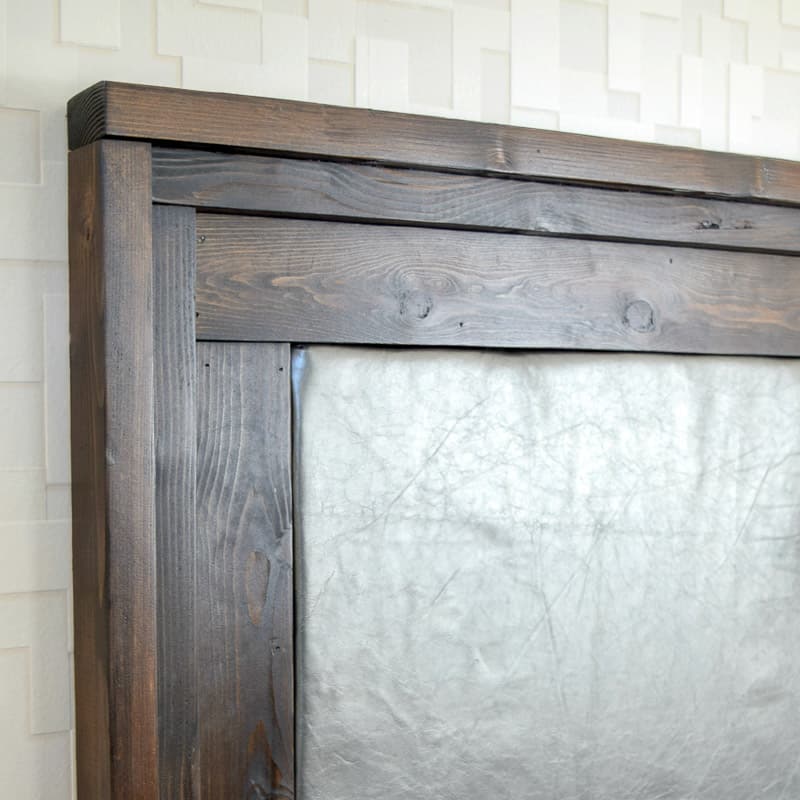
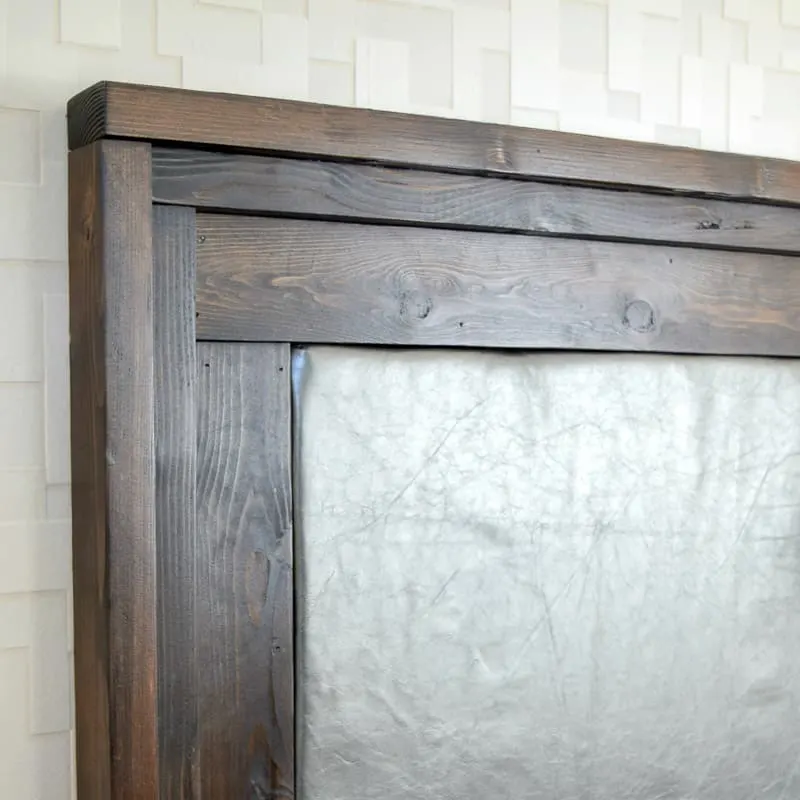
With the leather cut, I could now use those dimensions to design the frame of the headboard. I wanted to mimic the effect of the wallpaper blocks, so I put together a stacked wood frame with staggered corners.
Build the Headboard Frame
Make sure all your boards are sanded down before assembly. I started with 80 grit sandpaper, then 150, and finished with 220 for a super smooth surface.
Start with the 2 x 2 boards. Decide which sides you want to face outward, and drill pocket holes into one end of each of the short pieces on the back side.

Place those boards, pocket hole side down, next to each other on the worktable. Now mark along the length every 8-10 inches at the bottom of the sides facing each other. Drill countersink holes at those marks.
Your short 2 x 2s should end up looking like this.

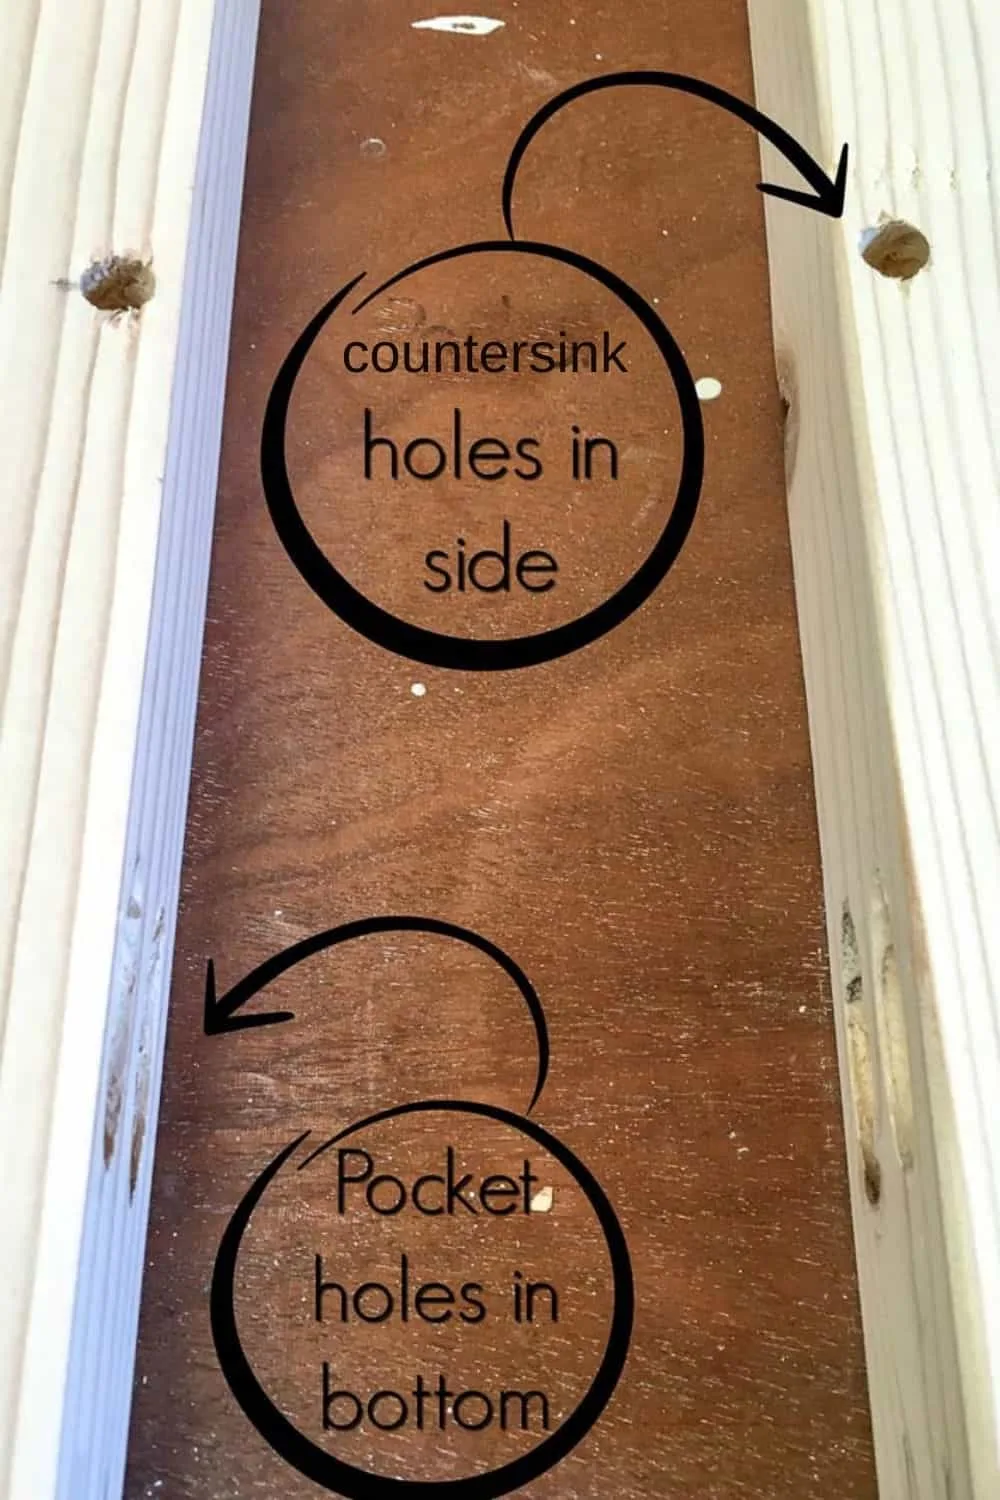
Repeat the pocket holes along the side of the longer 2 x 2, then assemble those pieces into a U shape. The countersink holes along the sides should be facing inward.

Place your 2 x 2 U shape on top of the edges of the plywood. It should fit perfectly along the edge.
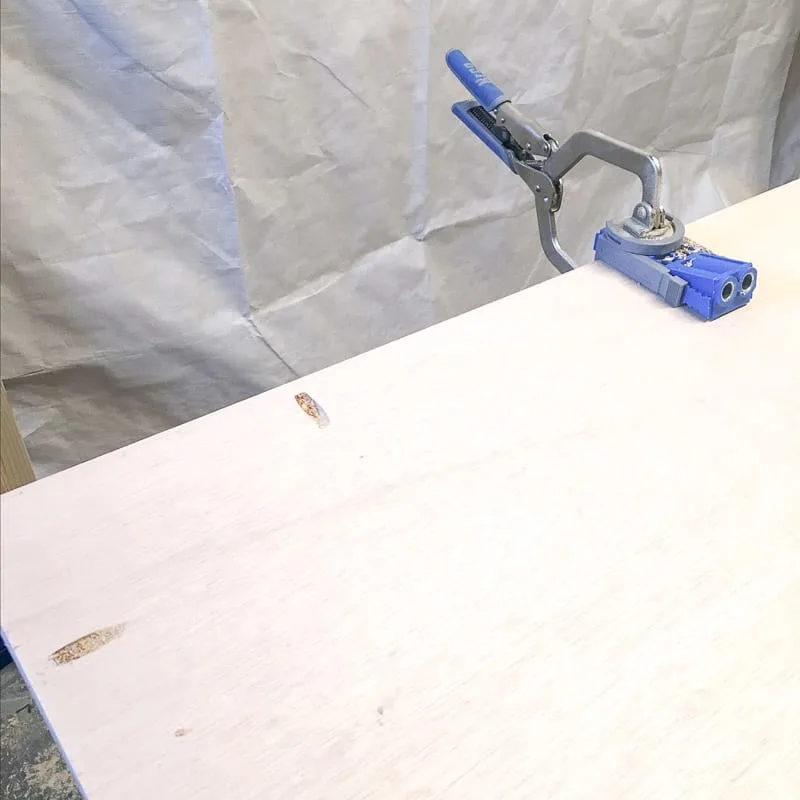
Next, set the 2 x 3 boards around the edge of the plywood, on the worktable. Clamp the 2 x 2s and 2 x 3s together. The plywood is just being used as a spacer right now, and doesn't need to be clamped. A picture is worth a thousand words, so hopefully this will help!
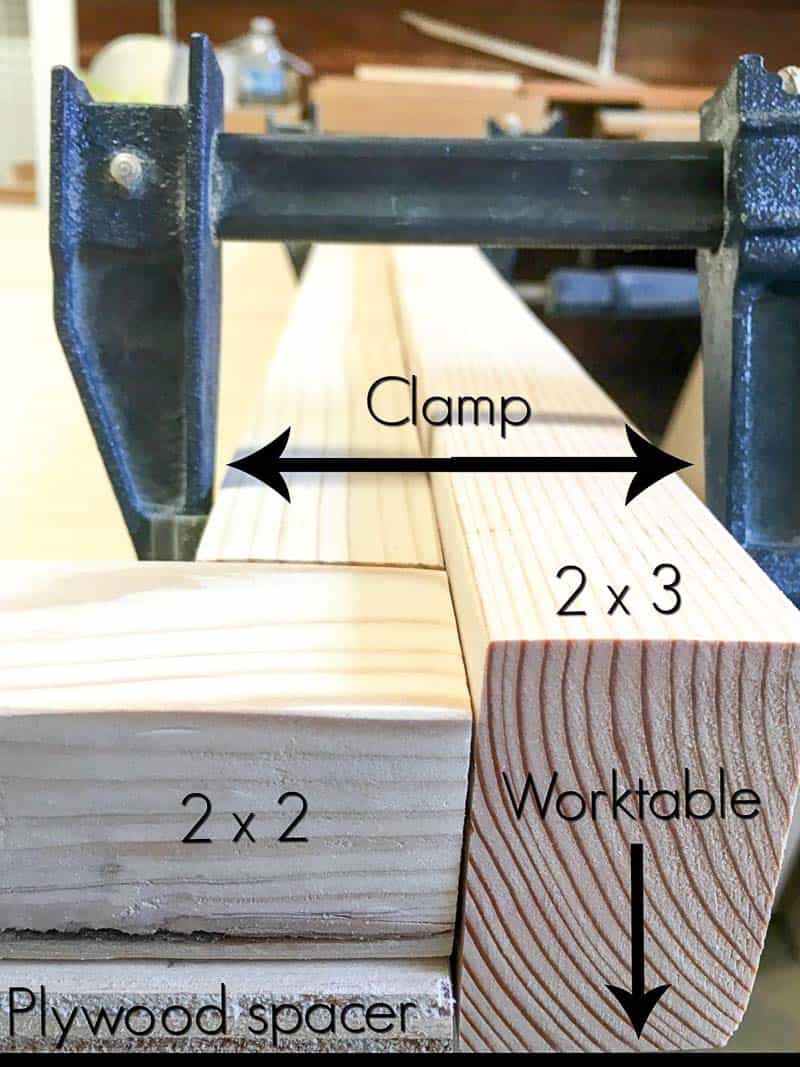

Using 2 ½" pocket hole screws, attach the 2 x 2 U shape to the 2 x 3s through the countersink holes. The heads should go below the surface of the wood, and they'll be covered up in the next step.

If this sounds confusing, the woodworking plans should make it much clearer. It's hard to explain, and even harder to show on this huge piece!
Attach the frame to the plywood back
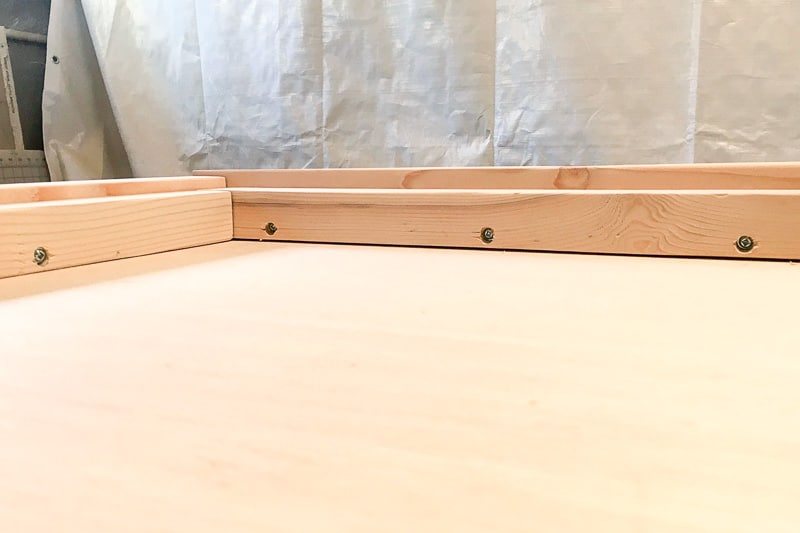
Remove the newly formed double U from the plywood. Drill pocket holes in the plywood every 8-10 inches along three sides, towards the outside edge.

Lay your double U frame upside down on a flat surface, and fit the plywood into the back. Clamp the plywood in place, then screw in 1" pocket hole screws.

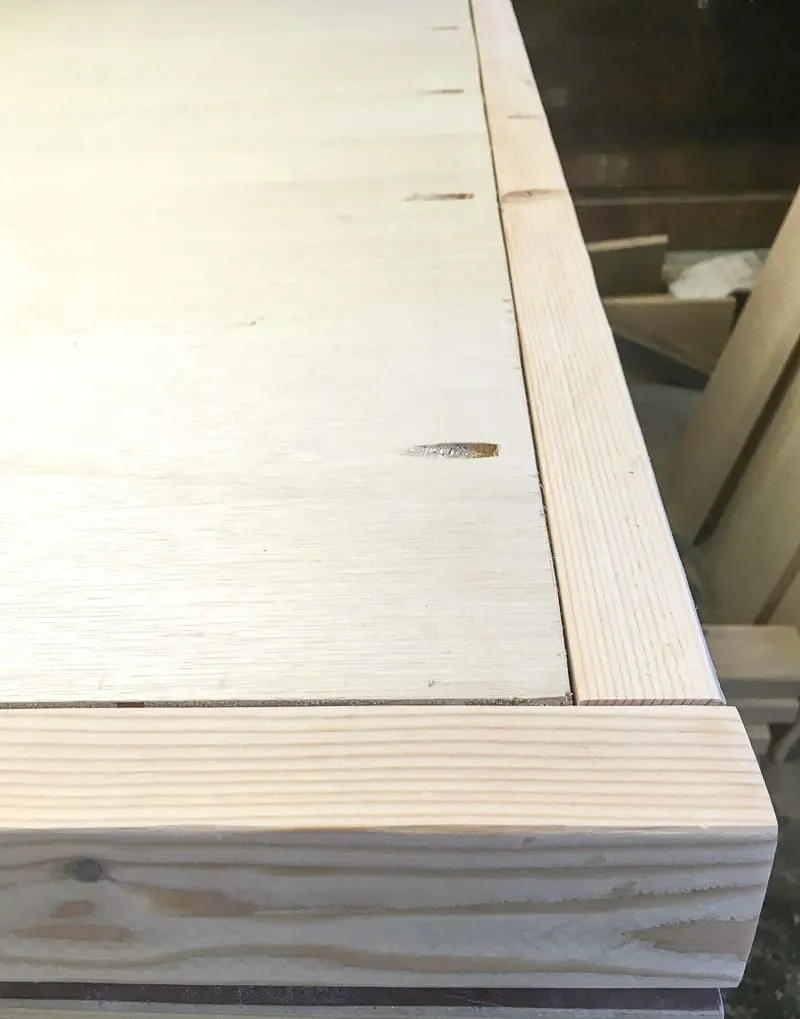
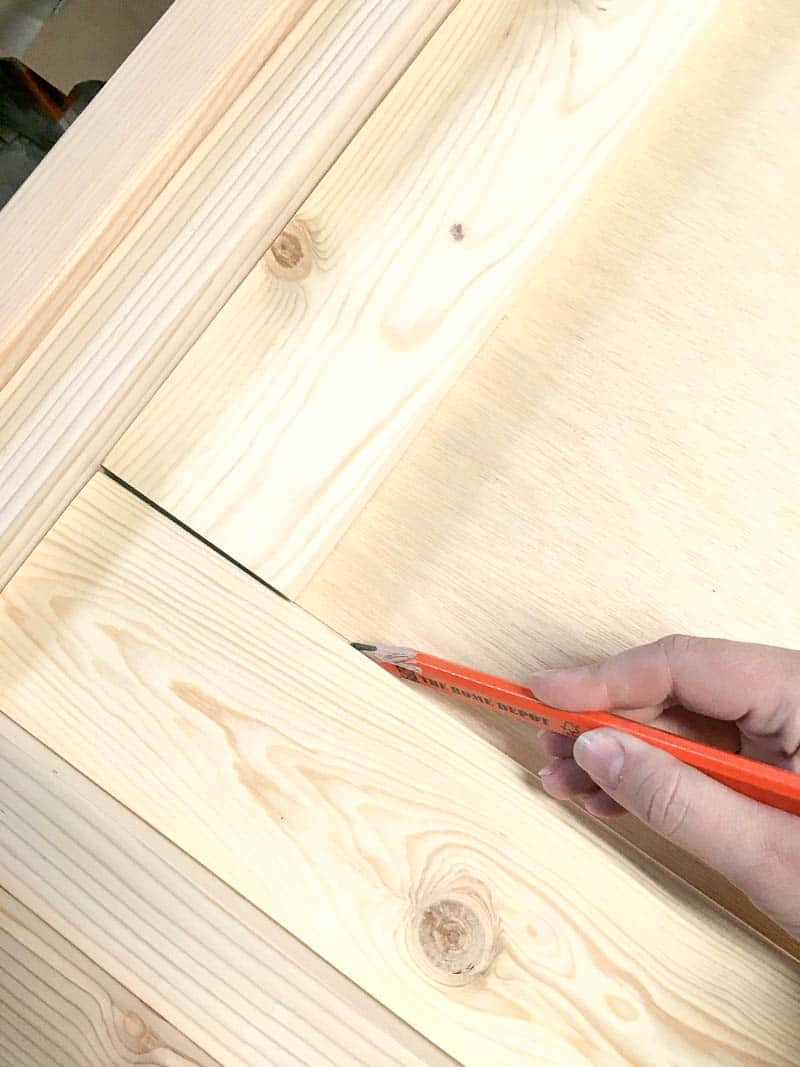
Flip the entire headboard over, and place your 1 x 4 pieces on the inside of the frame. Mark the inner edge of the 1 x 4s on the plywood with a pencil. These marks will indicate where to put your foam later on.

You should have a strip of plywood left over from the back piece. Cut it to fit the bottom of the headboard below the 1x4 frame. This piece will be hidden behind the mattress, and it will cover up the staples and protect your sheets from getting snagged.
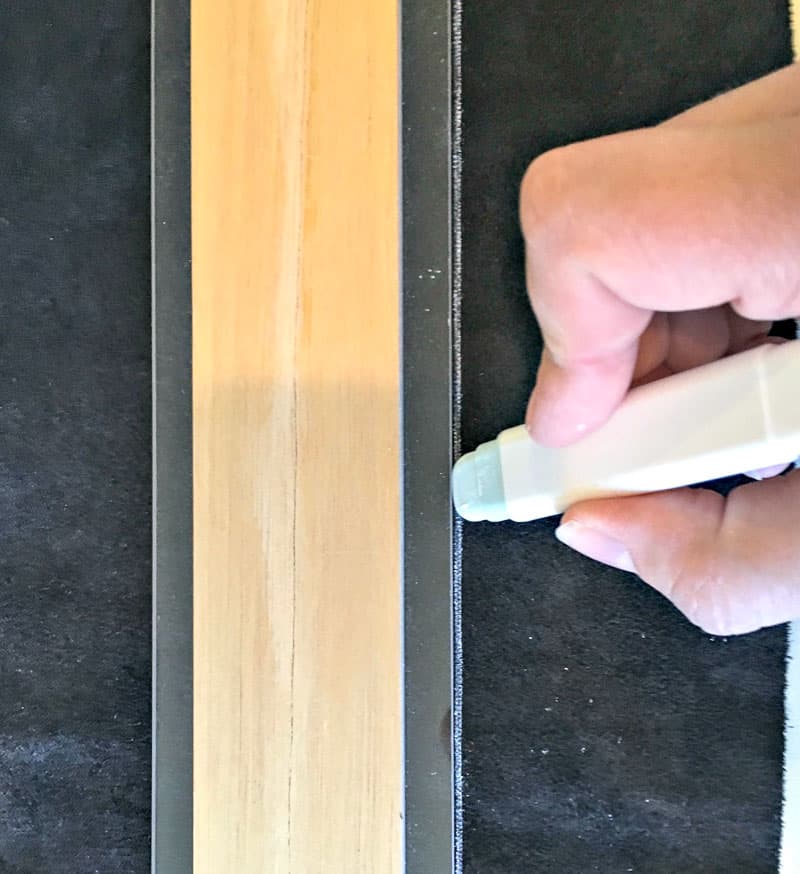
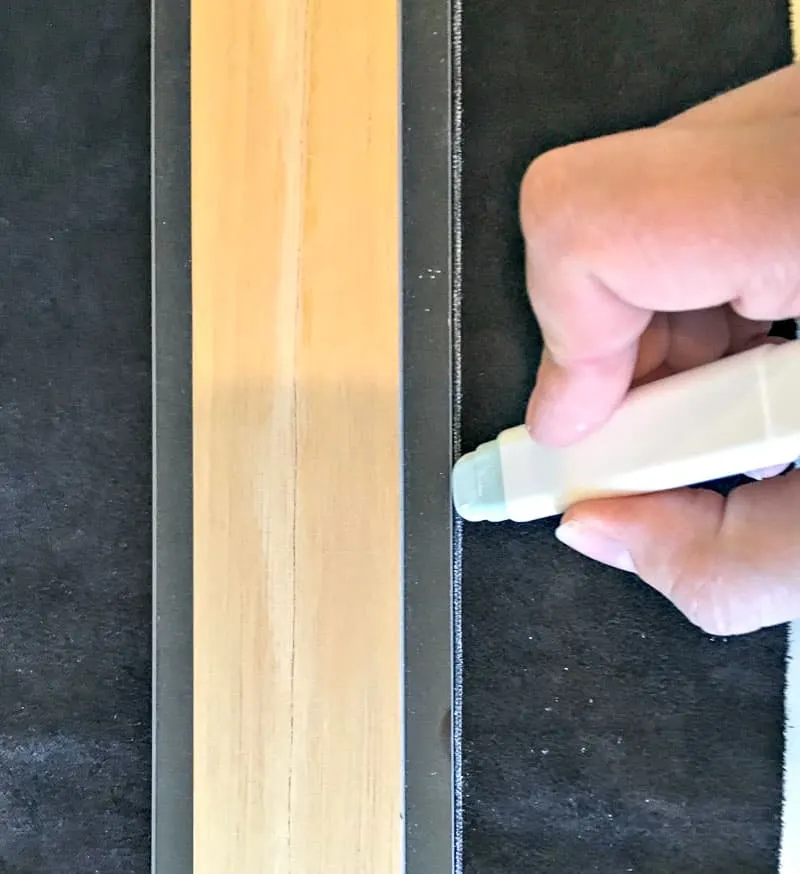
If you are planning on painting or staining your headboard, now would be a good time to do it. Remove the 1 x 4's and the plywood strip, and stain those separately. Don't bother with the plywood backing because it will be covered up.
I used Varathane's Stain + Poly in Kona. Typically, I don't like working with stains that have polyurethane or polycrylic already added, because it's hard to build up multiple coats. But it worked out ok for this project, because it won't get a lot of wear and tear. I really should have used wood conditioner, though, to prevent blotchiness.
Upholster the center panel
Spray the back of the foam padding with the spray adhesive and place it along your pencil markings. You may also want to add some batting to give it a bit more cushion and fill out some wrinkles in the fabric.
Drape the leather over the foam, making sure it overlaps evenly on all sides. Staple the leather to the plywood backing as close to the foam as you can get. If the staples won't sit flush with the surface of the plywood, use a hammer to flatten them.
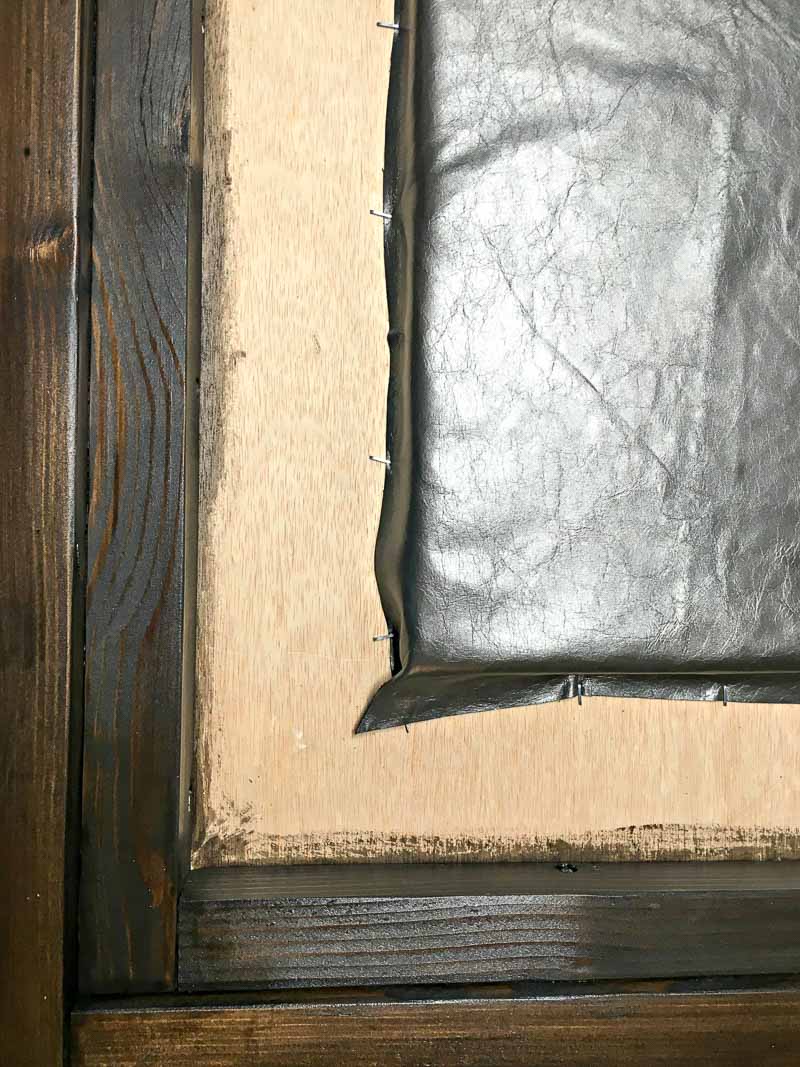

Fit the 1 x 4 boards between the frame and the leather. The boards should cover up the edges of the leather and the staples.
Attach the 1 x 4's to the plywood with 1" nails. Use the long strip of plywood to cover up the bottom edge. I used my Ryobi Airstrike brad nailer for this step.

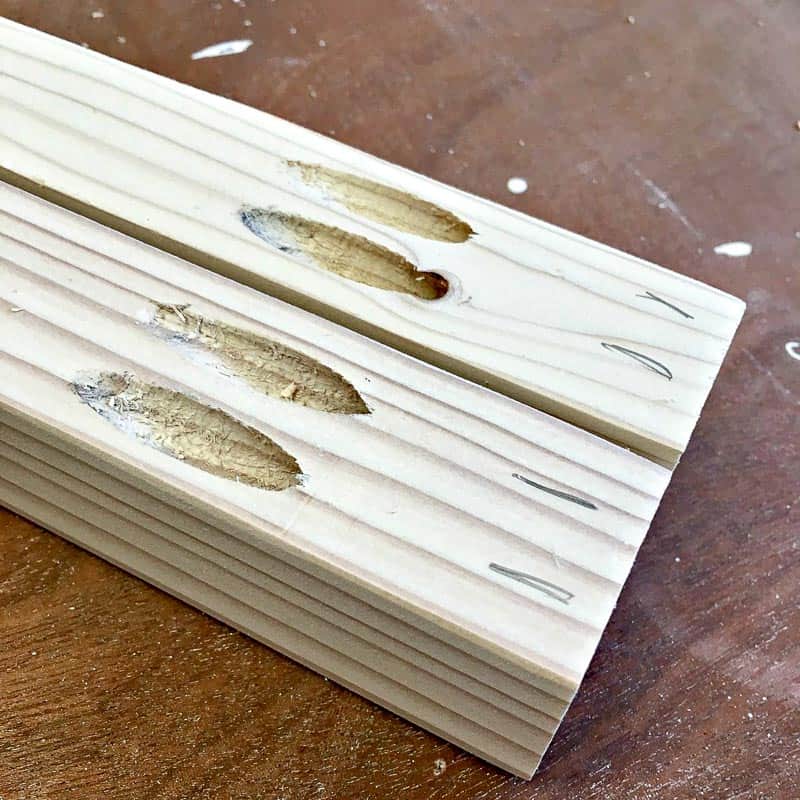
After nailing the final boards in place, dab a bit of your wood stain into the nail holes. Wipe away the excess on the surface of the boards with a paper towel.
Attach the Headboard to the Wall
Figure out where you want to attach your headboard to the wall, and mark the center. Keep in mind that the plywood at the bottom should rest behind the mattress, so measure the height of your bed!
Attach one side of the French cleat to the wall, making sure to hit at least one stud.
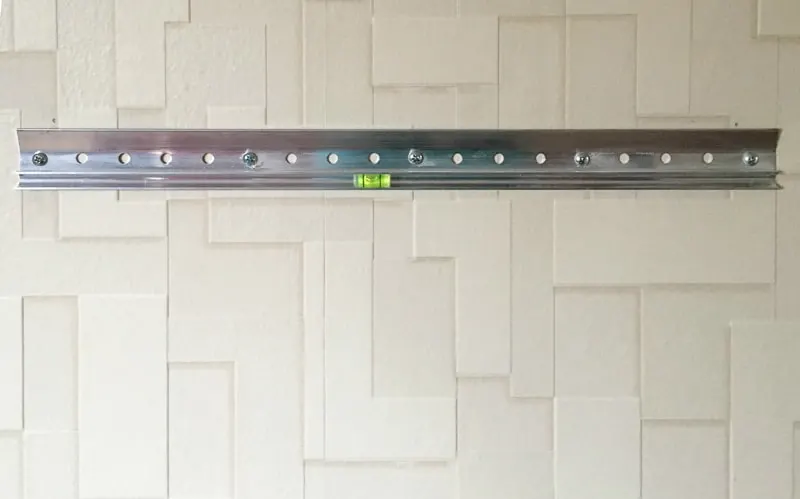
Attach the other side of the cleat to the back of the headboard, then just hook the two sides of the cleat together! A perfectly flat and level headboard without a ton of measuring!
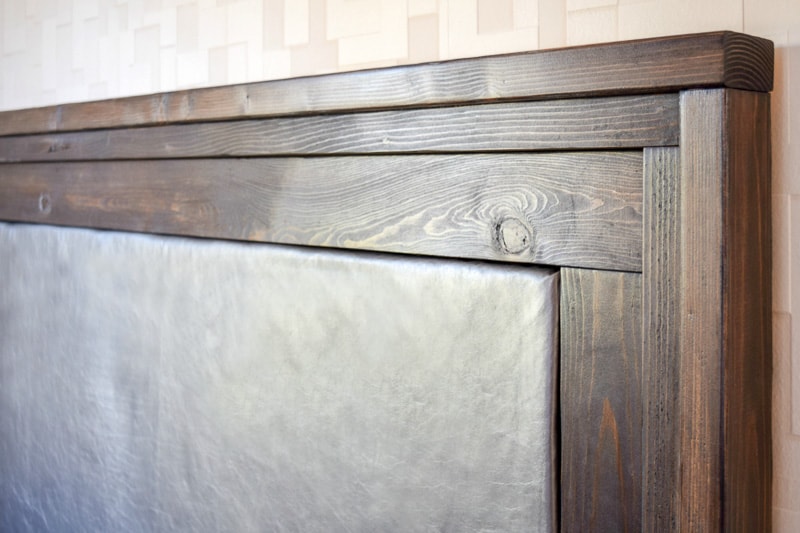

The leather really pops against the dark trim, and I love the stacked effect of the wood against the three-dimensional wallpaper.
Check out these other DIY project ideas!
Brenda Haines
Sunday 2nd of October 2016
I like the simply beige and the mint whisper.
Ed Connors
Sunday 2nd of October 2016
Hi Vineta... What perfect timing for me to find your site and this particular post! My daughter wants an updated headboard for her bed and is looking for something that's not that 'girly' but more modern. She just loves the look. And it'll be a nice project to build with her. Thanks for sharing!
The Handyman's Daughter
Sunday 2nd of October 2016
I'm so glad I could help! This would be a great project to build with your daughter!
gemma@thesweetestdigs
Friday 30th of September 2016
This is great!! And such a nice different look from the usual DIY headboards. Love it!
Jennifer Robinson
Friday 30th of September 2016
I love their 1k460 Red Clay leather. I have been wanting to do a padded headboard for ages but couldn't find the right color fabric. The red clay would be perfect for me. I have 4 dogs and live out in the country, they are always tracking in the red clay from outside and yes, I let them get on the bed. That means I have to wash my king sized comforter at least once a week at the laundry mat, it won't fit in my machine. So I have decided to redo my bedroom. After I finish the project I am currently working on, I am definitely going to make this headboard!!
Janine
Thursday 29th of September 2016
Wow, what an amazing project. You did a great job! Congrats, your headboard is beautiful!