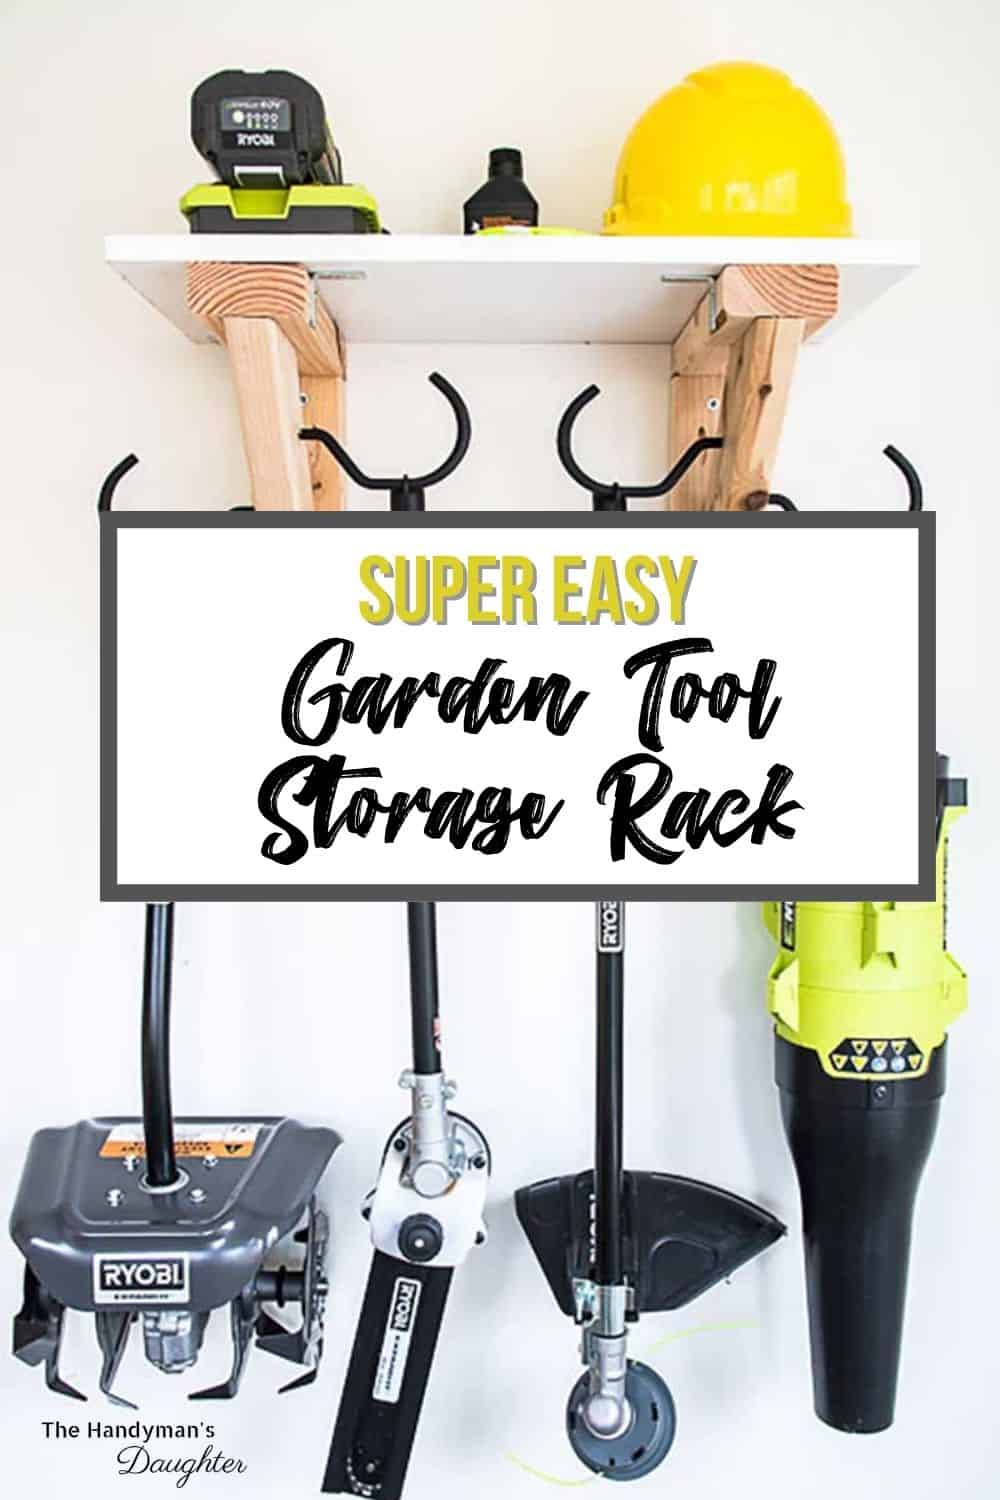
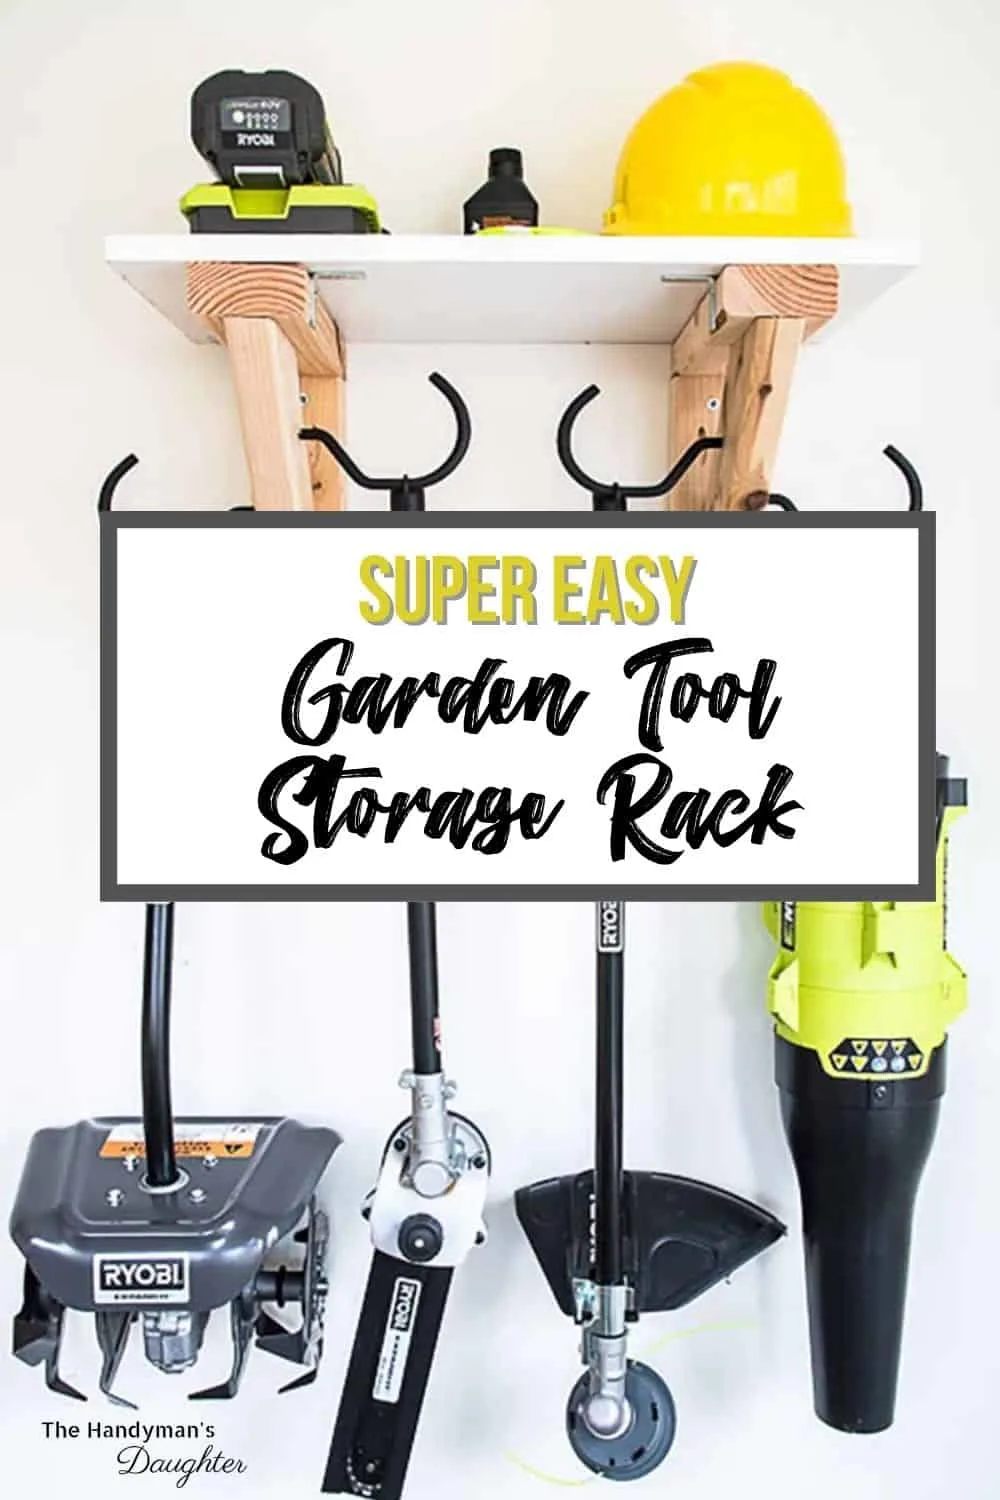
This easy-to-make garden tool rack has room to hang all your power landscaping tools, with a shelf above to hold battery chargers and extra string reels!
Our backyard shed is home to all our landscaping tools, holiday decorations and sports equipment. The storage shelves I built transformed the space by getting those plastic bins off the floor.
But with the addition of a bunch of new Ryobi garden tools this fall, it was starting to get cluttered again! I finally had enough, and built this simple garden tool rack to hold them all.
This post is sponsored by Ryobi Outdoor and contains affiliate links for your convenience. Purchases made through these links may earn me a small commission at no additional cost to you. You can read more about how this site earns money on my disclosures page.
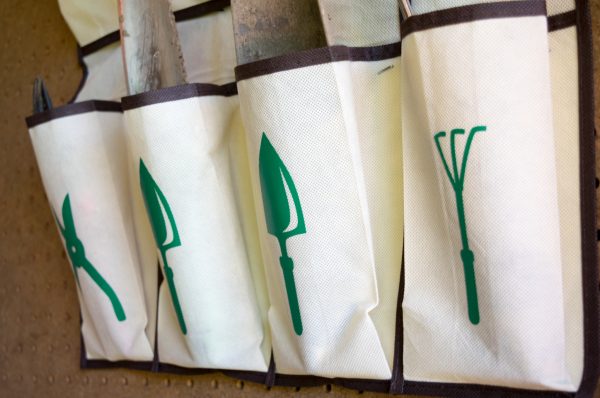
Looking for storage for those smaller hand tools? Try this hanging garden tool organizer!

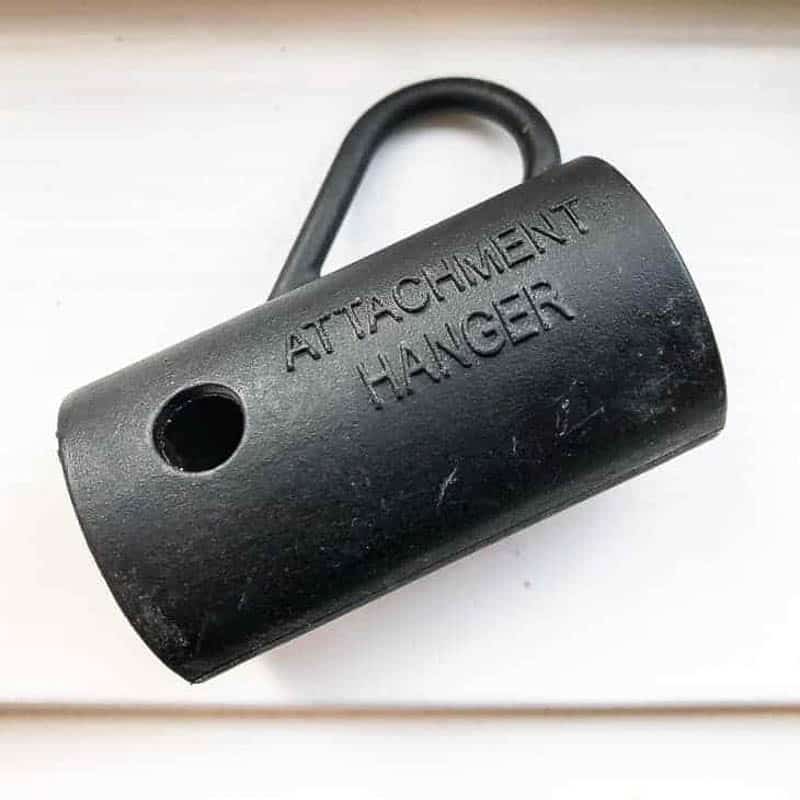
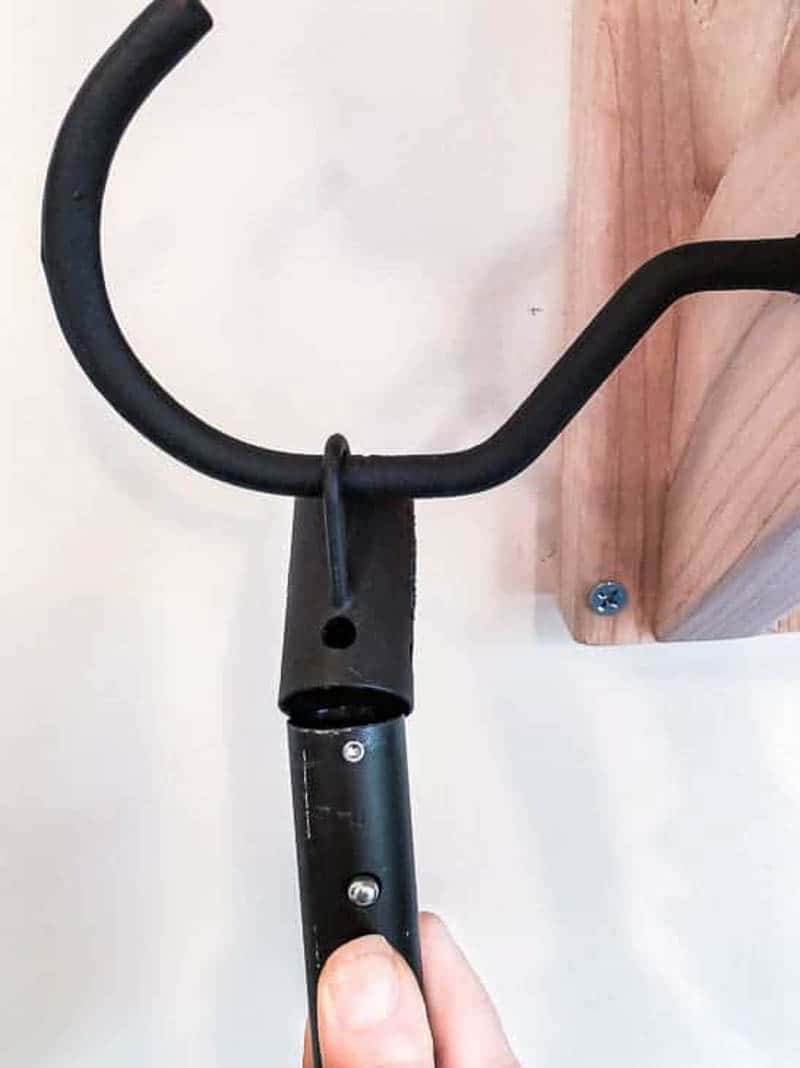
The beauty of the Ryobi Expand-it system is that every tool is an attachment, rather than a stand-alone piece of equipment. The clutter could have been much worse if they all had their own handles and power supplies!
Each attachment connects to the Ryobi Expand-it power head and uses the same battery, so it's important to corral everything in one place. Luckily, they all come with one of these handy little attachment hangers.

That got me thinking! I came up with a way to incorporate hooks into a shelf to create a compact garden tool rack for all of my Ryobi garden tools!
Materials Needed for Garden Tool Rack
- One 2 x 4
- Use up those 2 x 4 end cuts that are cluttering up your scrap pile! I managed to dig up enough pieces to make this entire shelf for free.
- ¾" plywood or MDF
- I used a 24" long piece of 11 ¾" wide melamine shelf left over from another project.
- Countersink drill bit
- ¼" drill bit
- 3" wood screws
- 4 right angle brackets
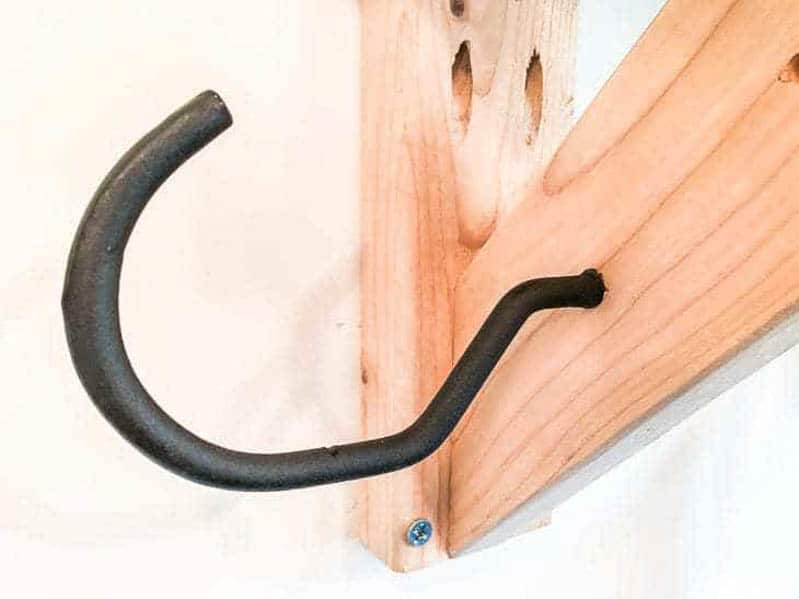
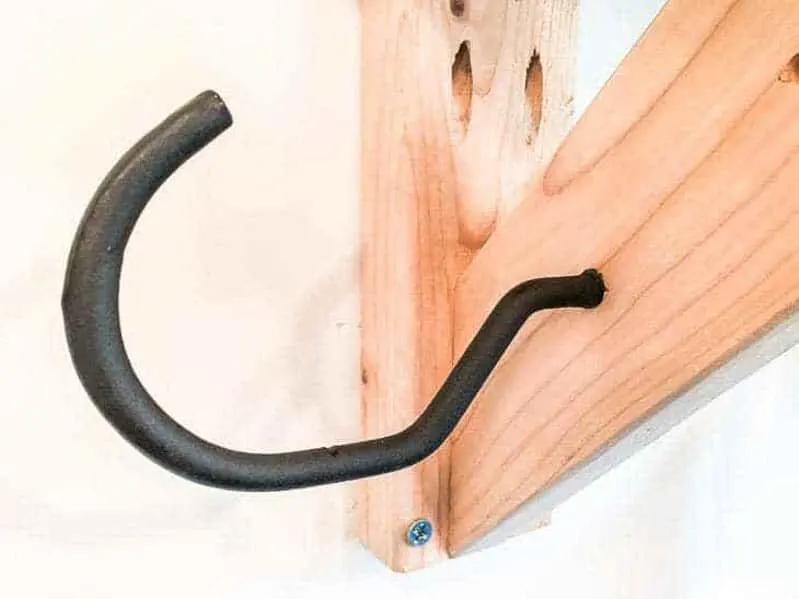
- Bicycle hooks
- Stud finder
Don't forget your safety gear when woodworking! Here are my recommendations for safety glasses and ear protection. No excuses!
Cut List
- 2 - 2 x 4 @ 11 ¾"
- 2 - 2 x 4 @ 10 ¼"
- 2 - 2 x 4 @ 14 ½" (miter ends at 45 degree angle)
- 11 ¾" x 24" piece of ¾" plywood, MDF or melamine
Instructions for Building a Garden Tool Rack
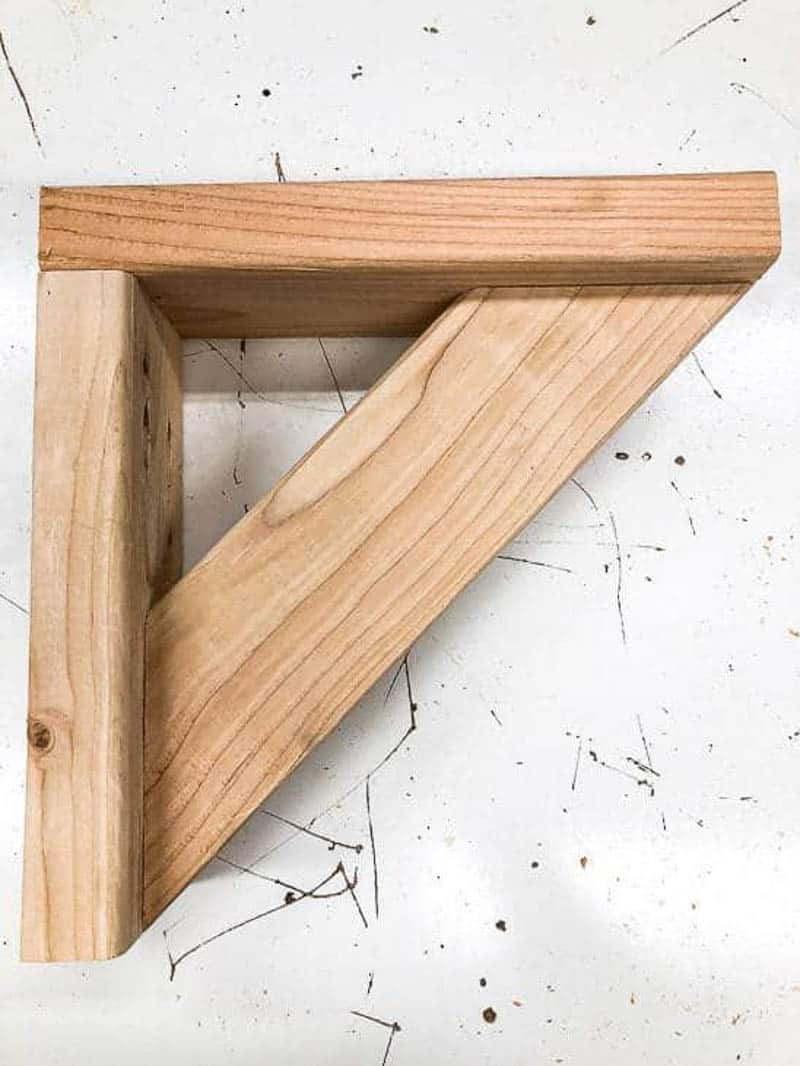
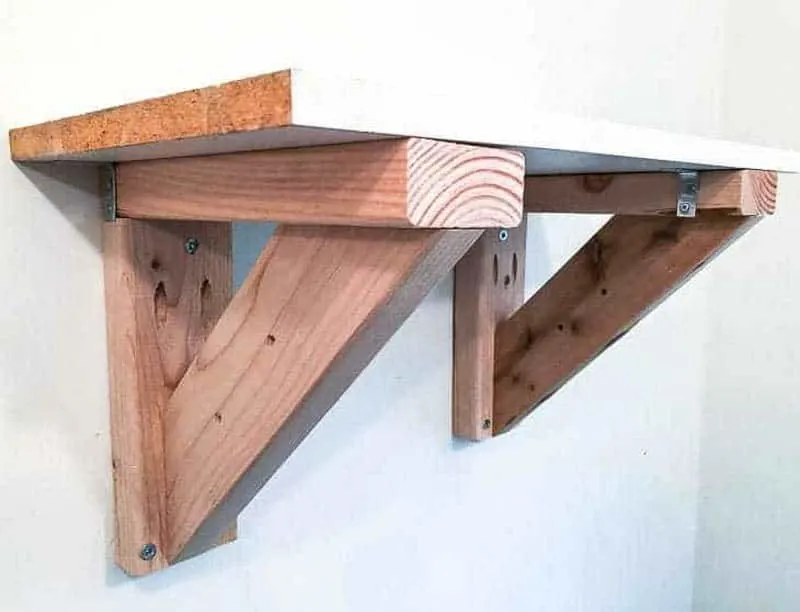
Make the Shelf Brackets
Attach the 10 ¼" pieces to the 11 ¾" pieces to form an L shape. I used 2 ½" pocket hole screws here. If you don't have a Kreg Jig (you can read more about how to use a Kreg Jig here), just join them together with 3" wood screws through the bottom piece.
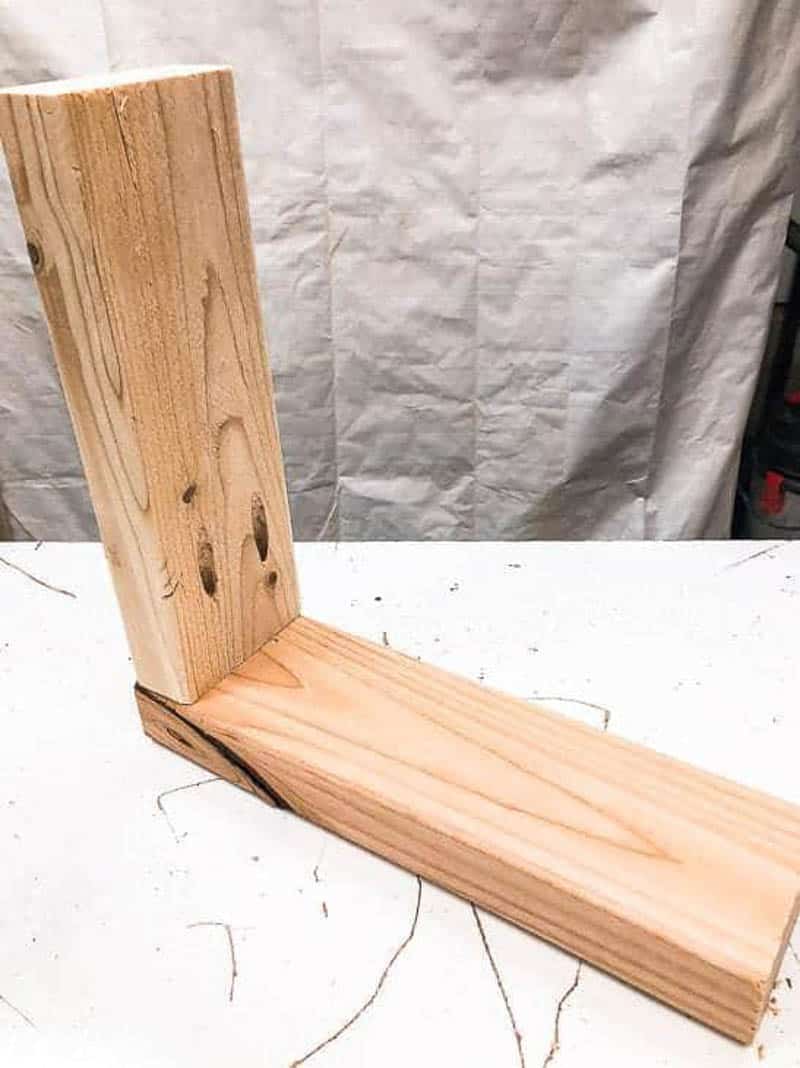
Cut two pieces of 2 x 4 a bit bigger than 14 ½", then cut the ends at a 45 degree angle. Trim the angle until you get a custom fit.

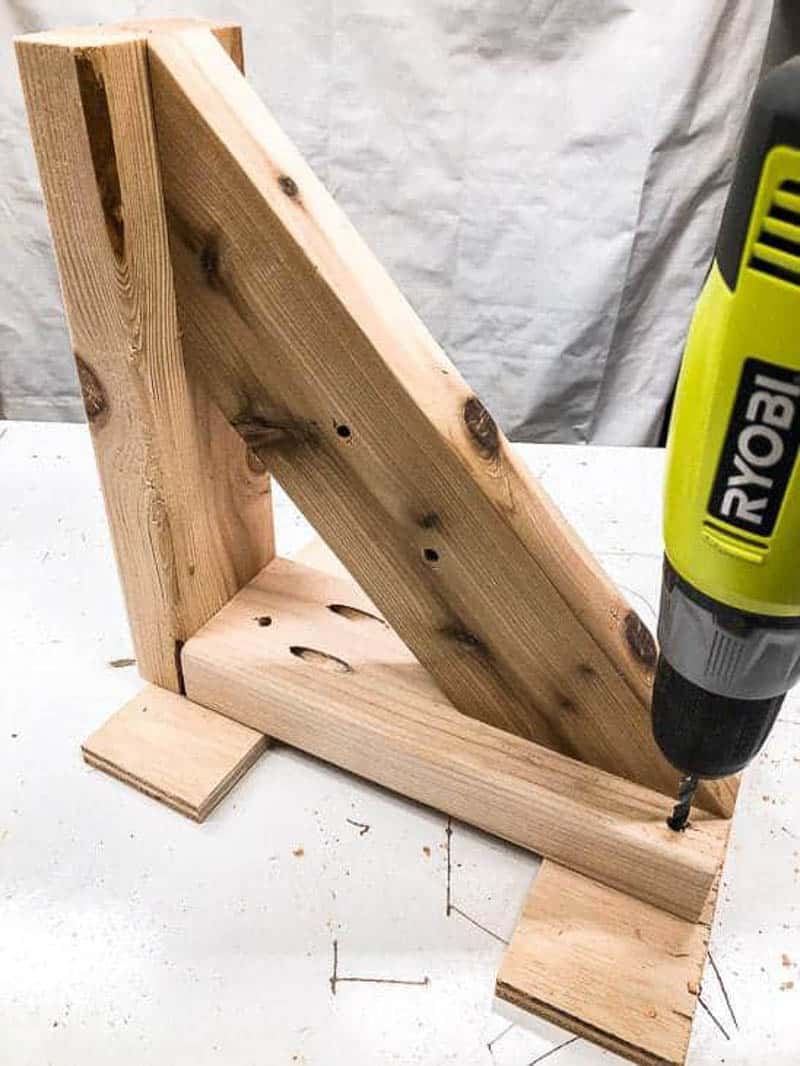
Mark the spot for screws where the angled piece meets the bracket. Don't place them too close to the point, or you'll have the ends of the 3" screws popping out the other side! Drill pilot holes with the countersink bit. Check out this tutorial if you're not familiar with countersinking screws.

I created a spacer with two scrap pieces of ½" plywood stacked together. This isn't entirely necessary, but helps to elevate the diagonal piece to the center of the bracket.


Attach Brackets to the Shelf and Wall
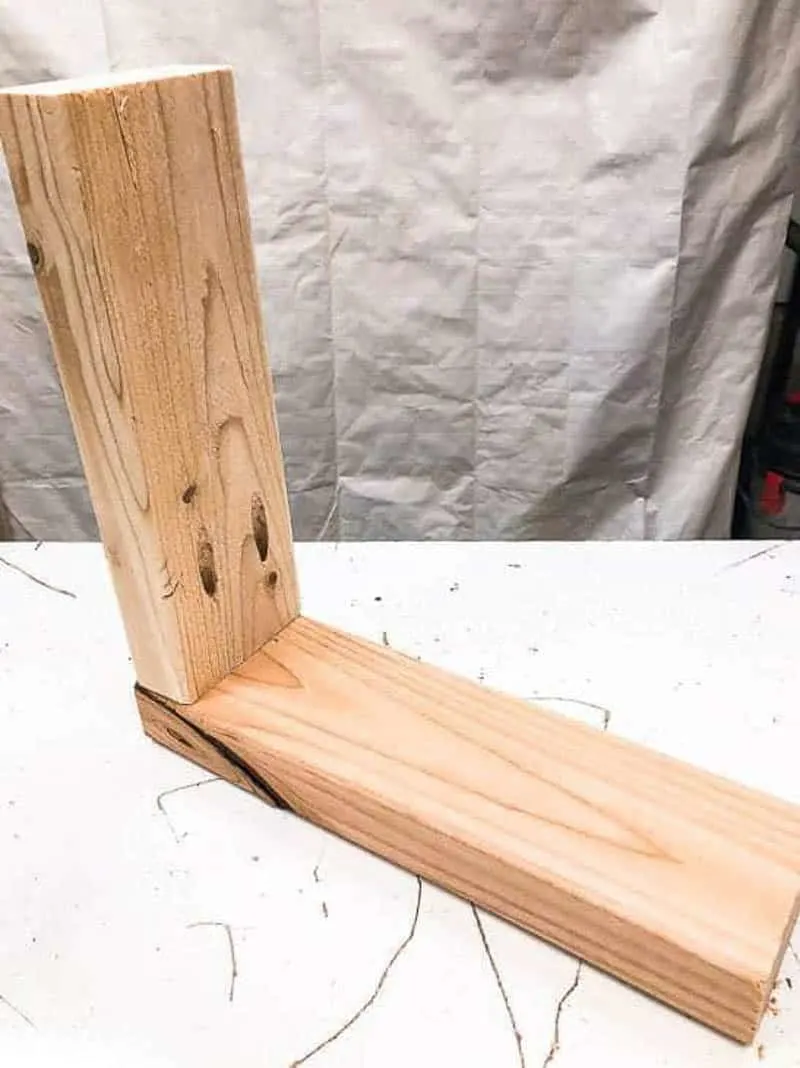
Drill 3" screws through the pilot holes and into the angled ends. Make sure the screw heads are recessed into the wood, or the brackets won't attach to the wall properly.


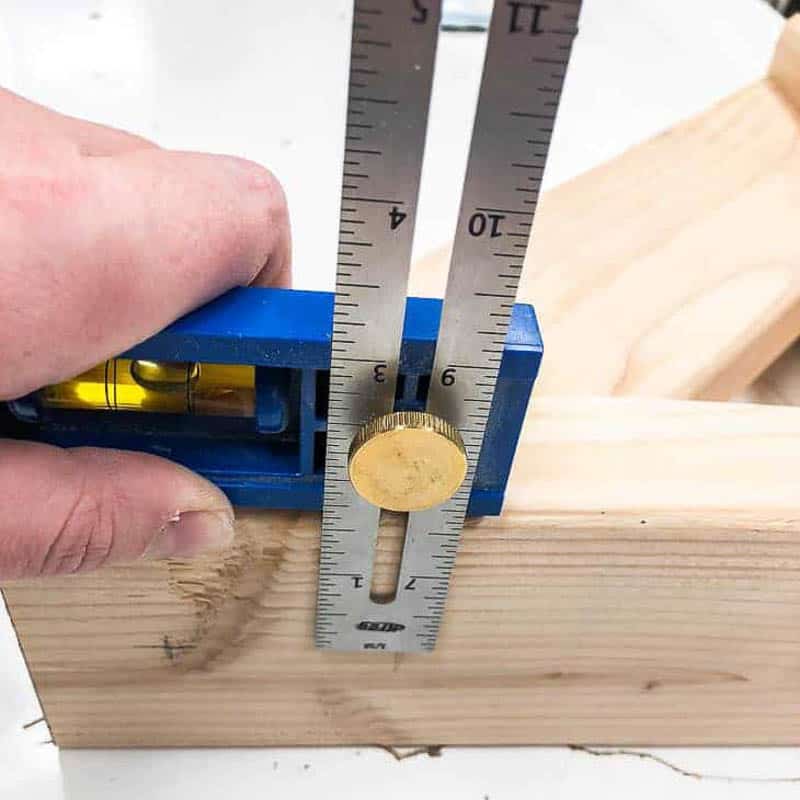
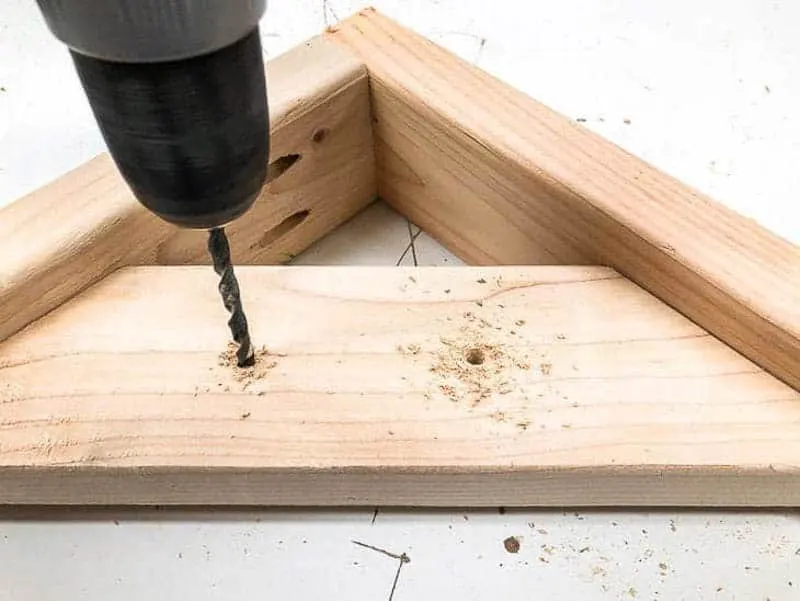
Using the ¼" drill bit, drill pilot holes in the middle and end of the shorter board. This is where the 3" screws will attach to the studs in the wall.

Using the same drill bit, drill two holes into the diagonal board. This is where you'll attach the bicycle hooks later on.

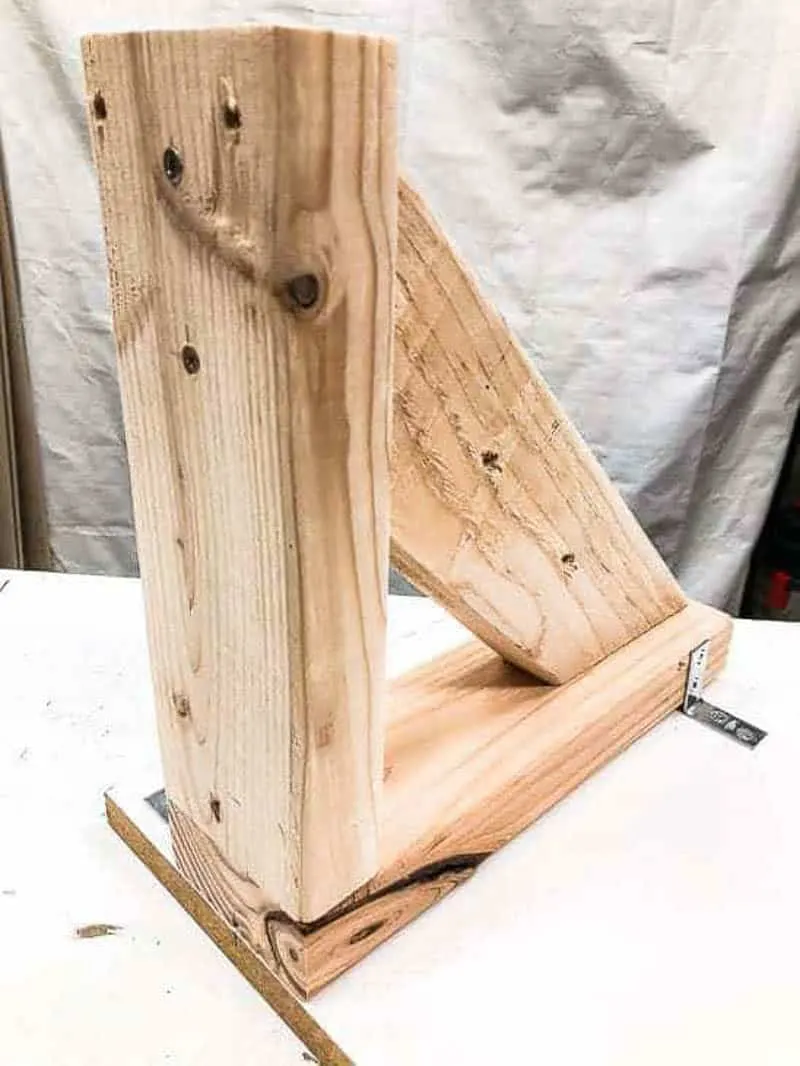
Attach the wood brackets to the underside of the shelf piece with right angle brackets. They should be spaced 16" apart on center to match the studs in the wall.

Use your stud finder to mark the edges of the studs in the wall. Line the edges of your wooden bracket up with those marks, and attach it to the wall with 3" screws.
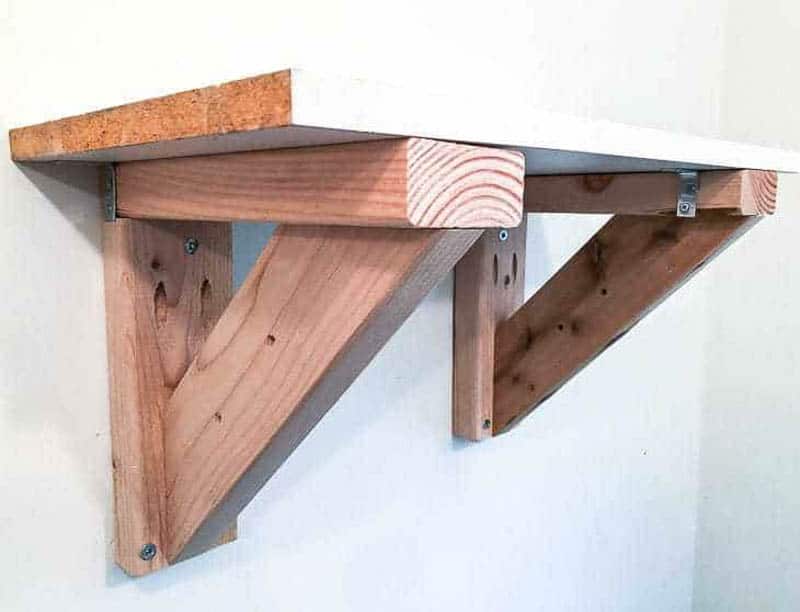
Screw the bicycle hooks into each side of the diagonal boards by hand.
Load up the garden tool rack
I found it easier to slide the loop onto the hook without the tool attached, then clip the tool in place.

The extra large bicycle hooks give you plenty of room, so the tools won't smash into each other or the wall.

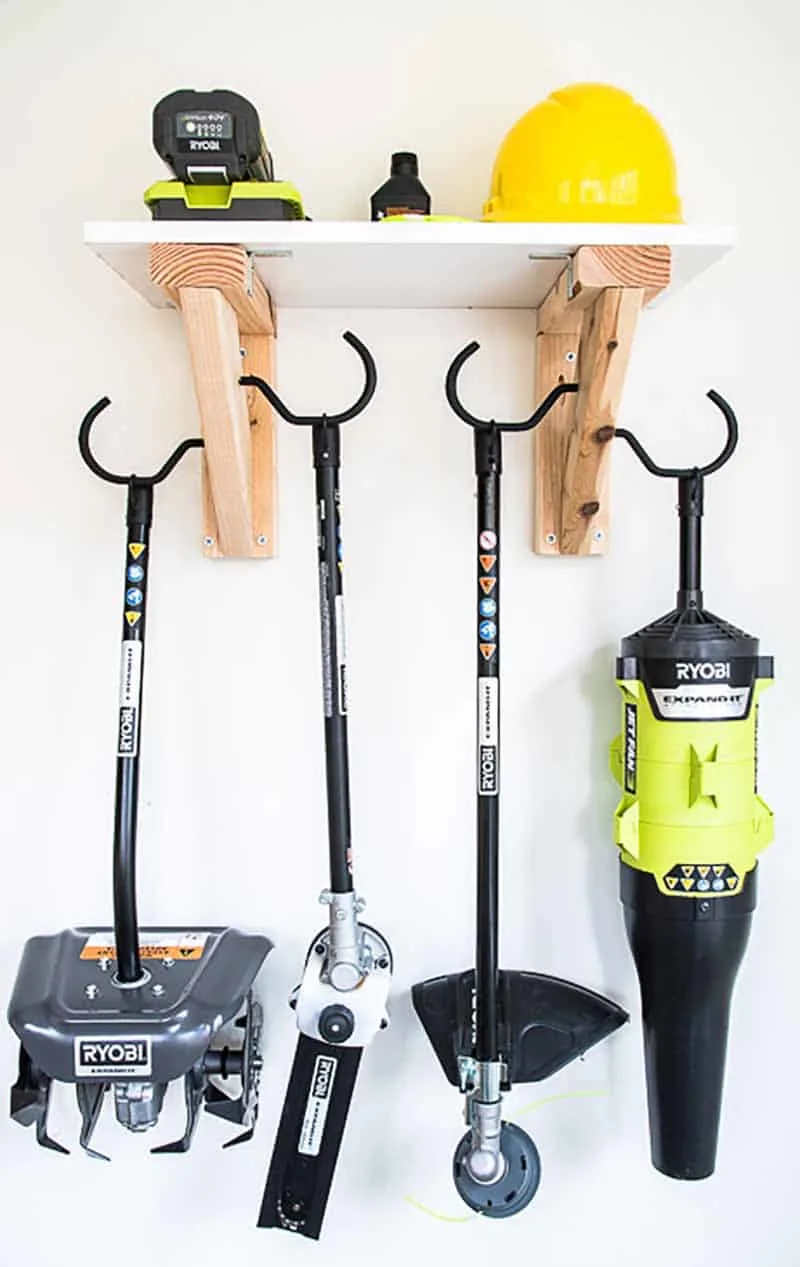
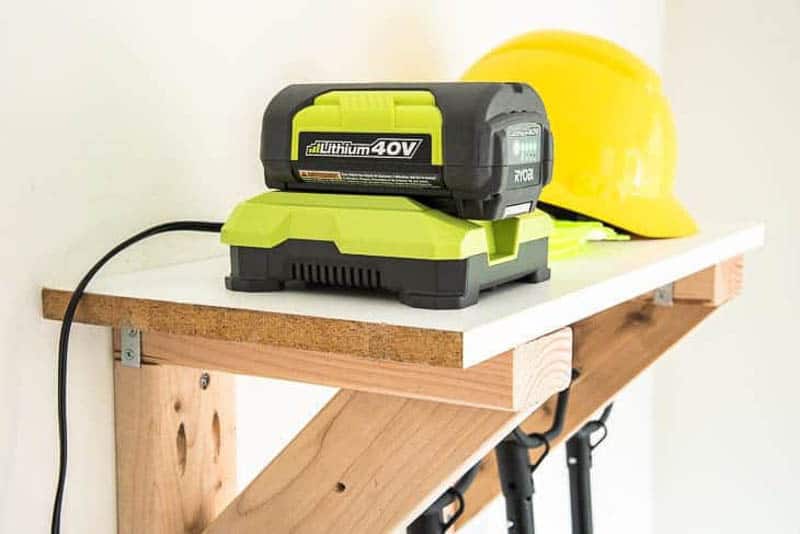
The battery charger, extra string reels and safety gear are all kept together on the shelf.

Now there's plenty of space on the floor beneath!


All my Ryobi garden tools are ready to go this spring! I can't wait for the weather to change so I can get my hands back in the dirt!
Need to store those hand gardening tools too? Check out this list for more garden tool storage ideas!


Teresa
Tuesday 20th of March 2018
Very good idea! I love getting things up and off the floor. Thank you for sharing it with us on Party in Your PJ's! Pinned.
Derek Hines
Thursday 25th of January 2018
Great project! The store-bought one that I have doesn't work well because the hooks are too close together. Yours gives each tool room to hang. I might very well have to make this myself!
Vineta
Thursday 25th of January 2018
I'm glad my post helped! At first I thought the bicycle hooks would be overkill because they're so huge, but they worked out perfectly!