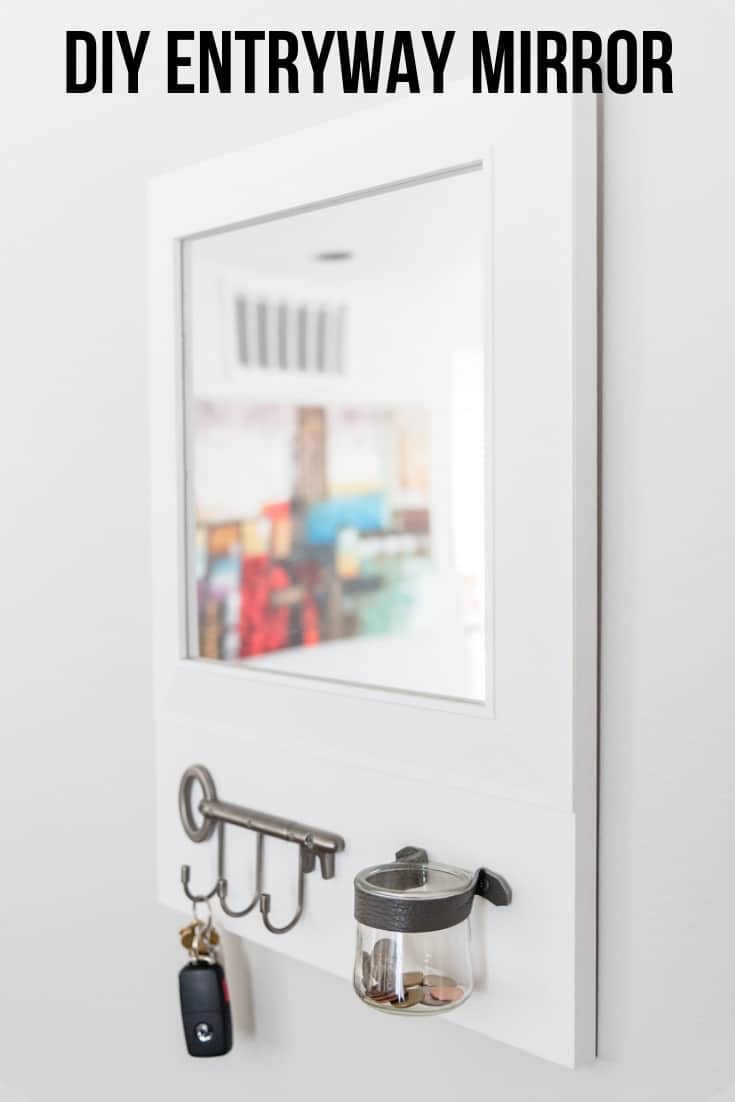
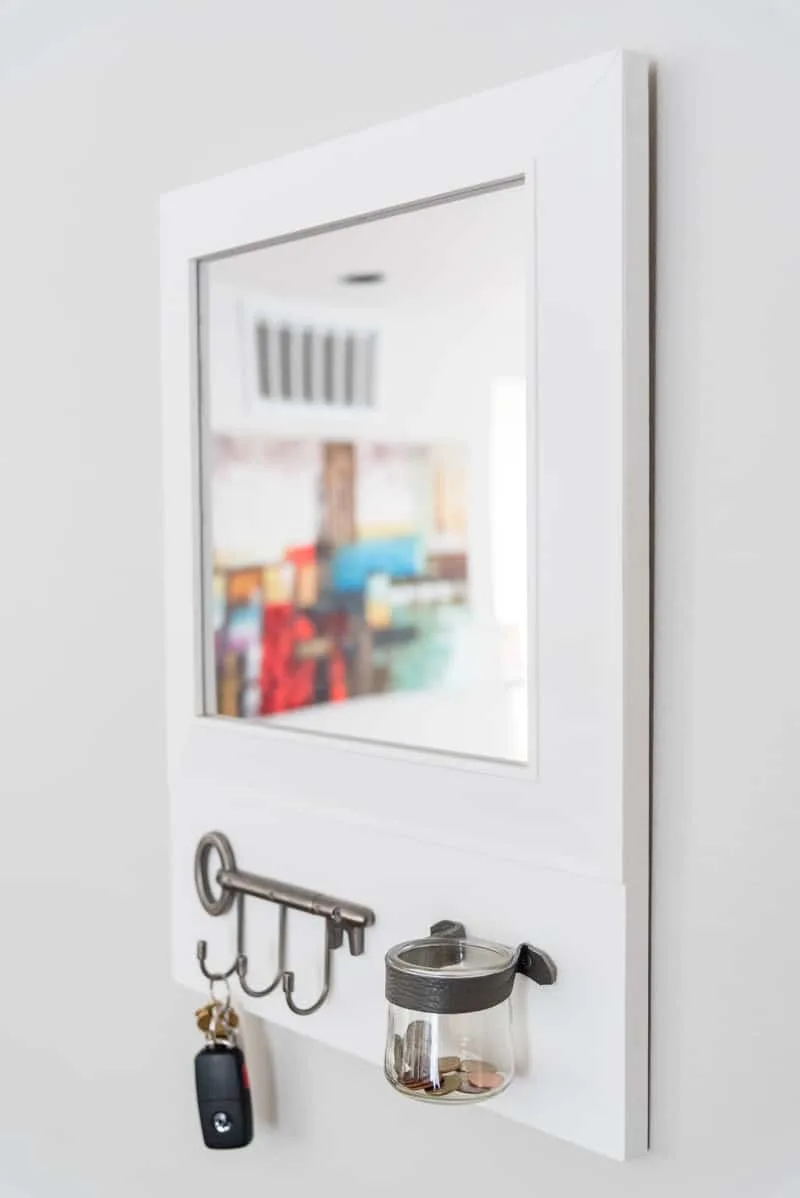
Create a drop zone with this DIY wood mirror frame with hooks! Hang keys, drop your change and check your hair all in one convenient spot!

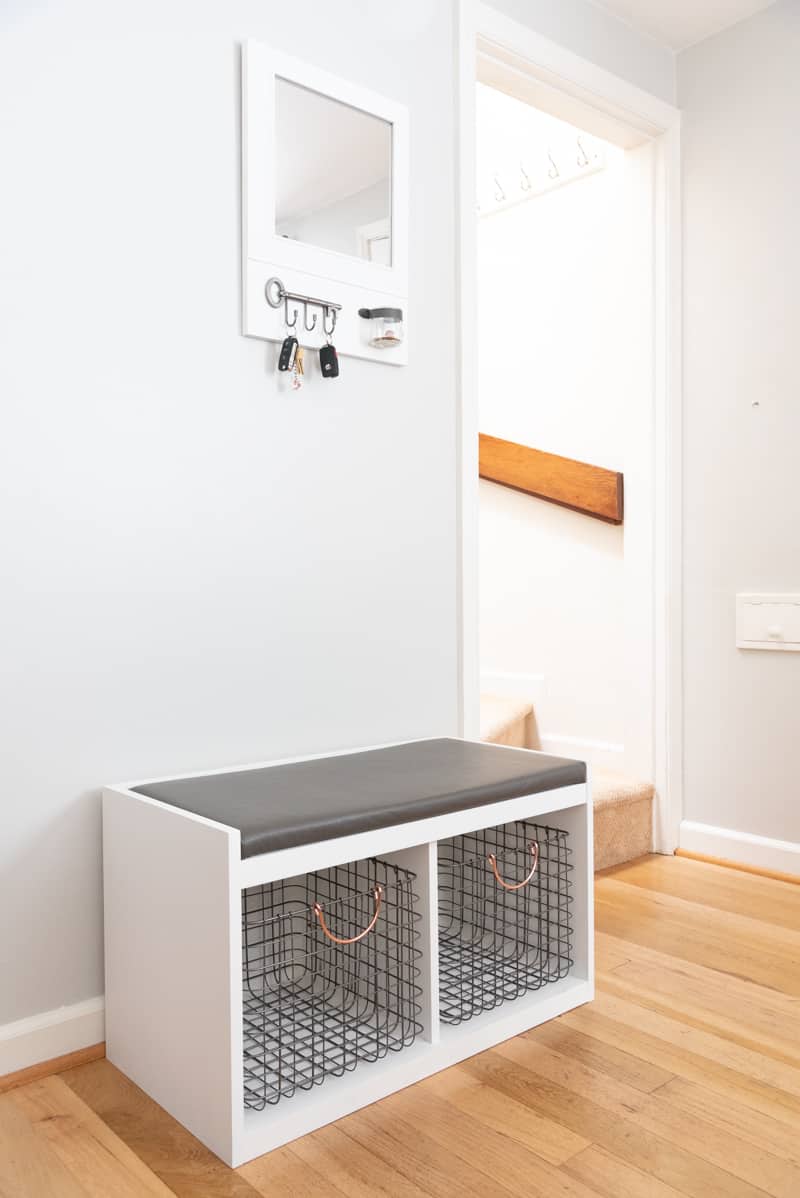
Our front door opens right into the living room, so I'm creating a drop zone so stuff doesn't get scattered everywhere! I built an entryway bench for all the shoes, and plan to make a console table to store hats, gloves and my purse.
But our keys are always getting lost! This simple DIY wood mirror frame with hooks gives us a place to hang our keys and check our hair before heading out the door! You could also use it as a DIY picture frame instead.
This mirror frame would work for any mirror, so long as you have a wood backer behind it. This allows you to nail the trim onto the backer instead of risking shattering the mirror itself!
Want something a little bigger? Check out these DIY hall tree ideas for inspiration!
This post contains affiliate links for your convenience. Purchases made through these links may earn me a small commission at no additional cost to you. Please visit my disclosures page for more information.
Before you begin, check out the video below for a quick overview of the process. Then continue reading for a more in-depth tutorial!
I dug out these small pieces of trim leftover from my fireplace remodel when I was cleaning up the workshop. This trim was used to frame the fireplace tile, and is perfect for framing a mirror too!
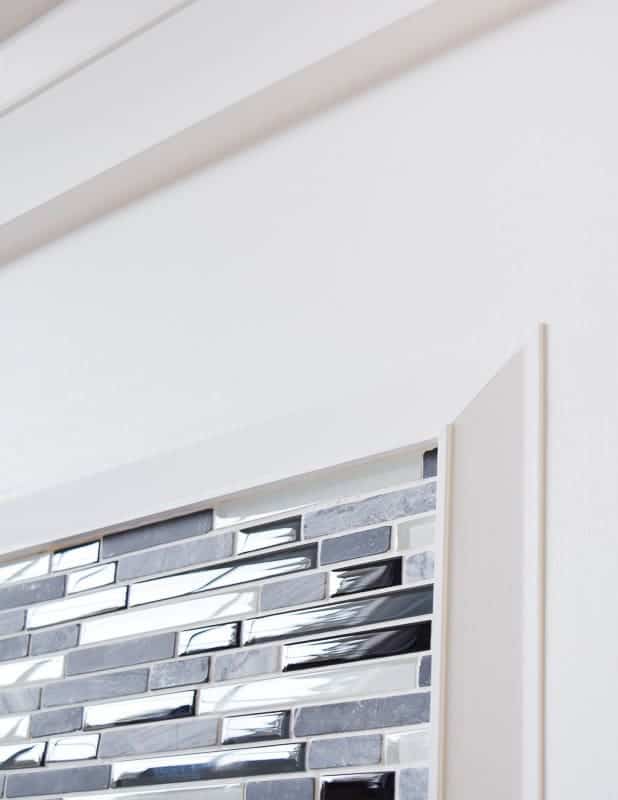
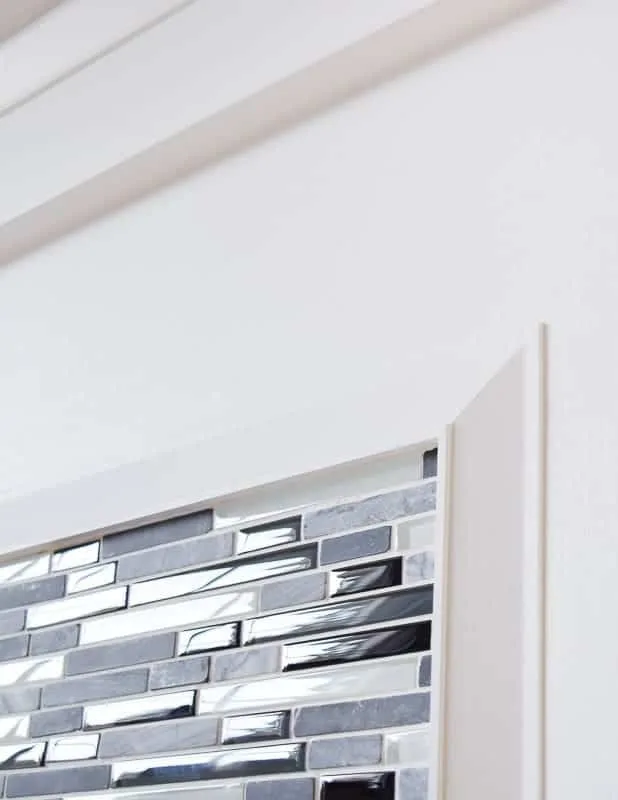
You could create the same type of trim with standard lumber by cutting a small rabbet along one side for the mirror to rest in. Any kind of picture frame moulding would work too!
Materials Needed
- ½" or ¾" plywood
- Picture frame moulding
- 12" x 12" acrylic mirror
- Brad nail gun and ¾" brad nails
- You could also use a hammer and finish nails. Sink the nailheads below the surface with a nail set.
- Wood glue
- Wood filler
- Paint
- Painter's tape
- Small French cleat for hanging
Dry Fit All the Pieces
I'm on a mission to use up all the scrap plywood around the workshop, and this 16x20" piece was a perfect fit. I wanted the trim to line up with the edges of the plywood, so I dry fit the mirror between two pieces and marked the side to be cut.

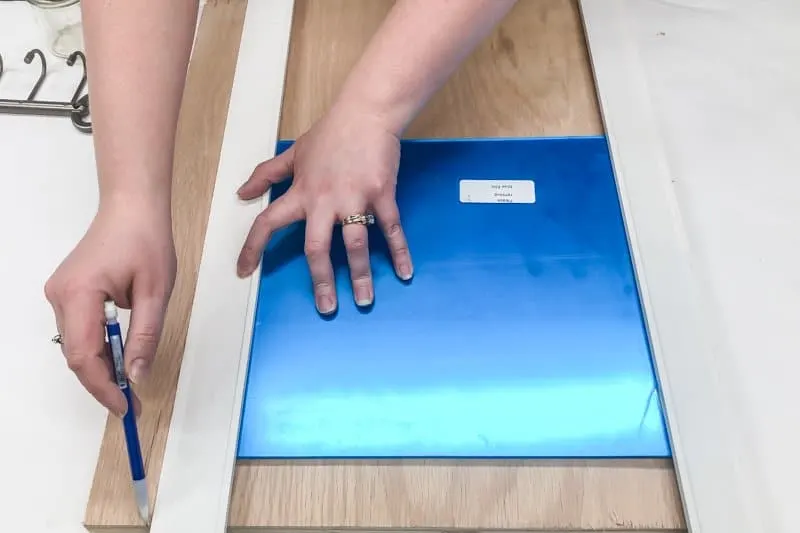
Then I did the same thing with the top and bottom, and roughly placed the key hooks and change jar underneath the trim. I decided to take off about an inch from the bottom.
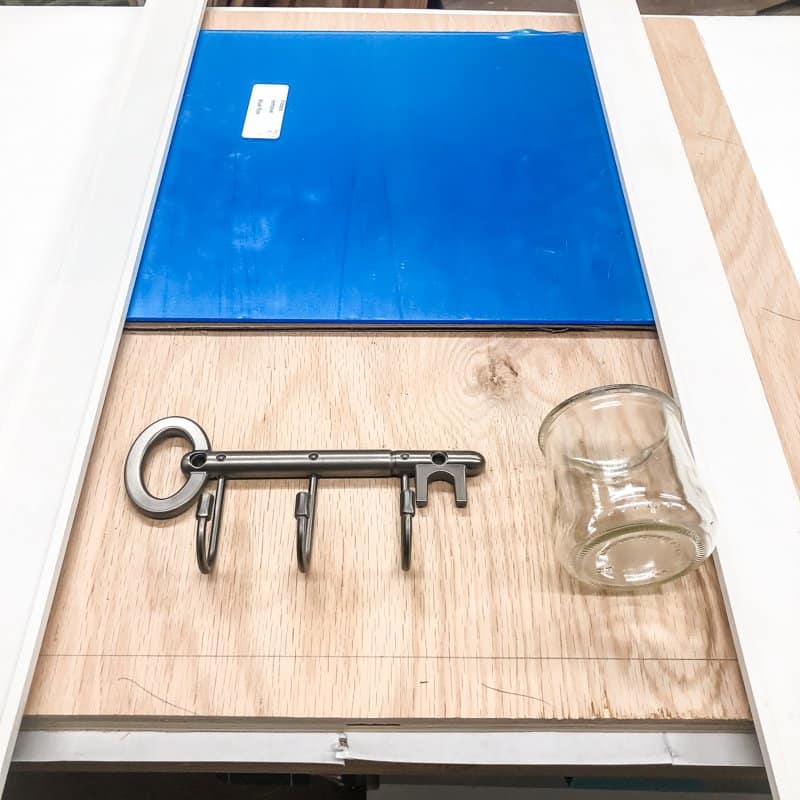

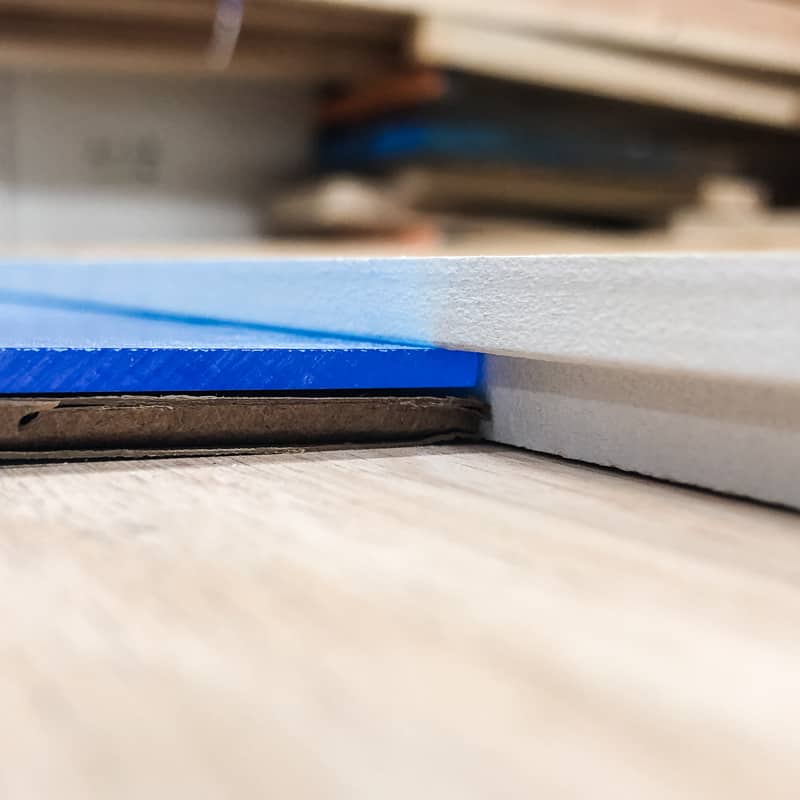
The notch in the trim is a little too tall for this thin acrylic mirror, so I added a piece of cardboard behind it to make it fit snugly.

Cut Plywood and Apply Edge Banding
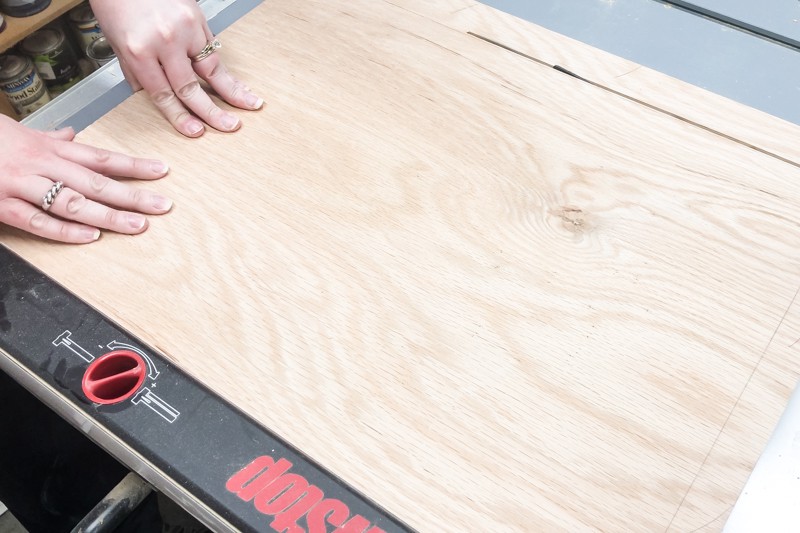
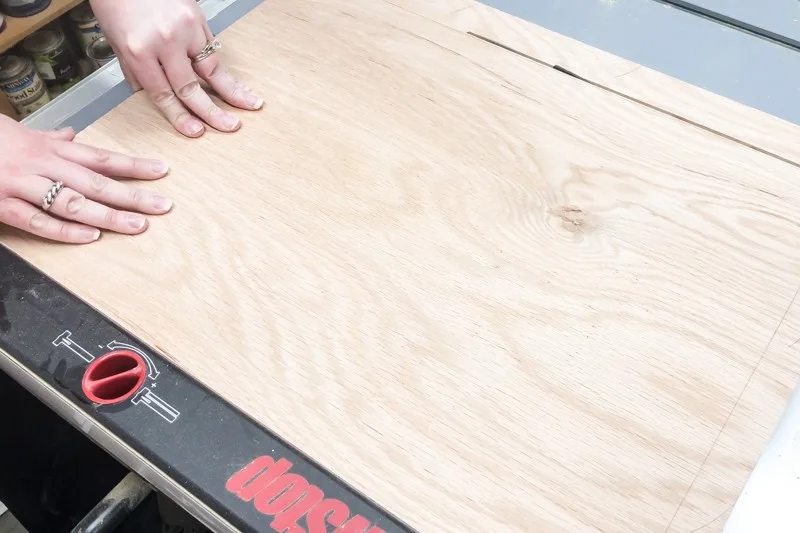
After marking the edges of the frame, I took the plywood over to the table saw and cut it down to size.
To cover up the exposed plywood edges, I applied edge banding to all four sides. You can find my tutorial on how to apply edge banding here.

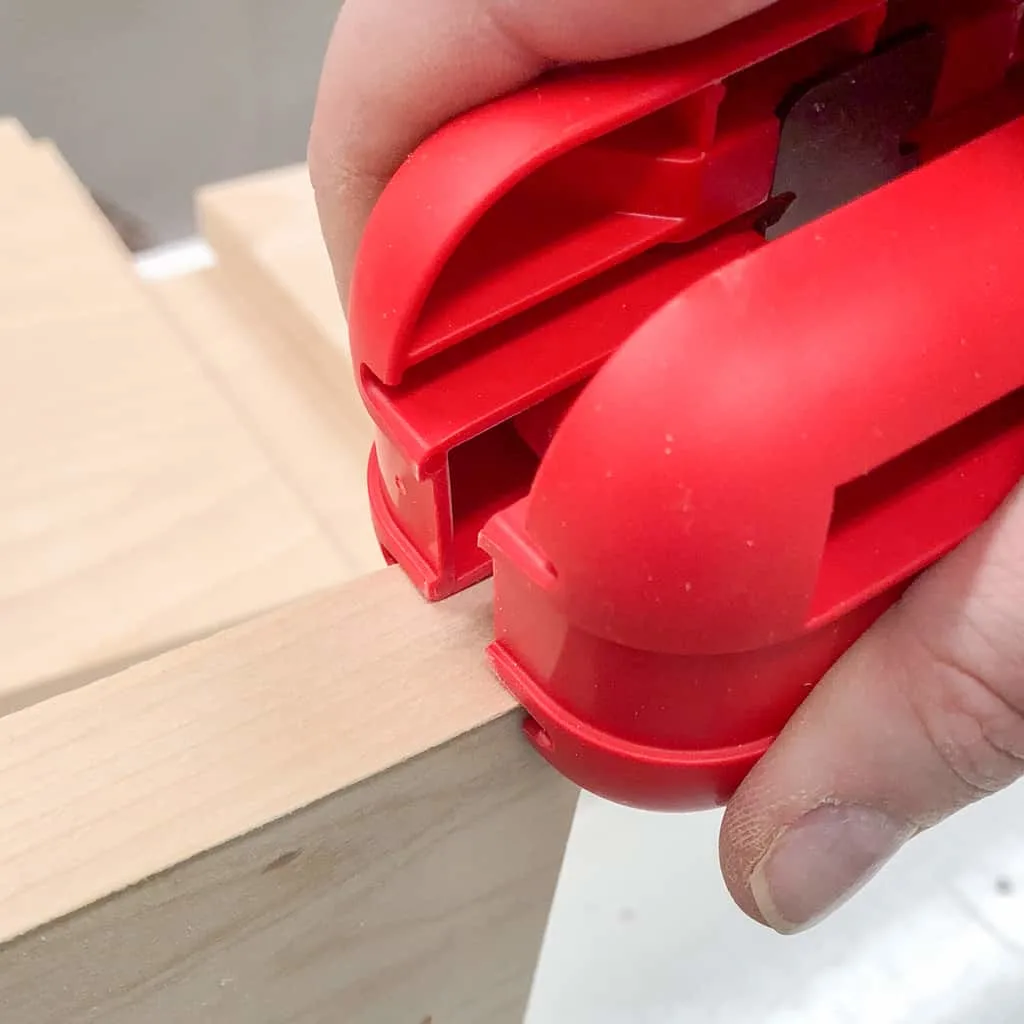
Cut the Mirror Frame Trim
Cut each end of the trim at a 45 degree angle on the miter saw. Remember that the notch on the back goes in towards the middle of the frame!
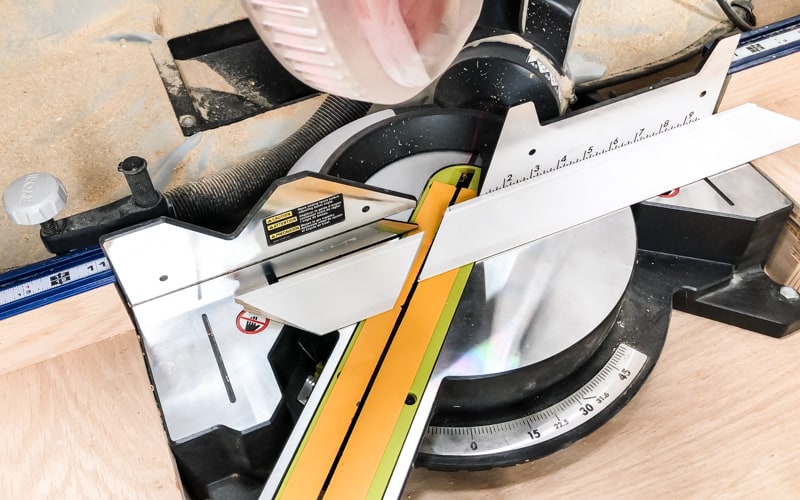

I like to cut my pieces just a bit longer than necessary, then creep up on the cut line until I get a perfect fit. My friend Serena from Thrift Diving has a great video showing you how it's done!
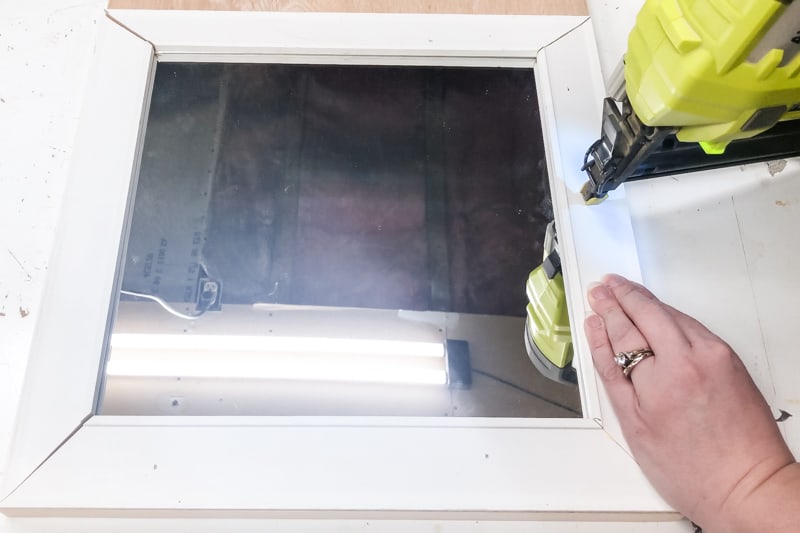
Attach the Mirror Trim to the Plywood
Apply wood glue to the back of the trim and the mitered corners, then frame the mirror. Ignore the reflection of my ugly workshop ceiling! 😉
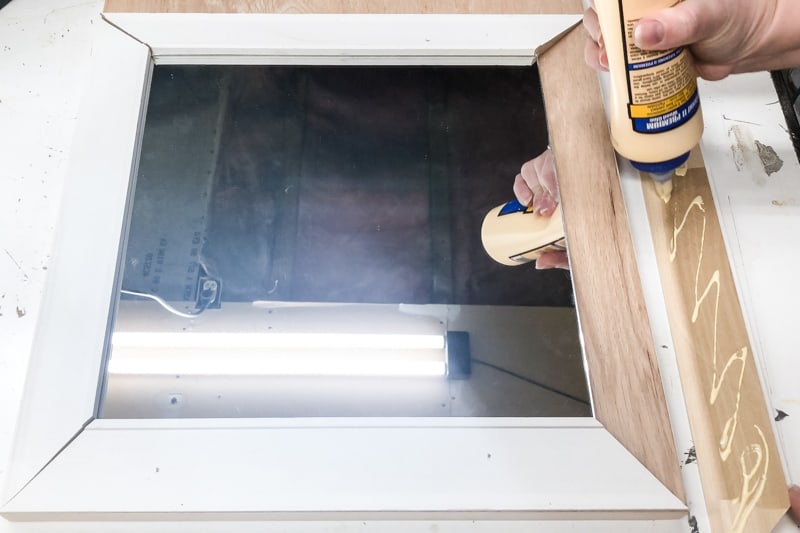
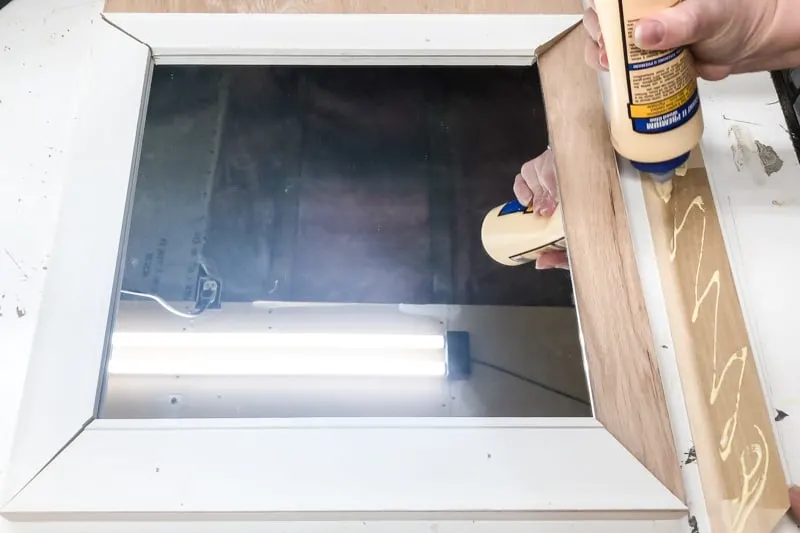
Secure the pieces in place with ¾" brad nails.

Use wood filler to hide the holes and gaps, then sand smooth when dry.

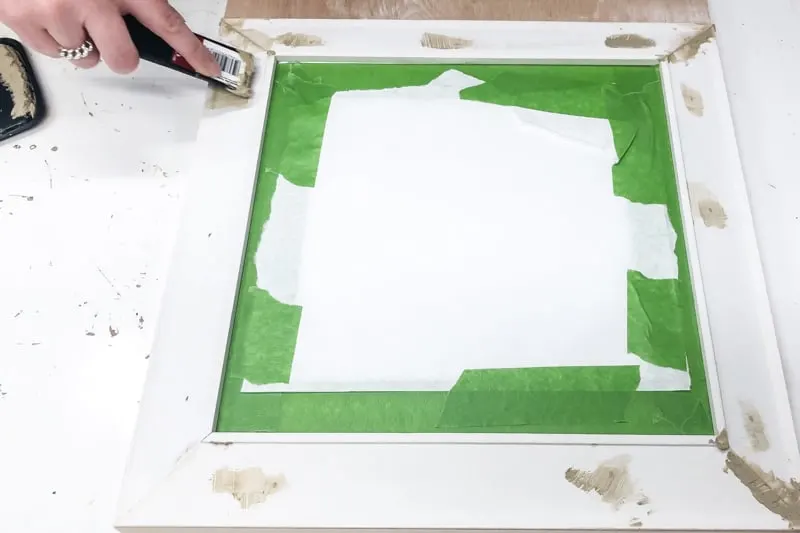
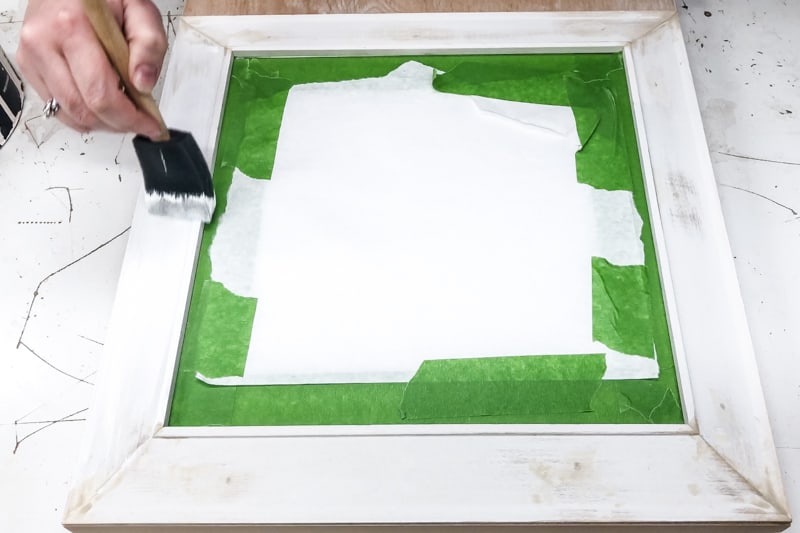
Paint the Mirror Frame
Apply painter's tape and paper over the mirror before starting to paint. I used the same Decorator's White paint by Benjamin Moore as the entryway bench that will be below it.

If you're just framing the mirror, you're done! But if you want to add extra details on the bottom like key hooks, I'll cover them next.
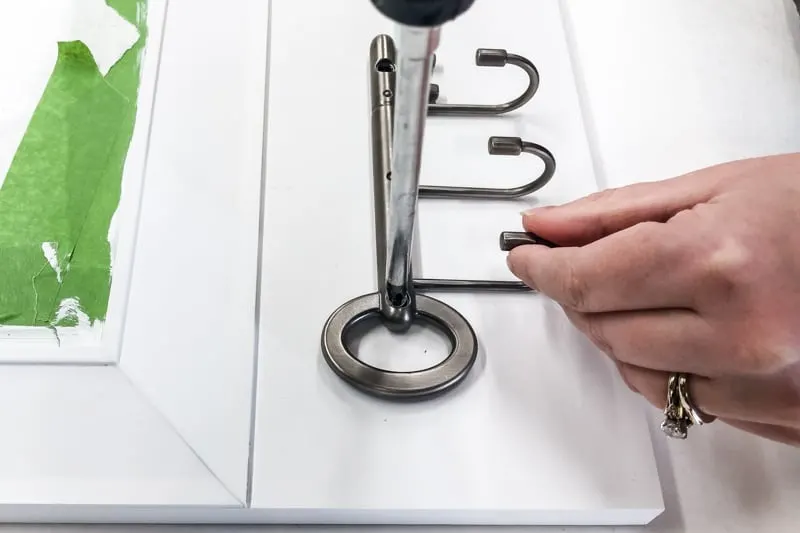
Add the entryway details (optional)
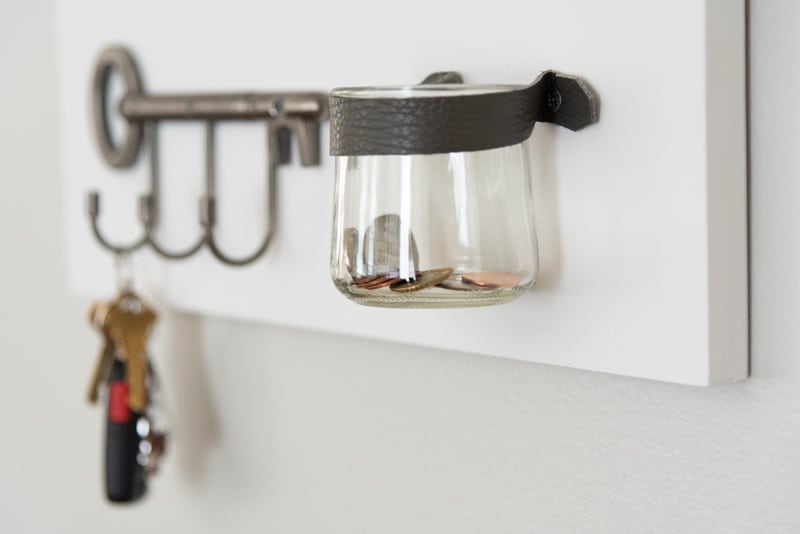
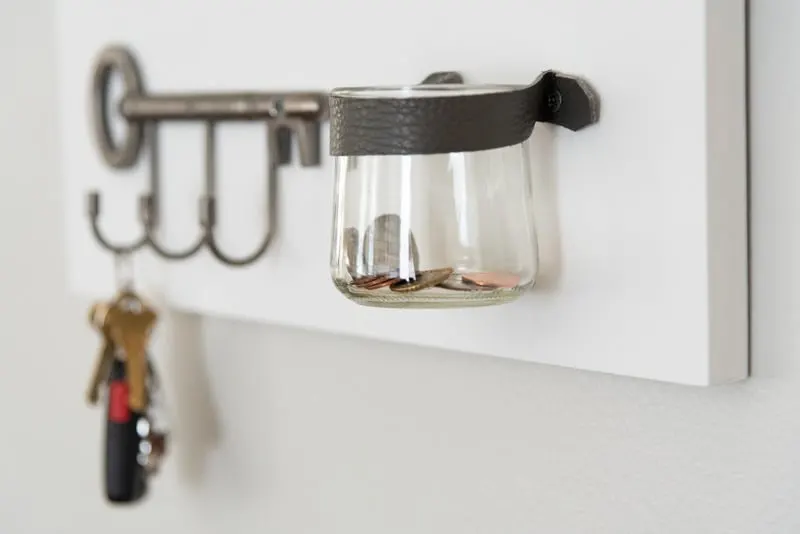
When the paint was dry, I attached the key hooks to the bottom with ¾" screws.

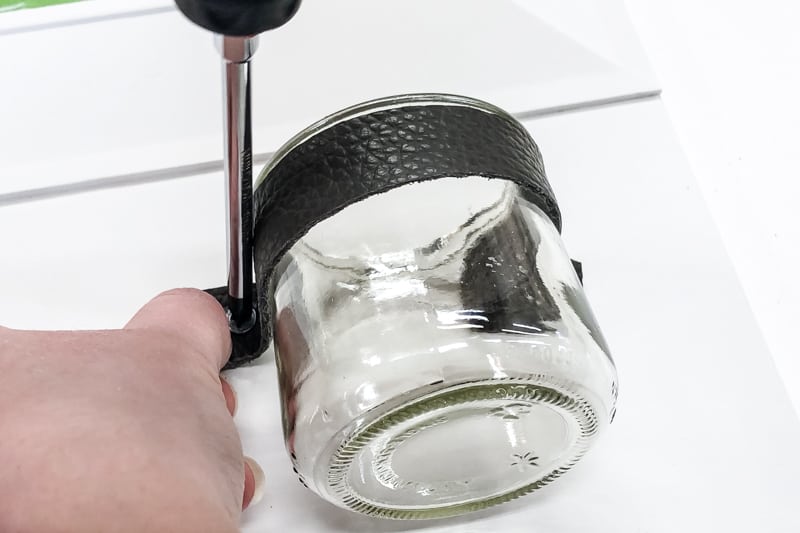
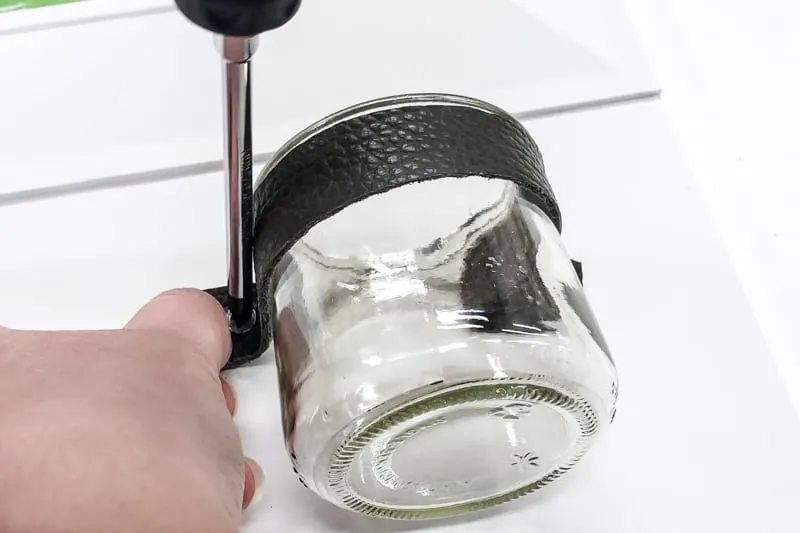
The change jar (which is just a glass yogurt jar!) is held in place with a scrap piece of leather from the upholstered cushion on the entryway bench. Just cut a strip long enough to go around the front of the jar, plus an inch on each side to screw it into place.
Hang Your New Framed Mirror
I used a French cleat to hang my new entryway mirror next to the front door. It holds the entire piece firmly in place, even if you yank your keys off the hook! I used a metal one, but you can make your own French cleat too.
This new framed mirror will be so nice for checking my hair before that early morning run to the bus stop. Nothing is more embarrassing than dropping your kid off with serious bed head!

We always seem to find a ton of change lying around, but never have it when we need it. With this small change jar, I can easily grab a handful to feed the parking meter if I'm going downtown. And now we're not hunting for keys when we're rushing out the door, because they each have their own hook!
This entryway drop zone is really coming together! I'm working on building a console table to complete the look soon!
Check out these other DIY bench ideas!
Toni
Thursday 17th of January 2019
I love this project, that little key hook for keys is the cutest. It's a great place to check yourself before you leave the house and grab your keys as you head out the door.
Vineta
Friday 18th of January 2019
Thank you, Toni!