Transform your space with beautiful DIY tea light candle holders. Create a warm, inviting glow with unique designs that are easy to make!
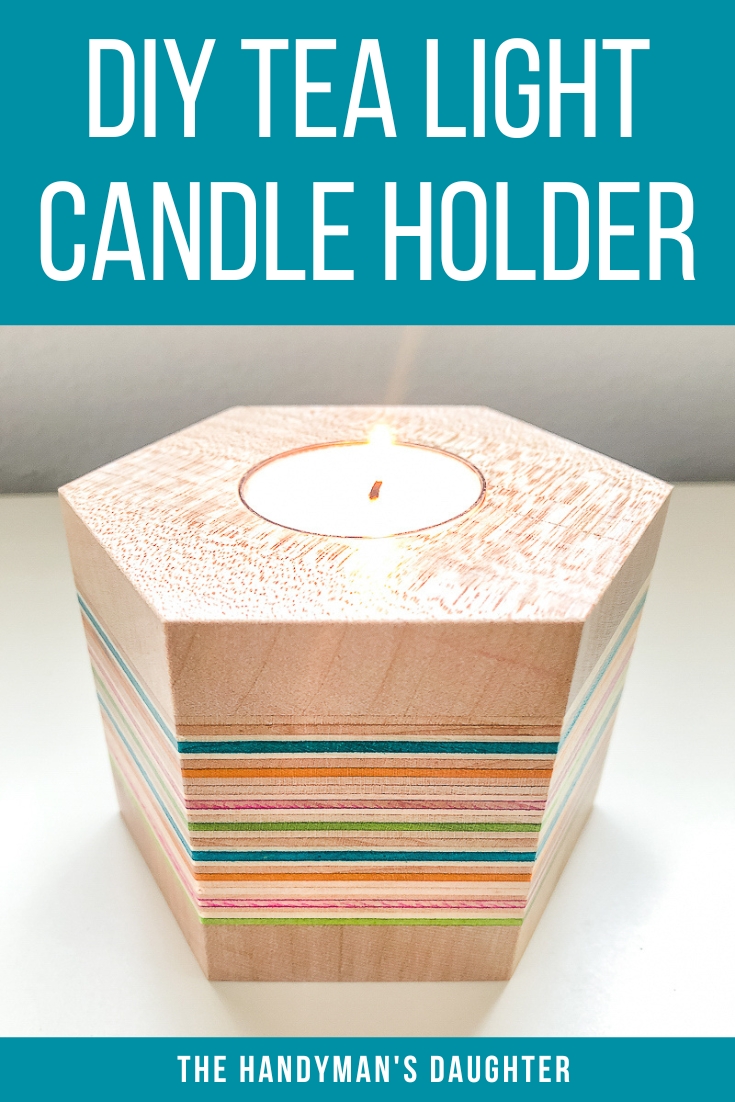
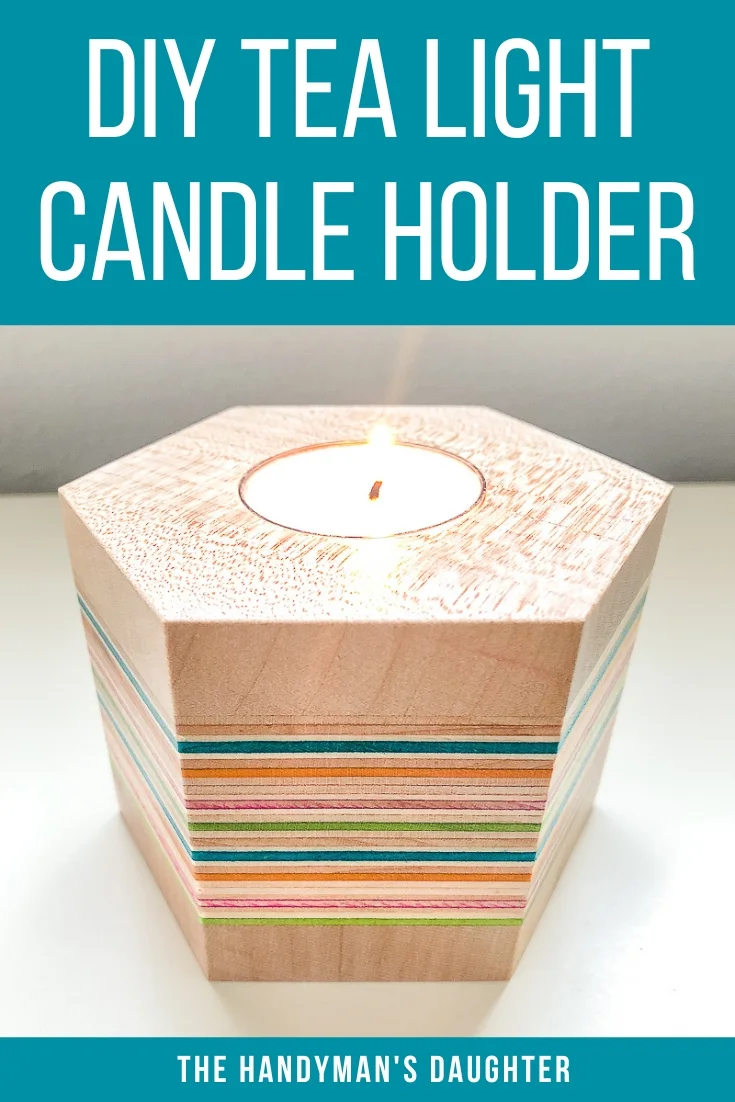
Unleash your creativity and craft a truly unique tea light candle holder out of scrap wood! This simple project only requires a few tools and can be completed in an afternoon.
This tutorial will show you how to make a fun hexagon shaped candle holder with colorful veneer stripes! You can customize your own with different wood, finish, and design accents.
Not quite what you were looking for? Check out these other DIY candle holder ideas!
This post contains affiliate links for your convenience. Purchases made through these links may earn me a small commission at no additional cost to you. Please visit my disclosures page for more information.
Materials Needed
- Scrap wood
- Wood glue
- Glue brush
- Clamps
- Ruler or tape measure
- 1 ½" Forstner bit
- Drill
- Tea light candle
- Sandpaper and sanding block or power sander
- Wood finish
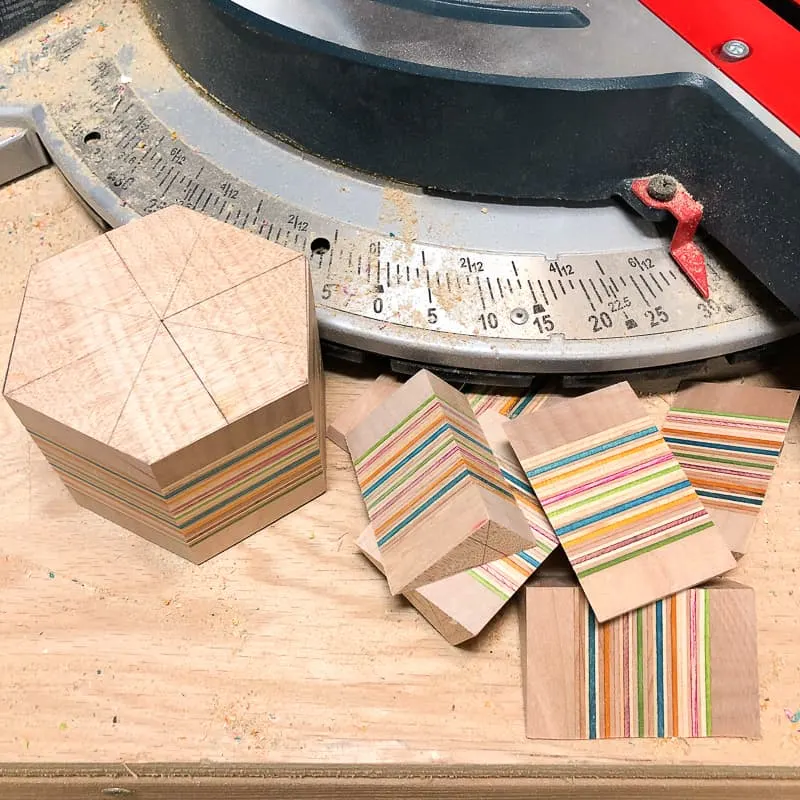
Cut the Wood Pieces
You can use any kind of wood in any size for this project. I usually rummage around in my scrap wood pile to see what I can find!

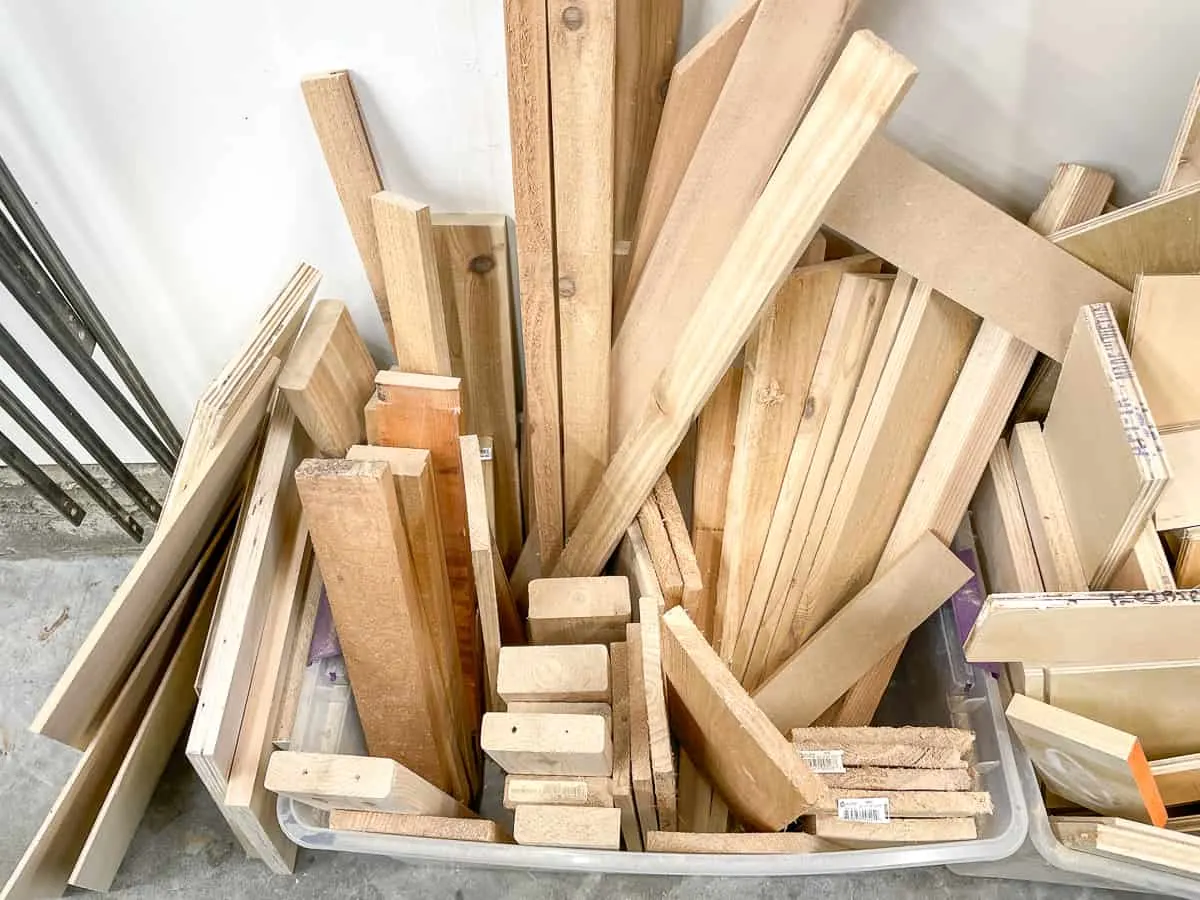
You could make a simple, rustic version with just a chunk of 2x4 lumber. Cut it down into 3 ½" squares for individual tea light holders, or leave it longer for a centerpiece with multiple candles.
My fancy version is made from a combination of curly maple and skateboard scraps. I had four scraps that were all about the same shape and size, so I marked and trimmed them down to a rough 4x4 square.

To add a little more height, I cut a scrap of curly maple (left over from my DIY nightstand drawer front) into two more squares for the top and bottom.
You could use contrasting wood species or alternating grain directions for a different look. Get creative and try out different designs!
Sand the Cut Pieces
If you're gluing multiple layers together, give both sides of all the pieces a quick sanding. This will ensure a good bond between the layers in the next step.

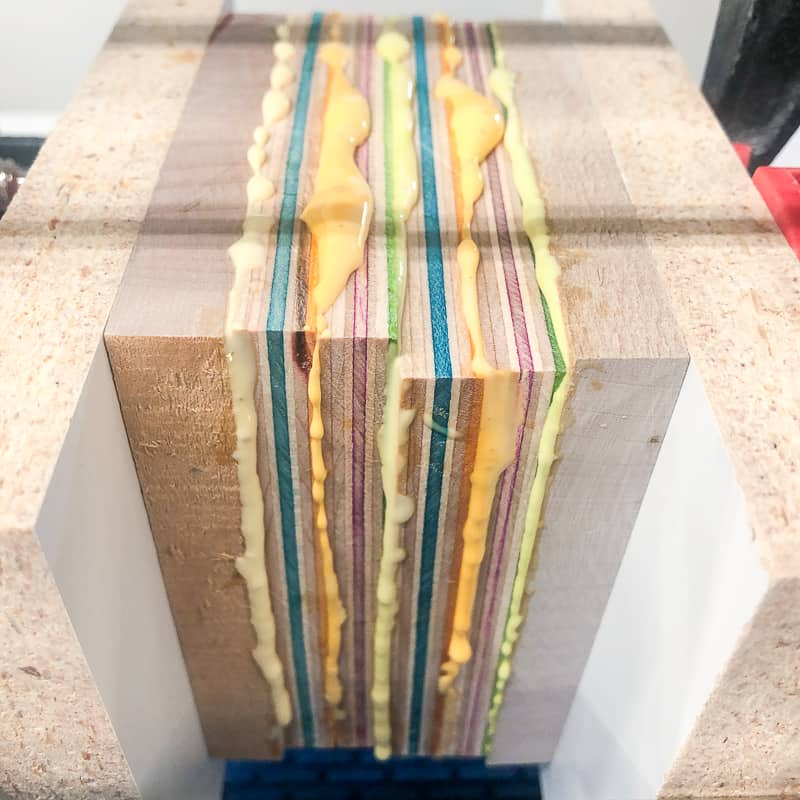
Glue Up the Layers
If you're making your candle holder out of a single block of wood, you can skip this step! But if you want to make it taller, or have thinner pieces, you'll need to add glue.
Wood glue is strong stuff, and it will hold all the layers together without any screws or nails. I suggest using Titebond III, because it gives you the longest time to assemble the pieces.
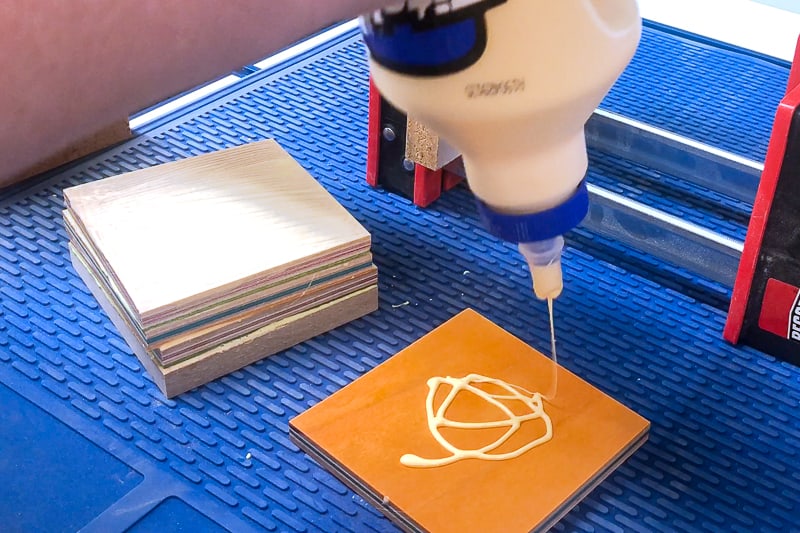

Use a glue brush to evenly distribute the wood glue on both sides of the squares. Make sure every spot is covered with glue to reduce the possibility of delamination.

Stack all the layers together with your desired pattern, then clamp them together. The melamine pieces on either end of the stack are there to prevent the clamps from marring the surface of the wood, but aren't totally necessary.

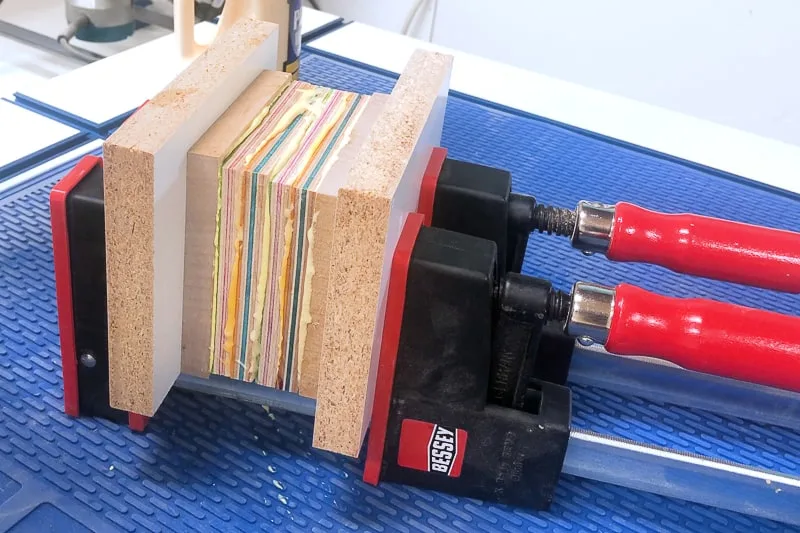
There will be some glue squeeze out, but that's ok! Just let it dry overnight, and the excess will be trimmed away in the next step.

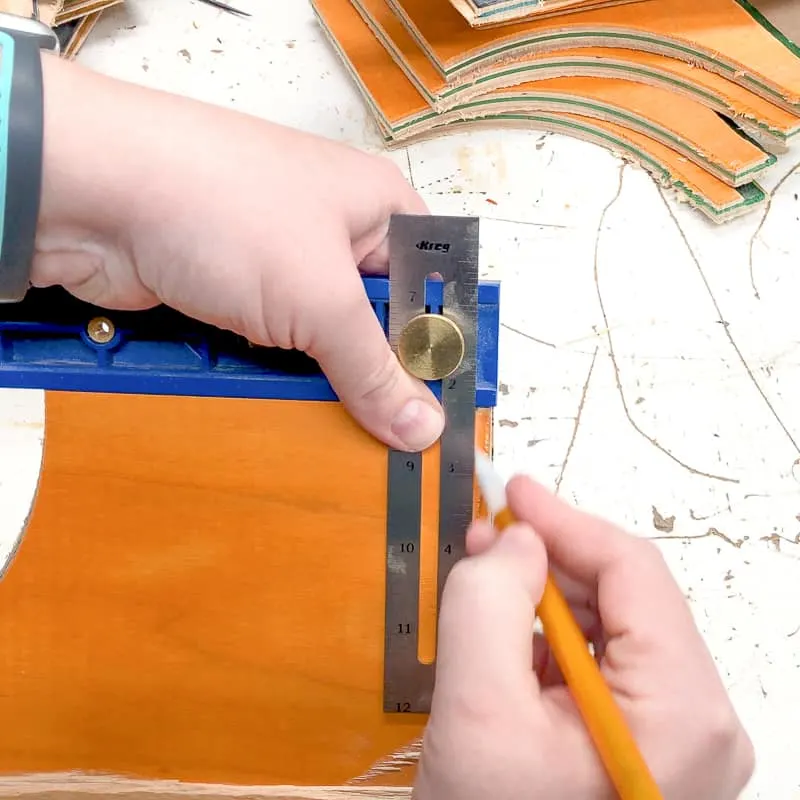
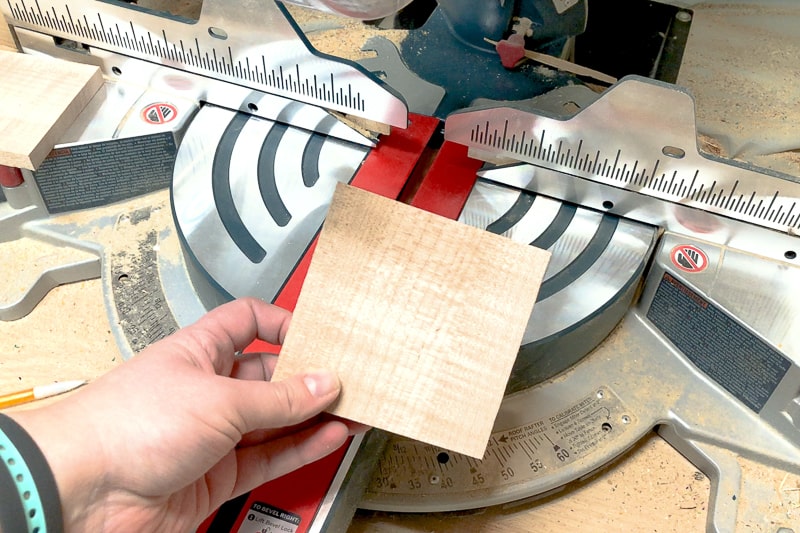
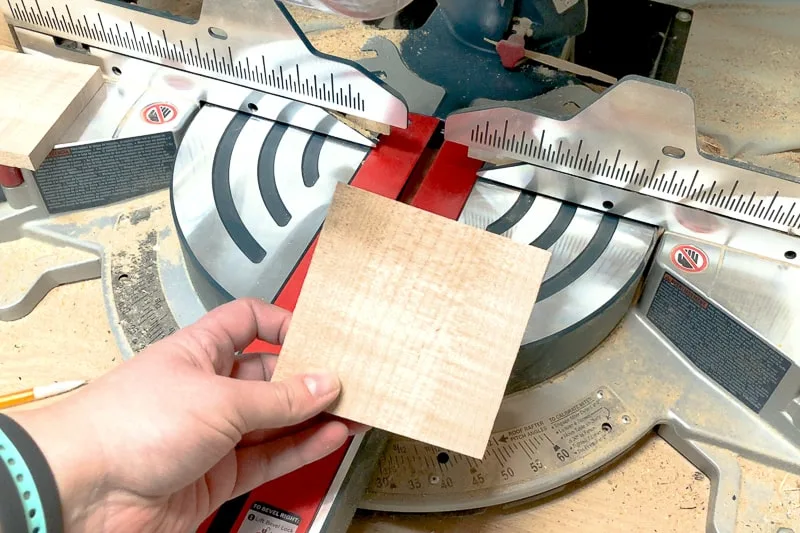
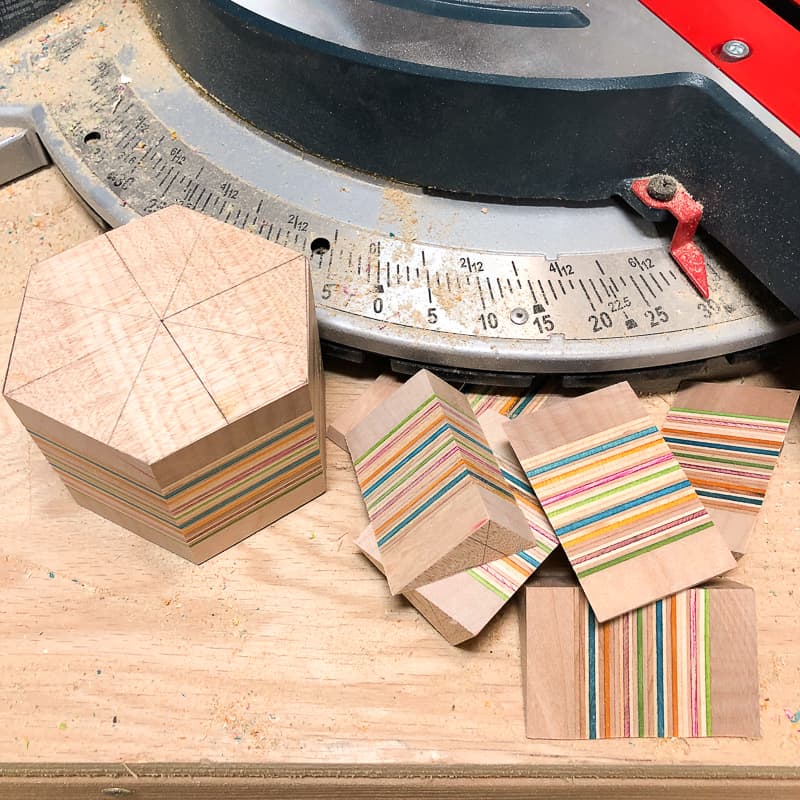
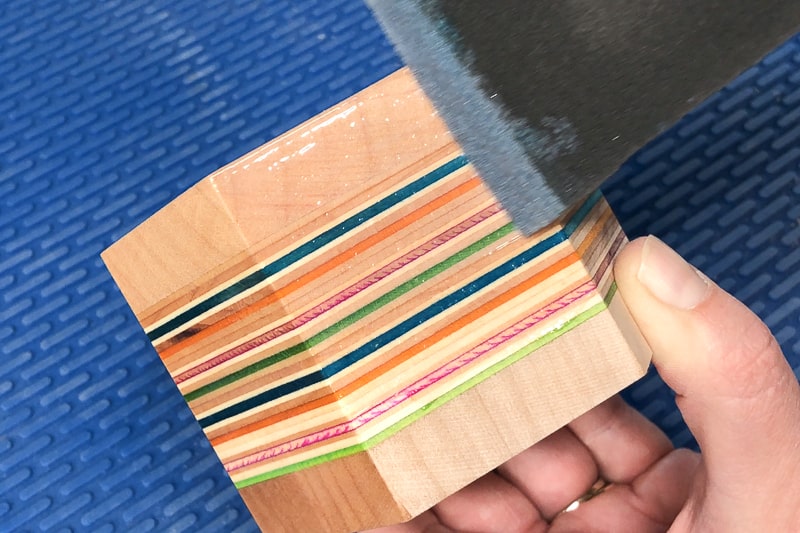
Cut the Final Shape (optional)
I decided to cut a hexagon shape out of this block to show off all those colorful layers. This will also save me a lot of sanding, because the excess glue will be cut off!
I used the miter saw set at 30°, being very careful to keep my fingers as far from the blade as possible. I originally planned to use the table saw and the cross cut sled, but the saw blade doesn't raise high enough! 🙁
Drill the Hole for the Tea Light Candle
Measure the diameter of your tea lights, and choose a spade bit or Forstner bit of that size to drill a hole to recess the candle in the wood.
Place the point of the bit on the marking, and make sure the drill is straight! Start off slow, so the bit doesn't wander and make a larger hole than you wanted.
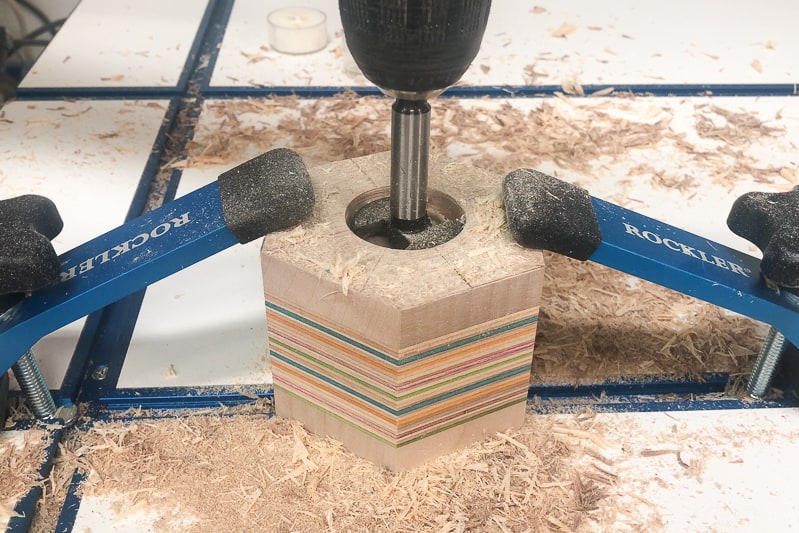

Stop occasionally to let the metal cool down so it doesn't scorch the surrounding wood. I used clamps in my T track table to hold it in place, so I could focus on getting the hole straight.
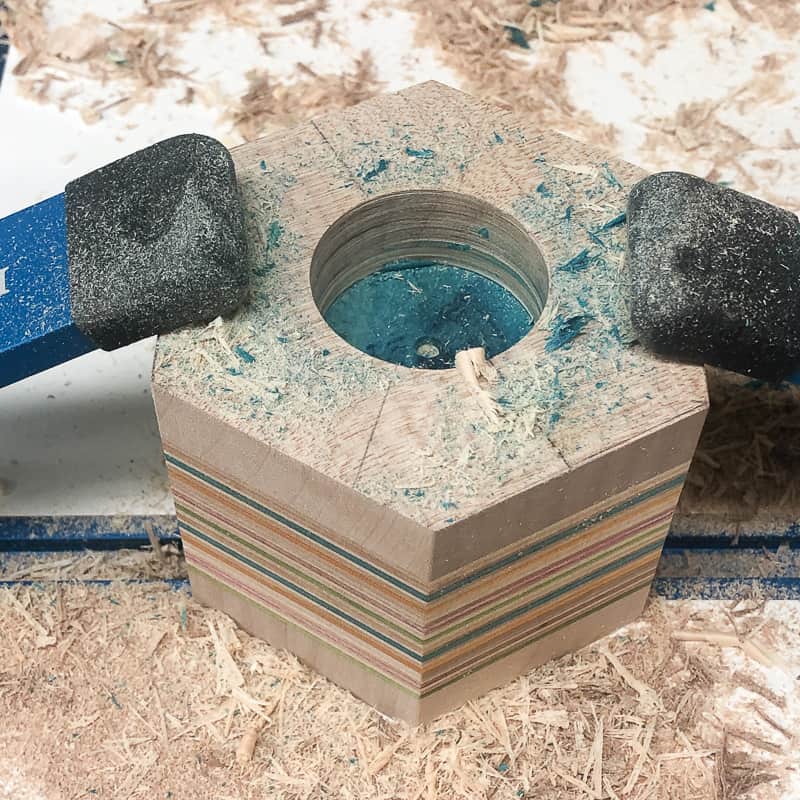
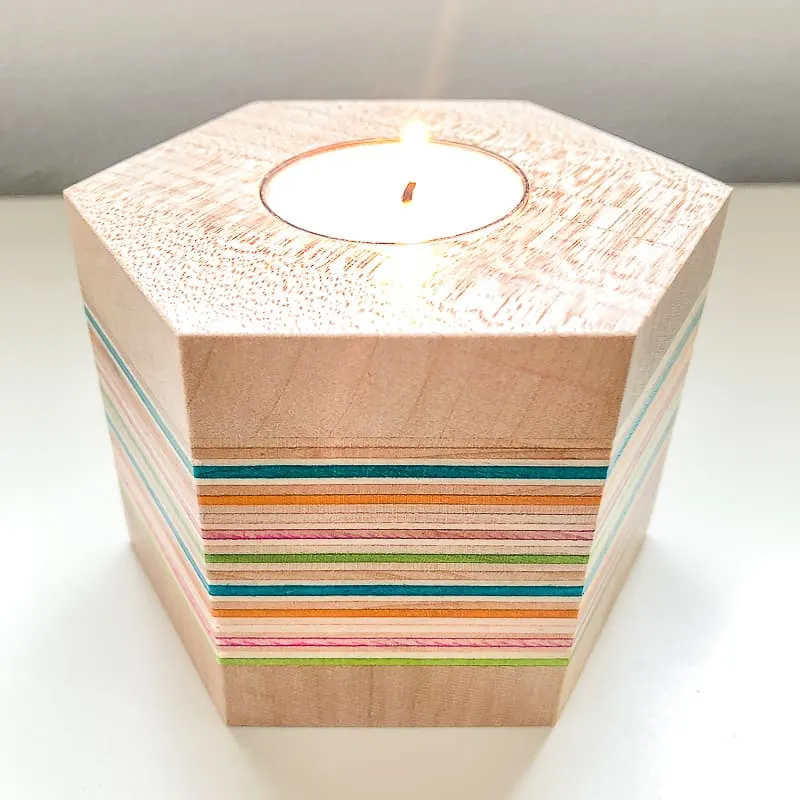
I just popped the tea light in occasionally to check the fit. Eventually, I got down to the first blue layer and all the sawdust changed colors! This ended up being the perfect size for my candle, so roughly ¾" down should work.

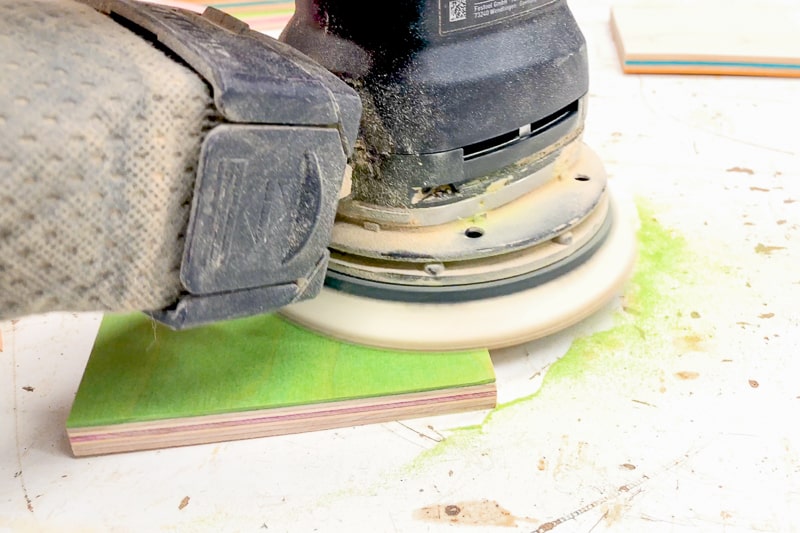
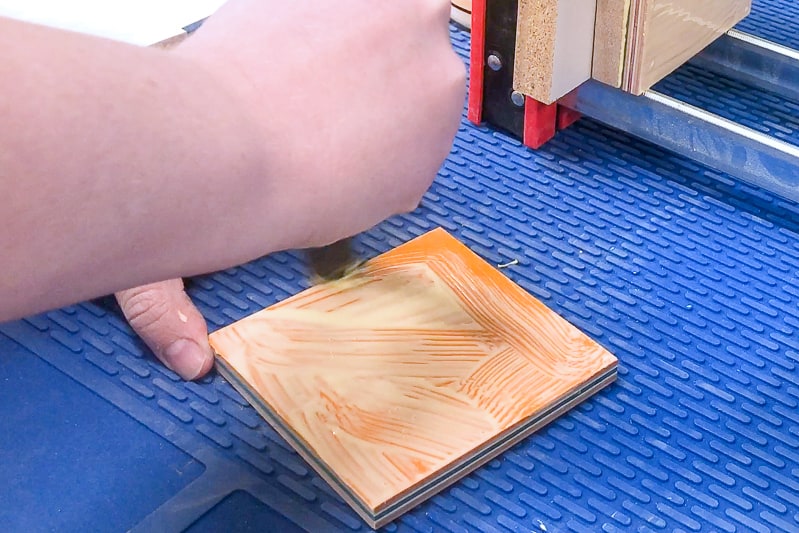
Apply Finish
It's almost done! I used a sanding block and 220 grit sandpaper to remove the pencil markings, and to round over the edges slightly.
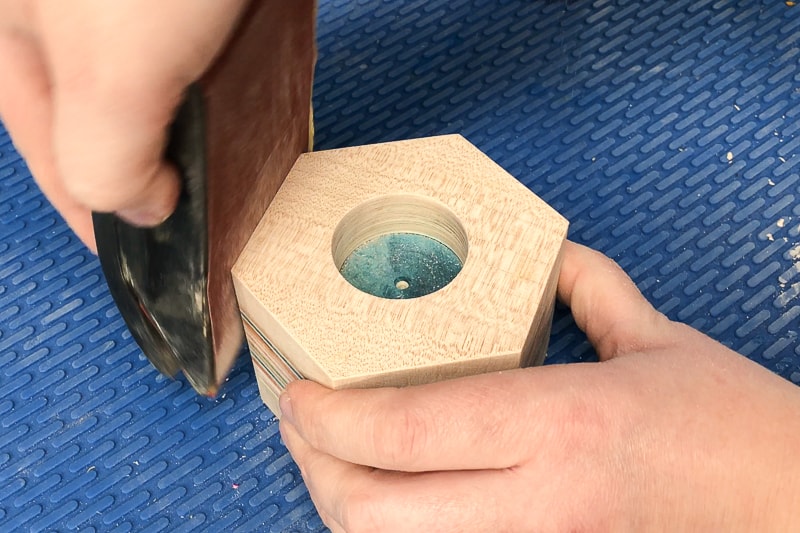

Remove all the sanding dust, then apply the wood finish. This will protect the raw wood and make it easier to remove any wax that might drip on the surface.
I used General Finishes High Performance Top Coat for the maple and veneer version. It doesn't change the color of the natural wood much but makes the dyed layers really pop!

Insert the Tea Light Candles
Your DIY tea light holders are ready to display! Just pop in the candles and watch them glow!

Alternatively, you could use the holes to display air plants instead! I had a few left over after making this air plant holder for the wall, so I popped out the wax from another tea light and filled it with decorative gravel. The bottom of the air plant is held in place by the tiny pebbles, and provides drainage.


Which version is your favorite? Let me know in the comments below!
Check out these other DIY project ideas!
Amy
Monday 11th of November 2019
How great is that? I just want to cut up some skateboards, glue pieces together and make some blocks out of them!!!
I love the candle holder!
Barb Willicome
Sunday 10th of November 2019
That is really cool!
Kat
Saturday 9th of November 2019
Awesome project! Who knew a skateboard could yield such gorgeous layers? Good job!
SR
Saturday 9th of November 2019
Wow, wow, wow! What a genius idea.This is beautiful.
I live in California (OMG no candles! Fire! Bad!) So, I vote air plant. And the green leaves look so pretty with the colorful layers.