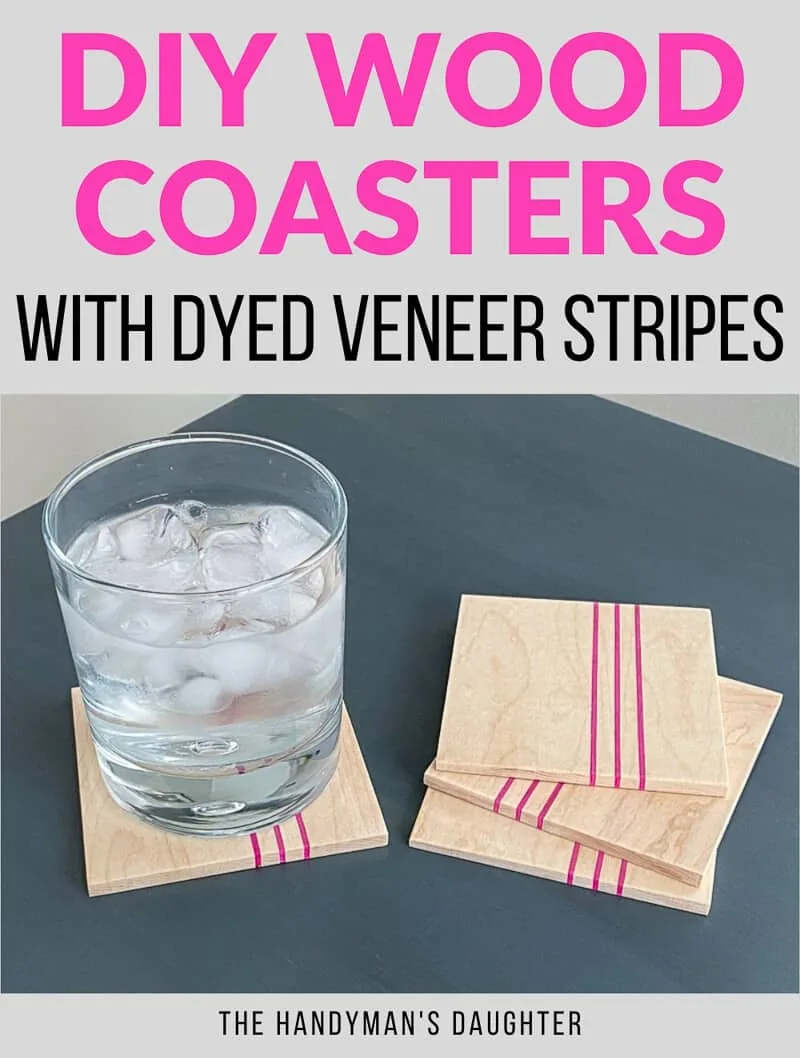
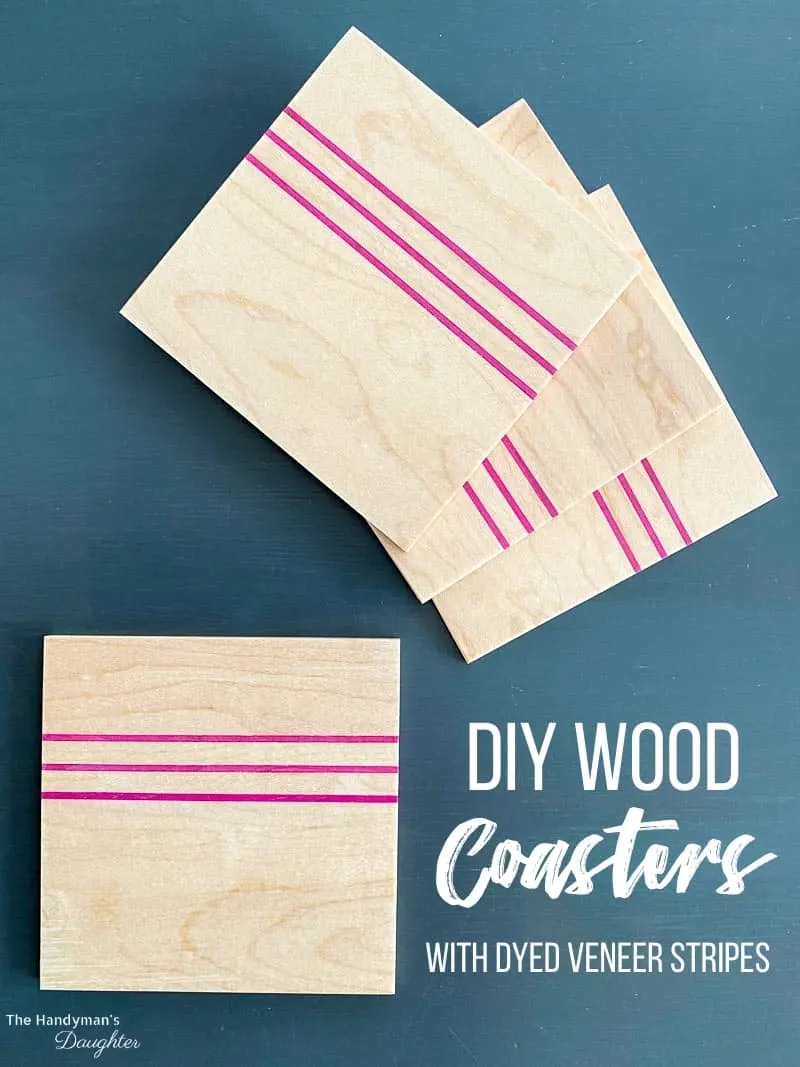
These DIY wood coasters are super easy to make, and feature a fun pop of color with vibrant wood veneer stripes!

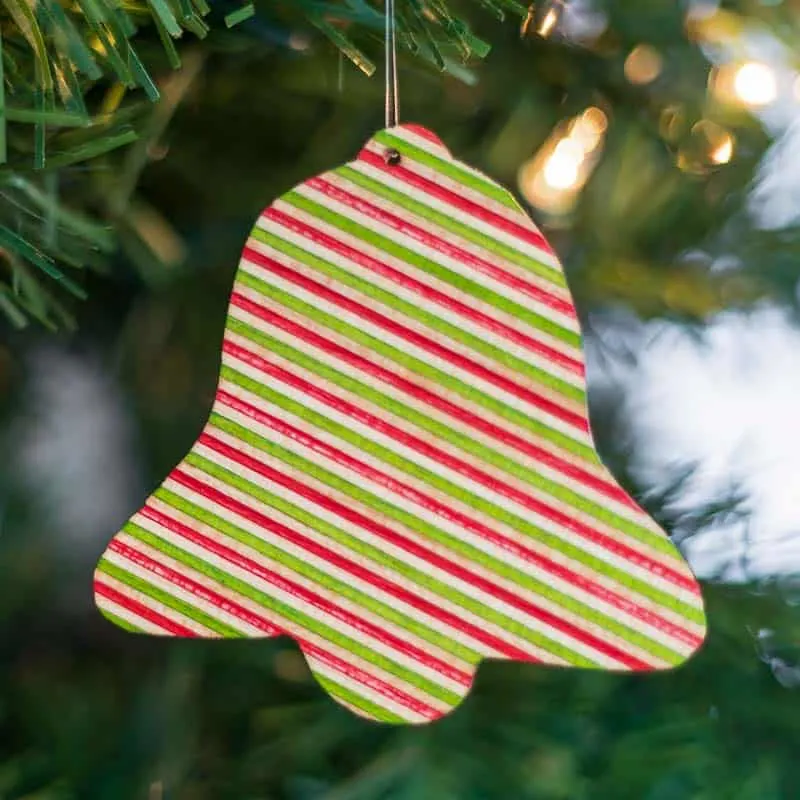
I'm so addicted to dyed wood veneer! It's usually found in skateboards, but I'm finding lots of uses for it in other projects (like these wooden Christmas ornaments and this DIY candle holder). The dye is saturated into the thin wood, so unlike paint, you can cut it anywhere and the bright color will still show through.

This time, I'm combining a thin piece of maple with tiny strips of hot pink veneer to create these fun DIY wood coasters!
Check out more DIY coaster ideas here!
This post contains affiliate links for your convenience. Purchases made through these links may earn me a small commission at no additional cost to you. Please visit my disclosures page for more information.
Materials Needed for DIY Wood Coasters
- Maple wood
- I used ¼" maple, but you could go up to ¾" for a thicker coaster. Any other type of hardwood also works!
- Wood veneer
- I buy my dyed wood veneer from Roarockit. They have a ton of fun, vibrant colors to choose from!
- Wood glue
- Parallel clamps or pipe clamps
- Large sheet of sandpaper
- Wood finish
- I like to use Polycrylic because it doesn't turn maple yellow.
- Table saw
- I recommend using the Grrr-ripper push block to keep your fingers away from the blade while cutting those narrow strips.
How to Make Wooden Coasters
Cut the Wood Strips
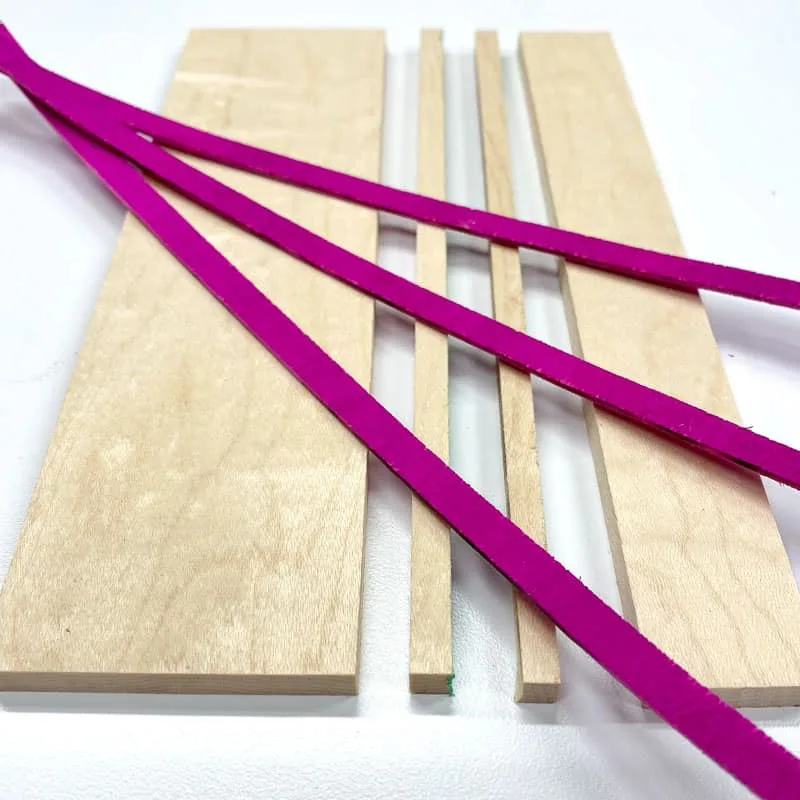
I used a piece of paper to play around with different configurations for the coasters. I wanted the stripes off center, but close together. I settled on one 1" strip, two ¼" strips, and a 2" wide strip. A 1/16" stripe of pink veneer will go between each one.

It can be a bit nerve-wracking to cut those itty bitty pieces on the table saw! The Grr-ripper push block has a ¼" wide leg so you can apply even pressure to that little piece throughout the cut (they even have a separate ⅛" leg if you want to get really tiny!) I highly recommend one for anyone who uses a table saw on a regular basis.


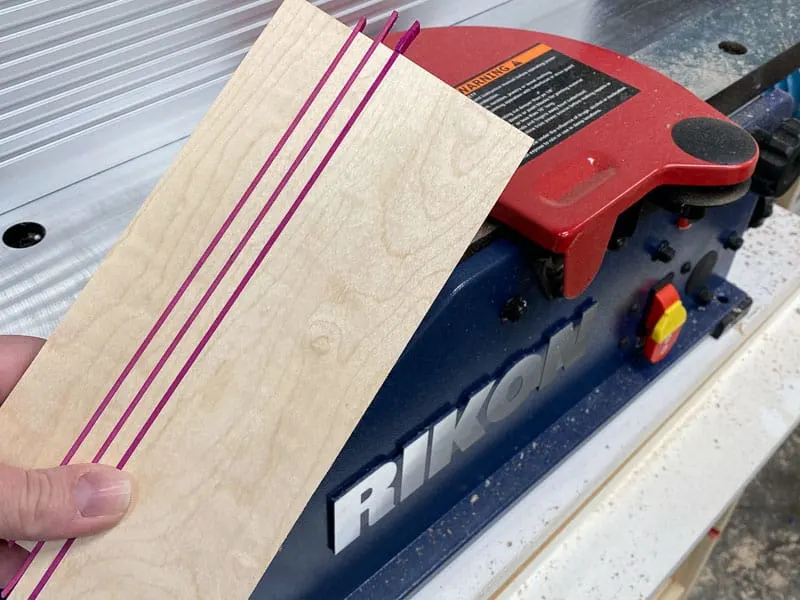
Cut the Dyed Veneer Strips
The veneer should be cut into strips slightly wider than the thickness of the maple wood. This way you don't have to be quite so precise with your glue-up, and you can sand it all flush later.
This stuff is so thin, it can be almost impossible to push through the table saw with a traditional push stick. Again, the Grr-ripper makes this much easier and safer to cut.


These veneer strips are really easy to break, so I suggest cutting a few extras just so you don't have to set everything up again if one snaps!
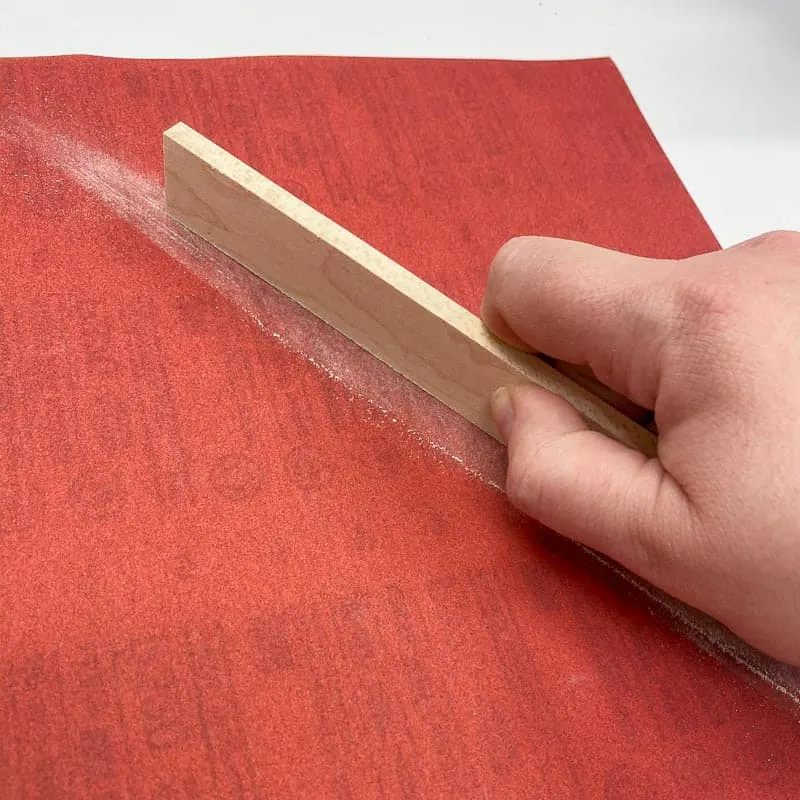
Sand the Cut Edges
In order to get a tight seam between all the stripes, you need to make sure you don't accidentally sand the edges unevenly. Use a big sheet of sandpaper on a flat surface, and just run the cut edges of each piece over it a few times. I'm really glad I recently replaced my workbench top with a fresh laminate sheet, so I know it's perfectly flat!

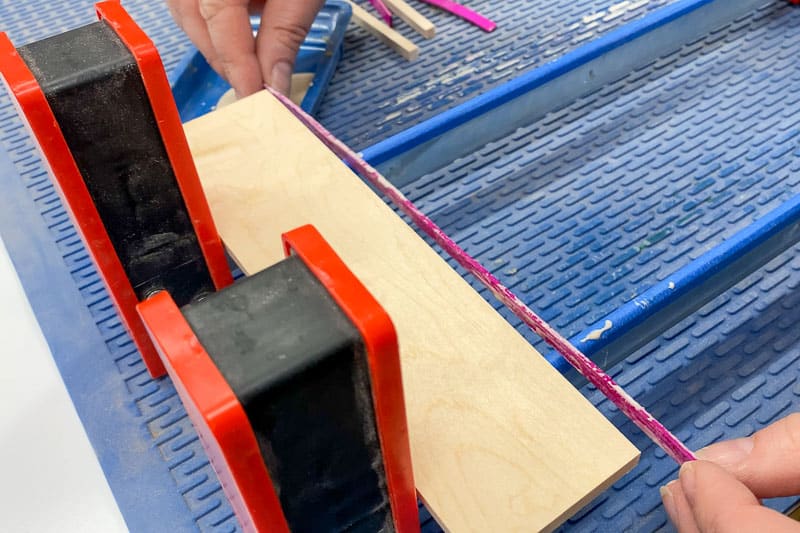
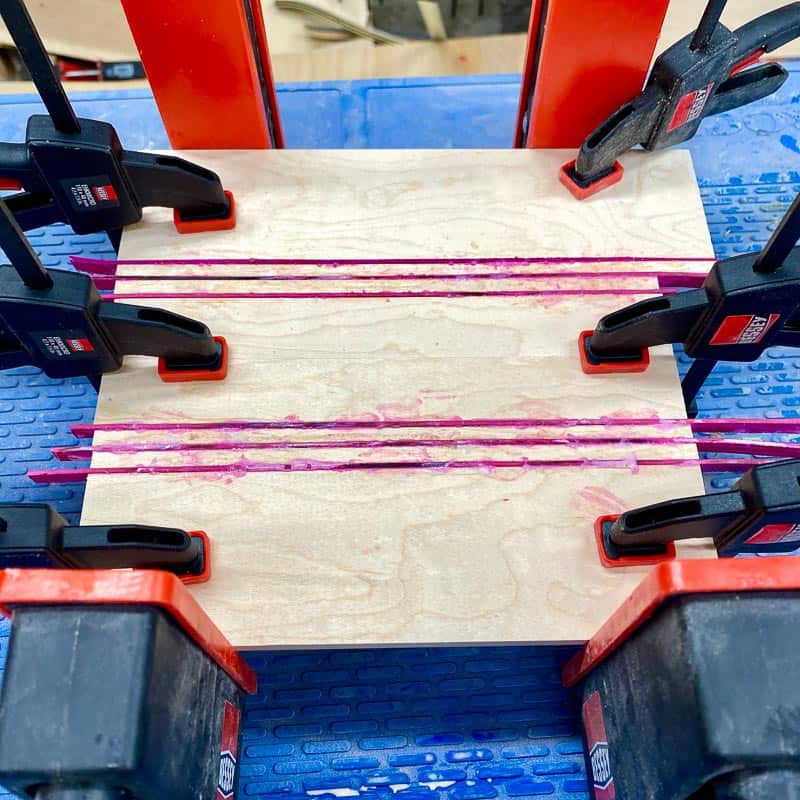
Glue Up the Stripes
Parallel clamps are the best way to apply even pressure along the length of a glue up while keeping all the pieces flat. You can also use pipe clamps, but they're a little trickier to use.
Apply wood glue to one edge of the widest strip, and lay it across the bars of the parallel clamps. Then coat both sides of a veneer strip with glue and stick it to the edge of the first piece.

Continue alternating strips until you have the full width of the wood coaster laid out on the bar. The glue will absorb some of the dye and turn pink, but it won't soak into the rest of the wood.
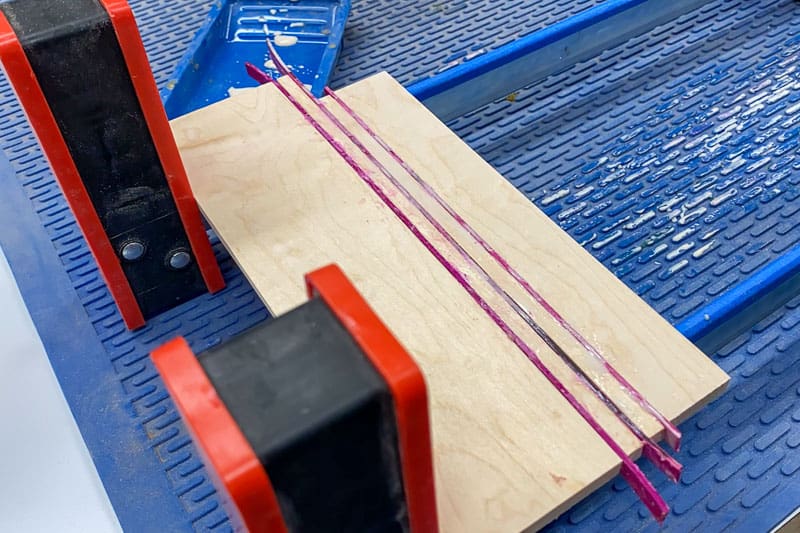
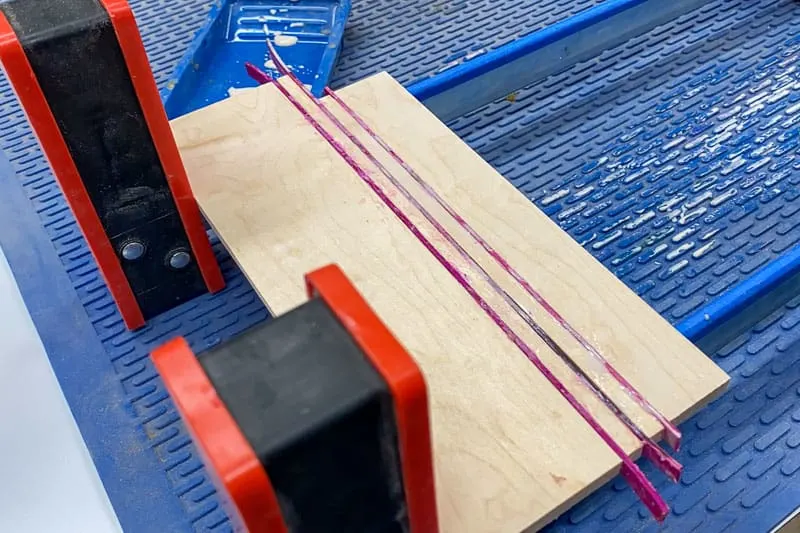
I had plenty of room on these clamps for a second glue up, just by omitting the wood glue between the two sets of coasters.
Unfortunately, the thin wood pieces started to buckle when I applied pressure with the clamps. I used these little trigger clamps to hold the wood to the bar while the glue dried. It worked like a charm!

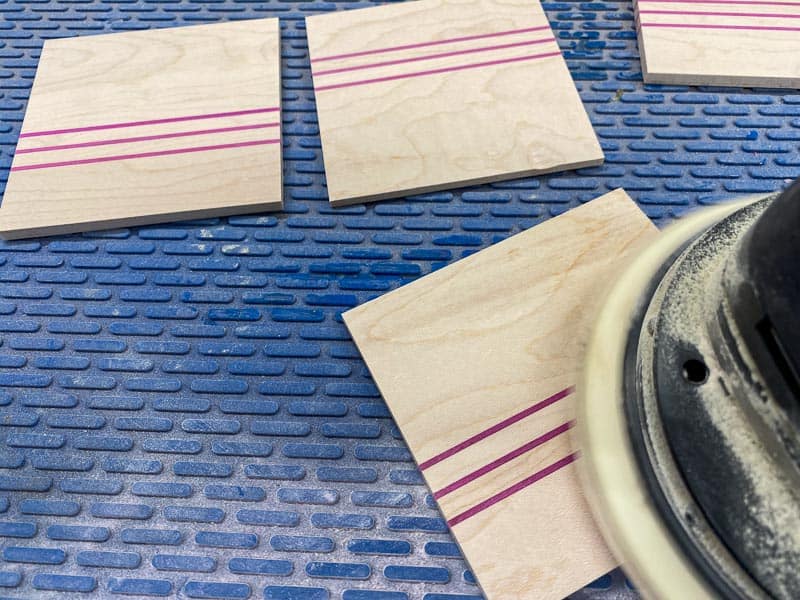
Cut and Sand the Wood Coasters
Once the glue has dried, give both sides a good sanding to make sure the veneer stripes are flush with the surface of the wood. I cheated and used my new jointer that I got for Christmas instead, but sanding works just as well!

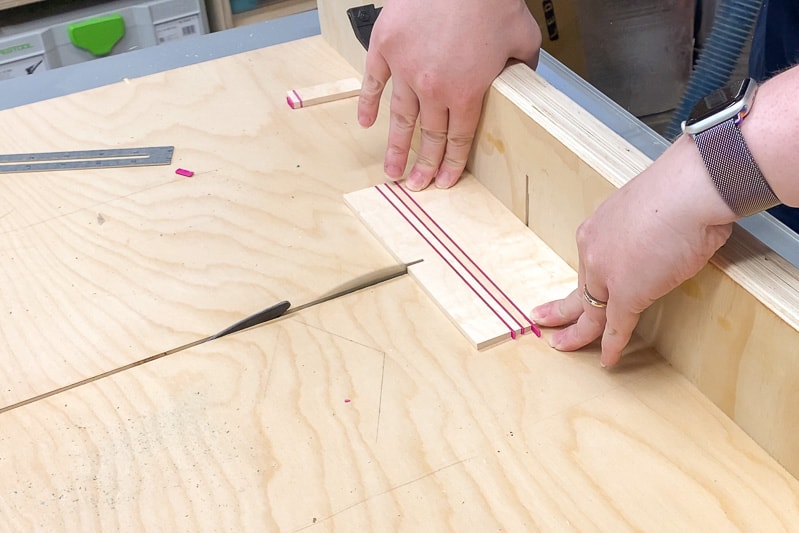
Trim off any excess from one end of the strip to create a straight edge across all the stripes. You can use a miter saw or a table saw with a cross cut sled for this step.
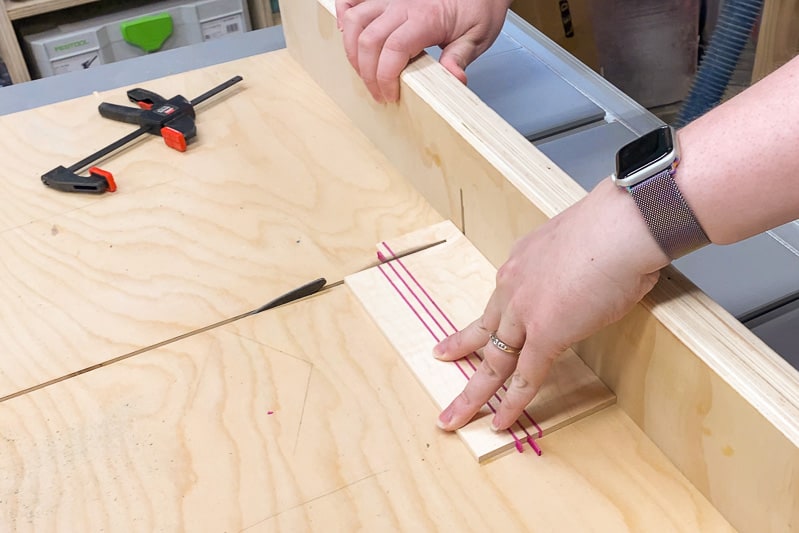
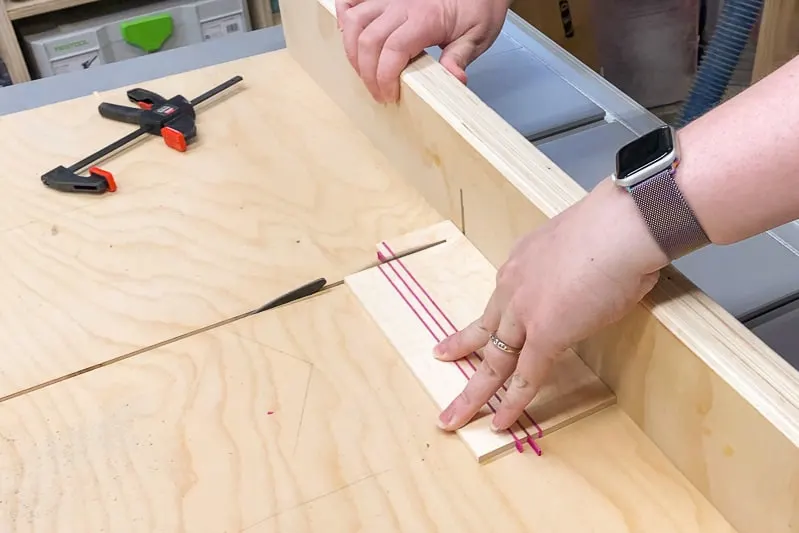
Now measure the exact width, and set a stop block at the miter saw or cross cut sled to that dimension. Then cut the perfectly square coasters!

Sand off any rough spots, and round over the edges slightly if desired.

Apply Finish
These wood coasters will get damp from condensation, so a protective finish will help keep them looking great. I prefer to use Polycrylic on maple because it doesn't turn the pale wood yellow, and it really makes that bright pink color pop! This article compares polycrylic to polyurethane in more detail.

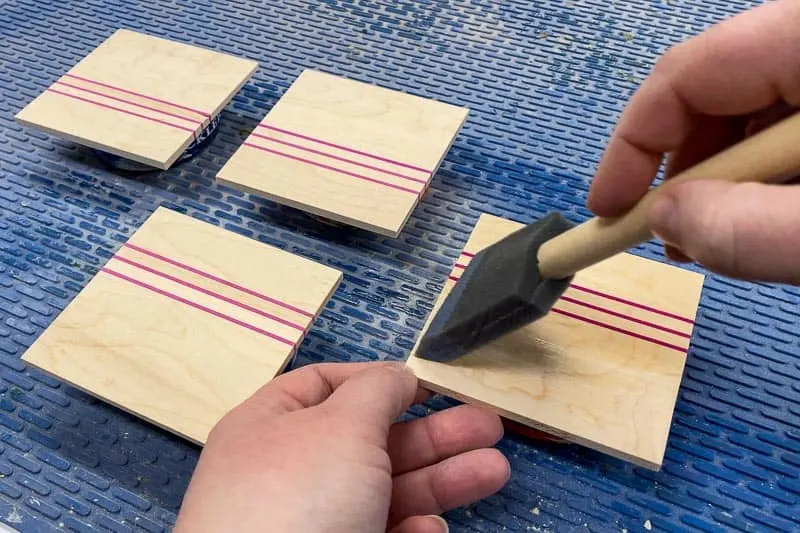
Sand in between coats with 220 grit sandpaper for a super smooth finish.
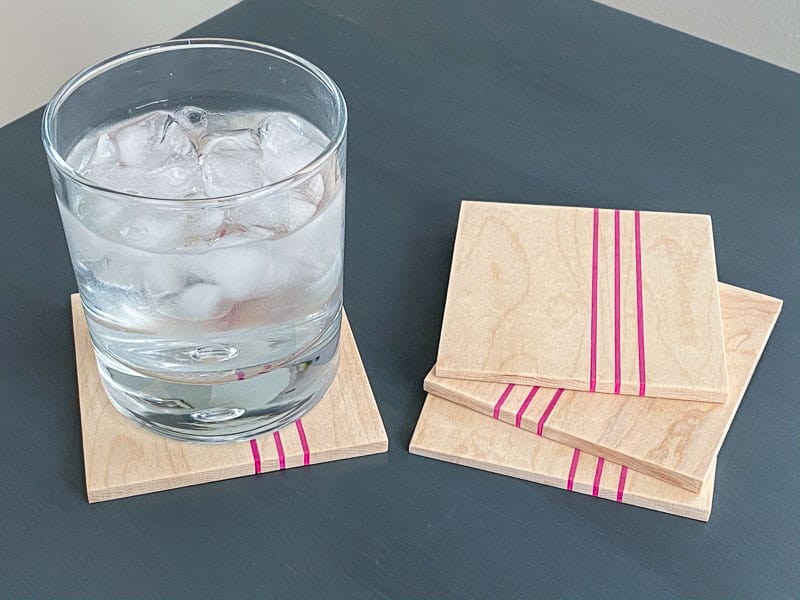
Enjoy your New DIY Wood Coasters!
I'm so happy with how these coasters turned out! The stripes give them a fun pop of color that won't wear or scratch off like paint does. I'm thinking of making a few more sets to keep on hand as gifts!

Print out the step by step instructions below!
Want more colored wood veneer projects like this one? Check these out!