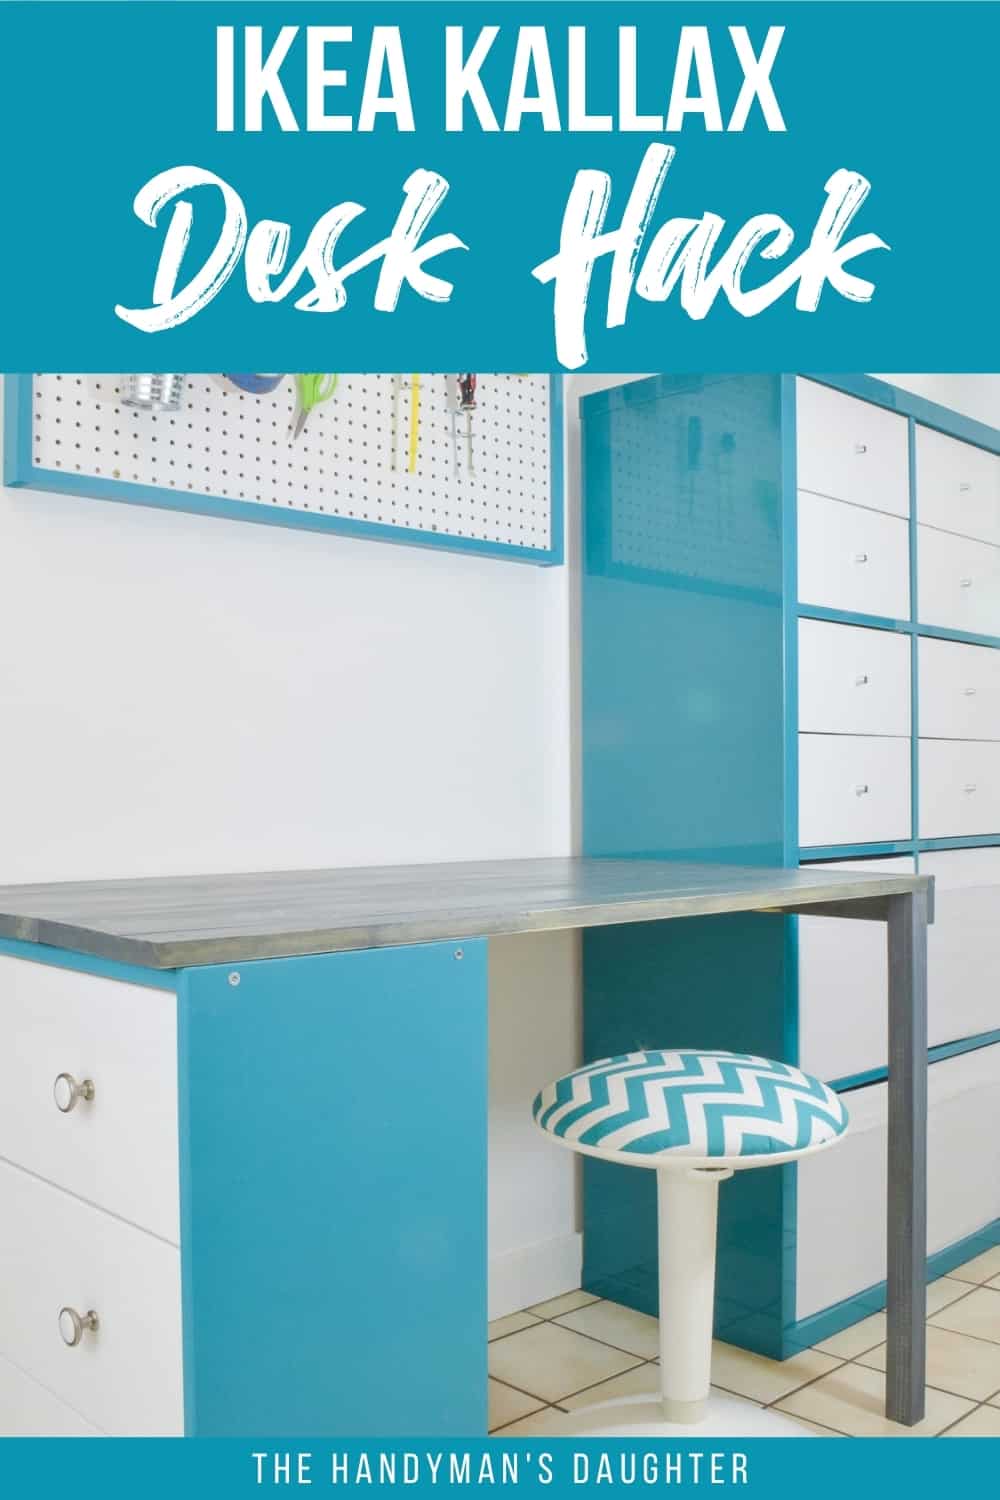
This IKEA Kallax desk hack is easy to make with a Rast dresser, Kallax or Expedit storage unit and a few boards!

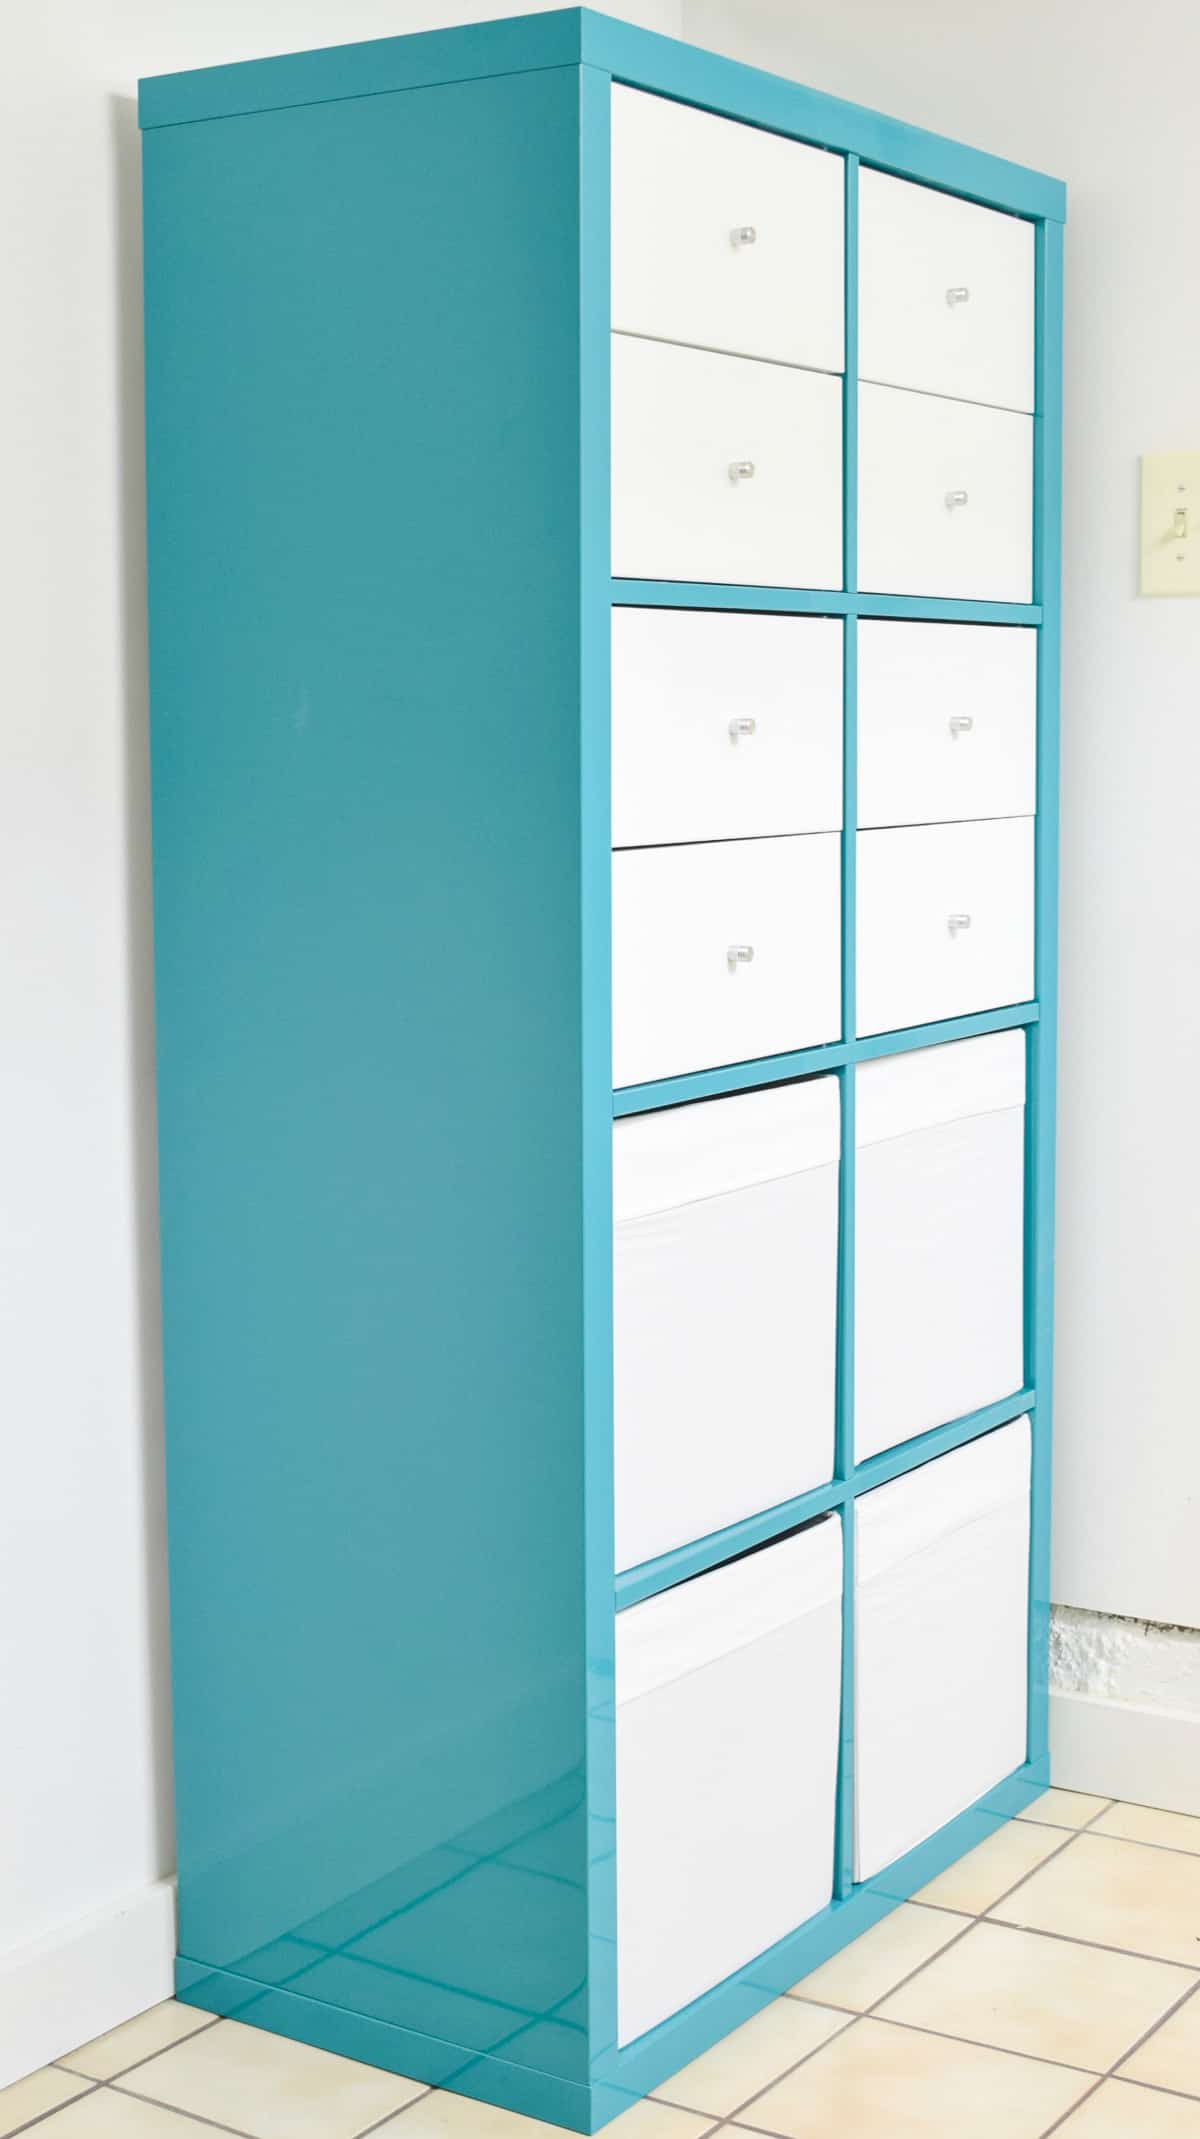
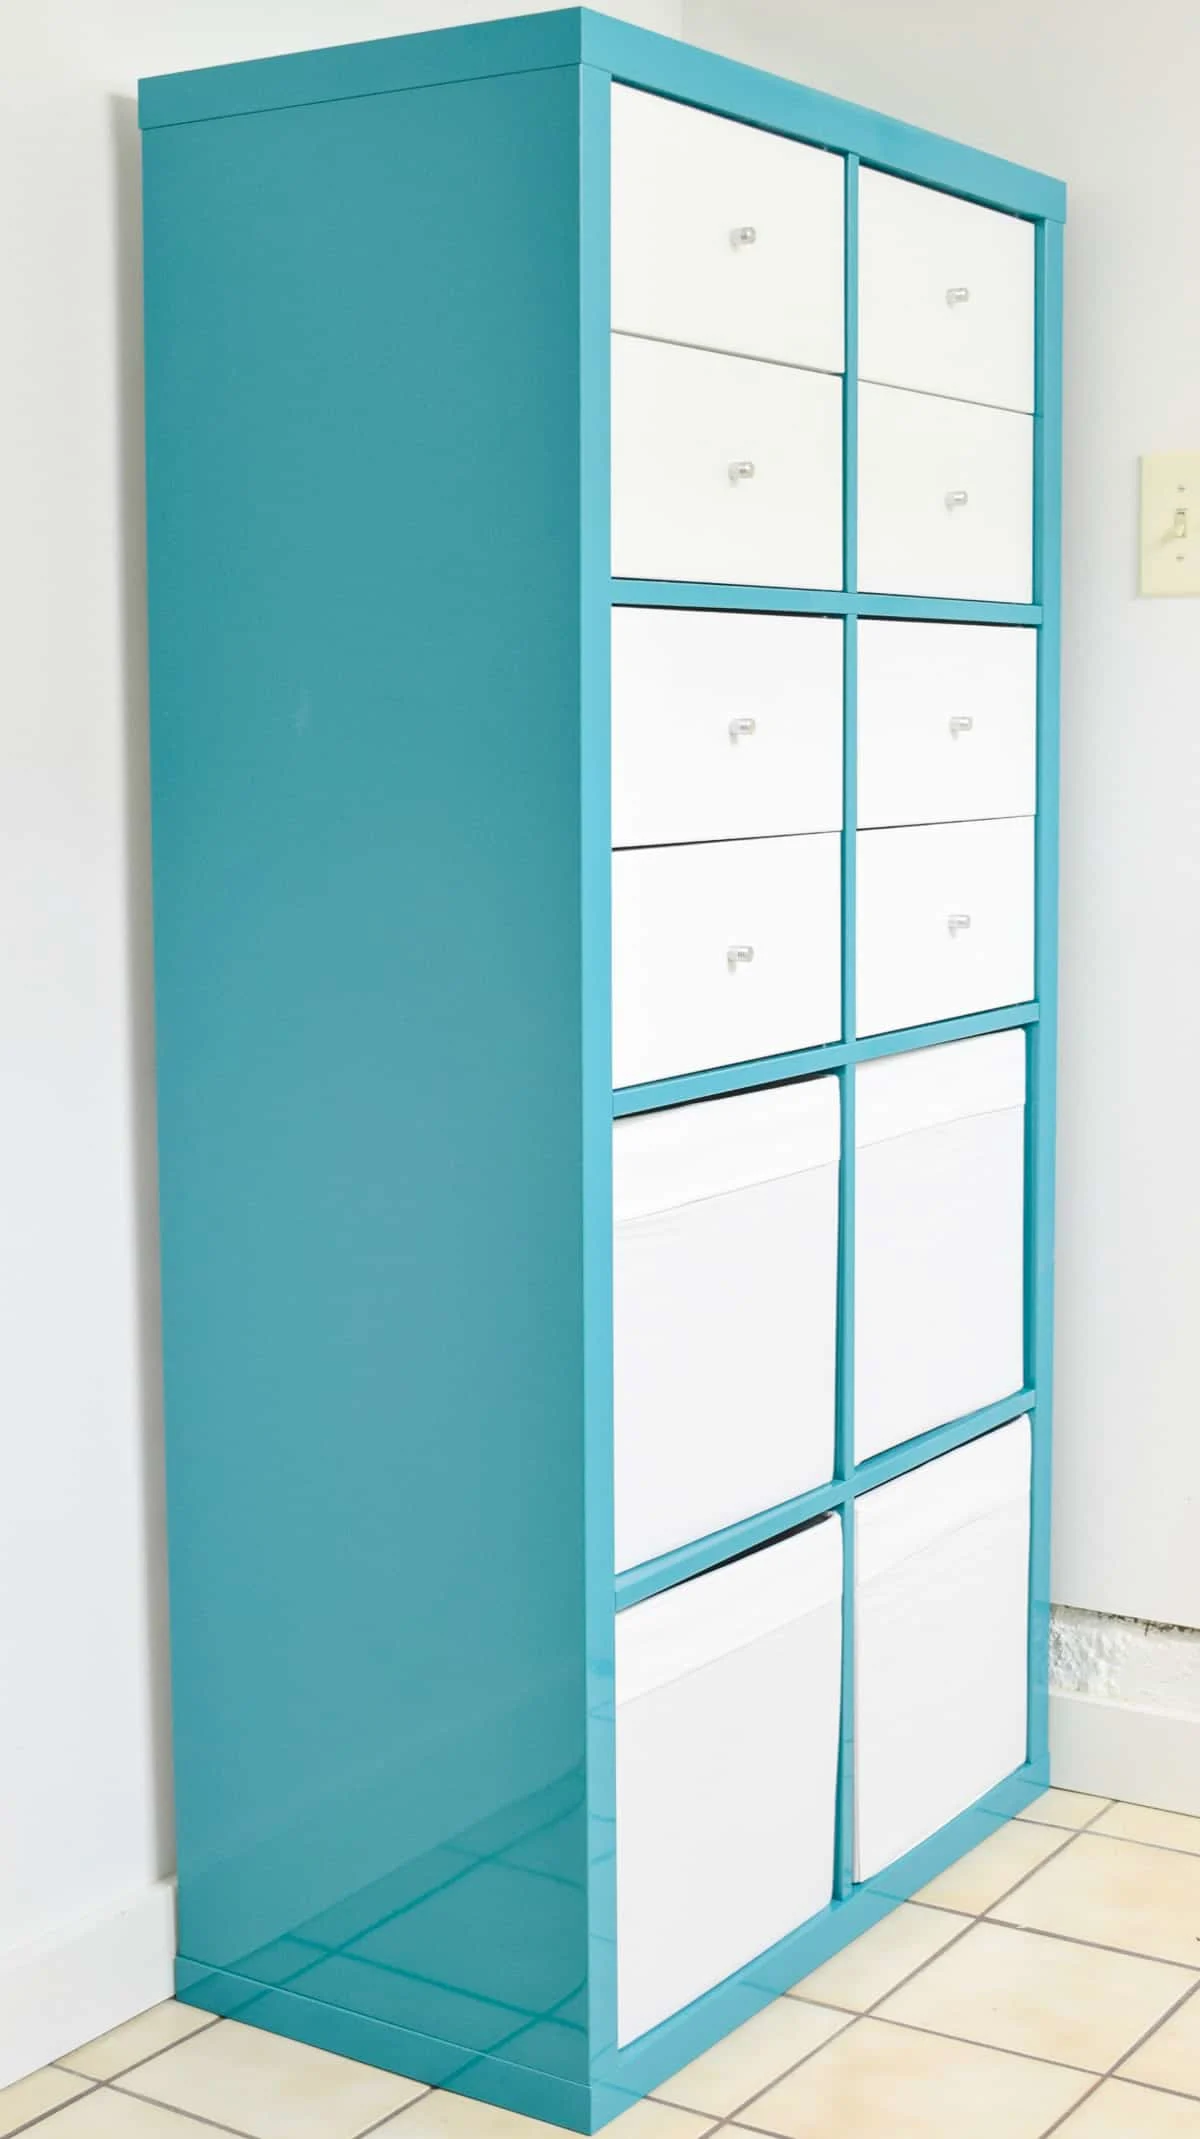
IKEA makes a ton of versatile furniture pieces, but none are more popular than the Kallax! You can add drawers, bins or just leave them as shelves to easily customize your storage.
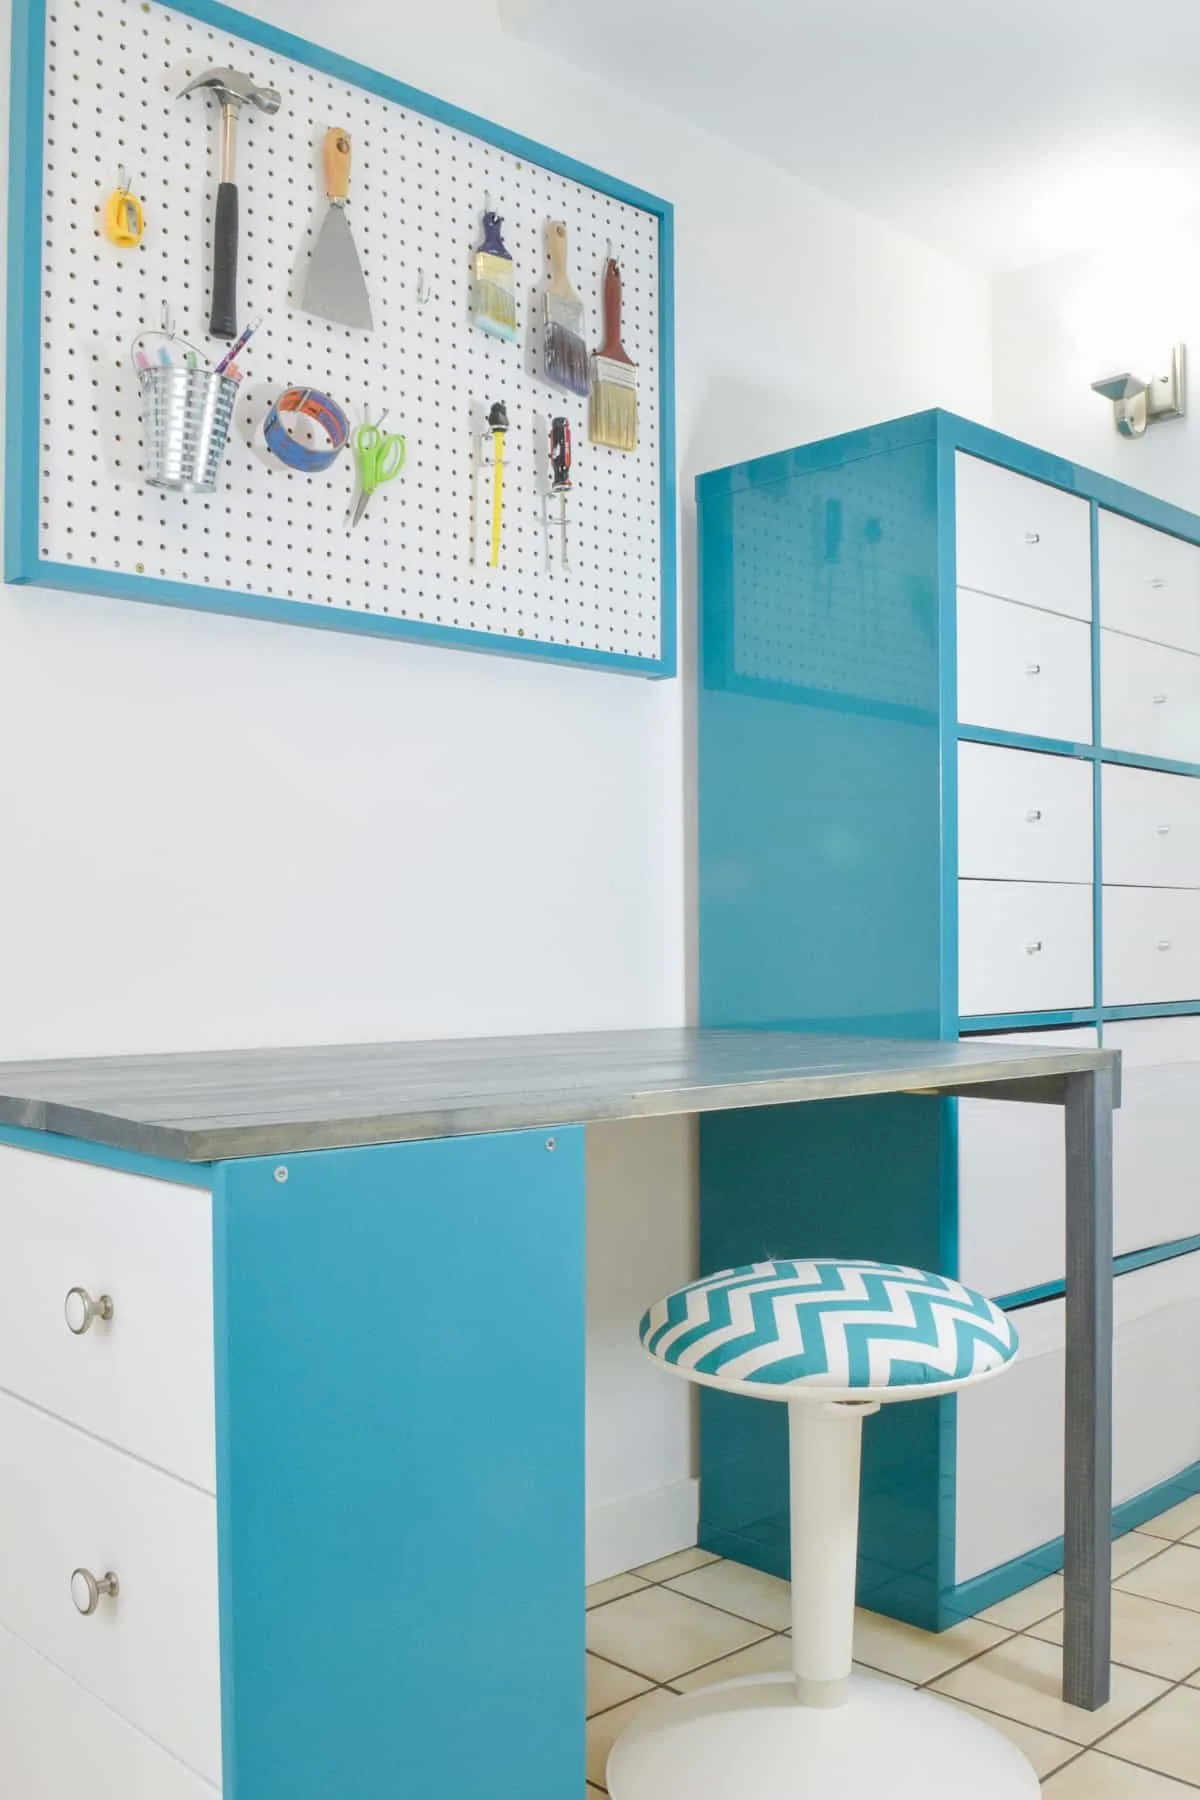
I wanted to brighten up this space right outside my workshop door, and make it more functional too. With just a few boards, I was able to connect the IKEA Kallax with the IKEA Rast dresser to create a small desk area that's perfect for sketching out new ideas and making lists to take to the hardware store.
There's also a ton of storage, thanks to all those bins and drawers. I keep all the supplies that need to stay dust-free in this area, safe from the sawdust. Today, I'm showing you how to pull off this easy IKEA Kallax desk hack yourself!
This post contains affiliate links for your convenience. Purchases made through these links may earn me a small commission at no additional cost to you. Please visit my disclosures page for more information.
Purchase the IKEA Furniture Pieces
Start off with the IKEA Kallax, formerly known as the Expedit. You can frequently find these shelving units on Craigslist or thrift stores even cheaper! Amazon also carries a variety of cube organizers and bins that would also work great.
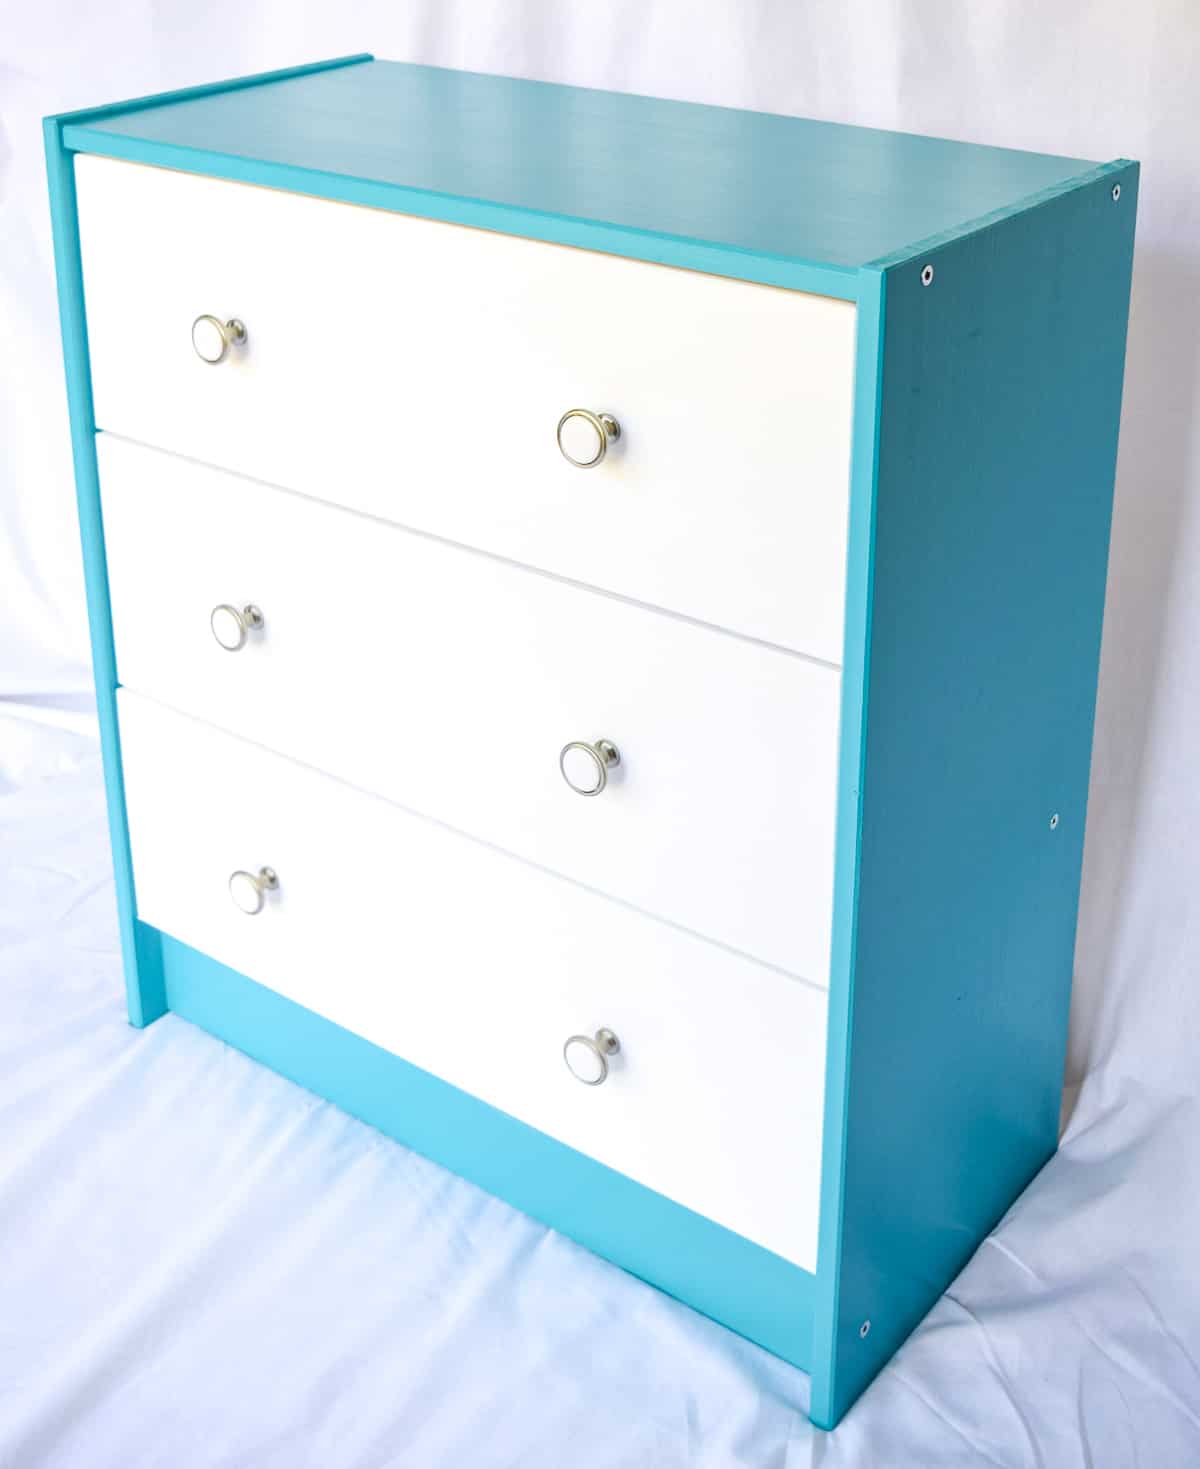
The main support for the desk is the IKEA Rast dresser. It comes unfinished, so I painted mine to match the Kallax. You can get all the details on that project here.

Other than those two pieces, here's what you'll need to create the Kallax desk:
Supply List for IKEA Desk Hack
- Two 1 x 6 boards
- One 1 x 3 board
- One 2 x 2 board (optional)
- Scrap piece of 2 x 4 (about 28")
- Pocket hole jig
- 1 ¼" pocket hole screws
- Clamps
- Wood glue
- ⅝" screws
- 1 ½" wall dog screws
- 3" screws
- Five 1 ½" Simpson Strong-Tie angle brackets
How to Make an IKEA Kallax Desk
Build the Desktop
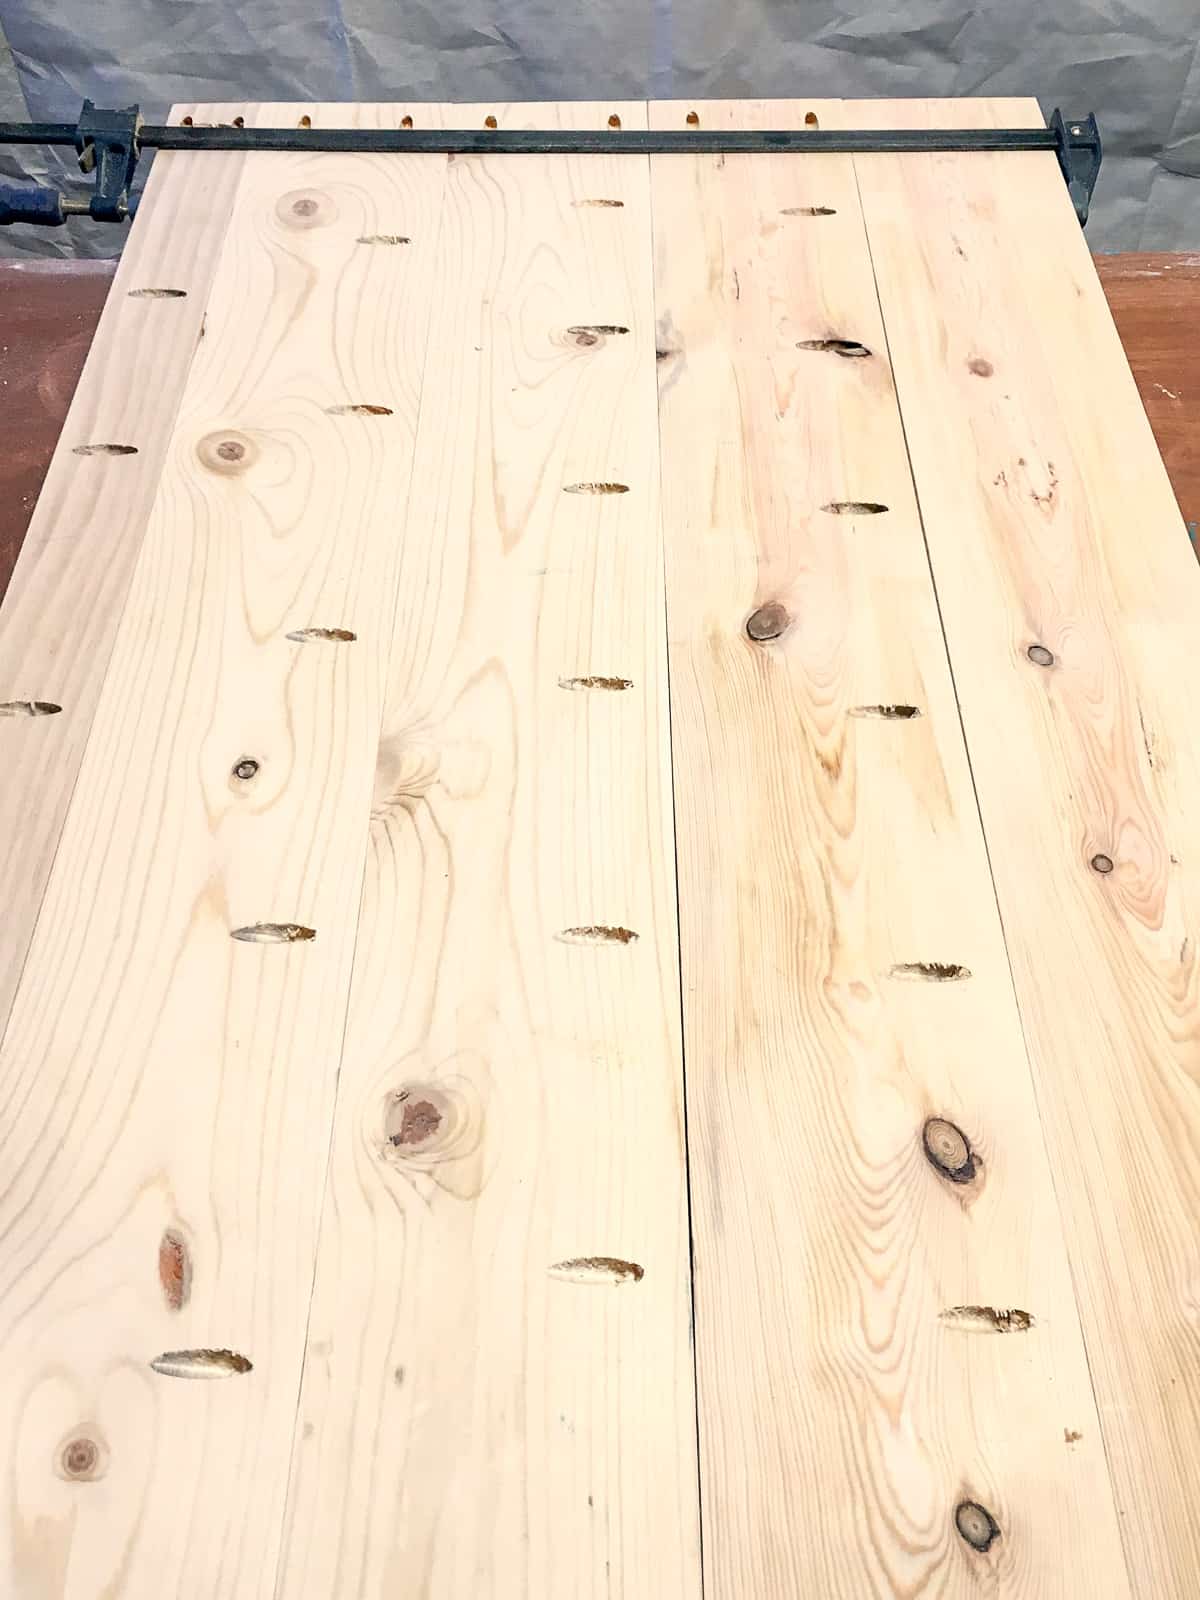
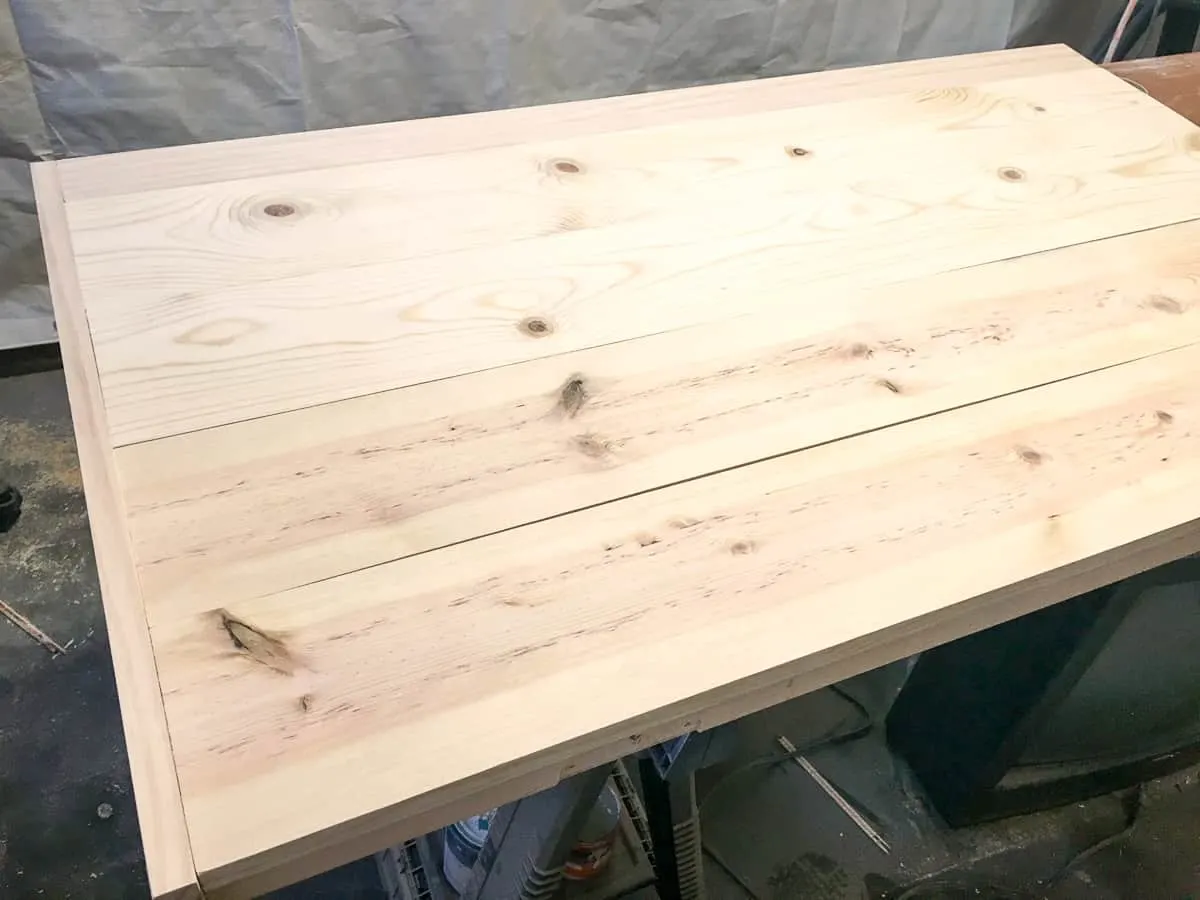
I planked together solid wood boards using pocket holes, but you could also use an IKEA tabletop or plywood! Just make sure to cover up those exposed plywood edges either with wood filler, edge banding or solid wood to give it a finished look.
Four 1x6 boards and one 1x3 board will cover the entire width of the Rast dresser and give you plenty of work surface for your new desk.
Determine how long you want your desk to be, making sure to include the size of the Rast dresser (which is 11 ¾" deep). Subtract ¾" from that dimension, and cut the boards to that length. My desk is 43 ¾" long, so I cut my boards to 43".
Mark where you will place the pocket holes, then drill them using a pocket hole jig. Drill two pocket holes at one end of each board as well. Clamp the boards at each end, then screw them together with 1 ¼" pocket hole screws.
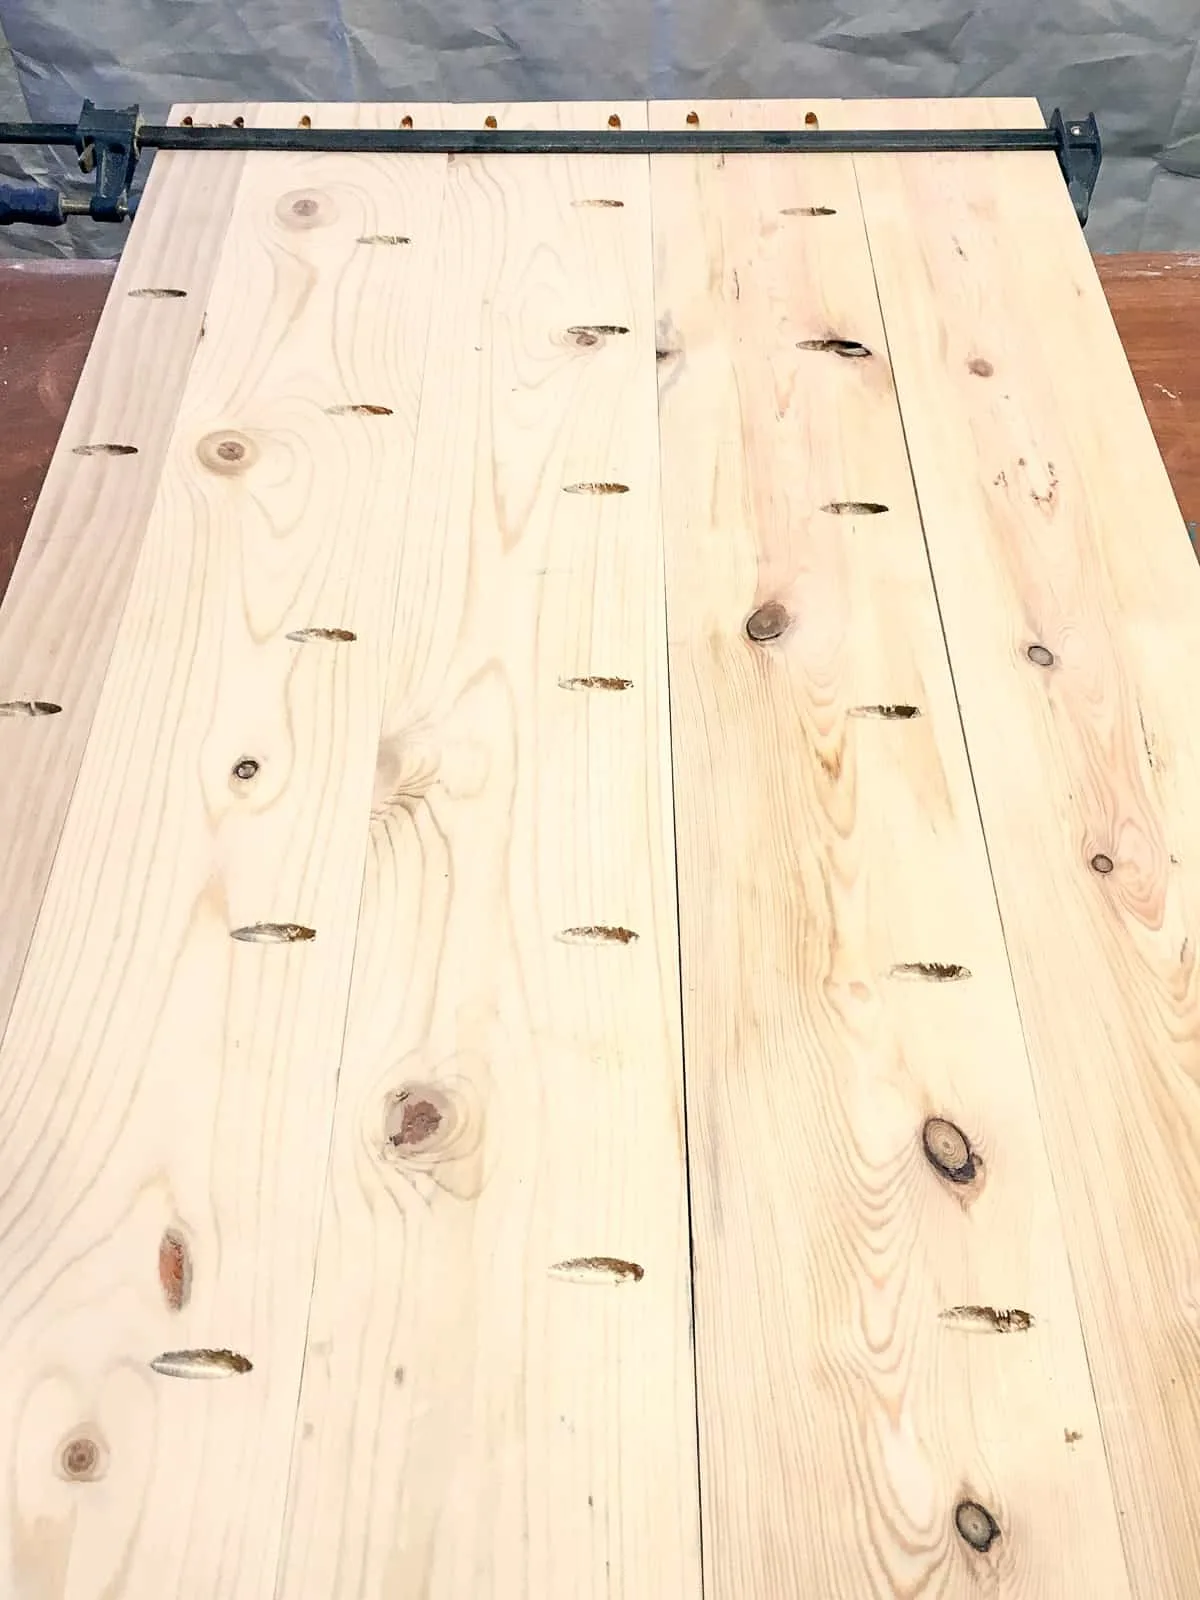
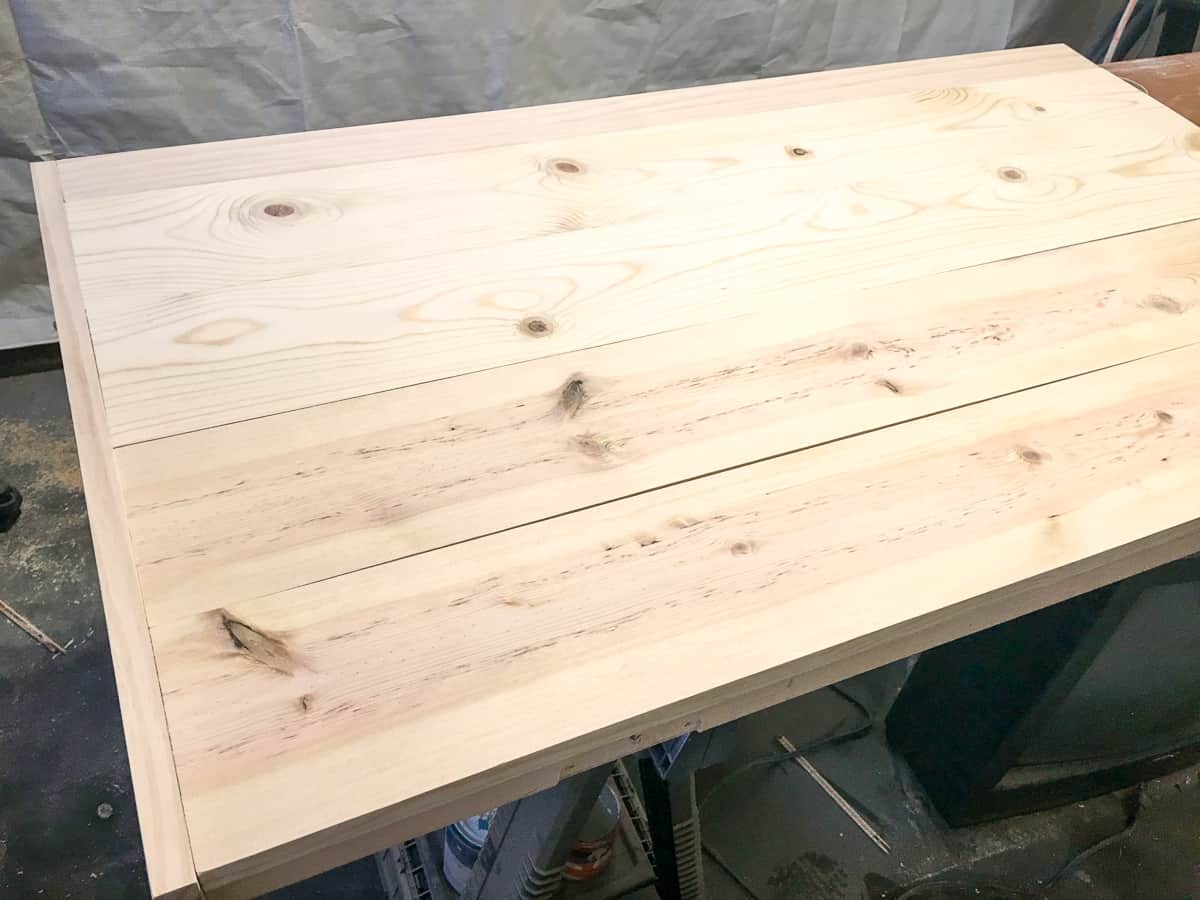
Cut the leftover piece of 1 x 3 board to 24 ½" (the width of all the boards joined together). Attach this piece to the end of the planked boards, making sure that the top is flush with the surface. This end board will be screwed into the side of the Kallax.

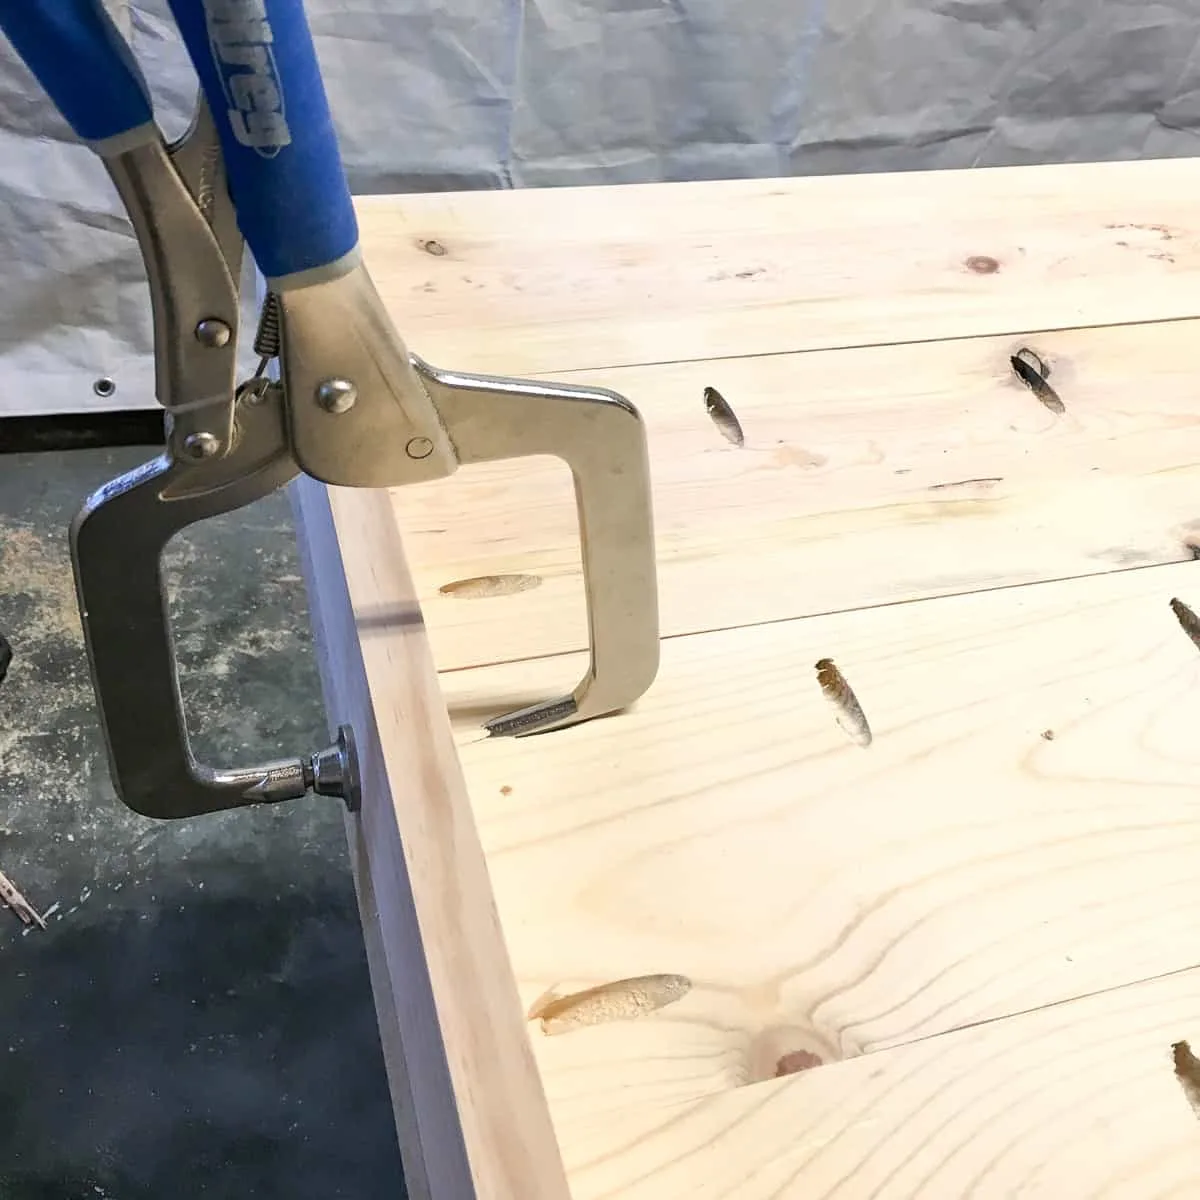
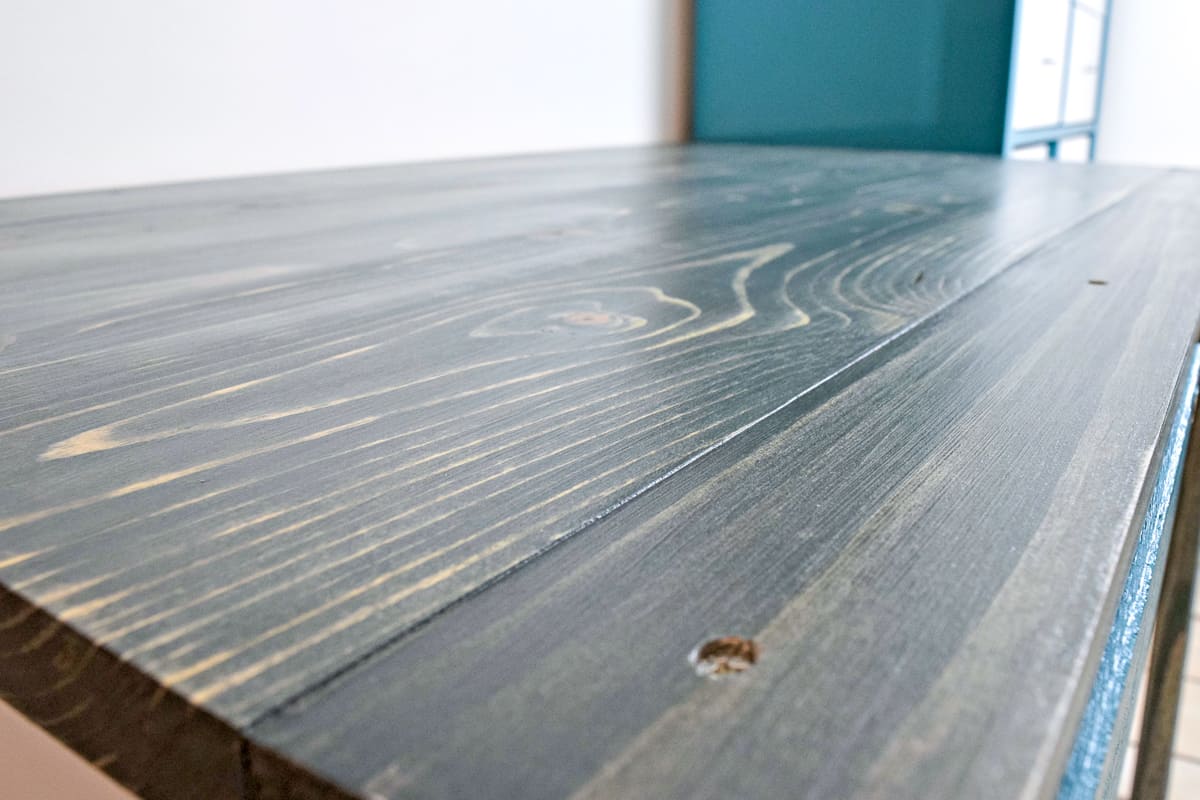
You can use wood filler to hide any gaps between the boards, but I decided to leave mine a little more rustic to contrast with the bright, shiny Kallax. Sand down your newly built desk top, then use a tack cloth to remove all the dust.
Paint or Stain the Desk Top
I stained my desk top with Minwax stain in Charcoal to contrast against the bright blue and white. I have a thorough side-by-side comparison of different gray wood stains if you want to see how the colors look on various wood species.
If you're staining the top, you'll also need to apply a clear protective top coat over it. Otherwise, the stain can transfer to anything sitting on the desk, including your shirt sleeves!
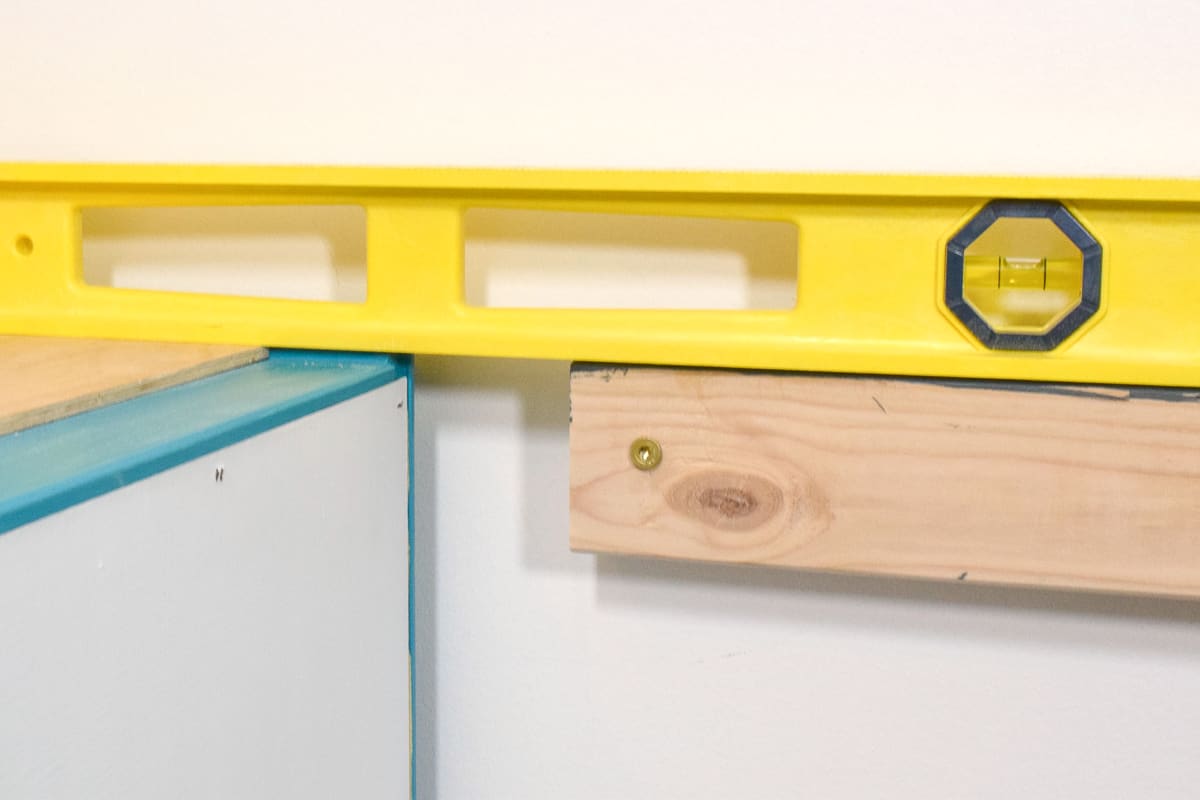
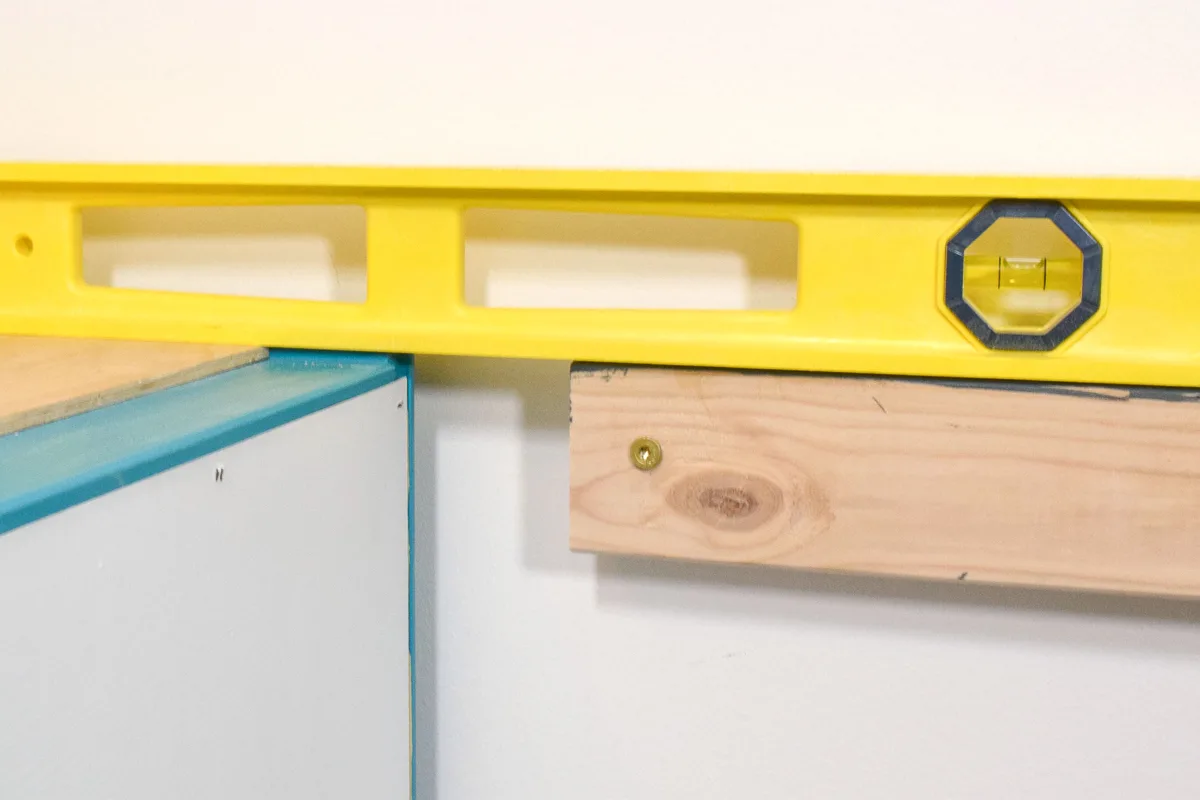
Attach the Support to the Wall
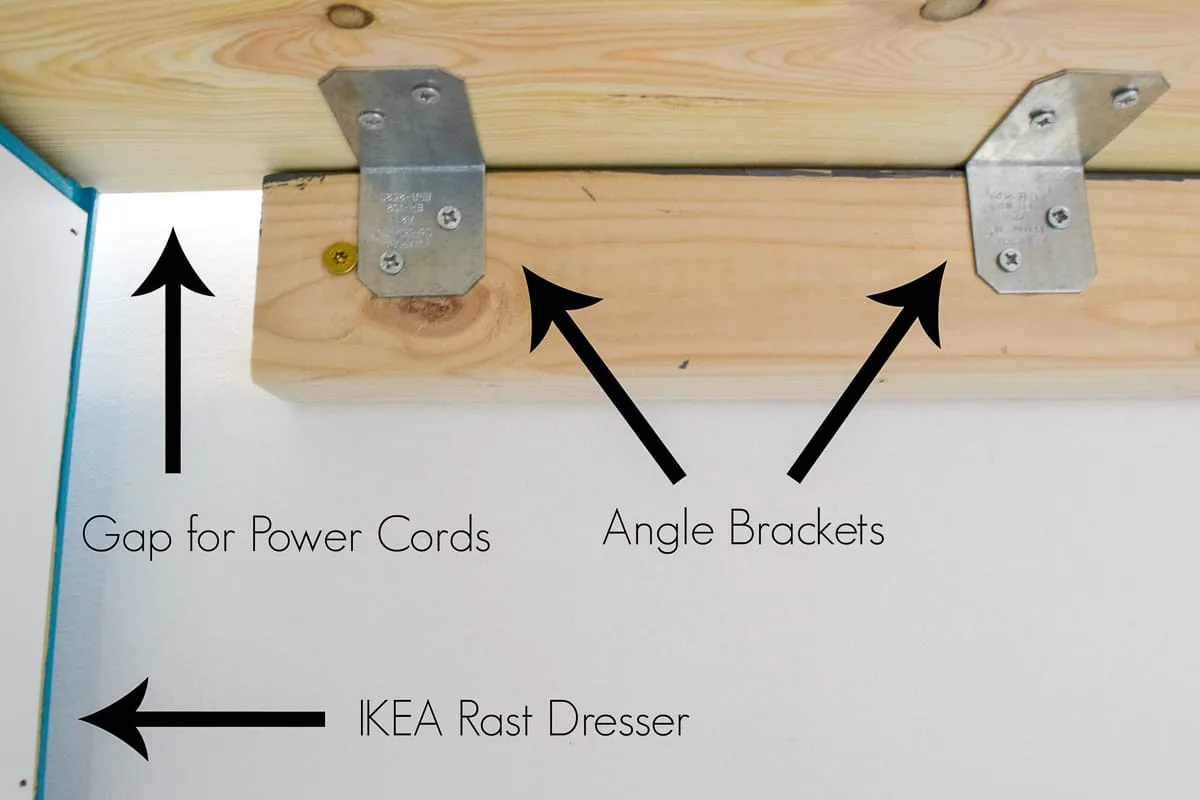
One drawback to the IKEA Kallax is that it isn't made of solid wood, which makes it difficult to attach the desk top securely. I decided to add a cleat to the wall to bear some of the weight, but it's totally optional!
Cut a scrap piece of 2 x 4 a few inches smaller than the distance between the Rast and Kallax. This piece will attach directly to the wall at the studs with 3" screws.
Use a level to make sure it is even with the top of the Rast dresser (I added a scrap of ¼" plywood to even out the top of the dresser). Leave at least ¾" of space on the Kallax side for the desk top lip, and a couple inches on the other side for power cords to slip through. My 2 x 4 is about 28 inches long.
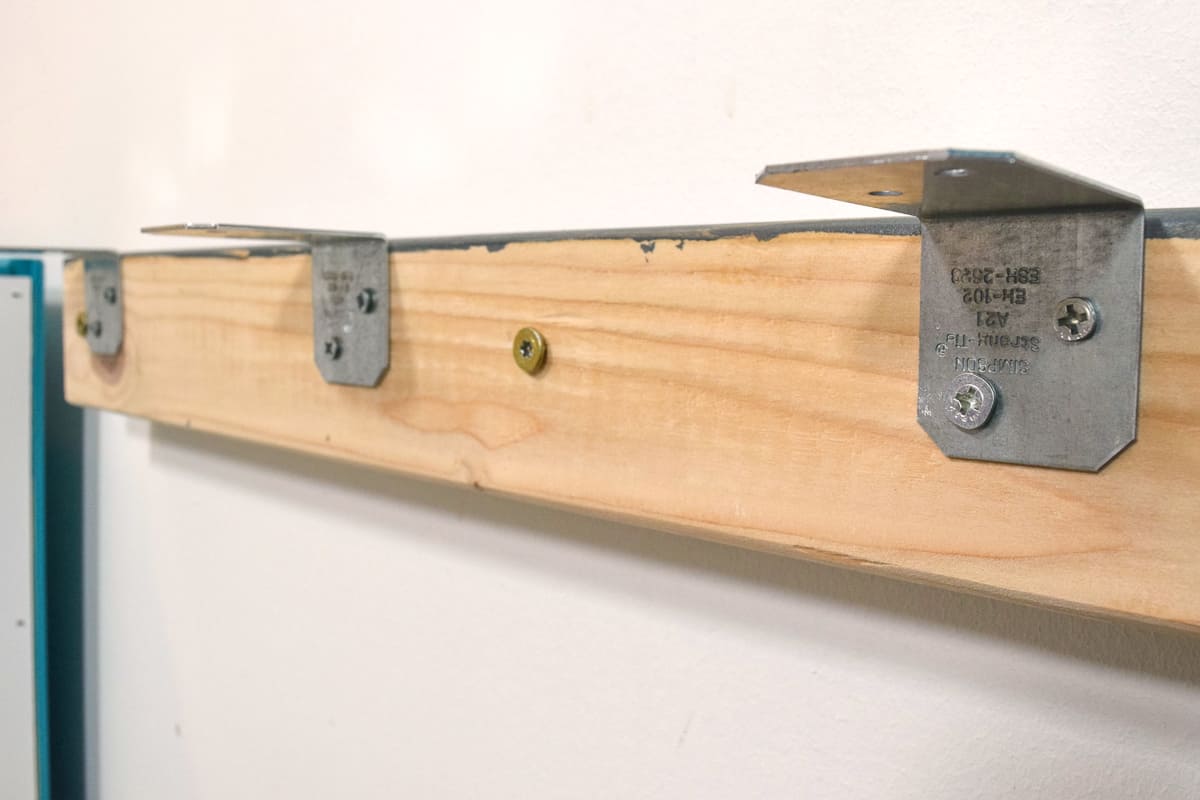
Attach four angle brackets to the top edge of the 2 x 4 using ⅝" screws. These brackets will keep the desktop in place and provide more support.

Attach the Desk Top to the Kallax and Rast
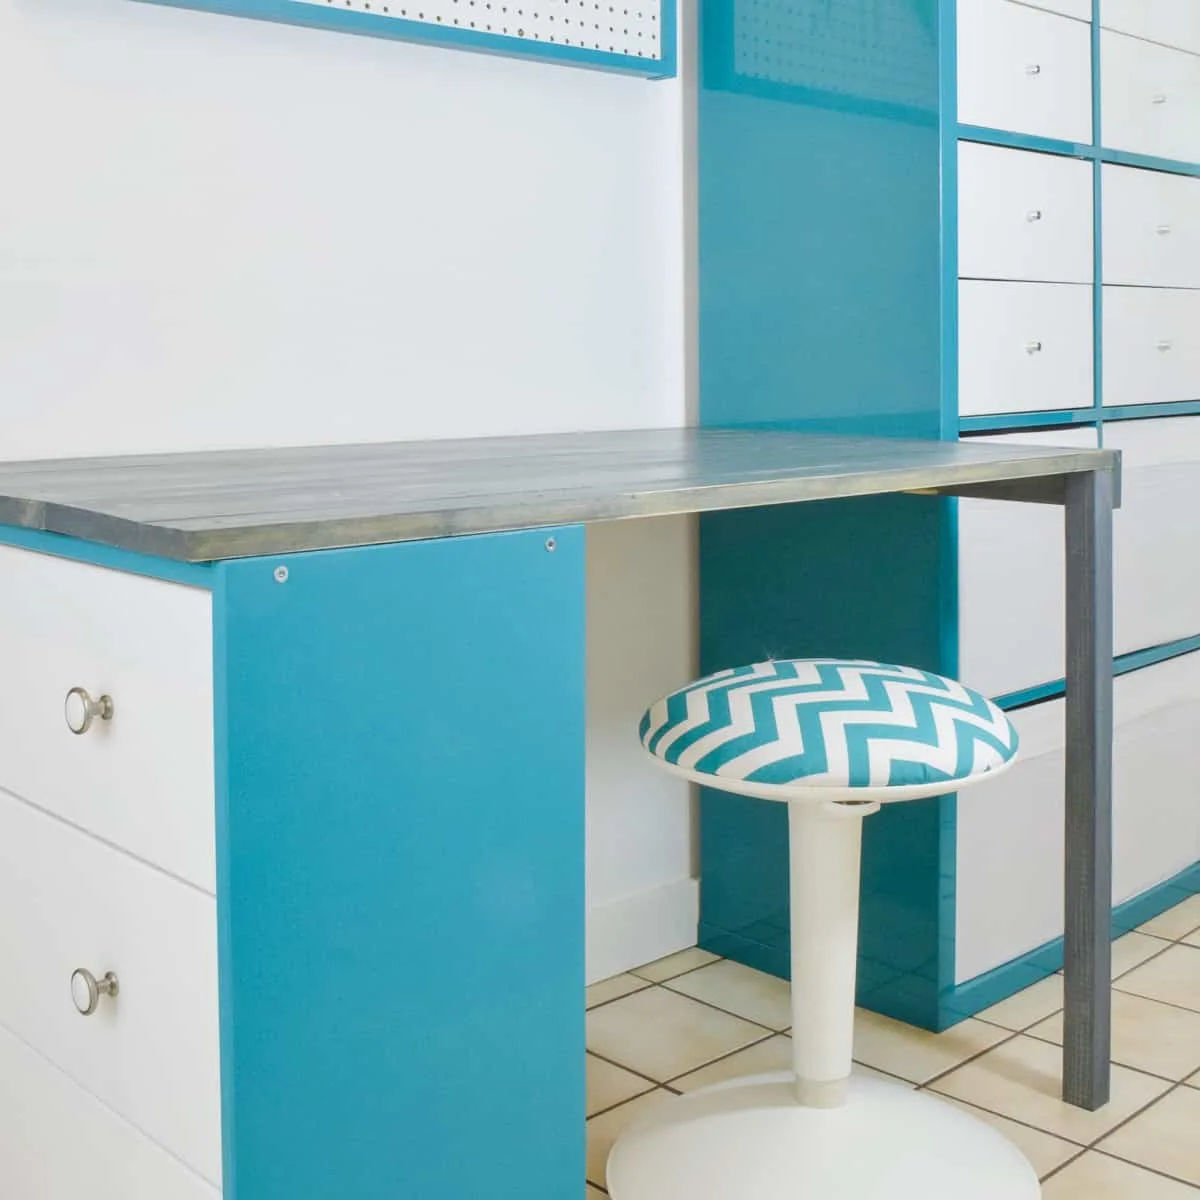
Now it's time to put all the pieces together! Set the desktop across the brackets and Rast dresser, with the lip facing towards the Kallax. Screw the angle brackets to the underside of the desktop using ⅝" screws.

To connect the Rast to the desk, I just screwed straight through the top with a few 1 ¼" screws. In retrospect, I should have removed the drawers and screwed it down from underneath to avoid putting holes in the top!

Attach the lip of the desktop to the side of the Kallax with Wall Dog screws. Wall dogs are anchors and screws in one, which will grip into the particleboard sides of the Kallax securely. I love using these screws anytime I need to attach something to drywall without a stud, too!
I thought the free-hanging corner of the desk looked a bit odd, so I cut a 2 x 2 leg to fit. The leg is totally optional, since the desk is pretty secure at this point. It's attached to the desktop with another angle bracket.


Enjoy Your New IKEA Kallax Desk!
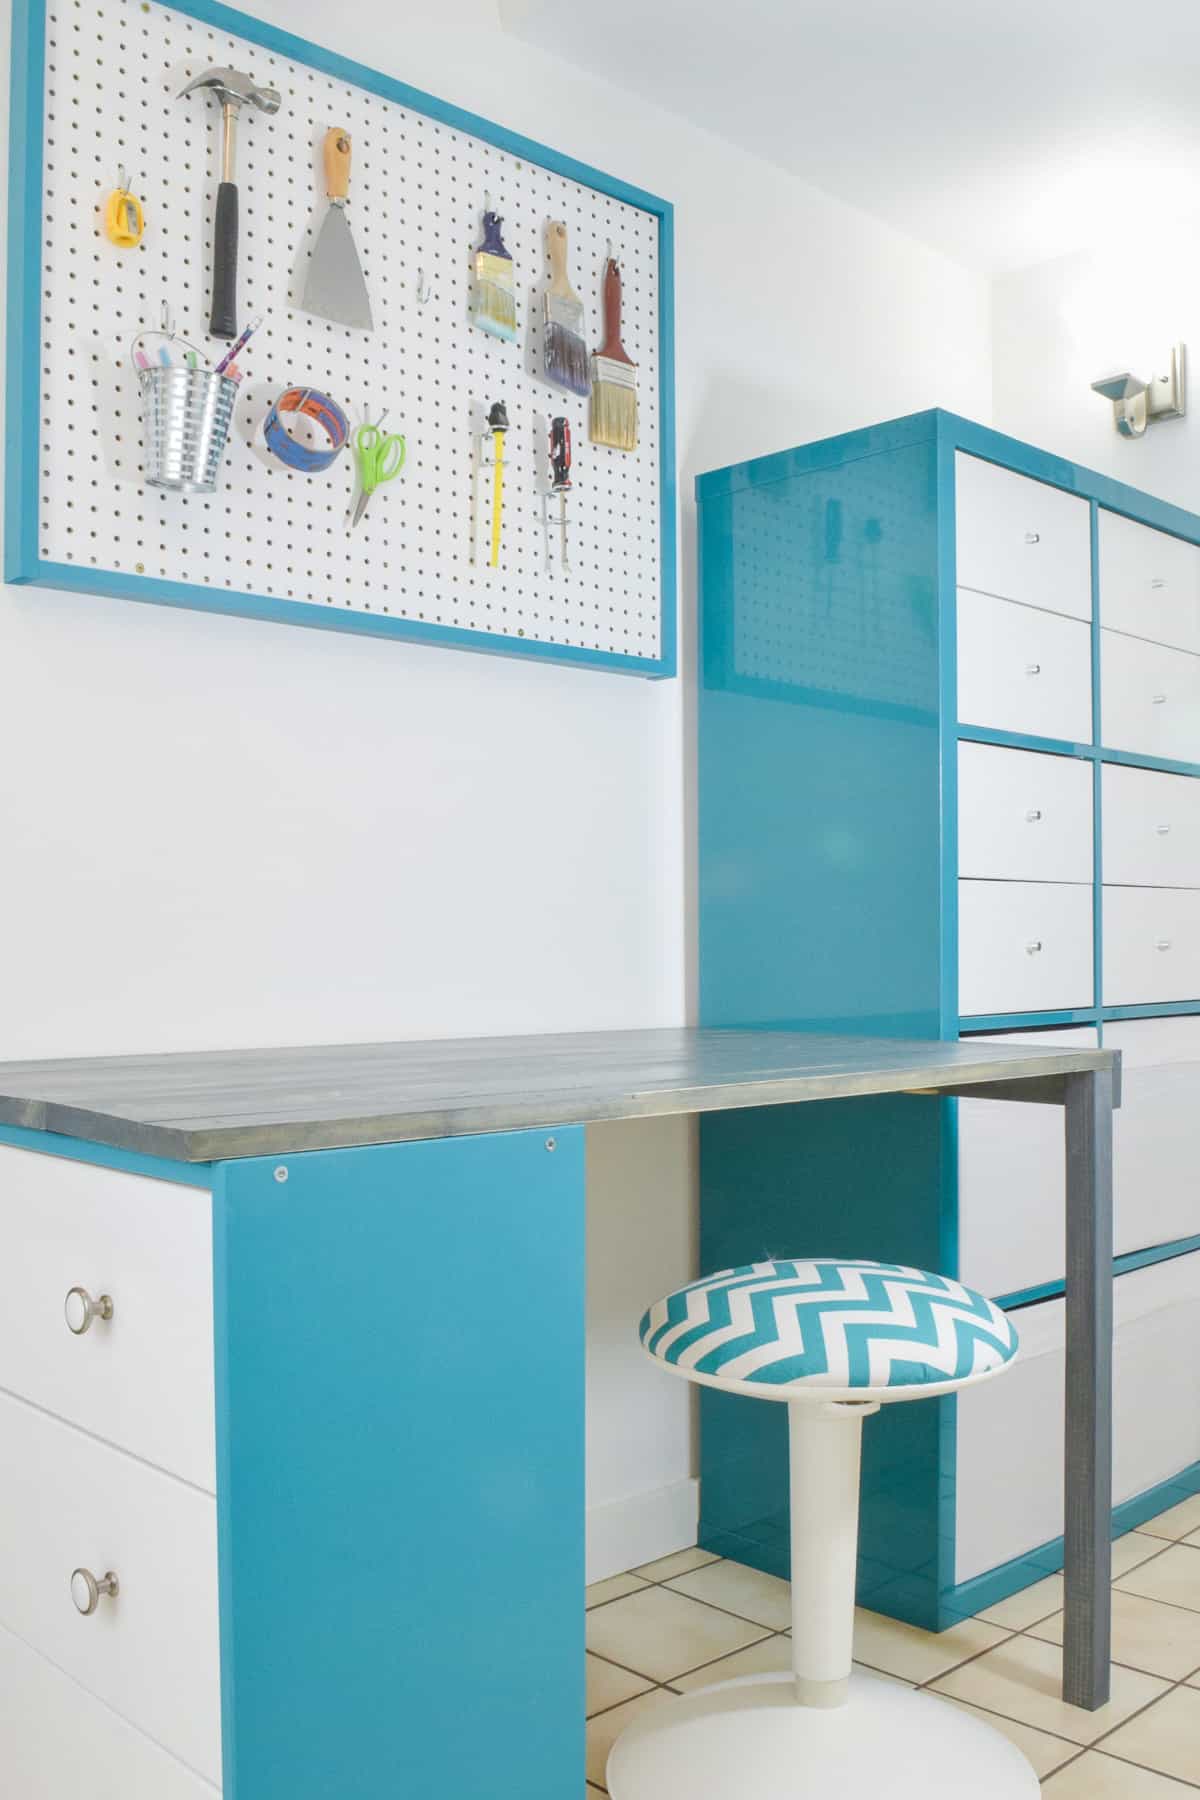
Ta da! A brand new desk with tons of storage, thanks to those two popular IKEA pieces!

I added a framed pegboard above the desk to store even more tools! It's a good idea to keep paint brushes and tape away from the sawdust in the workshop, but the pegboard keeps it easily accessible.
Check out these other IKEA hacks!
Judy
Monday 12th of November 2018
I love a good Ikea hack. This one is awesome. I will be featuring this tomorrow night my Fall into Fall party that opens at 8pm EST. Please stop by and pick up an I've Been Featured button. Thanks. http://diybydesign.blogspot.com
Grandmas House DIY
Tuesday 11th of October 2016
This is gorgeous! Love the colors you chose too! Thank you so much for sharing with us at our To Grandma's house we go link party! Pinned!
Theresa @DearCreatives
Monday 10th of October 2016
Love the colors & how this turned out! Thanks for sharing at the #InspirationSpotlight Pinned & shared.
debbie
Monday 10th of October 2016
A really nice work space and creative desk although over my head when it comes to the diy side of things. I really think you make an amazing workspace!
Julie
Saturday 8th of October 2016
Brilliant, looks great and SO much storage.