Turn an IKEA Trofast storage unit into the perfect rolling benchtop tool stand with this easy IKEA workbench hack!

Despite the name, benchtop tools aren't great to use on the workbench! They sit way too high, making them uncomfortable and unsafe. While you could adjust the height of one of these DIY workbench plans to accommodate these tools, sometimes it's just easier to buy something that will work!
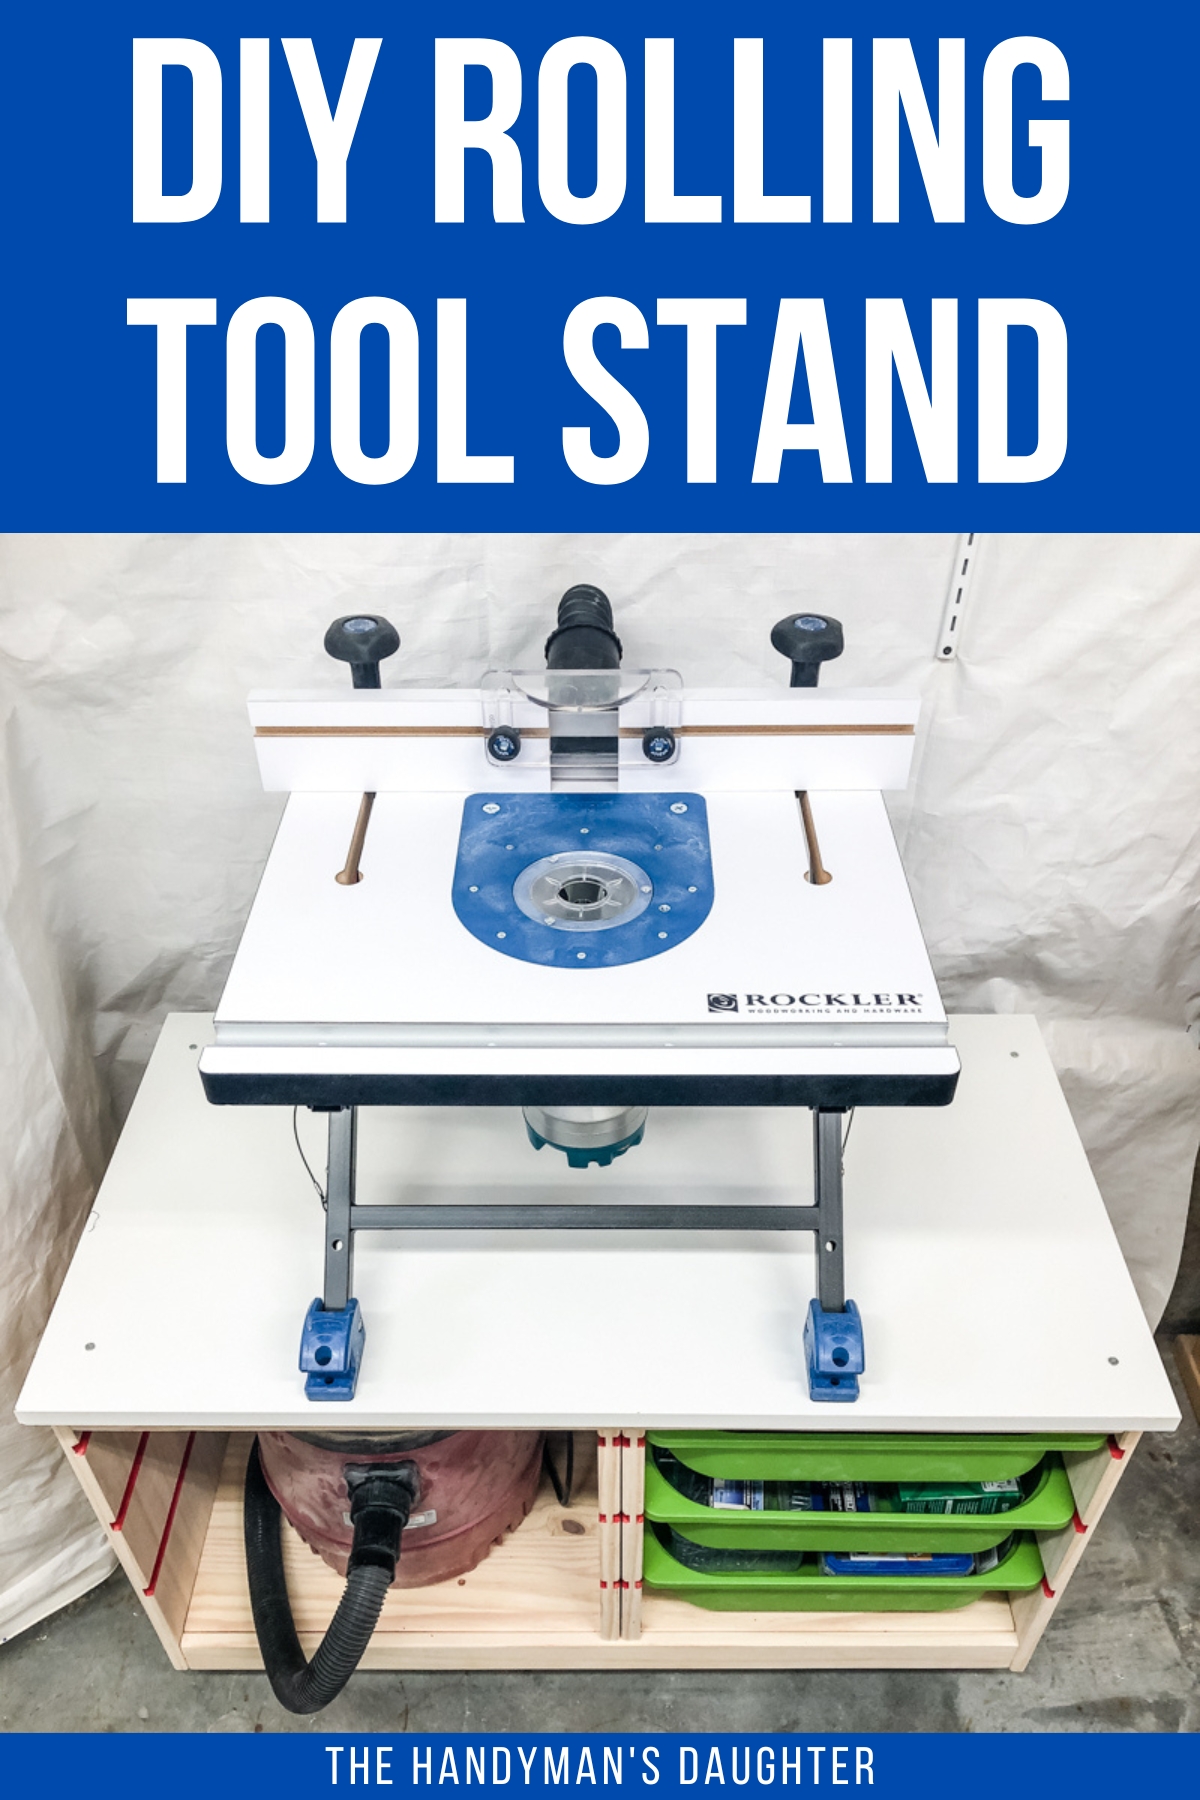
This IKEA Trofast hack takes the popular kids storage furniture to a new room of the house: the workshop! Its low profile and sturdy wooden frame makes it the perfect rolling benchtop tool stand.
This quick and easy IKEA workbench hack has room for a small shop vac, plus three storage bins on the side. Add a new plywood or melamine top to fit wider tools, and casters underneath to make it mobile.
Here's how to make it!
This post contains affiliate links for your convenience. Purchases made through these links may earn me a small commission at no additional cost to you. Please visit my disclosures page for more information.
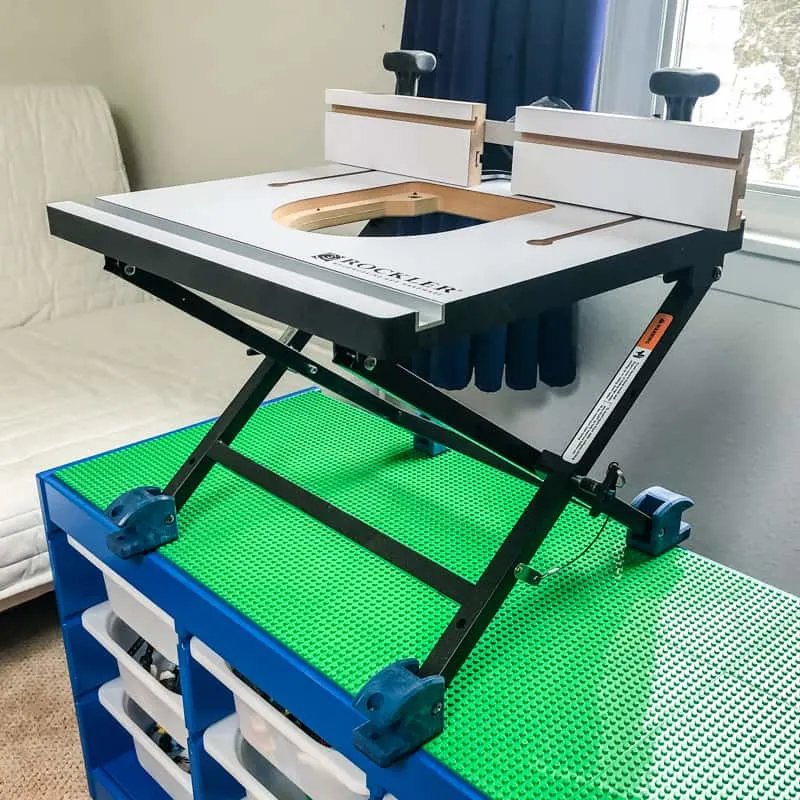
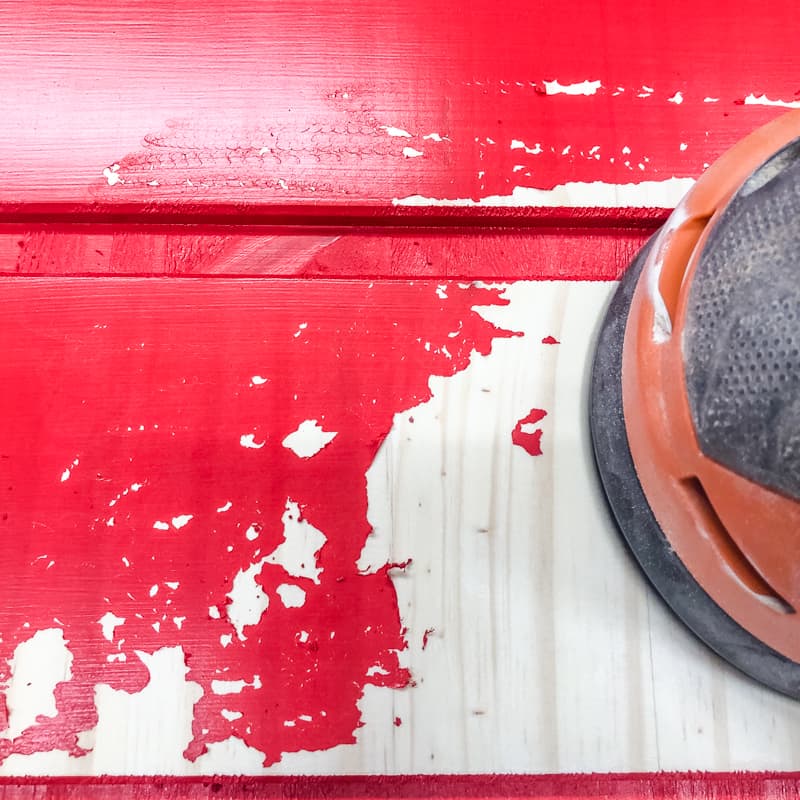
After the paint debacle with my son's IKEA Lego table, I banished the half-finished IKEA Trofast pieces to a corner of the workshop. During its week in time-out, I picked up Rockler's benchtop router table on a trip to Portland (tax-free, baby!)
After putting the router table together, I quickly realized the problem. My workbench is WAY too high, which puts the spinning bit at throat level! Never a good idea!
I started working up a plan in SketchUp for a new stand with room for a shop vac and a drawer for bits, but then I remembered the IKEA Trofast in the corner. With an inkling of an idea forming in my head, I brought the router table up to the playroom to test it out. It was a bit too narrow, but the height was perfect!

I quickly sanded off the rest of the peeling paint, although I didn't bother with the drawer grooves. The red paint was sticking pretty well in there, and shop furniture doesn't have to look pretty!
With a fresh slate, it was time for a quick IKEA workbench hack!
Materials
- Pine IKEA Trofast drawer unit
- 3" casters with brakes
- Scrap pieces of 2x4 to elevate the casters
- Kreg Jig
- Learn the difference between the Kreg Jig R3 and K5 and decide which one is right for you!
- 1 ¼" pocket hole screws
- Square
- 2' x 4' sheet of ⅛" thick hardboard
- ¾" melamine shelf board
How to Make a Rolling Benchtop Tool Stand
Test the Fit with Your Tools
I had an old shop vac that had been gathering dust under my miter saw stand since I made my miter saw dust hood and hooked it up to the dust collector. The spacing of the IKEA Trofast drawers was too narrow, but I could change that!
I assembled the bottom and sides, then tested the fit of one of the bins when inserted sideways. Now there's plenty of room on the other side for the shop vac! Mark the location of the divider on the bottom before removing it.

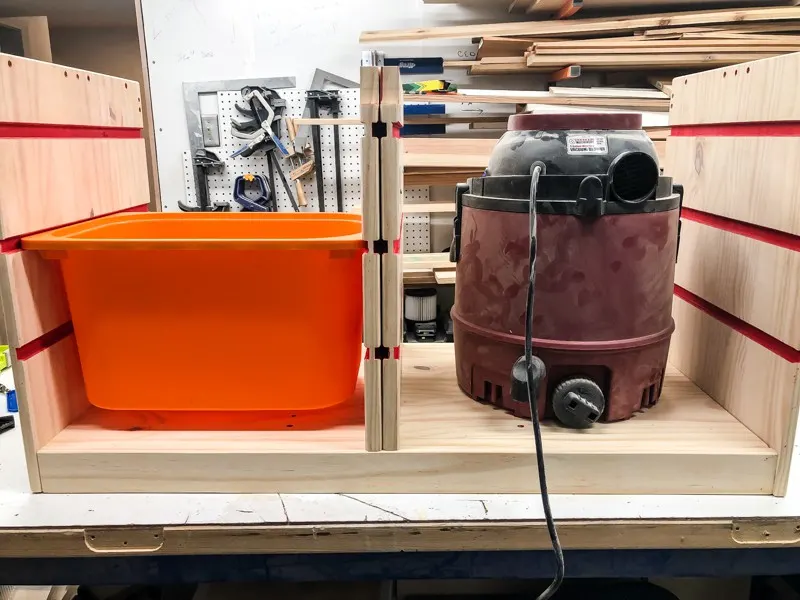
Since I would be left with an extra divider anyway, I decided to double up on the center support. I've been thinking of adding a benchtop bandsaw to my tool collection, so the extra support will keep the top from sagging under the weight.
Attach the center dividers
Since I was deviating from the original IKEA design, the dowels and screws no longer line up. Instead, I drilled pocket holes along the top and bottom.
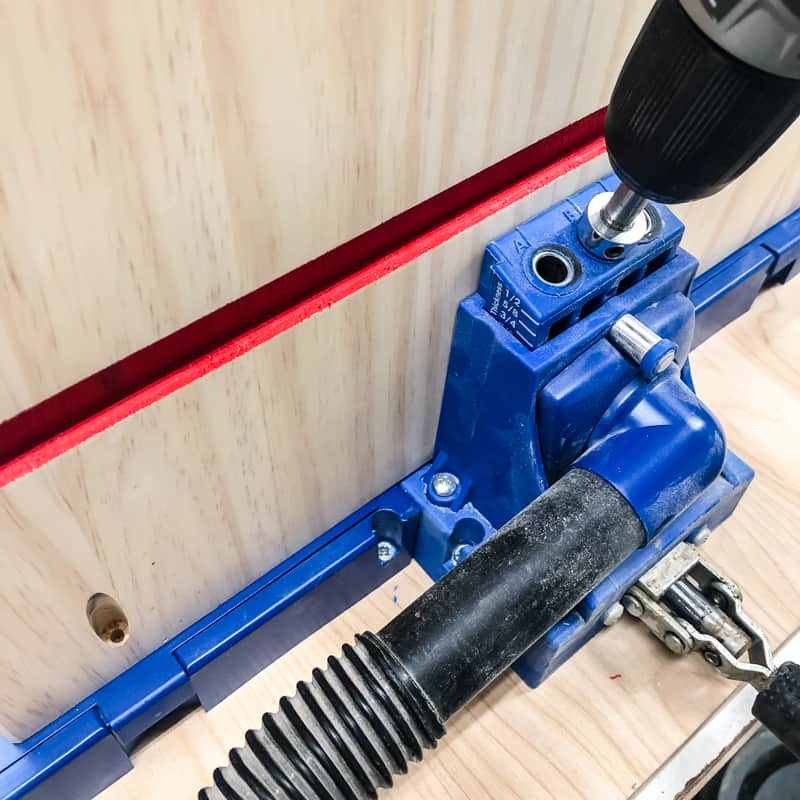
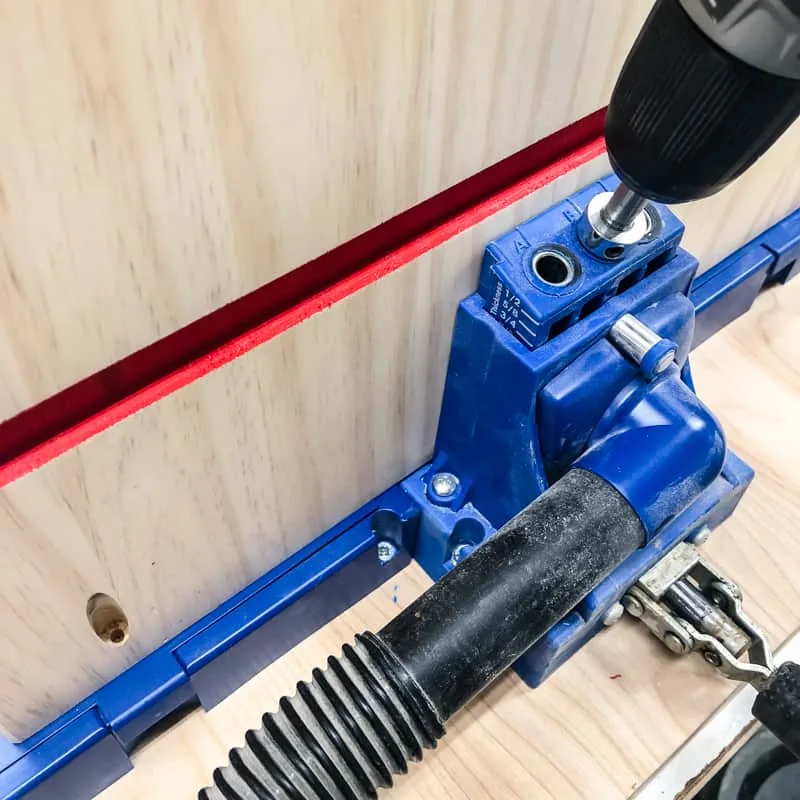
Line up the first divider with the mark you made during the test fit. Use a speed square to make sure the divider is straight both horizontally and vertically, then screw it into place with 1 ¼" pocket hole screws. Repeat for the other divider.
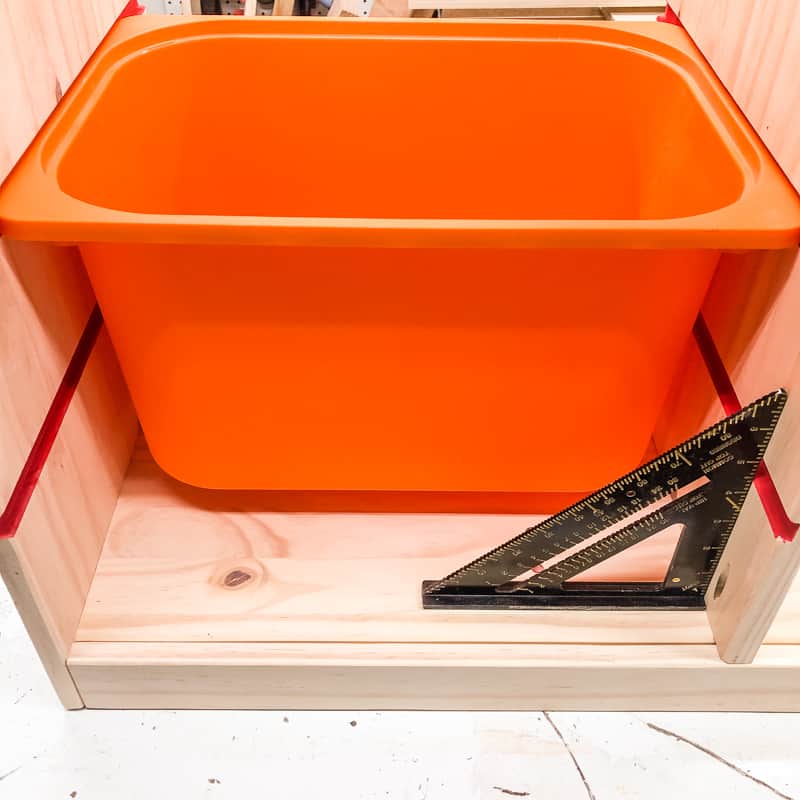

Test the fit to make sure the bins can slide easily, then finish building the rest of the IKEA Trofast as directed in their instructions.
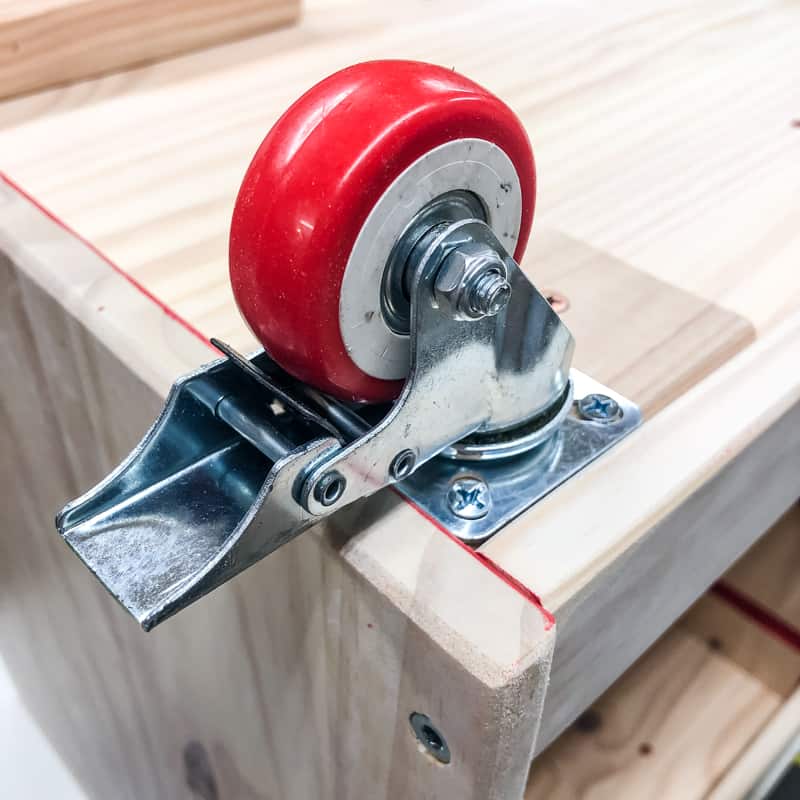
Attach Casters
The bottom of the IKEA Trofast unit is recessed, so you'll need to add a scrap block to each of the corners to attach the casters and access the brake easily.

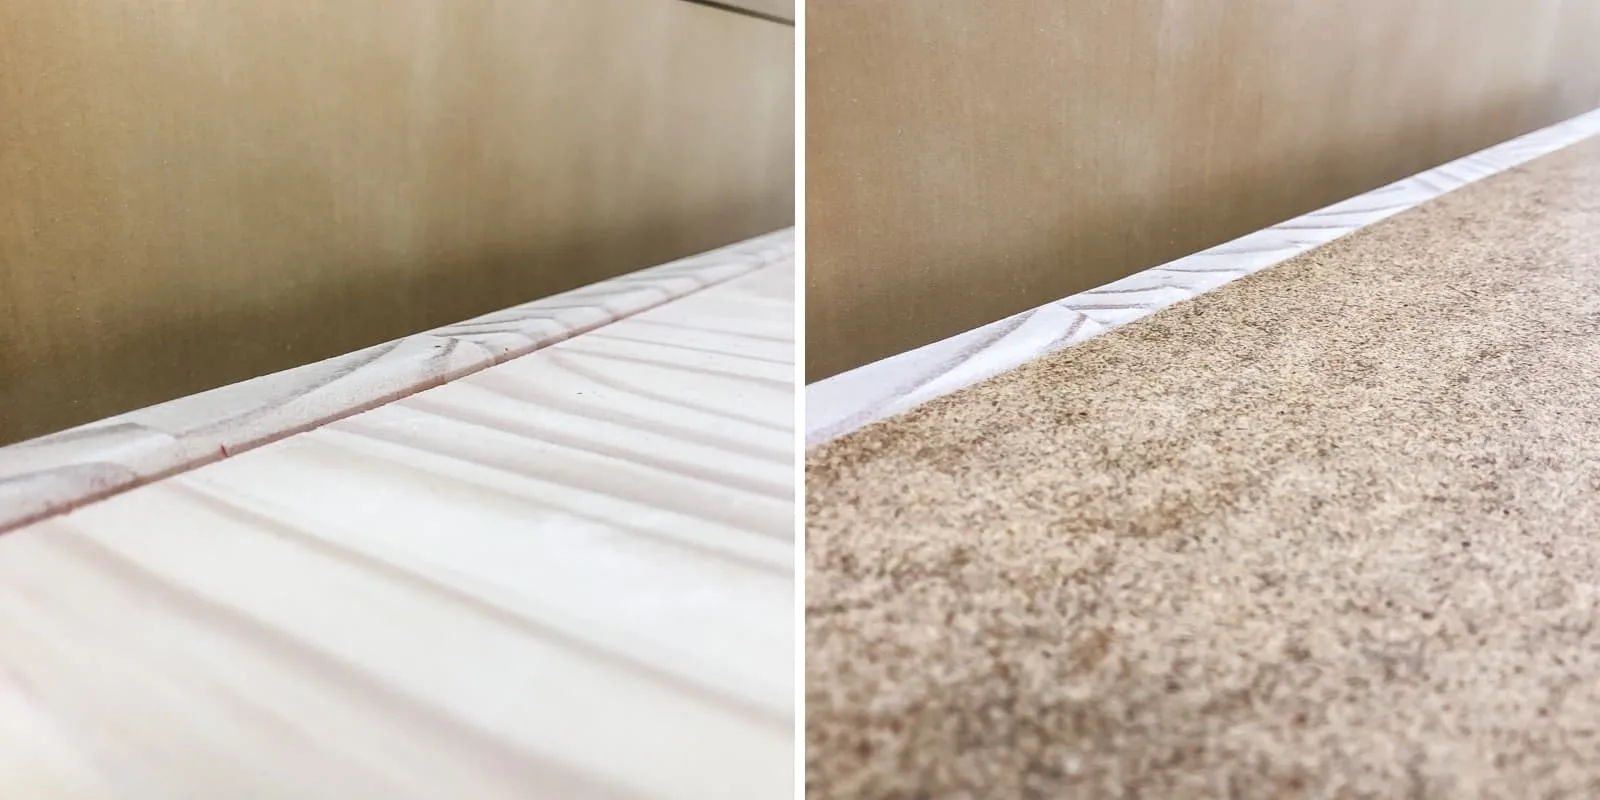
Level the top
The top of the IKEA Trofast isn't quite flat, because the ends stick up slightly. I'm planning to use a melamine sheet as the top, and it can sag over time if the center isn't supported.
To fill in that gap, I cut a piece of ⅛" hardboard to the exact dimensions of the lower portion of the top and nailed it into place. Now the top is the same height throughout!

Attach the Wider Top
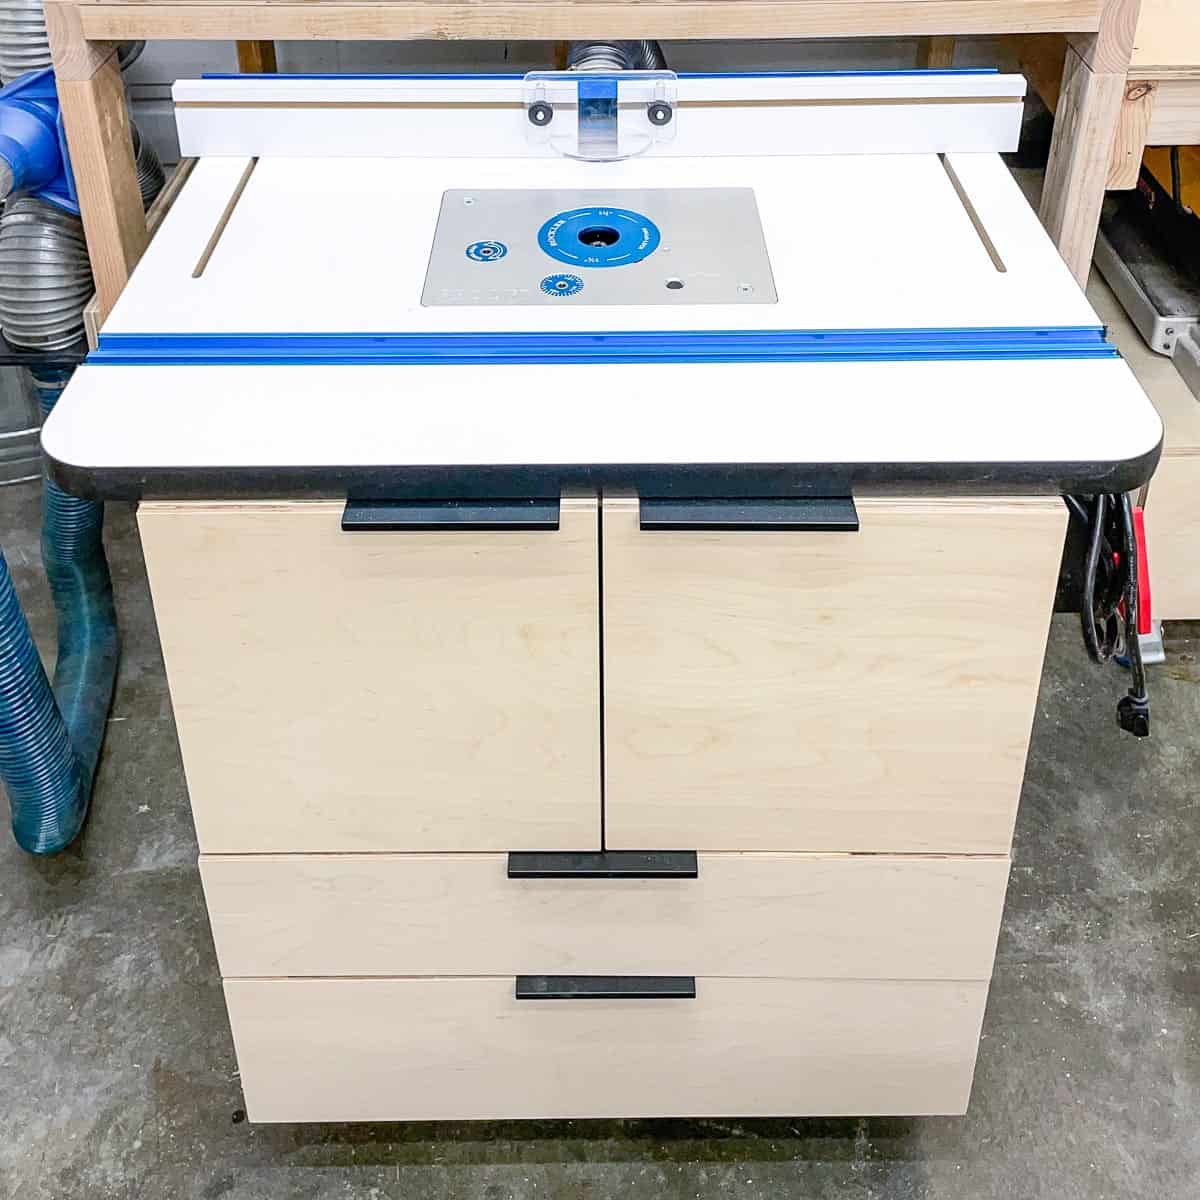
Depending on the width of the tools you plan to place on top of the rolling stand, you may not need to add a wider top. But the feet of the router table were hanging off the edge, so I wanted to add a few more inches so there's a solid surface to clamp onto.
You can find melamine sheets at the home improvement store that are pretty close to the dimensions needed. I trimmed mine to 20" x 37 ⅝", and screwed it down with countersunk 1 ¼" screws.
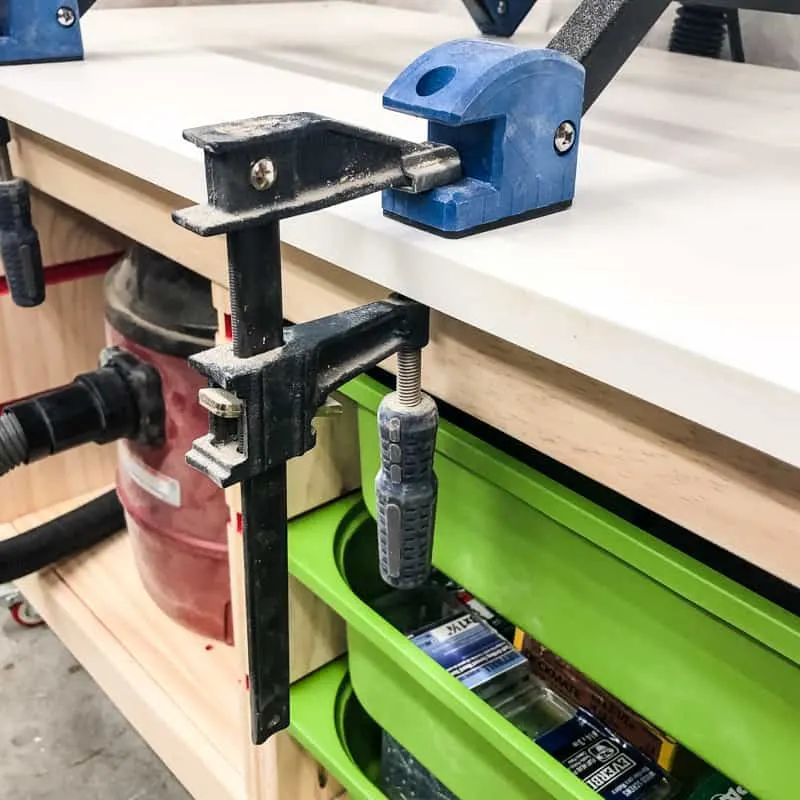
Clamp or Screw the Benchtop Tools to the Stand
The extra width from the new top gives me a bit of overhang to clamp the router table into place. You could also screw it down for a more permanent solution, but I wanted the flexibility to move it over when I add more tools.

I'm pretty excited about this IKEA workbench hack! Now I have a rolling tool stand that sits at the perfect height for using the router table and other tools safely.
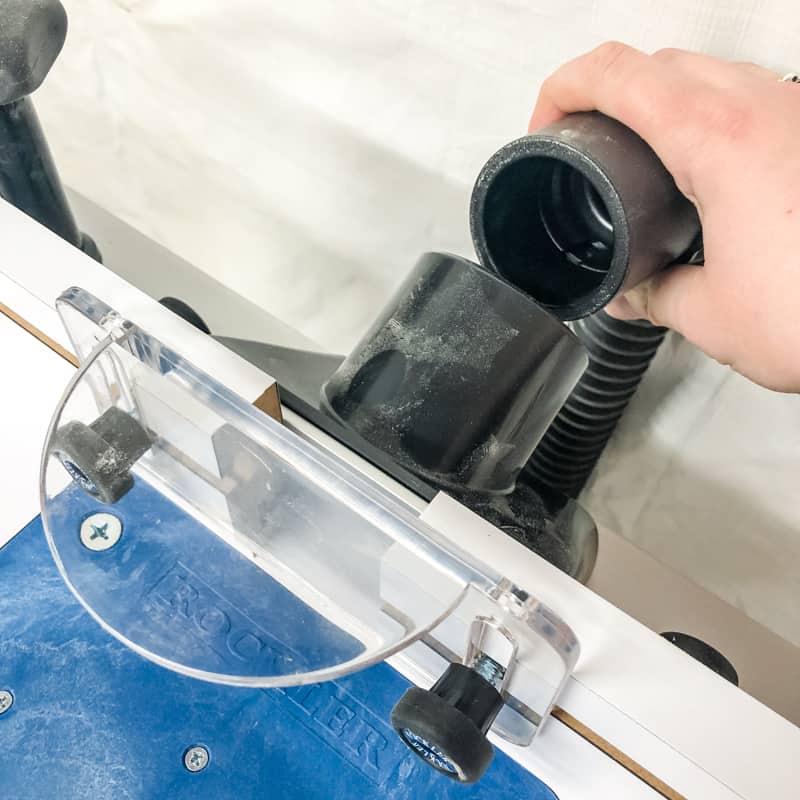
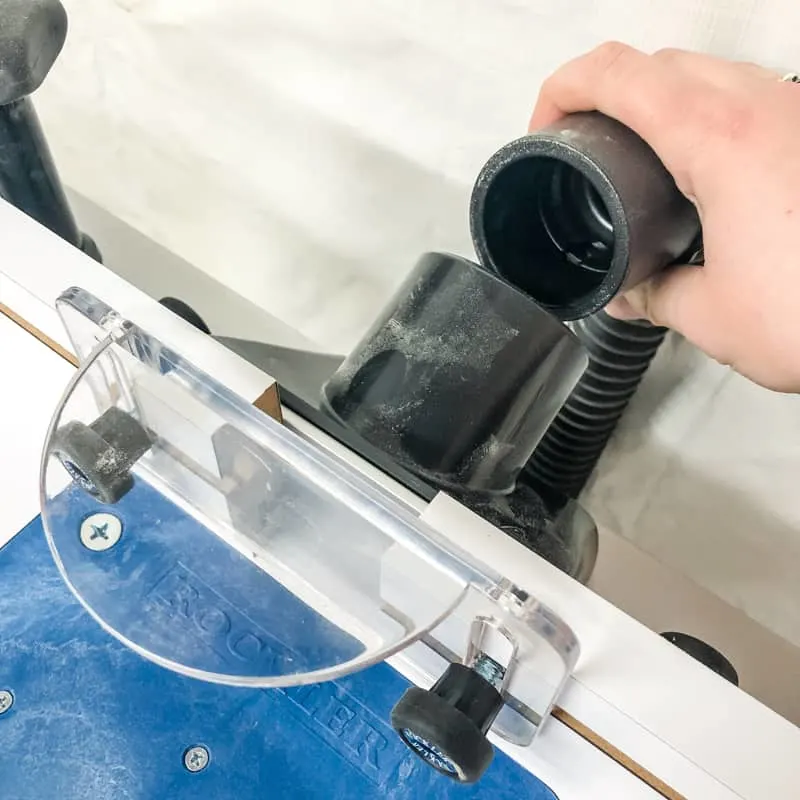
The shop vac underneath is connected to the router table with the Rockler small hose dust port. It's easy to pull out and switch to another tool.
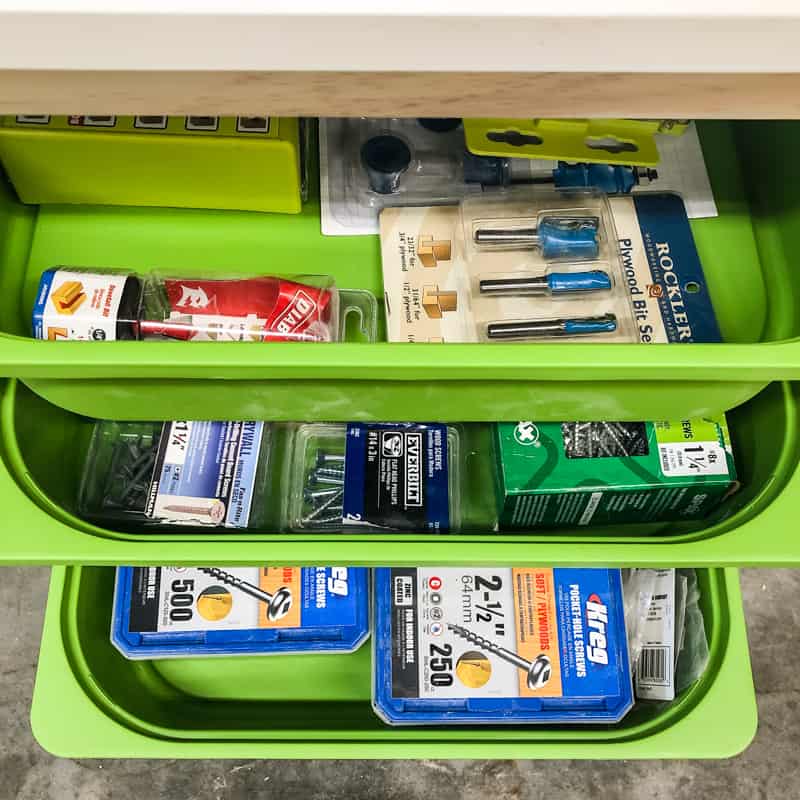
I stole three Trofast bins from my son's playroom to slide into the other side of the workbench. One holds all the router bits and tools, and the other two keep wood screws and Kreg pocket hole screws in one spot!

If you follow me over on Instagram, you might have seen the other IKEA piece that I converted into a drill press stand. They fit perfectly together in the space I cleared out in the workshop!
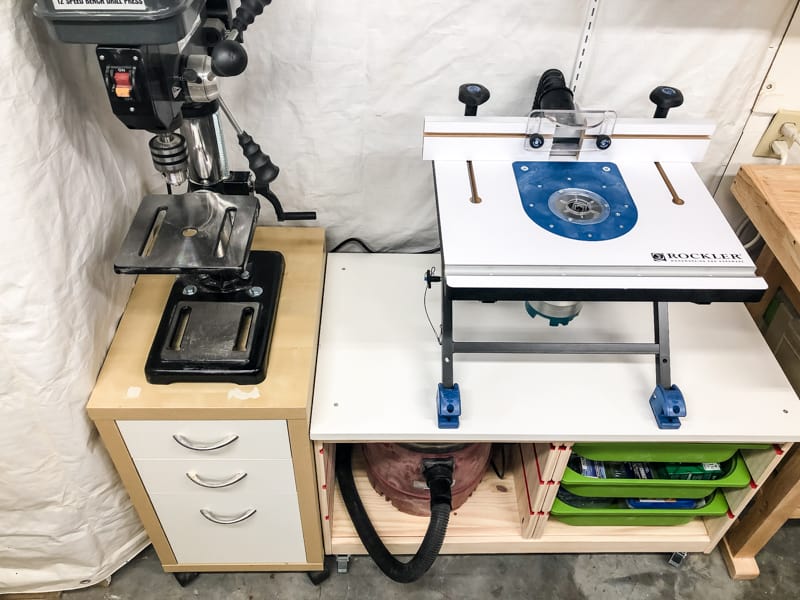
UPDATE: I decided to upgrade from my little collapsible router table to a full size router table that fits under my new miter saw station. This rolling tool stand is now used for my small jointer, so it's still an important part of my workshop!
Check out these other workshop storage ideas!