Tired of sawdust all over your workshop or garage? Make this simple DIY miter saw dust hood and hook it up to your shop vac or dust collector to keep everything clean!

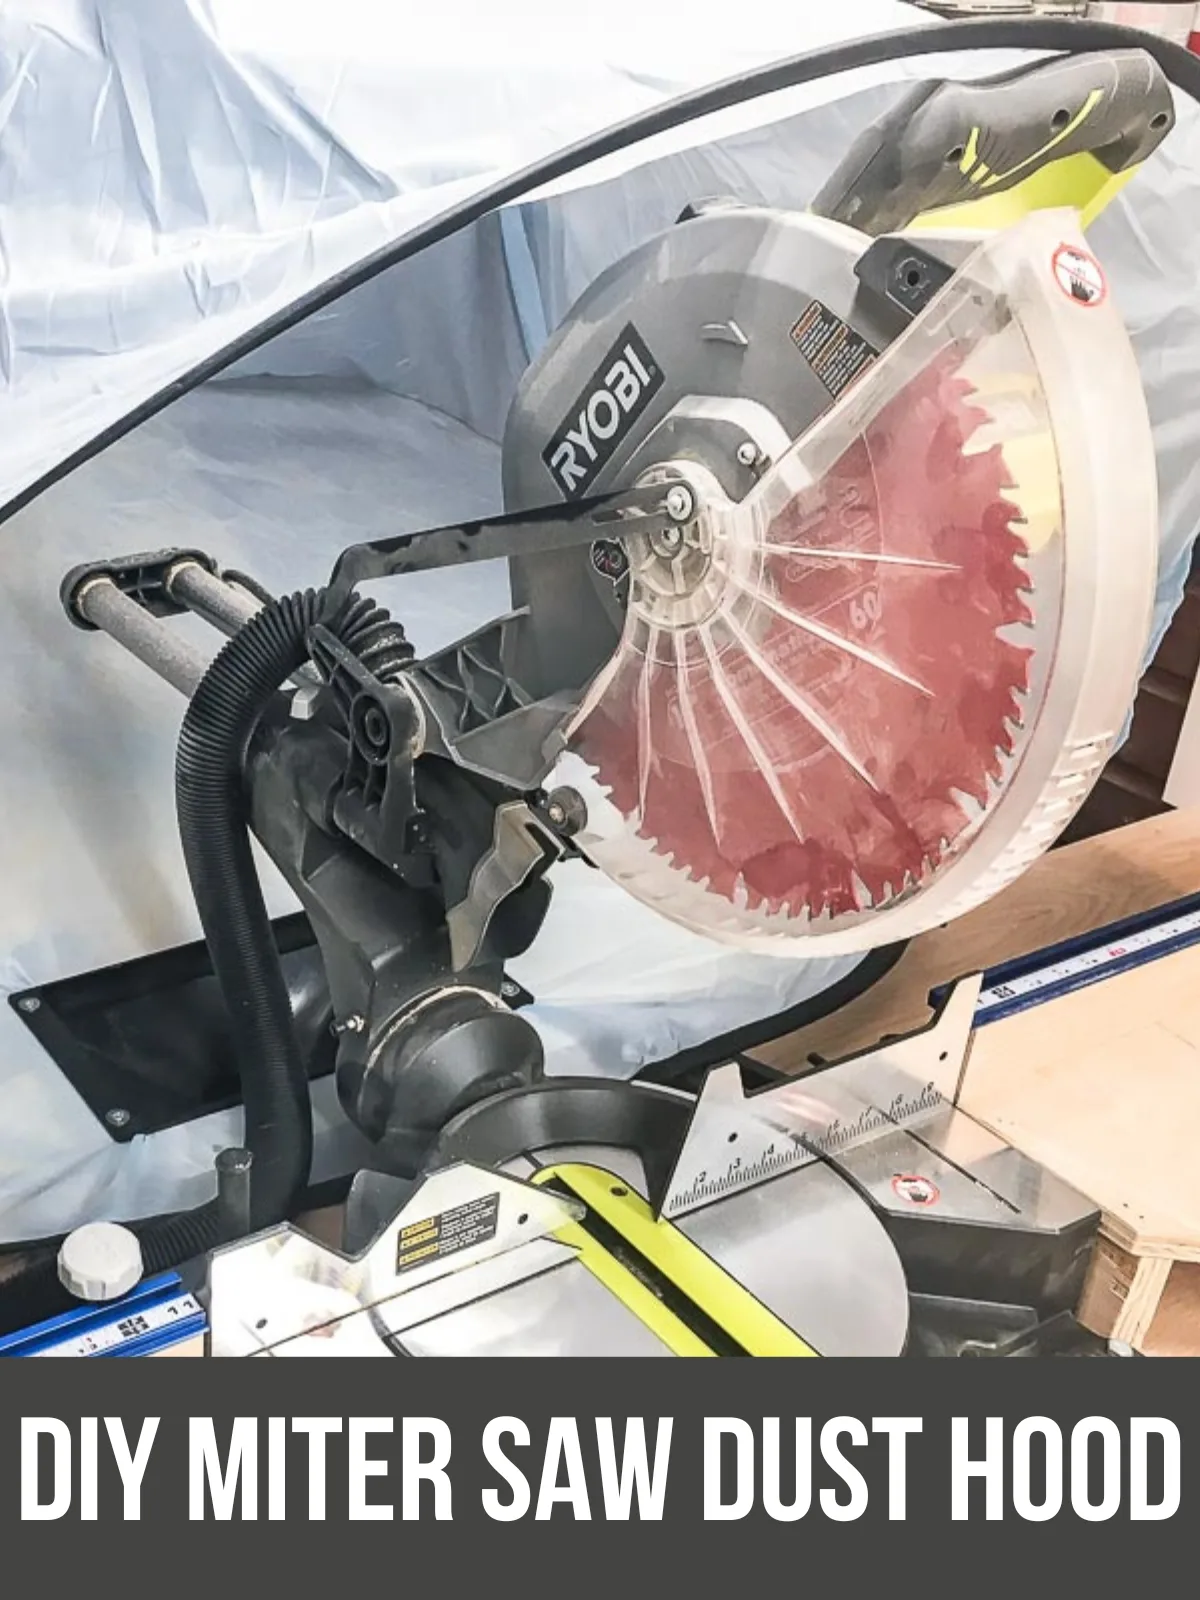
One of the biggest problems in any workshop is sawdust. The miter saw is the worst offender, creating piles of it behind my miter saw stand.

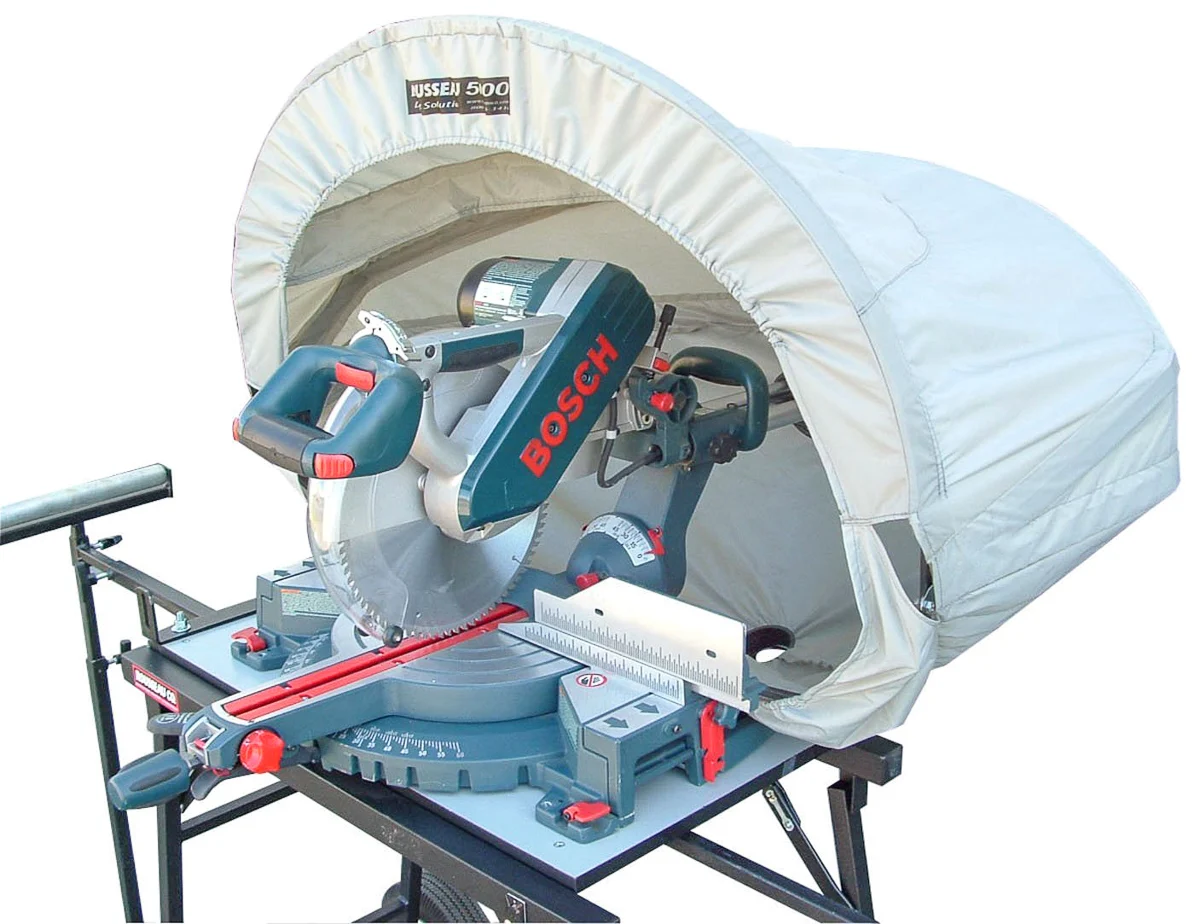
In a previous post, I rounded up the best miter saw dust collection ideas I could find. But they were all either too expensive, too labor intensive to make, or didn't work with my sliding miter saw.
This post contains affiliate links for your convenience. Purchases made through these links may earn me a small commission at no additional cost to you. Please visit my disclosures page for more information.
I liked the idea of a fabric dust hood, which is lightweight, flexible and captures any dust that shoots out the back of the saw. But ones like this are way out of my budget!

But that shape reminded me of something else . . . a baby tent! You've probably seen one in use at the beach or park. It protects your baby from the sun and prevents them from doing baby-like things such as eating grass or sand.
I settled on this simple, inexpensive tent (UPDATE: Unfortunately, the exact tent I used is no longer available. This one and this one are both similar in size and shape, so they should work the same way).
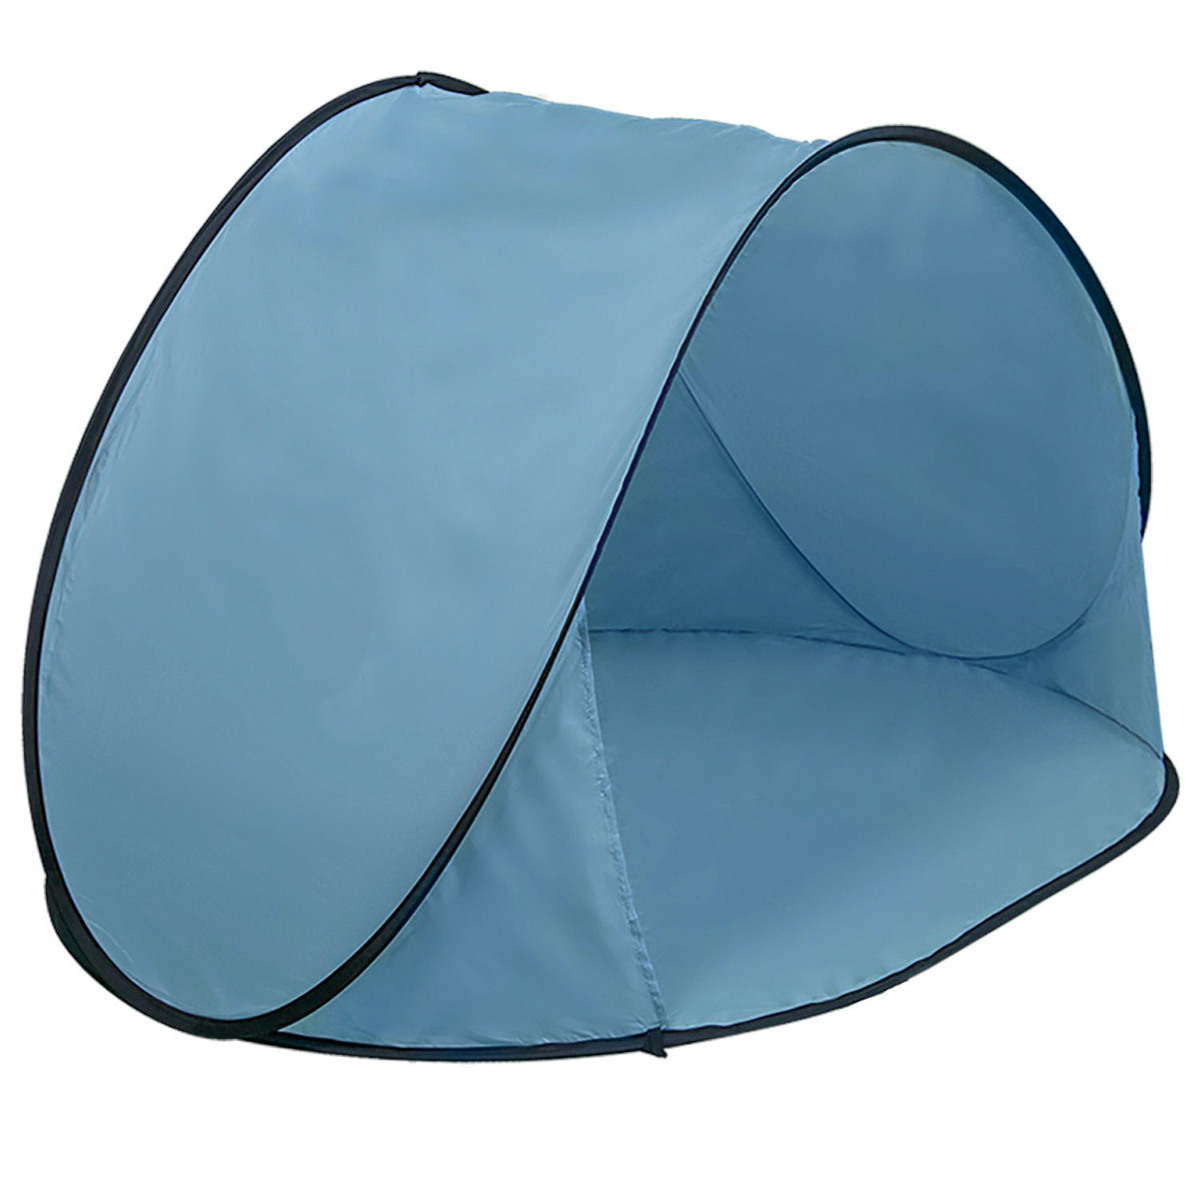

Any baby tent without a "window" screen will do! With some scrap wood and a few dust collector accessories, I turned it into the perfect miter saw dust hood!
Materials Needed
- Baby tent
- Scrap plywood
- Jigsaw
- Mini Gulp sawdust funnel
- 4" wide dust collection hose
- Dust Right Small Port Hose Kit (optional, but the hose fits perfectly on my Ryobi miter saw dust port!)
- 4" and 2 ½" Y-fitting
- 4" hose clamps
Build the Platform
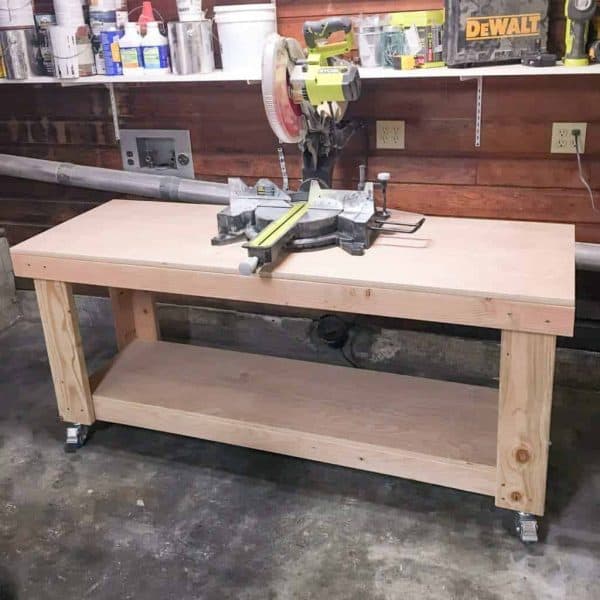
Start by creating a platform for the tent to rest on. This will be attached to the back of my miter saw stand.
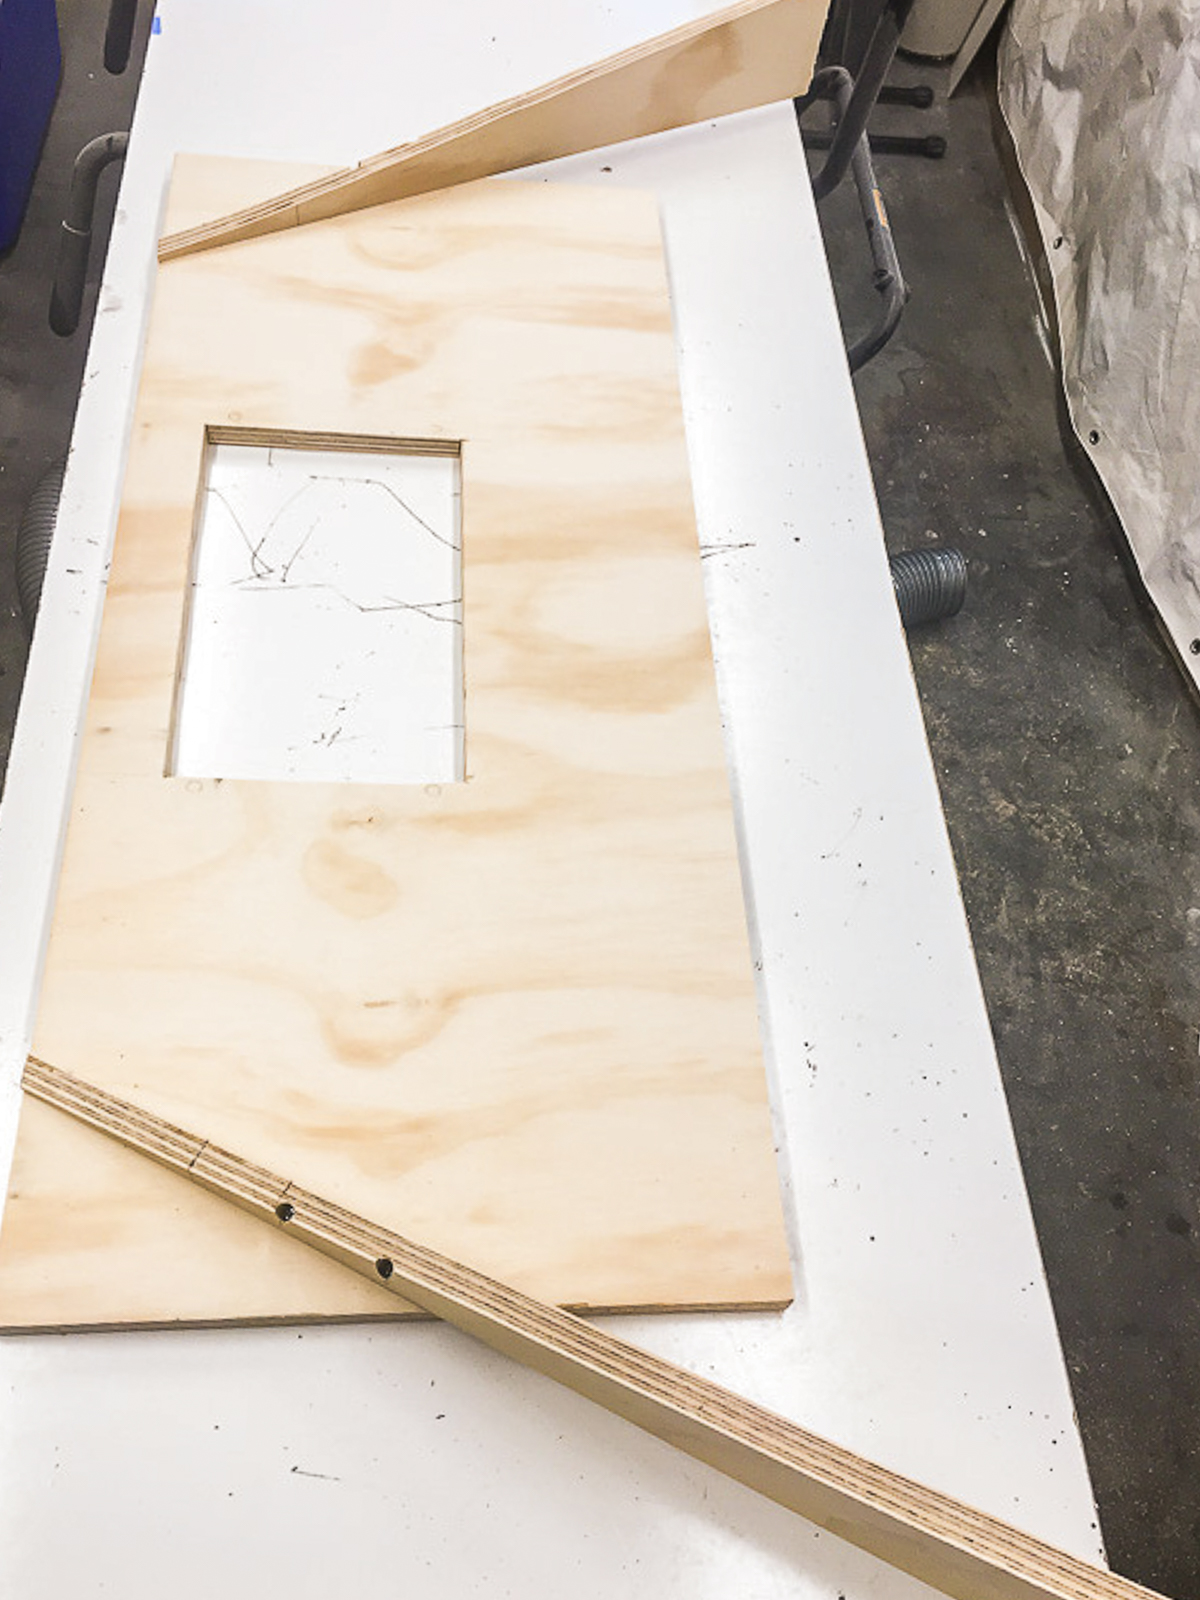
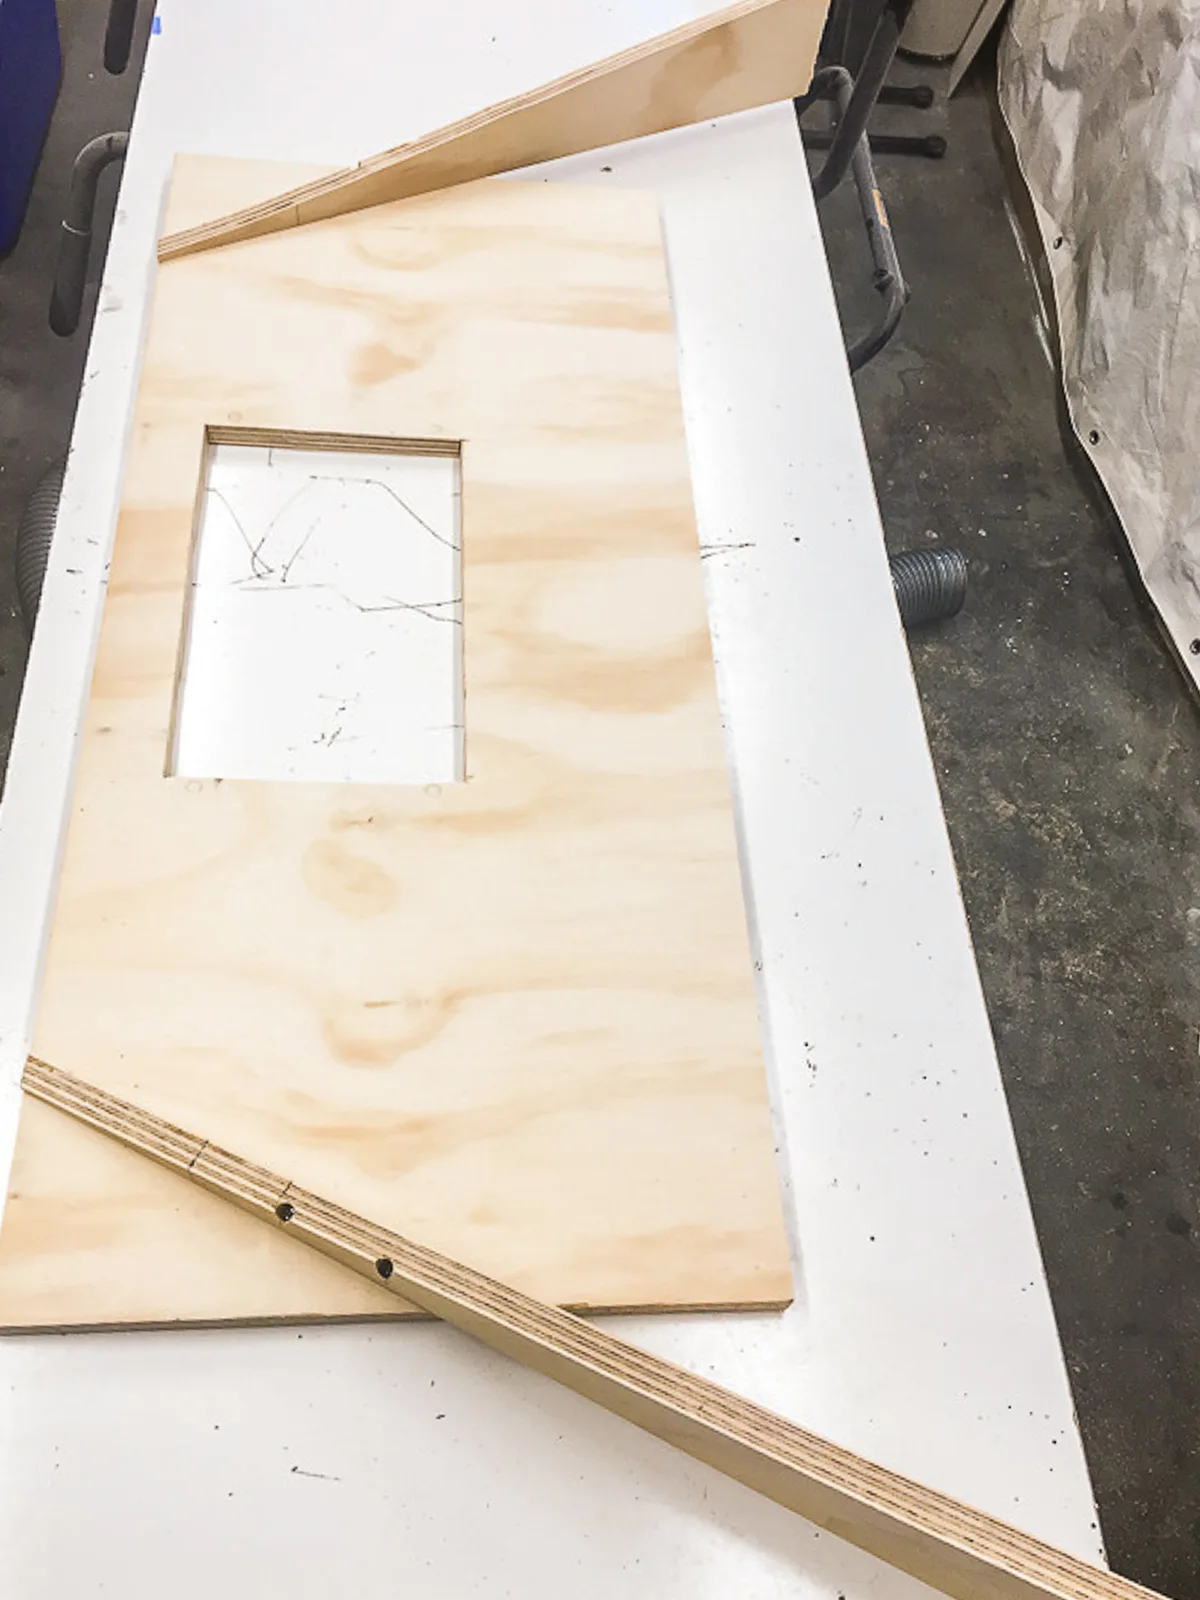
I scrounged up a piece of scrap plywood that's approximately the width of the tent opening and about 1 ½ feet deep. It will overlap the miter saw stand by 2", so I marked the hole for the dust funnel starting at that point.

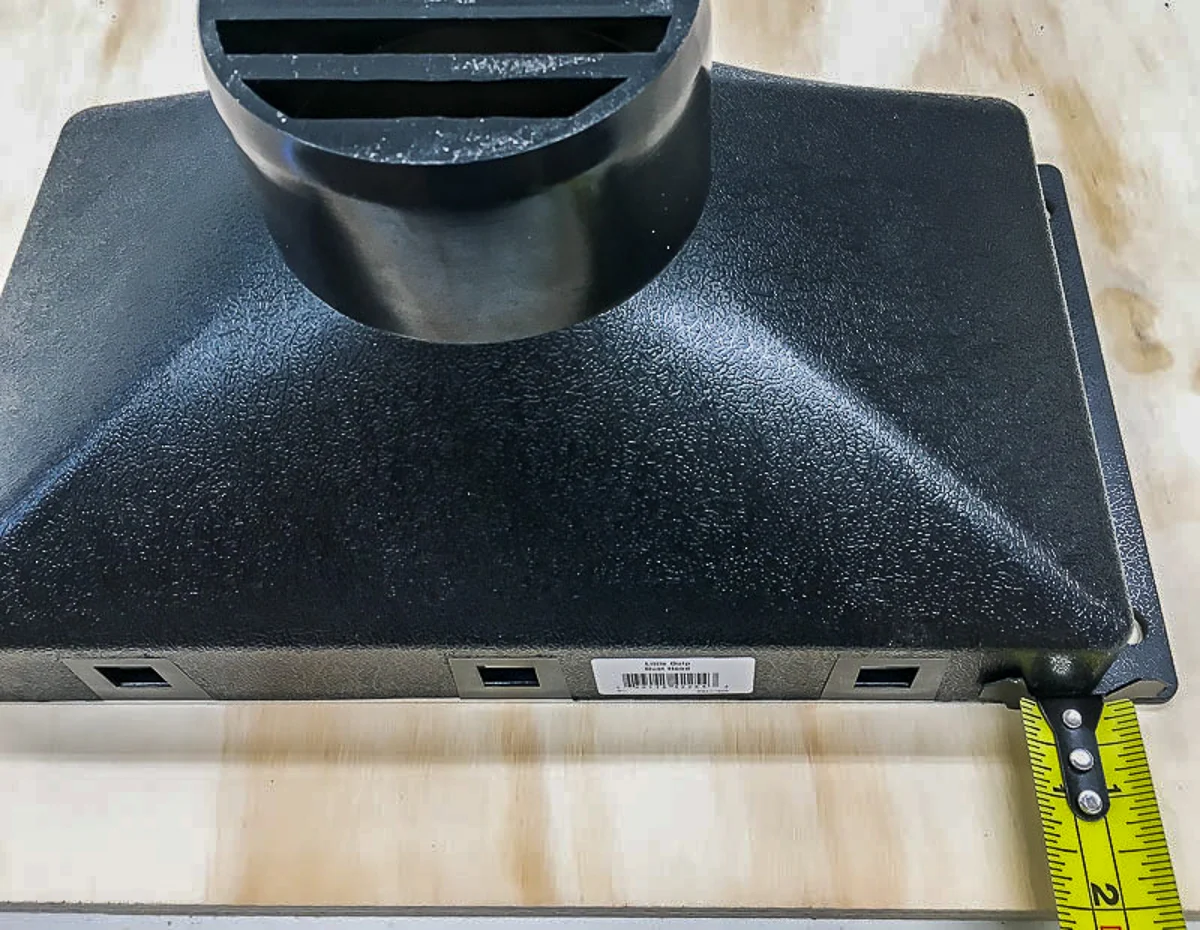
Cut out a hole for the dust funnel with a jigsaw, and test the fit. But don't attach it to the platform just yet!
I wanted the tent to rest at an angle, to allow the sawdust to fall into the dust funnel in the middle. These triangular scraps of plywood from my rocket bookshelf were pulled out of the trash and put to good use!
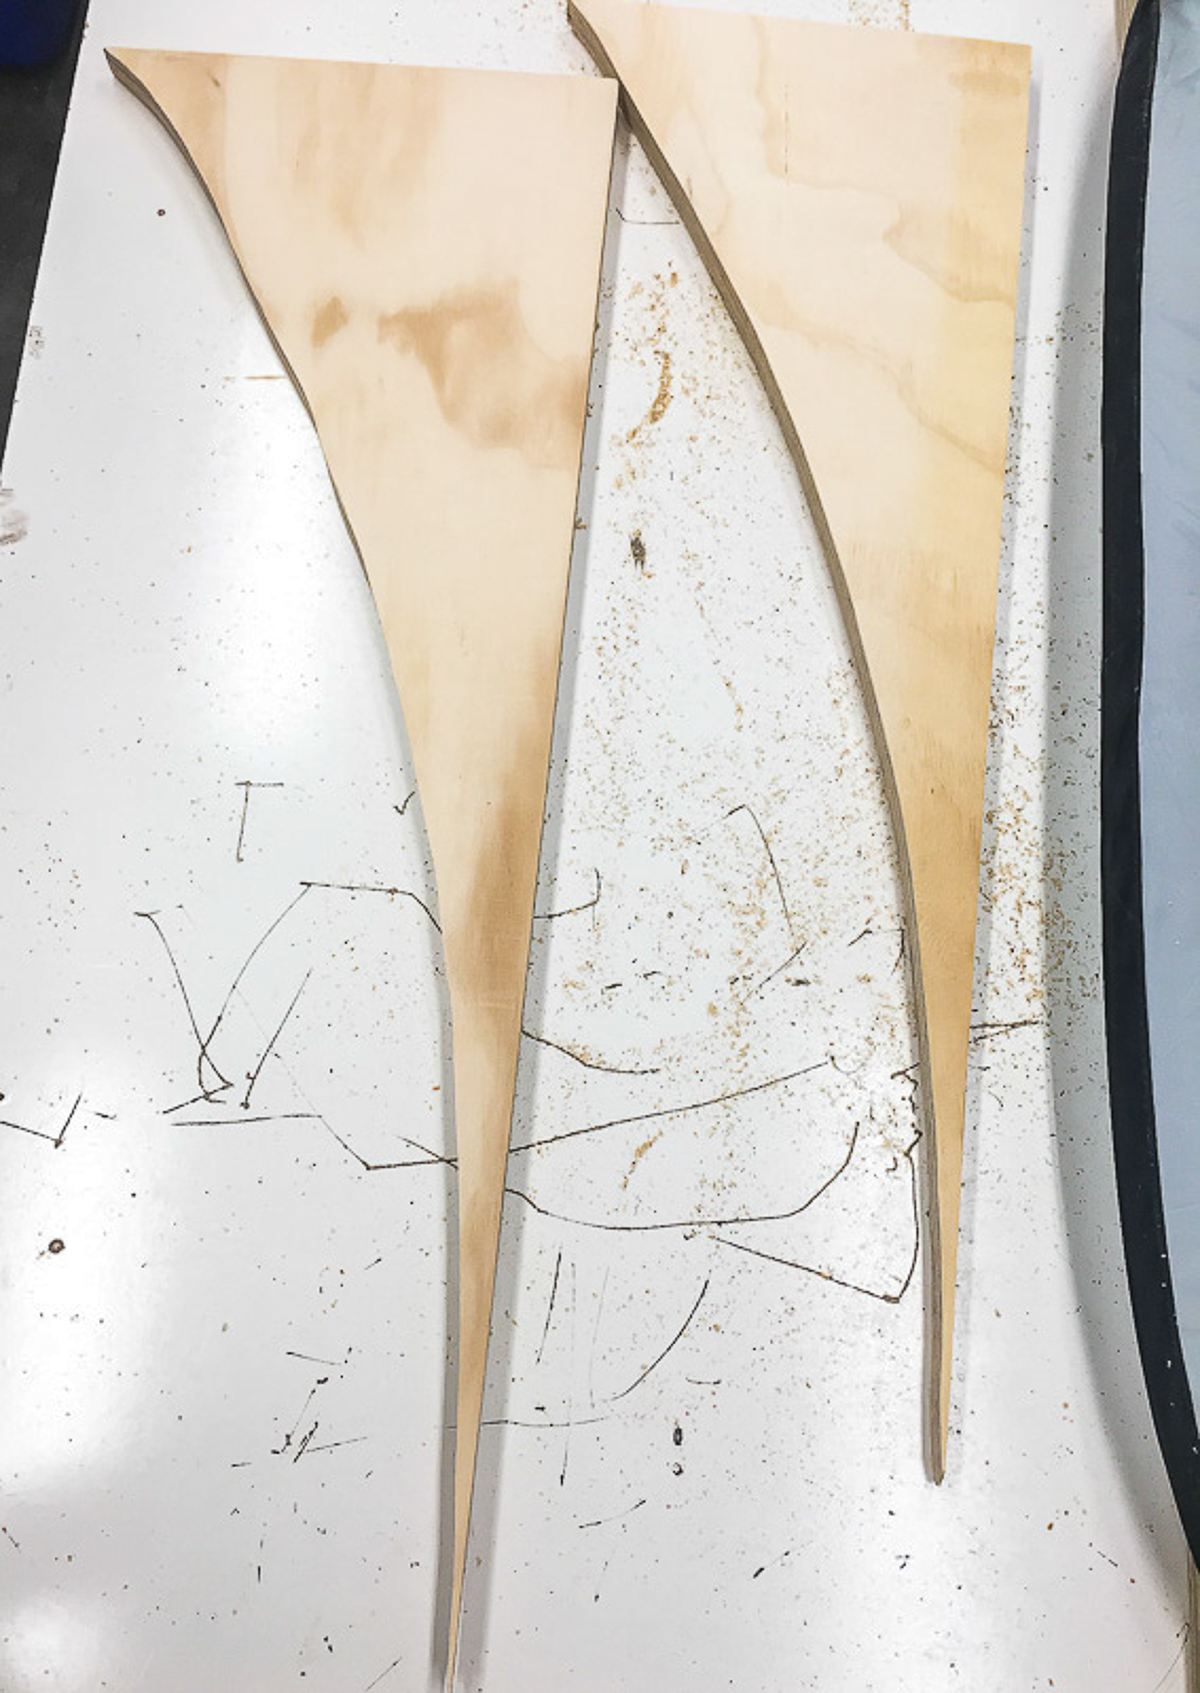
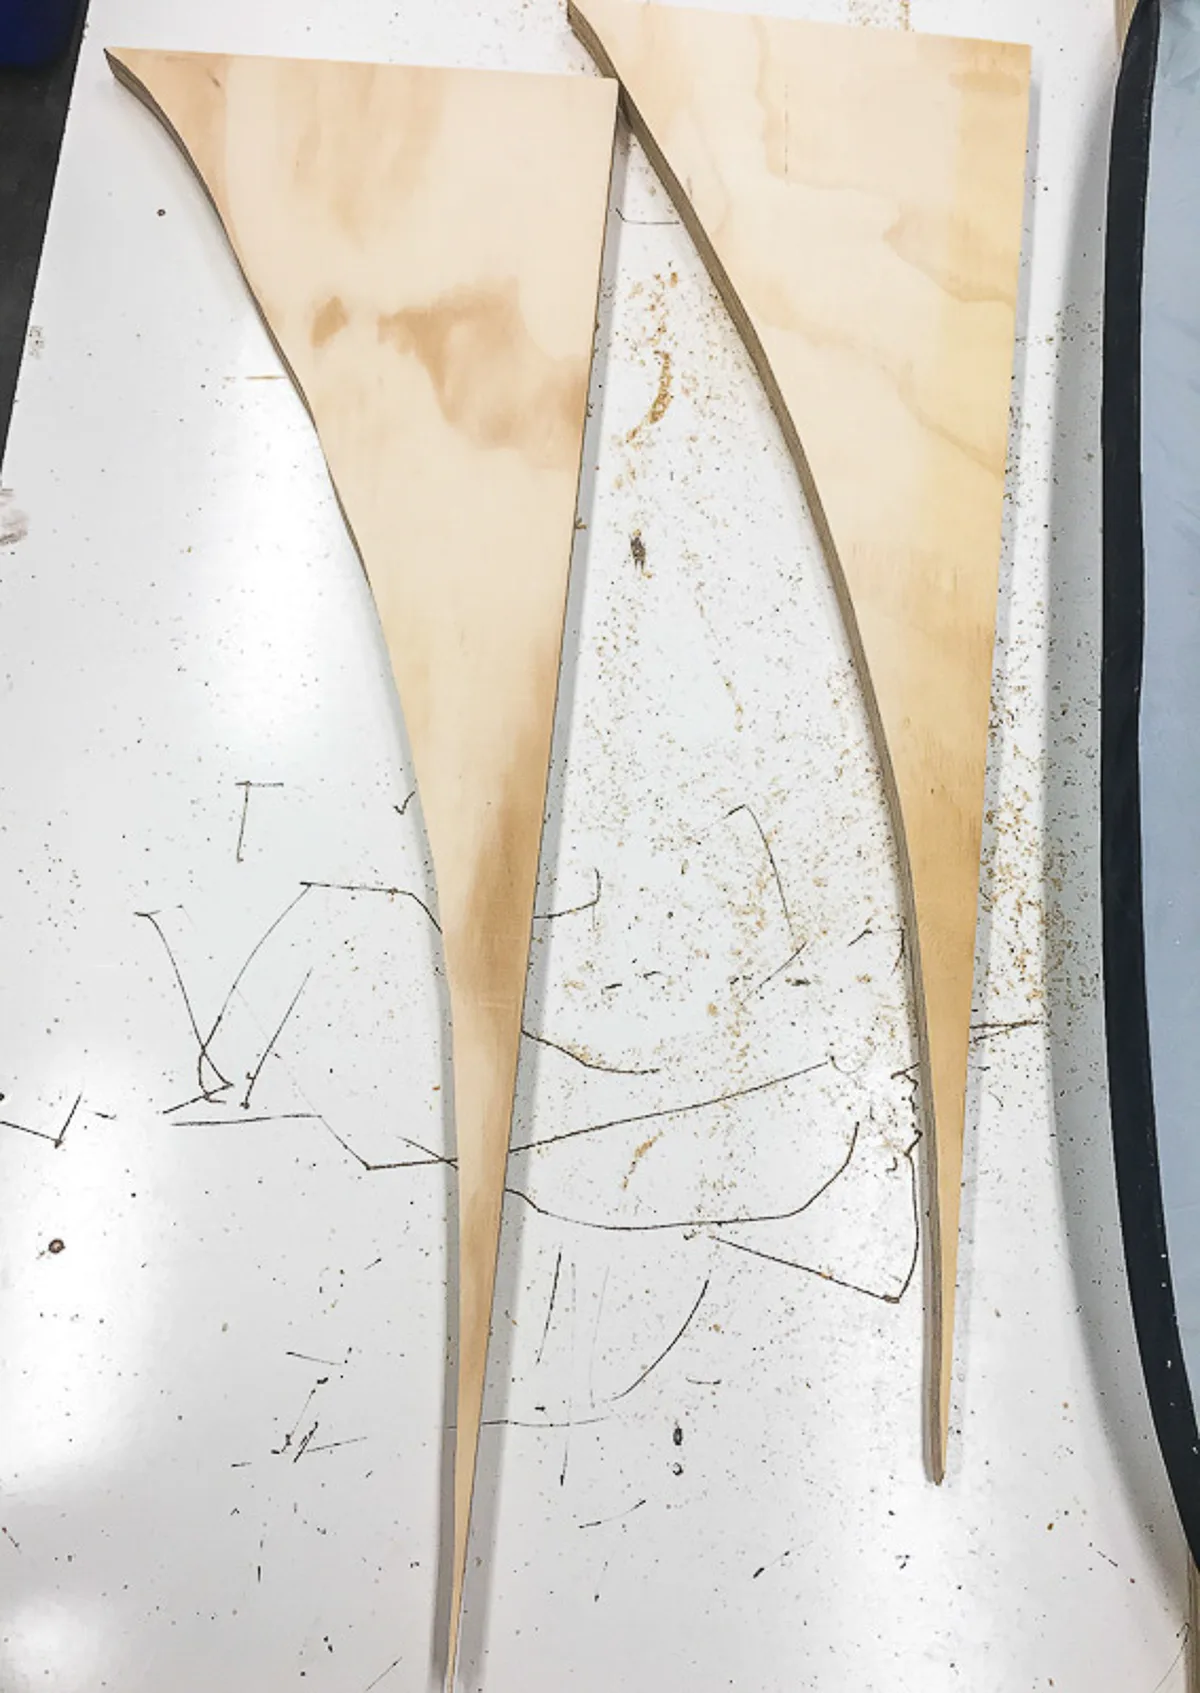
I clamped the platform to the edge of my workbench and placed the tent on top. Then I slid the angled pieces underneath to prop up the back. Play around with the position of these pieces so the tent is fully supported and not sagging.
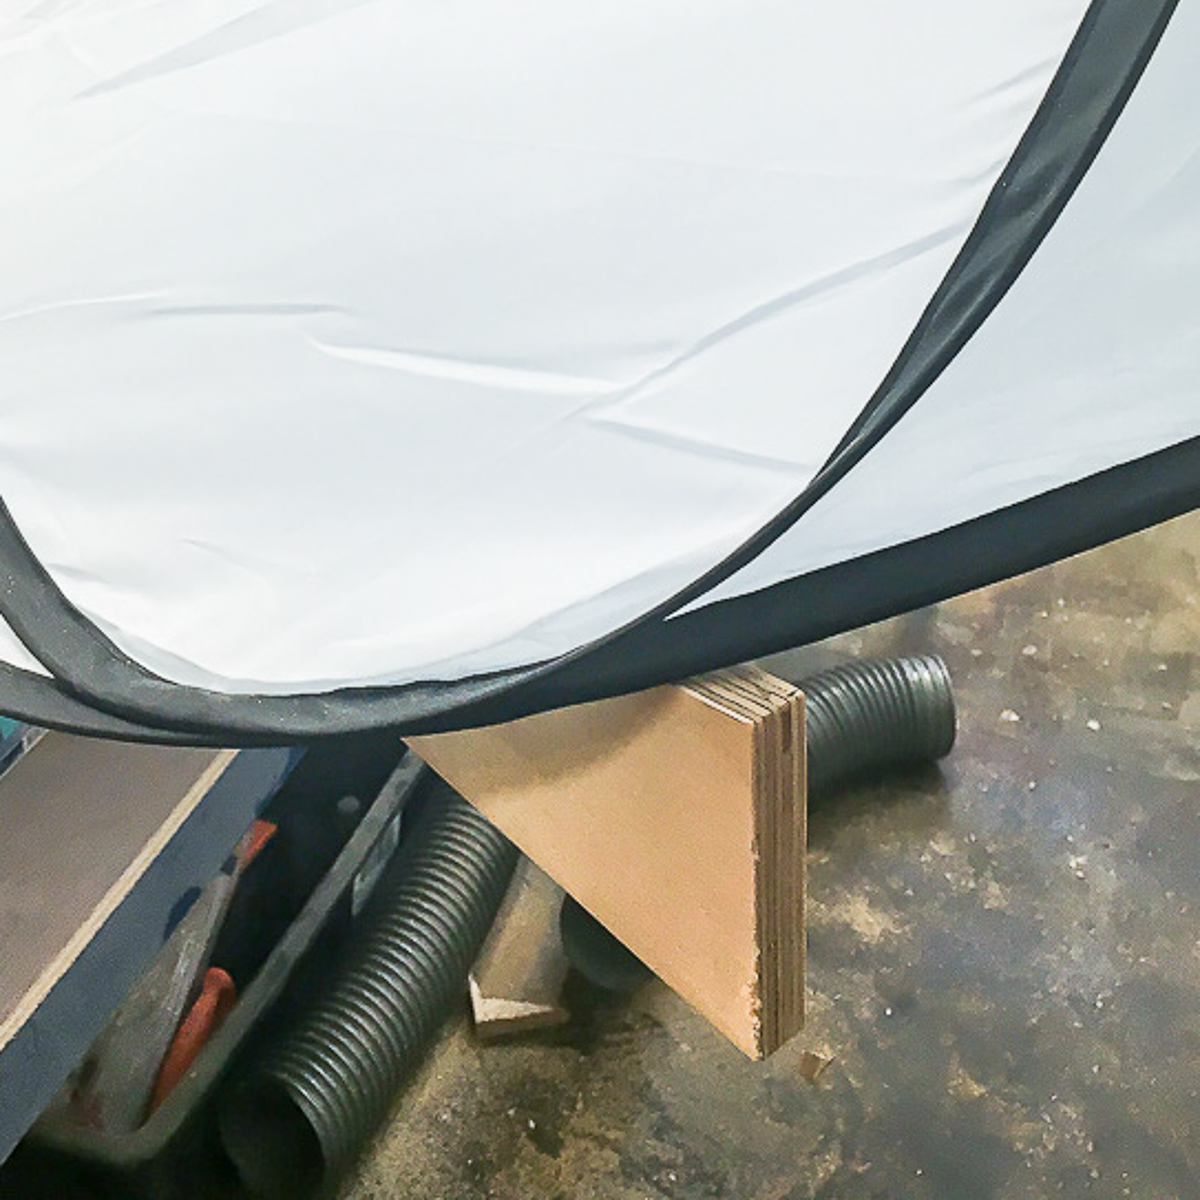

Once I got the angle I wanted, I marked their positions on the platform. Drill a couple of pocket holes in each angled piece, or attach them from the underside with longer screws.
Attach the Platform to the Miter Saw Stand
Line up the platform along the edge of your miter saw stand, making sure the dust funnel is centered behind the saw. Then screw it into place.

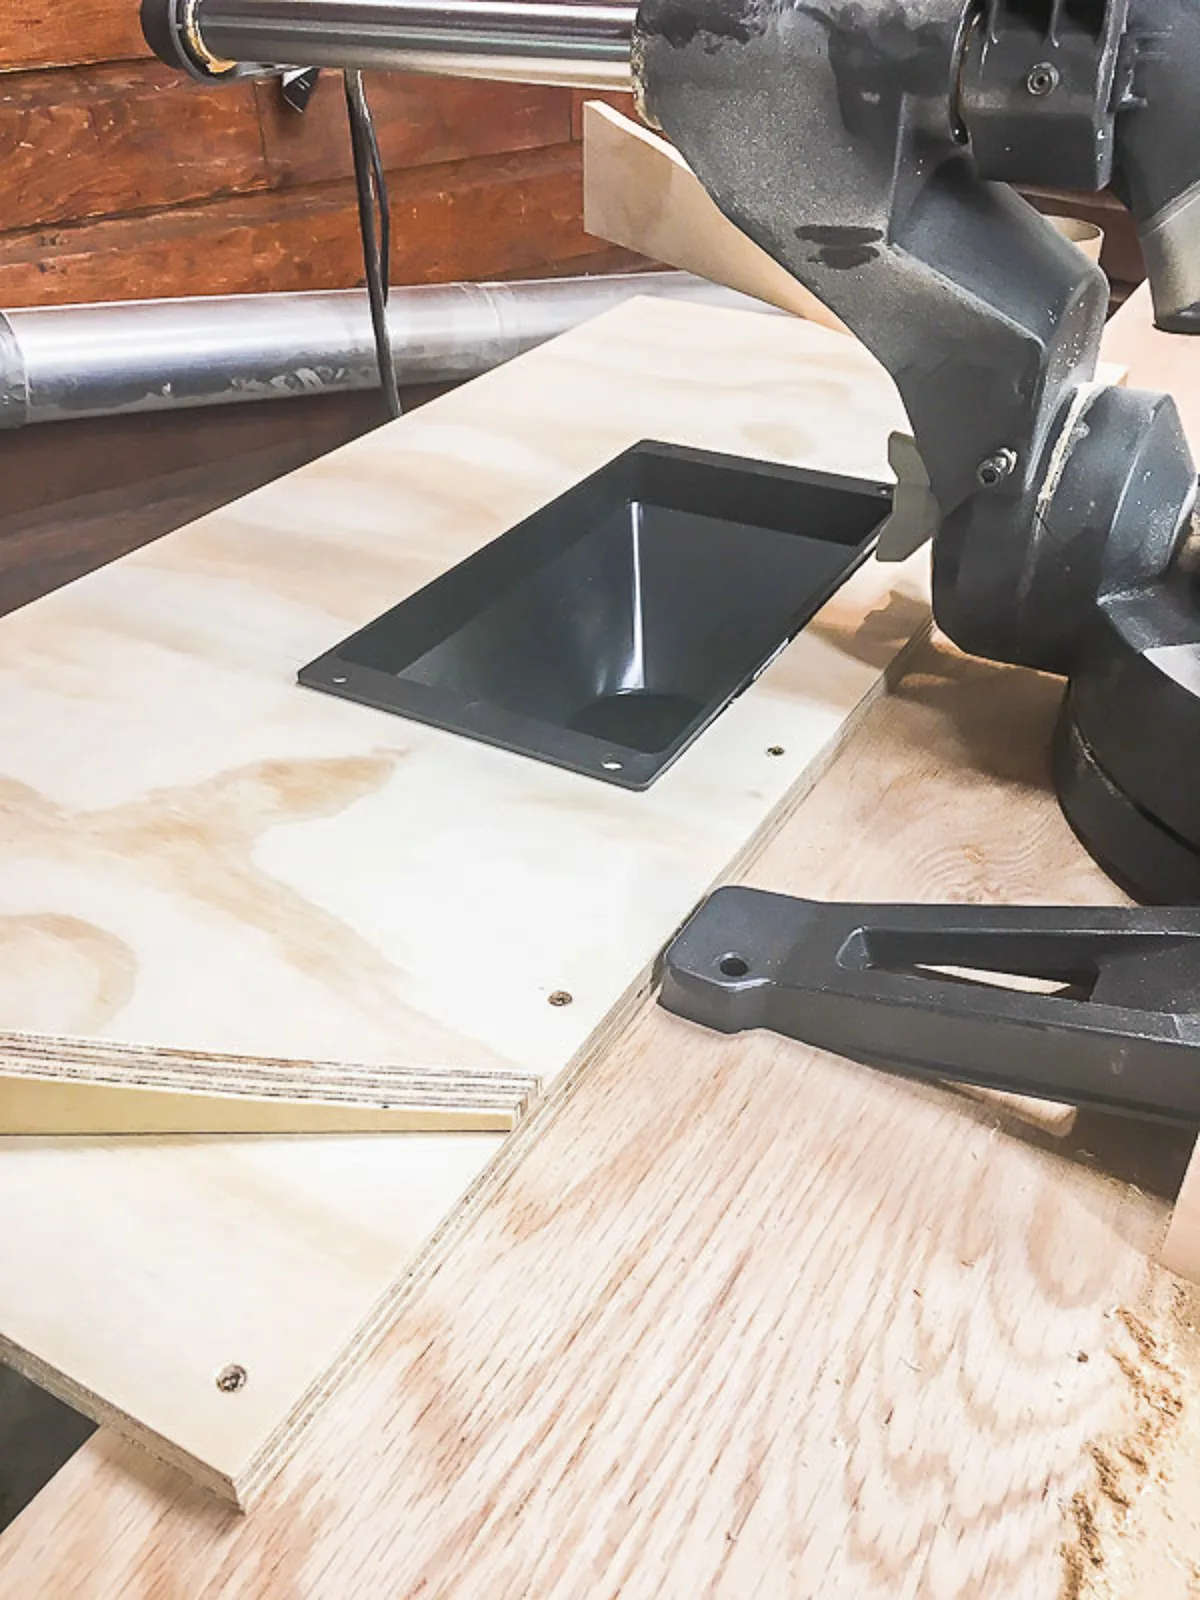
Add the Dust Funnel
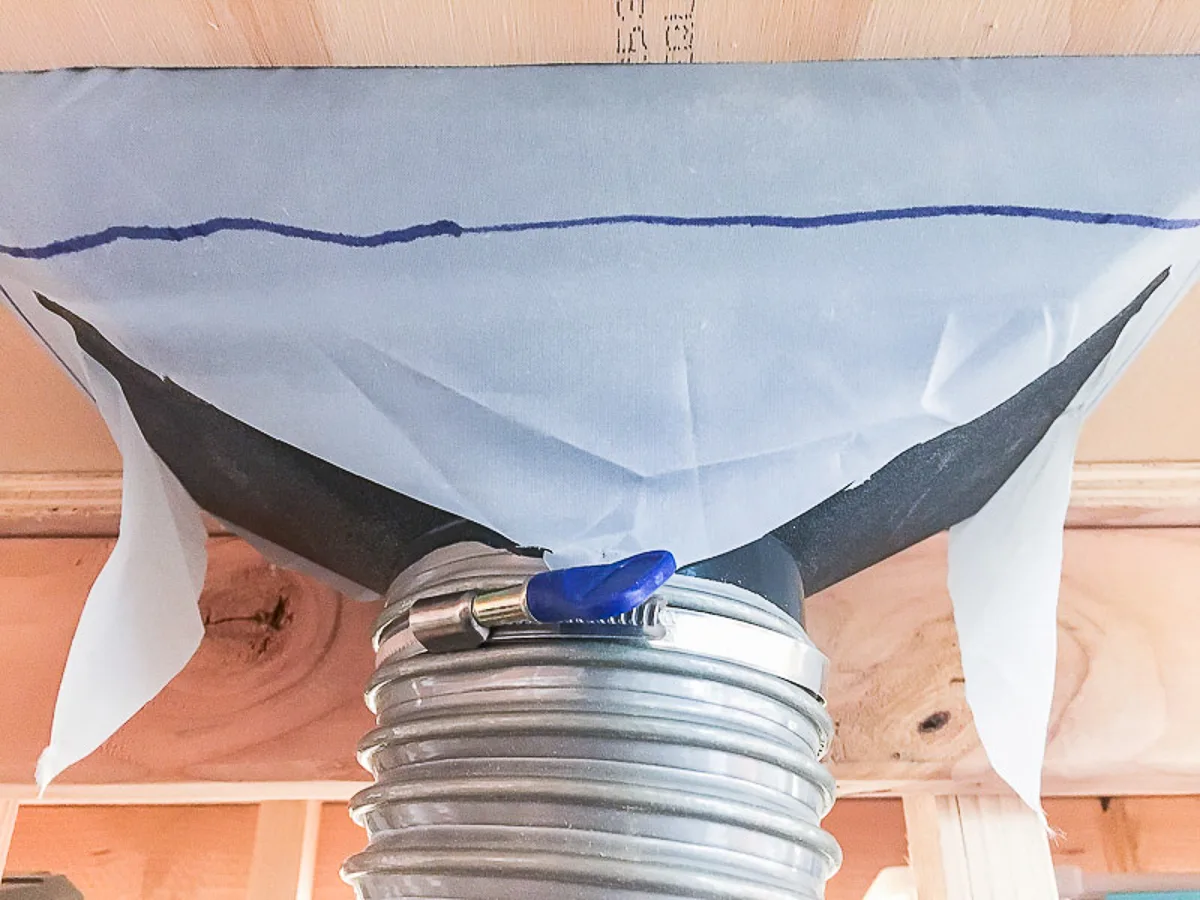
Center the tent on top of the platform, and mark the position of the dust funnel with a marker.

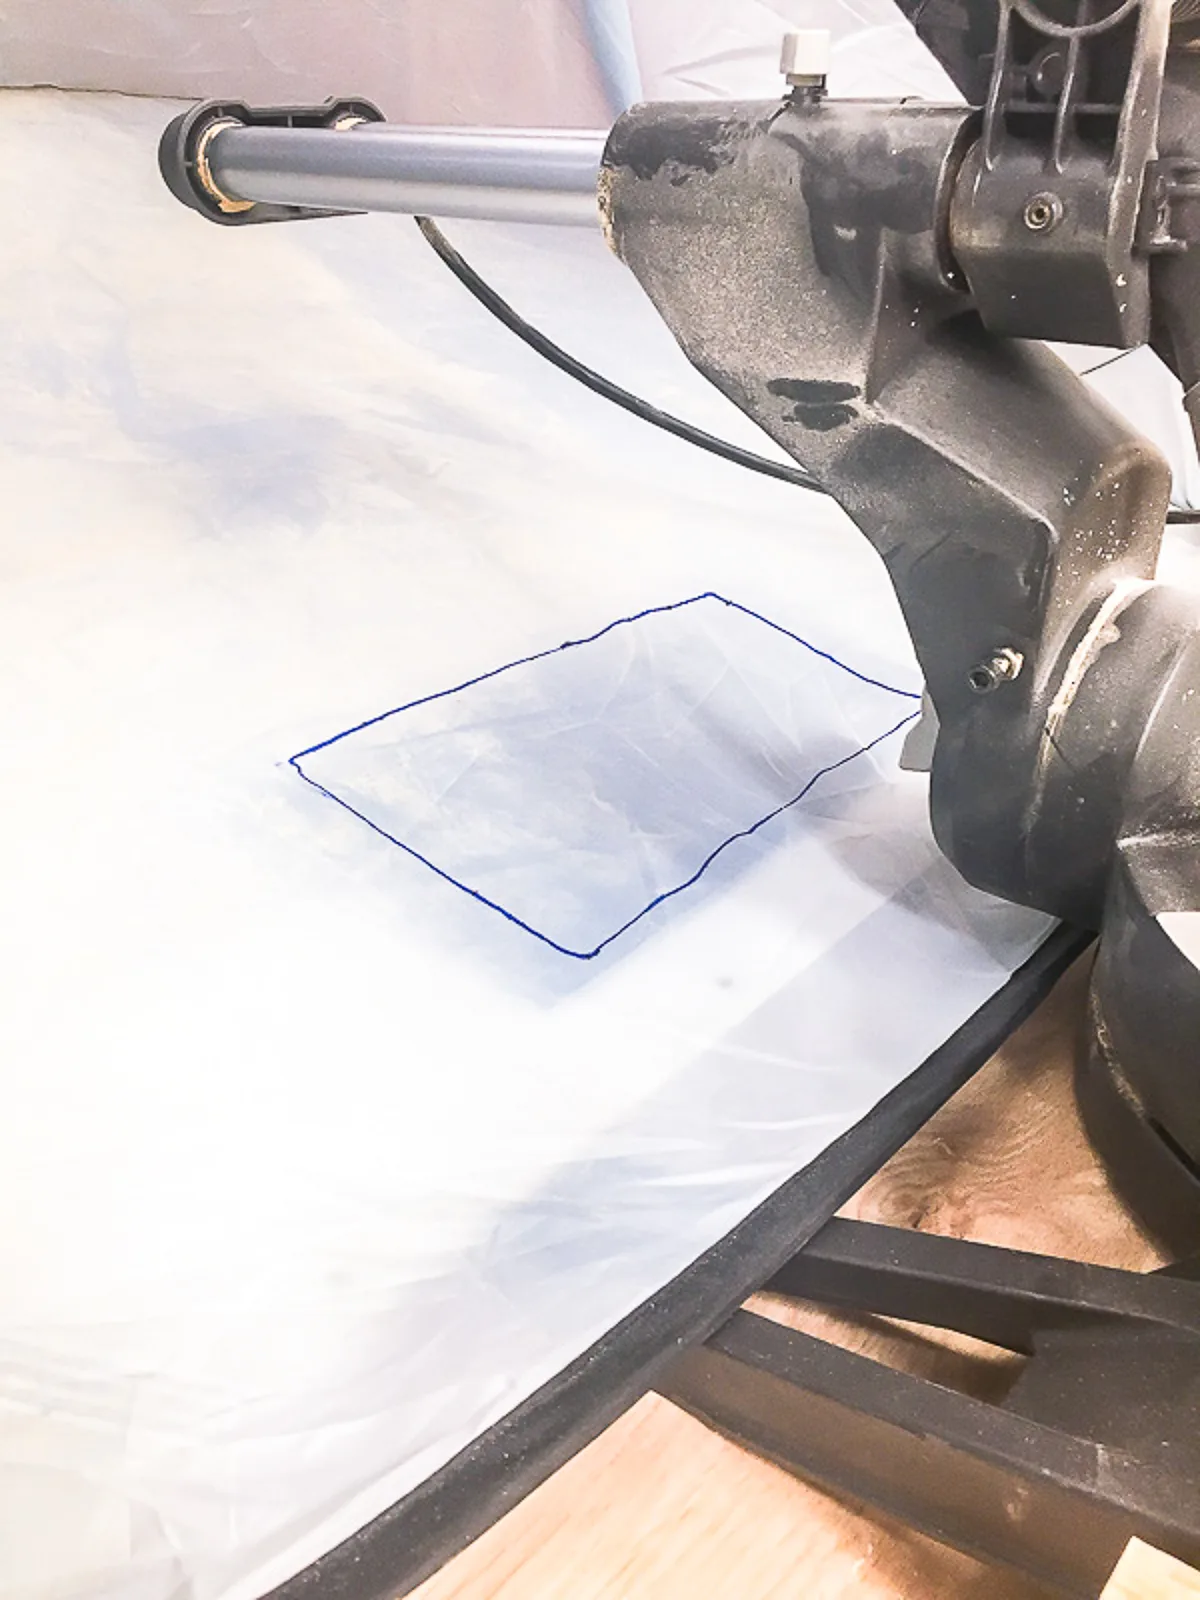
Use scissors to cut an X from corner to corner.

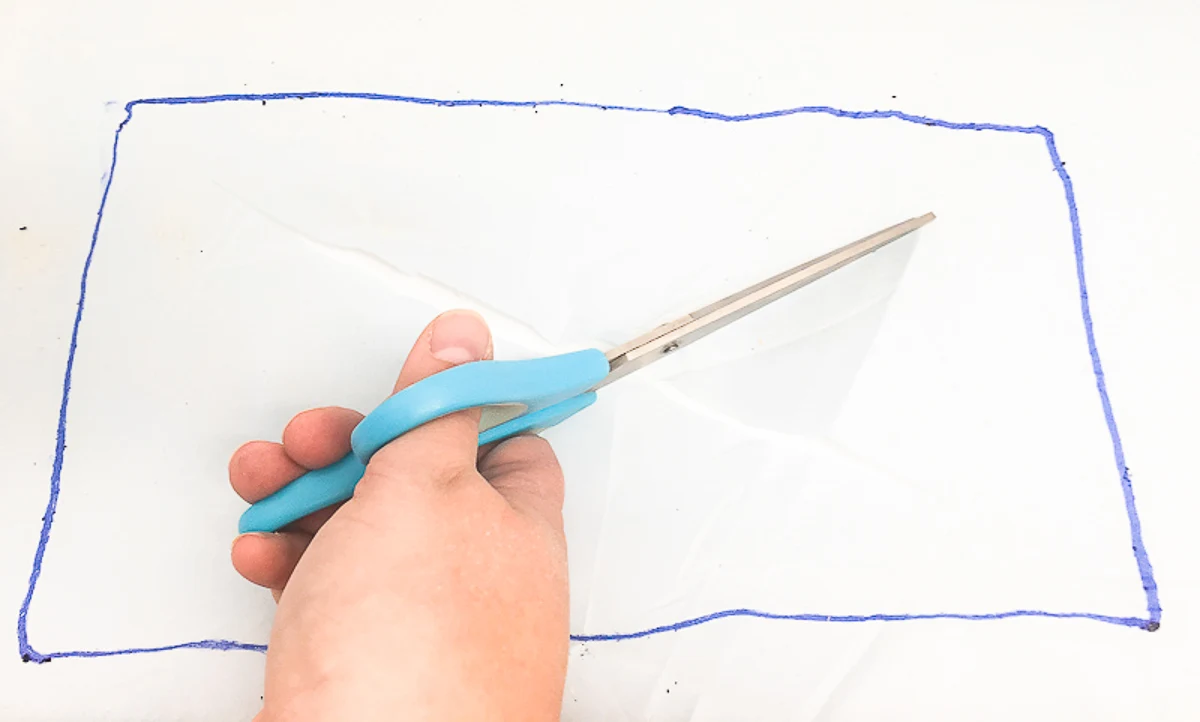
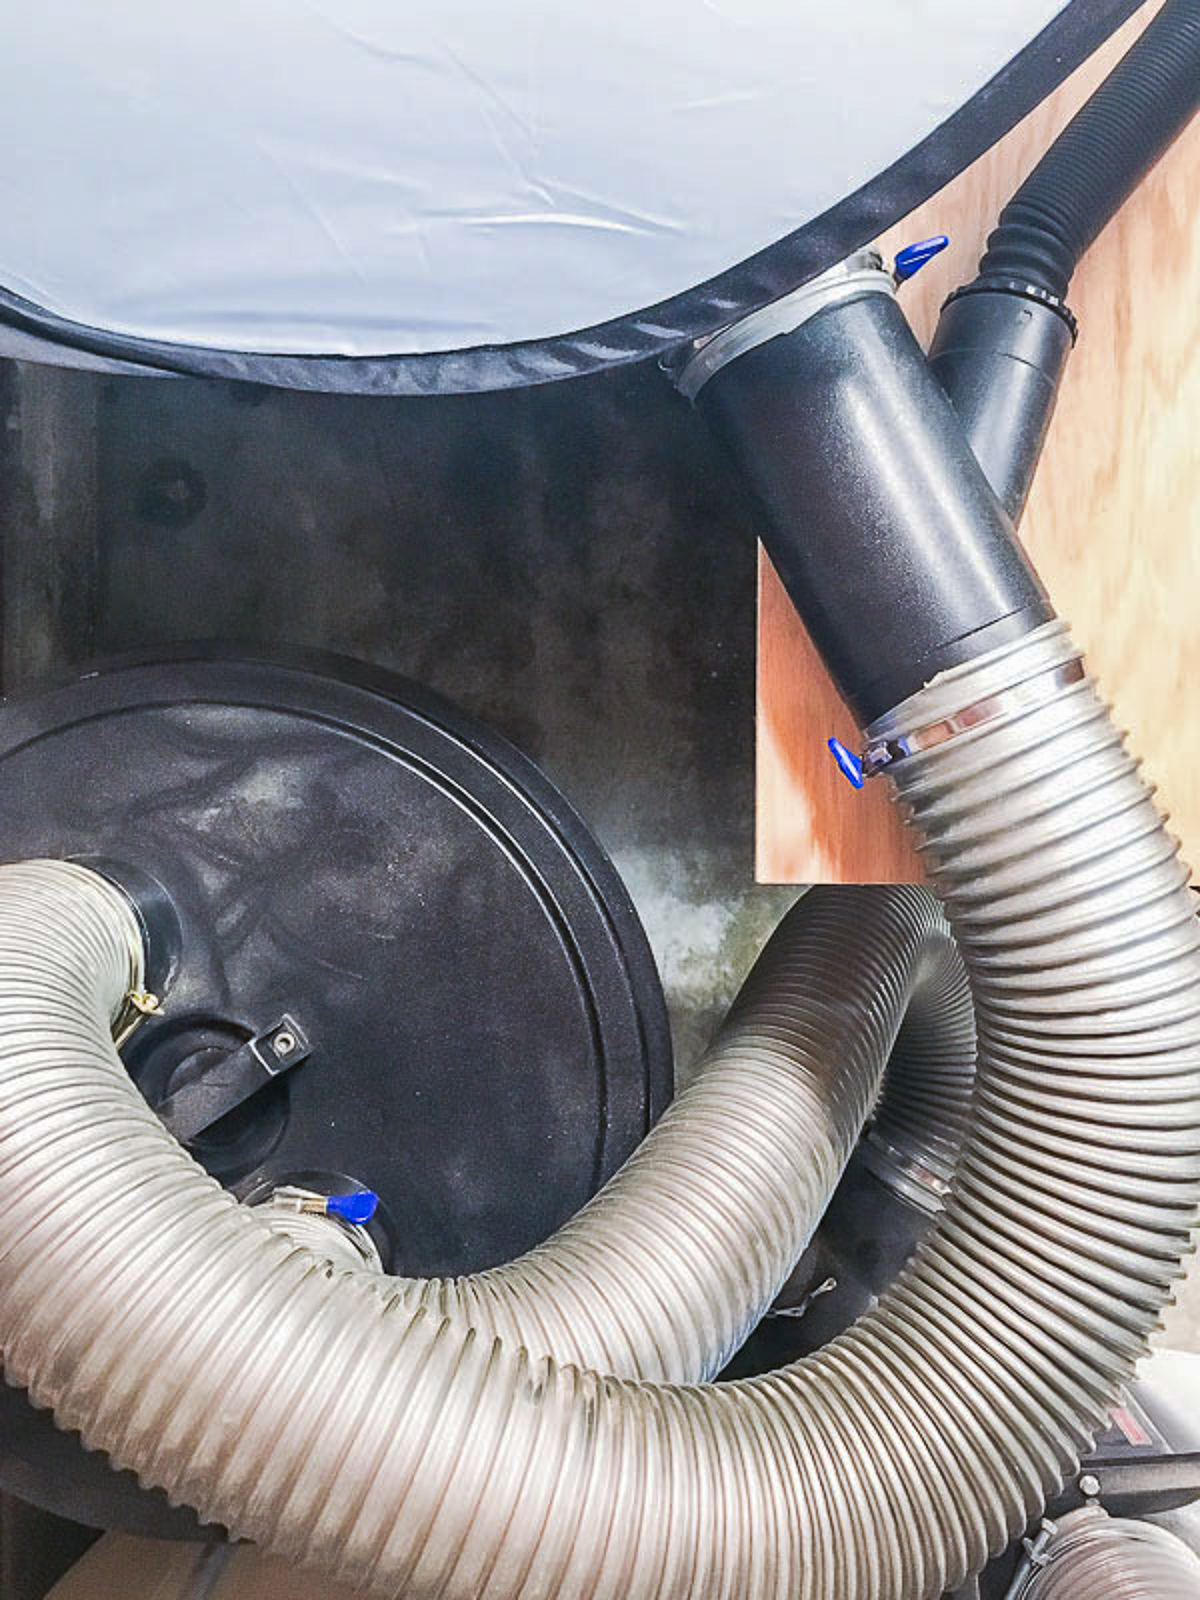
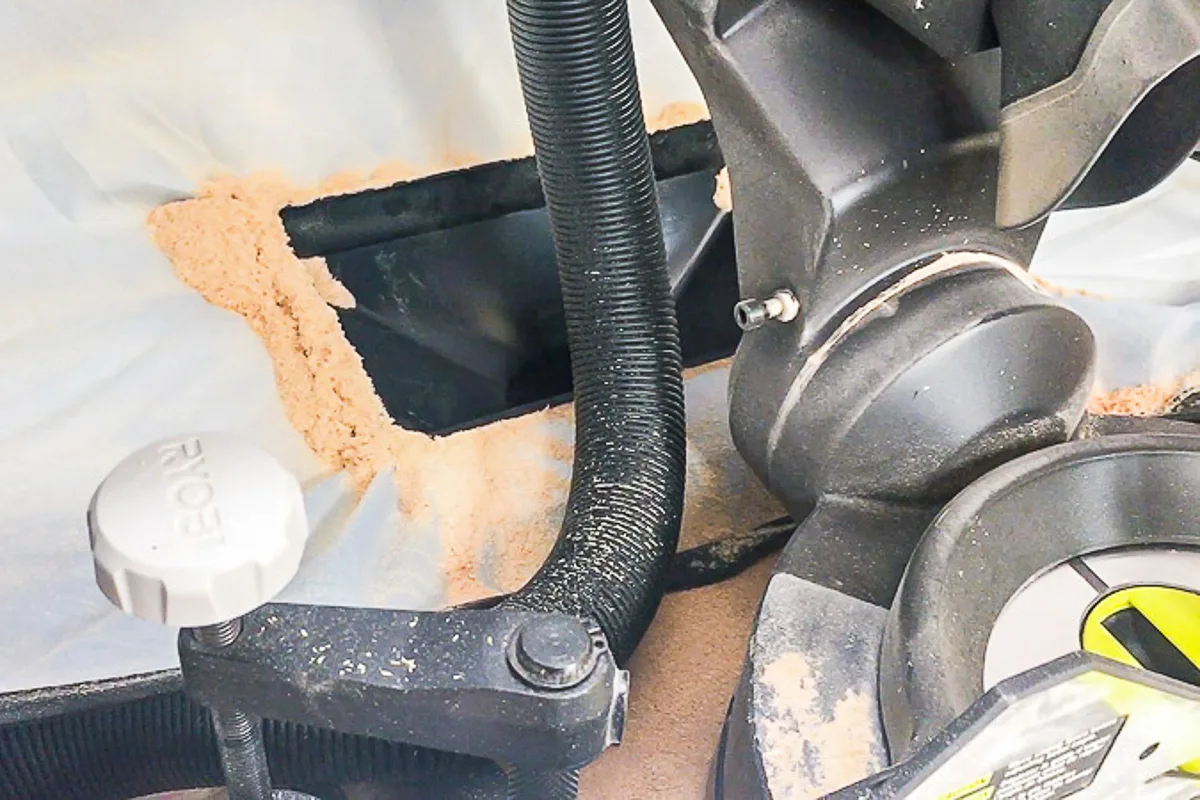
Take out the dust funnel and position the tent over the hole. Press the dust funnel into the hole over the tent fabric, and attach it to the platform with screws and washers.
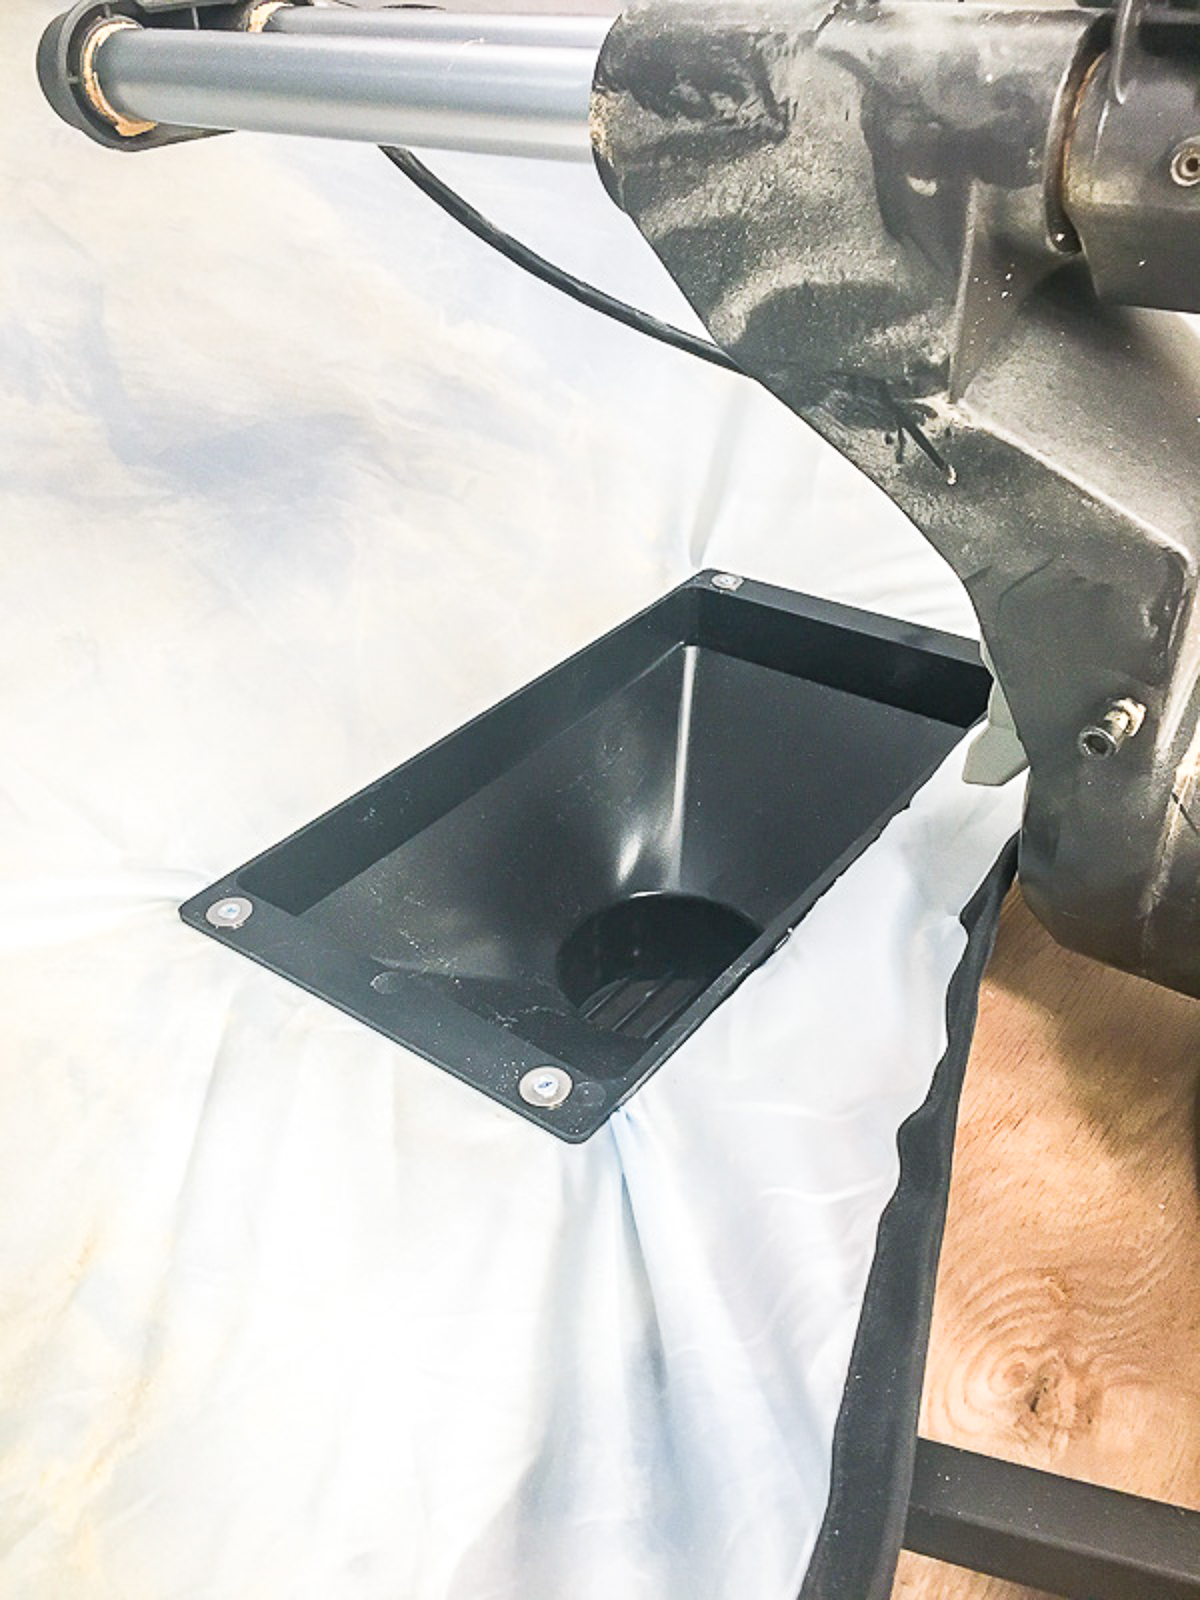

Attach a 4" dust collection hose to the underside of the dust funnel. Use a hose clamp to hold it in place.

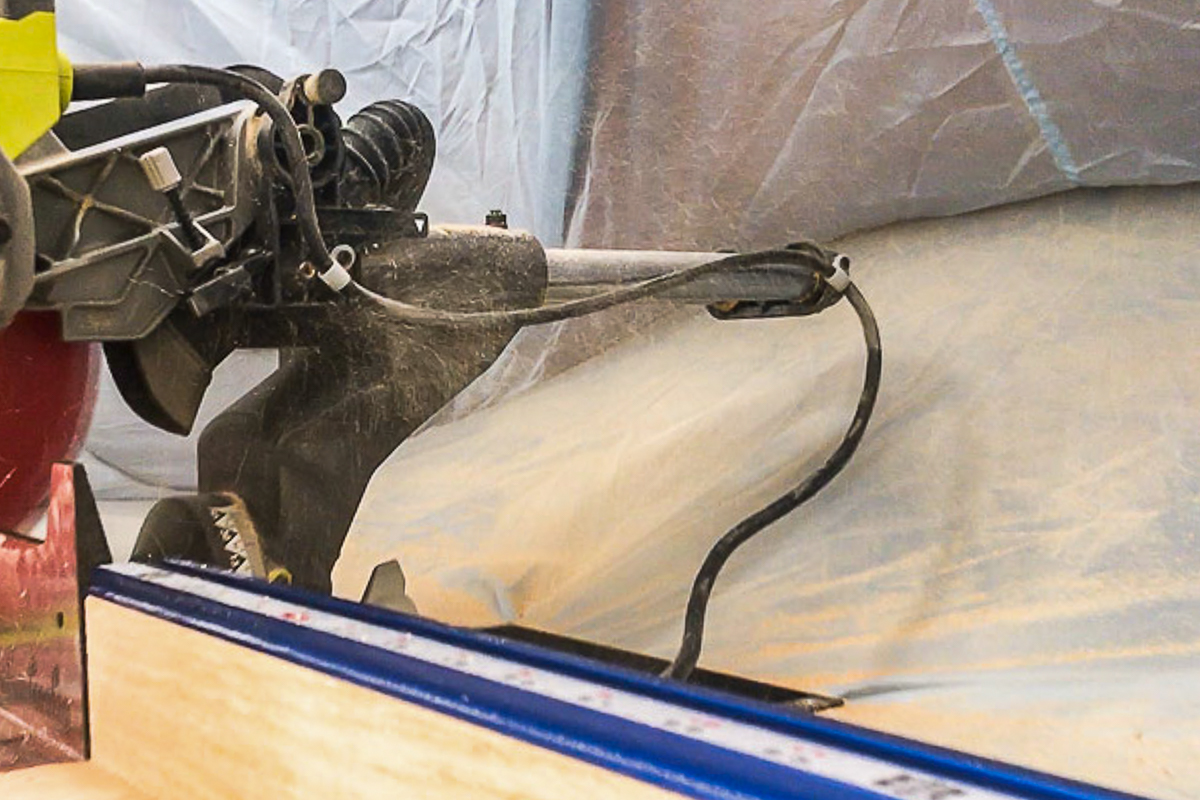
I attached the other end of the hose to this Y fitting. It has a 4" and 2 ½" input, so both the dust hood and the dust port on the miter saw are attached.

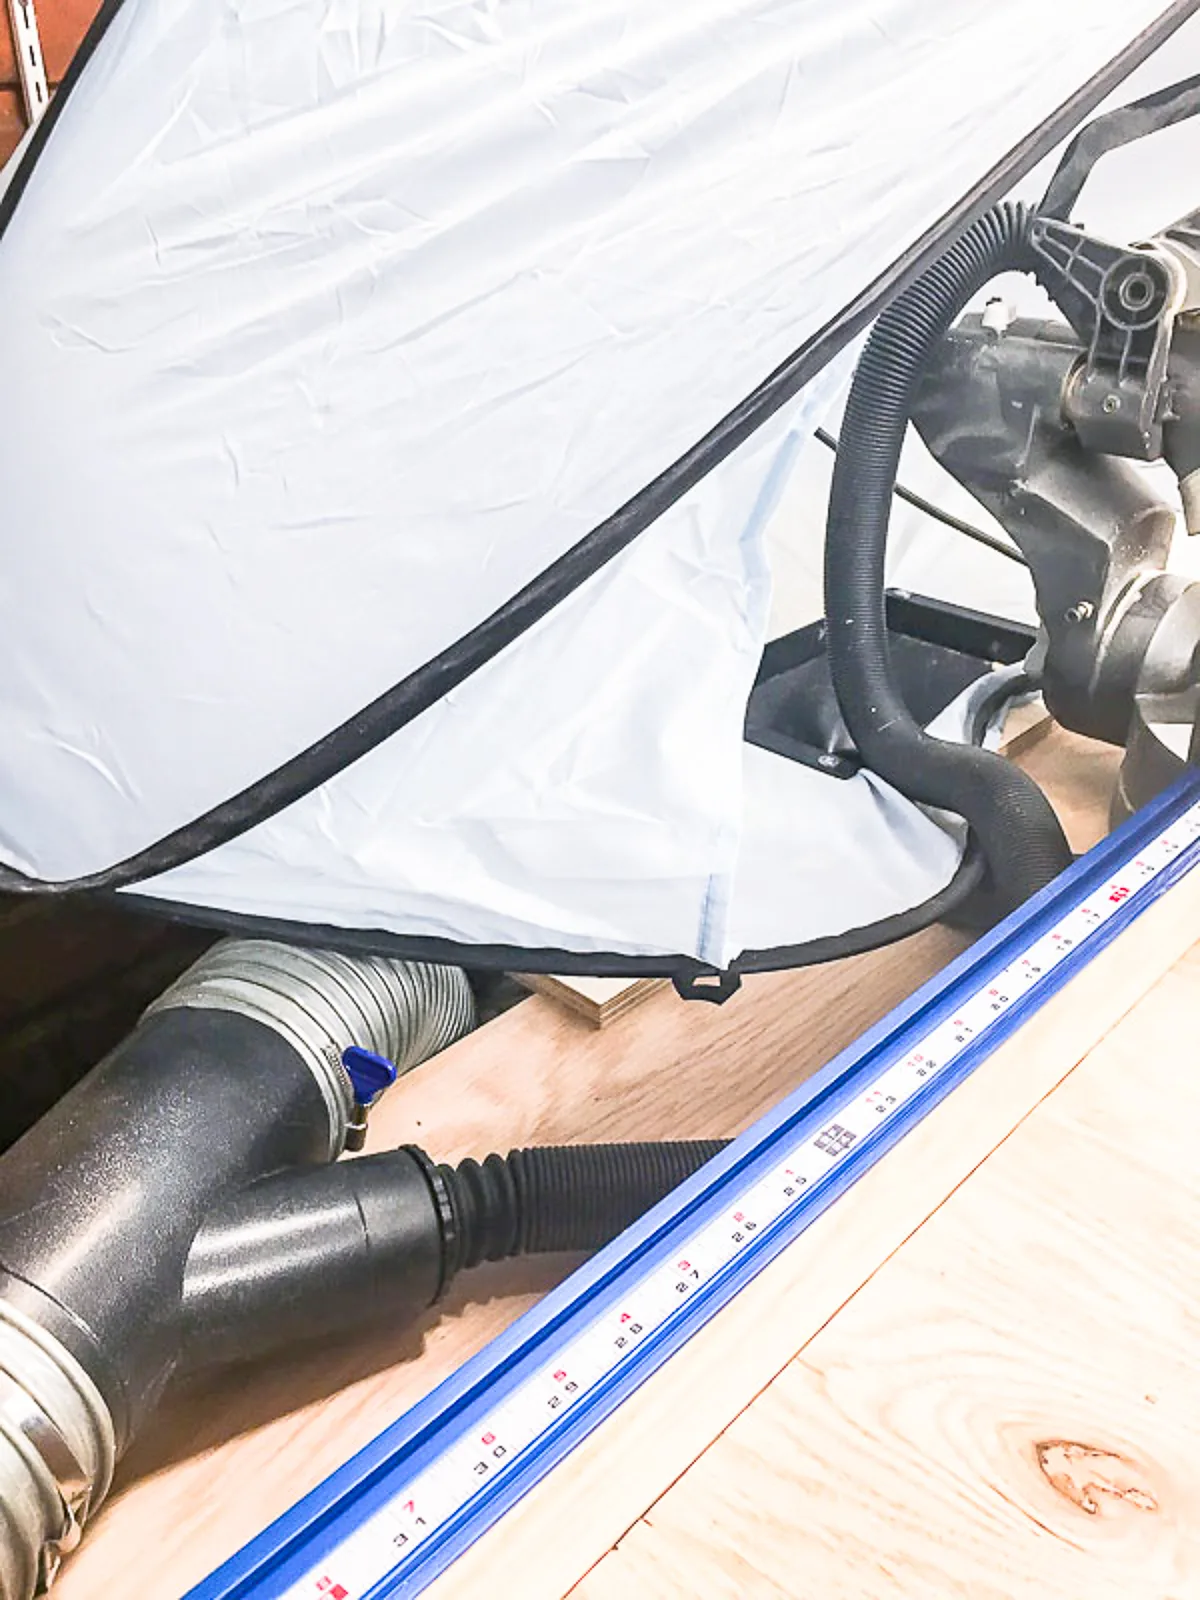
The other 4" end goes to my cyclone dust separator. You can read more about my dust collector set up here. UPDATE: I've switched over to a wall mount dust collector to save space in my small workshop, and it works great!

Finishing Touches
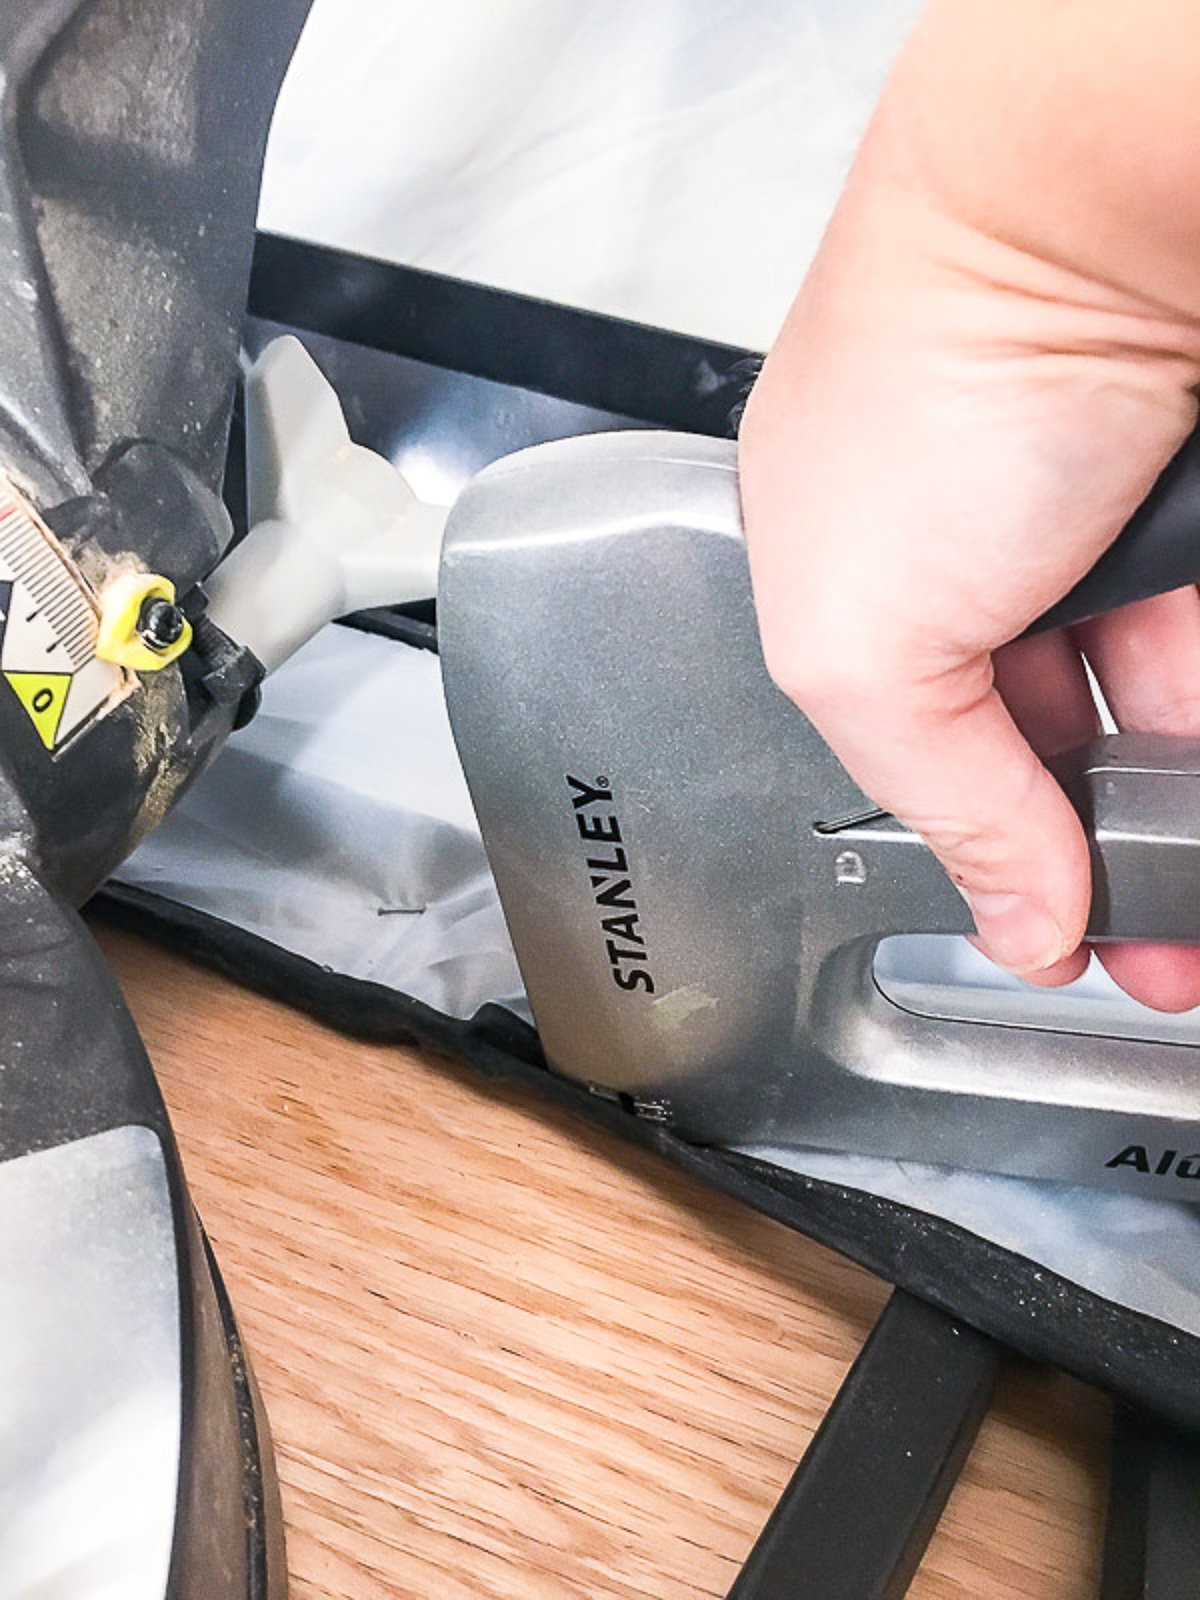
To keep the tent front from curling up, I stapled it down to the miter saw stand.

Now it's time to take it for a test drive!
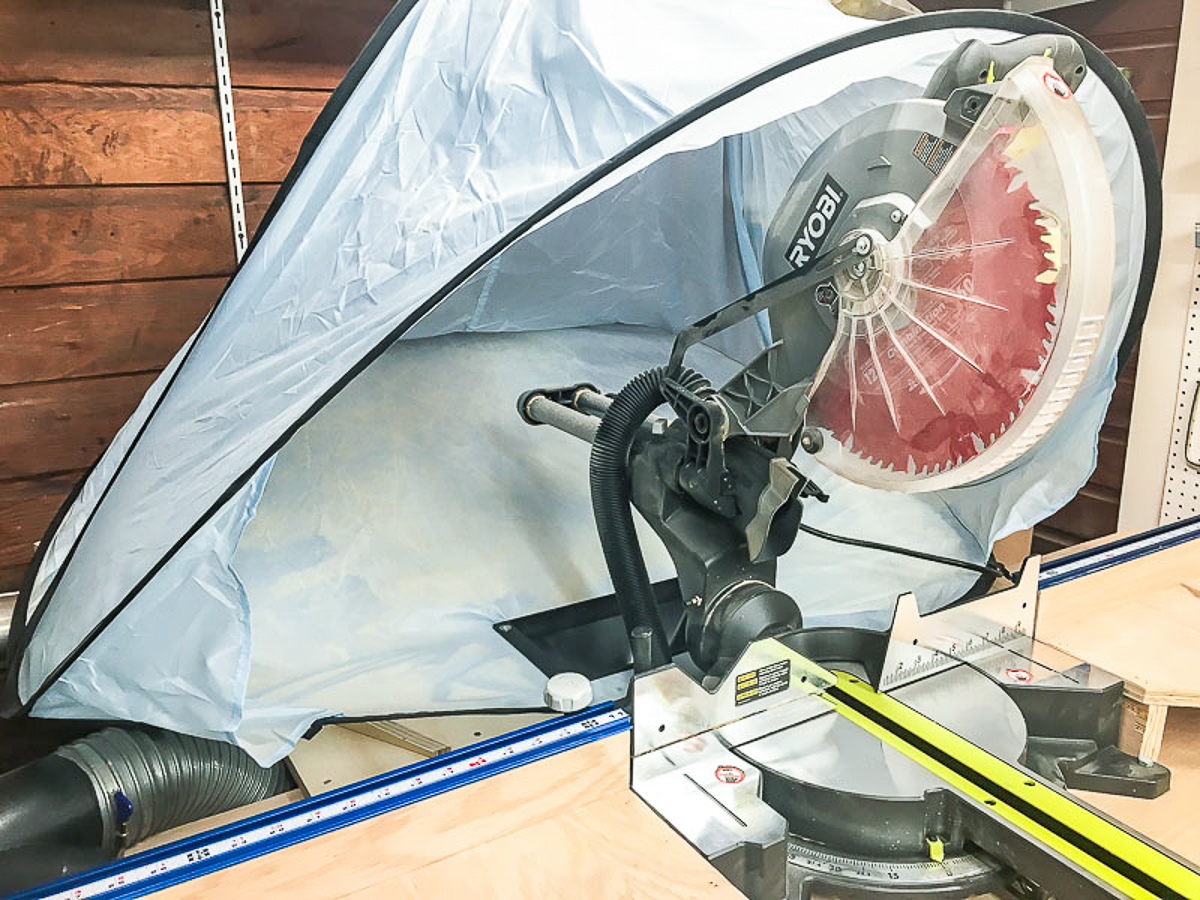

Testing the dust hood
I couldn't wait to try it out! I grabbed a scrap piece of 2 x 4 and started making sawdust.

It worked like a charm! You could see the dust getting sucked right out of the air and down into the funnel. Some of the heavier pieces made it past the vacuum, but got caught in the tent. When I finished cutting, I just lifted each side of the tent to dump the excess sawdust into the funnel.
The lip of the funnel is causing some sawdust build up along the edges. I'll suck it up with the shop-vac when I'm cleaning up the rest of the workshop in between projects. I read similar complaints about the expensive dust hoods as well.

Check out the video below to see it in action!
Check out these other workshop projects!
Kevin
Sunday 30th of December 2018
I am trying to find the white version of the tent you posted. It looks like it in the color pic posted, but the description does not mention anything about a white version. Normally there is an option on Amazon Products to select what color / options you want, but there appears to be a different link for each color. Do you have the link to white color you purchased?
Thank you,
Kevin
Vineta
Sunday 30th of December 2018
I purchased the light blue version, which you can find here. It's very light blue, and looks almost white in my photos, even though it looks darker blue on Amazon.
Marshall Herman
Saturday 8th of December 2018
was the "Pluto baby beach tent" the best fit for your miter saw duct collection
Thanks
Vineta
Monday 10th of December 2018
I didn't test out any other tents, but the Pluto tent works perfectly! It's deep enough, plus I can move the saw from side to side for mitered cuts too!
Pat wqilliams
Friday 6th of April 2018
You have built something for your miter saw to give a level surface. Can you share that? Thanks!
Vineta
Friday 6th of April 2018
The miter saw stand post is here: https://www.thehandymansdaughter.com/workshop-wednesday-miter-saw-stand-with-extra-storage/
The miter saw fence and stop track post is here: https://www.thehandymansdaughter.com/workshop-wednesday-miter-saw-fence-kreg-trak/
Tony Ferguson
Thursday 5th of April 2018
Where did you buy the baby tent. I am looking for same but can not find it on web or in store.
Thx
Tony
Vineta
Thursday 5th of April 2018
You can find the tent on Amazon here.
Timisha
Friday 27th of October 2017
This is PERFECT! Thank you! I am redoing my mitersaw station and have been looking for a solution to the sawdust and this is perfect. Thank you!!