The ultimate guide to pocket holes will show you everything you need to know about this simple joinery technique, from proper placement to the correct screws for the job. With a few handy tips, you can make your project look professional, even if it's your first!

Last week, I gave an overview of how to use a Kreg Jig and compared two popular models. Now that you have the right tool for the job, how do you use those pocket holes to create amazing furniture? I'll show you all the tips and tricks to making perfect joints so your project looks professional even if it's your first build!
No matter which model of Kreg Jig you have, you can create perfect pocket holes. But it's how you use them that turns your project from amateur to amazing! I've had my fair share of sub par joints that gaped, twisted or lined up incorrectly. Hopefully some of these tricks will help you prevent those issues!

This post contains affiliate links for your convenience. Purchases made through these links may earn me a small commission at no additional cost to you. Please visit my disclosures page for more information.
Pocket Hole Placement
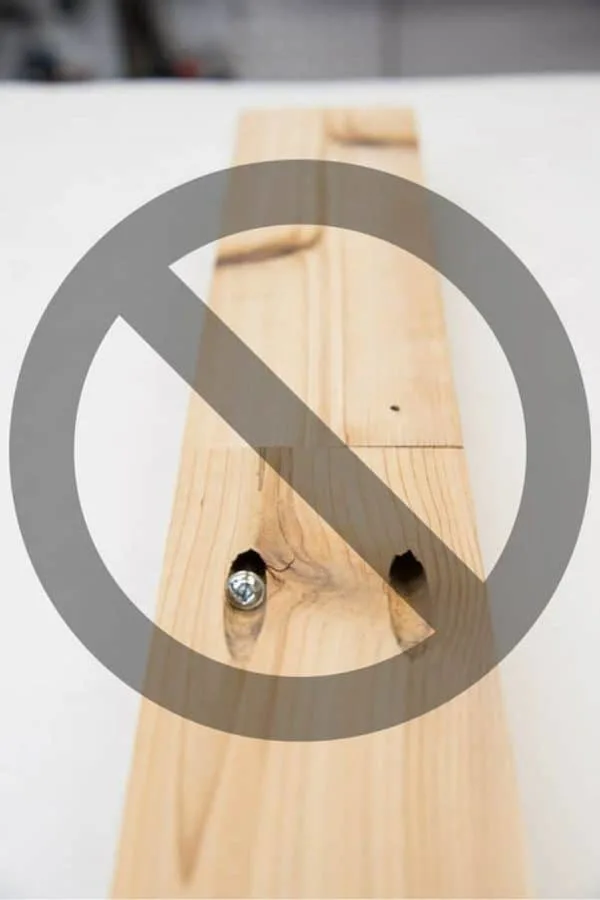
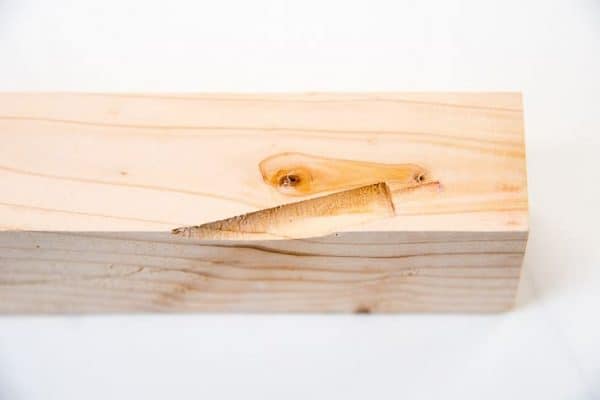
First, a bit of board anatomy . . . There are three faces: the end grain, the edge grain and the face grain.

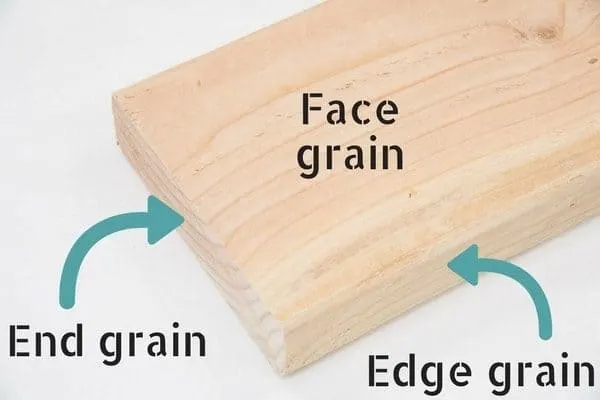
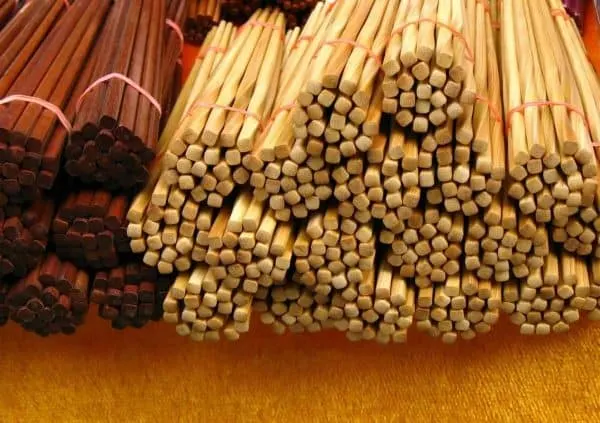
When planning the placement of your pocket holes, keep in mind that the screws can go into the edge grain and the face grain, but not into the end grain. Imagine the board like a bundle of chopsticks. A screw will slip between the ends of the chopsticks (the end grain) without gripping, resulting in a weak joint.

So you can't use pocket holes to make a board longer by joining two together at the end grain.

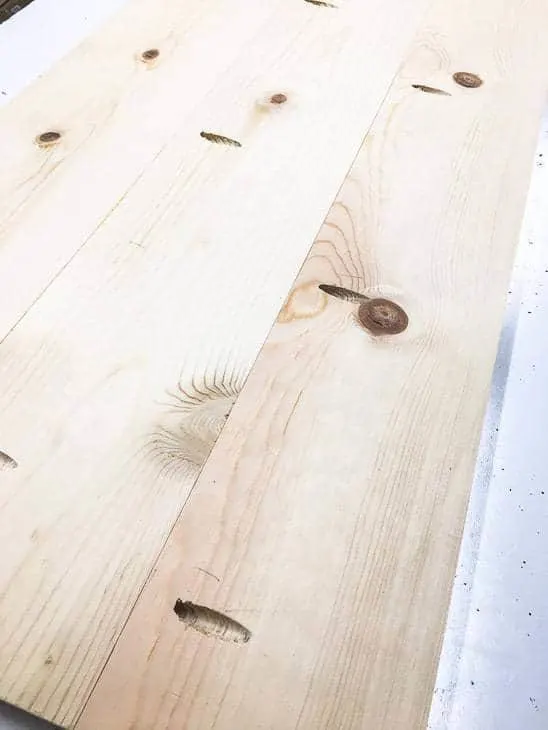
But you can make boards wider! Planking multiple boards together along the edge grain is a great way to create solid surfaces without resorting to plywood. I've used this method to make wooden signs, bench lids and a desk top. I'll show you my trick for getting a perfectly flat surface with pocket holes later on.

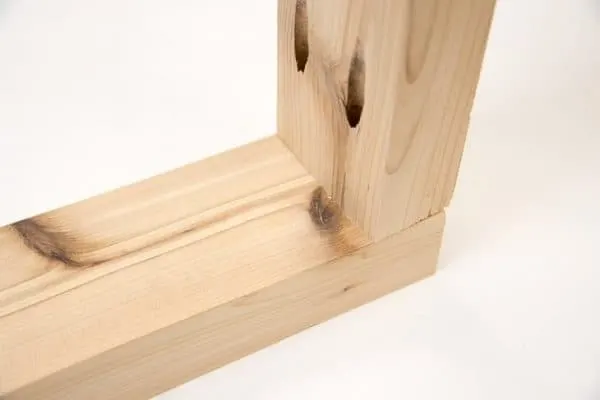
But the most common way to use pocket holes is a simple 90 degree angle joint. When combined with wood glue, this joint will be strong and secure for the life of your furniture.
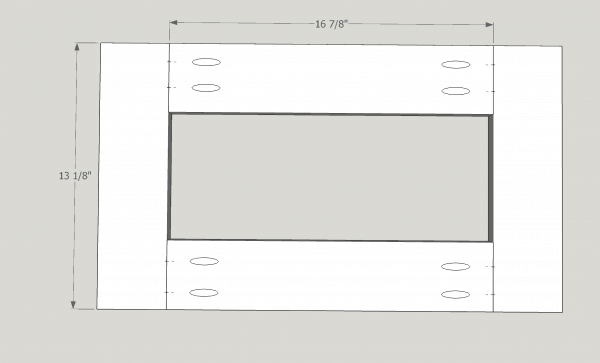
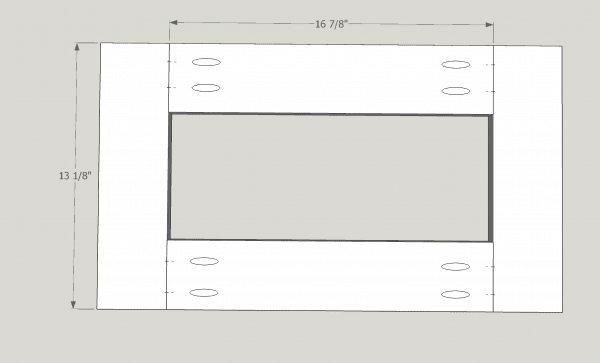
If you're building with plans like the ones in my woodworking plans library, the diagrams will show you exactly where to place the pocket holes.
If you're creating your own design, a little planning goes a long way. A quick sketch of your idea will help you determine which ends will receive pocket holes, and where the screws will go. Hopefully this way you can avoid cutting the wrong piece, drilling the wrong pocket holes, and taking another trip to the store for more lumber.
Pocket Hole Screws
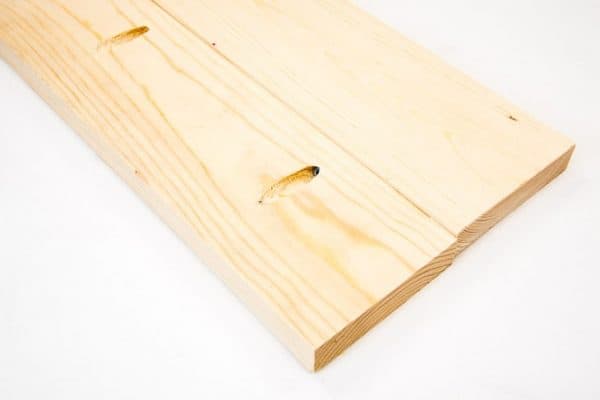
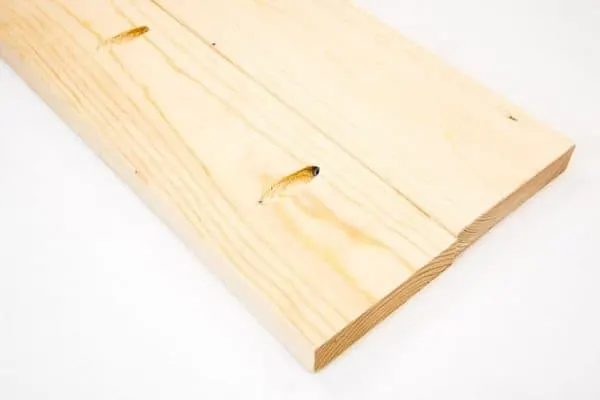
Kreg pocket hole screws come in two thread varieties: coarse and fine. Coarse screws are made for soft woods like pine and cedar, as well as plywood. This is the type of screw I stock up on. Fine screws are for hardwoods, which I don't use as often.
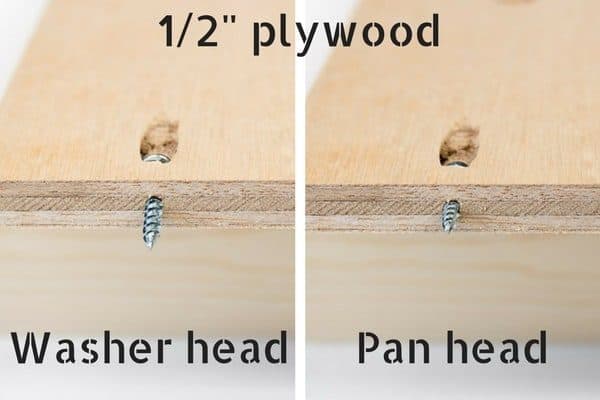
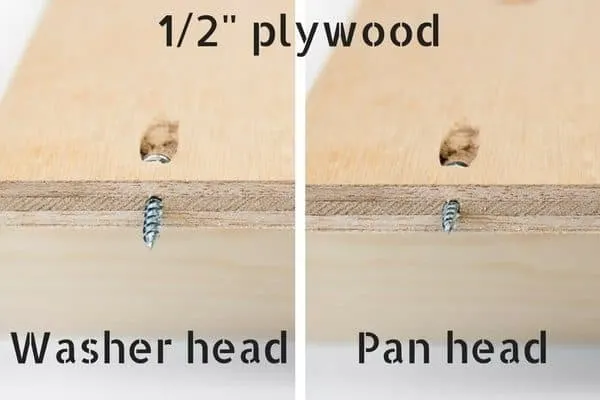
There are also two different types of heads: washer heads and pan heads. Most of the time, you'll be using washer heads. Pan heads are smaller, and are used for thin ½" boards or hardwoods, and won't stick out from the hole like washer heads can. This article goes more in depth into the different types of wood screws and heads.
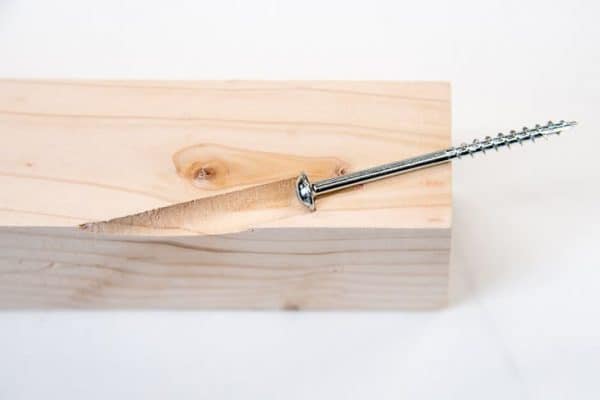
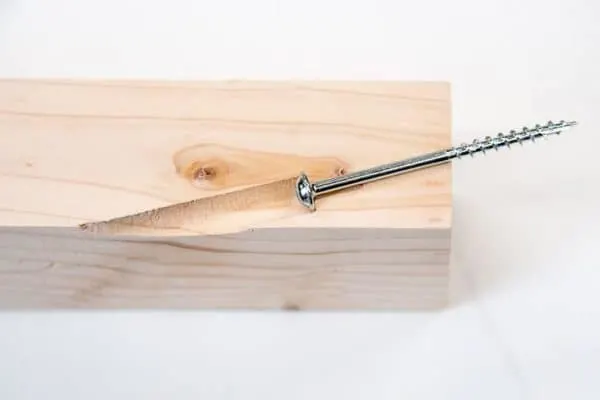
The unique shape of both types of screw heads is what makes pocket holes work so well. The flat bottom rests on the shelf that is created by the Kreg Jig drill bit and draws the pieces together tightly.

The screw enters the wood at a 15 degree angle. This means more screw is in contact with the wood than if you drilled it straight on, resulting in a better grip.
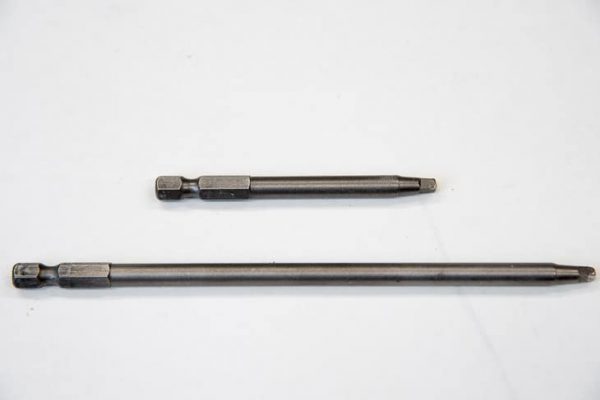
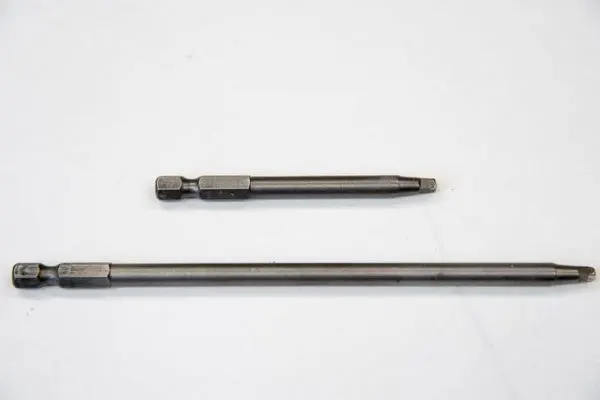
The square shaped driver bit included with all Kreg Jigs prevents your drill from stripping the screw head. I've found that over time, the square corners start to round out and the bit will spin in the head. I always keep a spare one around, as well as a shorter 3" bit for those tight spaces.
Tips for Using Pocket Holes
Ok, enough talk! Let's get building!
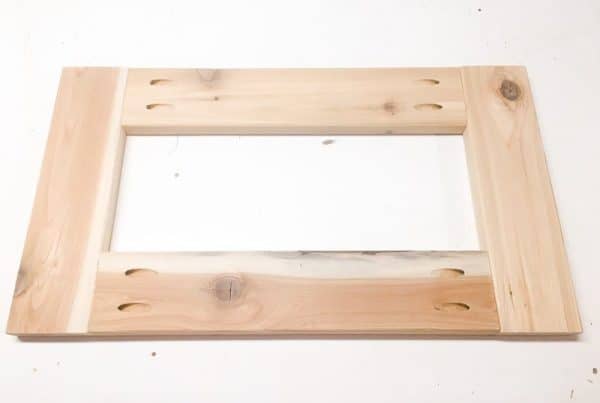
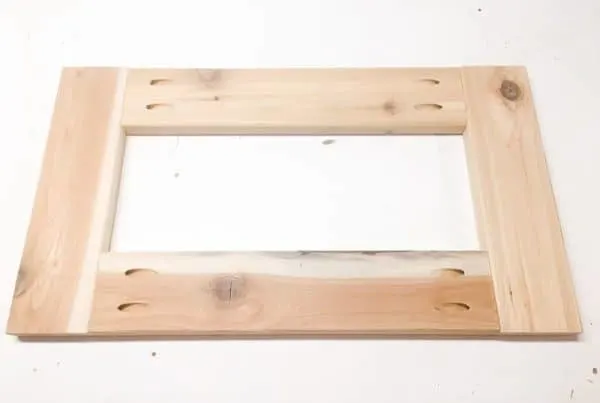
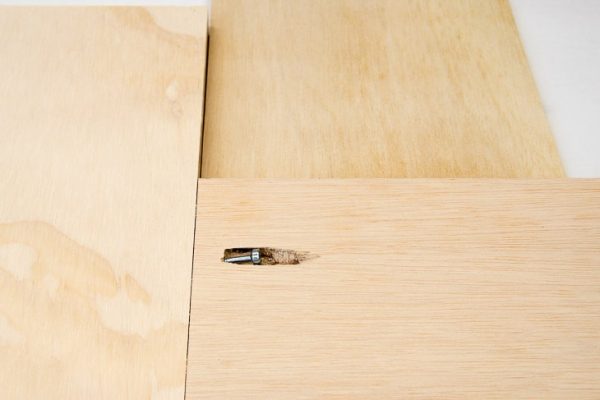
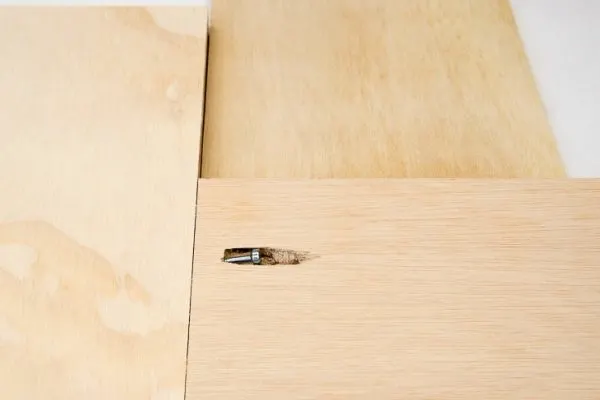
The most common way to join two boards together with pocket holes is at a 90 degree corner. While you could try to use the brute force of your hand to keep the boards lined up exactly, it's soooo much easier when you have a few clamps to act as extra, stronger hands!
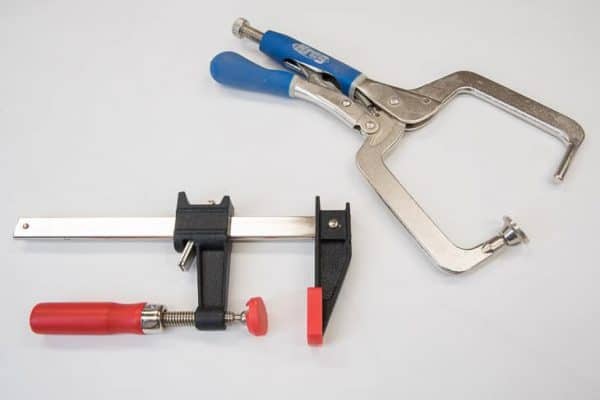
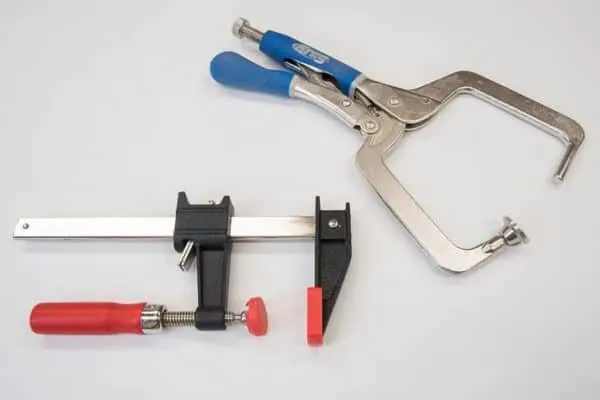
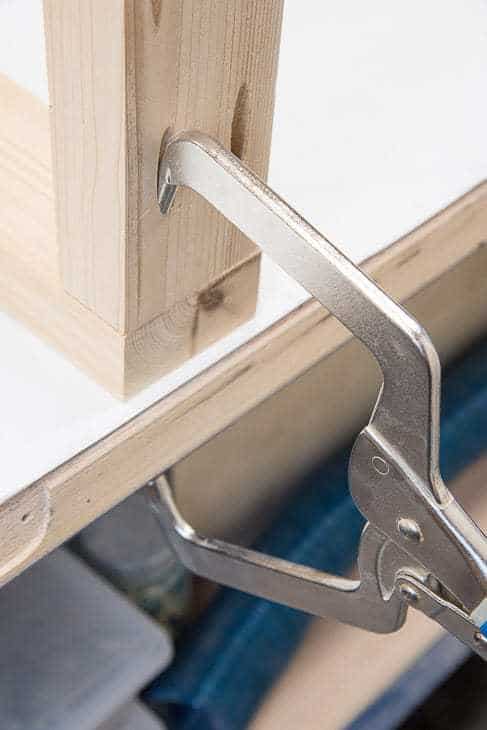
This handy right angle clamp is specifically made for assembling furniture with pocket holes at a 90 degree angle. One end is pointed, and fits perfectly in your pocket hole.
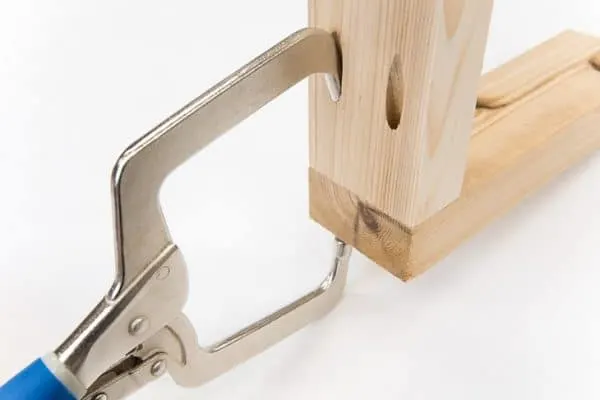
The other end is flat, and clamps the two boards together. I prefer to clamp everything to my workbench, so nothing moves as I drive in the screws.

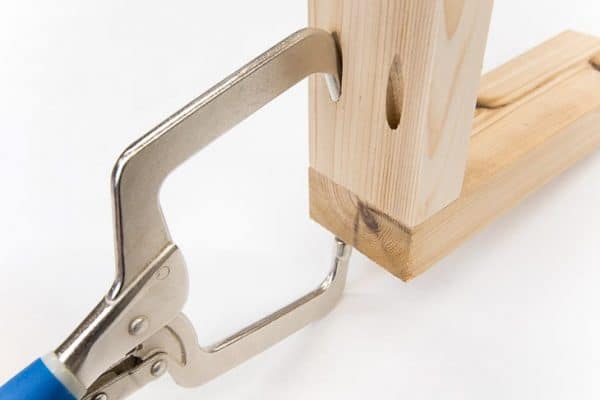
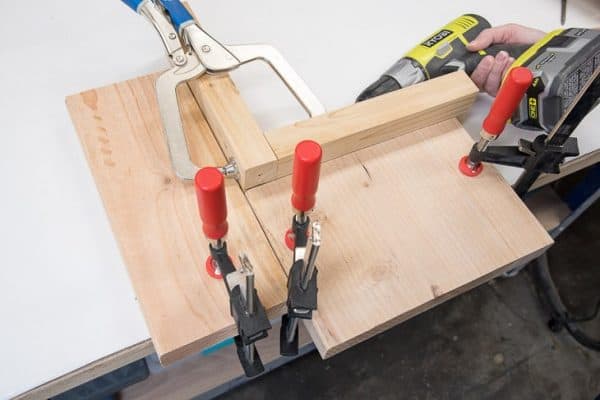
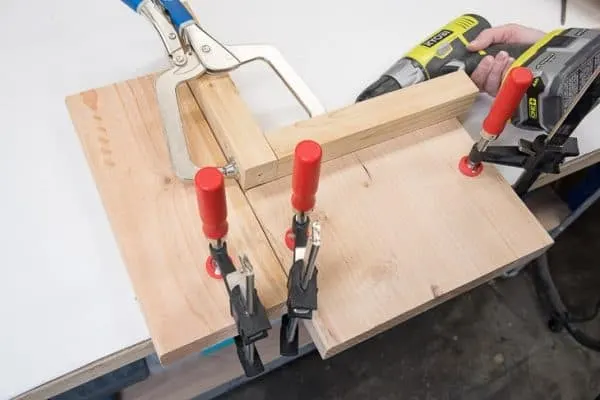
Sometimes the boards will shift when the screw goes into the wood, even with those clamps in place. The answer: more clamps! Here, I've used scrap wood to block the board from shifting. Then it has no choice but to go where you want it!
If your boards aren't the same thickness, things can get a little tricky. Drill your pocket holes to the depth recommended for the thinner board, and use a screw that corresponds to that dimension.
If you want the backs to stay flush, use a spacer to fill in the gap while you screw them together. In the example below, I'm joining a ½" board to a ¾" board, using a ¼" scrap of plywood underneath as a spacer.
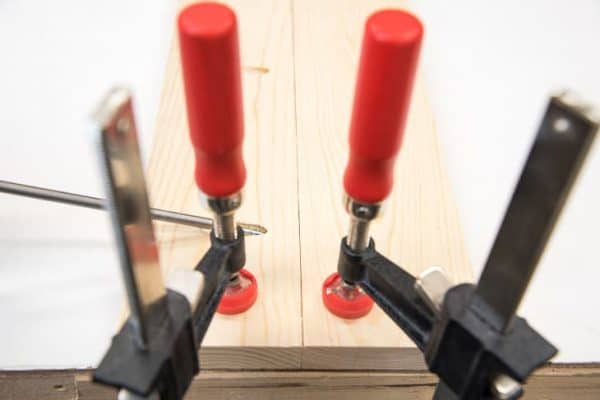
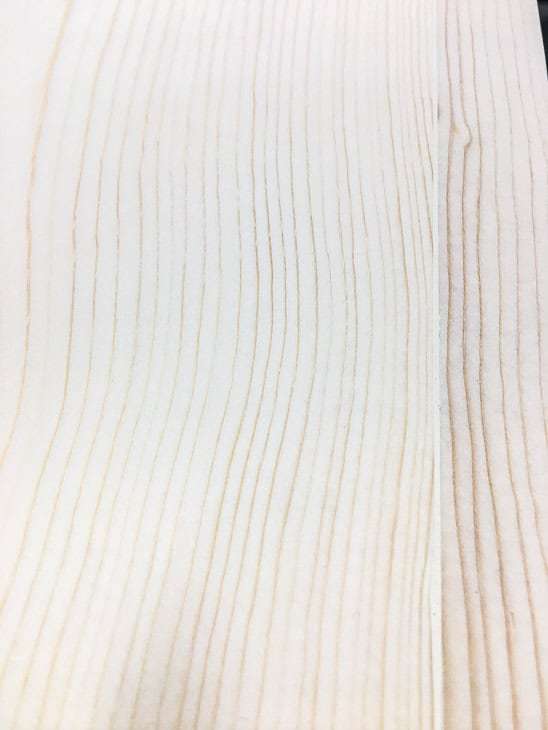
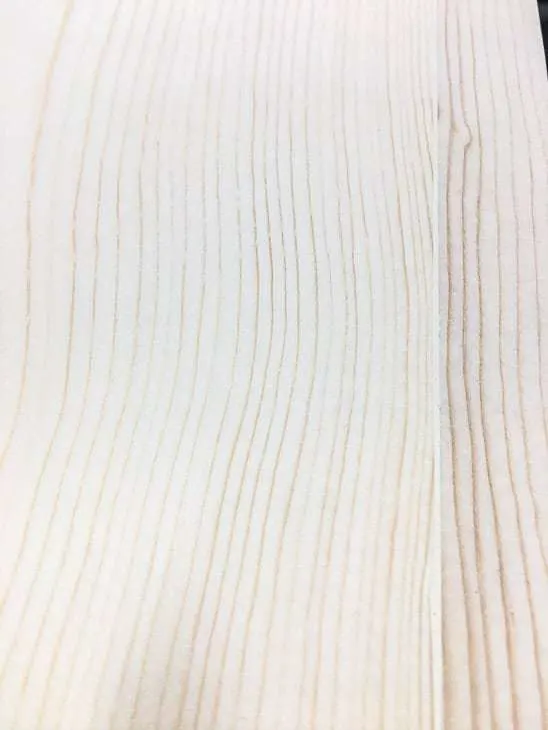
When planking multiple boards together to form a desk or table top, you want to make sure the boards are as flat as possible. Even a small shift that occurs when the screw enters the wood might result in a lot more time spent sanding!
One trick is to clamp both boards tight to the workbench right next to the first pocket hole. I do this at both ends. When I get to the pocket holes in the center, I press down firmly on both boards to make sure they're flat against the work surface while I screw them together.

As long as your boards have crisp, clean edges and aren't twisted or warped, you should barely be able to see the joint. With some sanding and a little wood filler, you might not be able to spot the seam at all!
You can even use pocket holes on mitered corners! I haven't tried this technique out yet, but Kreg Tools has a great video to show you how it's done.
How to Fill Pocket Holes
Pocket holes make building furniture easy, but those big holes are so ugly! Most of the time, you can find a way to hide them on the underside or back of your furniture piece, so they won't be seen.
However, sometimes they're front and center and you need to cover them up somehow! I've put together a complete guide on how to fill pocket holes with seven different methods to choose from!
Ready to make some pocket holes?
Most of the projects on my woodworking projects page use pocket holes, and would be great for a beginner. The diagrams show you exactly where to place the pocket holes, so you just need to cut and drill!
If you're not sure which Kreg Jig is right for you, be sure to check out my side by side comparison of the two most popular models. It also teaches you how to use a Kreg Jig, so you can confidently tackle your first woodworking project!
Check out these other woodworking tutorials!
Ruth
Saturday 6th of October 2018
Your information was more helpful than the Kreg folks! I thank you and just finished my first project - working with the K 5.
Sunday 9th of September 2018
I have a pocket hole jig and use it often and with great success. It never hurts to get more advice.
Carol@BlueskyatHome
Tuesday 13th of March 2018
This is a great tutorial and exactly what I needed for a future project. Definitely PINNED. Thanks so much for sharing at Happiness is Homemade.
Jenny
Monday 12th of March 2018
This is very informative and great information for when we start making some tables. Pinning for later! Thanks for sharing at Merry Monday!
Debrashoppeno5
Sunday 11th of March 2018
Thank you for an excellent post. I have had my Kreg Jig for years and have yet to use it!