Our front porch has been a cluttered, embarrassing mess for too long! It's always covered with our son's foam sword armory, umbrellas, bike helmets and half-dead plants. Nothing says "Welcome to our home" quite like the decor of an abandoned yard sale.
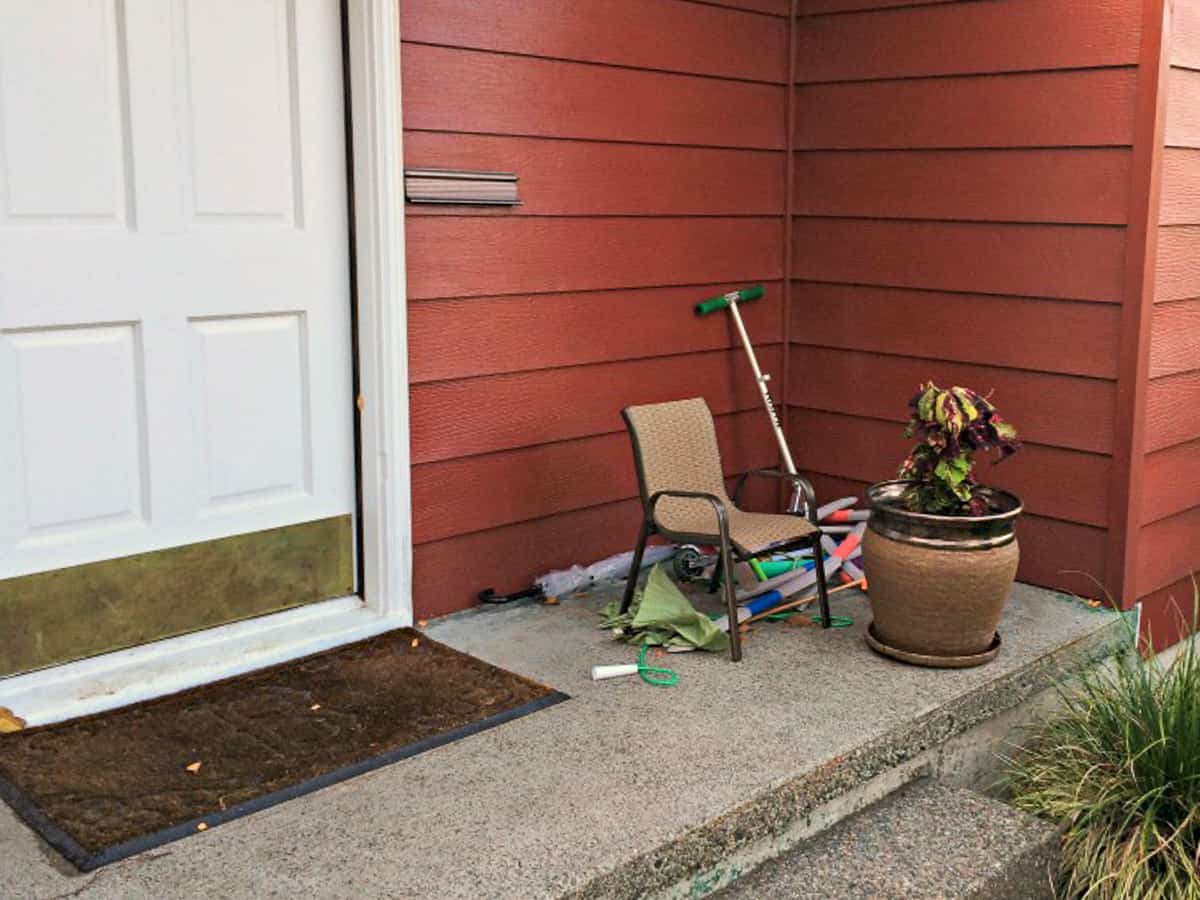

I wanted this collection of random outdoor things to stay outdoors, but contained and hidden away. Some seating would also be nice, so I can watch the sword fights from something a bit more comfortable than the concrete steps. What I really needed was a bench storage box.
I started looking around at various options, but there's not a ton of choices out there. Plastic deck boxes are fairly inexpensive but don't do much for the curb appeal. On the other hand, nice wooden ones are soooo expensive! Then I found this fabulous DIY outdoor storage box plan made by Kim from the fantastic blog Sand and Sisal.

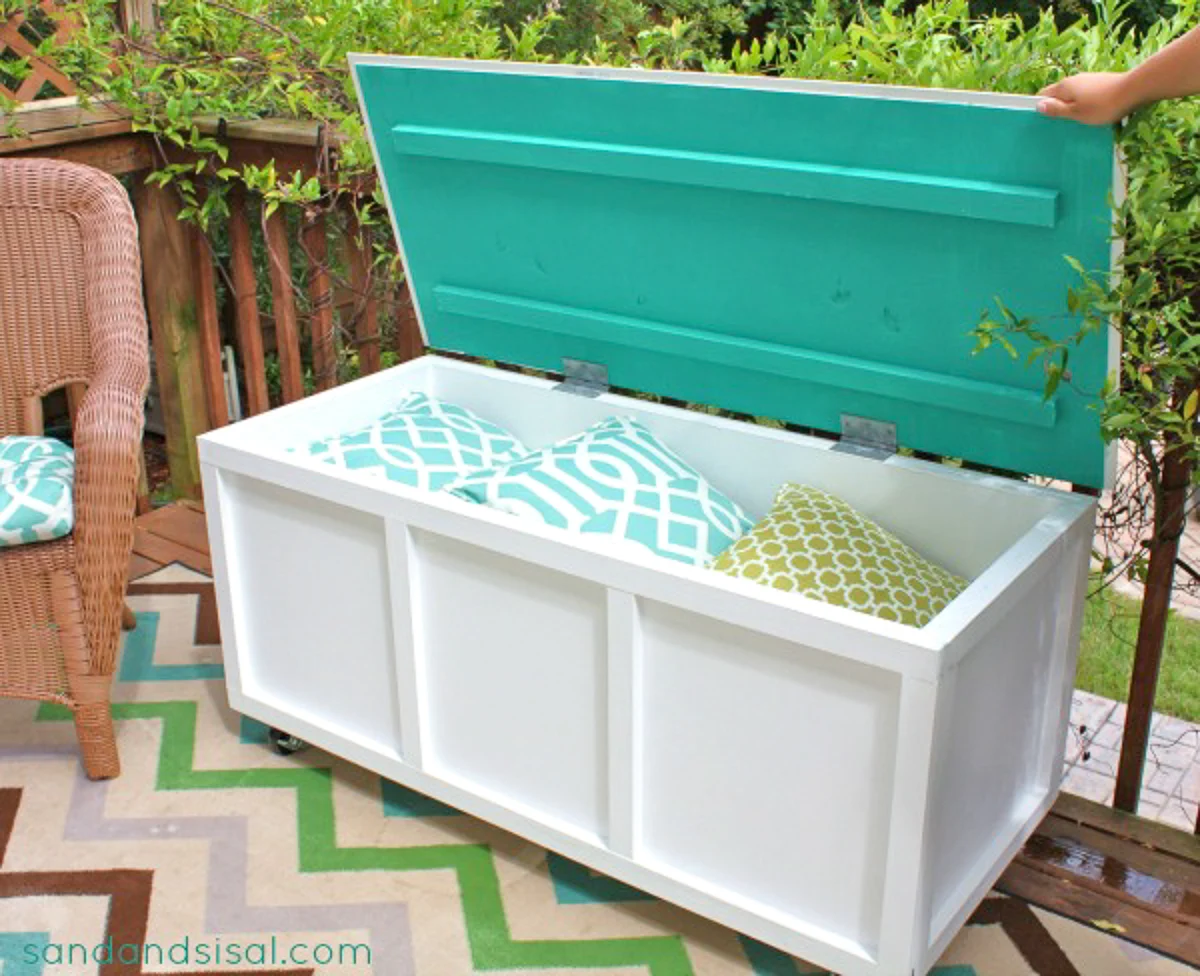
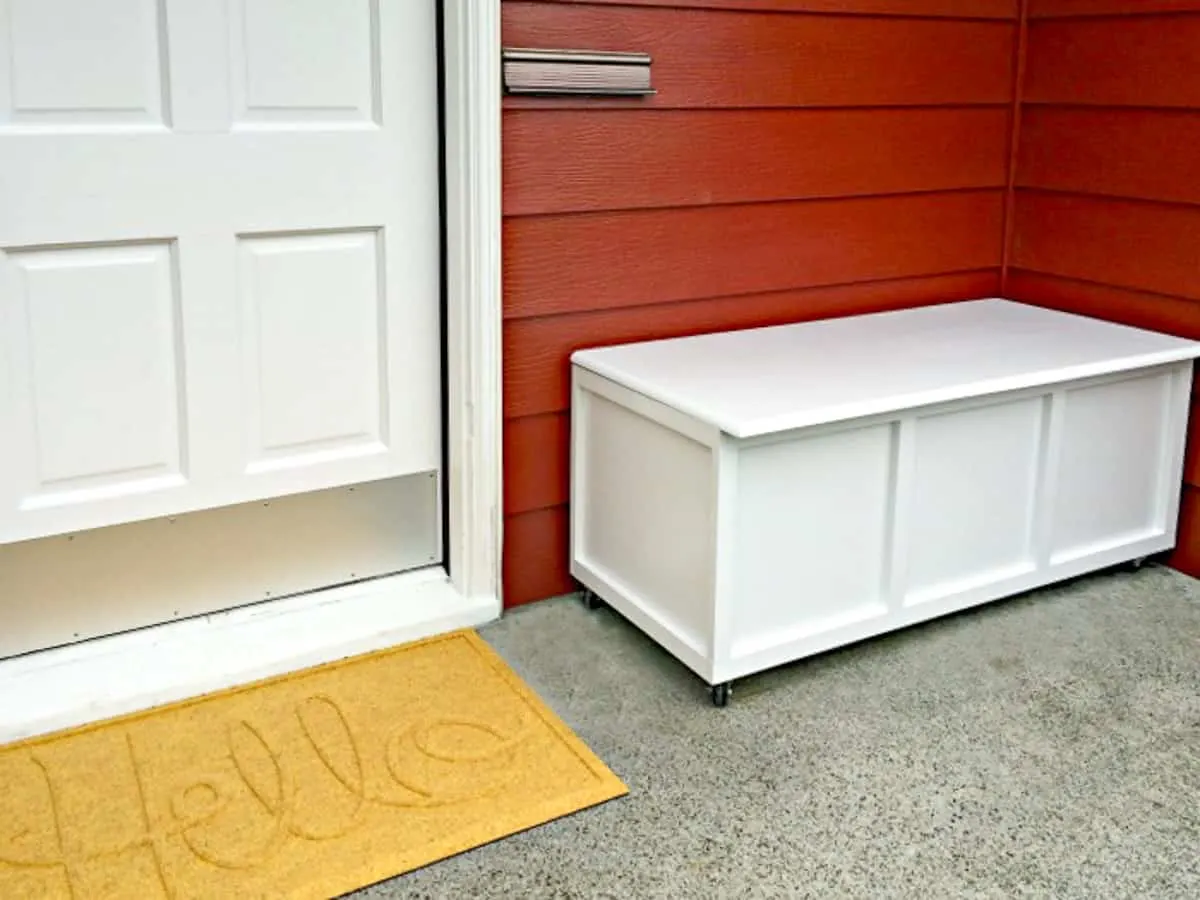
Isn't it gorgeous? And exactly what I was looking for! The trim would echo back to our huge 9-pane picture window at the front of the house, and the dimensions were perfect for the space. I love the pop of color under the lid, but I'll stick with boring white for now.
I won't go through the step by step building process, since Kim did such a great job with her tutorial. But I'll show you some changes I made along the way, and some mistakes you can hopefully avoid!
This post contains affiliate links for your convenience. Purchases made through these links may earn me a small commission at no additional cost to you. Please visit my disclosures page for more information.
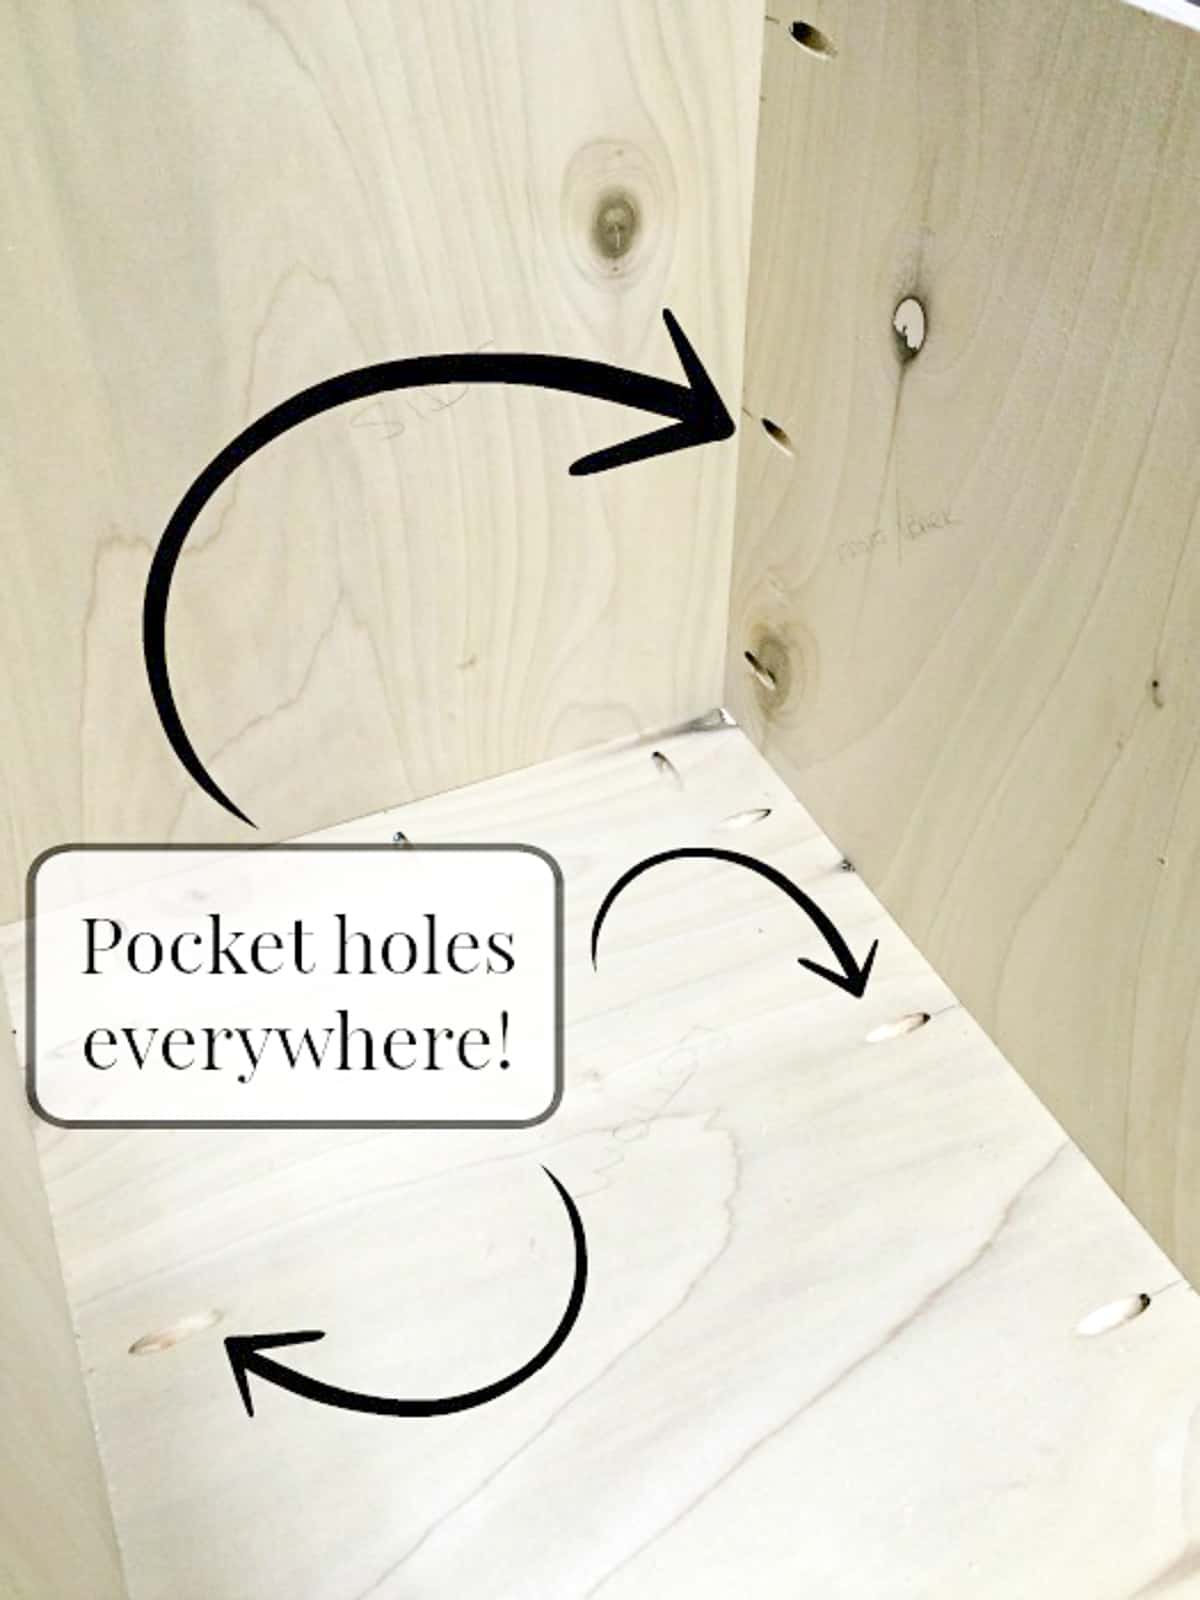
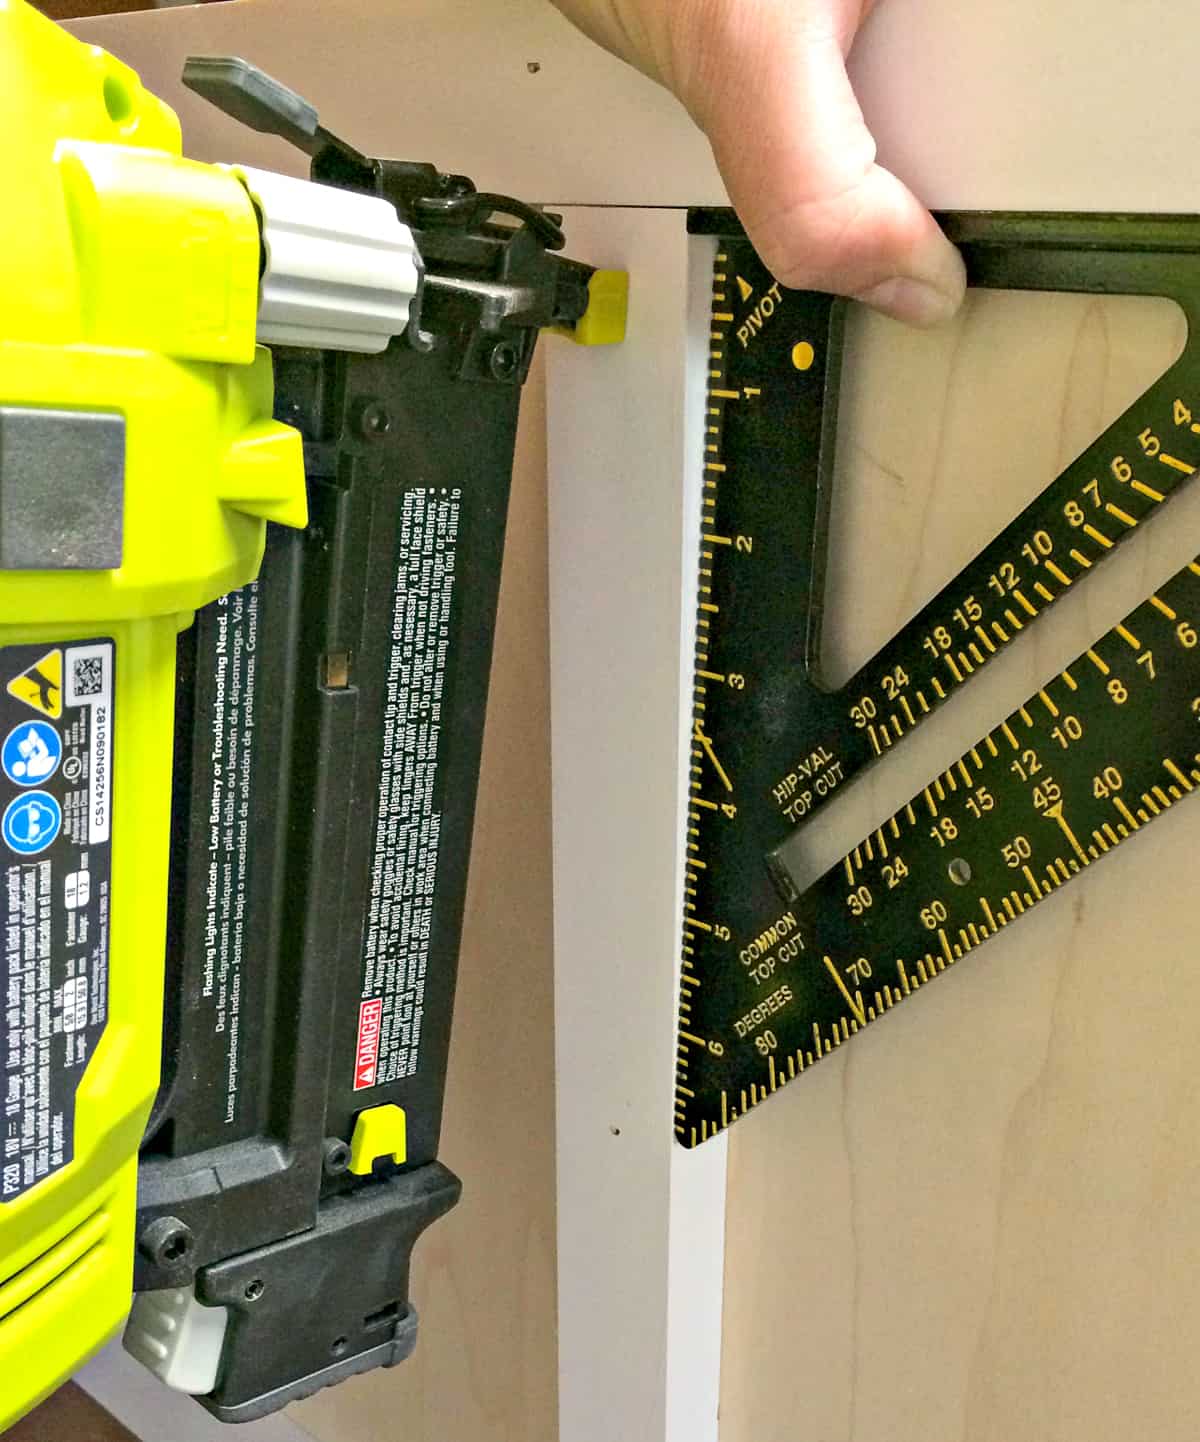
My first change was to assemble the box with pocket holes and screws, rather than glue and nails. I was worried that nails wouldn't hold up to constant abuse from our son and his friends grabbing toys out of the box.
I used my pocket hole jig to make the holes, then the Kreg right angle clamp to hold the pieces in place while I screwed them together.
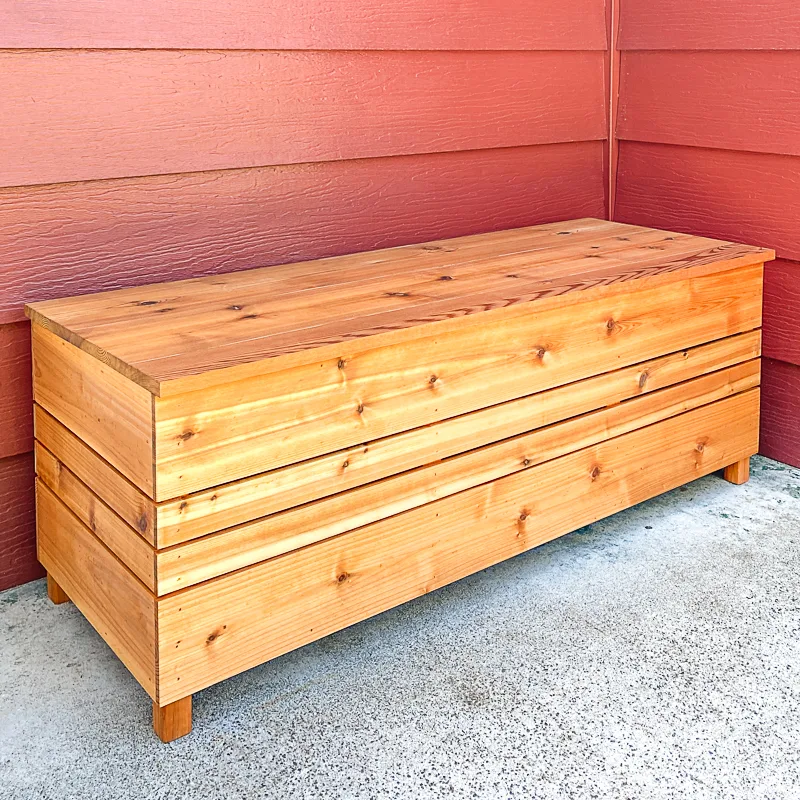
My trim turned out slightly different on the ends of the box. I wrapped the top and bottom of the box with 1x2 primed trim boards. I left a ¾" overhang on the front and back trim, and cut the side pieces to fit.
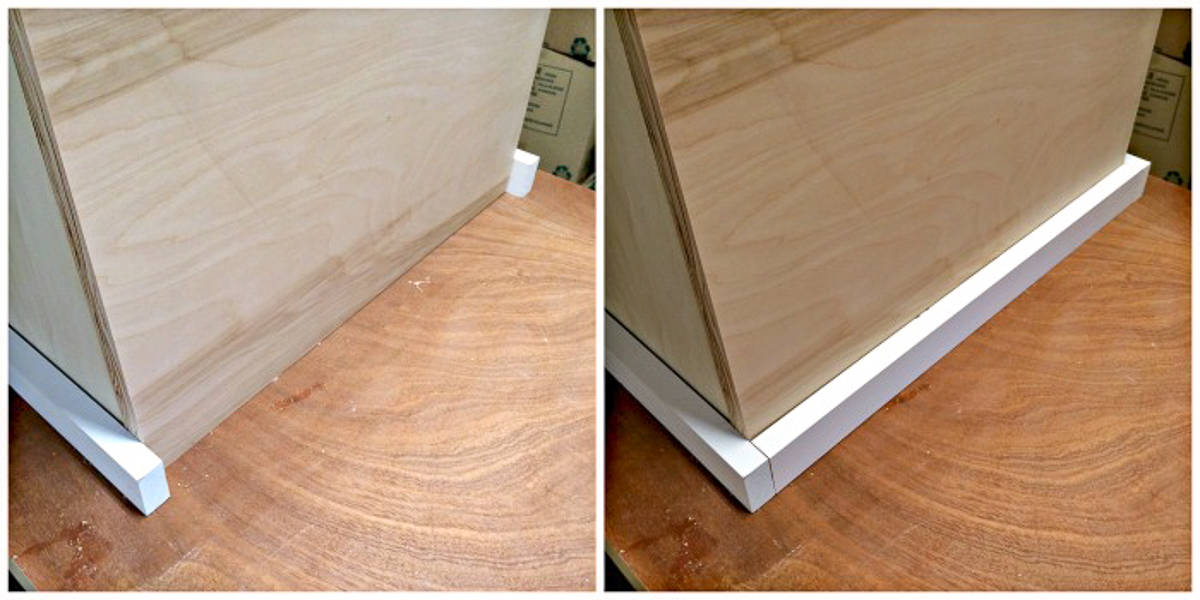
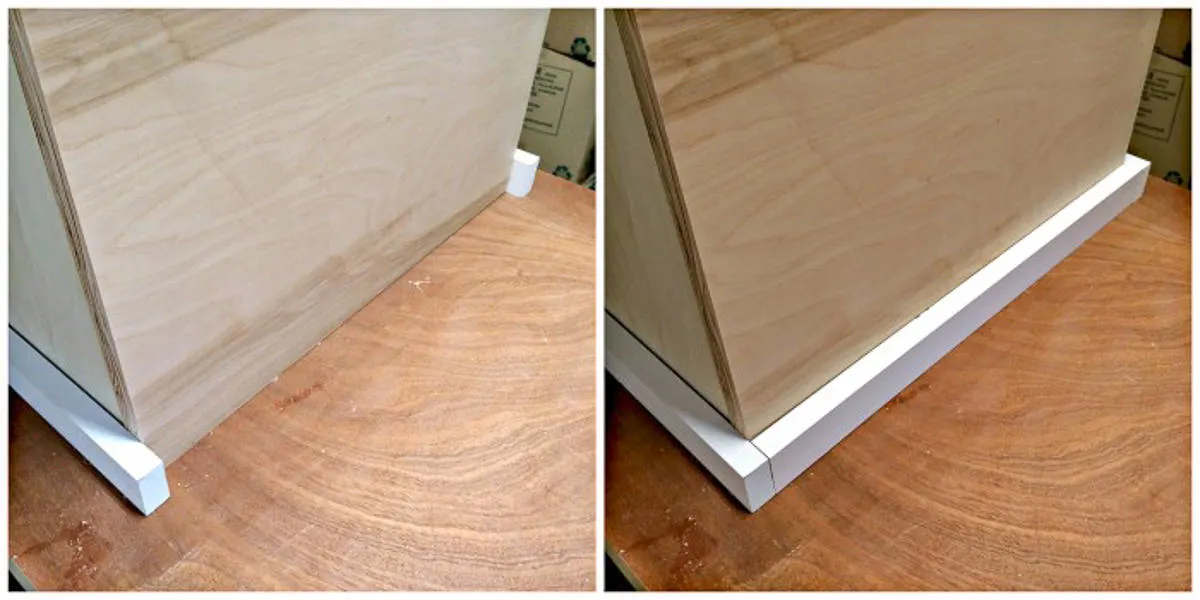
I cut each vertical trim piece to fit, making sure each one was at a perfect 90 degree angle when nailing it in place.

I didn't add any vertical trim pieces to the ends of the box. I offset the front edge pieces by ¾", so they frame out the side panels without any additional trim. That resulted in slightly narrower trim on the sides than the top and bottom, but I liked the lighter look.
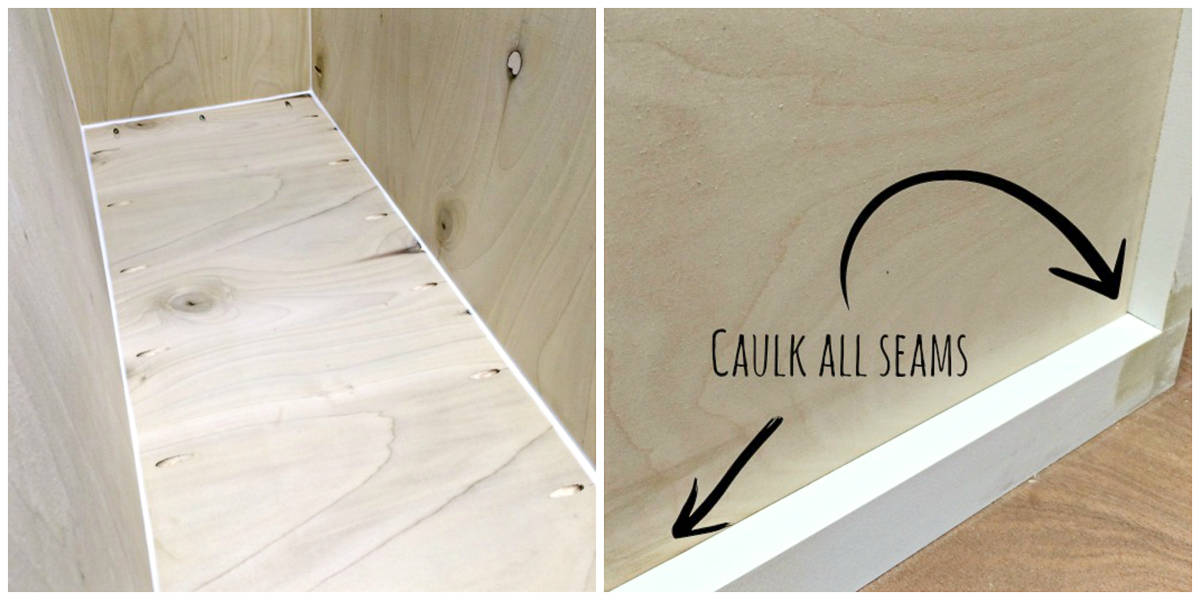
Once the trim was in place, I filled every crack and hole with wood filler to create a nice smooth surface.

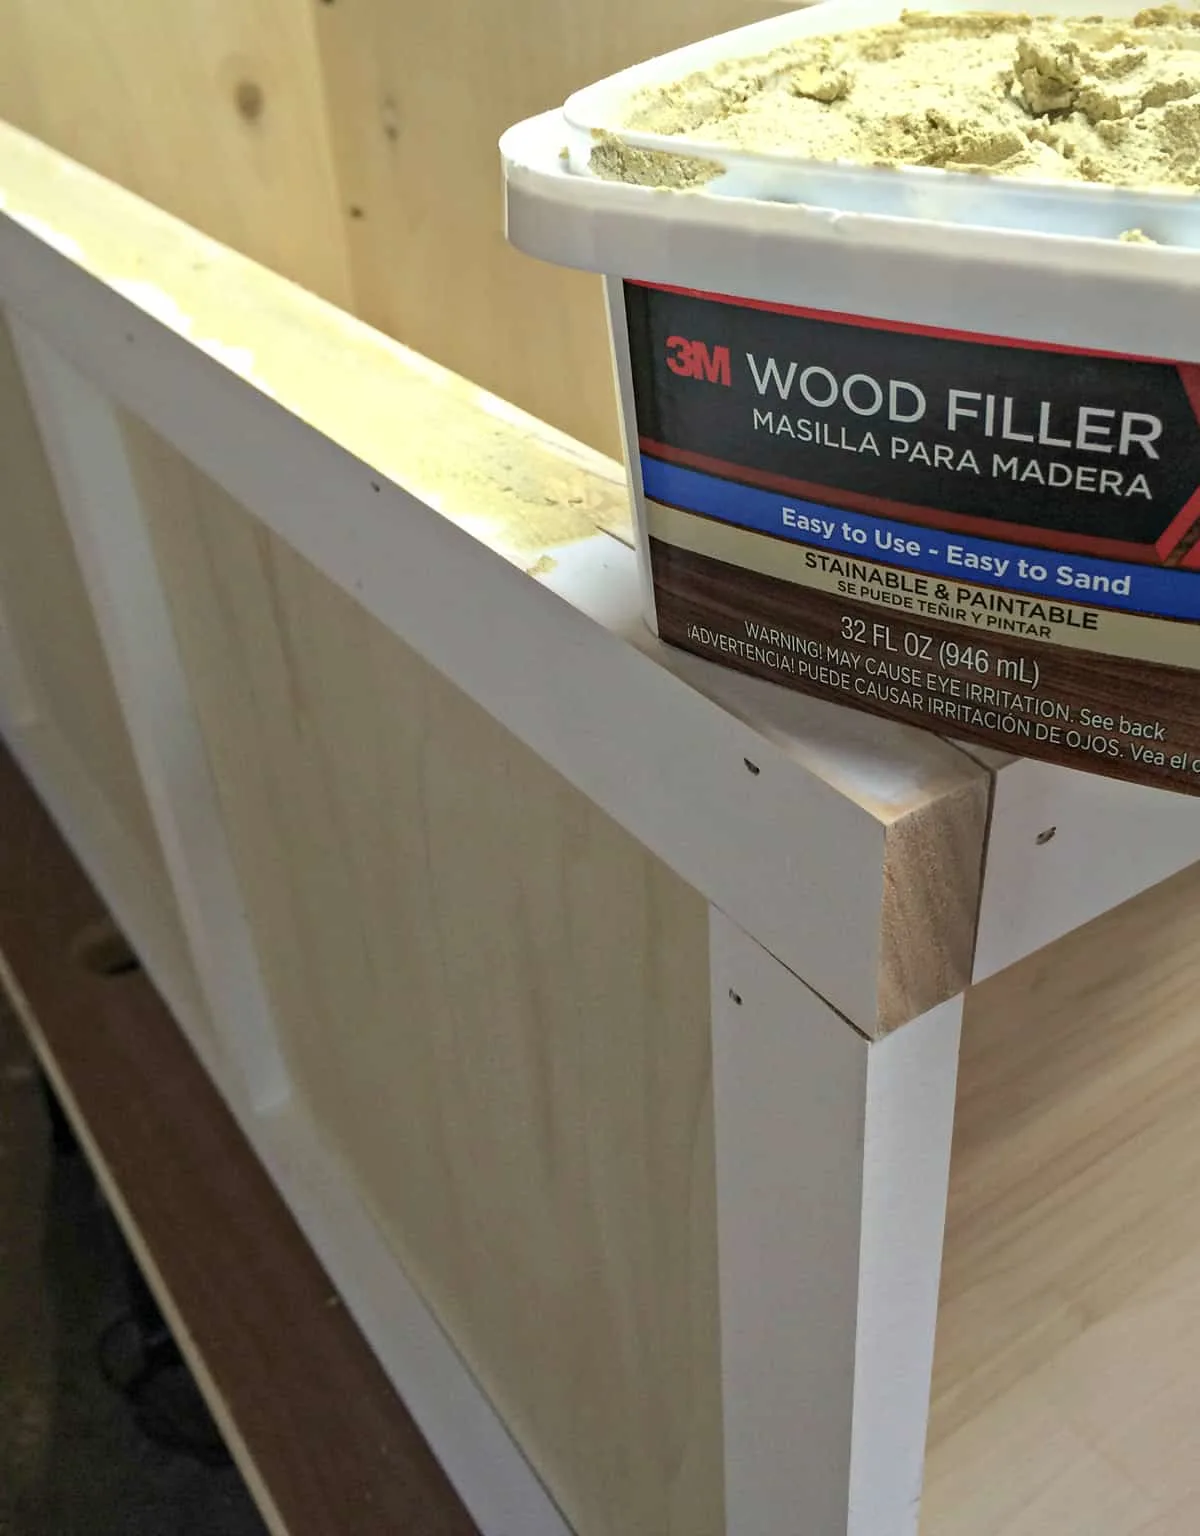
After all the wood filler was sanded down and the dust cleaned up with a tack cloth, I filled every seam with paintable caulk. It seemed like it took forever to caulk around every one of those squares, but it gave the final product a much more finished look.

After primer and two coats of white outdoor paint, it was time to build and attach the lid to the box.
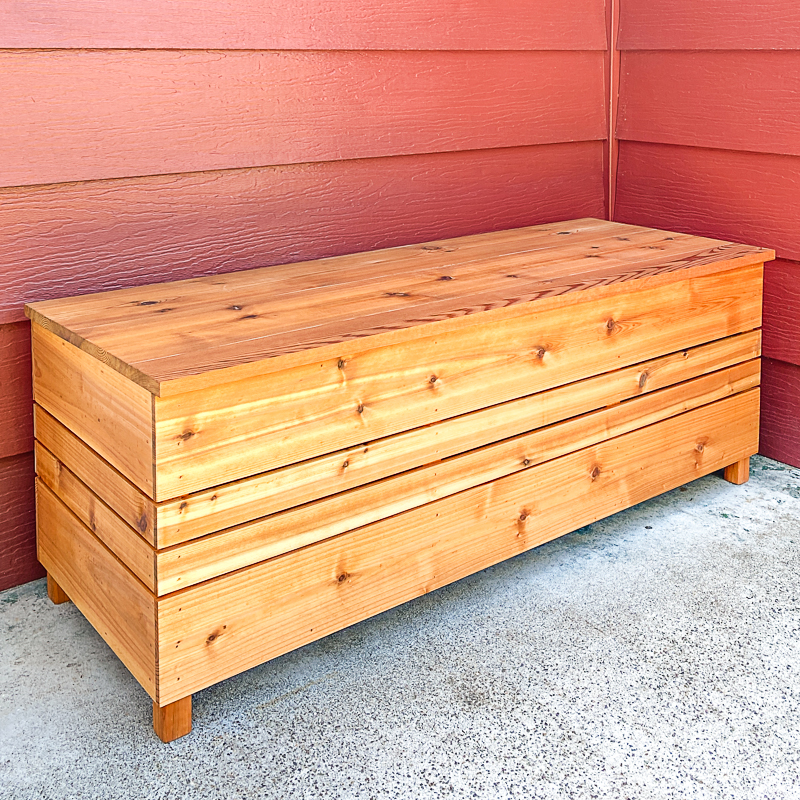
The original design called for a plywood top with quarter round trim around the outside edge. However, the rain absolutely destroyed it, so I ended up building another version out of cedar, which is rot-resistant.
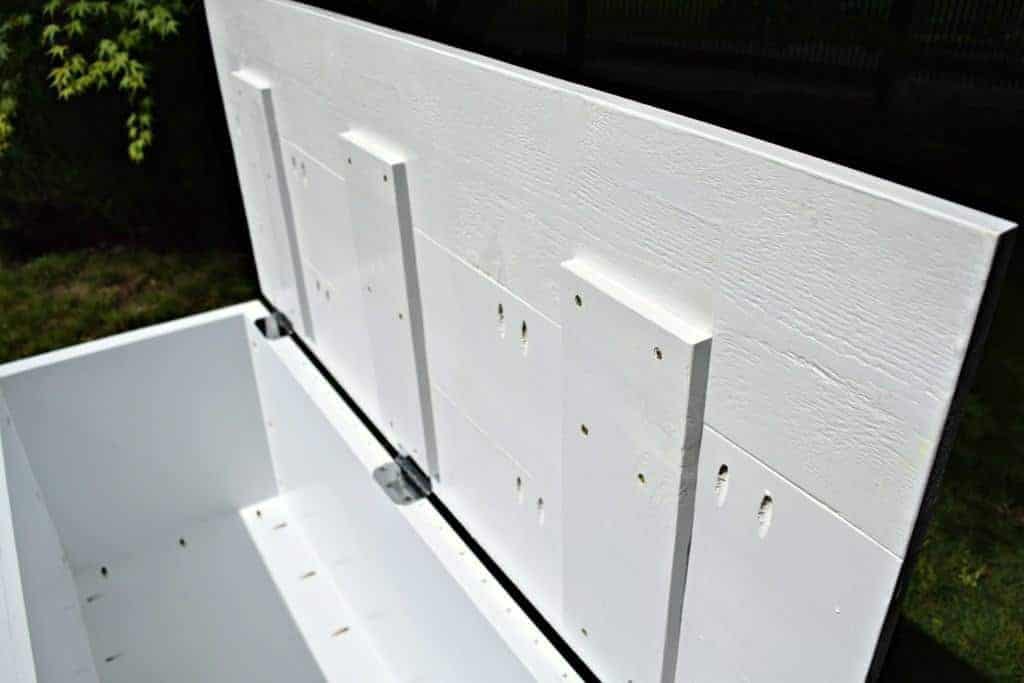
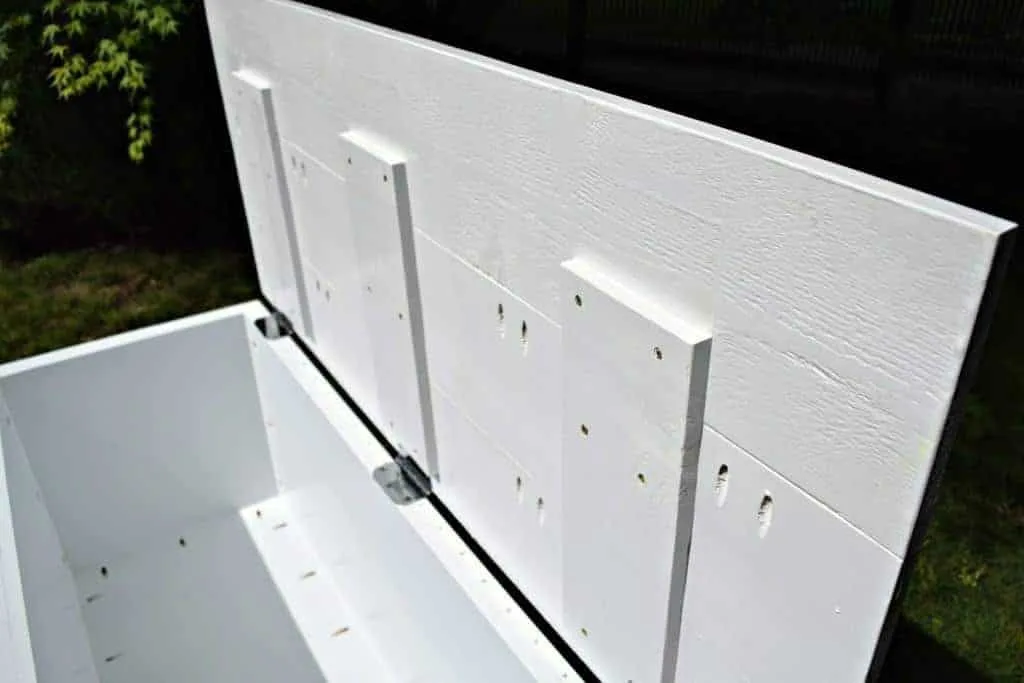
The door hinges raise up the back of the lid slightly, but this turned out to be a good thing. Rain will now flow off the lid, rather than pool in the middle. Yay for happy accidents!
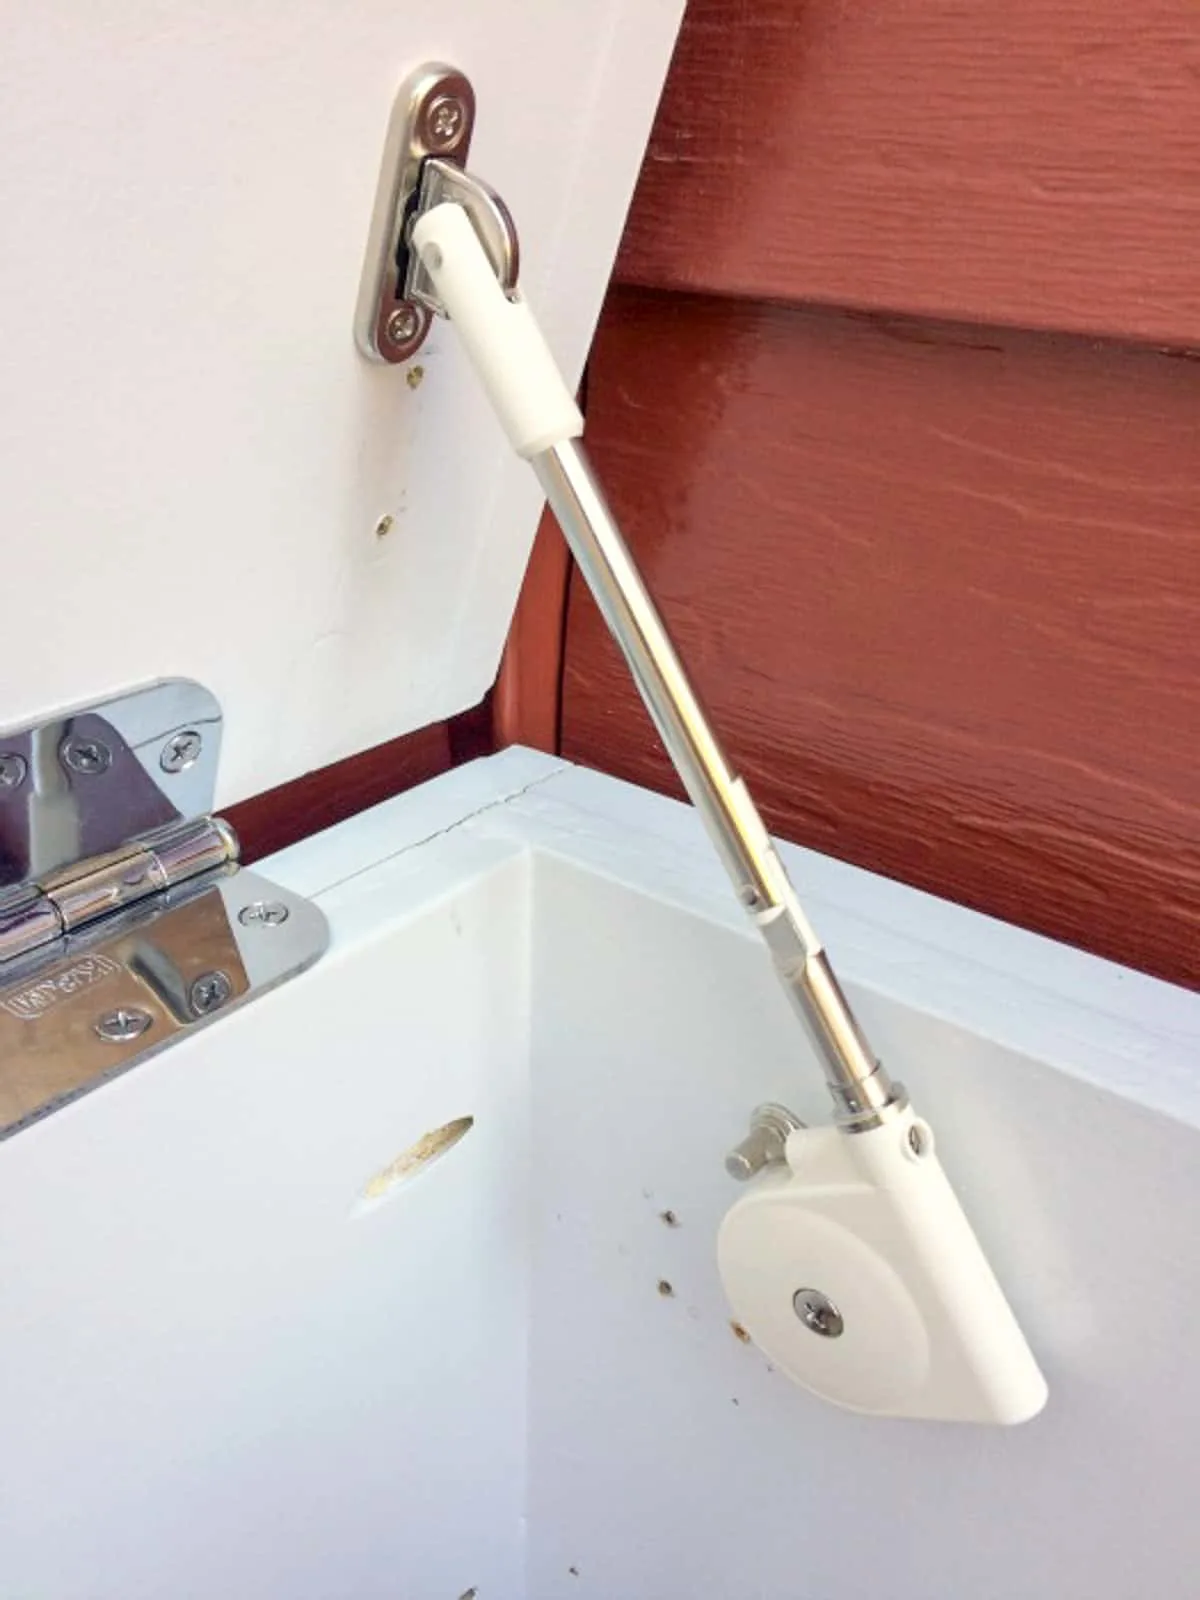
I also decided to install a soft-close lid support so the lid wouldn't slam down on little fingers. However, the instructions for installing the lid support were insanely un-helpful, and I ended up having to reinstall it a few times to get it to function correctly. Pay no attention to those extra holes!

I am so excited to finally get this project completed and in place. It has a ton of room for all my son's outdoor toys, and I can even put a few pillows and cushions in there to make more comfortable seating.

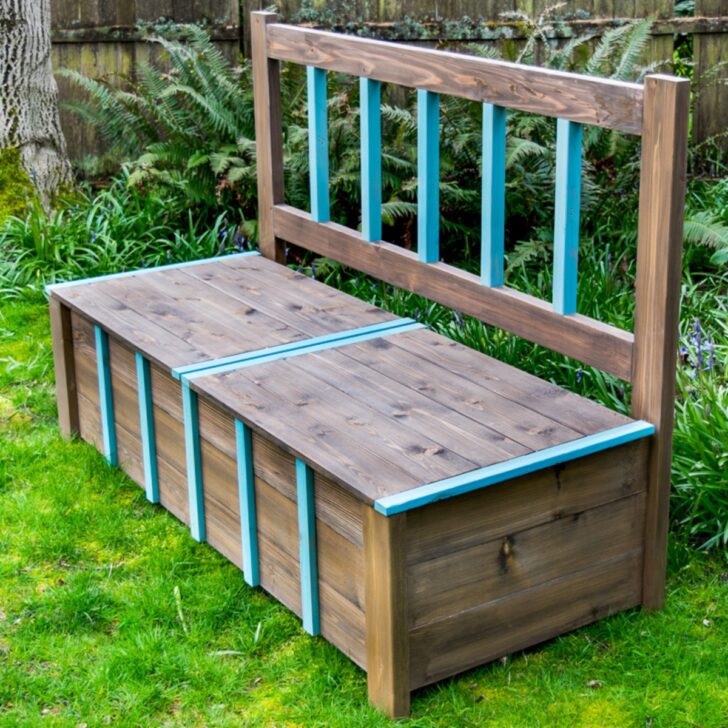
Check out these other outdoor furniture projects!


Landscape Design Ideas Photos Gallery | Romantic Garden
Wednesday 22nd of March 2017
[…] https://www.thehandymansdaughter.com/2015/10/26/front-porch-update-part-1-diy-storage-bench/ http://romaticgarden.millmax.org/compost-into-soil/ http://romaticgarden.millmax.org/worm-composting-food-52/ http://romaticgarden.millmax.org/english-garden-valbonne/ […]
40 DIY Container Project Ideas To Completely Declutter Your Home | Gardening And Home
Tuesday 22nd of November 2016
[…] 01. Storage Bench […]
Kenny Gavaldon
Tuesday 14th of June 2016
Very nice post. I just stumbled upon your blog and wanted to say that I've truly enjoyed surfing around your blog posts. After all I will be subscribing to your feed and I hope you write again soon!
Antonia Cruz
Friday 27th of November 2015
Great job! It looks perfect! I hope that my husband will be enthusiastic about it as much as I am! Such a storage bench is good for storing everything you need to be stored away! I was considering buying an old trunk that can be used as storage but making our own bench like this sounds like a wonderful family project! Thanks for sharing!
The Handyman's Daughter
Friday 27th of November 2015
It would be a great family project! Let me know how it turns out.
Jozie
Wednesday 4th of November 2015
I love this finished product but not just for the proposed idea. When we have packages delivered, they are always left on the front steps, behind a plant pot or balanced against the door-exposed to the elements. BUT THIS-WOW! It would be perfect for the delivery men to leave or packages protected from the snow and rain. Thank you!
The Handyman's Daughter
Wednesday 4th of November 2015
Yes, we're going to start using the storage bench for this purpose too. Just need to corner the delivery guys and let them know they can leave packages in it. Especially with Christmas coming, we get a ton of packages!