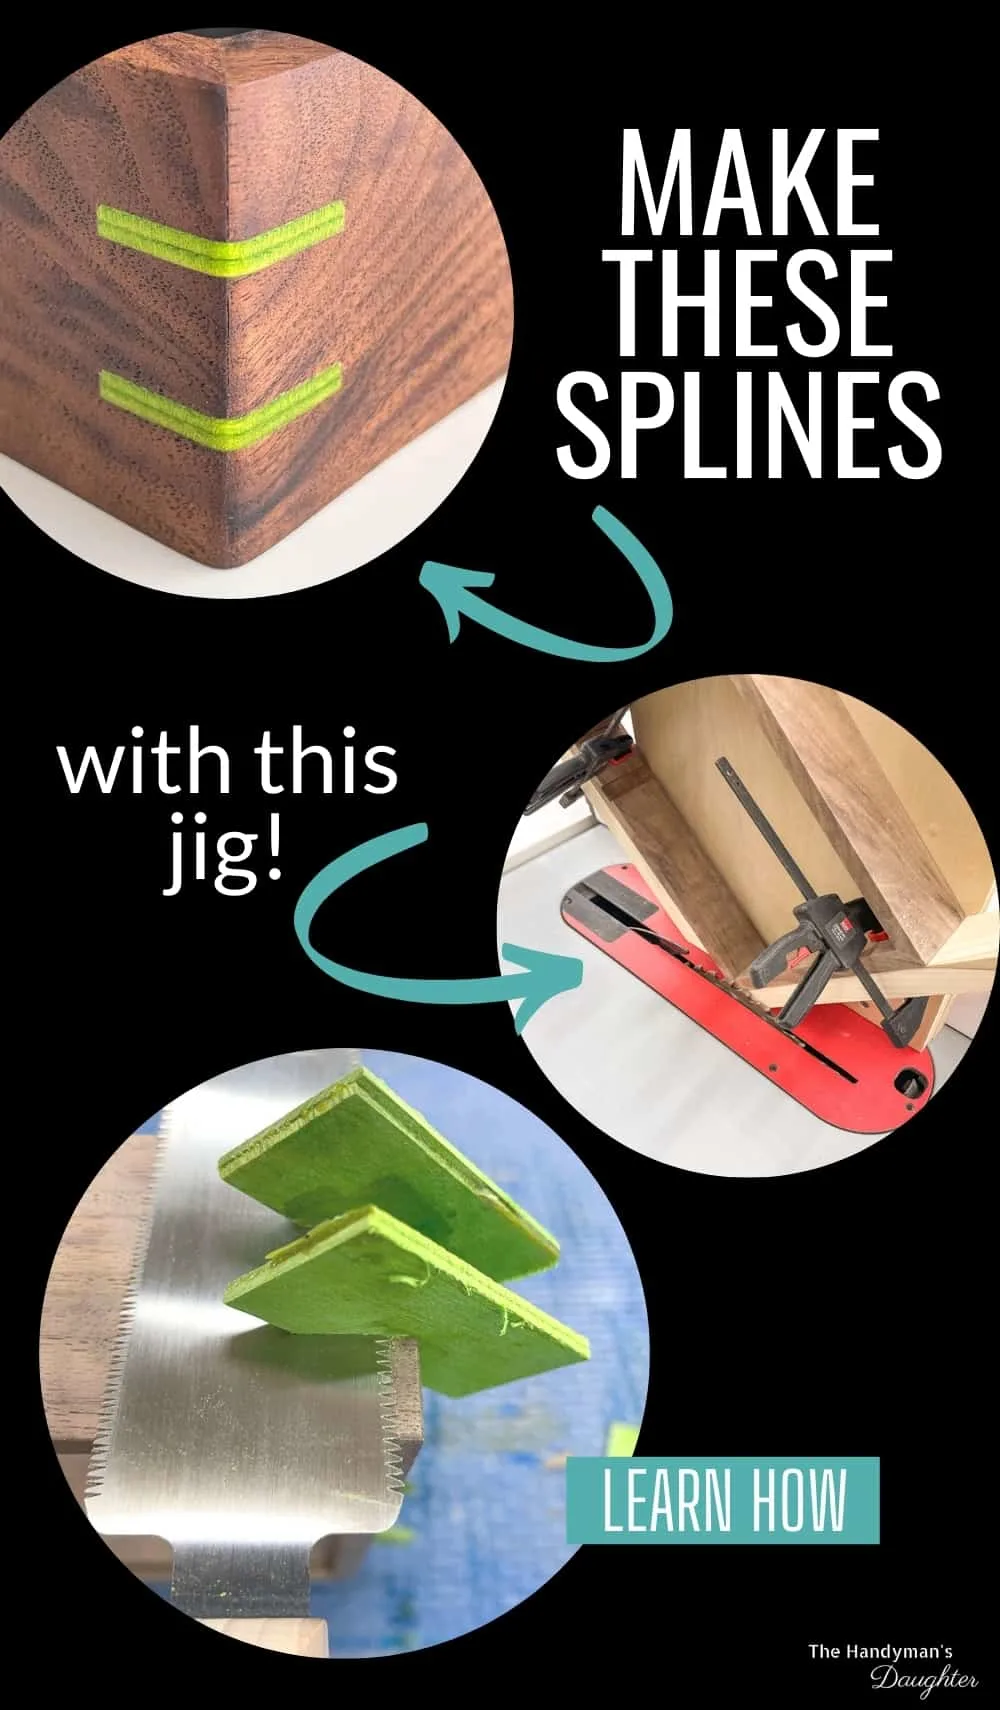
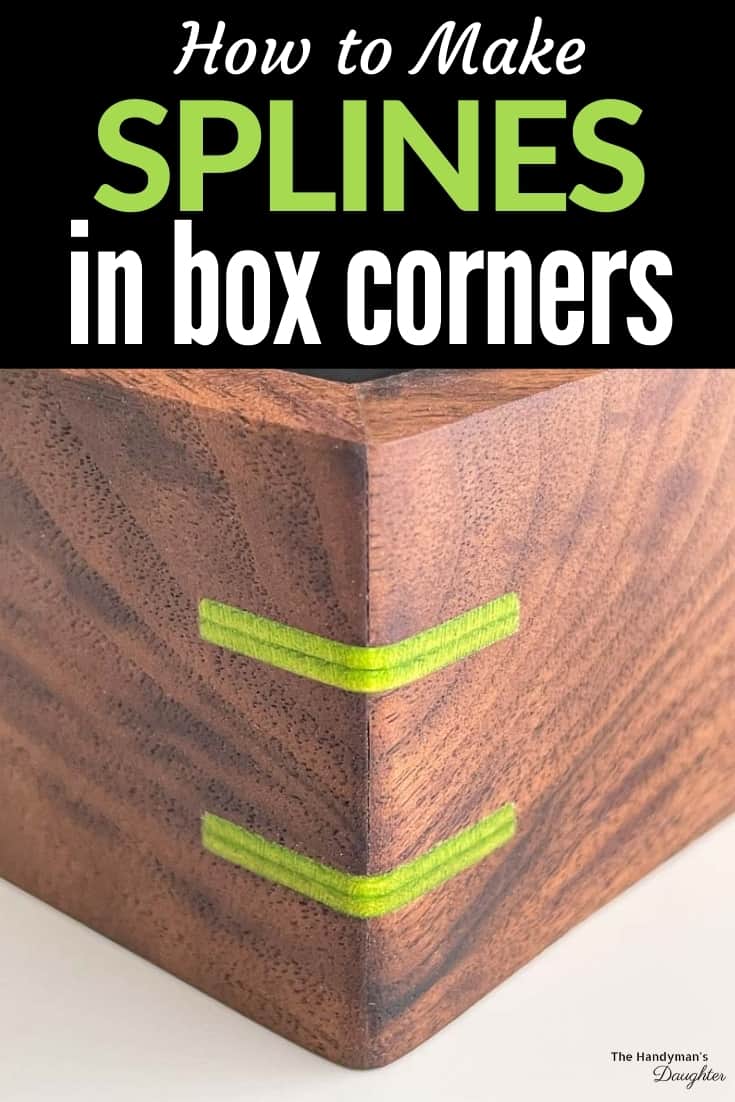
Strengthen mitered corners on picture frames and boxes with splines! I'll show you how to make a spline jig for the table saw, and how to use it safely!

What is a spline?
A spline is a strip of wood inserted into a groove in two boards with glue. It can be used to align the edges, or to reinforce mitered corners. It can also add visual interest when a contrasting wood is used in an exposed spline.

The spline jig I made is for strengthening mitered corners on picture frames and small boxes. Just using glue on a miter joint may result in breaks along the seams as the wood expands and contracts. The spline is glued into the joint across the two adjacent boards to hold the corner together tightly.
How to make a table saw spline jig
This spline jig is custom sized to fit over the table saw fence, so your dimensions may differ from mine. But the measurements are really simple, so just follow the directions below to make one for your own saw!
This post contains affiliate links for your convenience. Purchases made through these links may earn me a small commission at no additional cost to you. Please visit my disclosures page for more information.
Make the fence saddle
Just like on a horse, the fence saddle keeps the spline jig riding securely throughout the cut. Usually, cutting tall pieces like this is pretty dicey, but the saddle ensures that everything stays straight without tipping.
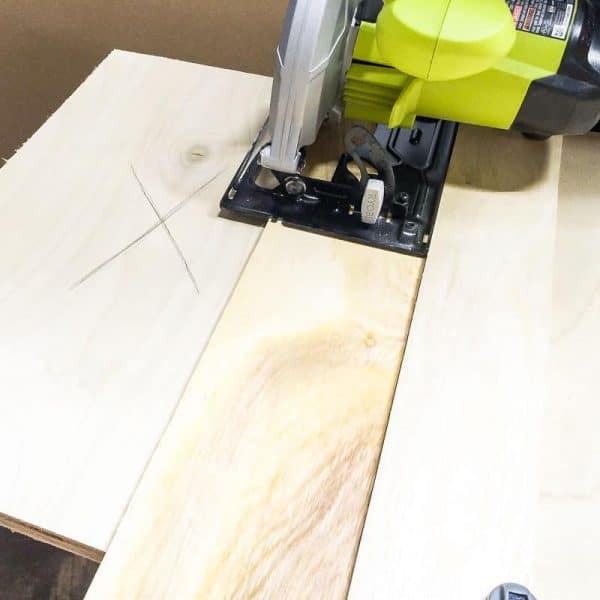
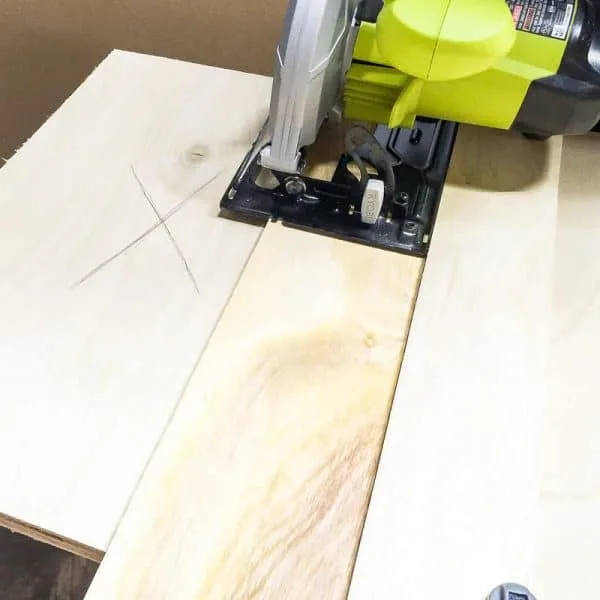
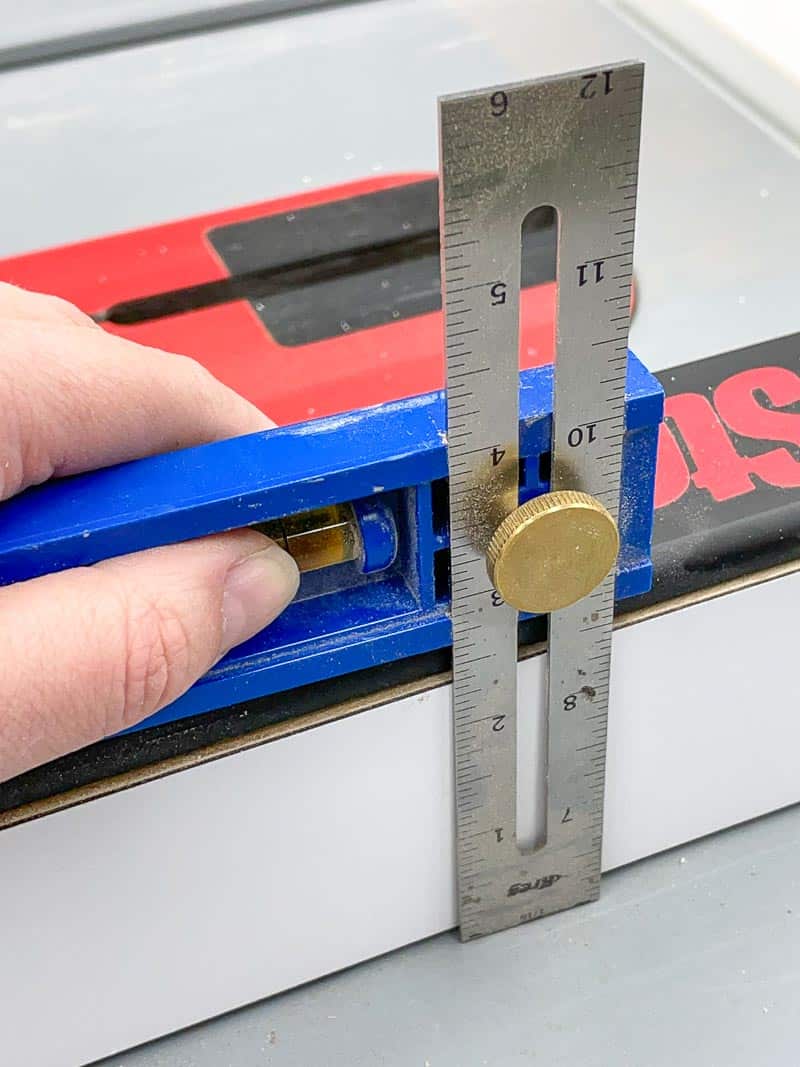
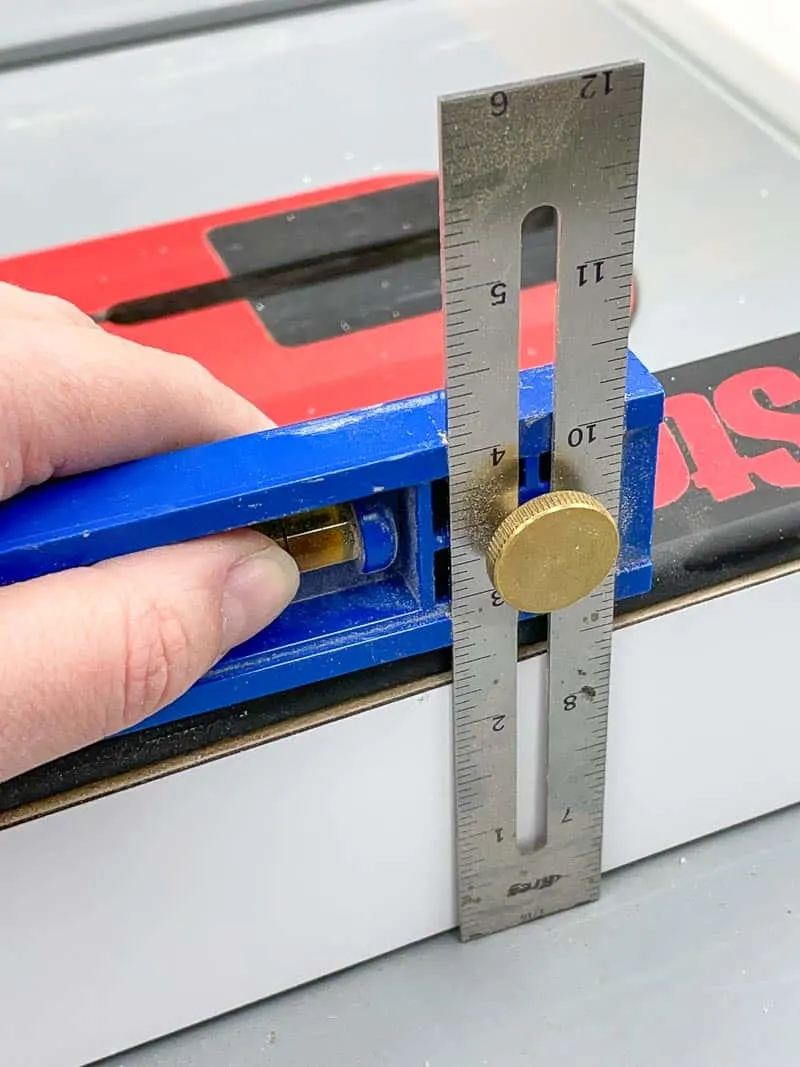
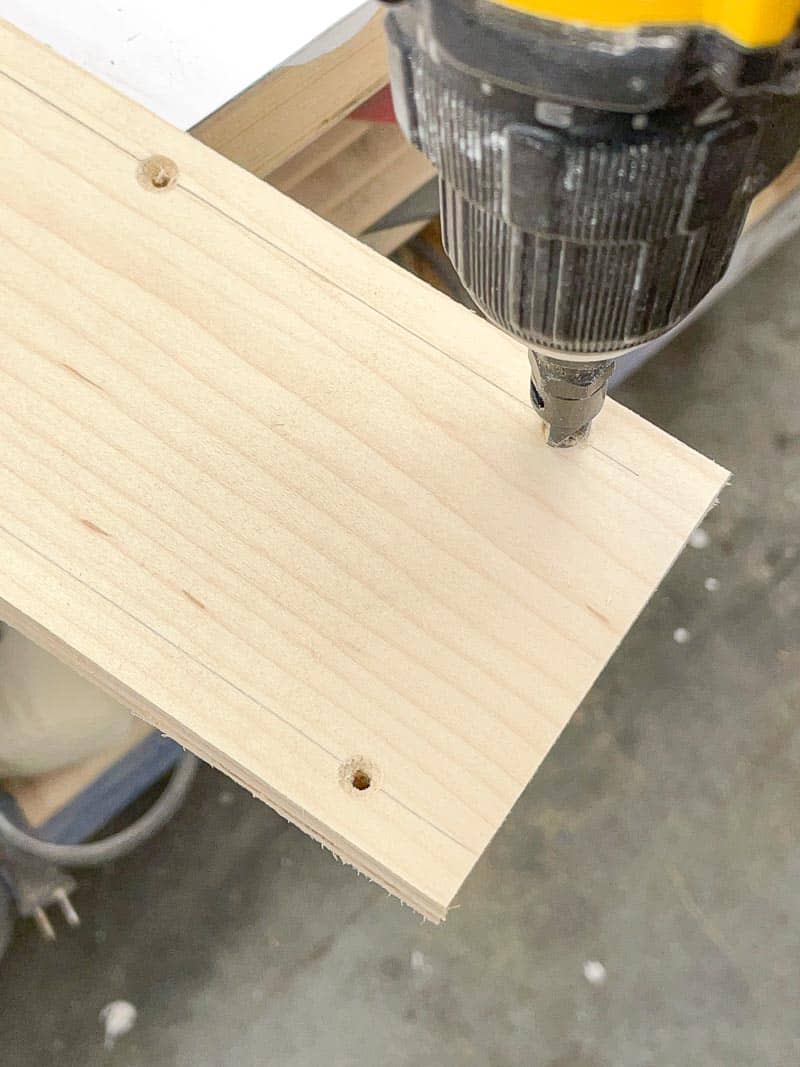
Measure the height of your table saw fence. Cut two pieces of ¾" plywood or MDF to that width, and 12-18" long.
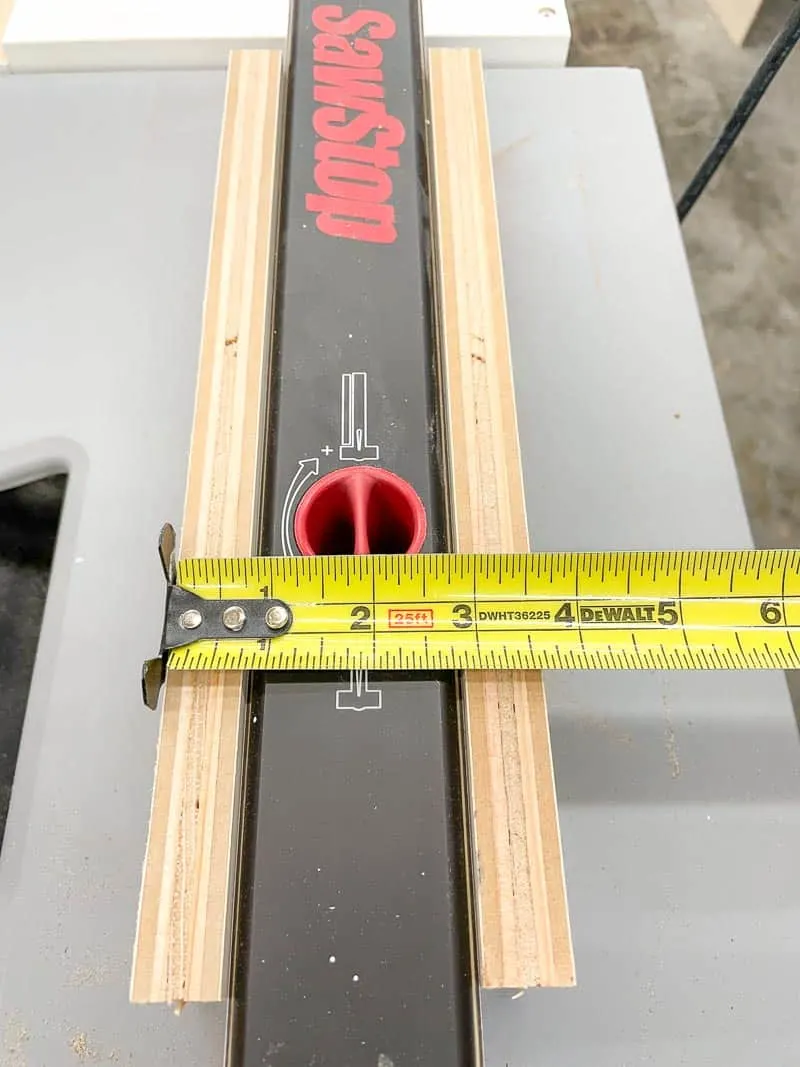
Place the side pieces on either side of the fence, then measure the distance across the top. Cut another piece of ¾" plywood to that width, and the same length as the other two pieces.

Mark a line ⅜" in from both sides of the top piece. Drill countersink holes along those lines, then attach the top to the sides with wood glue and 1 ¼" flat head screws.

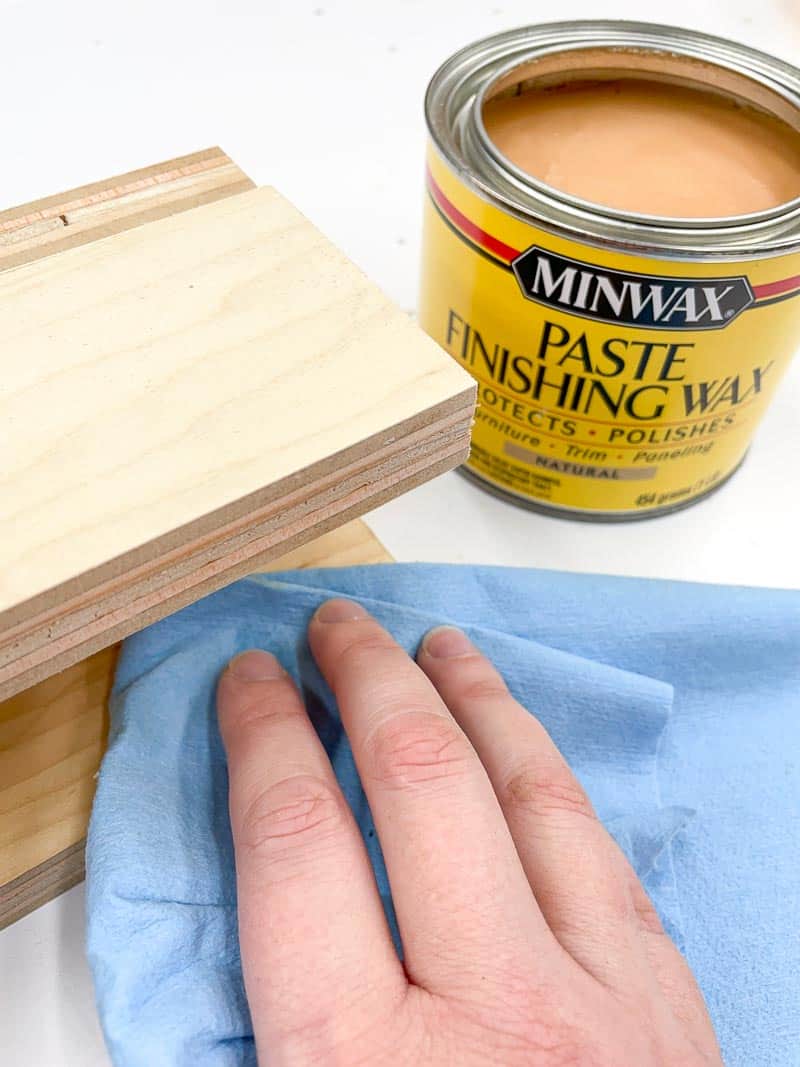
Test to make sure the saddle can slide smoothly along the top of the fence. It should be snug side to side, but move easily front to back. Mine had a little too much friction, but a little paste wax rubbed onto the inside of the saddle worked like a charm!

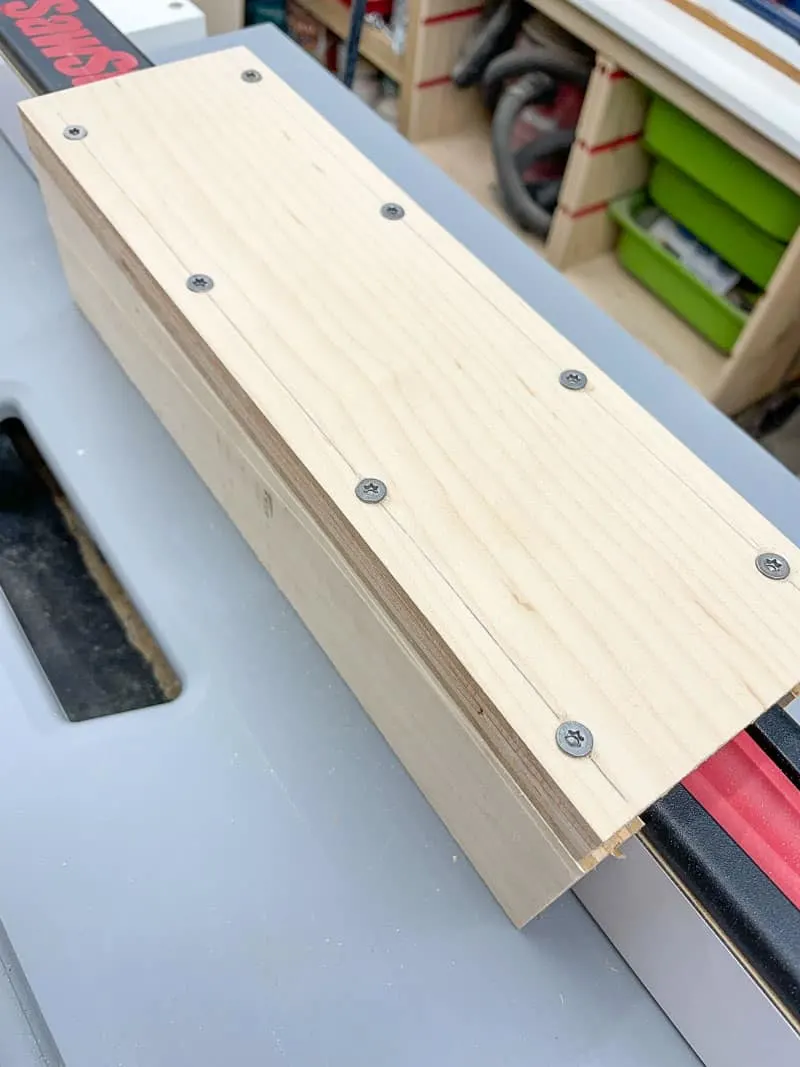
Here's how the spline jig saddle should look when it's complete on your table saw fence.

Make the 45 degree supports
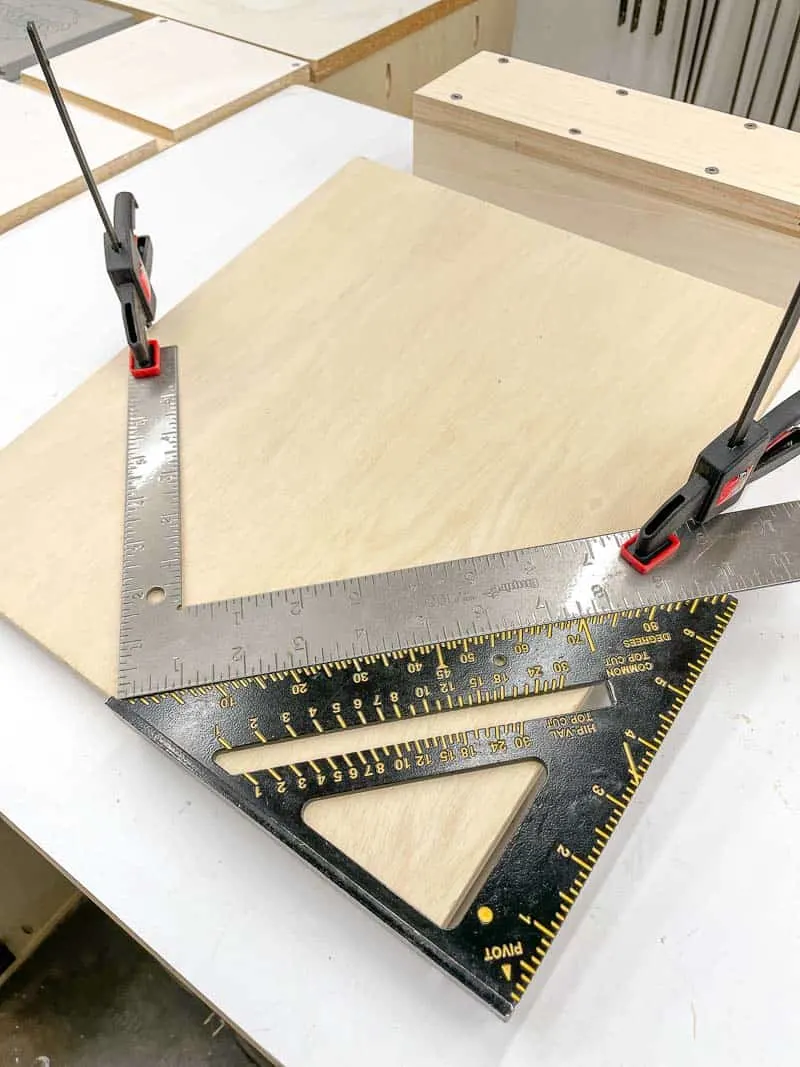
Cut a larger piece of plywood the same length as the saddle. Mark the bottom center, and place the corner of a flat framing square at that point.
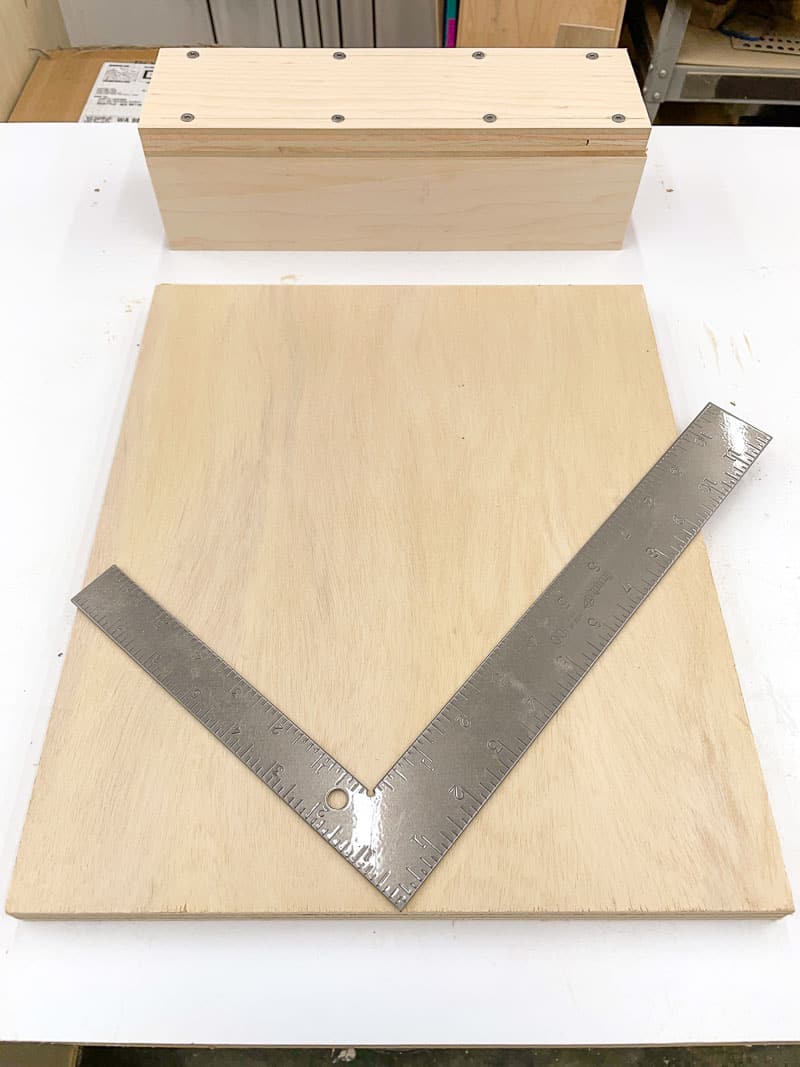
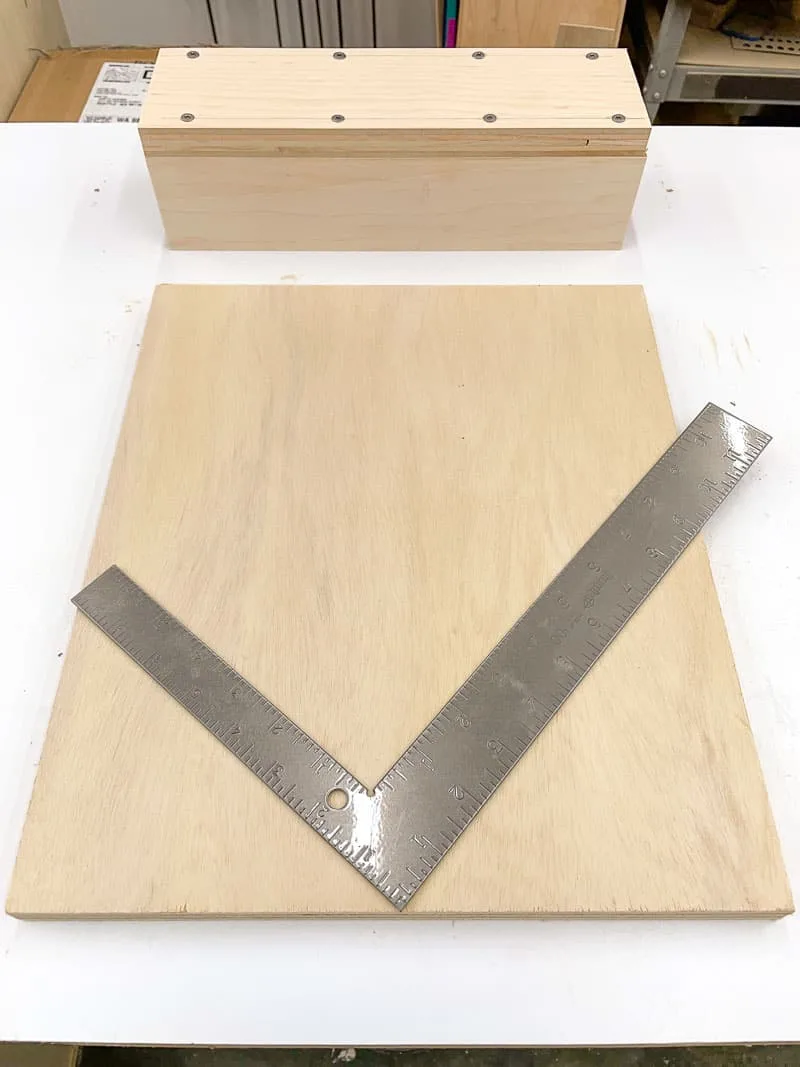
Now place a speed square along the bottom and line up the two edges to get an accurate 45 degree angle. Clamp the framing square securely in place, then double check the angle to make sure it didn't shift. Mark the lower edge of the framing square with a pencil onto the plywood so you don't lose your positioning.

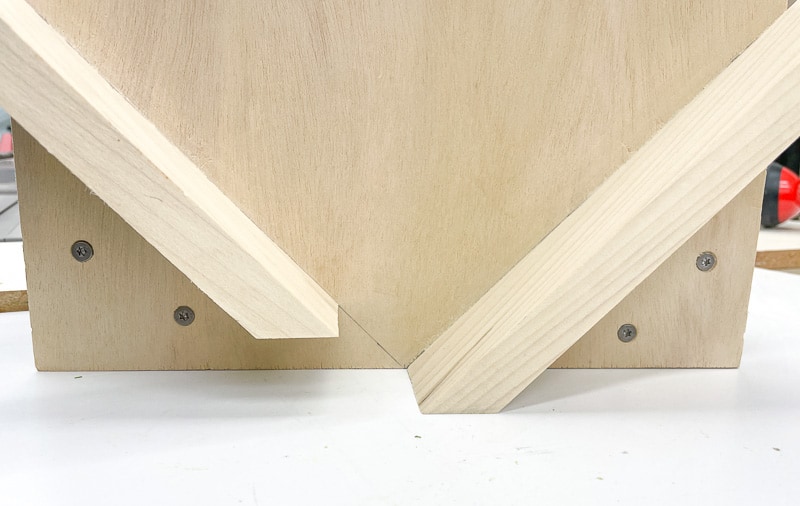
Cut two 1x2 boards about 8" long with a 45 degree angle on one end. Align one piece along the right side of the V with the point even with the bottom of the plywood. The other piece should be a few inches above the bottom.
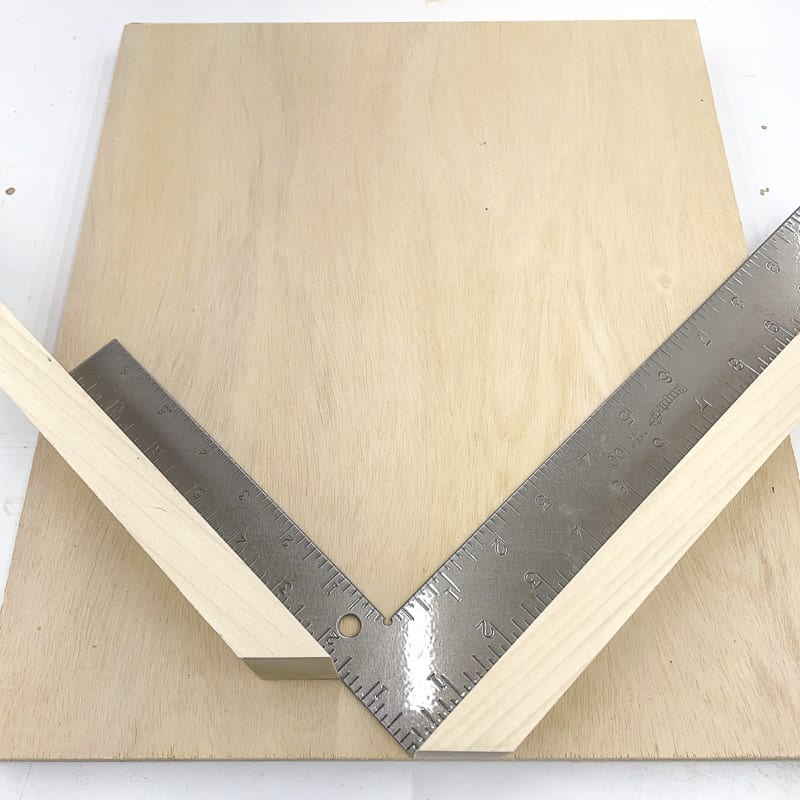
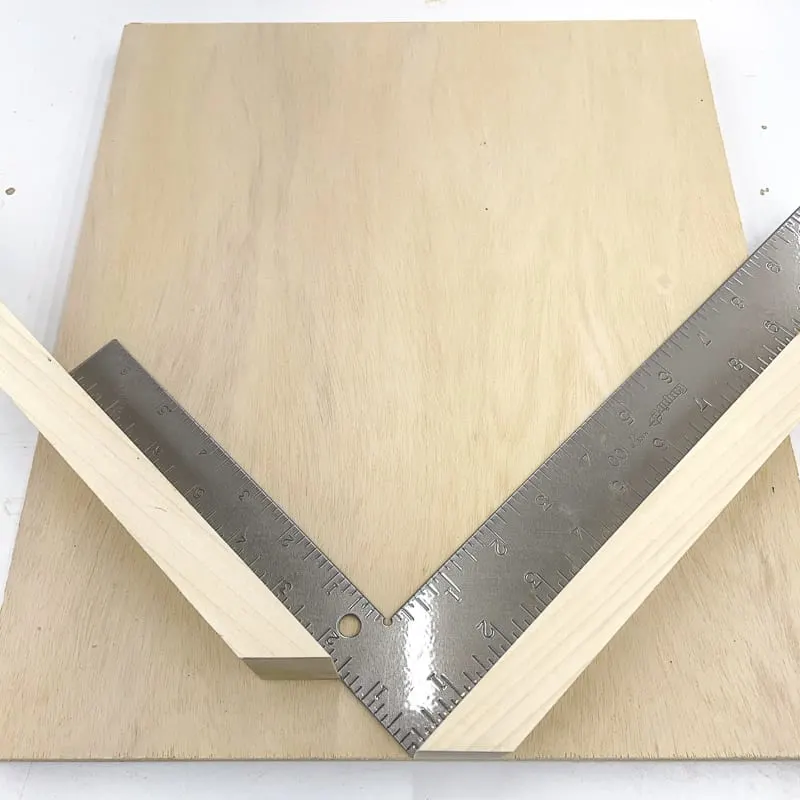
Other spline jigs I've seen have both sides meeting in the middle, or both sides elevated. If they meet in the middle, you can't see the blade to get accurate placement of the spline. Elevating the supports allows you to see the blade, but you risk getting tearout on the back of your workpiece because it's not supported behind the cut.
By keeping the front side elevated and the back support down by the blade, you get the best of both worlds! Over time, the back support may get chewed up from all those cuts in various positions, but you can easily replace it or add a block behind it to give your jig a fresh surface to cut into.
I used CA glue to hold the supports in place along the lines. This stuff instantly bonds the two parts together, so nothing shifted while I screwed the pieces to the back.

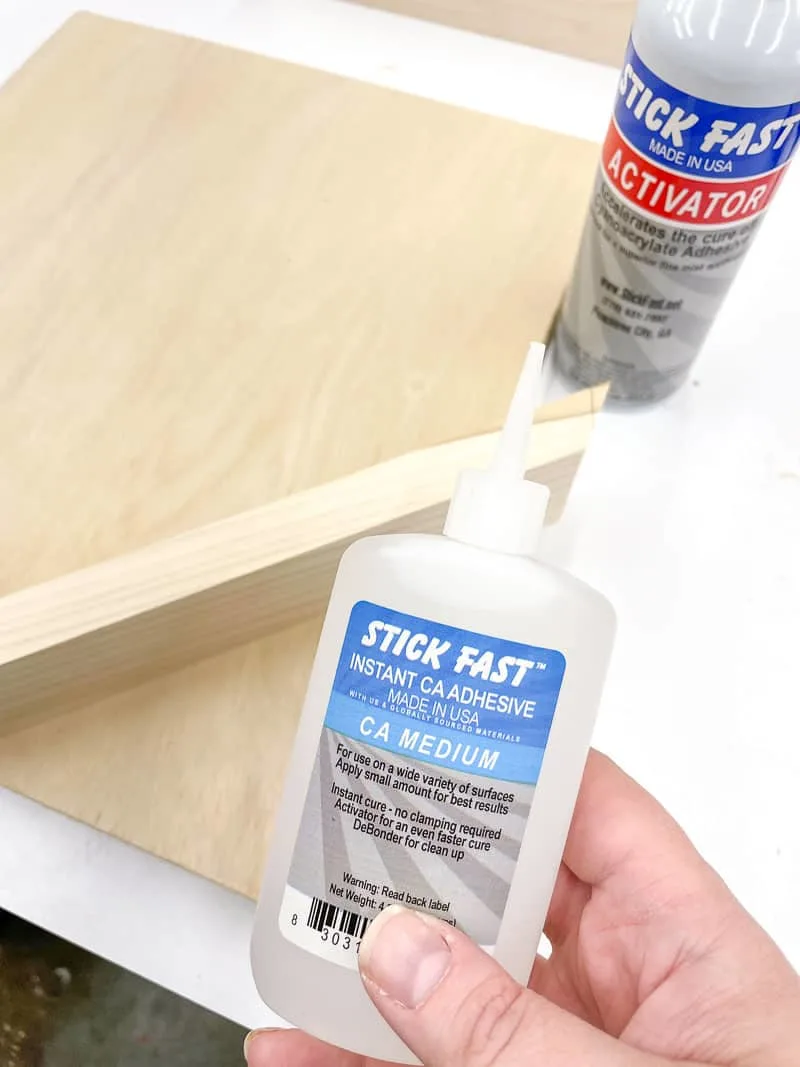
Make sure your screw on the lower support isn't in the path of the blade! I drilled mine even with the higher support.
Attach the spline jig support to the saddle
Now you can attach the two pieces of the spline jig together and take it for a test drive! Drill countersink holes in the front of the jig, and attach it to the saddle with a 1 ¼" flat head screws.
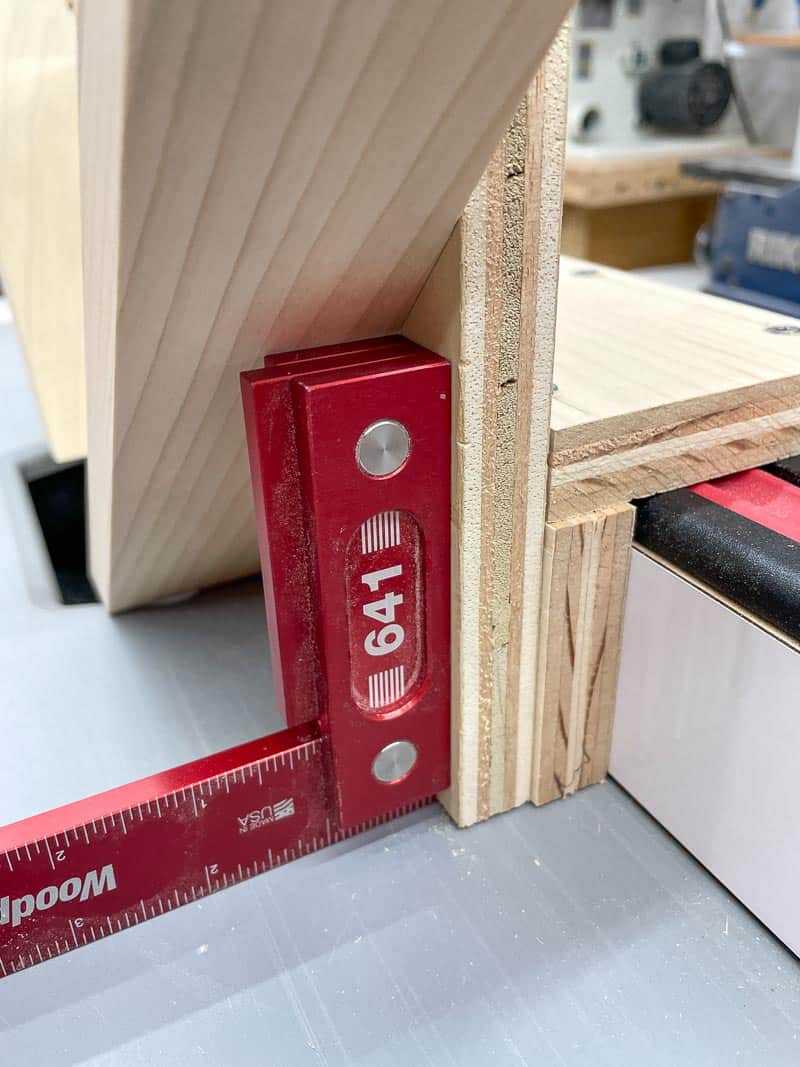
Check to make sure the vertical part of the jig is exactly 90 degrees to the table saw surface.

Now you're ready to cut some splines!
How to use a spline jig
This spline jig is super easy to use! Once you get it set up, you can cut perfect grooves in mitered corners in just a few minutes. Here's how to do it.
Switch to a flat tooth saw blade
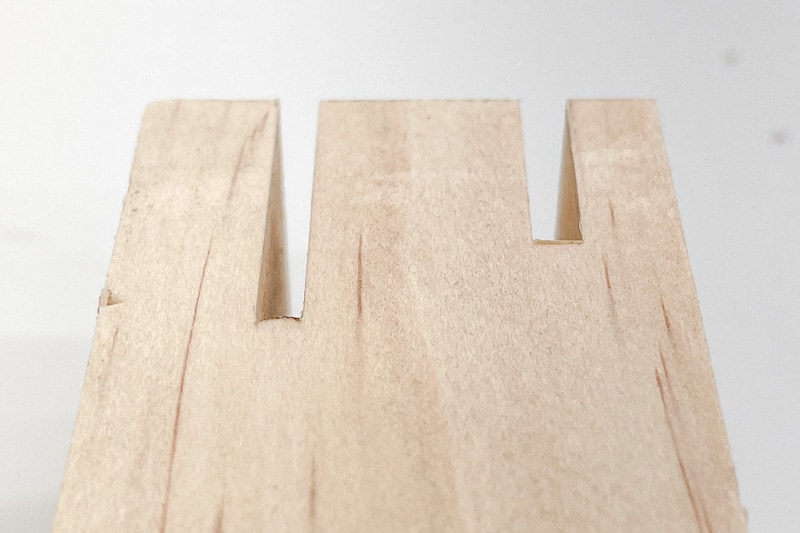
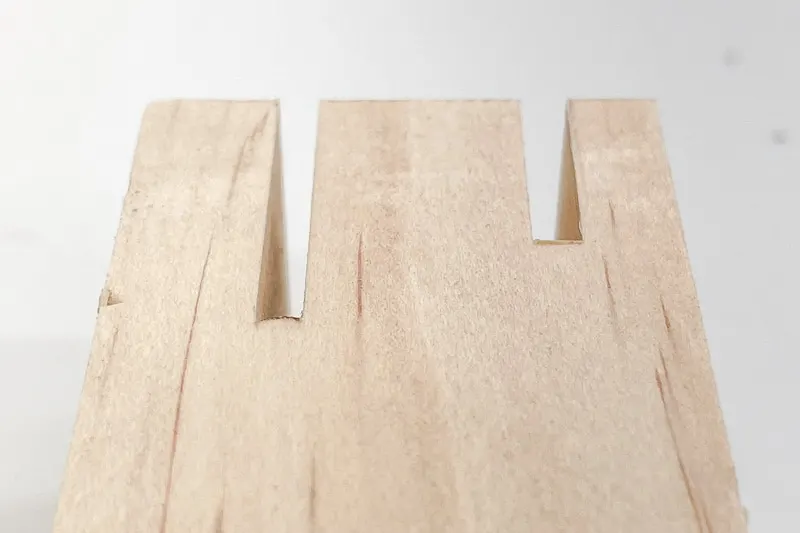
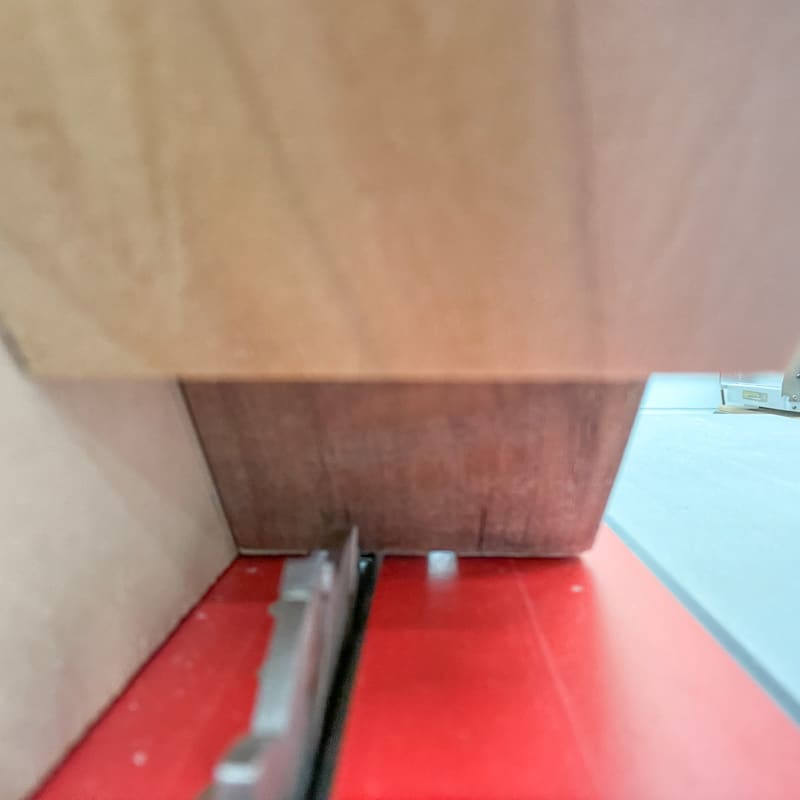
Most table saw blades have pointed teeth, which will leave small gaps at the corners of your spline groove. For the best results, consider switching to a flat tooth saw blade that will create a perfectly rectangular slot for your spline to rest in.
You can see the difference in these sample cuts (although it's a little hard to see on camera). The one on the left was made with a regular blade, where the middle is slightly raised. The one on the right was made with a flat tooth blade, resulting in cleaner corners and a flat bottom.
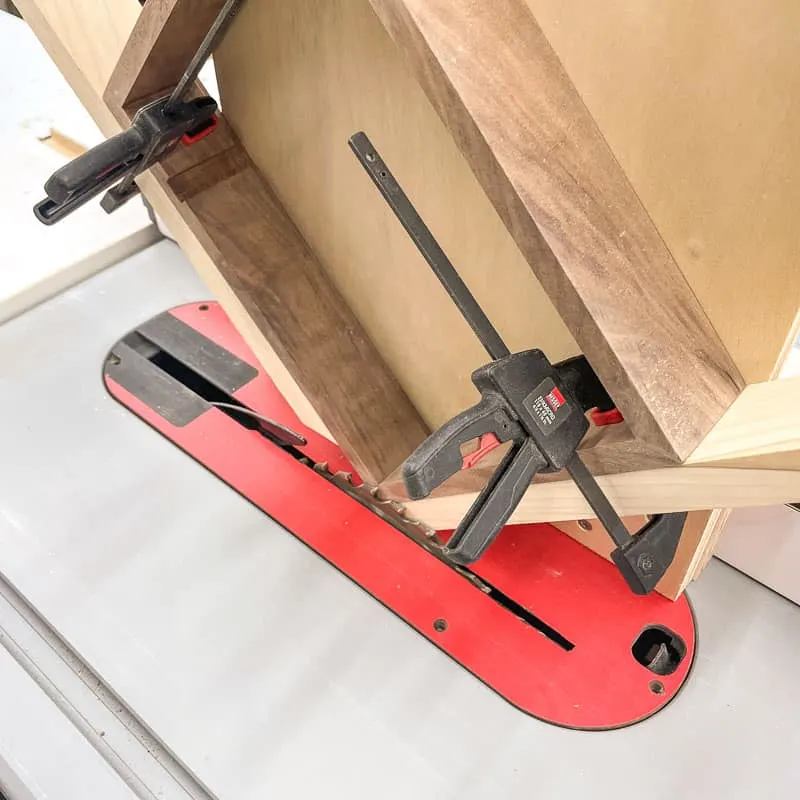
Clamp your workpiece to the jig
It's super important that your workpiece doesn't move as you make the cut. Not only is it safer, but it will give you better results too.
These tiny trigger clamps from Bessey are perfect for this! Larger clamps can get in the way, and their weight could cause the jig to tilt slightly. These little guys have a lot of clamping force to hold your workpiece securely, but they're really light and easy to position away from the blade.

Position the blade
With the workpiece clamped to the spline jig, adjust the table saw fence so the jig is flat against the blade. Raise the blade until the highest point is just below the inner corner of the mitered joint. You don't want to cut all the way through to the inside!
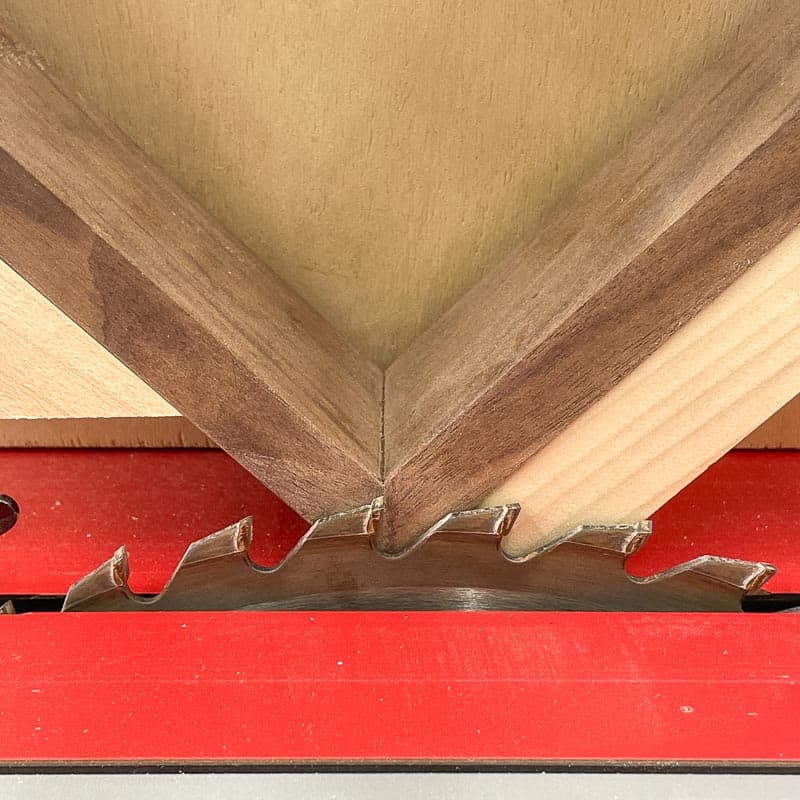
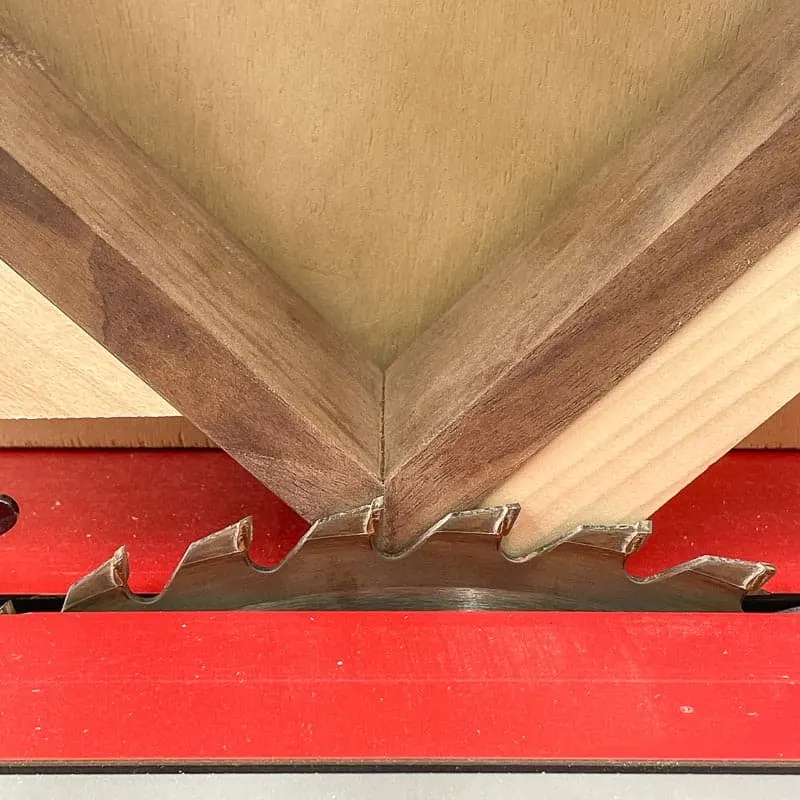
Now slide the jig back and adjust it so that the blade lines up with the marks on the corner of your workpiece. I'm making two splines on this 2" tall box, but you only need one on something narrow like a picture frame.

Cut the splines
Once everything is lined up correctly, the easiest part is making the cuts! Hold the saddle with one hand, and the top of the jig with the other. Turn the table saw on, then slide the jig along the fence all the way through the blade. Turn off the saw, then bring the jig back for the next cut.
Remove the clamps, then rotate the box clockwise to reveal the next mitered corner. Continue cutting splines all the way around the box, then flip the box 180 degrees to repeat the process for the other side.
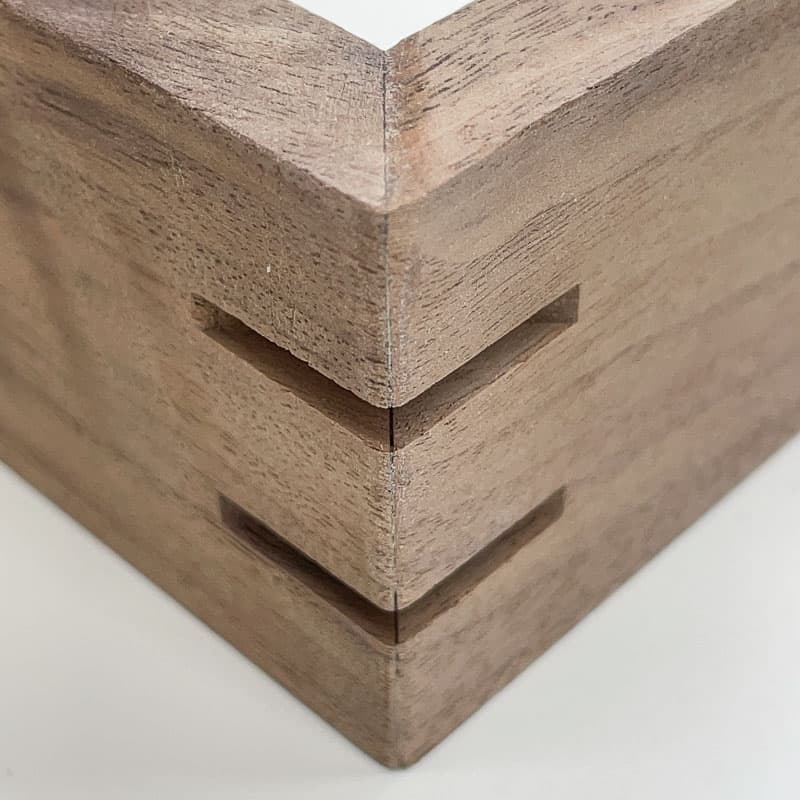
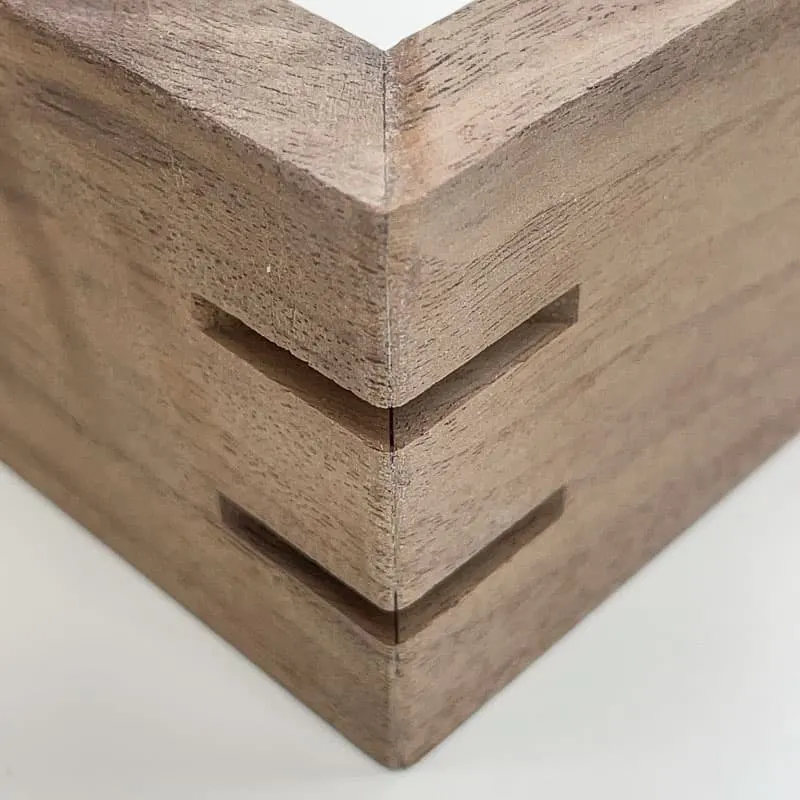
Cut and Glue in the splines
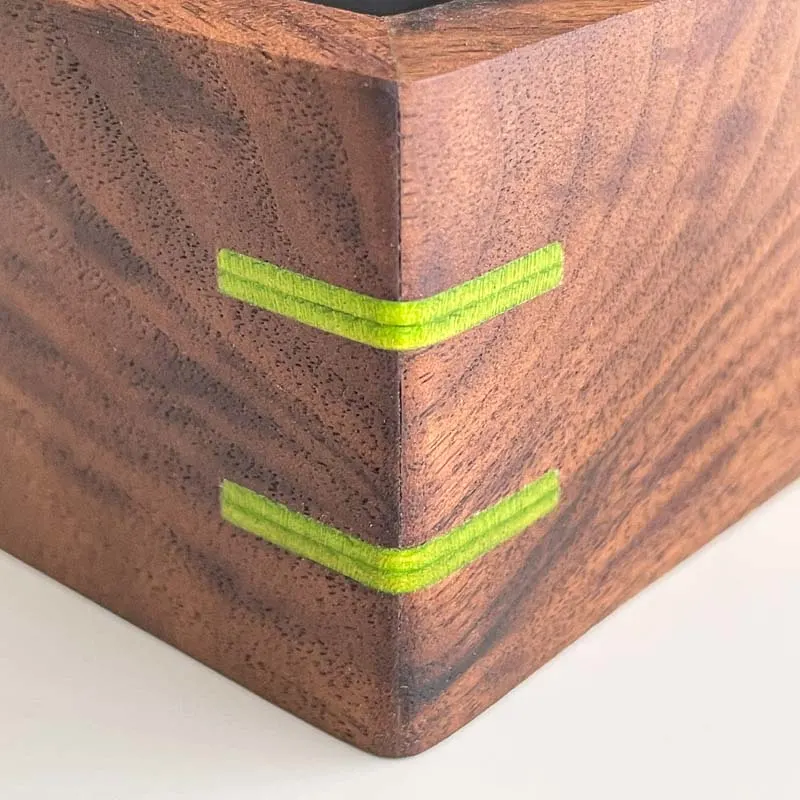
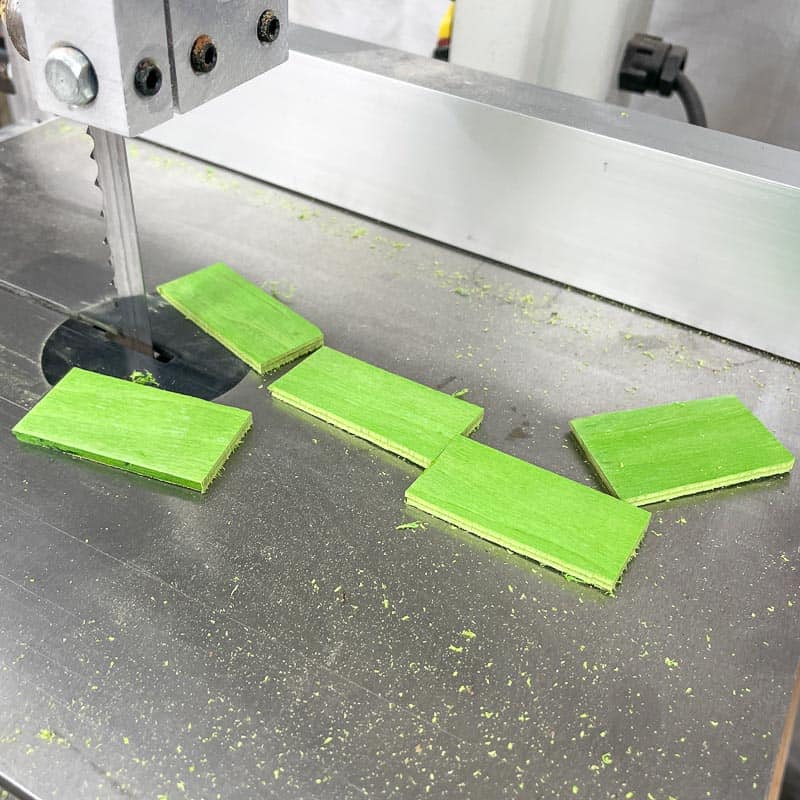
A standard table saw blade makes a ⅛" wide groove, so you'll need to cut thin pieces to fit. You could rip a strip of the same wood as the rest of the box, or use a contrasting species or color!
I had some small scraps of dyed veneer left over from these DIY wooden ornaments I made last year, and they add a fun pop of color at the corners! The veneer is 1/16" thick, so I glued two pieces together to create the exact size I needed.
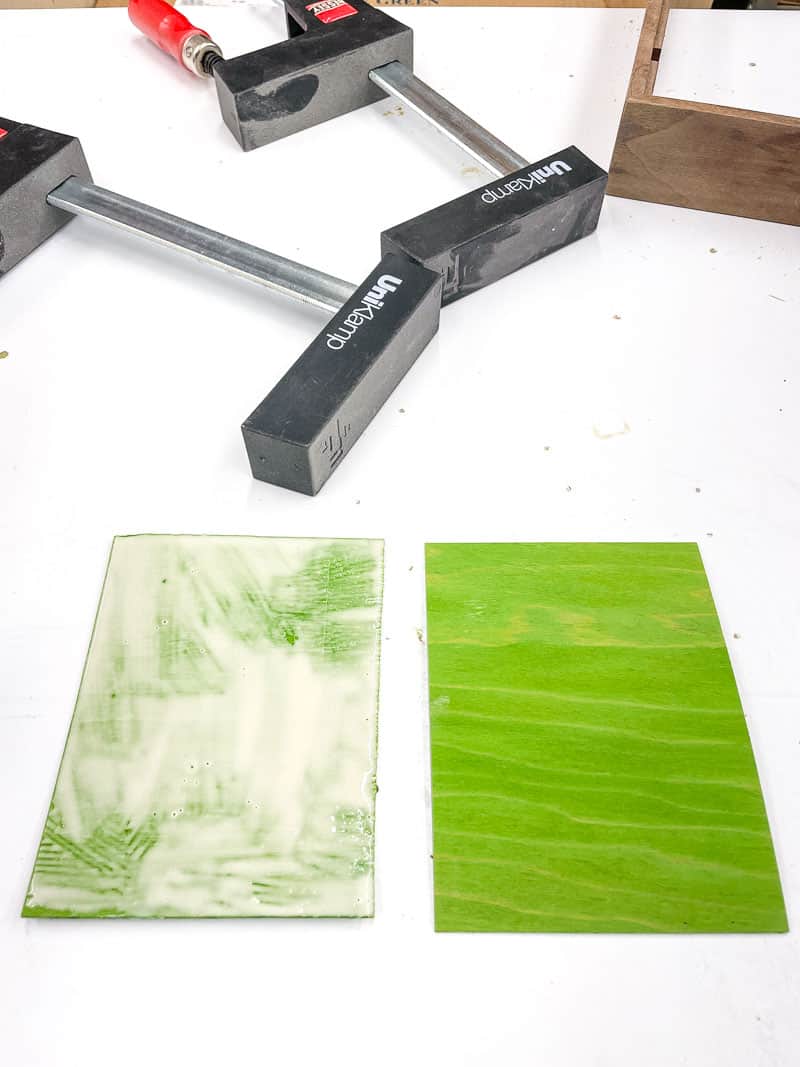

Then I cut out small strips at the band saw to fill the splines.

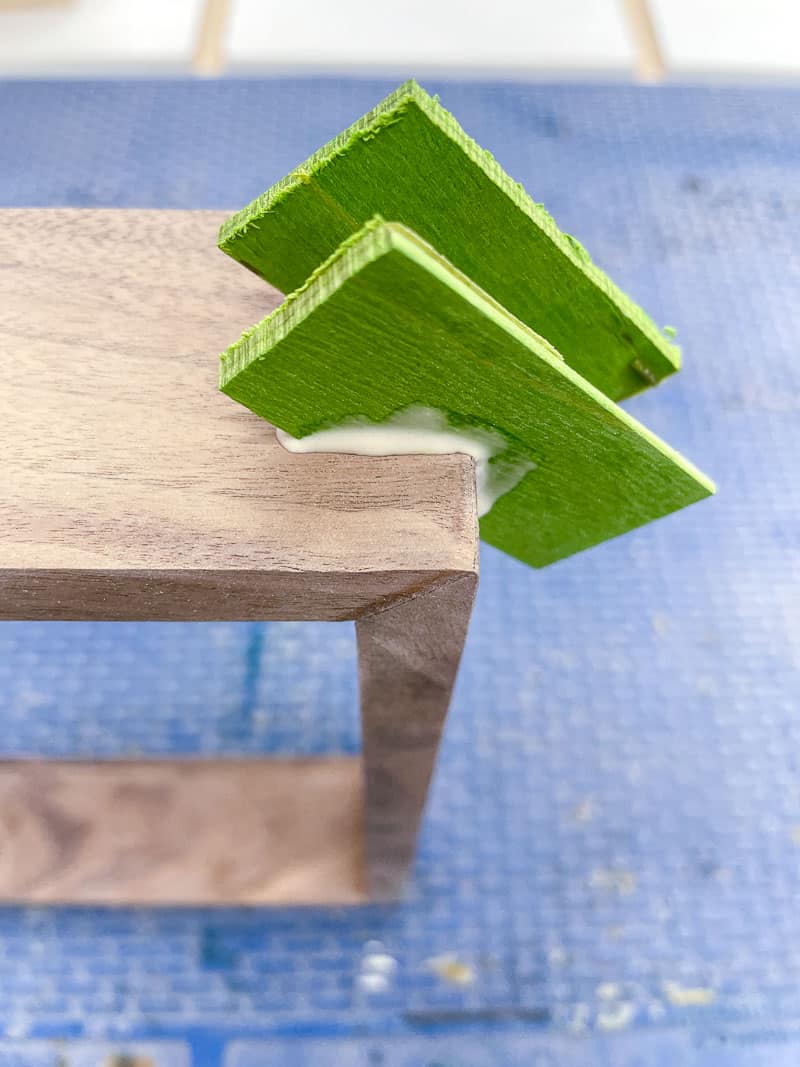
Apply wood glue to the inside of the grooves, then insert the splines. Wipe up any glue squeeze out with a damp rag.

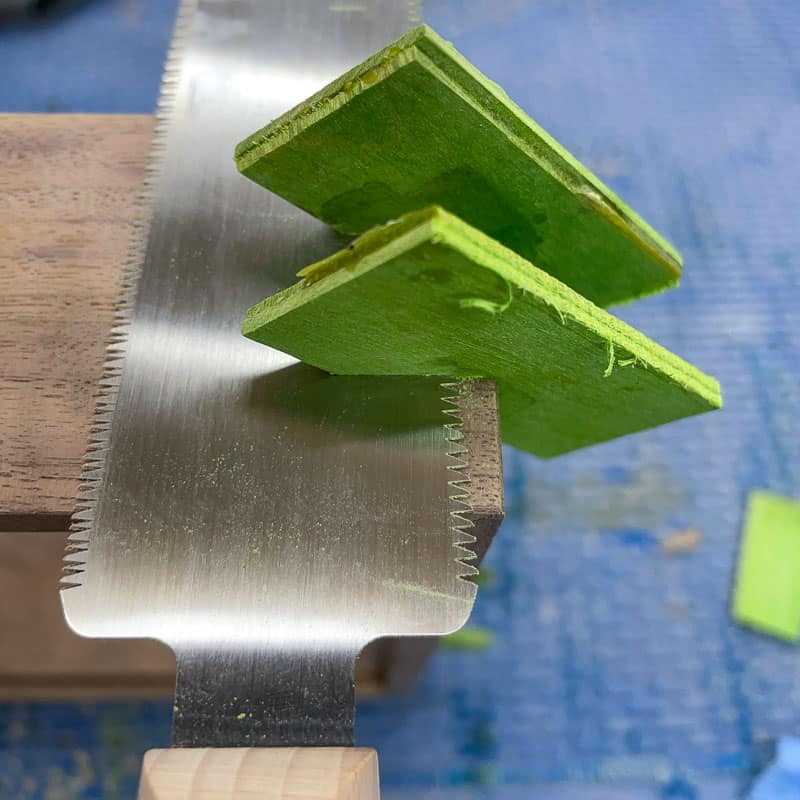
Cut and sand down the excess
Once the glue has dried, you can trim off the excess. A flush trim saw will get you close, then you can sand down the rest.

I put a ⅛" roundover on the corners of this box to make it more comfortable for my son to handle. With a little Danish oil, the green splines really pop against the walnut!
I can't wait to add this decorative detail to more woodworking projects in the future! The tutorial for this dice tray will be coming soon, and I can't wait to use this spline jig on the picture frames I plan to make in a few weeks!
Check out these other woodworking tips!