Tired of losing your dice? This DIY dice tray is perfect for keeping dice from rolling away during DnD and other tabletop games!

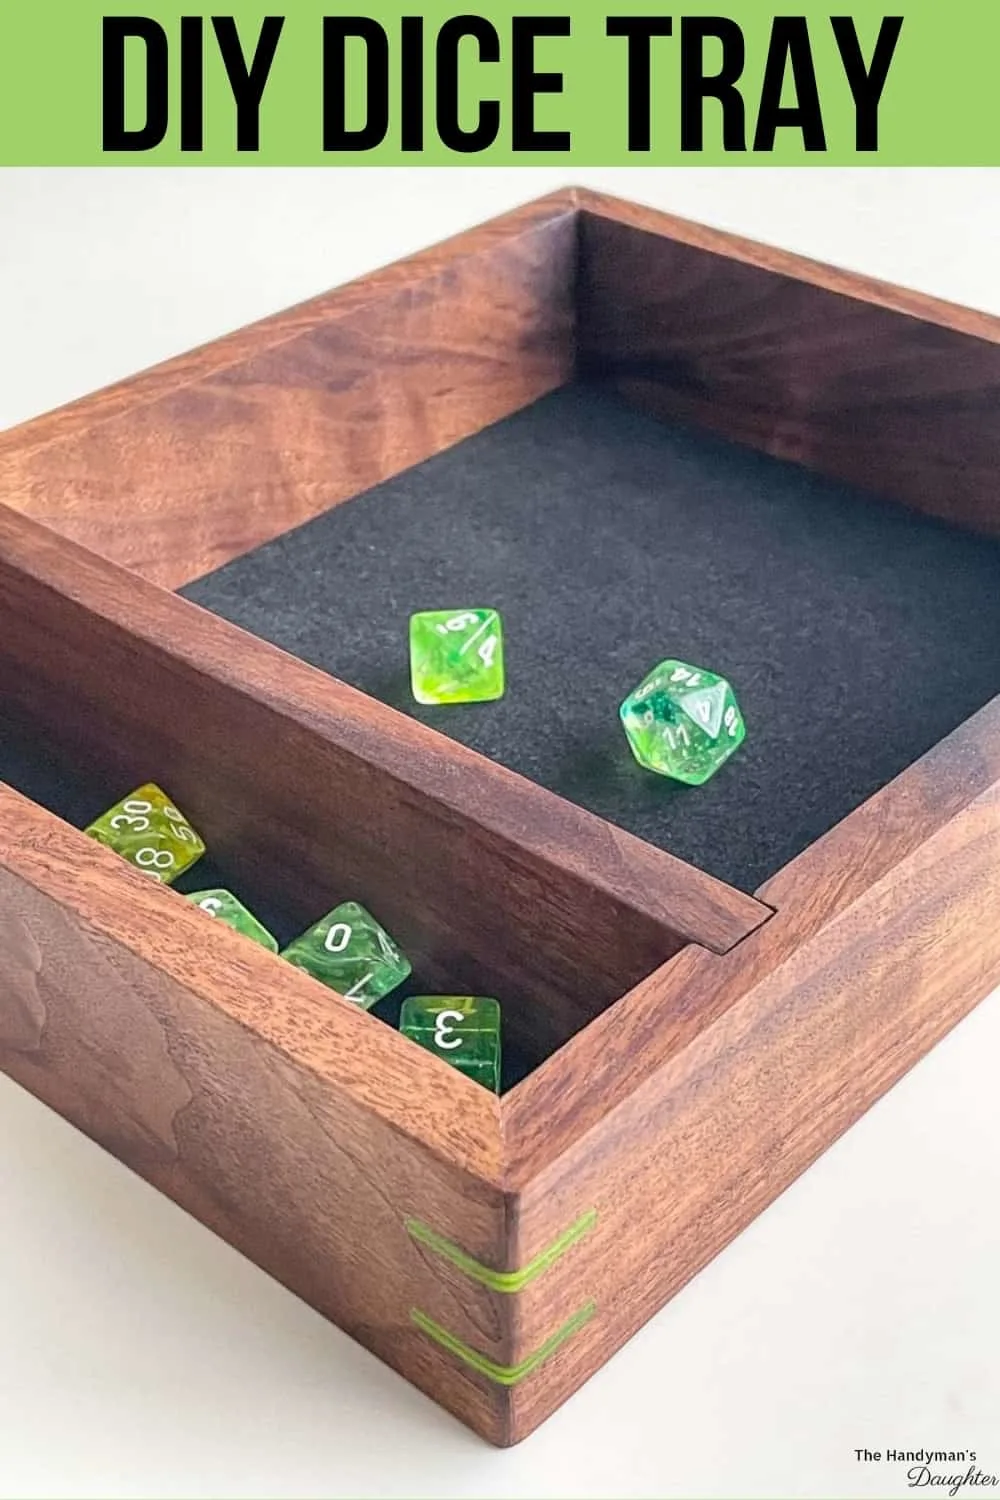
My son has really gotten into Dungeons and Dragons over the last year. He's been playing virtually, and he's always losing his dice among the Legos and other junk in his bedroom. For his birthday, I decided to make him a DnD dice tray to keep them all in one spot.
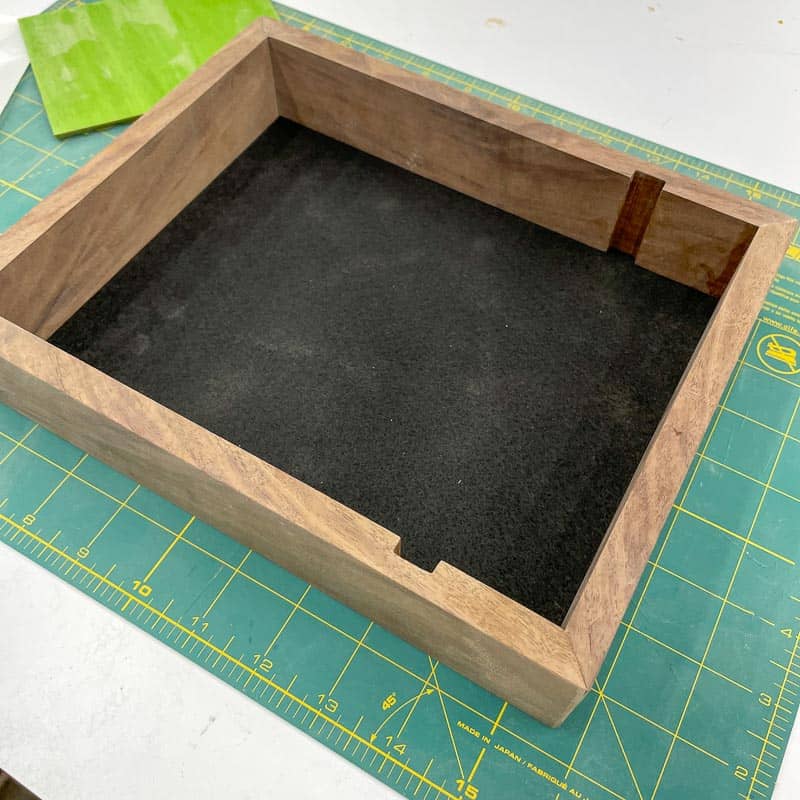
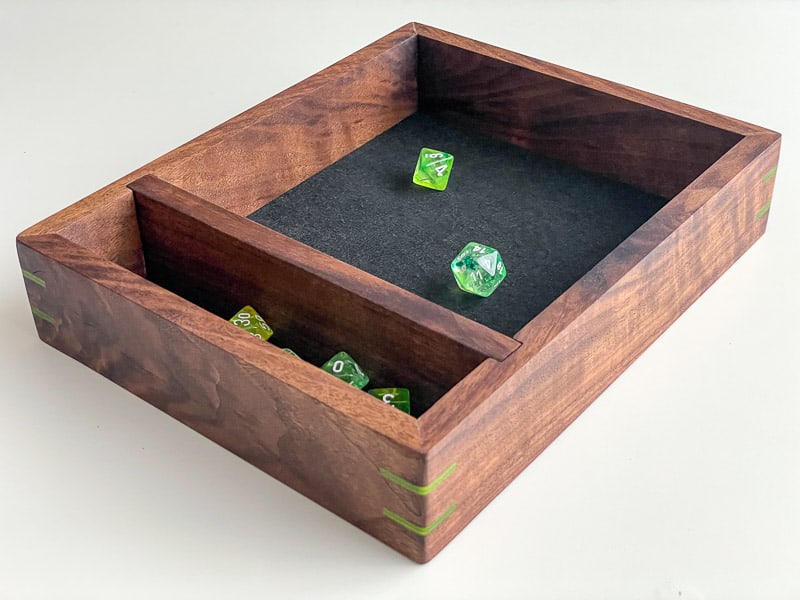
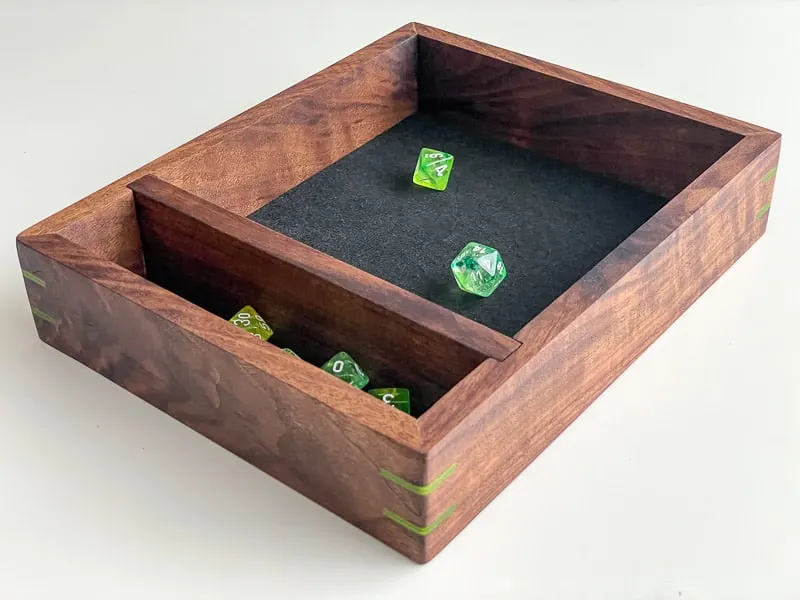
This DIY dice tray features a larger area for rolling, plus a smaller section to store all your dice! I made mine out of scrap walnut left over from my cutting board project, but you could use any type of wood.
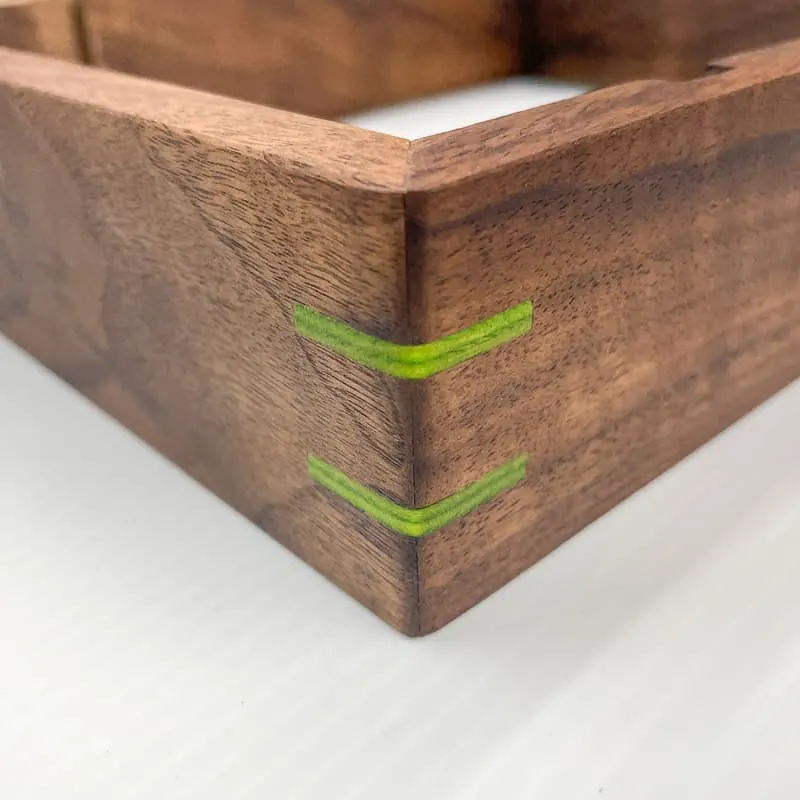
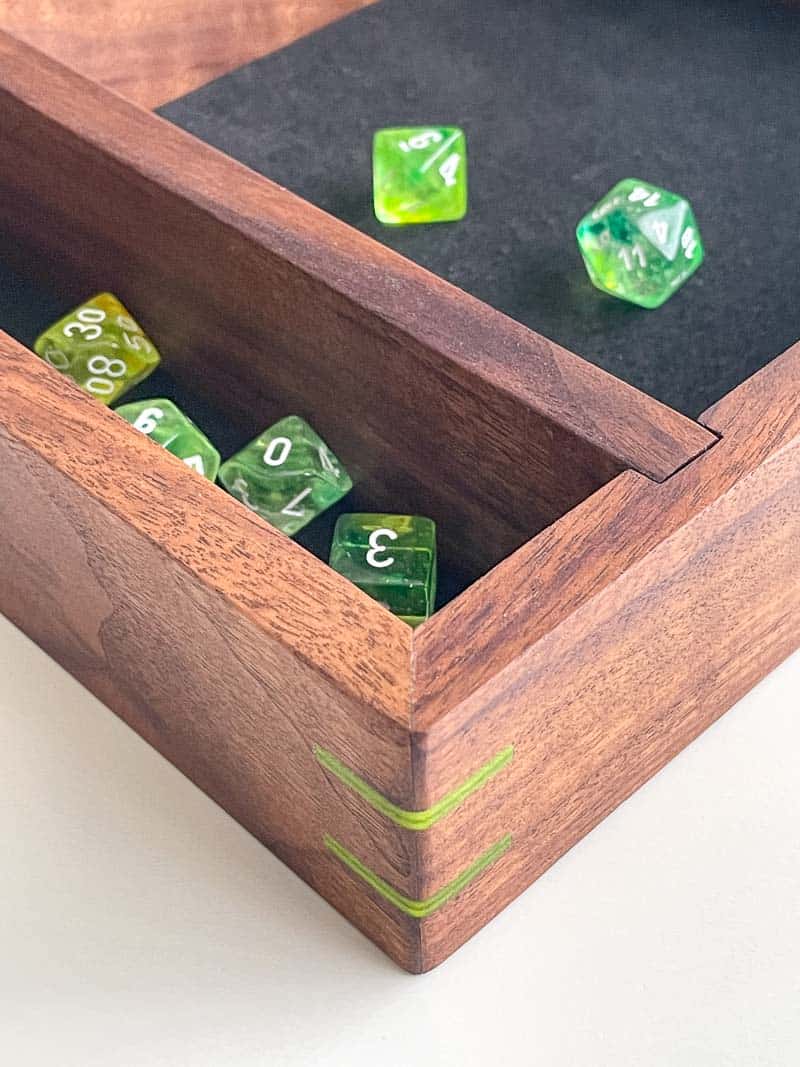
To give the corners extra strength, I added splines with bright green wood veneer scraps from these wooden Christmas ornaments I made last year. These accents match his green DnD dice perfectly and add a fun pop of color to the tray.


Since I used scraps for this whole project, it was practically free to make! All I had to buy was the adhesive felt for the bottom of the tray. I love it when I can whittle down my scrap wood pile and make something cool in the process!
This dice tray would make a great gift, especially if you pair it with this DIY dice box! Check out this list for more DIY wood gift ideas!
This post contains affiliate links for your convenience. Purchases made through these links may earn me a small commission at no additional cost to you. Please visit my disclosures page for more information.
Materials needed for DIY dice tray
- One 1x3 board (½" thick)
- You'll need about 4 feet of length total, so you can splurge on nicer wood!
- Small scrap of ¼" plywood (about 8" x 10")
- Adhesive backed felt
- Contrasting ⅛" thick wood for the splines
- Table saw
- Wood glue
- Strap clamp
- Wide painter's tape
- Flush cut saw
- Boiled linseed oil
- Brad nail gun and ¾" brad nails
How to make a dice tray
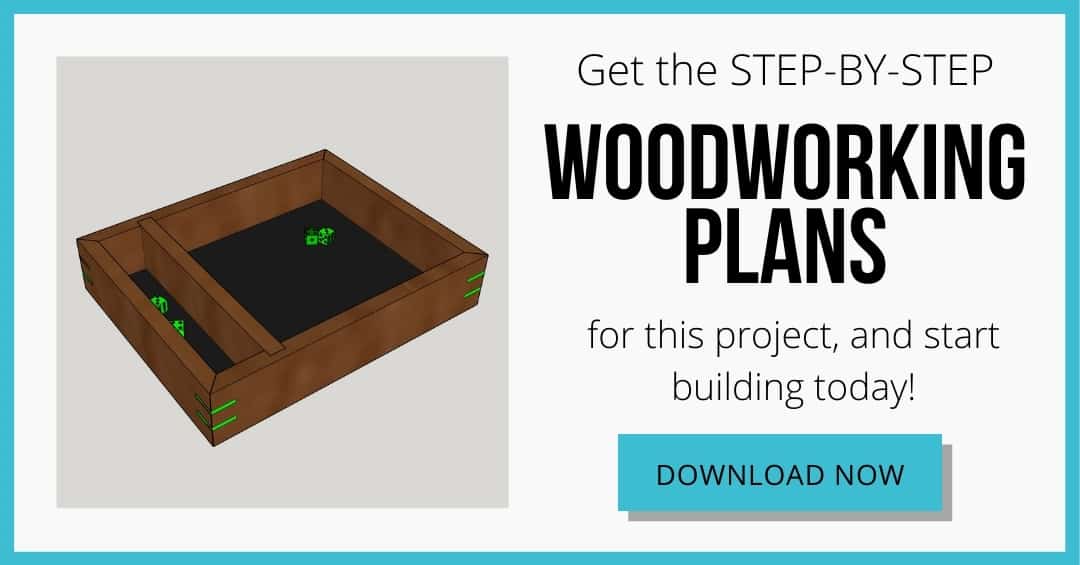
Download the woodworking plans
The woodworking plans for this dice tray includes two different versions, so you can choose based on your skill level! The beginner version is super easy to make, just with a miter box and countersink screws! The more advanced method will be shown in the tutorial below.
Click here or on the box below to get the plans for this project!

Cut the side pieces
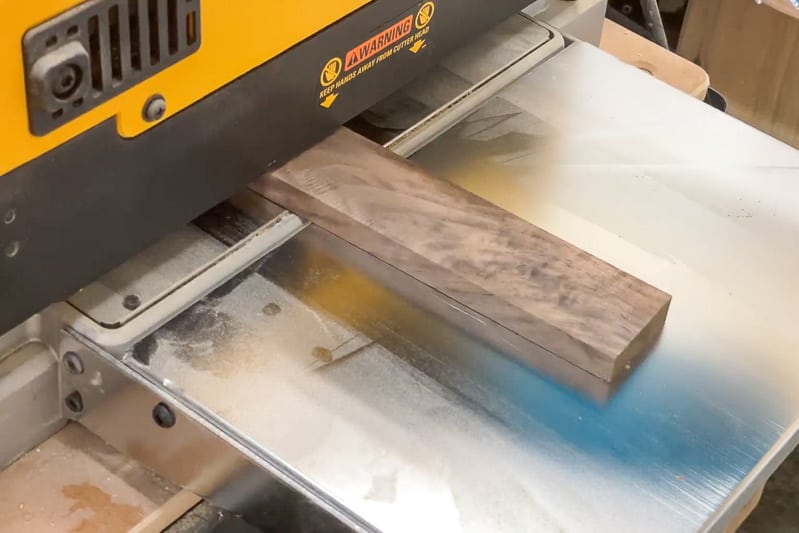
I used a leftover chunk of 1 ¼" thick walnut for this project, so first I had to mill the pieces down to their final size. After cutting it to the correct height at the table saw, I resawed the board into two thinner pieces at the band saw.

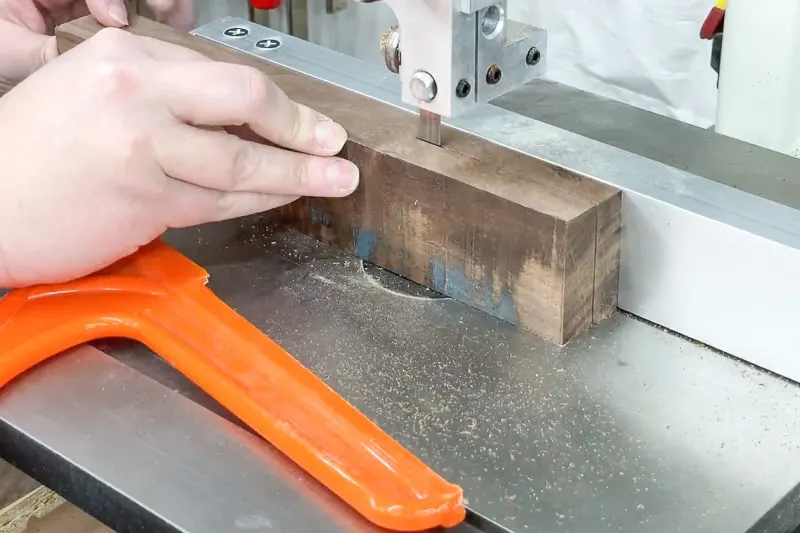
Then I used the jointer and thickness planer to flatten all the surfaces and get them to the desired ½" thickness. You can avoid all this work just by buying a ½" thick 1x3 board instead! 😉

Cut the ends of each side piece at a 45 degree angle at the miter saw. Make sure the opposing sides are exactly the same length.
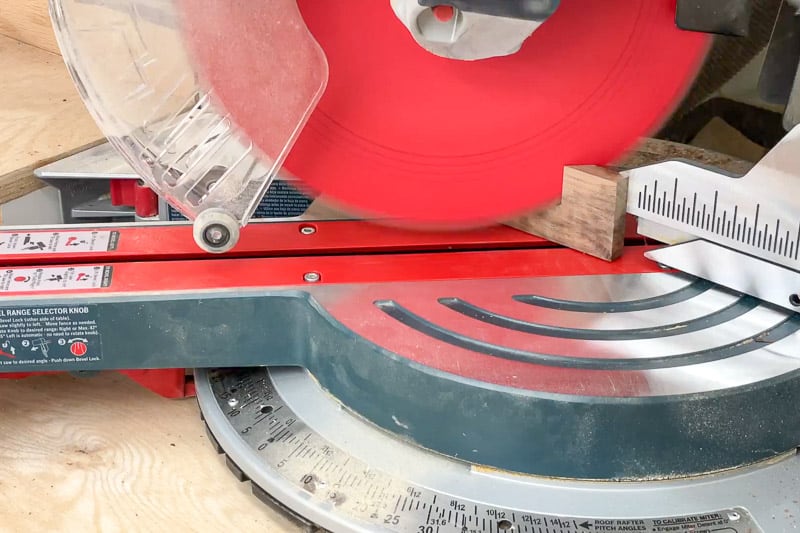

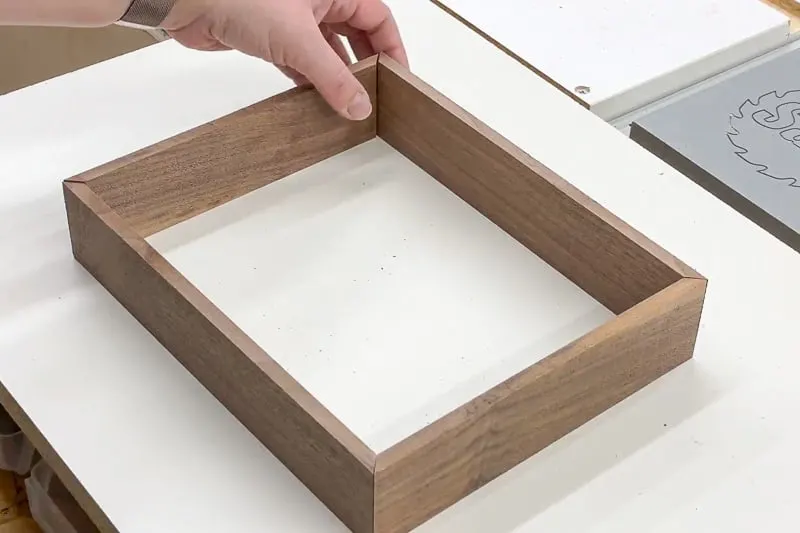
Test fit the pieces to check that all the corners are lining up correctly before moving on to the next step.
Cut the grooves
The bottom of the dice tray is recessed into the sides with rabbets, so you won't see the plywood edges. You can use a router or a dado stack for this, but I was being lazy and just took multiple passes with the regular table saw blade instead.
Set the table saw blade height to half the thickness of the board. Then move the fence so that the blade will cut a shallow groove along the corner.

Test the fit of the ¼" plywood, and move the fence accordingly to widen the groove so the plywood sits flush. You might be left with a little ridge in between the two passes, but that's easy to sand down or clean up with a chisel later.

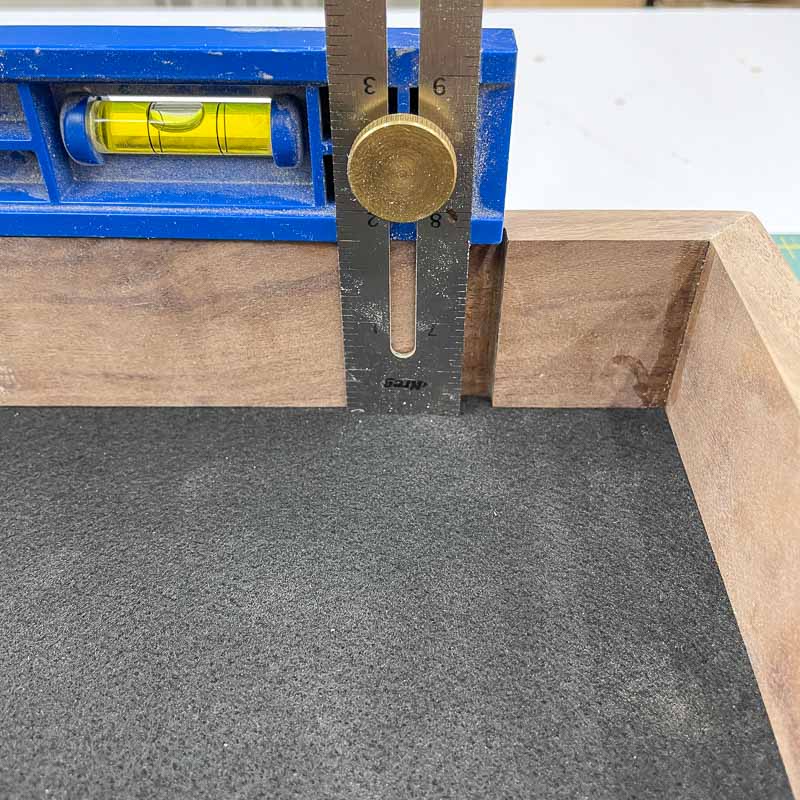
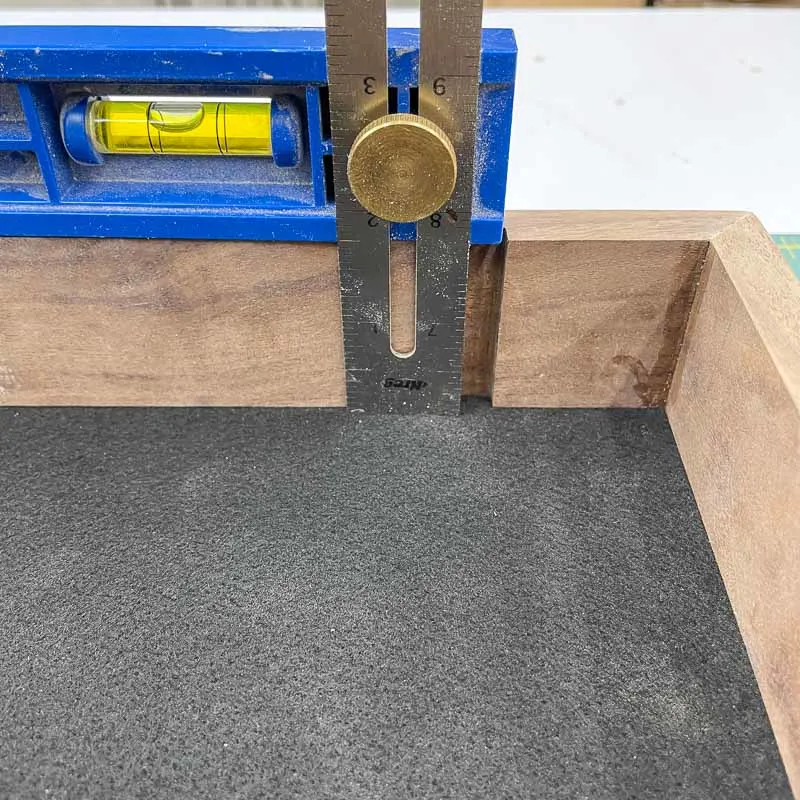
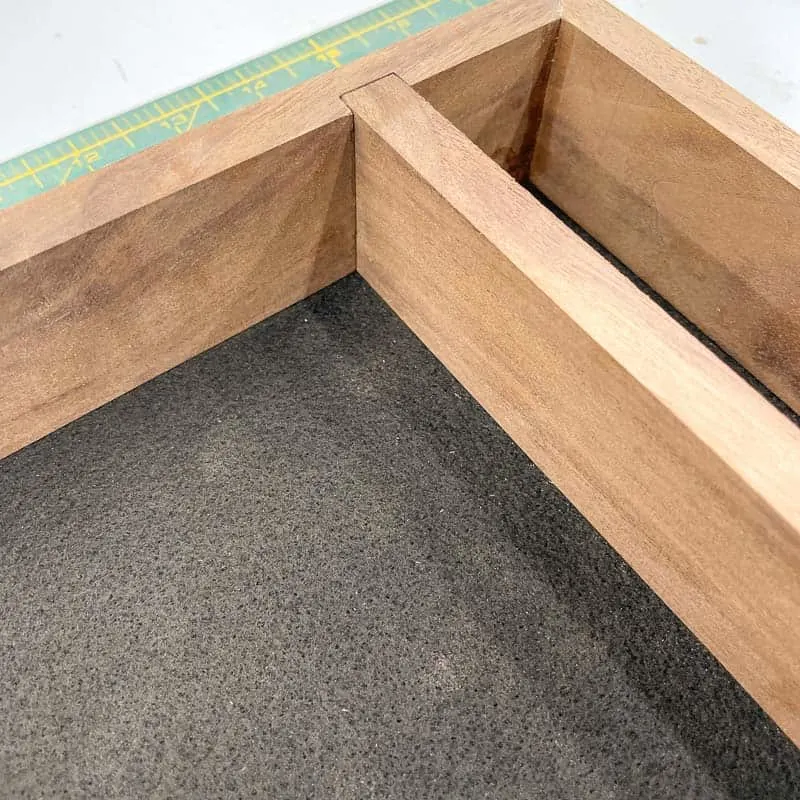
The longer side pieces also need a dado cut on the inside of the frame for the divider that separates the rolling area from the dice storage section. Mark the exact thickness of the divider piece onto the longer pieces, then use a crosscut sled or miter gauge to cut the groove.


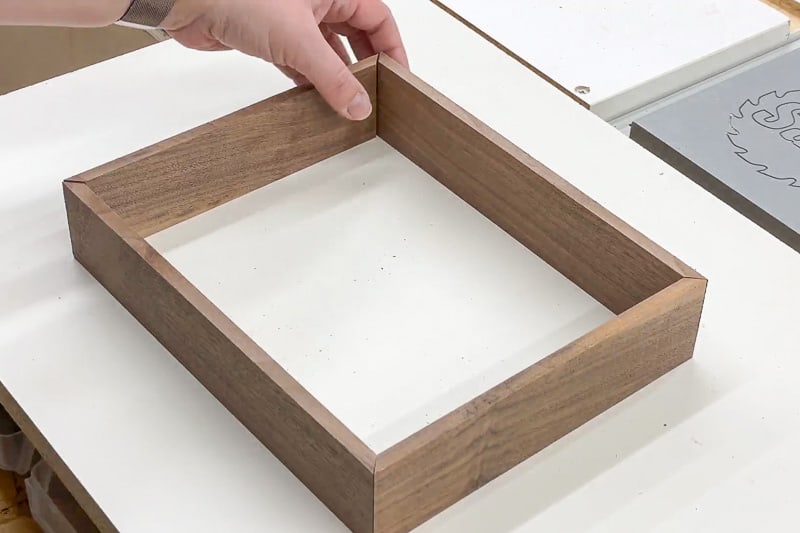
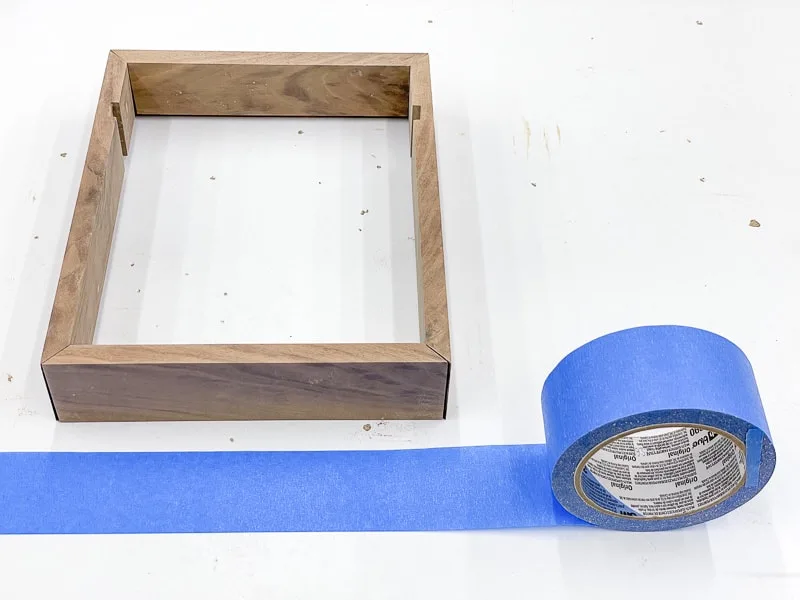
Glue up the frame
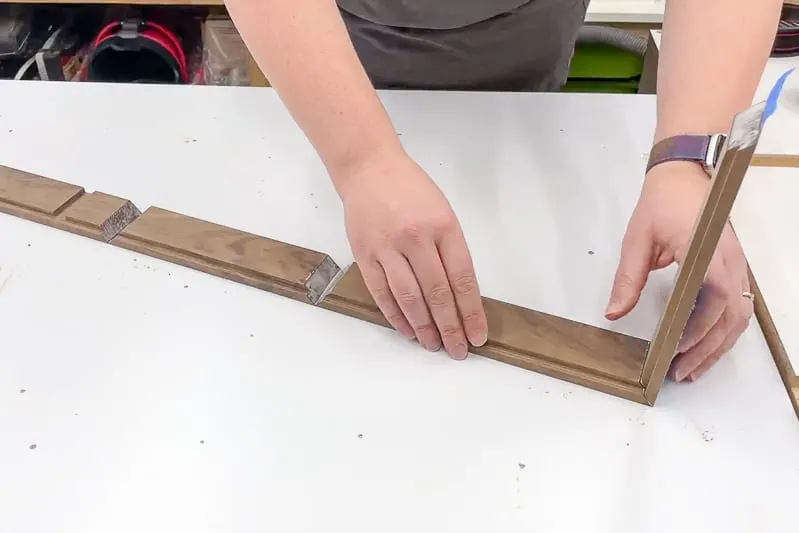
This trick for gluing up mitered boxes works great for those fiddly smaller pieces! Dry fit the frame, and roll out a long strip of wide painter's tape with the sticky side facing up.

Place each piece onto the tape with the ends touching, keeping the same corners together as the dry fit. Apply wood glue to both sides of each corner, and the ends.

Roll up the tape to pull all the pieces together to form the box frame!

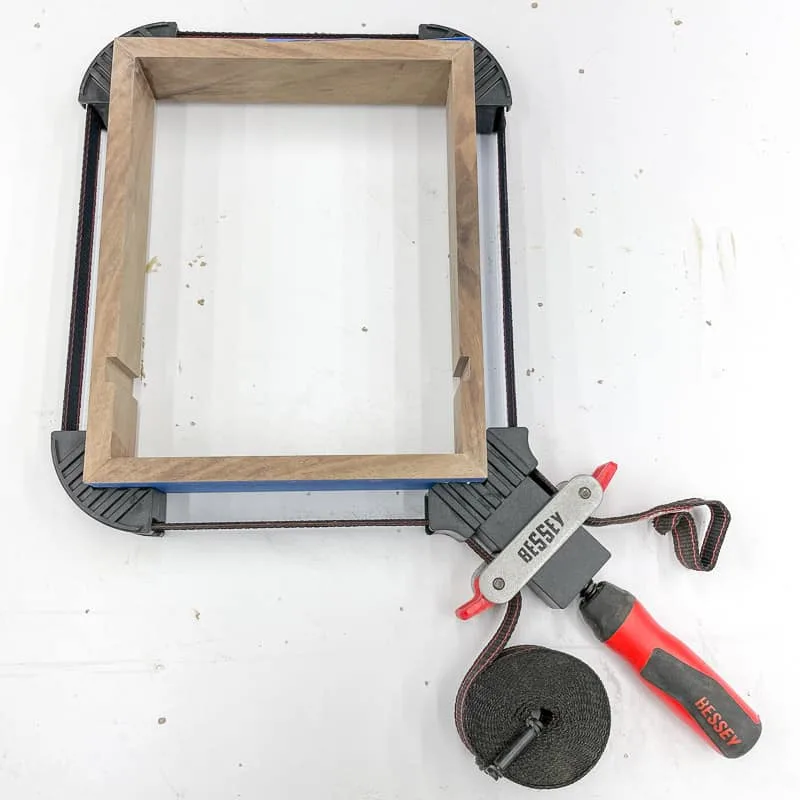
For additional clamping pressure, I used my Bessey strap clamp to hold all the pieces together at a perfect 90 degree angle. Clean up any squeeze out once the glue turns a little rubbery, so it peels off easily. Then allow the glue to dry overnight.

While the glue was drying, I turned my attention to the bottom of the tray.
Prepare the bottom piece
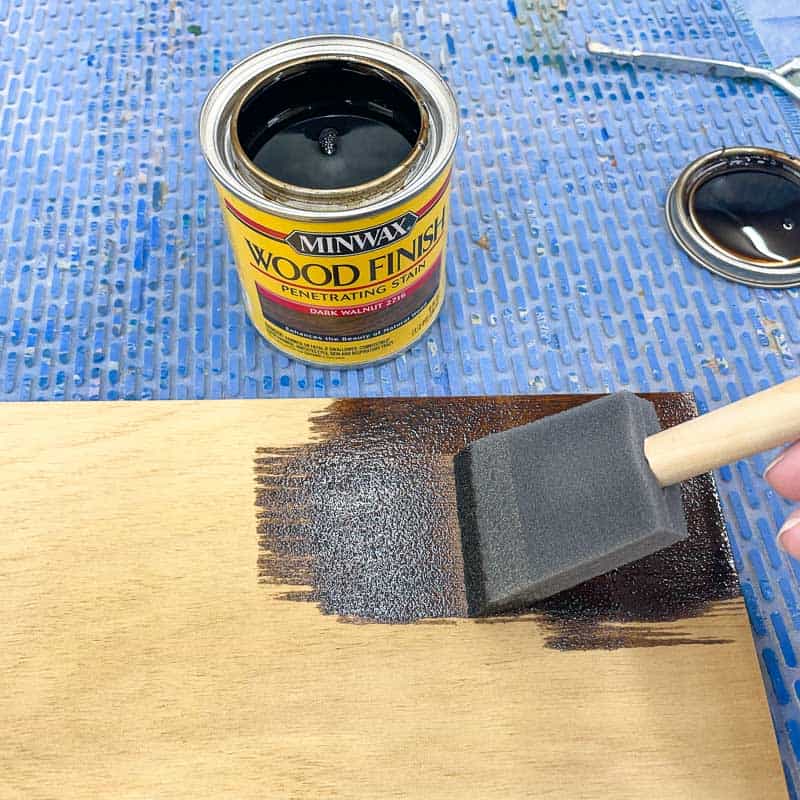
You can get ¼" walnut plywood to match the rest of the dice tray, but I decided to use some scrap birch plywood I already had on hand. Cut the plywood to the same dimensions as the recessed area of the bottom, then give it a quick coat of Minwax Dark Walnut stain.

The top of the plywood is covered with adhesive felt to reduce the sound and bounce of the dice. Just cut the felt sheet to the same size as the bottom and stick it in place.

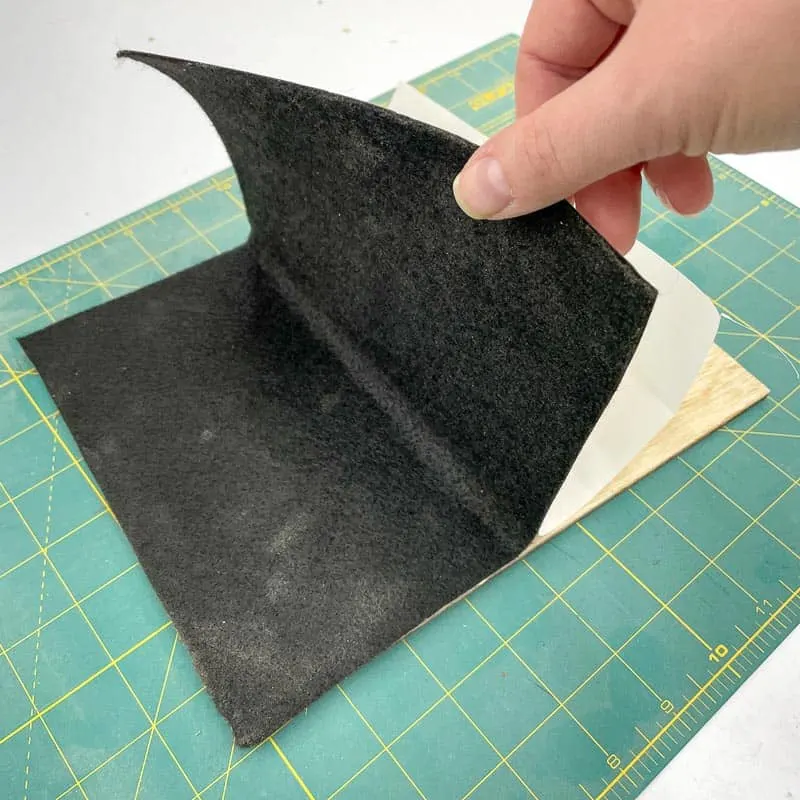
After everything was dry and out of clamps, I did a test fit with the bottom. The felt added a tiny bit extra to the plywood thickness, but it compressed easily so it was still flush with the bottom edges.

You can attach the bottom with brad nails or glue now, but I waited until after I applied the finish.
Cut the divider
I waited until after the frame was glued up before I cut the divider to fit so I could get accurate measurements. Check both the depth of the inside of the dice tray and the length between the two grooves, then cut it to size.
I decided not to glue the divider in place, in case my son wanted a larger dice throwing area for other games. It fits pretty snug, and it takes some effort to slide it out of the grooves, so I'm not worried about it falling out.

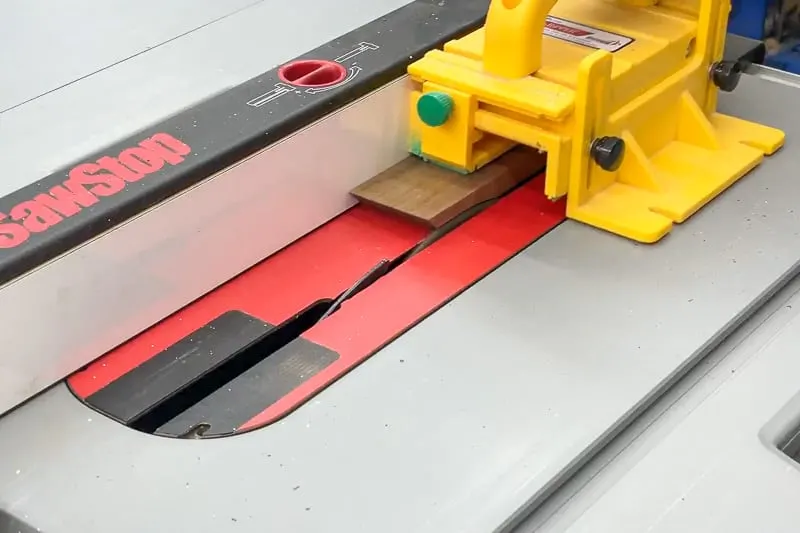
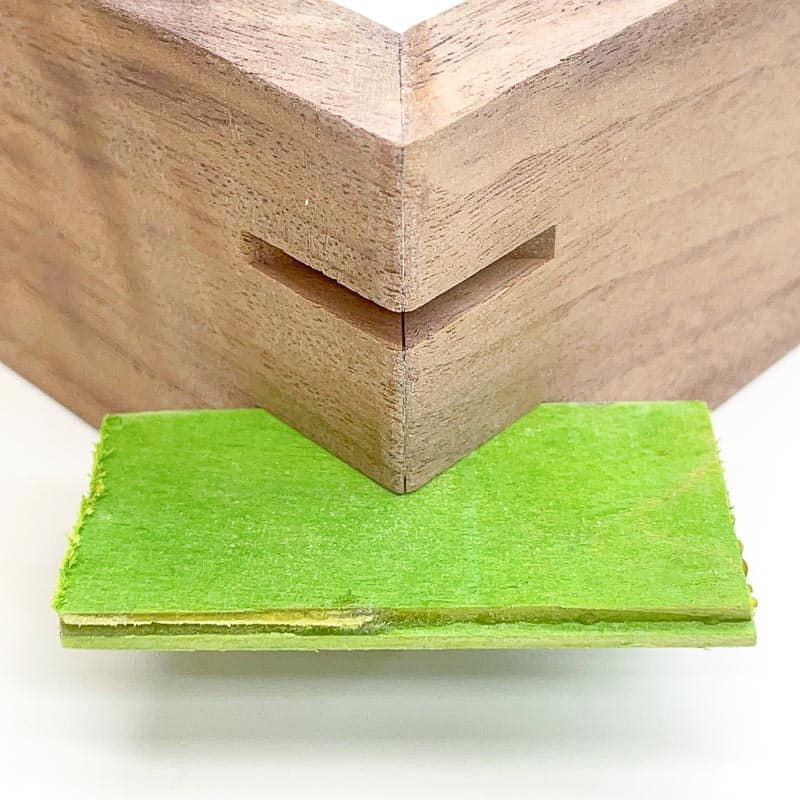
Add splines to the corners (optional)
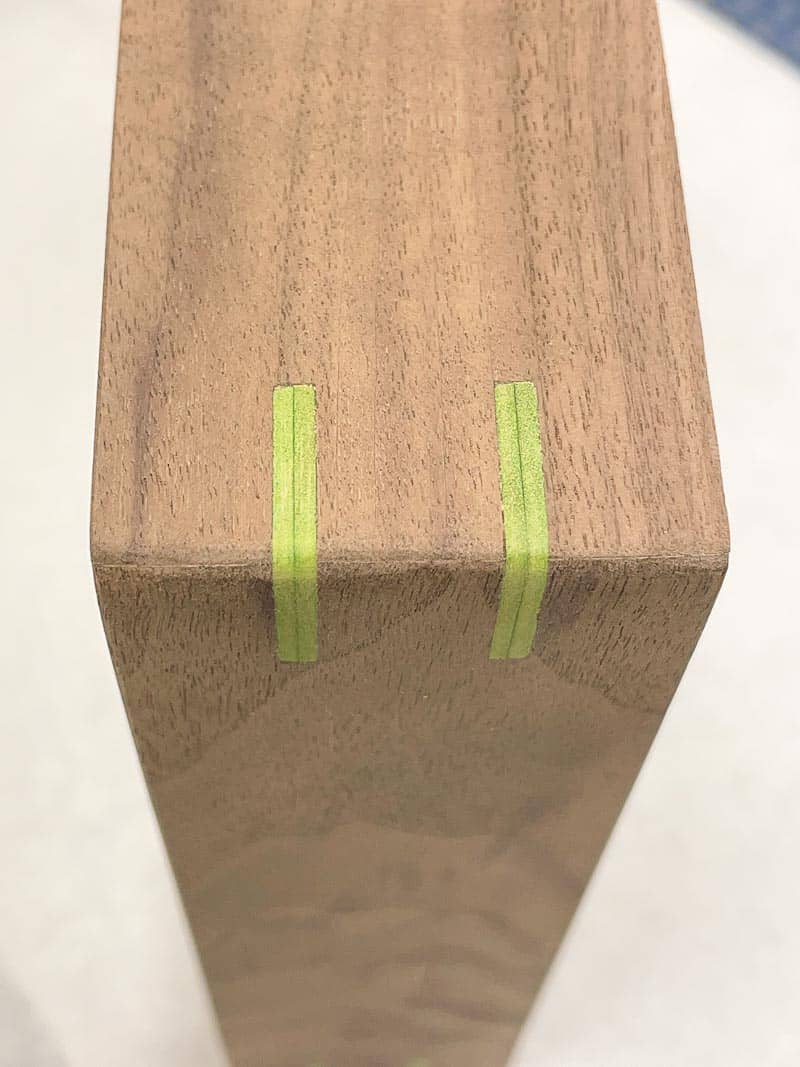
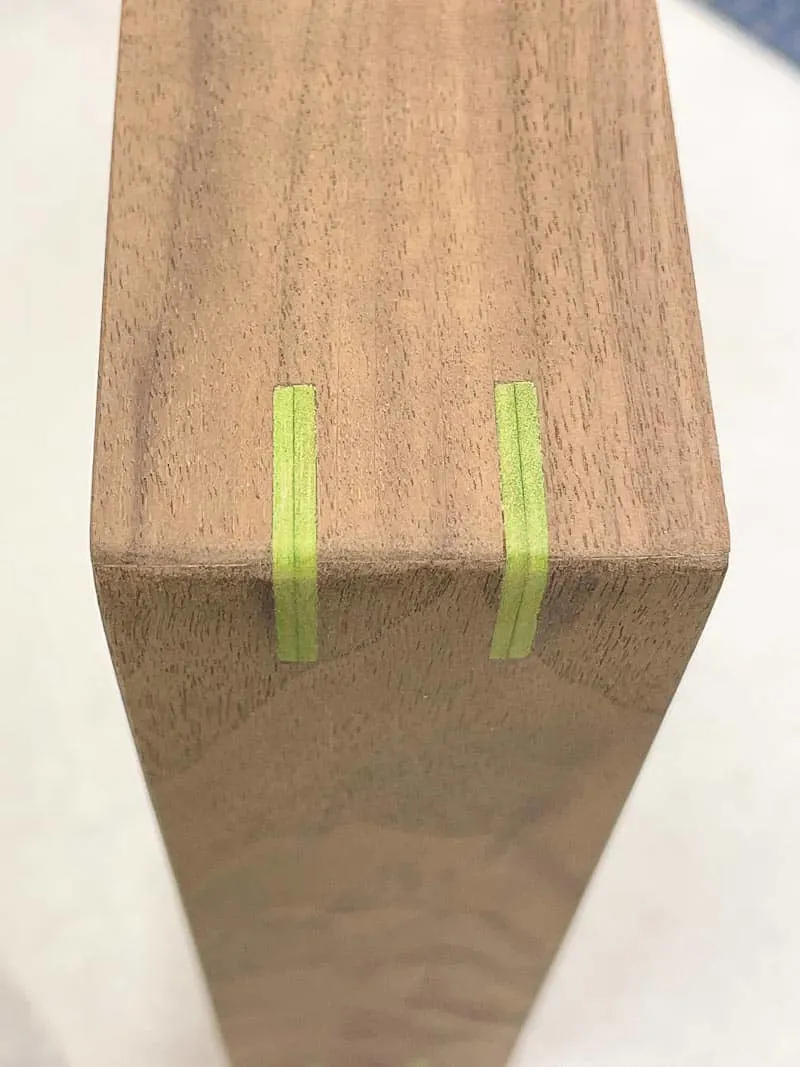
Glued mitered corners aren't particularly strong, and I was worried my son would drop and break it. To strengthen the dice tray and add a fun decorative touch, I made splines across all the mitered corners. This part is totally optional, but it's my favorite part of the whole project!
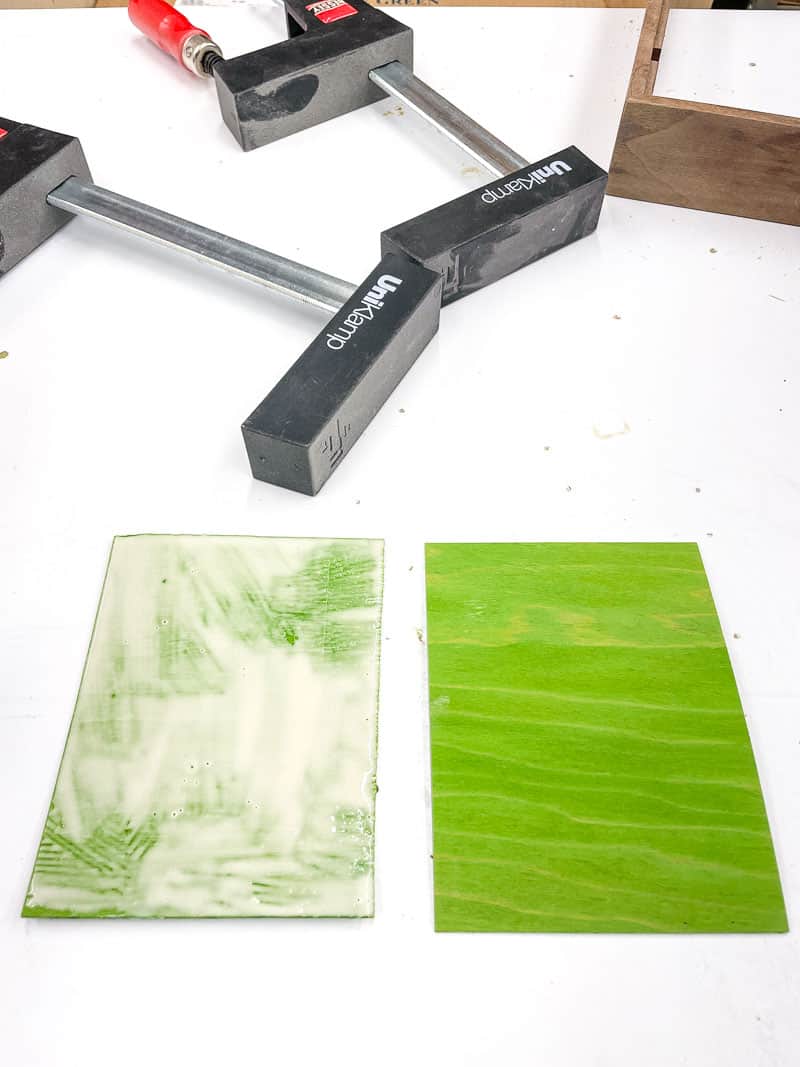
My son's DnD dice are bright green, and I dug out a few scraps of green dyed veneer that were a perfect match! My table saw blade is ⅛" thick, but the veneer is only 1/16", so I glued two pieces together to fill the gaps. You can use any ⅛" thick wood for the splines.

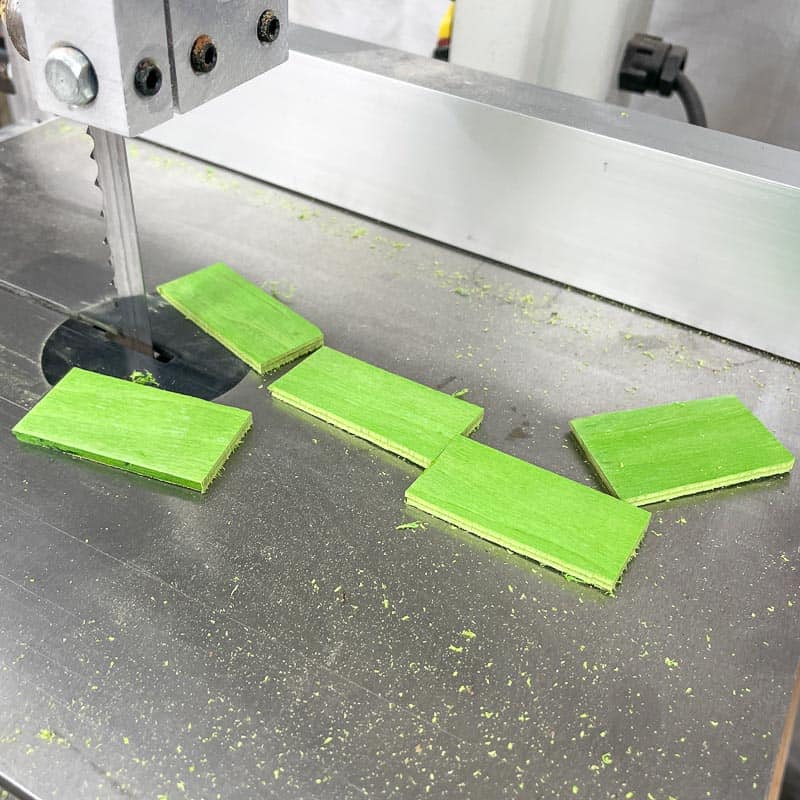
Then I cut that down into smaller pieces at the band saw.

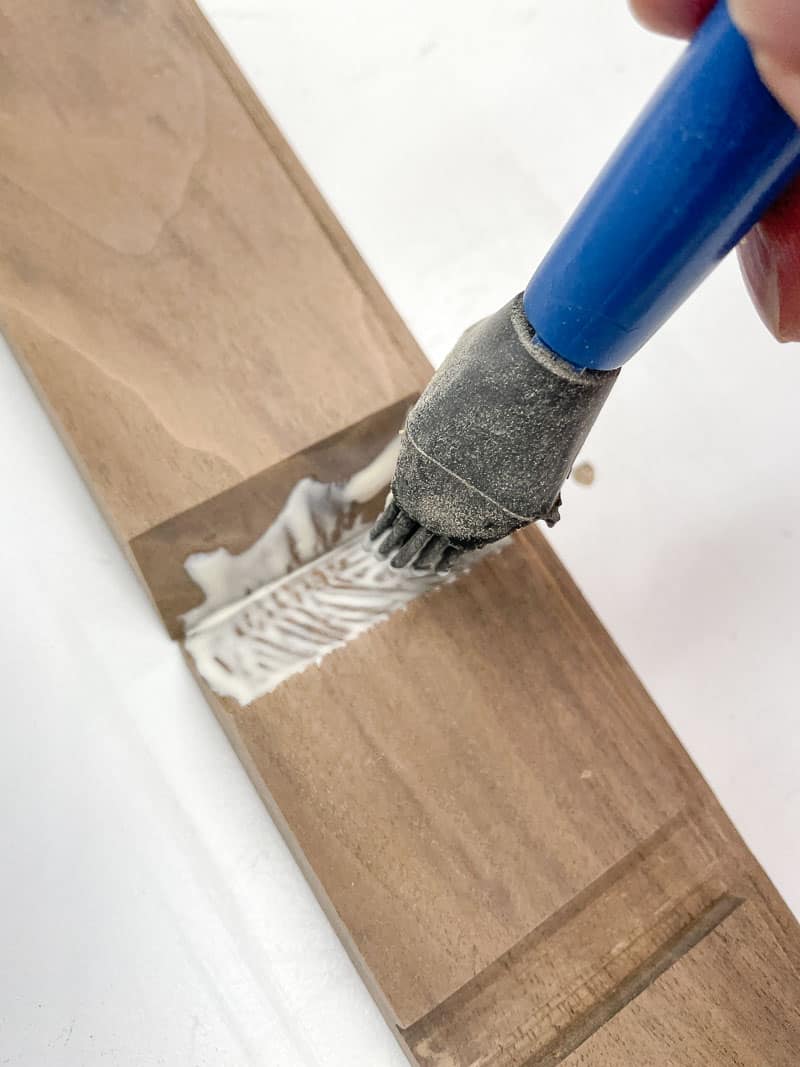
I used a spline jig at the table saw to cut the grooves. You don't want to try to cut these freehand!

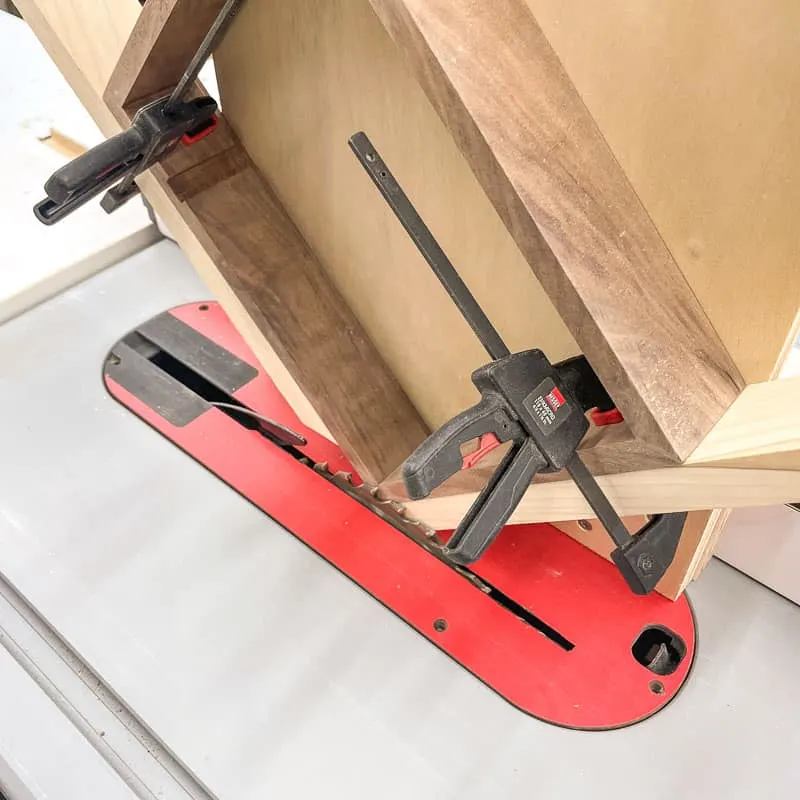
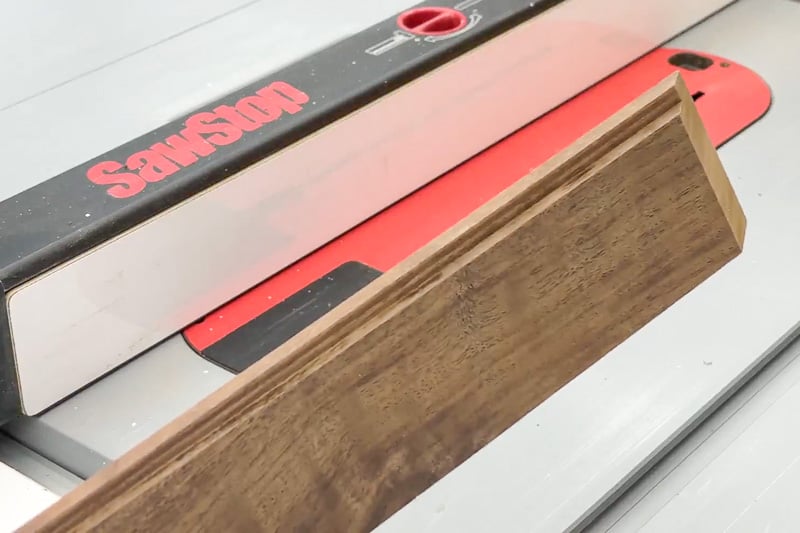
Add glue to the grooves, then slide the splines into place. Let the glue dry, then cut off the excess with a flush trim saw.

Sand and apply finish to the dice tray
Give all the pieces a good sanding, starting with 80 grit sandpaper on those splines and working your way up to 220 grit on the entire tray. I rounded over the corners to make it more comfortable in my son's hands, and to expose more of those beautiful contrasting splines!
Hardwoods like walnut only need a bit of oil finish to really make the color and grain pop! I just rubbed on some boiled linseed oil, then wiped off the excess.
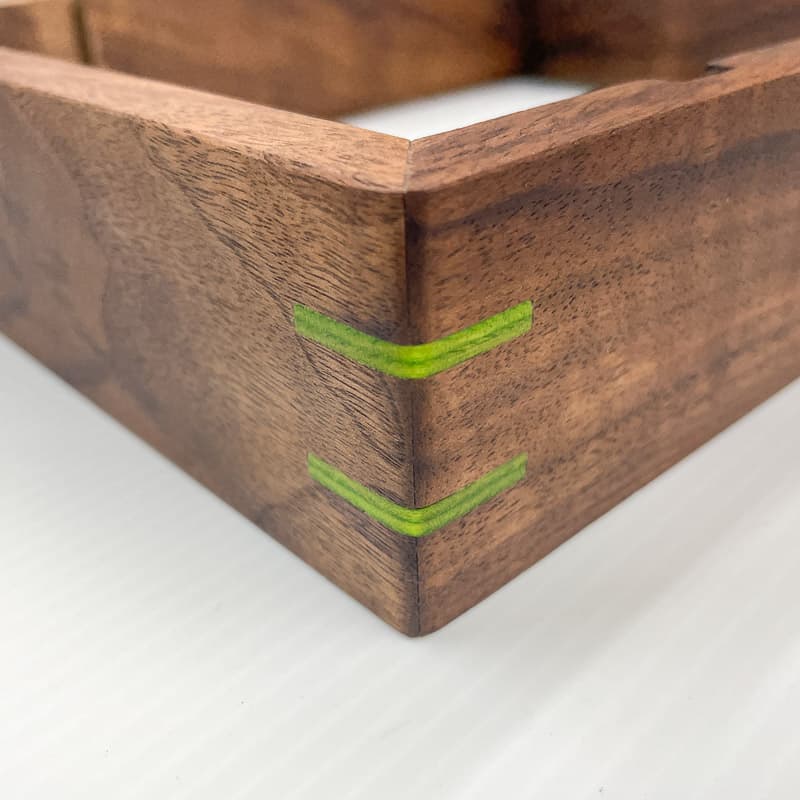
My son was genuinely impressed with his new dice tray, and that's high praise coming from a 12 year old boy! 🙂 The splines match his bright green DnD dice perfectly, so it looks like a complete set.
Even though this walnut board was just scrap wood, it cleaned up beautifully! Small projects like this are perfect for scraps!

Want a simpler version of this dice tray? The woodworking plans include both a beginner version, plus the one you see above. Choose the decorative elements, like splines or dividers, and make it your own!
Check out these other DnD project ideas!