Earning a new belt in any martial art is something to be proud of. Show them off with this easy DIY karate belt display!
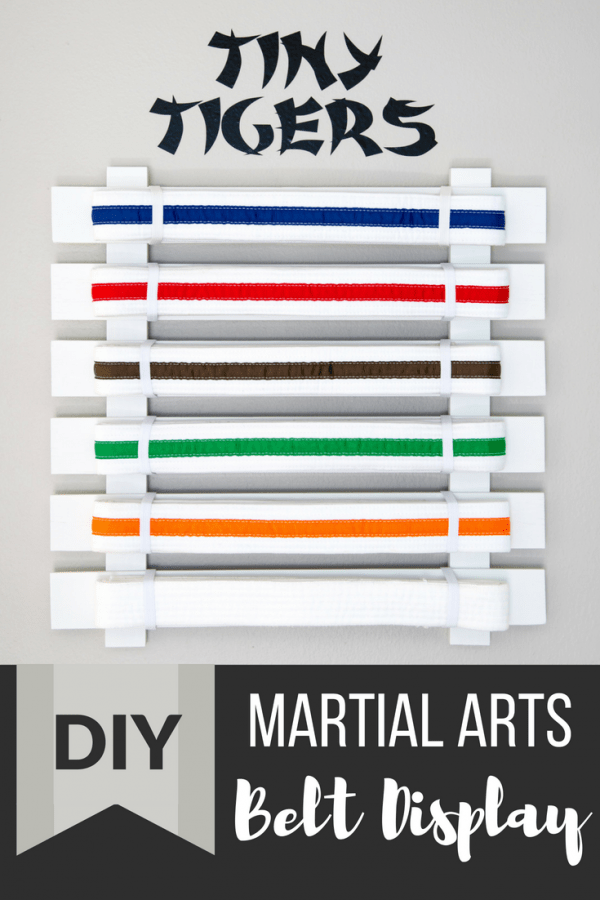
After over a year of work, my son finally completed all the white belt requirements for Tiny Tigers in the martial art of Tang Soo Do. He wears his yellow belt with pride! I couldn't wait to showcase his accomplishments with this DIY martial arts belt display!
This post contains affiliate links for your convenience. Purchases made through these links may earn me a small commission at no additional cost to you. Please visit my disclosures page for more information.
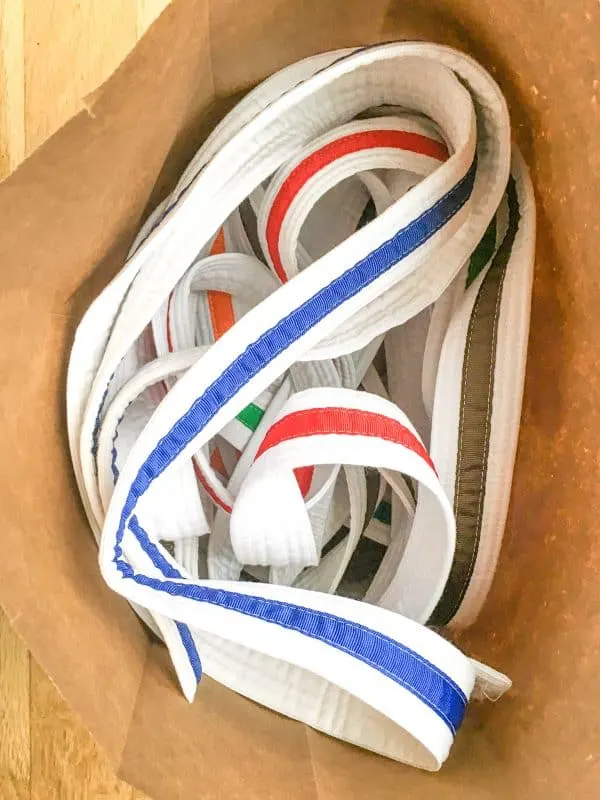
At my son's dojang, the students are tested on a quarterly basis as long as they feel they are ready (and trust me, he is ALWAYS ready!) His collection of white belts with colored stripes was growing quite quickly and I was tired of them being shoved into the back of the closet collecting dust.

Not only will this DIY martial arts belt display let him show off his belts proudly, it helps others to see just how much dedication and hard work he put into it as well!
Materials Needed for Martial Arts Belt Display
- ¼" plywood (a 2' x 2' piece is plenty)
- 1 x 2 board
- ⅝" brad nails
- Square
- Wood filler
- Sandpaper
- ⅜" elastic
- Staple gun and ¼" staples
- Picture hanging hardware
- Paint or stain
- Saw
- I used a table saw to cut down the plywood slats, but you could also use a circular saw.
Don't forget your safety gear when woodworking! Here are my recommendations for safety glasses and ear protection. No excuses!
How to Make a Martial Arts Belt Display
Measure Your Belts
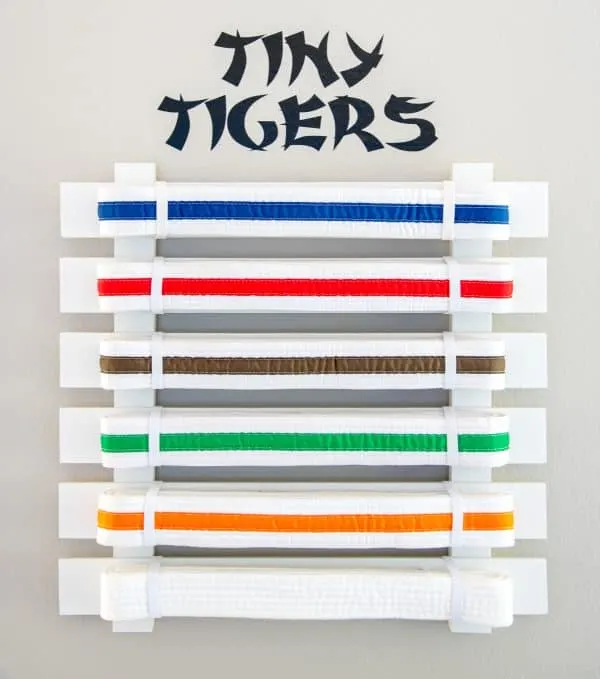
Begin by checking the size of your karate belts. Fold one up to a size that allows the belt to lay flat in the display without sagging. Mine was 1 ¾" wide and 15" long. The slats need to be a bit wider than the folded belt and a couple inches longer as well.
If you happen to have any leftover scraps of wood laying around, they are perfect for this project! If you don't have any, head to the store and purchase a 2' X 2' plywood panel.
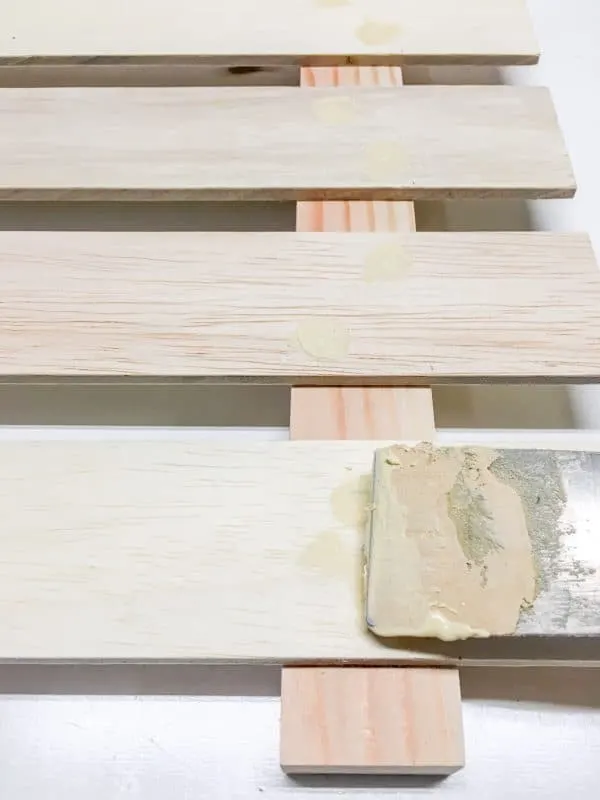
Cut and Sand the Slats
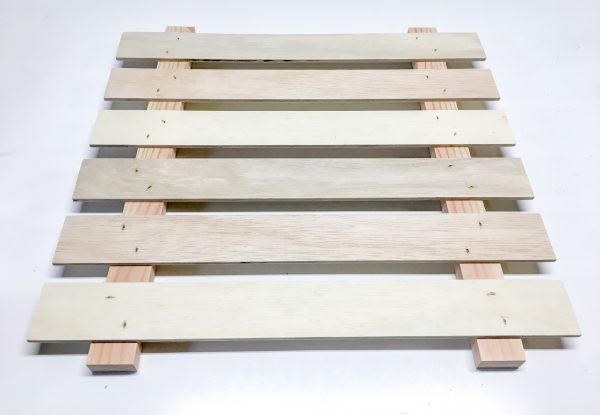
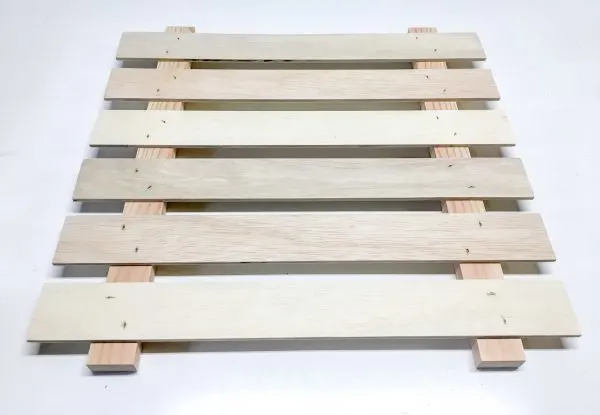
Use a table saw or circular saw to trim down the plywood into 2" x 18" strips. The back supports are 1x2 pieces cut to 17 ½". This is long enough for six belts with ¾" spacing between them.
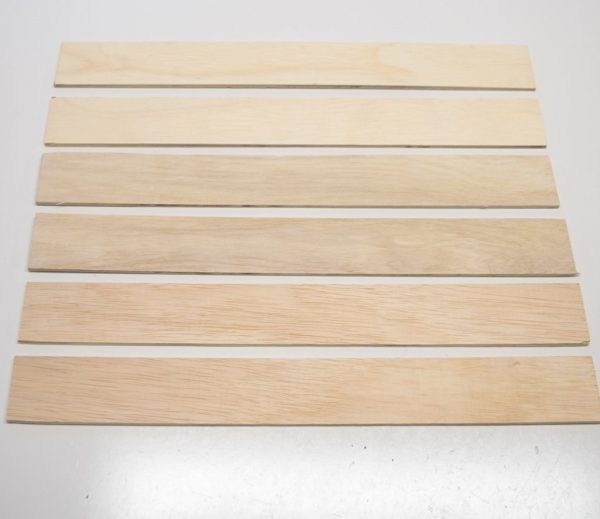
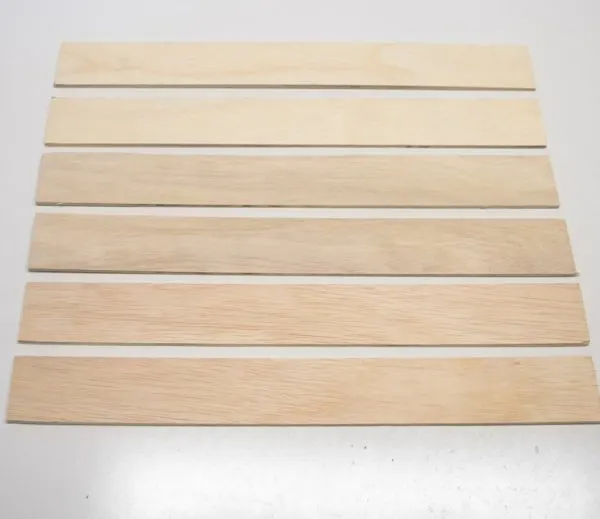
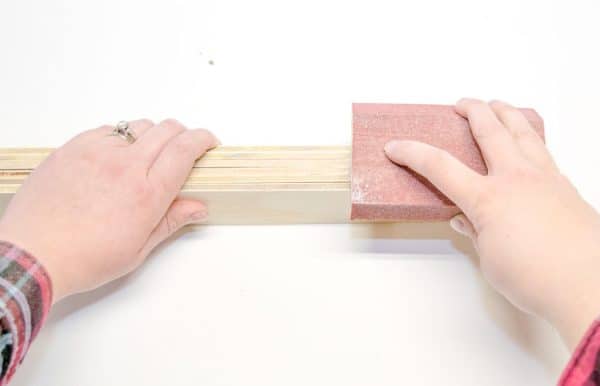
Sand down any rough edges. Here's a helpful tip: Stack up the slats and sand all the edges at the same time. This also keeps them a consistent size.

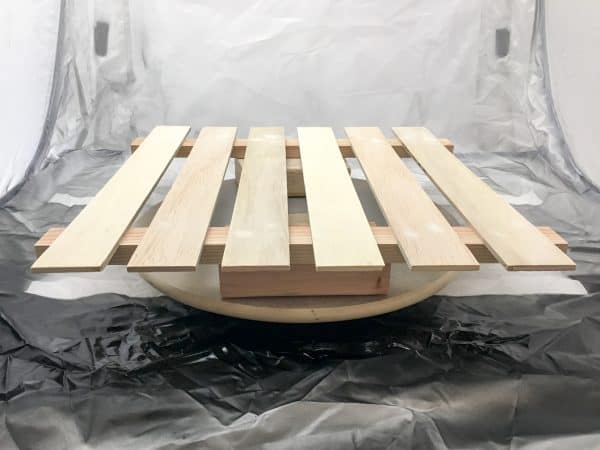
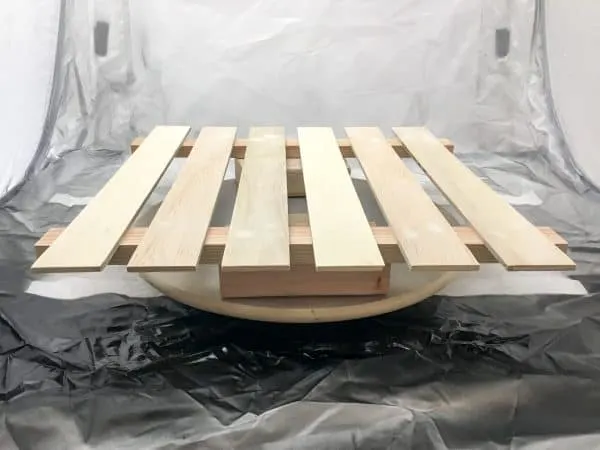
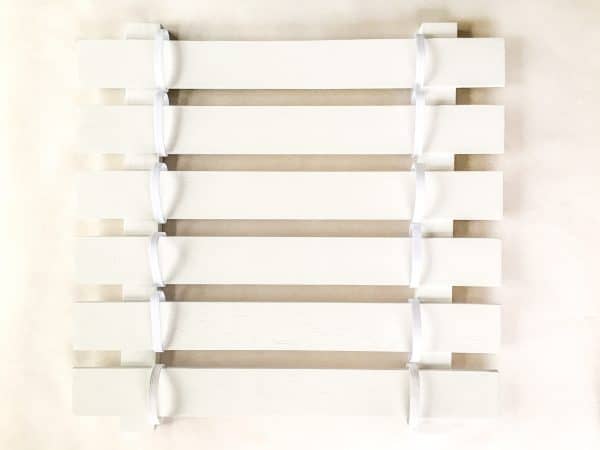
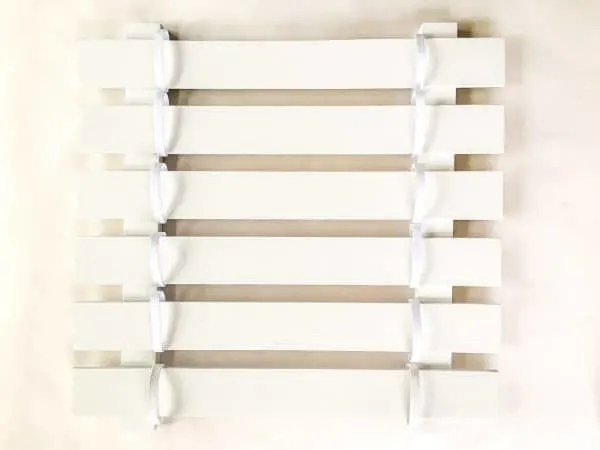
Assemble the Martial Arts Belt Display
This belt display is put together like a ladder, showing the progress from one belt to the next. It goes together really quickly once you get the first slat attached!
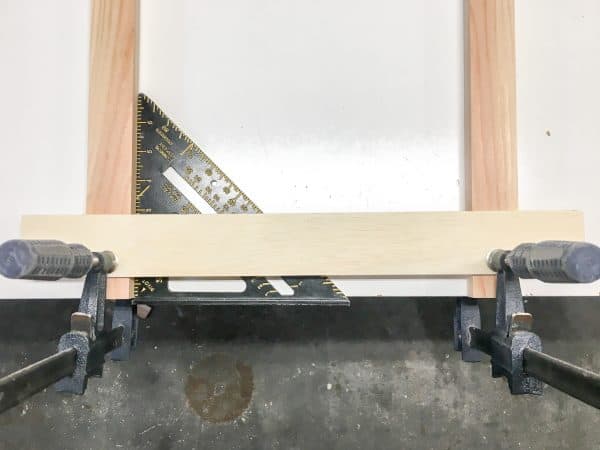
Lay the first slat on top of the 1 x 2 pieces and adjust the spacing until it's ¾" from the bottom and 2" inches in from each side. Use the square to keep the pieces aligned as you clamp it to your work surface.

Nail the slats into place with ⅝" brad nails. The Ryobi Airstrike is one of my favorite tools because it's battery operated and doesn't need an air compressor. You can also use a staple gun like this one that also shoots brad nails.
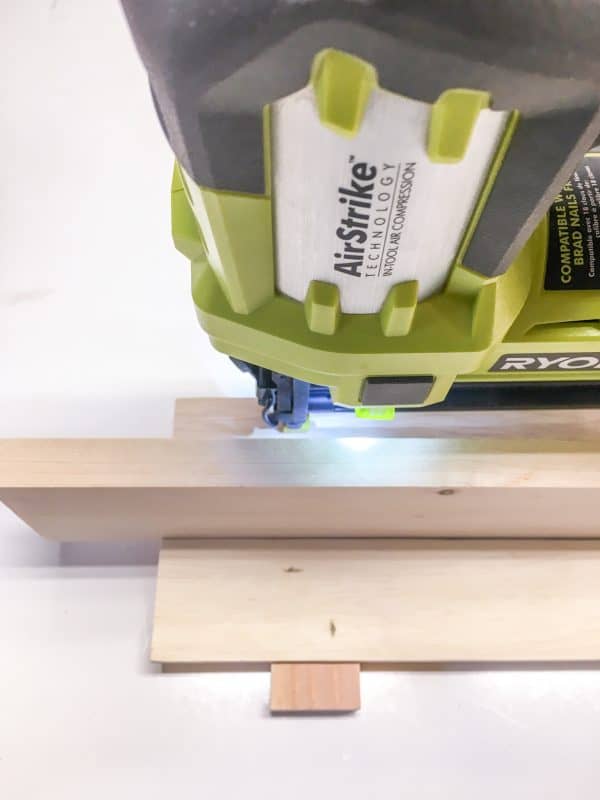

A scrap piece of 1x2 is the perfect spacer and makes the rest of the process quick and easy. Lay it across the display and butt the next rung up against it. Nail the next one into place, and move the spacer up to the next rung.
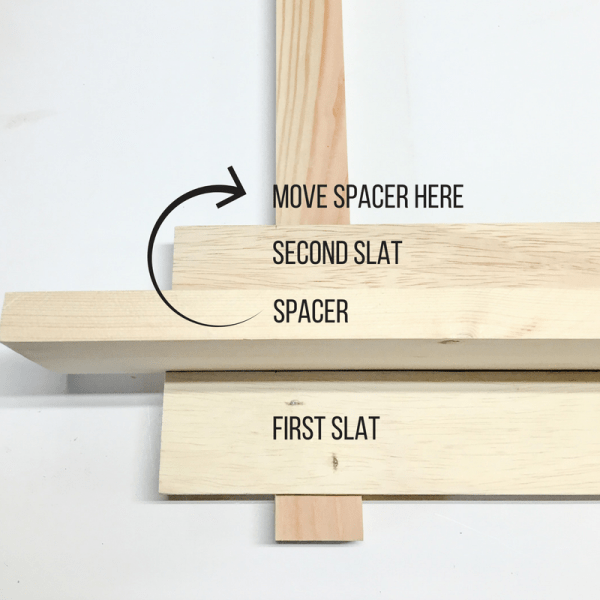
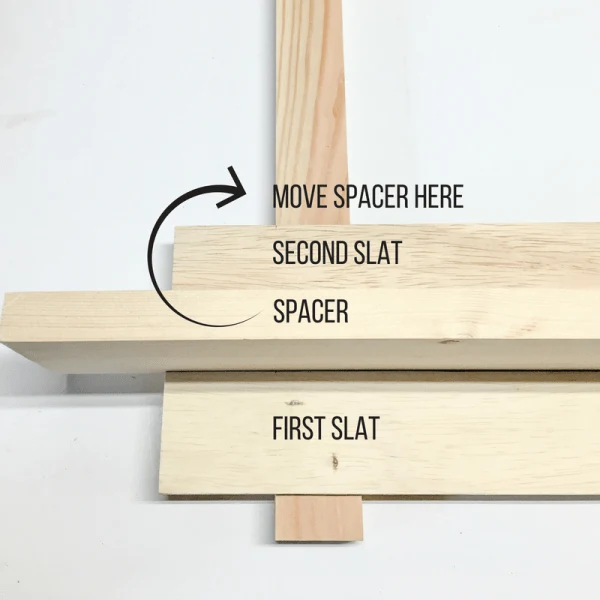
There should be ¾" left at the top when you're finished attaching all the slats.
Fill Nail Holes and Paint
Hide the nail holes with wood filler, then sand down the excess when dry.

Spray paint is the easiest way to tackle these thin pieces. I set up my pop up spray shelter with a lazy susan to rotate the piece as I painted.
Attach Elastic
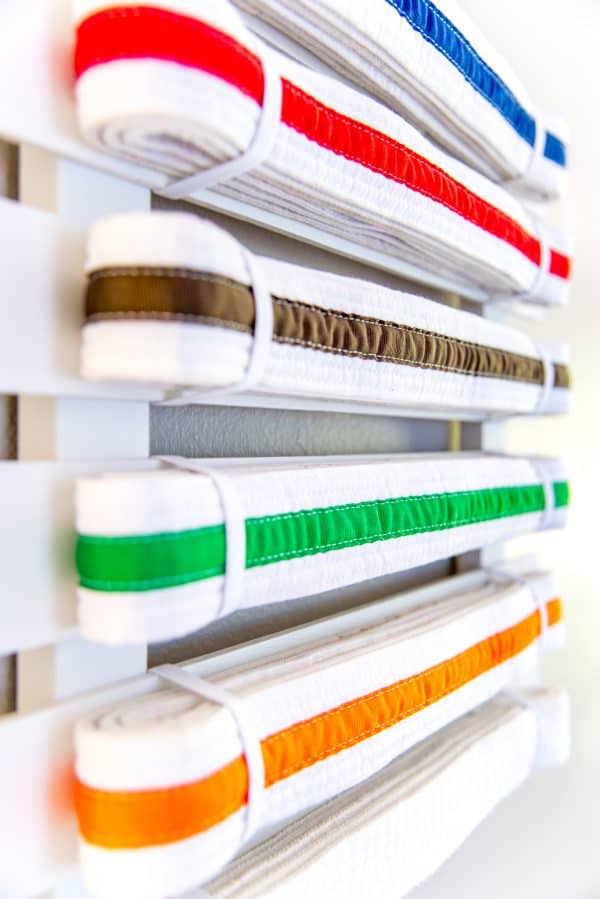
I used ⅜" elastic to hold the belts to the display rack. This makes it simple to add belts as you earn them!
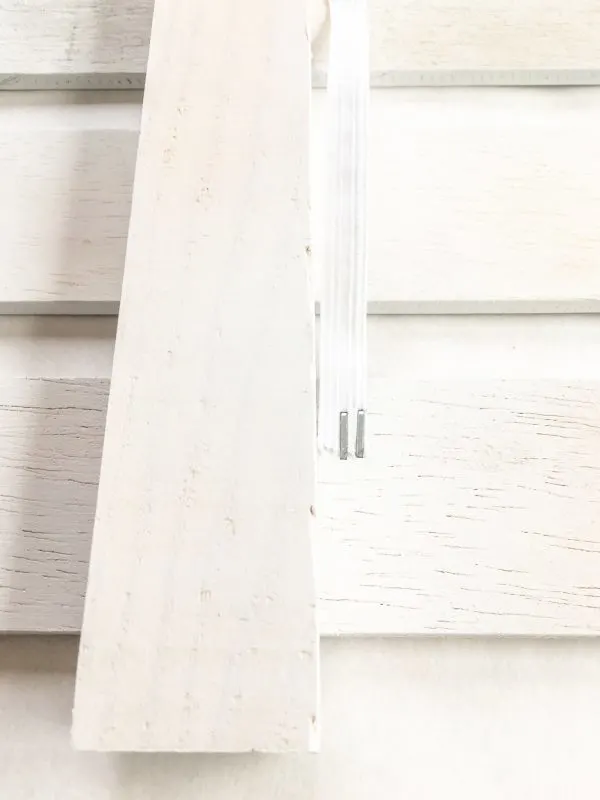
Simply staple one end of the elastic to the back of the slat just inside the 1 x 2 supports. Poke the other end through the gap in the slats to the front.
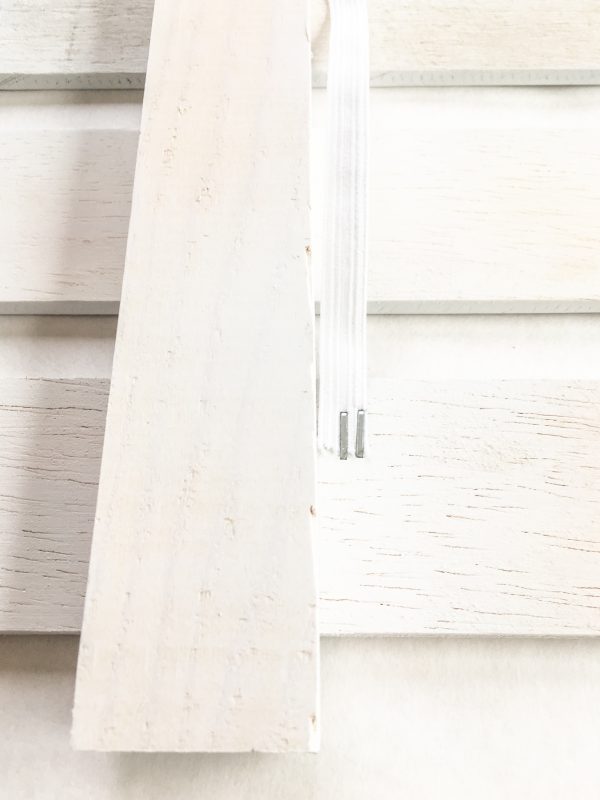
Hold one of the folded martial arts belts to the front of the slat, and wrap the elastic piece over the top. It's important to have the elastic tight enough to secure the belt without drooping, while not so tight that it makes an indentation.
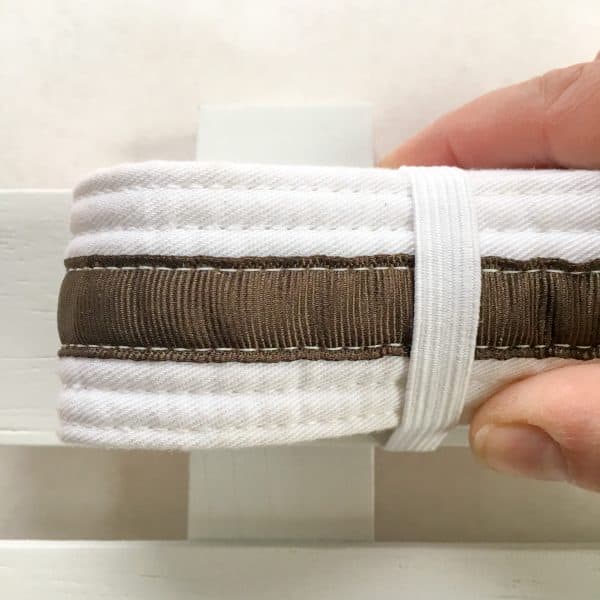

Poke the remaining end through the slats to the back again, and mark where you will attach the staples. Measure the length of the elastic and cut enough pieces for two elastic bands over each belt. Staple them all in place to form loops.
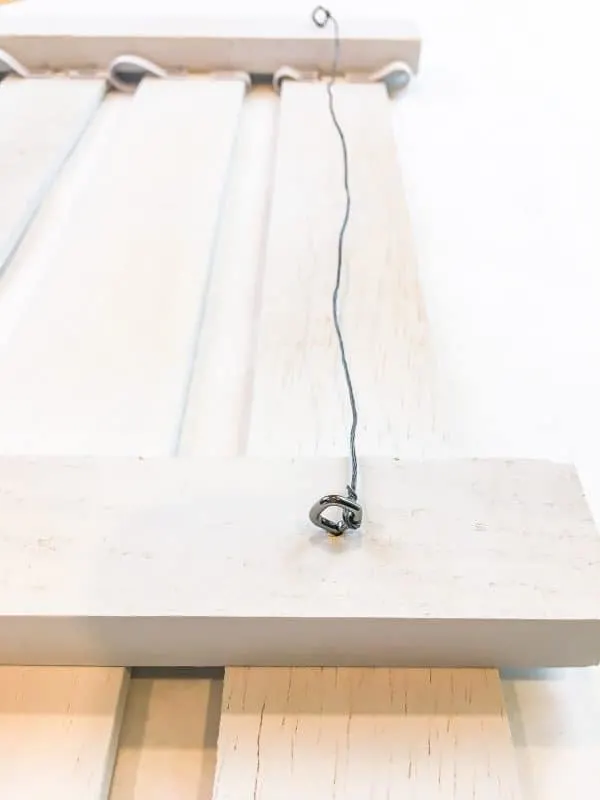
Attach Hanging Hardware
Turn the martial arts belt rack over and secure picture hanging hardware to the back. I used eye hooks and wire, but you could use sawtooth hangers as well.

Stick each belt under the elastic loops in order they were earned. Then proudly hang your new martial arts belt display on the wall!
I love how the bright colors pop against the gray walls of his bedroom. To personalize it further, I added a vinyl decal with the name of his class to the wall above it. I used this "Karate" font with my Silhouette machine.
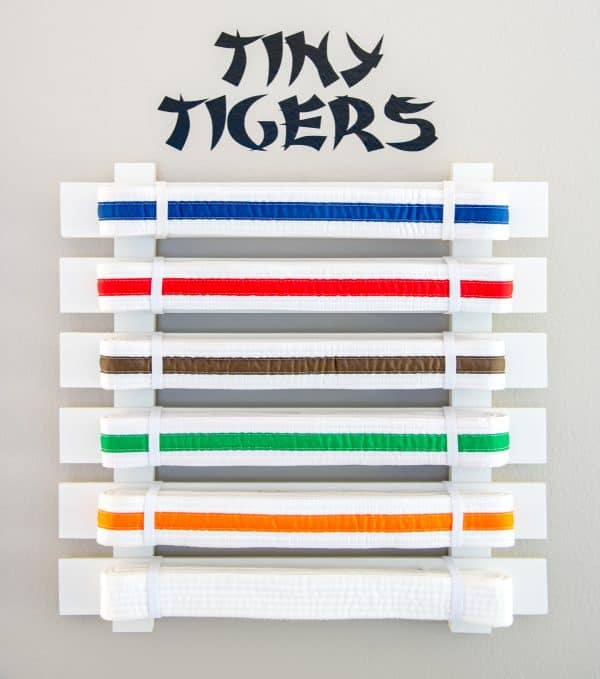
Hopefully this inspiring display will remind him of all his hard work and motivate him to keep working for that black belt!
Check out these other easy DIY projects!