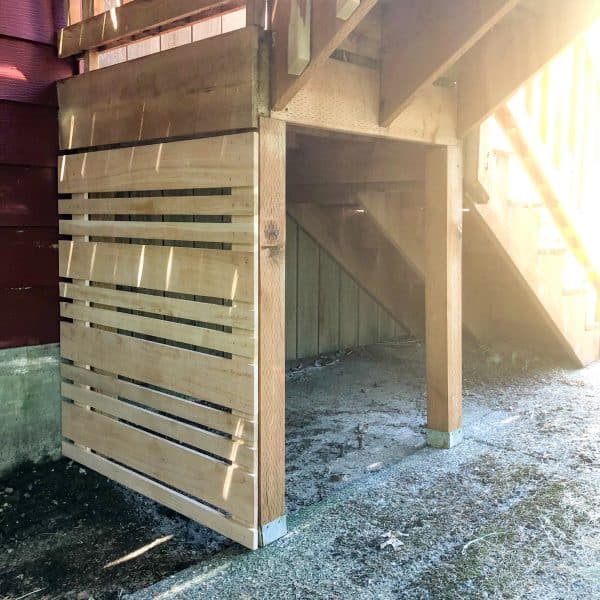
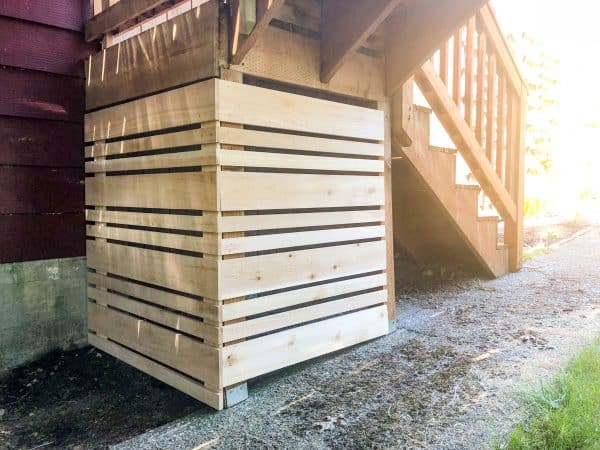
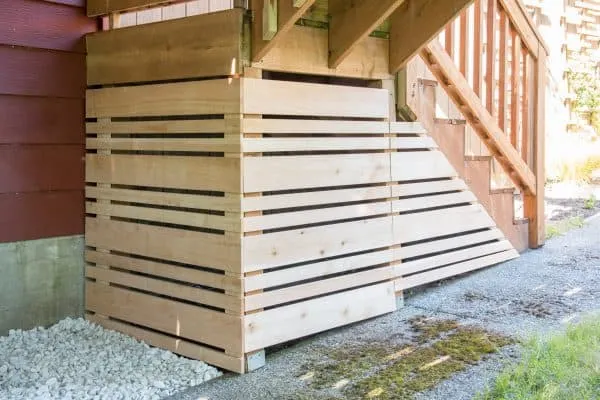
The area under our deck stairs was a total eyesore! I'll show you how I hid it away with a clever removable fence panel to create an under deck storage space.
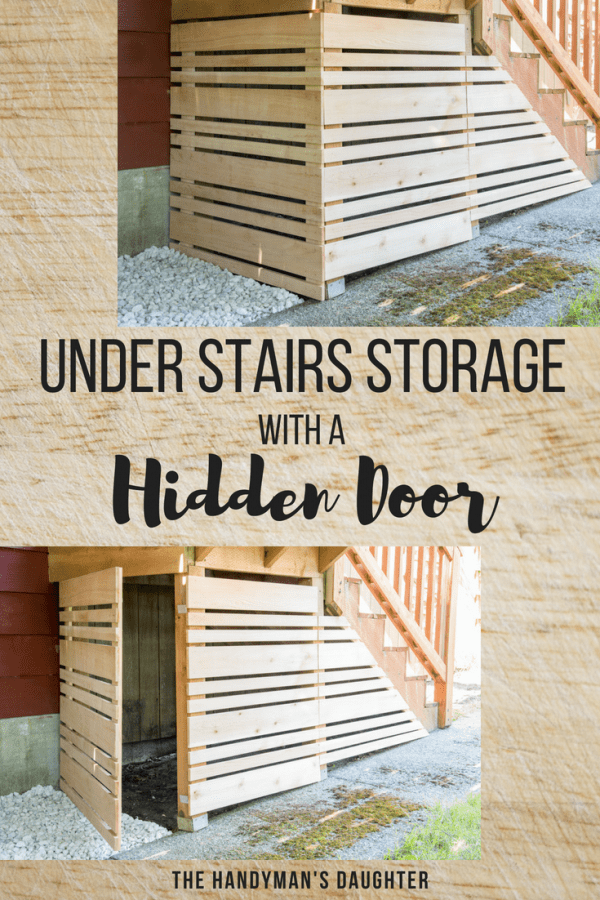

Turn the space under your deck stairs into outdoor storage! This simple project hides all the clutter from view, and the removable fence panel gives you a seamless look with easy access. I wish I had done this project sooner!
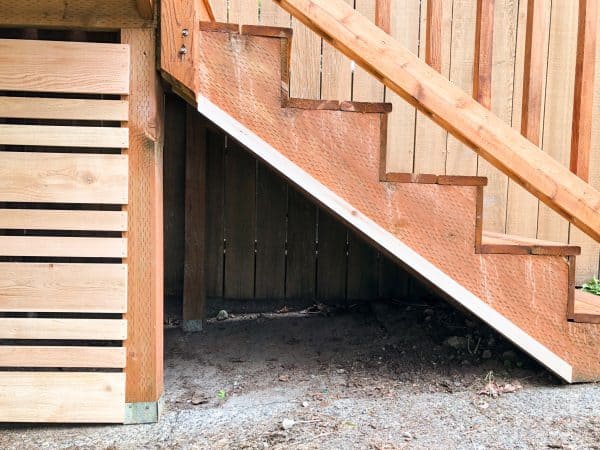
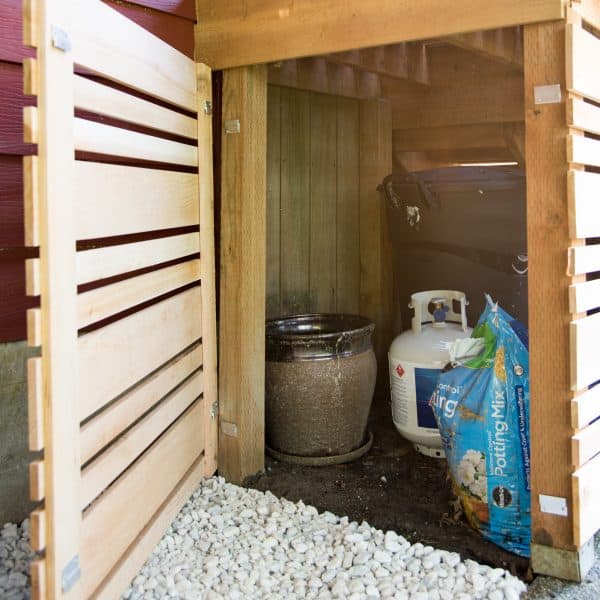
We practically live outside in the summer, and our deck is the perfect place to hang out. Because it's so high off the ground, I was able to take advantage of the space underneath to hang a cozy hammock from the joists. But I can't seem to relax in it, because I stare at this eyesore the whole time!

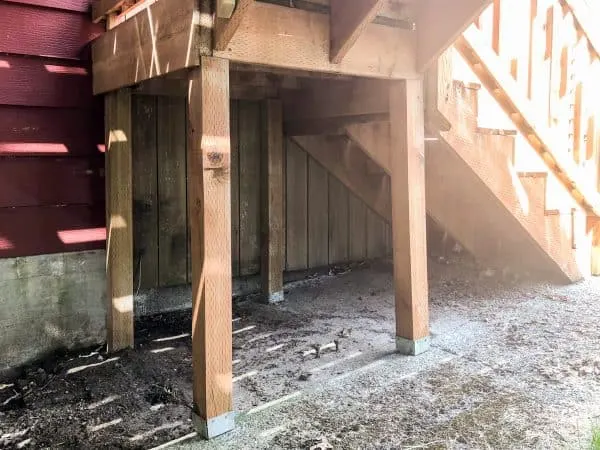
I cleared it out before I took photos, but we usually store an extra trash can, propane tank for the grill, and gardening supplies under there. But it's also a magnet for leaves and weeds, and just looks awful!
Fencing off the area is a pretty easy task. But I didn't want to install a traditional gate with bulky hinges. Instead, I created a removable fence panel with hidden brackets that allow it to blend seamlessly!
This post contains affiliate links for your convenience. Purchases made through these links may earn me a small commission at no additional cost to you. Please visit my disclosures page for more information.
Materials Needed for Removable Fence Panel
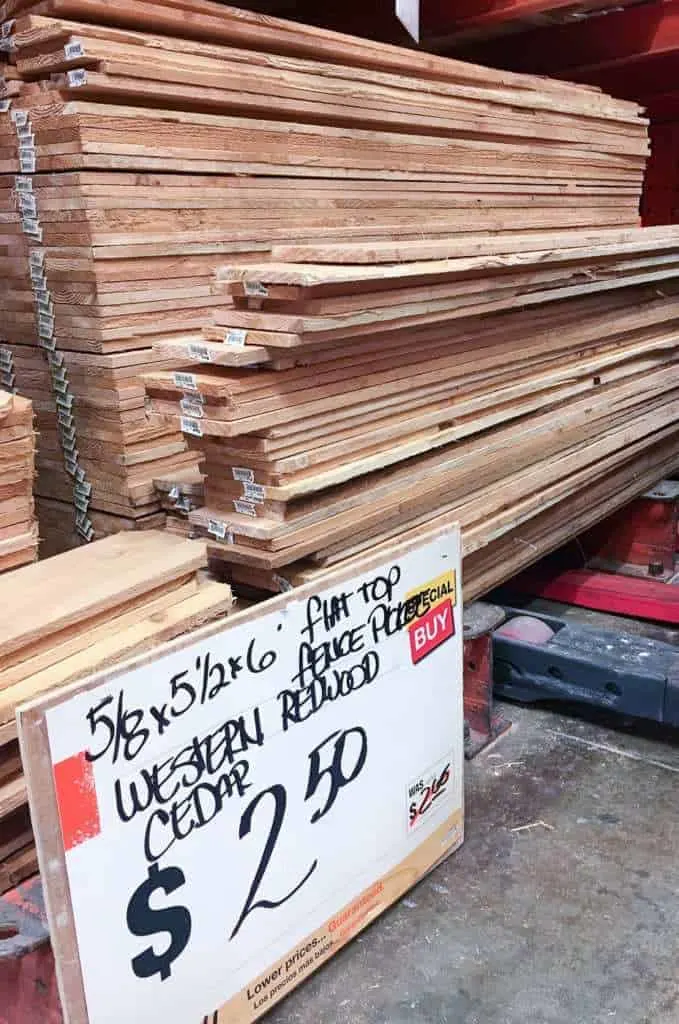
- Flat top cedar fence pickets
- Nail gun and 1 ¼" brad nails
- Table saw
- If you want to keep the fence pickets full width, you can skip the table saw.
- Miter saw or circular saw
- 2" Z clips
- Scrap piece of ¾" lumber (for the spacer)
- Level
- Square
Don't forget your safety gear when woodworking! Here are my recommendations for safety glasses and ear protection. No excuses!
How to Make a Removable Fence Panel
Measure Your Fence Space
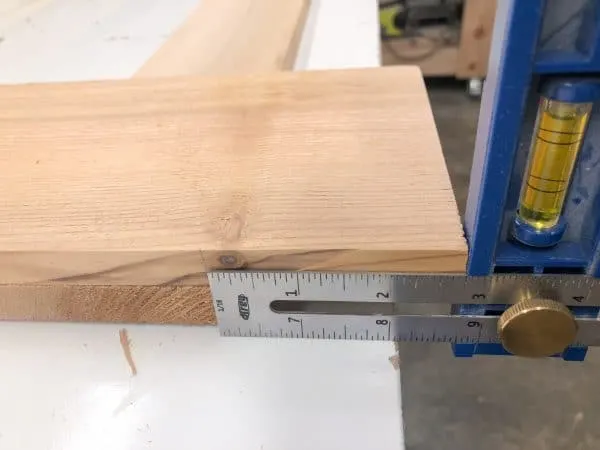
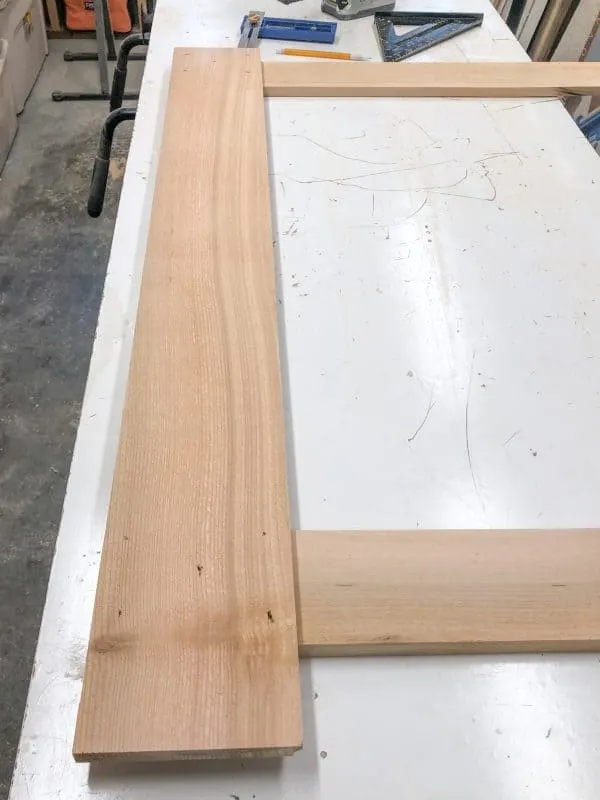
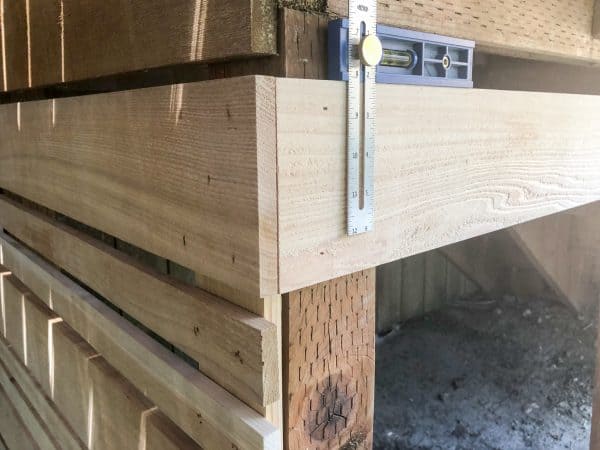
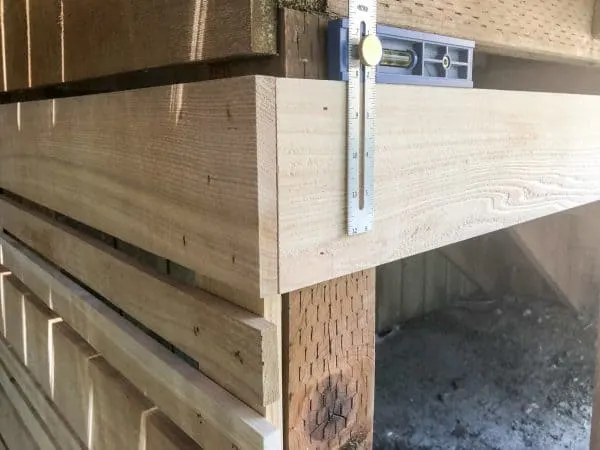
Measure the space that you plan to cover with the removable fence panel, including the posts that are already in place. I cut my upright pieces to match the width of the posts, so they blend together seamlessly when the panel is hung in front of them.
The space under our deck stairs has posts 2 ¾" away from the house, so I added that into my measurements to close the gap.
I also added ⅝" to the other side to account for the thickness of the fence pickets on the opposing corner. This will allow it to fit snugly against the permanent part of the fence when the panel is in place.
Cut the Fence Pickets
Cedar fence pickets are one of my favorite building materials. They're cheap, they're rot resistant, and they smell amazing when freshly cut!
The hard part is finding decent ones in the giant stack at the home improvement store. Look for pickets without a lot of knots, straight grain, and DRY! The ones at my store always seem to be sopping wet, which makes it more likely that they'll do strange things like warp or twist when they're cut and dry.

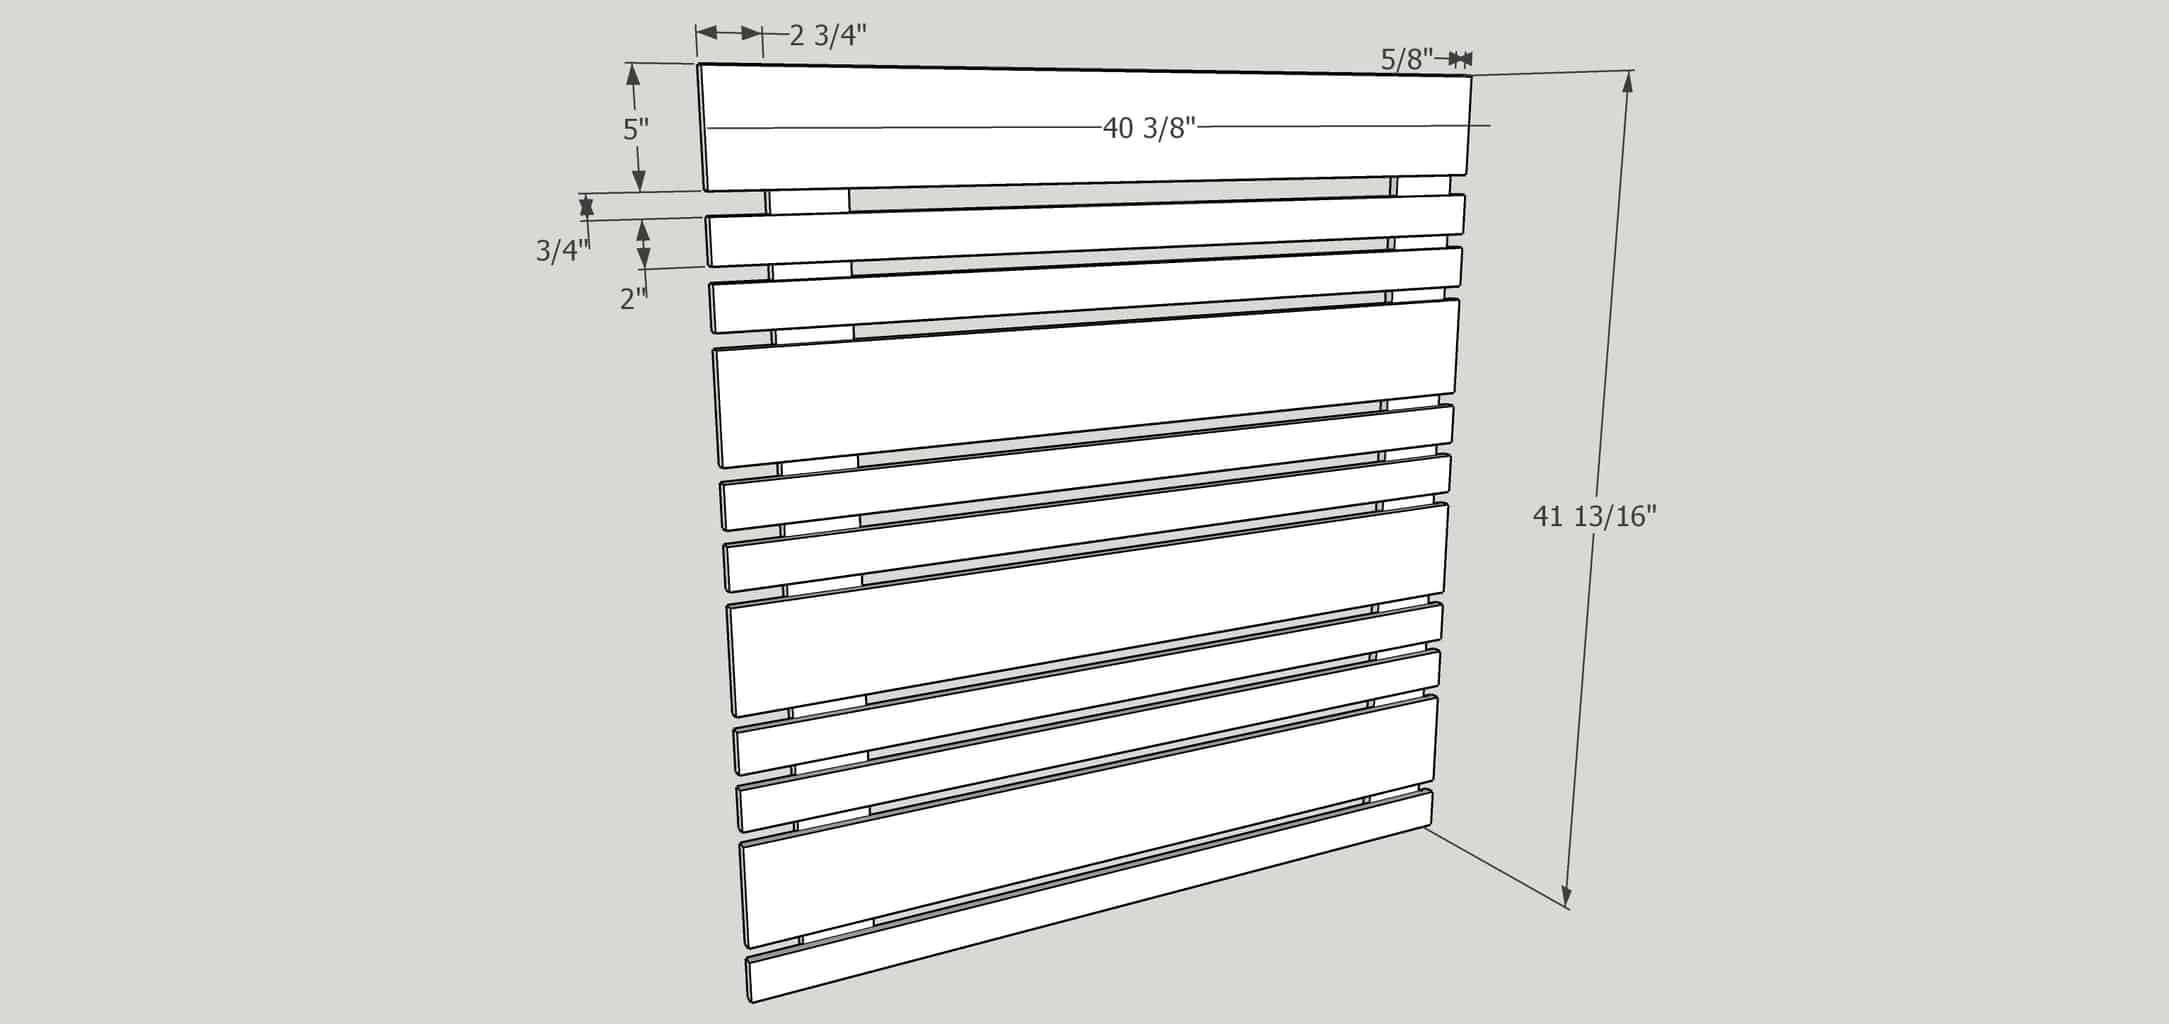
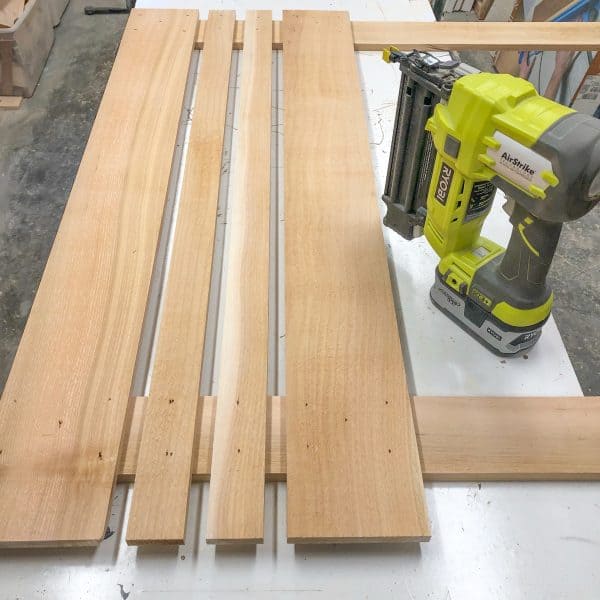
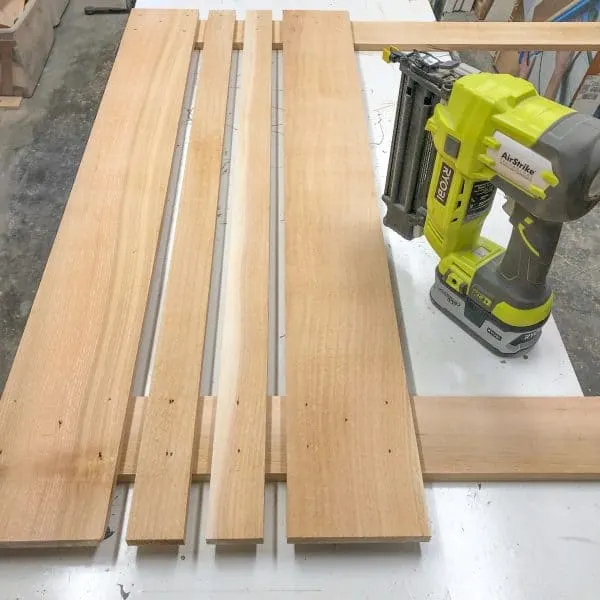
Cut all the pickets to the width of your removable fence panel. If you want to replicate the pattern I used, rip them down on the table saw into 5" wide and 2" wide slats.
Cut two pickets to the height of your fence posts. I also ripped mine down to the same 3 ½" width as the posts.

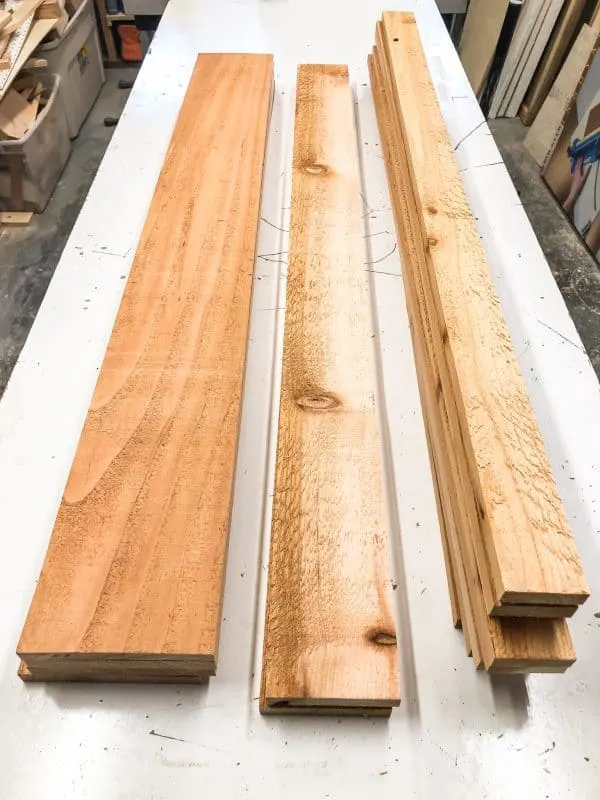
Sand each of the slats to remove splinters and rough spots. Cedar takes on a whole new look when it's been sanded smooth!


Assemble the Removable Fence Panel
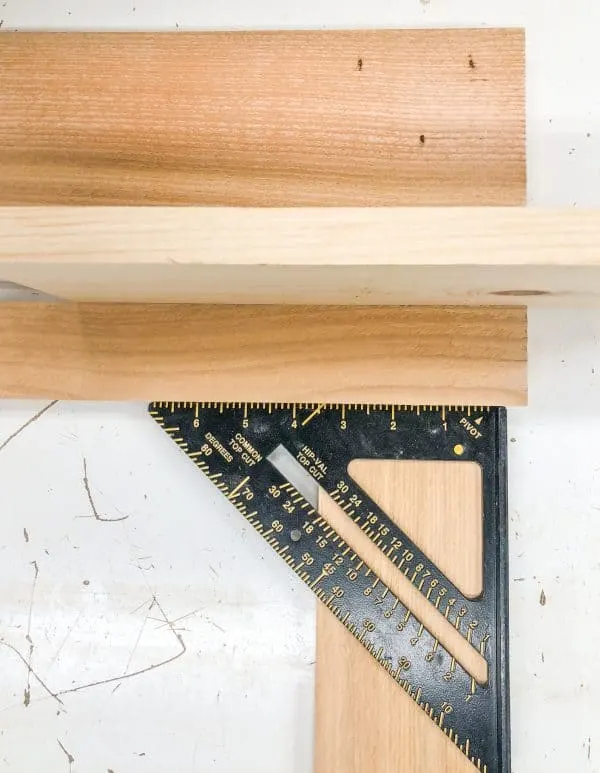
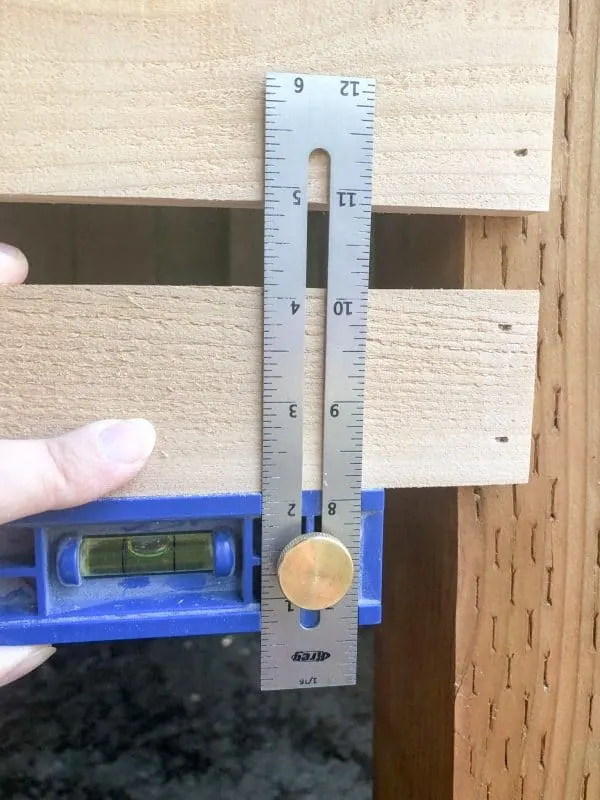
Lining up the first slat correctly will make the rest of the assembly much easier. Mark the placement for the upright supports on both ends of all the slats. Mine are 2 ¾" in on one side, and ⅝" on the other.

I started with the wider 5" slat at the top. Check that the top slat is square to the uprights, then nail it into place with 1 ¼" brad nails.
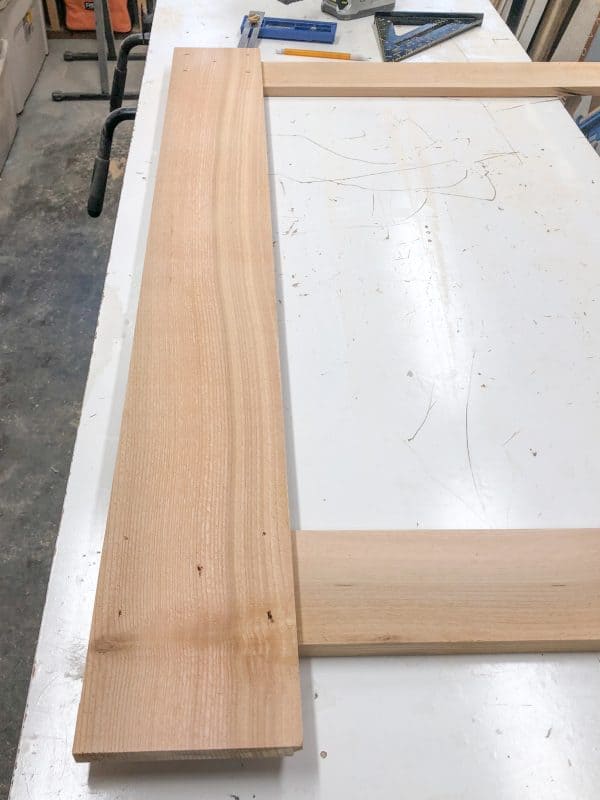
Use a scrap of ¾" lumber to use as a spacer to keep the distance between slats consistent. It's so much faster and easier than measuring it every time! Place it under the first slat, then line up the marks on the 2" wide slats with the uprights as before. Check for square again, then nail it into place.

I used a pattern of one 5" slat, followed by two 2" slats, with ¾" spacing between each slat. You can start to see the pattern taking shape now! Continue until you reach the end of the uprights.
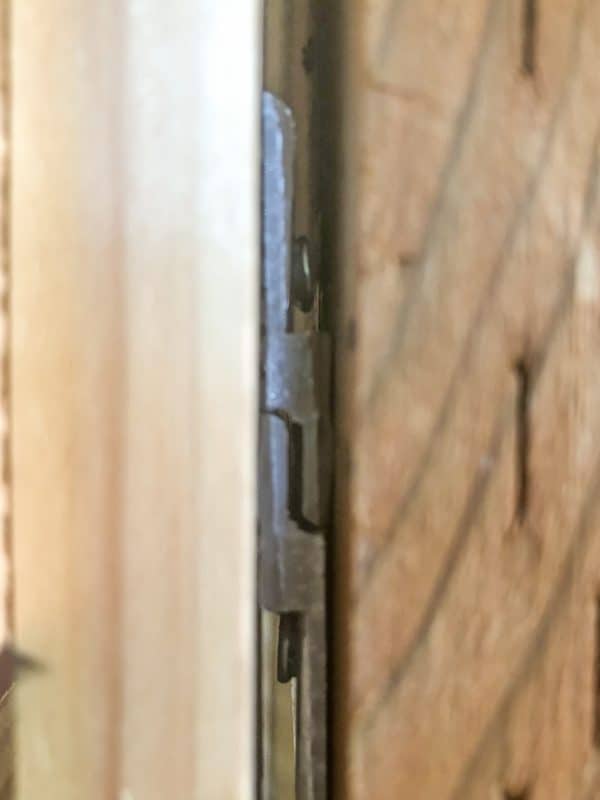
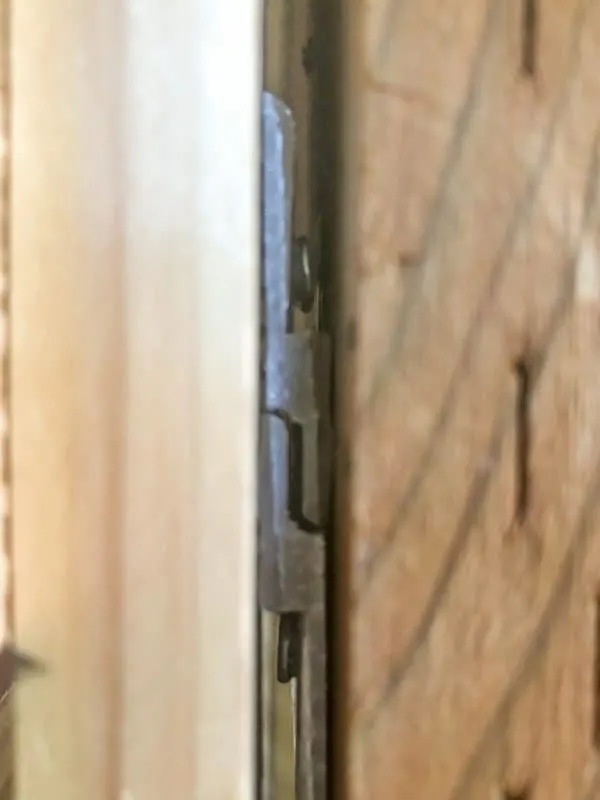
Install the Removable Fence Panel Brackets
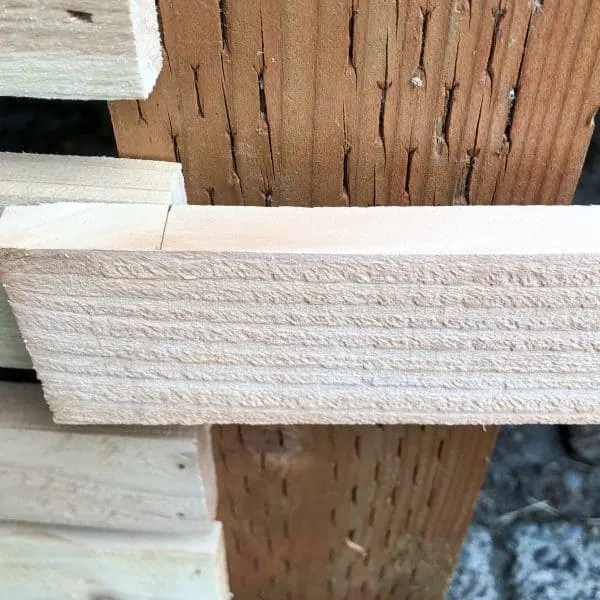
These Z clips work just like the French cleat I used to attach my upholstered headboard to the wall. You just screw one side to the back of the removable fence panel, and the other to the fence post.
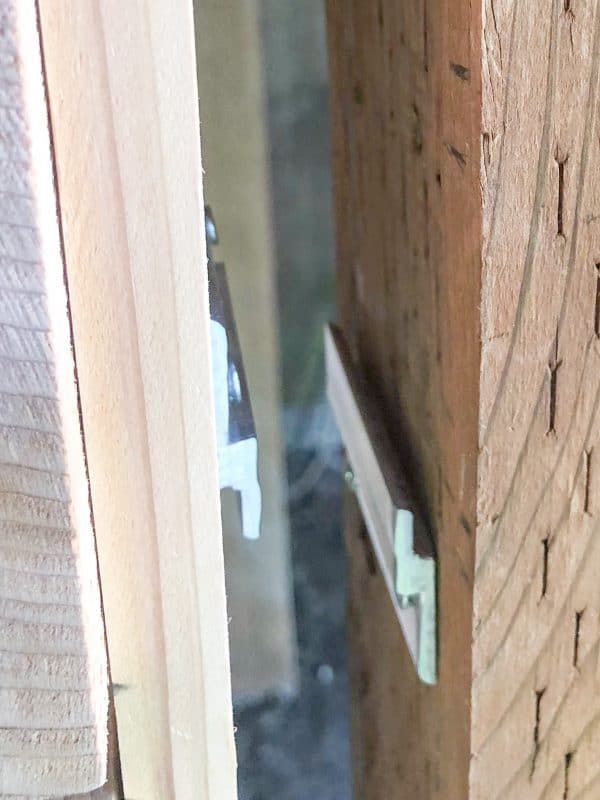

When the two opposing clips slide past each other, they hold the panel straight and secure!
To remove the panel, just lift up slightly!

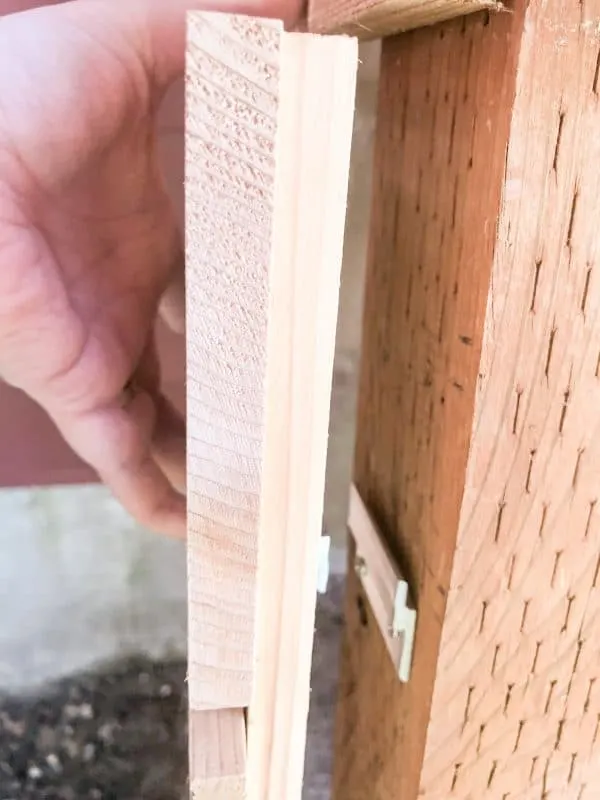
The panel sits just ¼" away from the posts, so if you're installing this in the middle of a long fence, you'll barely see the gap.

Install the Rest of the Fence
With the removable fence panel in place, I installed the rest of the fence to match. Here you can see why I added ⅝" to the right side of the panel. The slats on the front cover the gap from the brackets and create a nice, continuous line around the corner.
These slats are nailed directly to the deck stair posts. Instead of using the spacer, I matched up the slats with the corresponding one on the removable section, and nailed one nail to hold it in place. Then I used that pivot point to adjust the other end until it was level before nailing it securely.

Because of the slope, I left off the bottom slat. I'll put bricks behind the gap to prevent any critters from making a home under the stairs!

The third section was a little trickier. The stairs are set back about ¾" from the posts, so I used a piece of 1x2 cedar to bridge the gap.

After figuring out the angle with my handy Kreg Multi Mark tool, I cut the ends of the slats to the same angle.
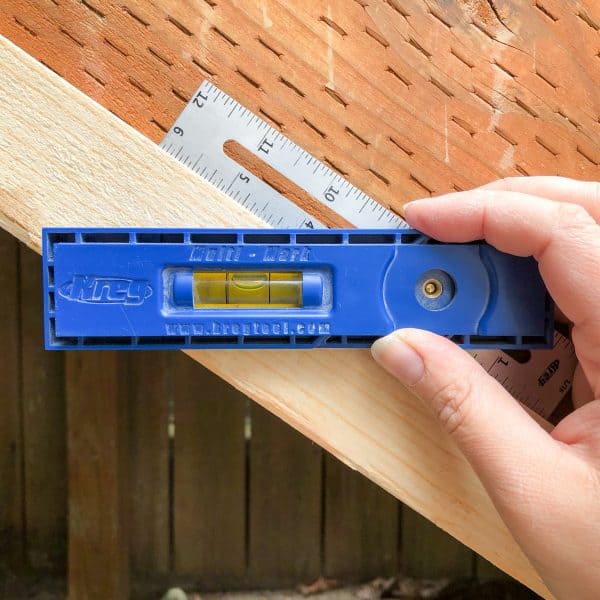

I held the angled end in place on the stairs side and marked the straight cut on the other side. A custom fit every time without breaking out the measuring tape!

Again, the slope made the bottom slat tricky. I might go back and custom cut a 5" wide piece to match the slope, but I call this good enough for now!


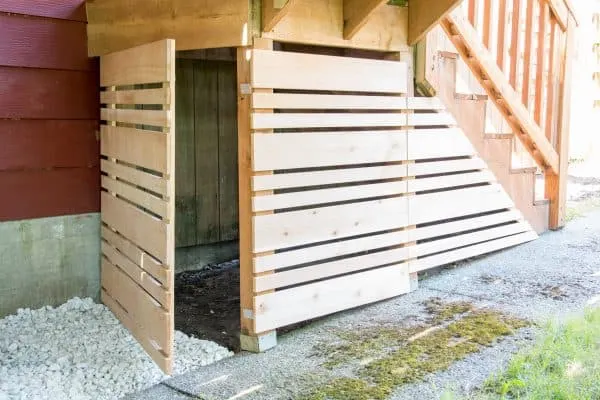
It's so easy to take off the removable fence panel! But if you didn't know it was there, you'd think it was permanent. Check out the video to see it in action!

Check out these other outdoor projects!
noor
Monday 10th of December 2018
Good project and a nice use of that space. Good choice with the cedar!
Handy Squad
Wednesday 21st of November 2018
This post is very useful and clever, thank you for sharing your great idea!
Elon
Thursday 8th of November 2018
This wooden storage is so lovely! Ties in perfectly with the wooden stairs. Thanks for the meticulous details and even sharing the blueprint. (:
Emily
Friday 13th of July 2018
What a great idea! I love how you varied the size of the slats - it adds an extra touch of style to the finished project! Thank you for sharing at Merry Monday. I'm going to feature your DIY Fence at next week's party. We'd love to have you come by and share another project or two!
Sherry Cole
Monday 9th of July 2018
Vinetta, I have chosen your deck storage project as my feature at Totally Terrific Tuesday this week. thanks for linking up with us.