If your ottoman has seen better days, then you need this tutorial! I'll show you how to reupholster an ottoman for a whole new look.
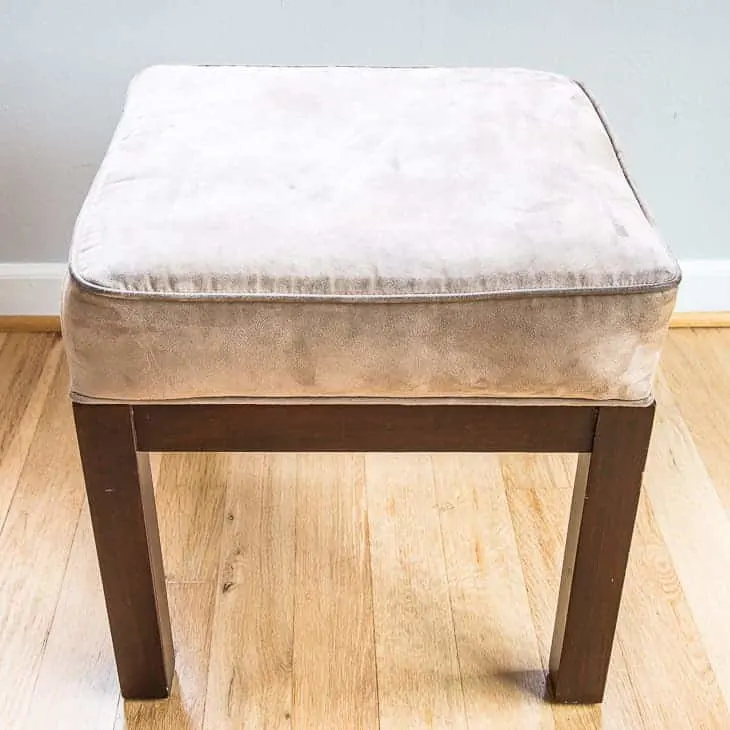
We've had this ottoman in our house for-e-ver and it's taken a LOT of abuse. The microfiber cover has a thin layer of sippy cup spills and Cheerio crumbs from our son's toddler years.
I'll show you how to reupholster an ottoman with gorgeous leather, so you can transform those thrift store finds into a piece of furniture you love!
This post is sponsored by Leather Hide Store, and contains affiliate links for your convenience. Purchases made through these links may earn me a small commission at no additional cost to you.
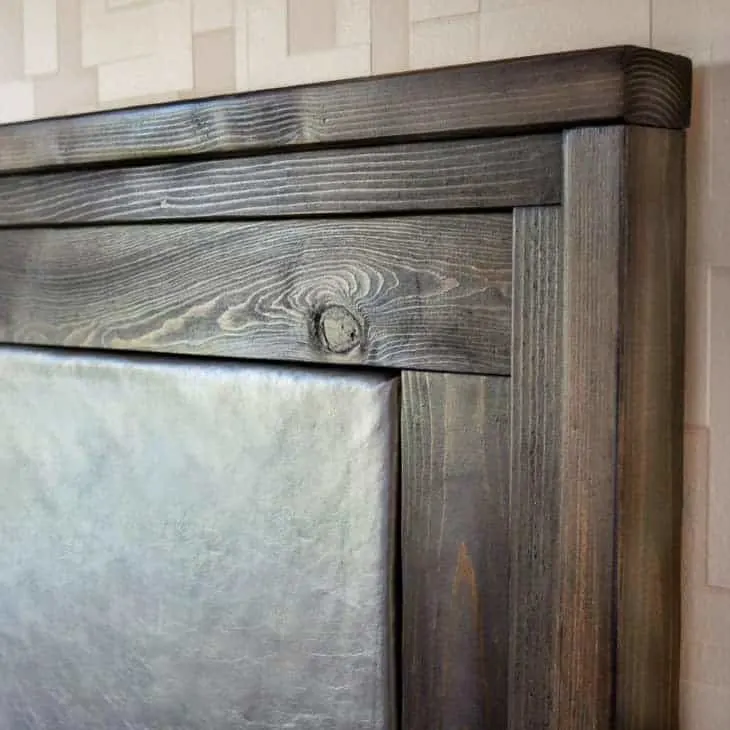
This isn't my first time incorporating leather into our decor. You may remember this upholstered headboard I created for the master bedroom.

When Leather Hide Store asked me if I had any other projects that could use leather, I instantly thought of my old ottoman. It had been banished to the basement ever since we moved, because it didn't fit in with our new decor.
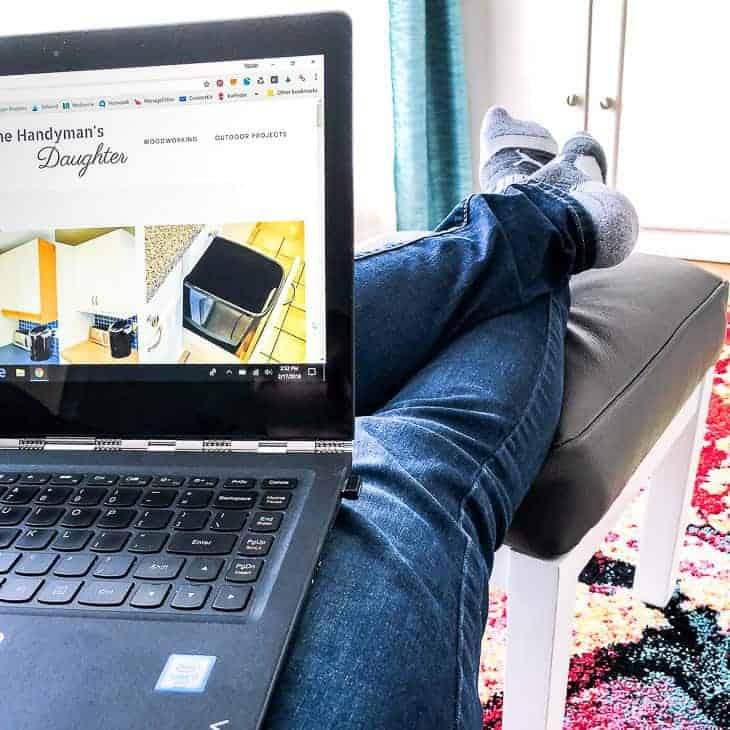
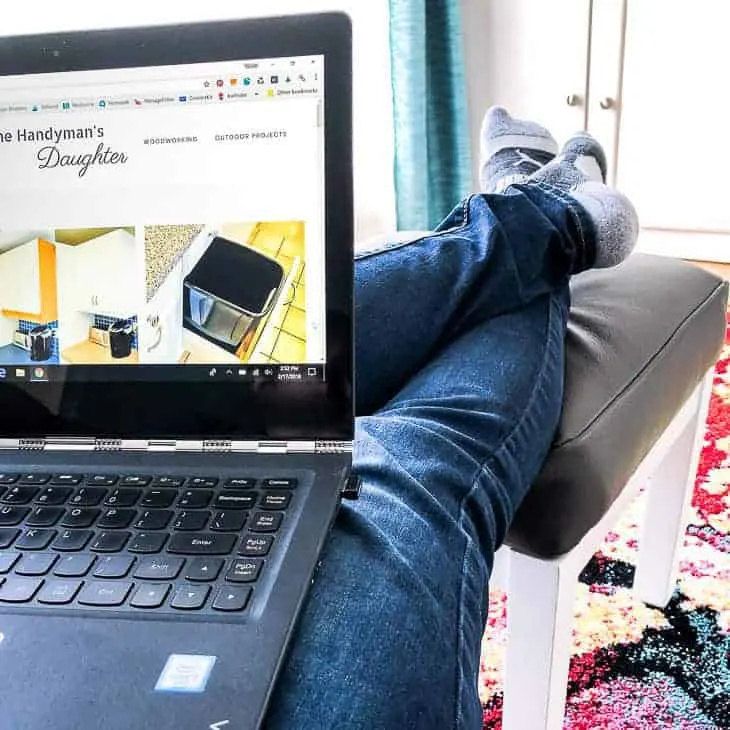
But the small size is perfect next to the coffee table in our living room, so I can prop my feet up while writing this blog!

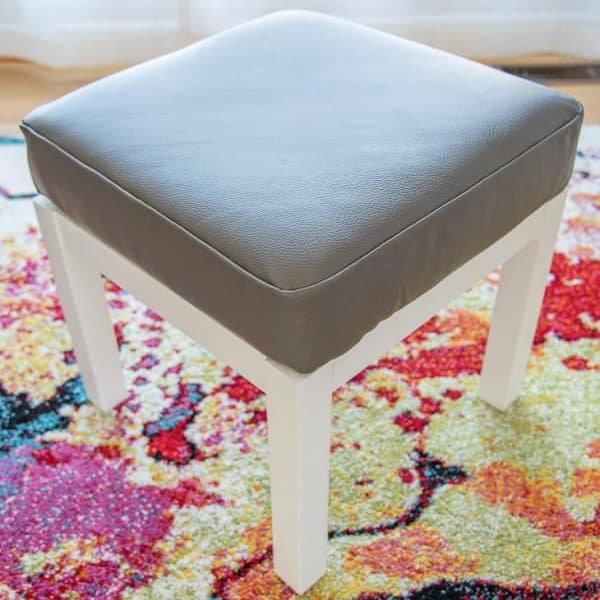
Leather Hide Store sent me a few samples, and I decided to go with their Philadelphia Steel gray leather, which matches our living room sofa perfectly.
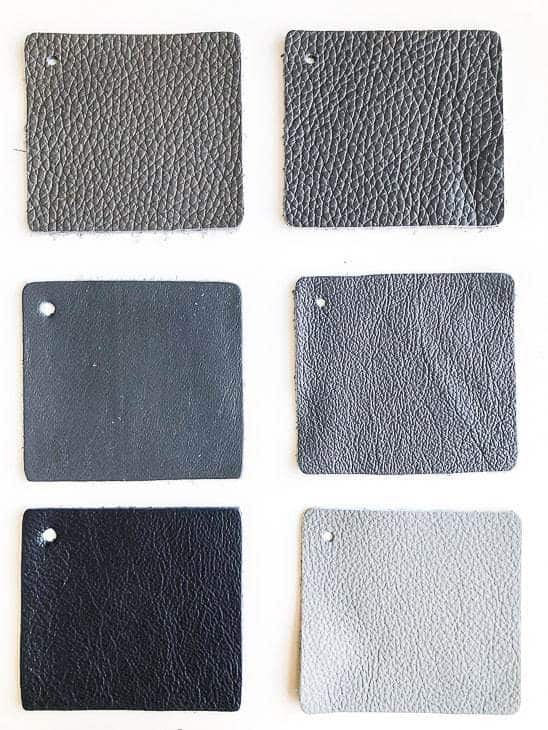

I have a second project in mind for this leather, so they sent me a whole hide. This is a great option if you want to ensure that different elements of a room match precisely. If you're not sure what size you need, they have a handy guide to help you out!
Materials Needed to Reupholster an Ottoman
- Leather or upholstery fabric large enough to cover the entire cushion
- Upholstery staple remover
- Seam ripper
- Fabric scissors
- Batting (optional)
- Chalk wheel
- Sewing pins
- Sewing machine and leather sewing needles
- Staple gun and ⅜" staples
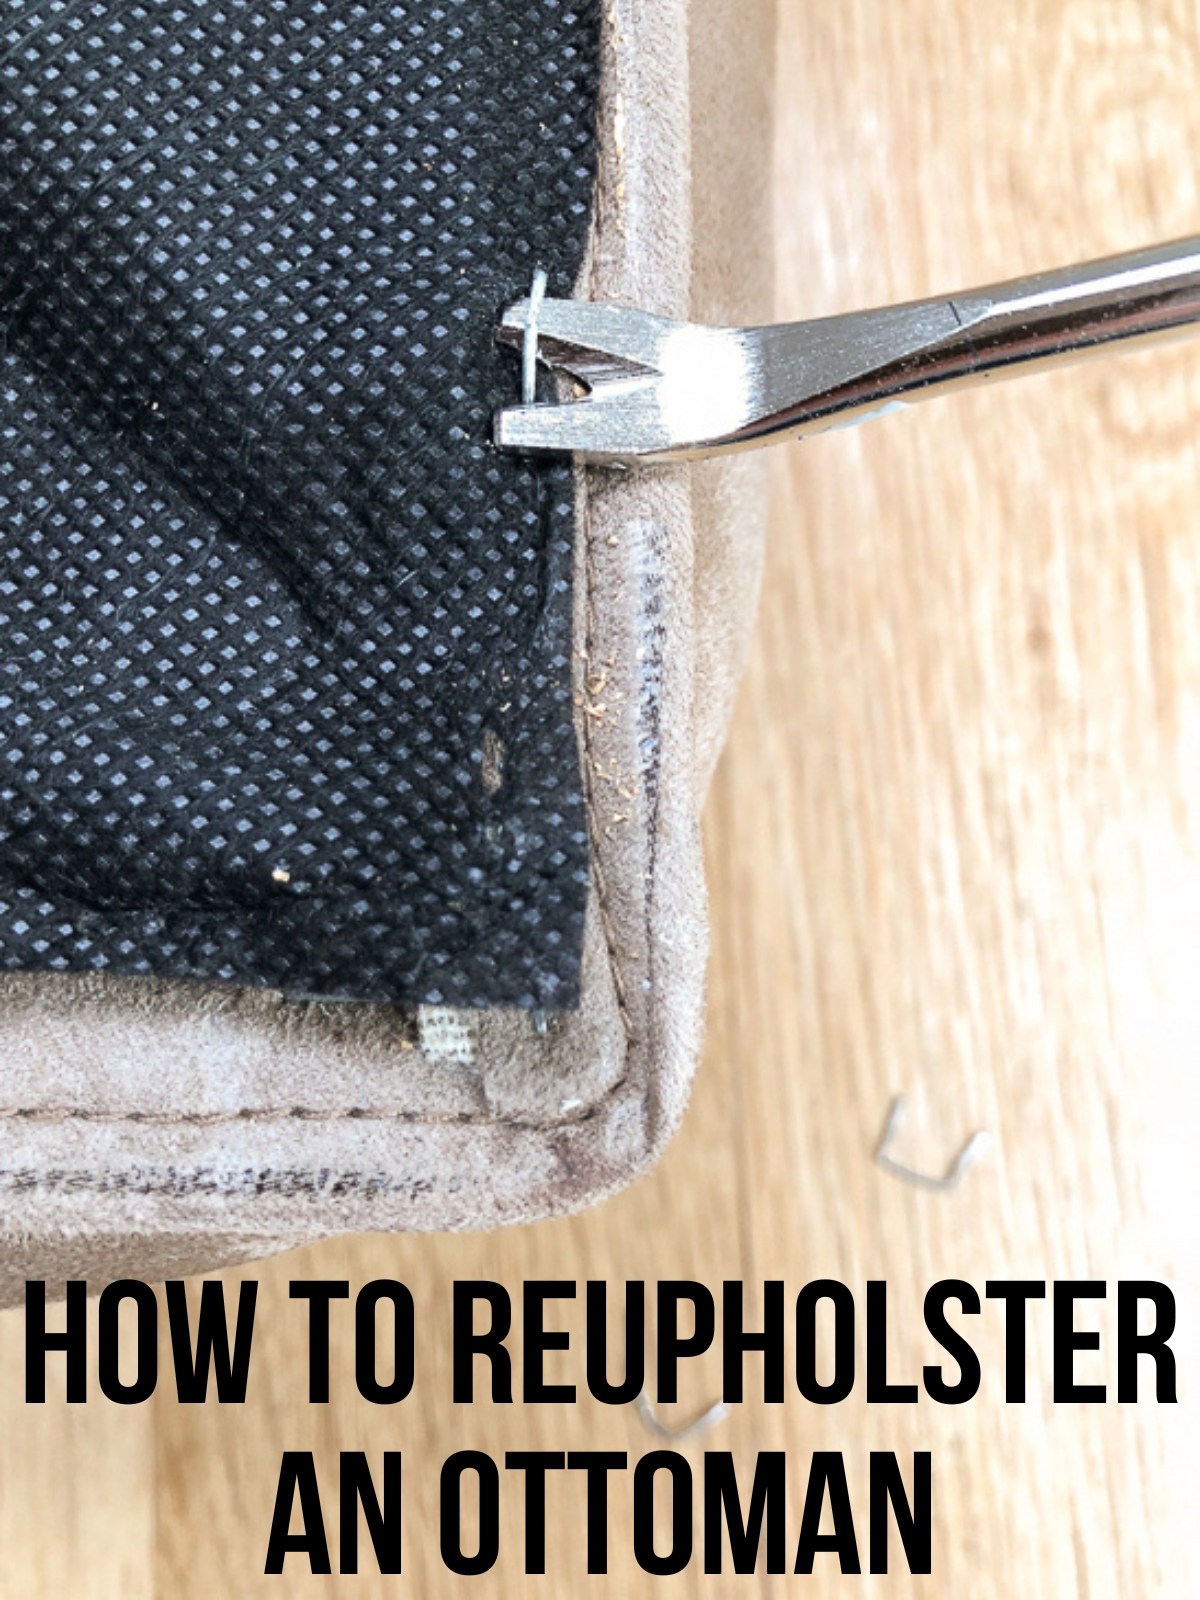
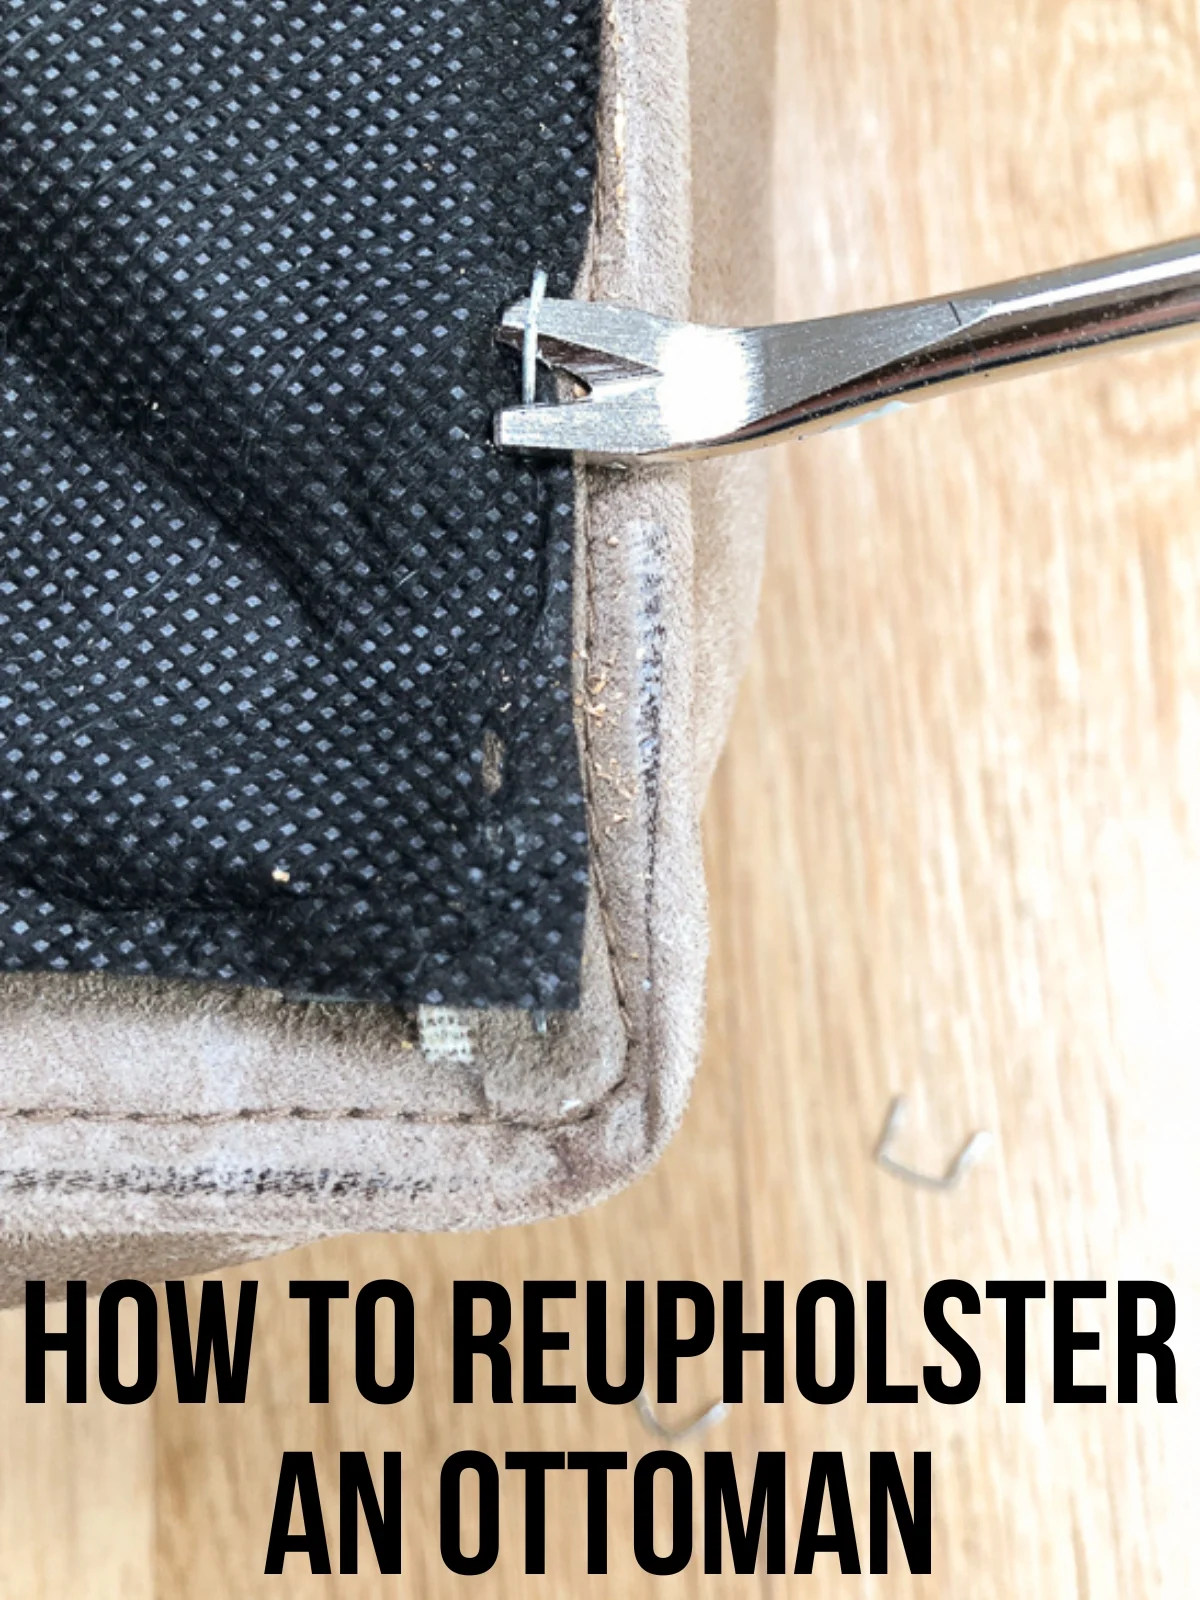
Remove the Old Ottoman Cover
Start by removing the cushioned top of the ottoman by unscrewing it from the base.


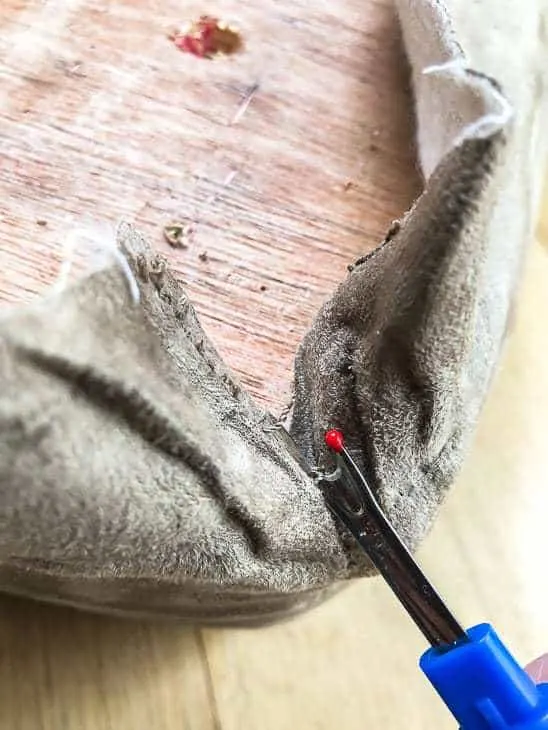
Remove the thin piece of fabric from the bottom with the staple remover. This just covers the mess underneath.
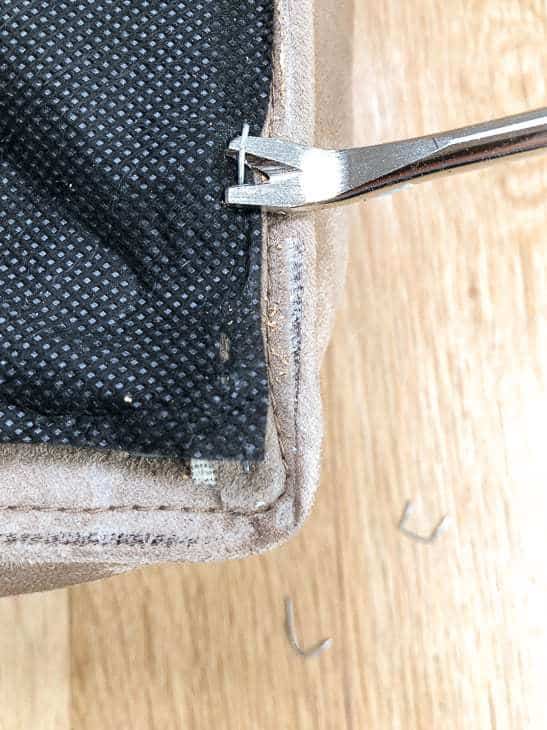

Now put on your favorite music or show, because you have a LOT of staples to remove! Just wiggle the head of the staple remover under each one and pop it up. Be careful not to rip the fabric, because you'll be using as a template for the new ottoman cover later.

If your ottoman has piping and you'd like to keep it for your new cover, set it aside. I discarded mine because I wanted a cleaner look.

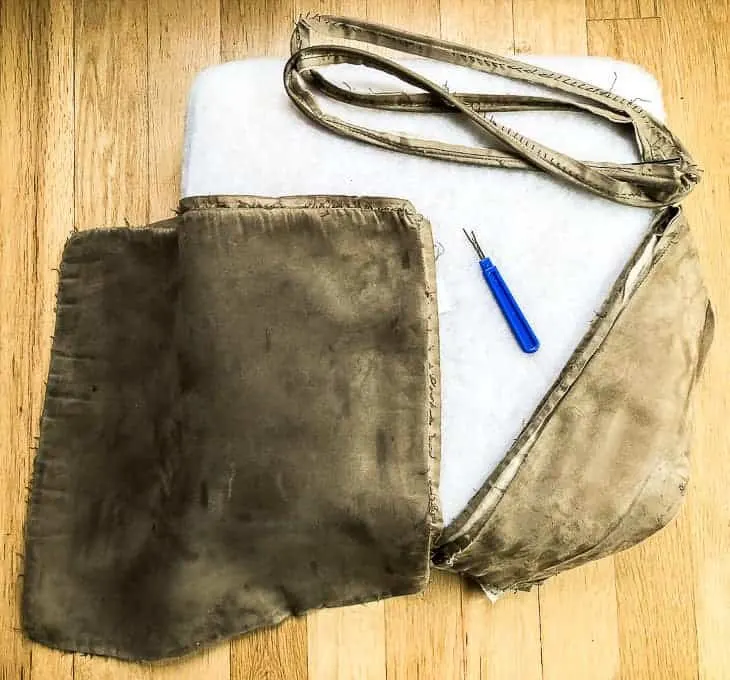
Next, use your seam ripper to take apart the old ottoman cover. Mine is just two pieces (the sides and the top), so it was pretty quick work.

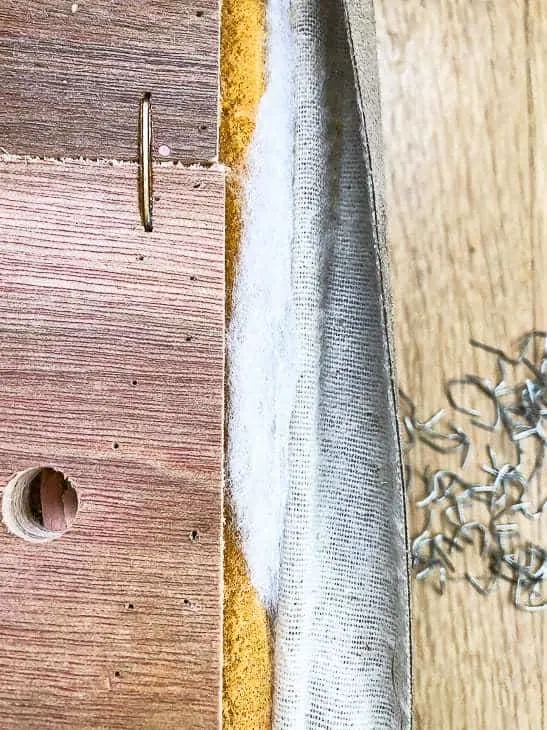
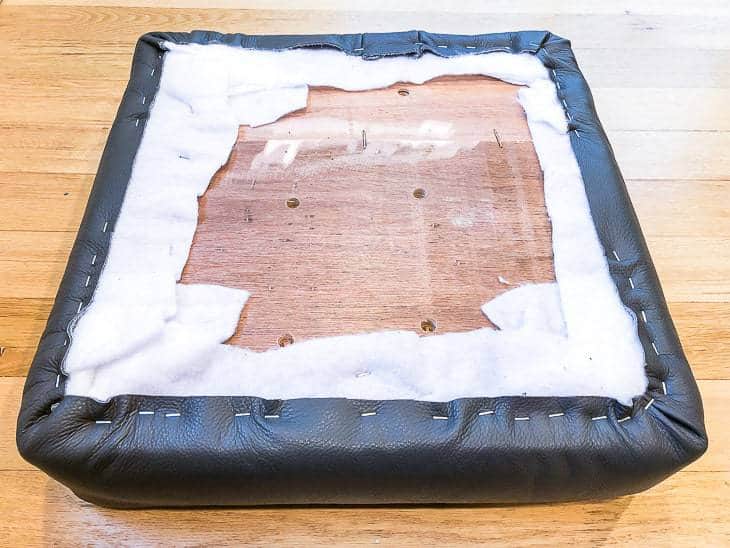
The batting and foam cushion were in surprisingly good shape, considering how dirty the cover was. I decided to keep everything intact on the plywood base.

Make the New Ottoman Cover
Give your old ottoman cover pieces a good press with an iron to flatten it out. Then roll out your leather or fabric and decide where you want to place your templates.
Try to avoid any irregular spots or thin areas, which are common in a natural material like leather. Luckily, leather doesn't have a grain, so you can cut it whatever way you like!
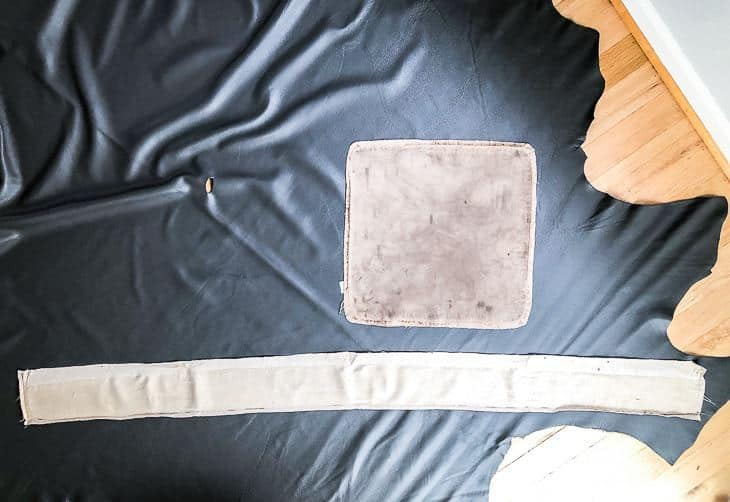

Use the chalk wheel to mark the outside edge of the templates. Be careful not too stretch the fabric out of shape as you trace. Then cut out each piece with sharp fabric scissors.

Sew the New Ottoman Cover Pieces Together
Believe it or not, sewing was my first hobby, not woodworking! My sewing machine has been gathering dust for the past few years while my table saw takes center stage, but it's just like riding a bike! 🙂
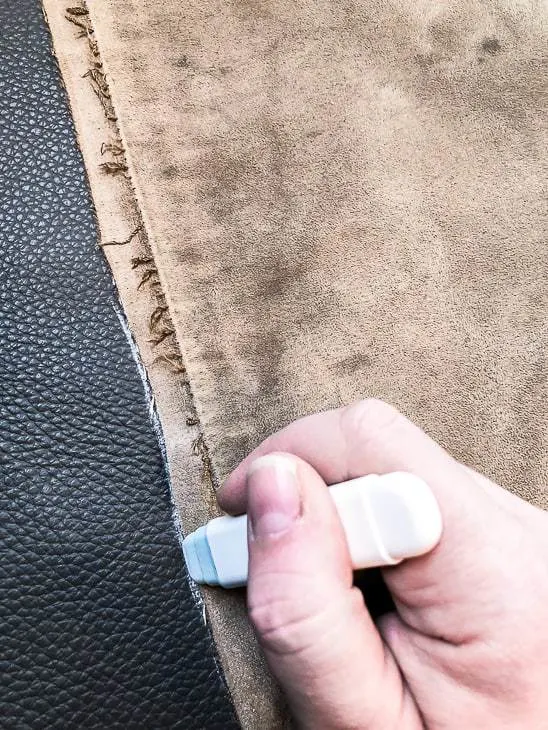
Measure the size of the seam allowance on the original cover. Mine was ⅜". Sew the two ends of the long piece together. I found that a walking foot really helps move the stiff leather through the sewing machine easily.
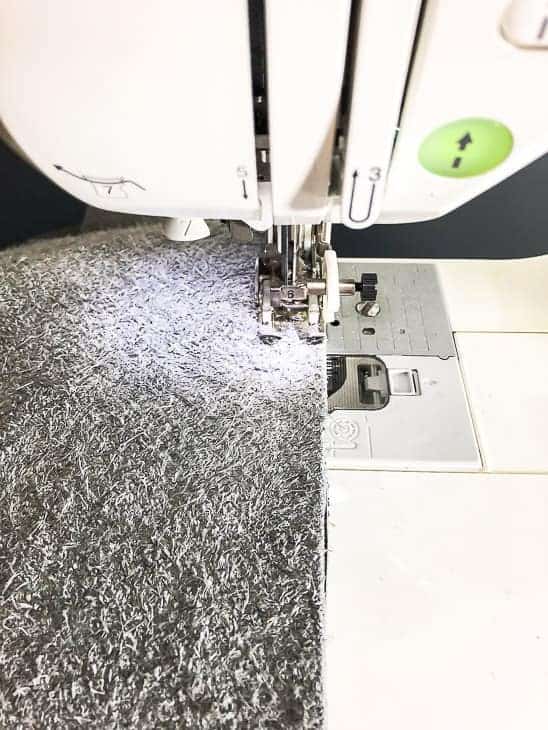
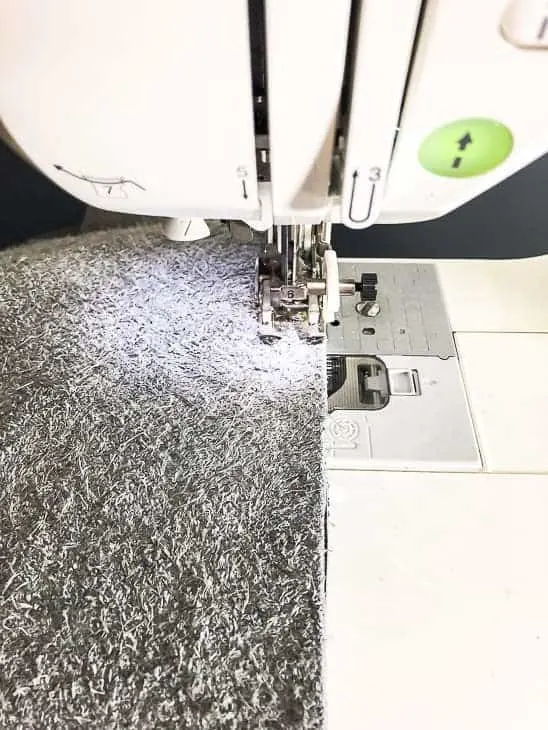
The original cover had the seam at the corner, but I thought it would be too bulky with the thick leather. I centered the seam on one side, and sewed the top to the sides.
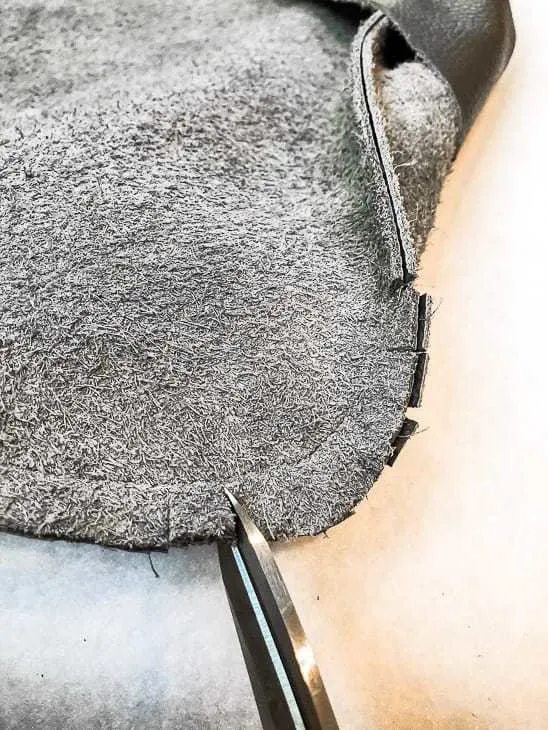
To reduce bulk at the corners, clip each curve right up to the stitching line (without cutting the thread).

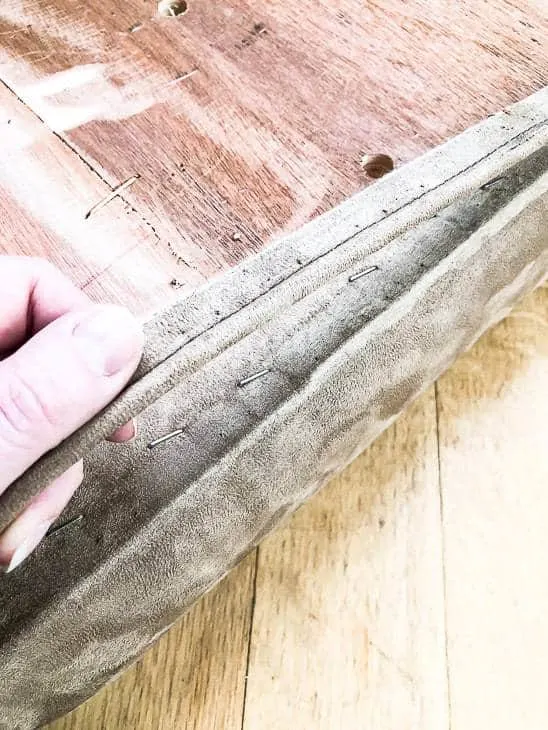
Staple the cover to the original plywood base
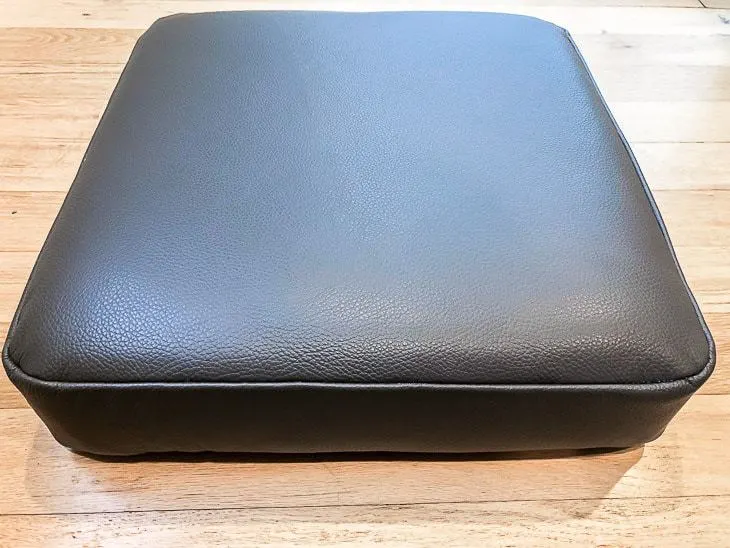
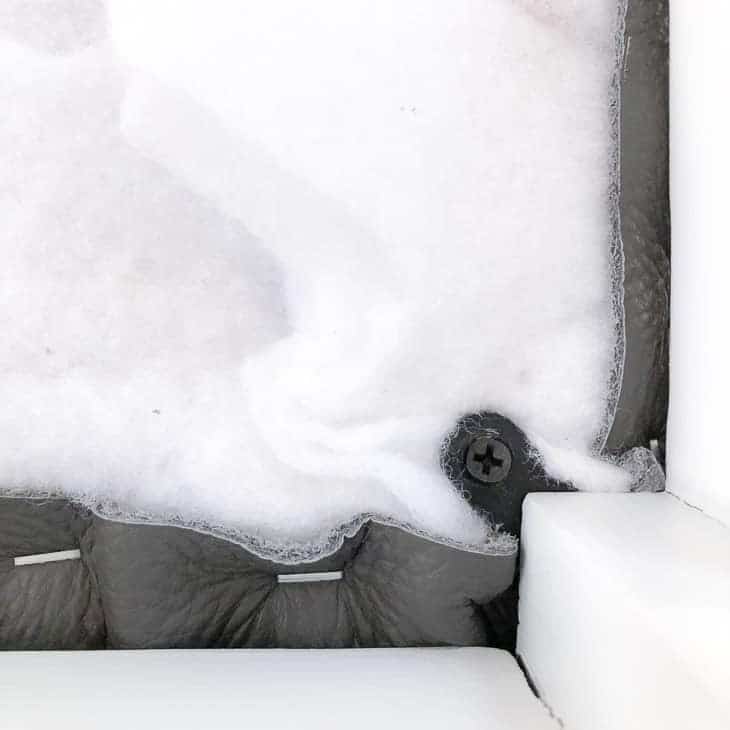
Remember all those staples you removed before? Now you get to put them all back! Slide your new cover over the cushion and batting, and adjust the seams so they're all facing down the sides. This gives it a bit of a piped look without the piping.

Flip the ottoman cushion over, and pull the cover tight against the plywood backing. Staple each side first, then fold in the corners and secure them in place.
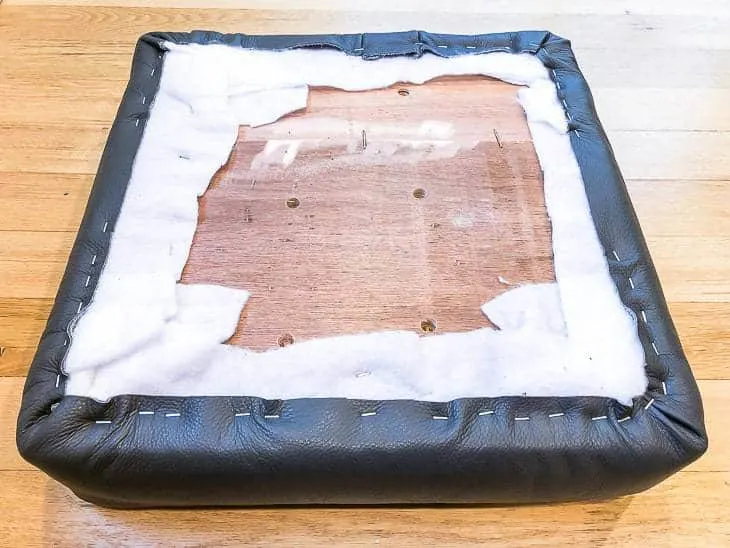
Flip it over from time to time to make sure there aren't any wrinkles in the top. If one of the corners is looking a little deflated, unstaple it and fill it in with extra batting.

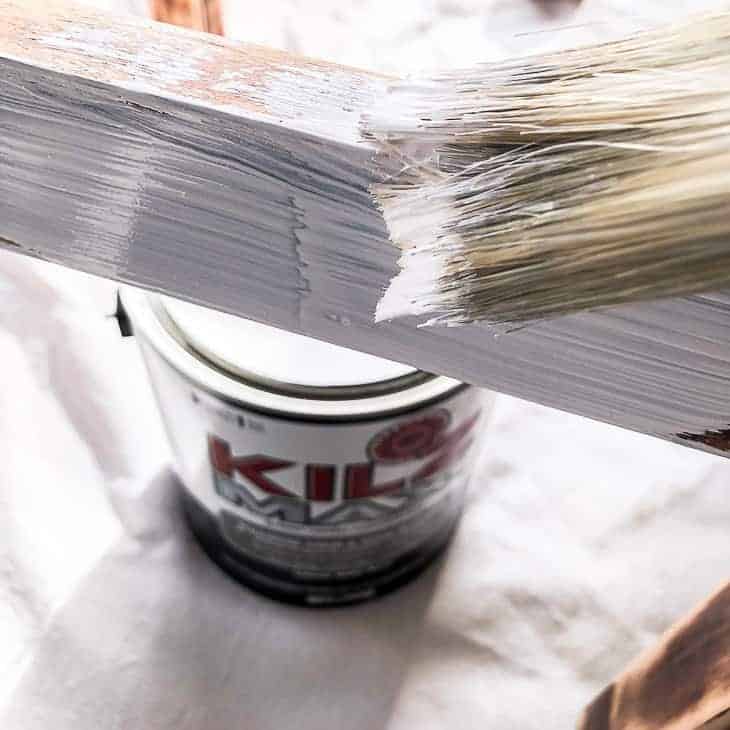
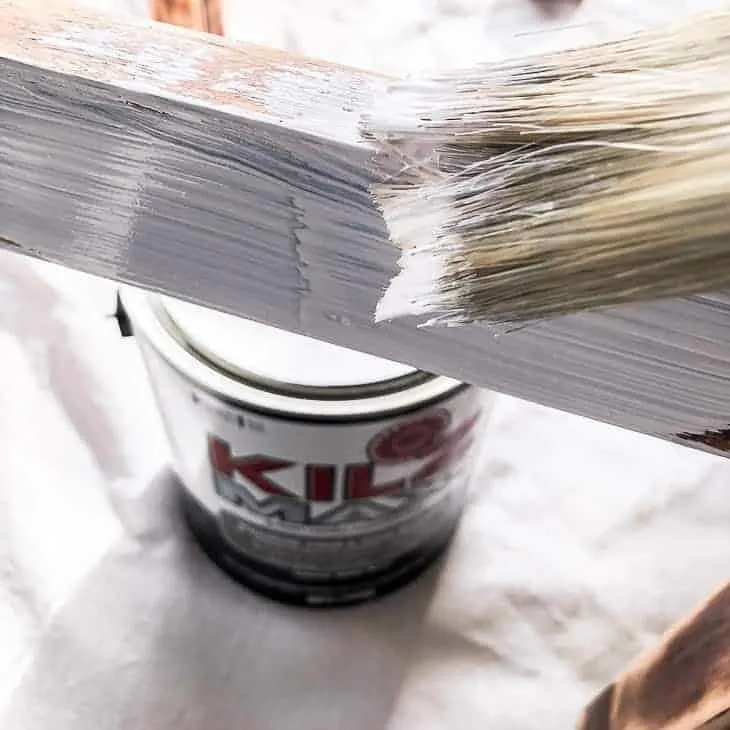
Paint the Base and Reattach the Top
This part is pretty straightforward. I sanded down the base a bit, then gave it two coats of Kilz Max primer. When that was dry, I sanded it smooth with 220 grit sandpaper and gave it two coats of Decorator's White by Benjamin Moore.
I reused the same hardware to attach the top to the base. I didn't bother covering the bottom with the black fabric, since it would just add more bulk.

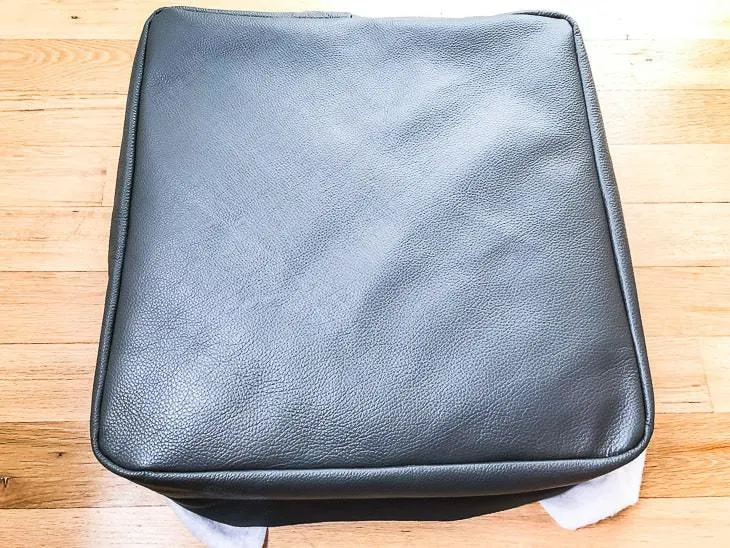
Put your feet up and relax!
My ottoman looks like a brand new piece of furniture! I love the combination of textures in our living room now. The grays look different here because the light reflects off the leather but not the couch. In real life they're almost identical.

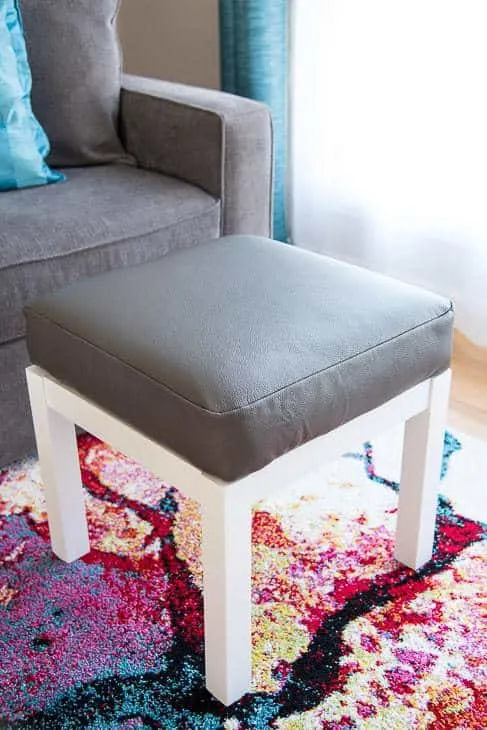
Now I finally have a place to put my feet up while I write!

Check out these other DIY furniture projects!
Ashley Rosa
Tuesday 15th of May 2018
Wow. Loved the entire idea. The leather stool is looking just amazing. Thanks, for this lovely post. Your sense of interior is just awesome can you please suggest me something. Recently I've got the interior of my entire house. Reds, strong blues and vibrant greens in particular. Please suggest me the best Area Rug, as I have a wooden Dining table in my dining room with vintage cutlery set and blue color painted walls, Suggest me something which goes absolute fabulous with this combination.
Vineta
Tuesday 15th of May 2018
With all those colors, I recommend a neutral rug that will work with all of them. A white, gray or beige rug will allow you to change up the rest of the decor without having to buy a new rug when your tastes change. I did the opposite, with gray and white on the walls and furniture, so I can use bright pops of color in the rug and accent pieces. Good luck!
creativejewishmom/sara
Thursday 1st of March 2018
Great tutorial and thanks for sharing on craft schooling Sunday, wonderful to "meet" you.
Victoria @DazzleWhileFrazzled
Thursday 1st of March 2018
Great makeover! I've never worked with leather but you make it look easy. Visiting from Share Your Style.
Ivory
Wednesday 21st of February 2018
This is absolutely fabulous, and a job well done.
Anne
Tuesday 20th of February 2018
This looks AMAZING! The Philadelphia Steel really does look wonderful with your decor!