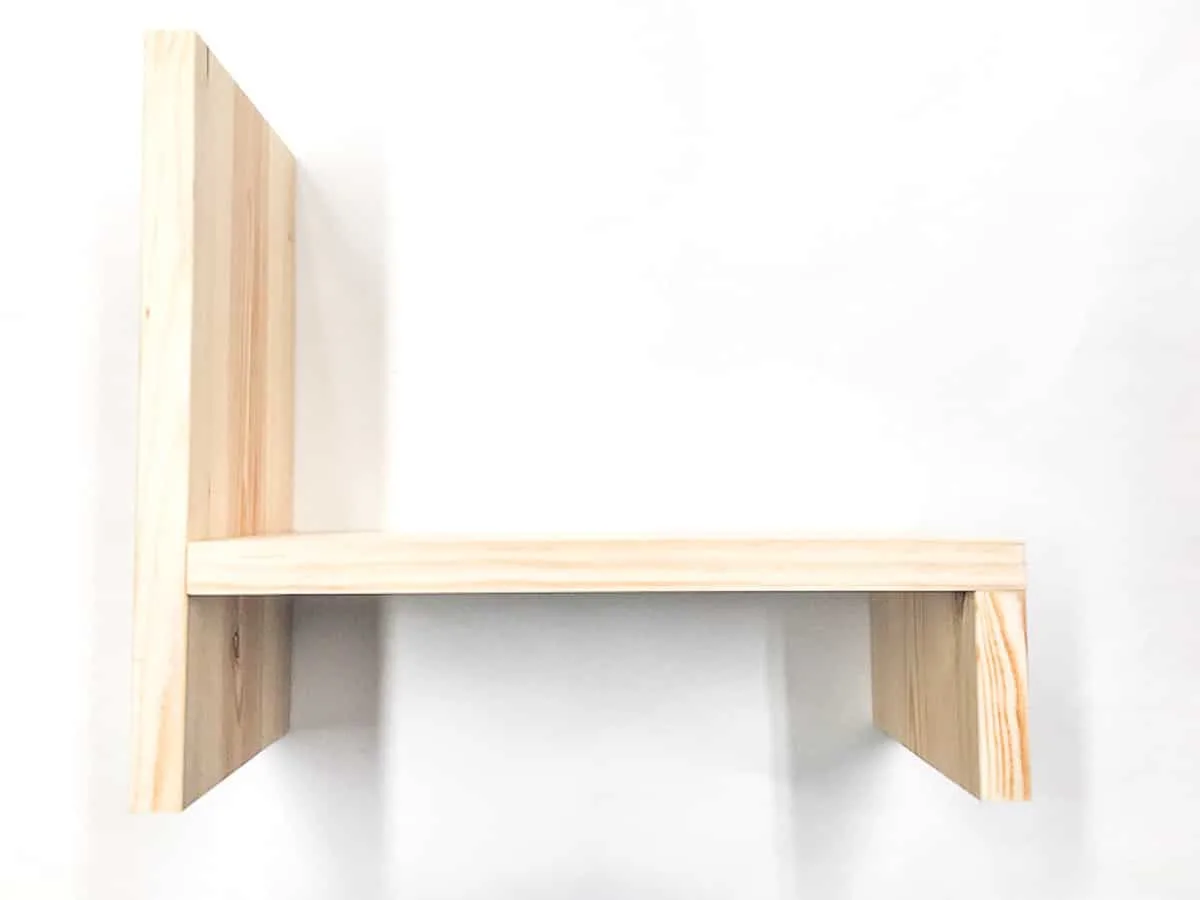
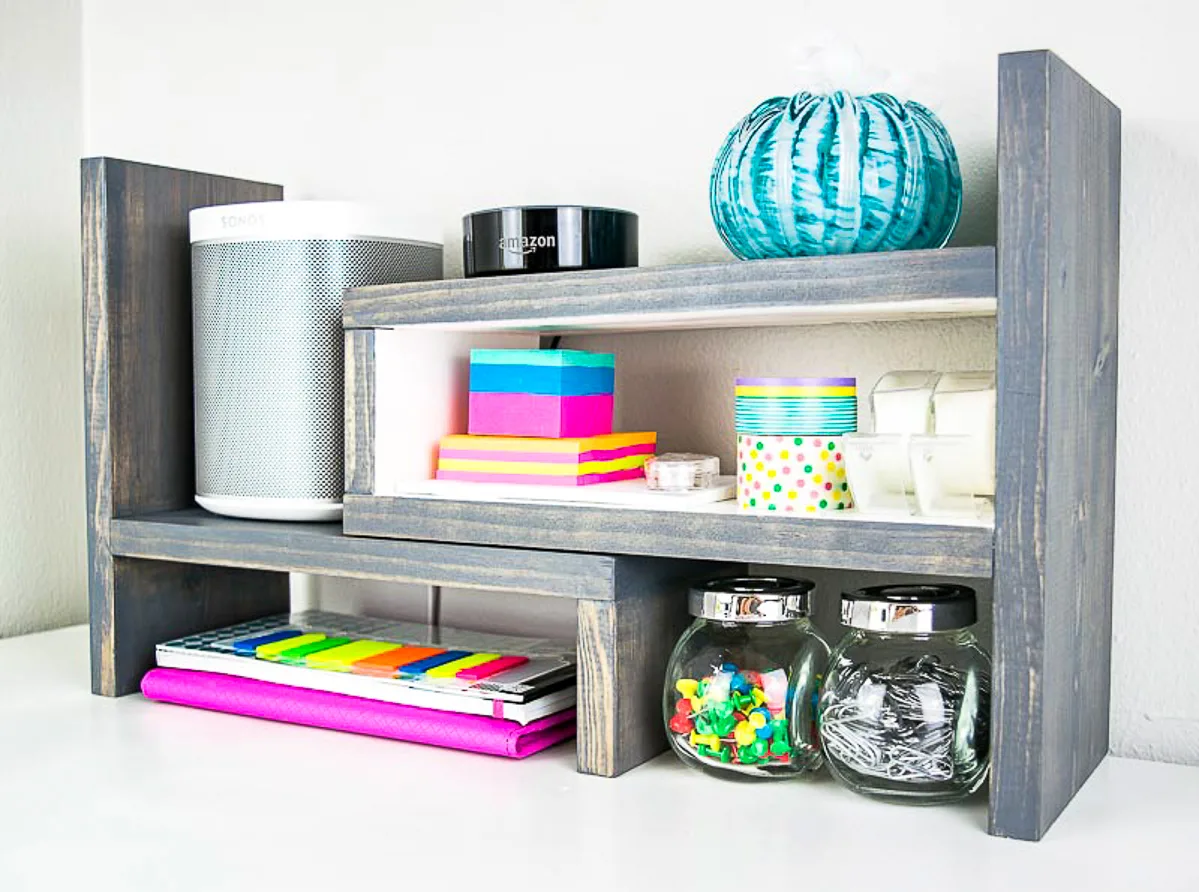
Customize your storage with this DIY desk shelf! Expands from 12" to 24" long, or fits into a corner with the 90 degree configuration.
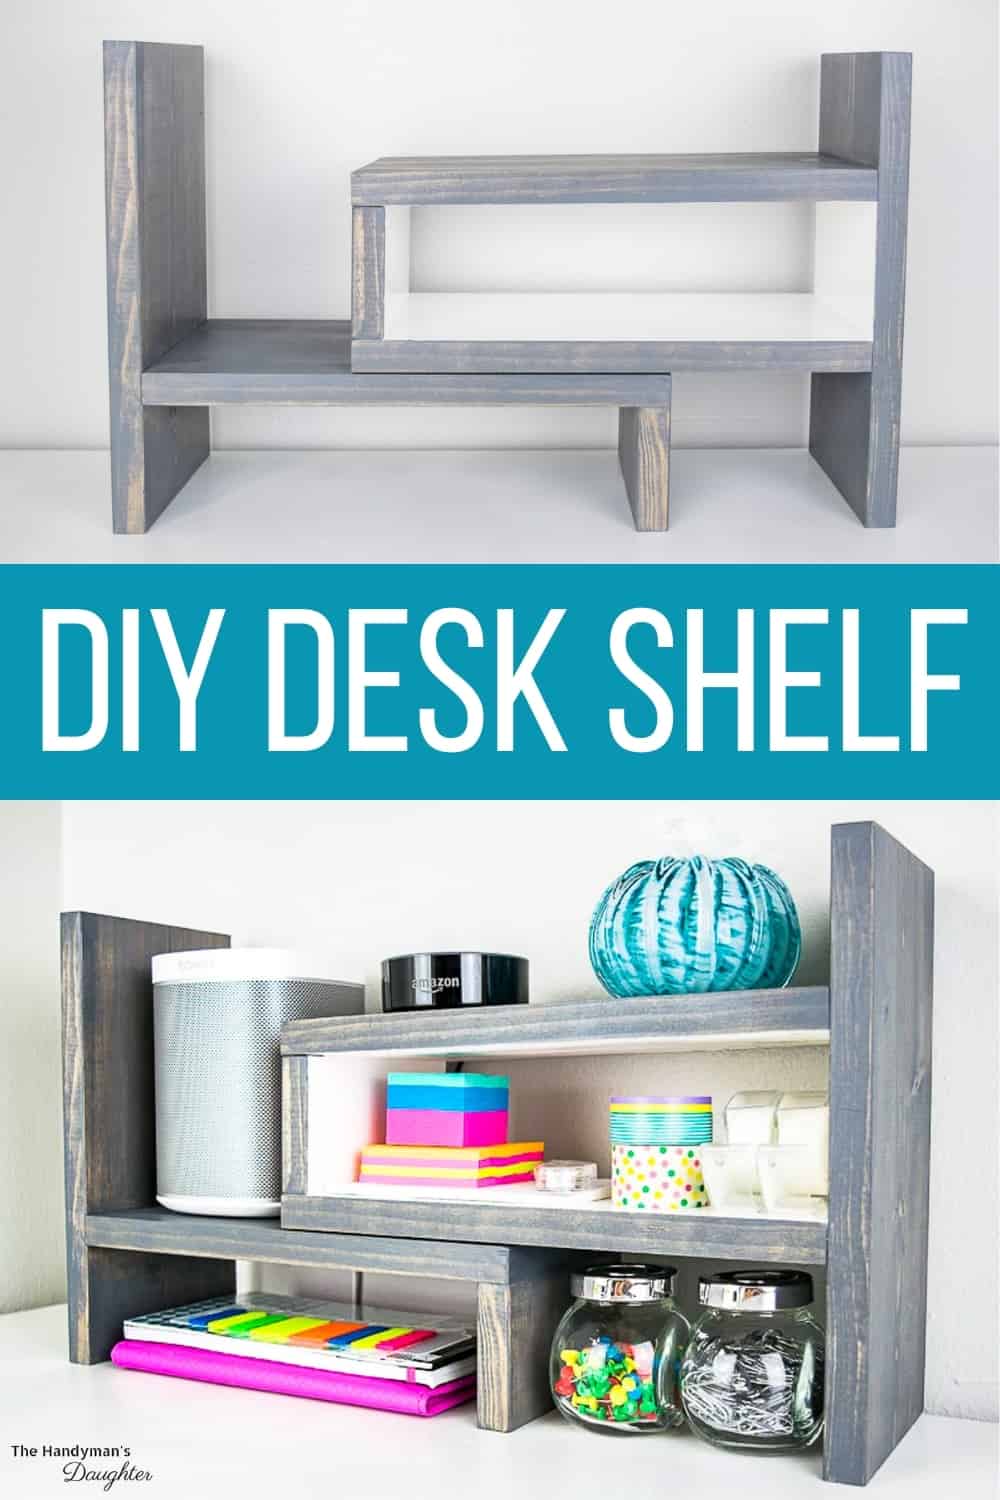
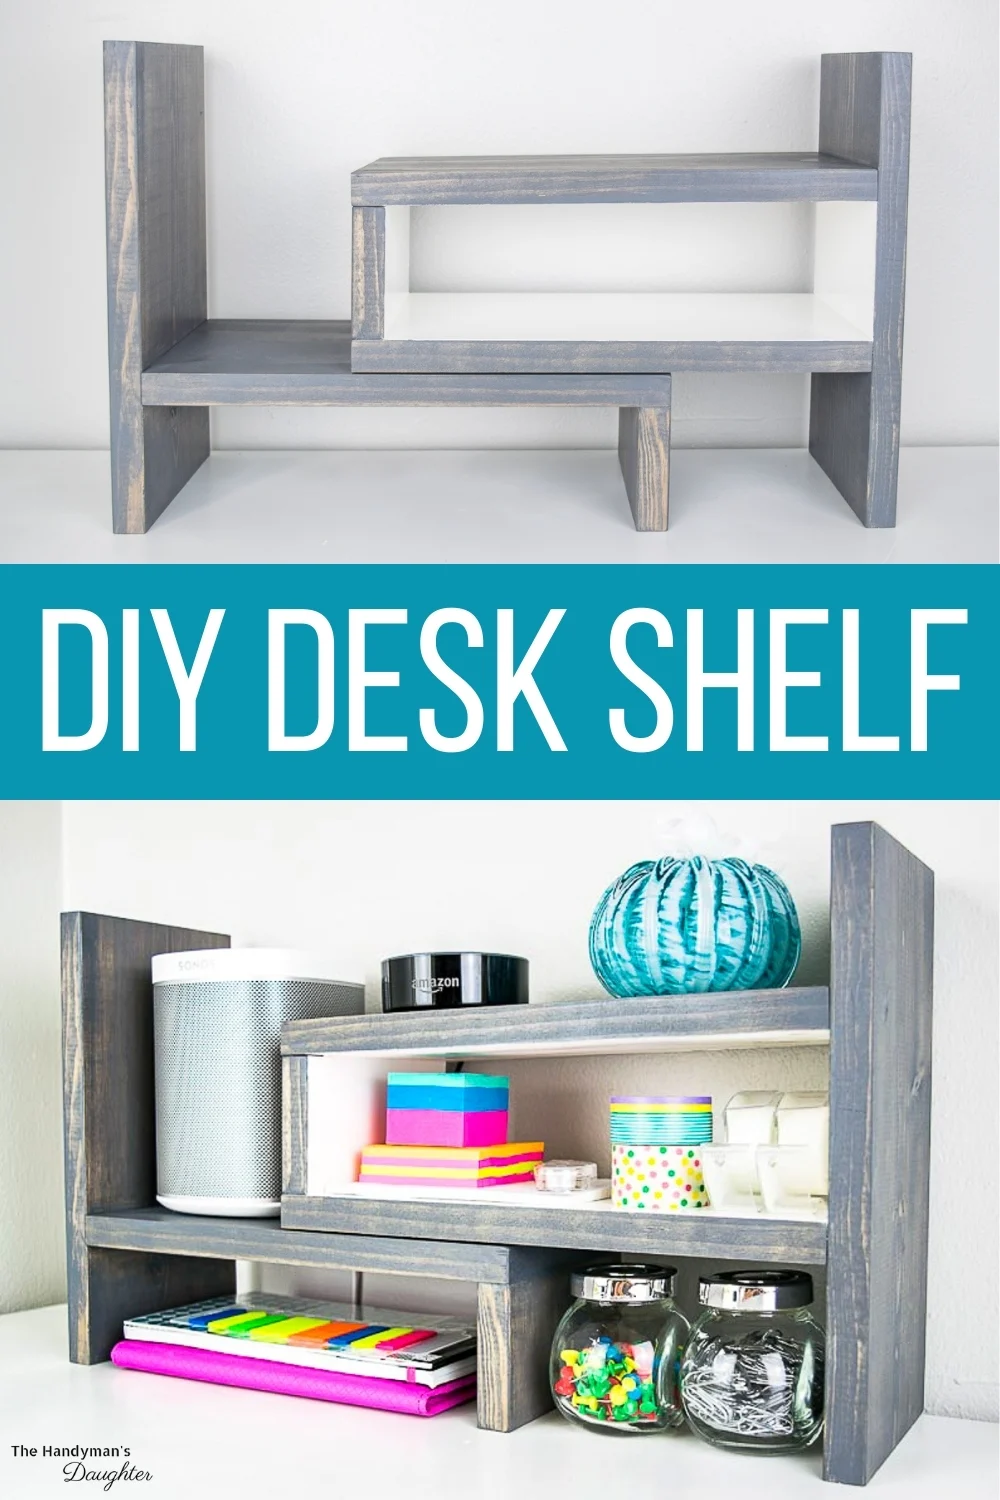
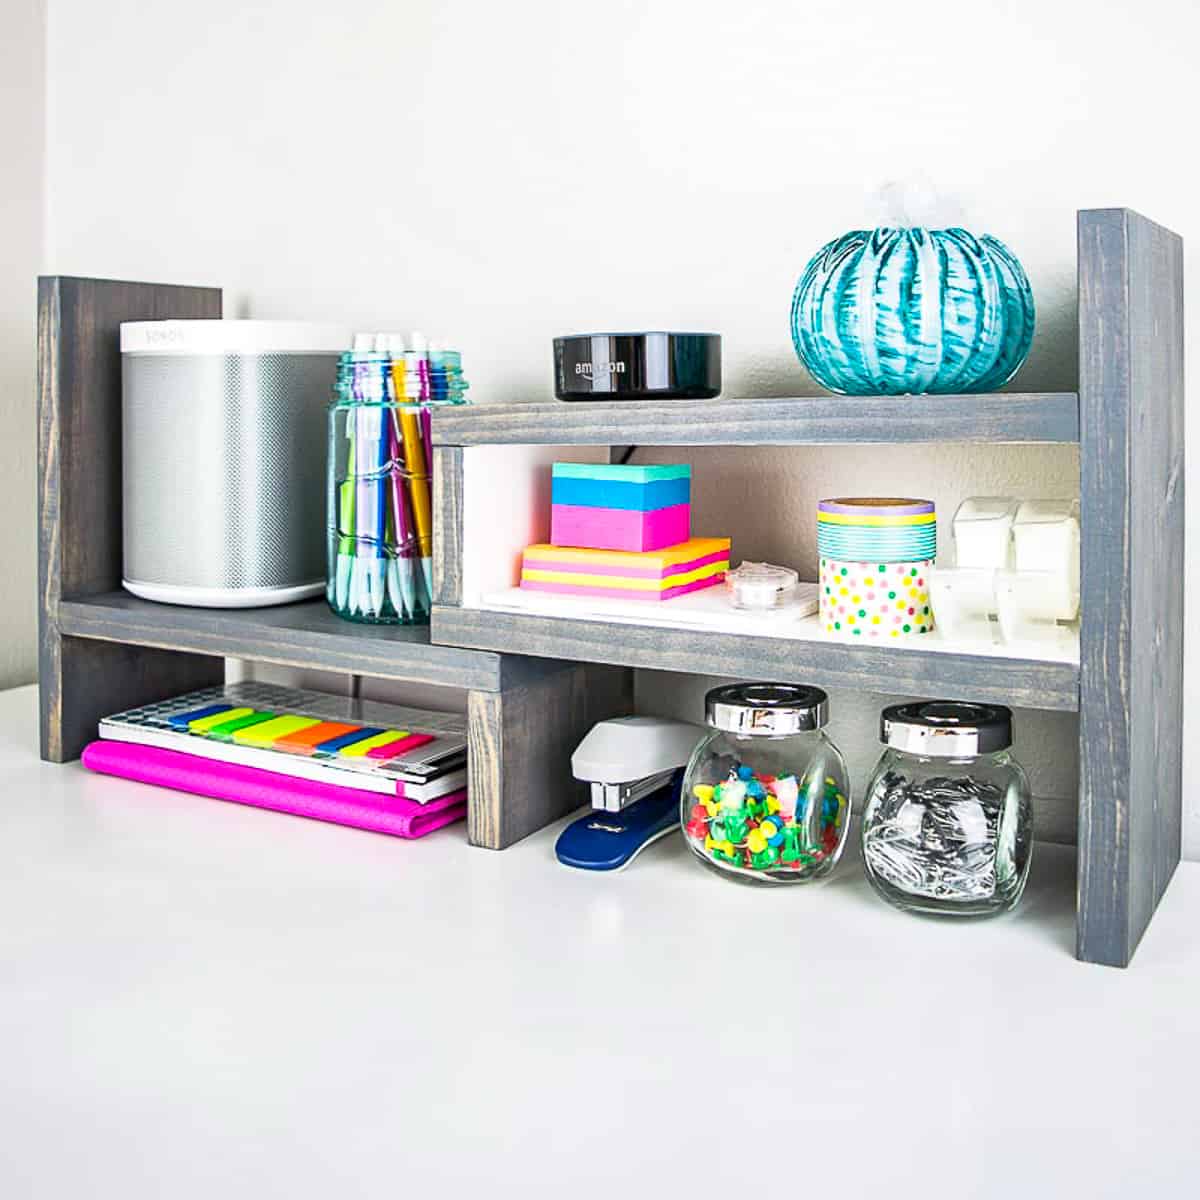
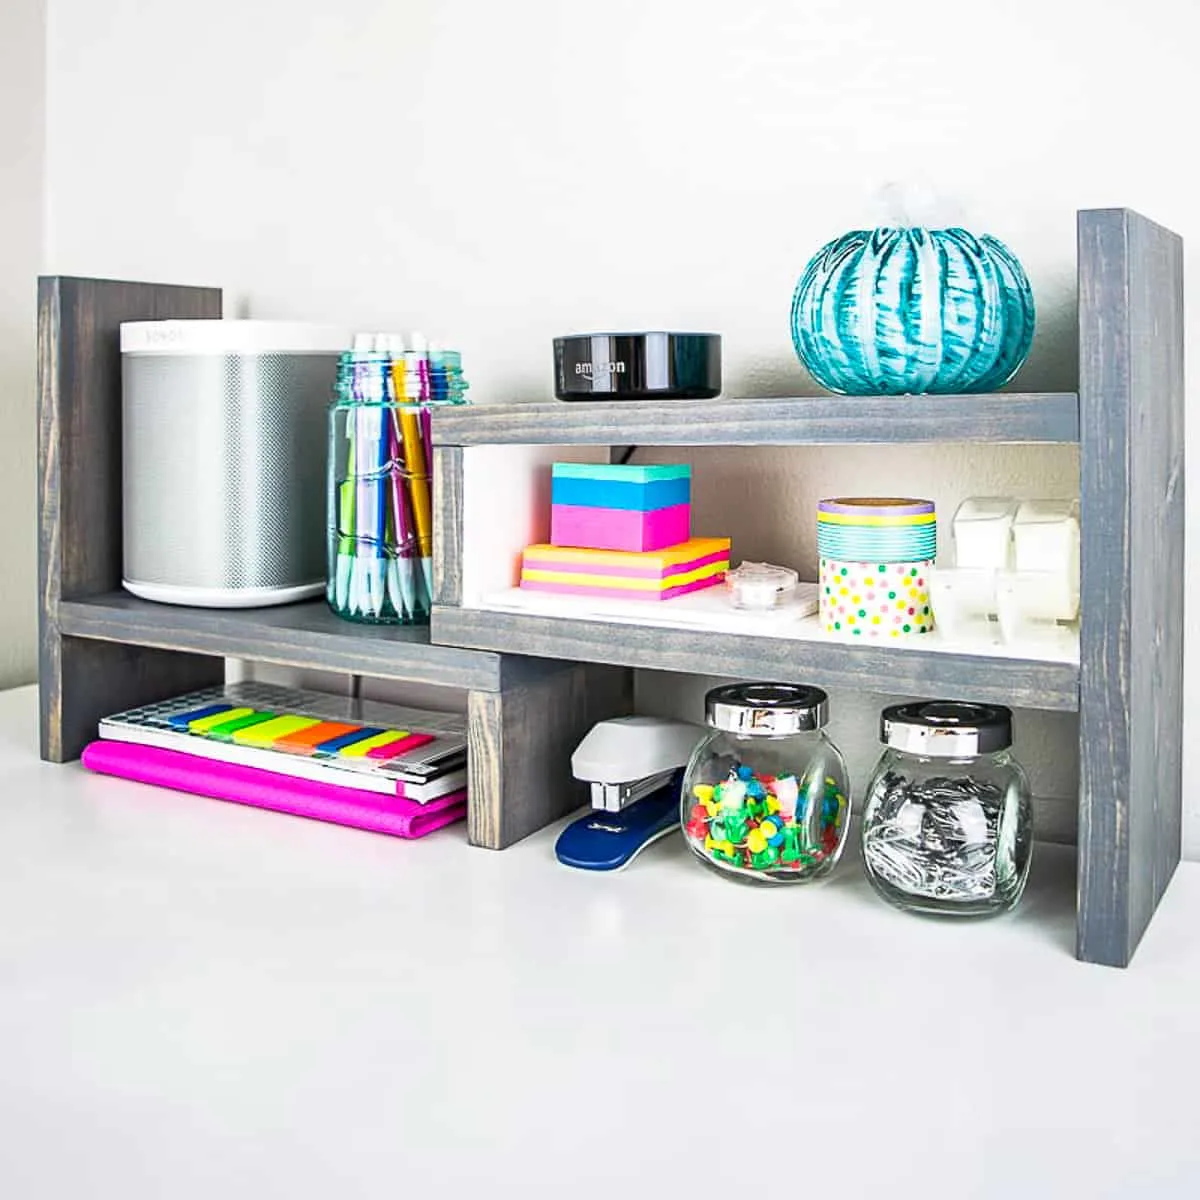
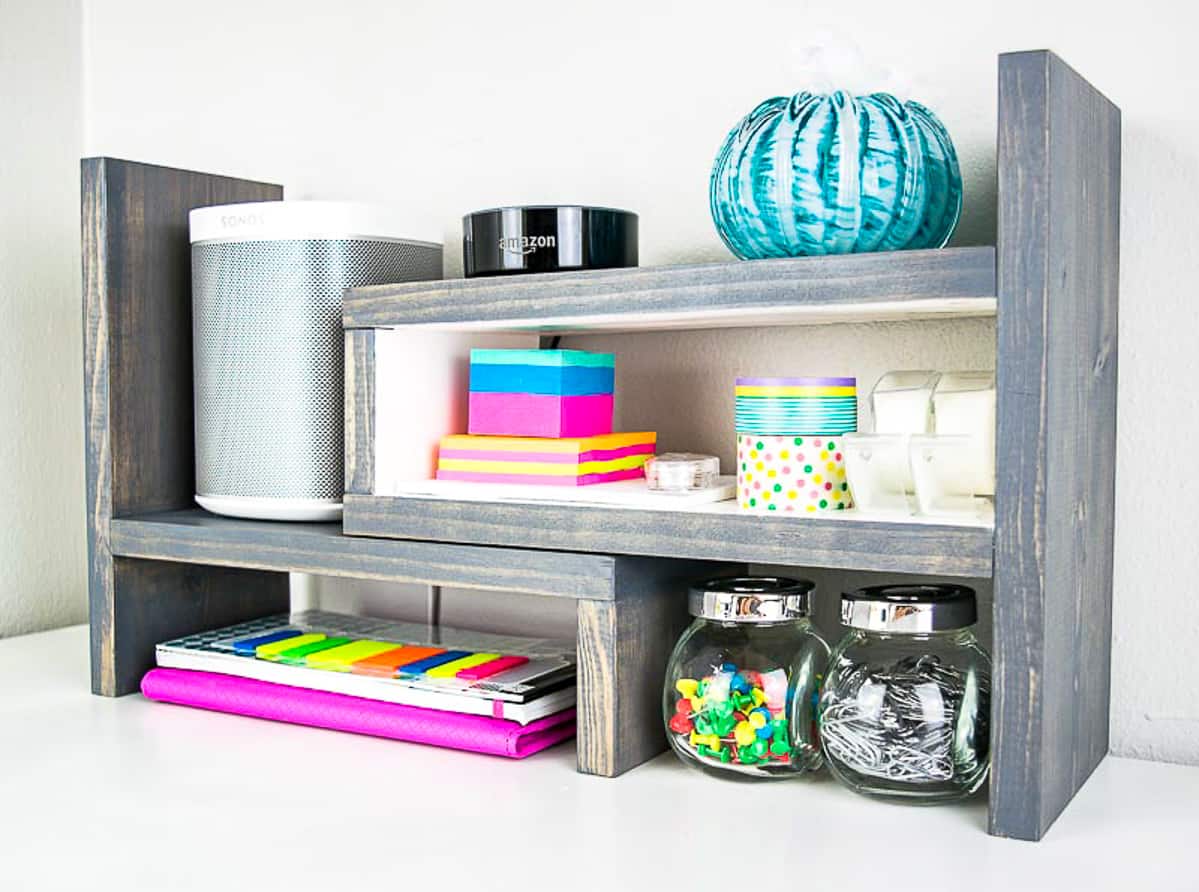
The cabinet in our living room has become a magnet for clutter. I wanted a way to store school supplies and other essential items in a way that was easily accessible. This simple adjustable desktop shelf is just what our family needs to contain the chaos!
This post contains affiliate links for your convenience. Purchases made through these links may earn me a small commission at no additional cost to you. Please visit my disclosures page for more information.
Instead of shoving everything into a drawer where it would get lost, I wanted to organize everything on top of the cabinet with a multiple levels of small shelves. I did a bit of searching and came across this desktop organizer on Amazon.
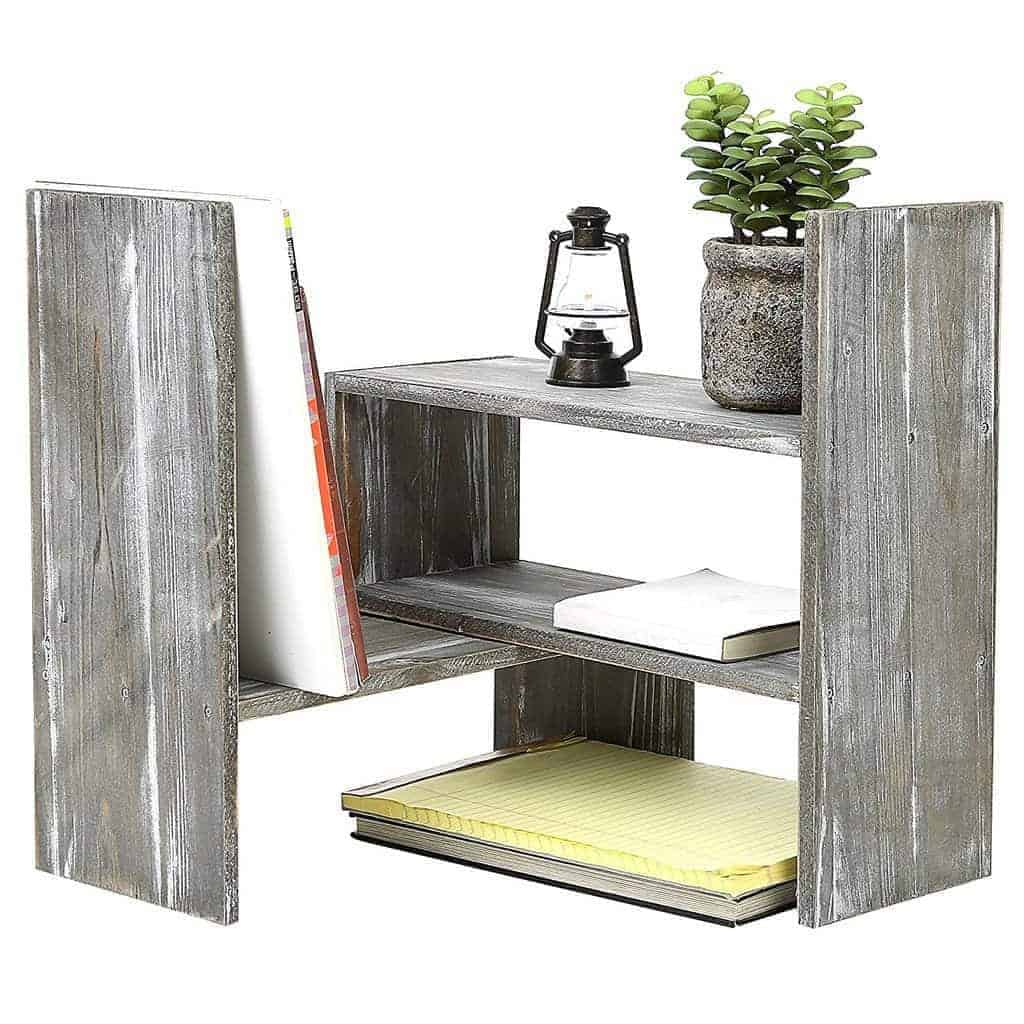
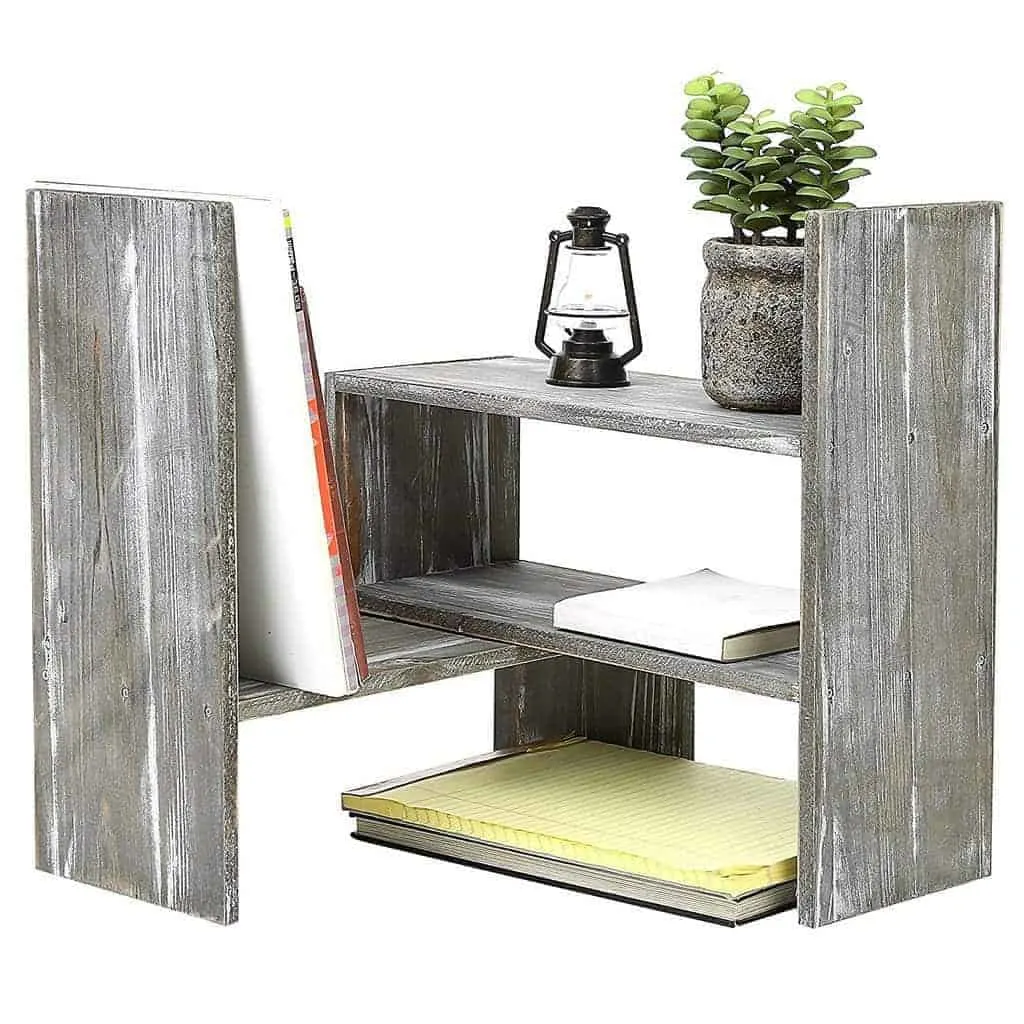
But the price tag was way too high for what is really just a few bucks worth of wood (if it's even real wood!) Why buy it when I can make it myself!
This is a great scrap wood project if you have extra plywood or 1x6 board end cuts laying around the workshop. Pair it with a DIY laptop stand for the ultimate workspace! Here's how to make your own!
Materials Needed for DIY Desktop Organizer
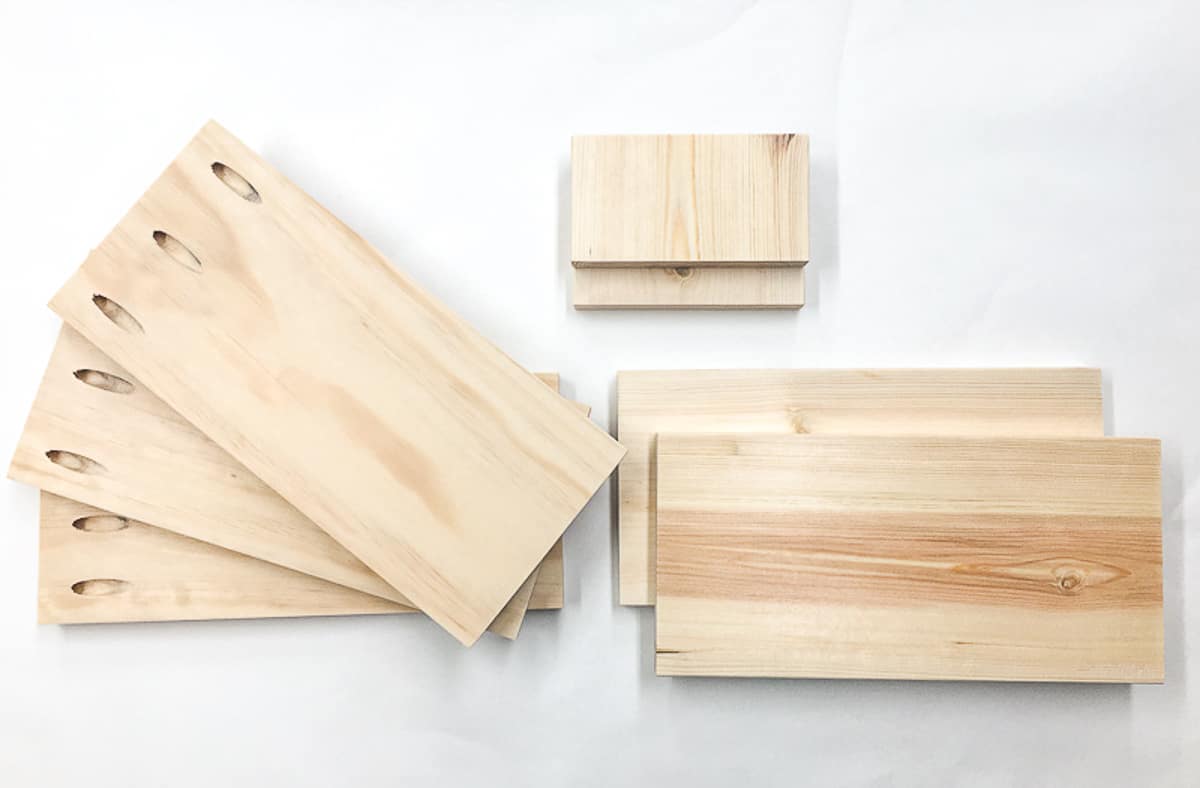
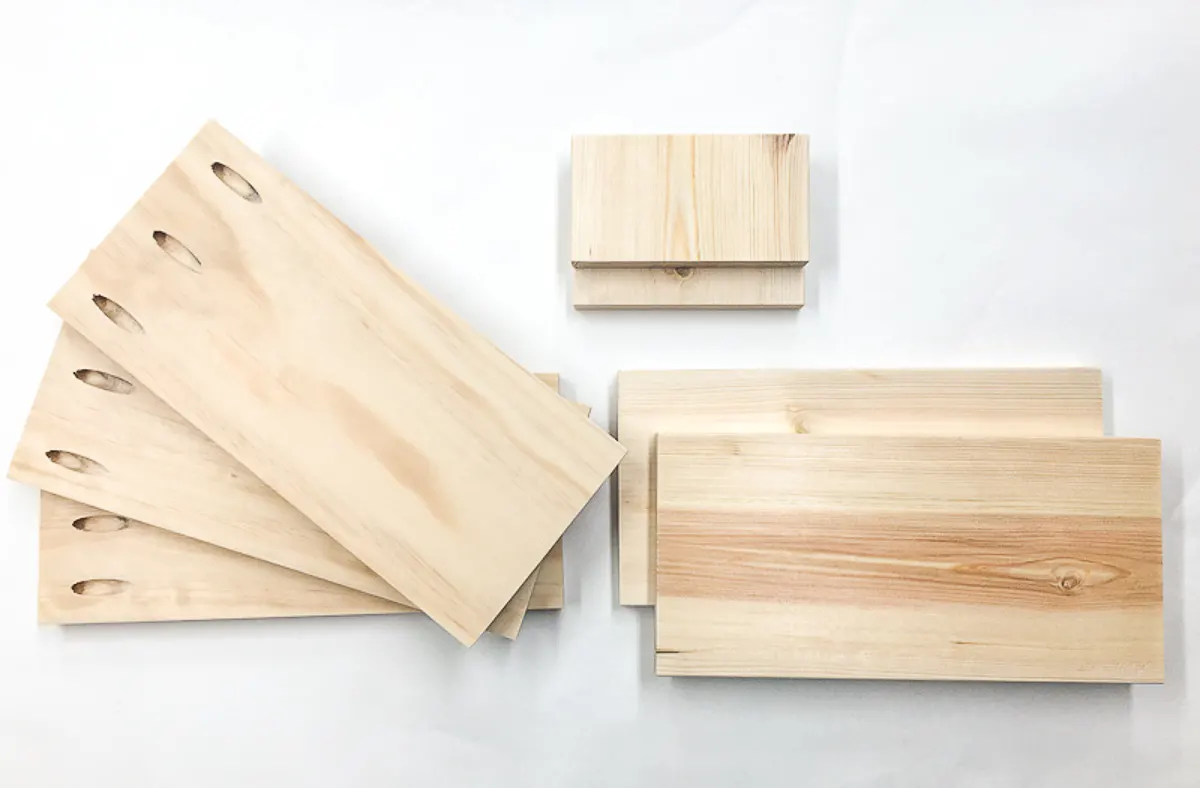
- One 1x6 board (or ¾" plywood)
- Pocket hole jig
- Check out my post on how to use a Kreg Jig to help you decide which one is right for you.
- 1 ¼" pocket hole screws
- Right angle drill attachment (optional, but helpful!)
- 1 ¼" brad nails
- Brad nailer
- Wood glue
- Wood stain or paint
- I used General Finishes gray gel stain for all but the interior of the rectangular shelf.
Don't forget your safety gear when woodworking! Here are my recommendations for safety glasses and ear protection. No excuses!
How to Make a Desk Shelf
Download the free woodworking plans
Before you begin, don't forget to download the free woodworking plans for this DIY desk shelf by clicking here!
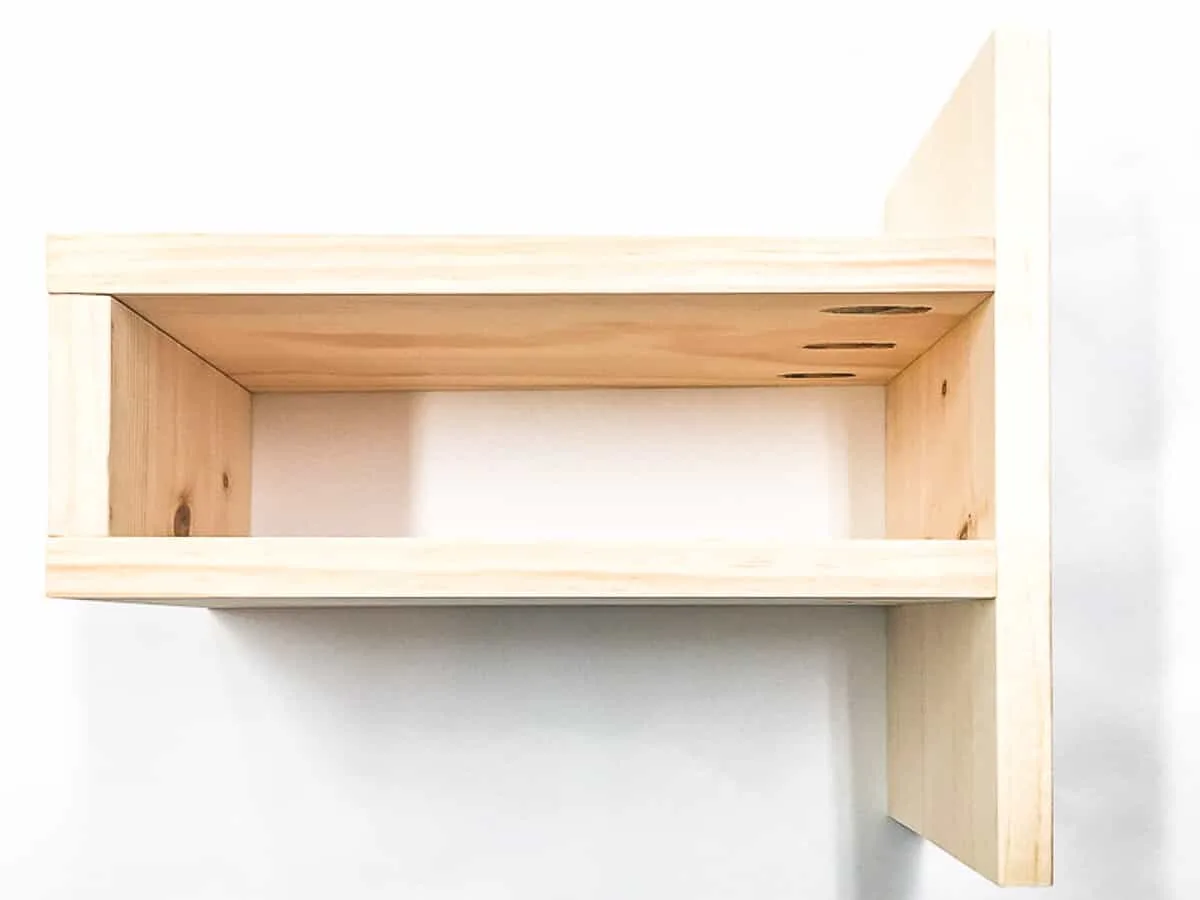
Cut the 1x6 board and drill the pocket holes
The best part about this little desk shelf is that it only requires one 1x6 board! Cut it down into the individual pieces you'll need according to the cut list in the plans. You can also customize the dimensions to fit your space perfectly!
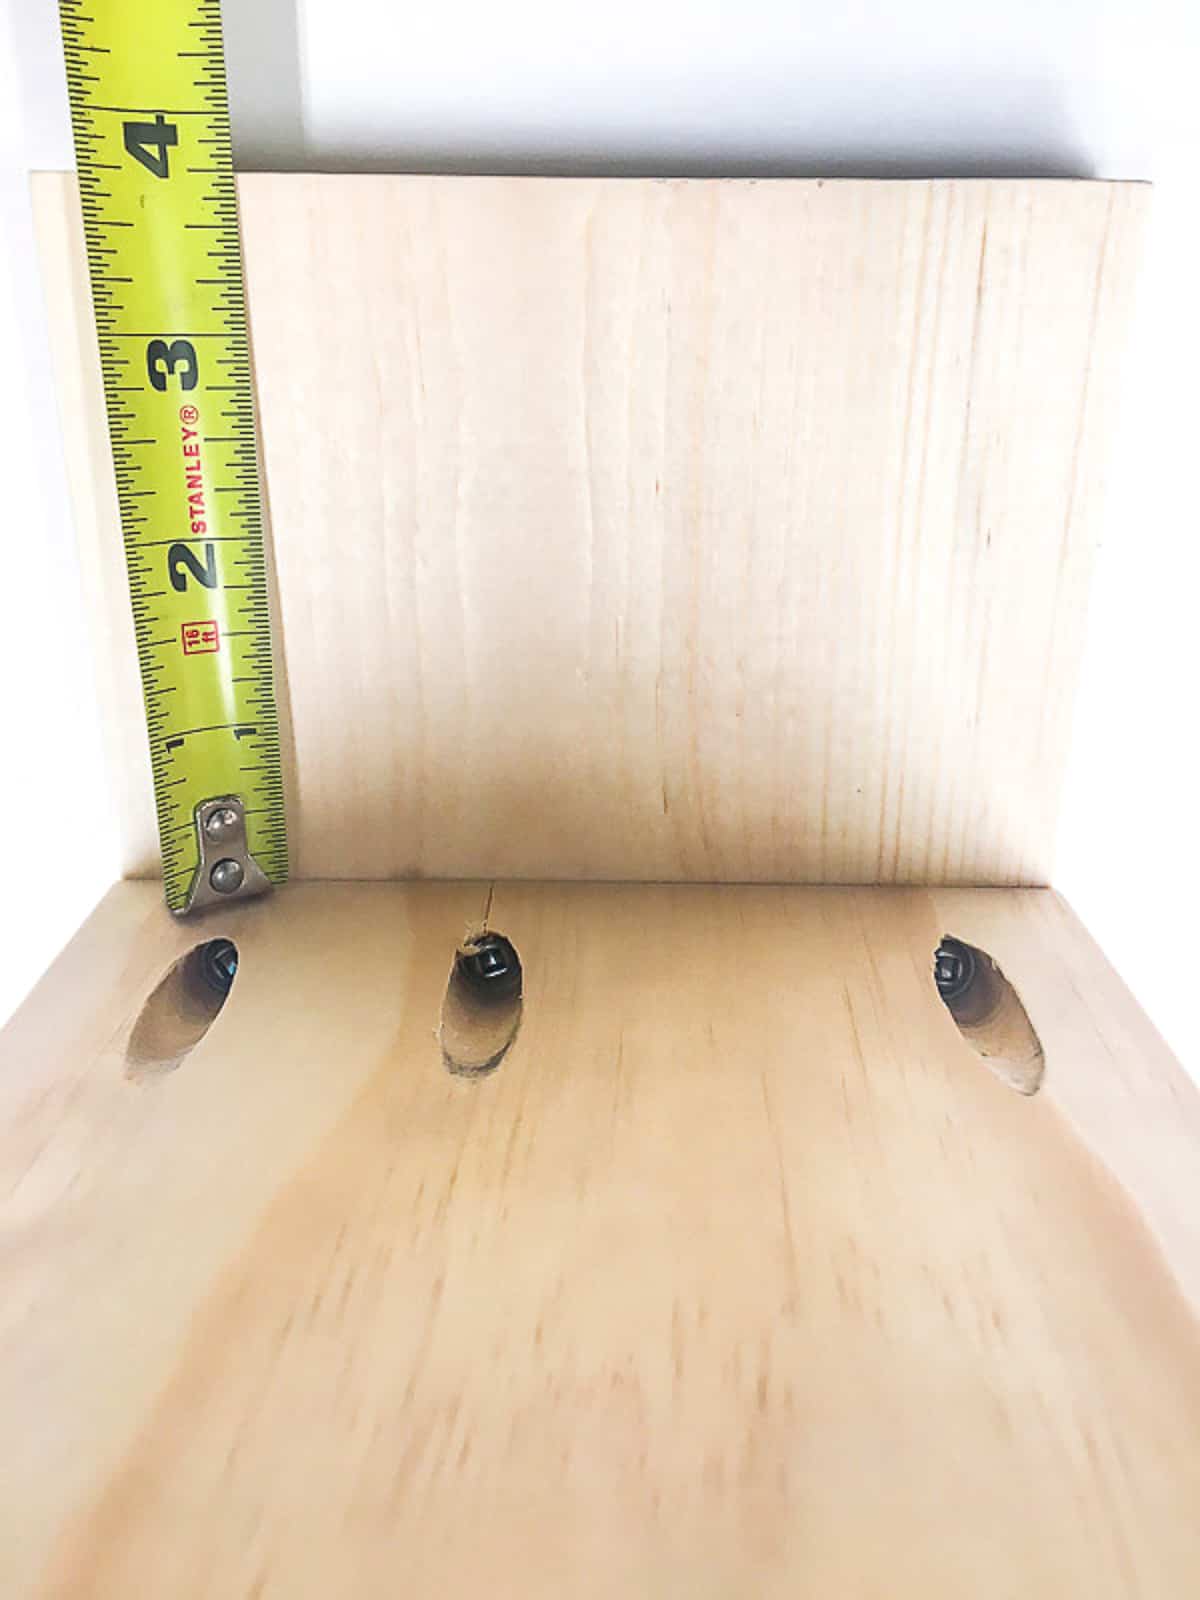
Drill pocket holes into one end of each of the longer pieces. These will be the horizontal shelves.
Assemble the first shelf
Attach one of the long pieces three inches up from the bottom of the side piece, using wood glue and 1 ¼" pocket hole screws.
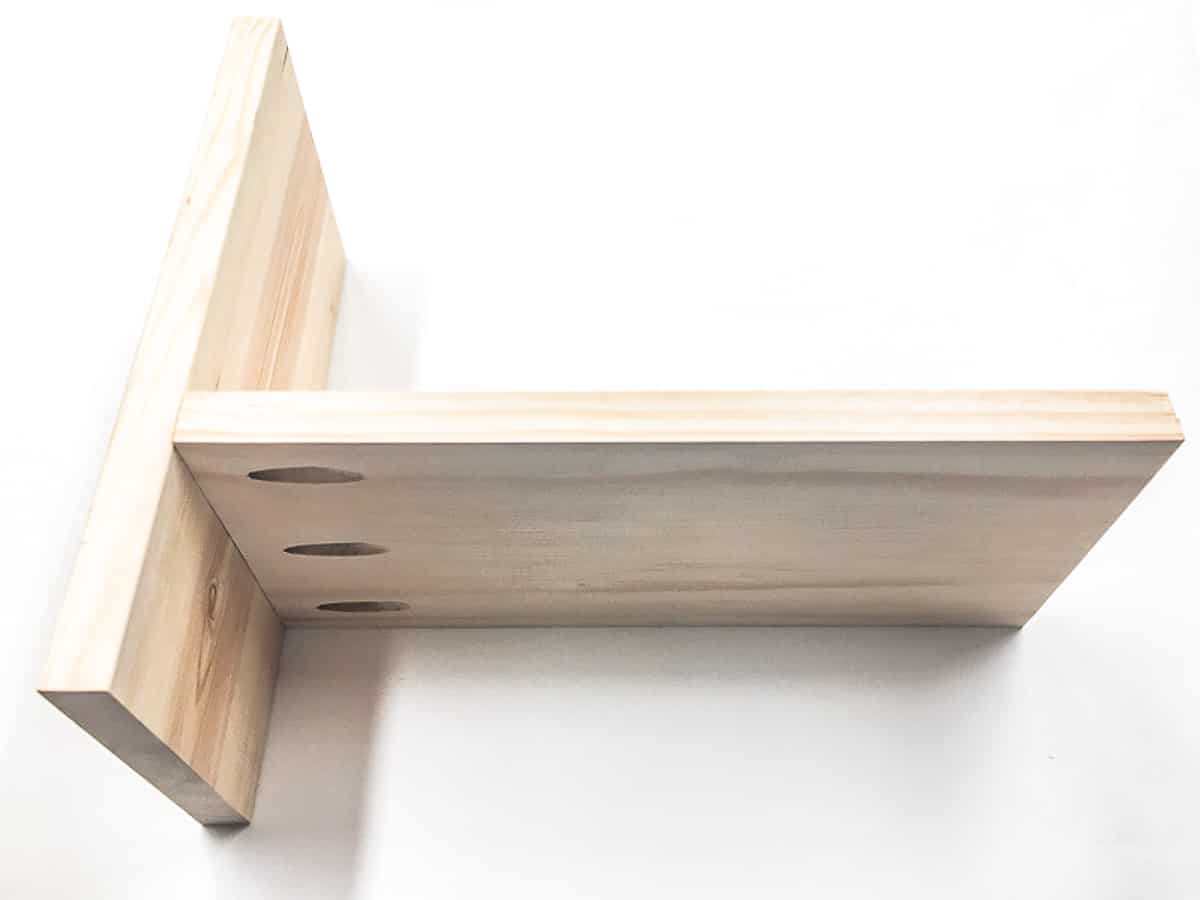

Attach one of the short pieces under the other end of the shelf with wood glue and brad nails. You could also use countersunk screws through the top if you don't have a brad nailer or finish nailer. The top of this shelf will mostly be hidden under the other shelf, but you could also cover the holes with wood filler if you plan to paint it.
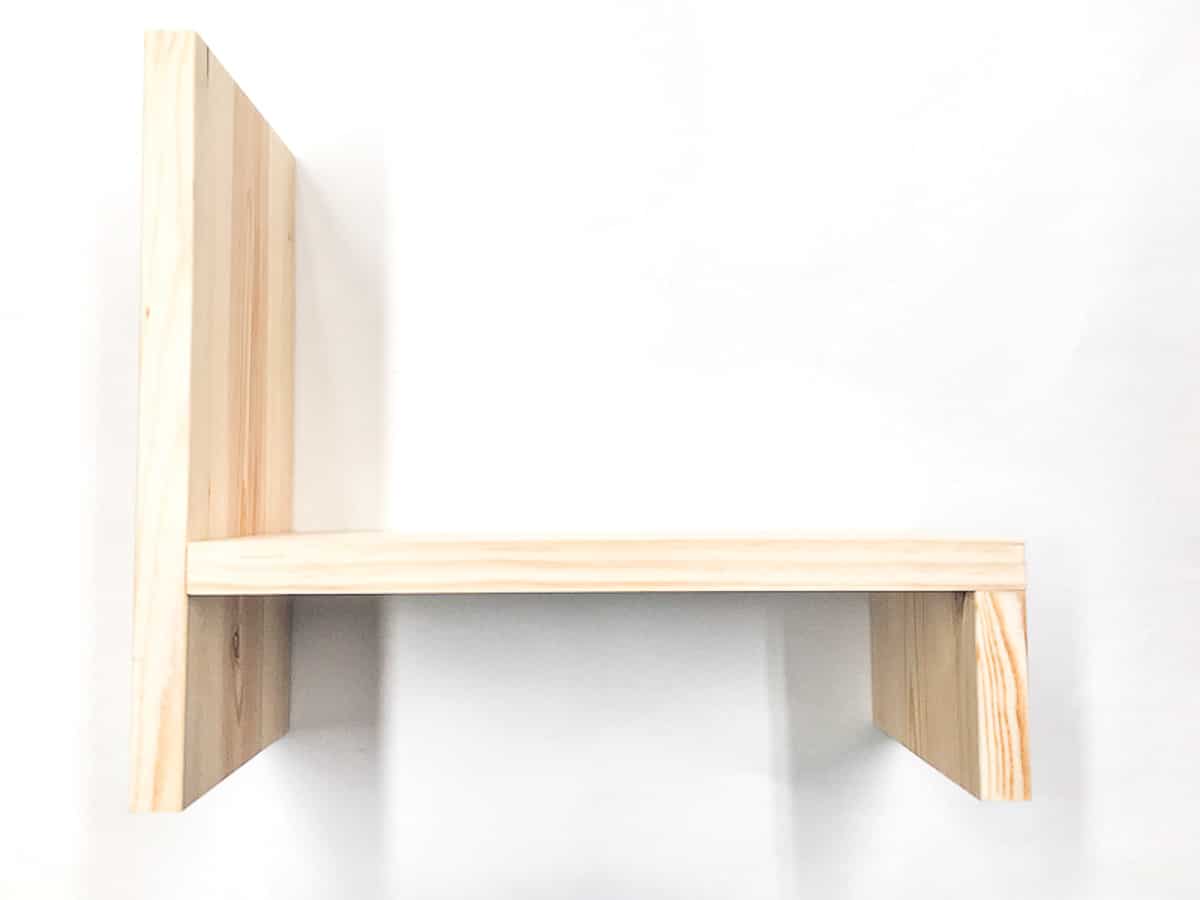
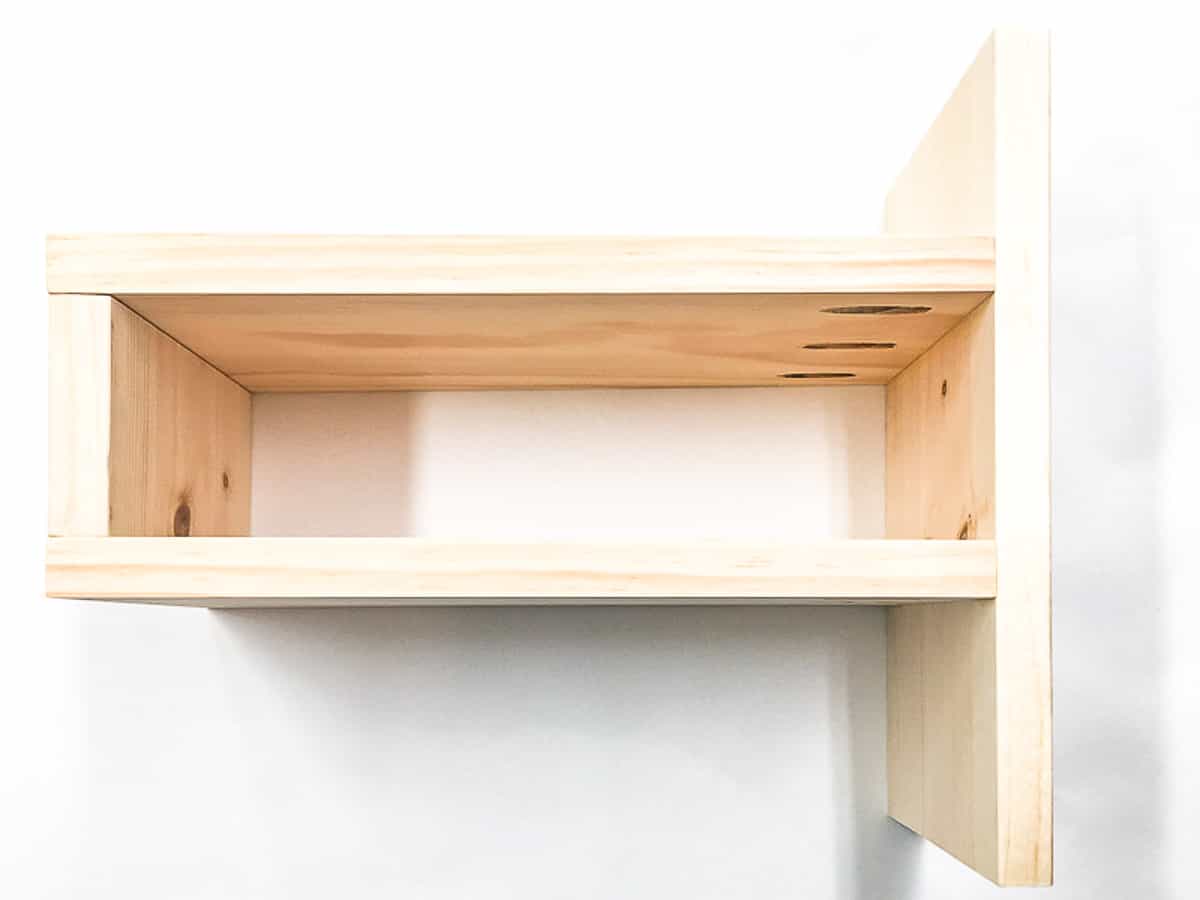
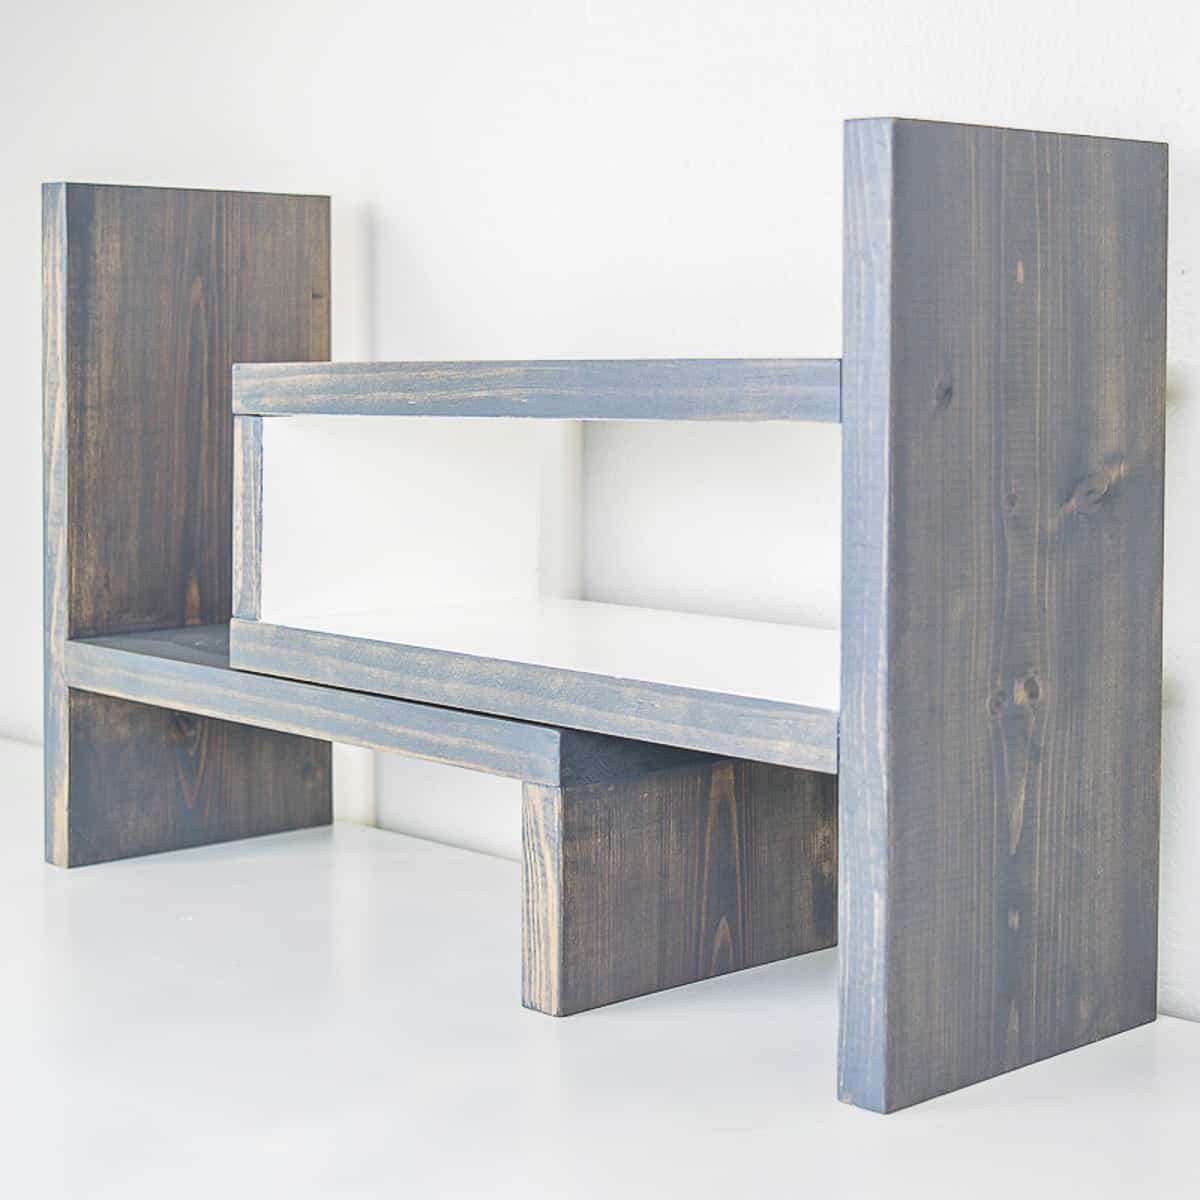
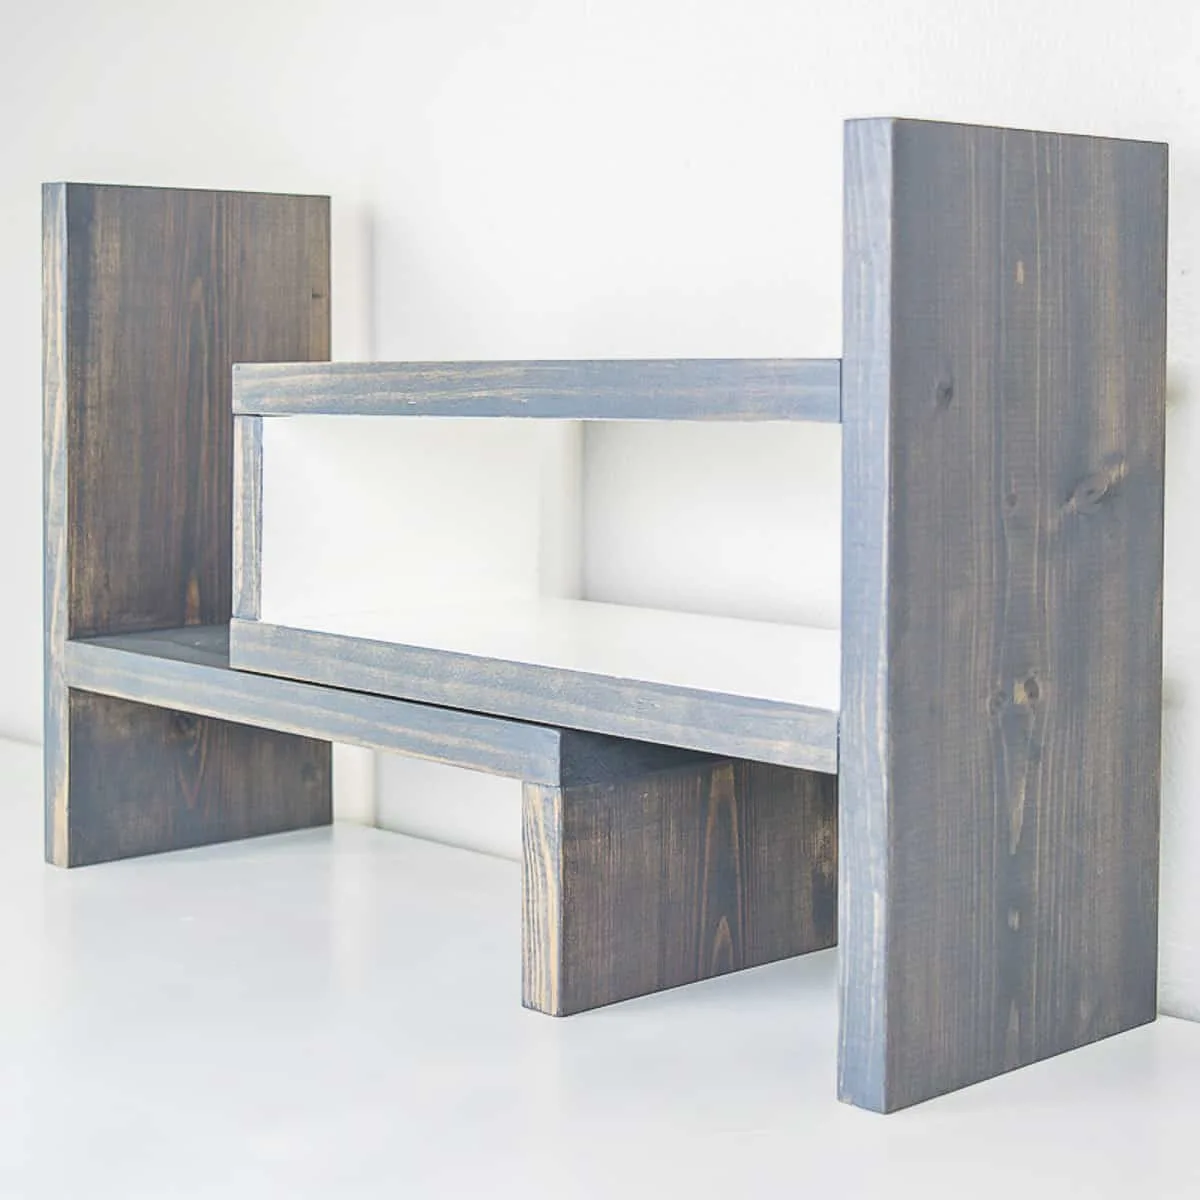
Assemble the second desk shelf
The other half of the organizer rests on top of the first, so getting the right height is crucial. Measure the height of the assembled shelf from the bottom of the short end to the top of the shelf.
Now attach the bottom of the second shelf to the side at that height. Mine was 3 ¾" up from the bottom, but yours can vary if you're using plywood instead of solid wood.

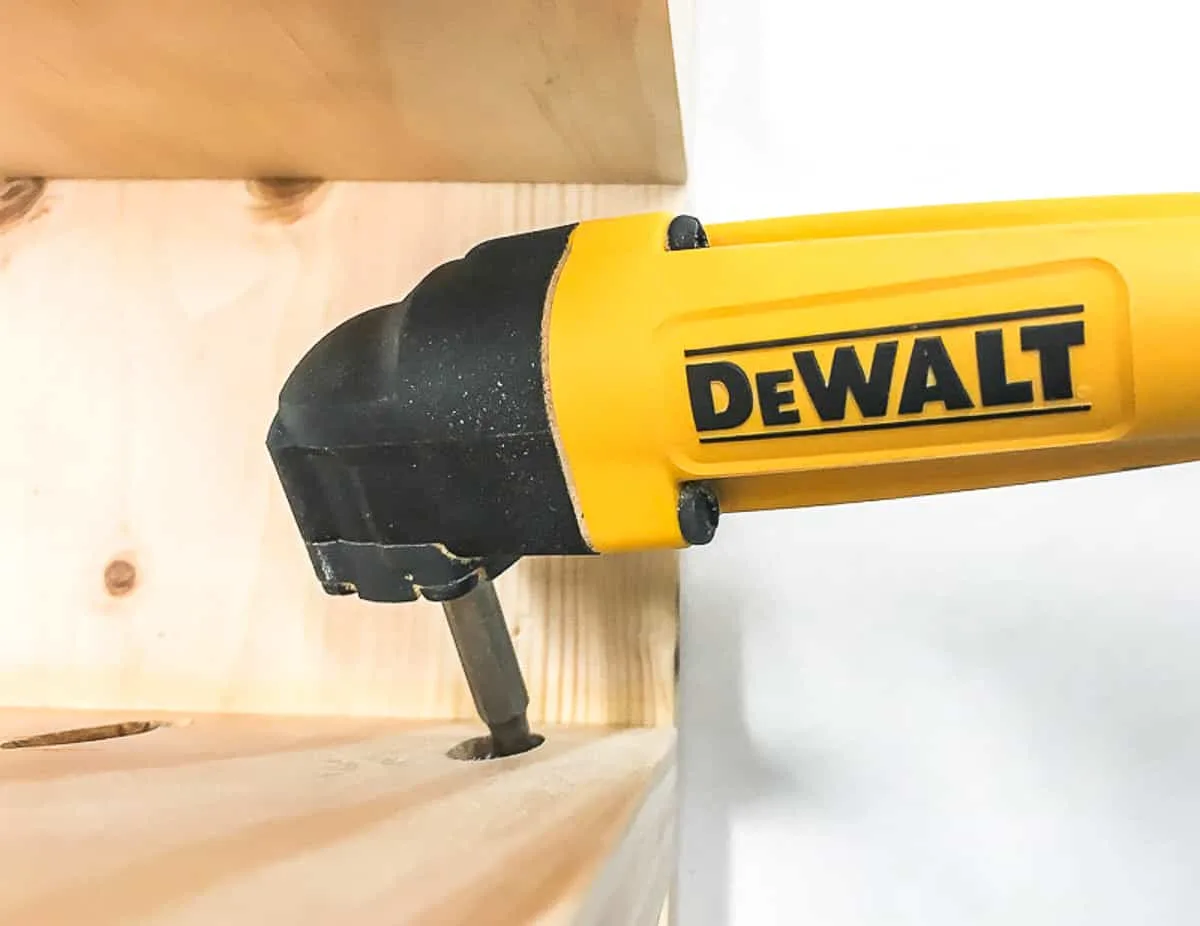
Now use the short piece as a spacer to hold the next shelf at the proper height while you drive in the pocket hole screws. The space is pretty tight between the two shelves, so a right angle drill attachment comes in handy to insert the pocket hole screws.

Slide the spacer out and apply wood glue to both long edges. Slide it between the top and bottom shelf and nail it into place on both sides.
Paint or Stain the Desk Shelf
How easy was that! Now you can customize your new desk shelf with whatever stain or paint matches your decor.
I went with my favorite gray stain for most of the shelves, but brightened up the interior of the rectangular shelf with white paint. In retrospect, I should have applied wood conditioner first to prevent some of the blotchiness.
This two-toned effect is the same one I used on my hexagon side table, so now the color scheme is repeated throughout the living room.
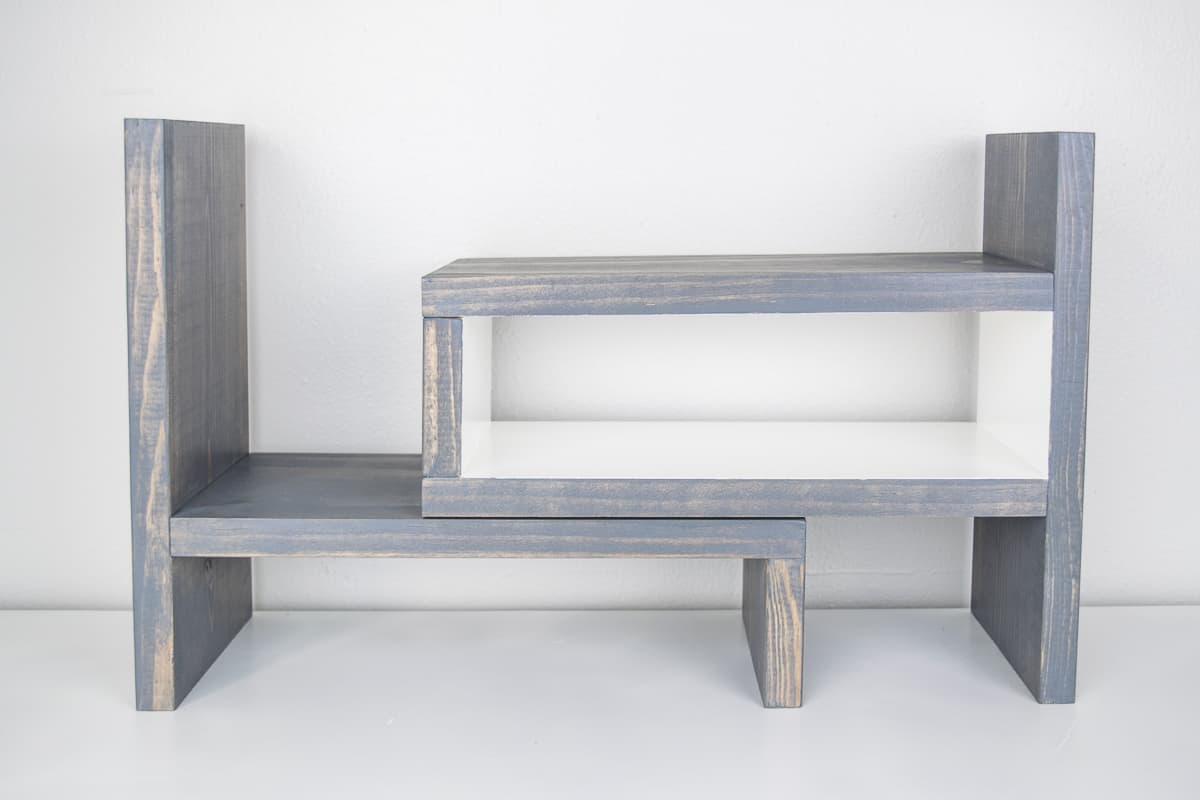
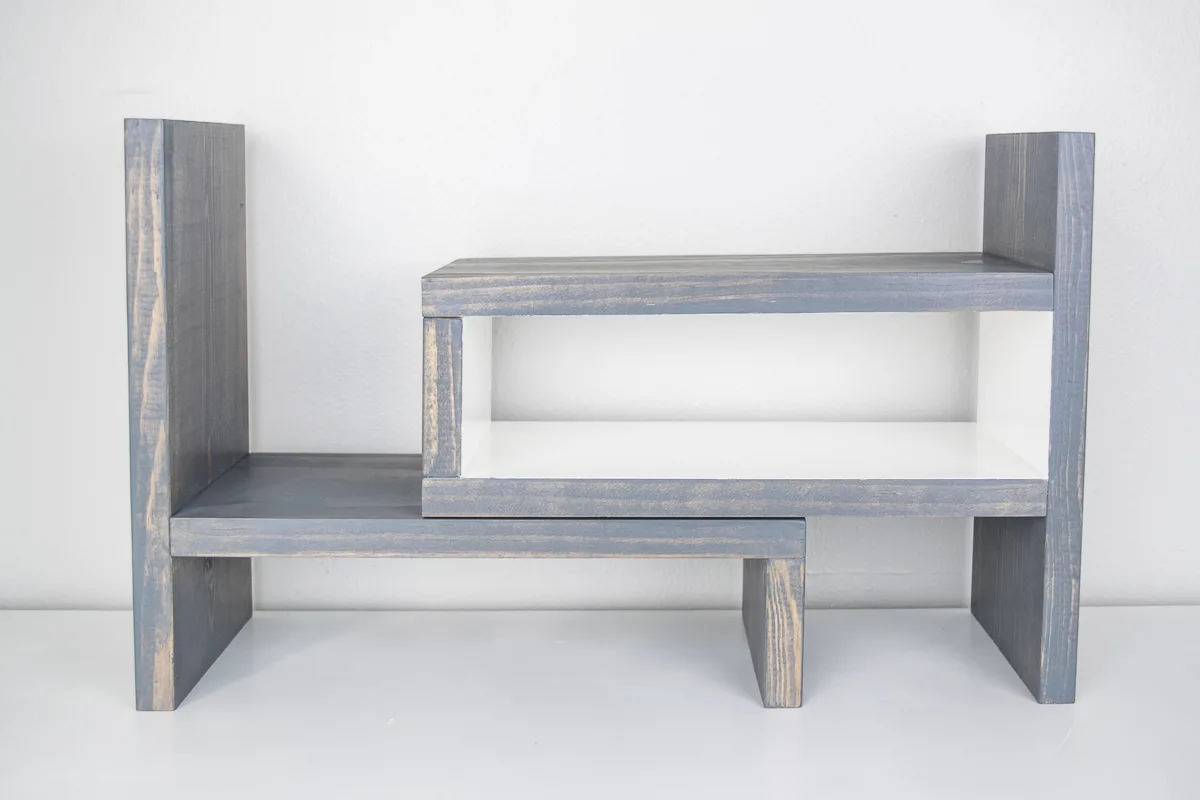
Choose your desk shelf configuration!
The versatility of this desk shelf is perfect for our multi-purpose living room. I can stretch it out almost two feet long when we need lots of storage for school supplies.
Or we can keep it compact to make room for other things on the desktop.
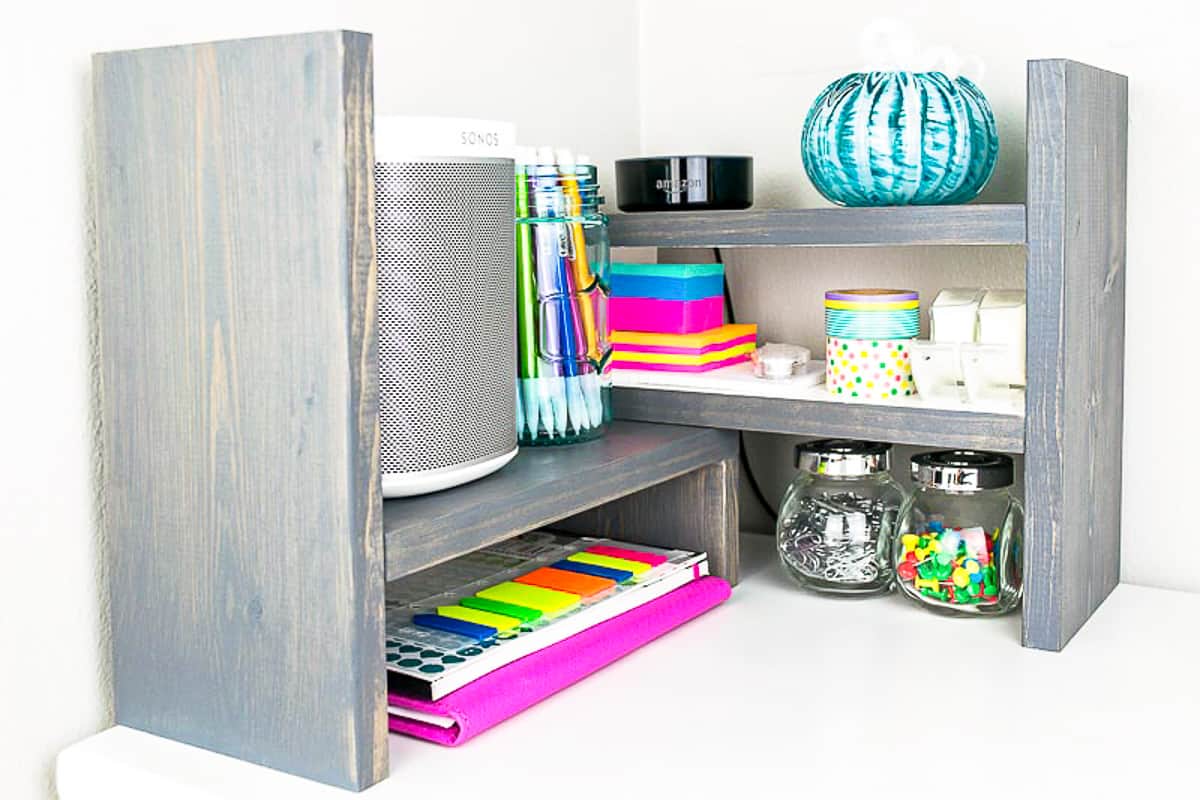
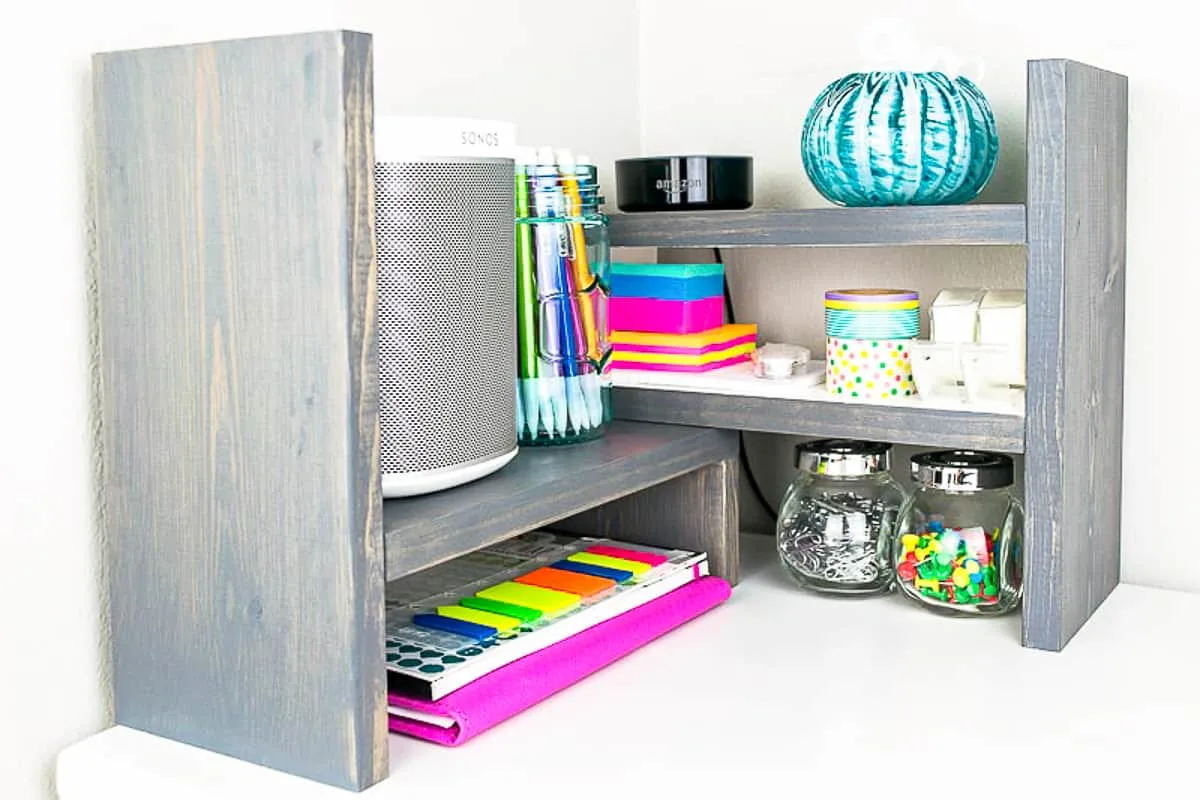
You can also rotate one side 90 degrees so it becomes a corner desk shelf instead!
It's been wonderful having all our supplies in one spot, instead of rummaging through multiple junk drawers to find what we need. I'm thinking of making another of these for the kitchen counter as a spice rack!
Check out these other beginner woodworking projects!
Audrey
Wednesday 13th of June 2018
Congratulations on the feature on To Grandma's House We Go. I love your website. There are so many projects there that I would have done when I was a little bit younger. Your website reminds me of me, (except that I would have had to put "thehandywomansdaughter". My mother was so adept at making anything and my dad could not put much of anything together. I grew up on a farm and my father was very good at tending to the livestock, but my mother ended up fixing most anything that my dad didn't hire out to get fixed. I do have an office and love the shelf. I am going to put one together. Thanks for sharing and I am going to point my nieces and nephews to your website.
Jann Olson
Tuesday 12th of June 2018
What a great desk! Thanks for sharing with SYC. hugs, Jann
Donna @ Modern on Monticello
Monday 11th of June 2018
This is a really good idea and awesome design. I have pinned it so I can show it to my husband for my desk. Thanks for sharing at #HomeMattersParty
Linda on Poinsettia Drive
Wednesday 6th of June 2018
You are so clever. I would like to invite you to come share on the NEW Classy Flamingos Blog Party . Wednesday thru Friday. poinsettiadr.com
Marissa | Squirrels of a Feather
Monday 4th of June 2018
Wow, it rotates! Now that is a cool organizer!