This DIY hexagon end table is easy to make and looks amazing in a modern living room. Get the free woodworking plans and start building!

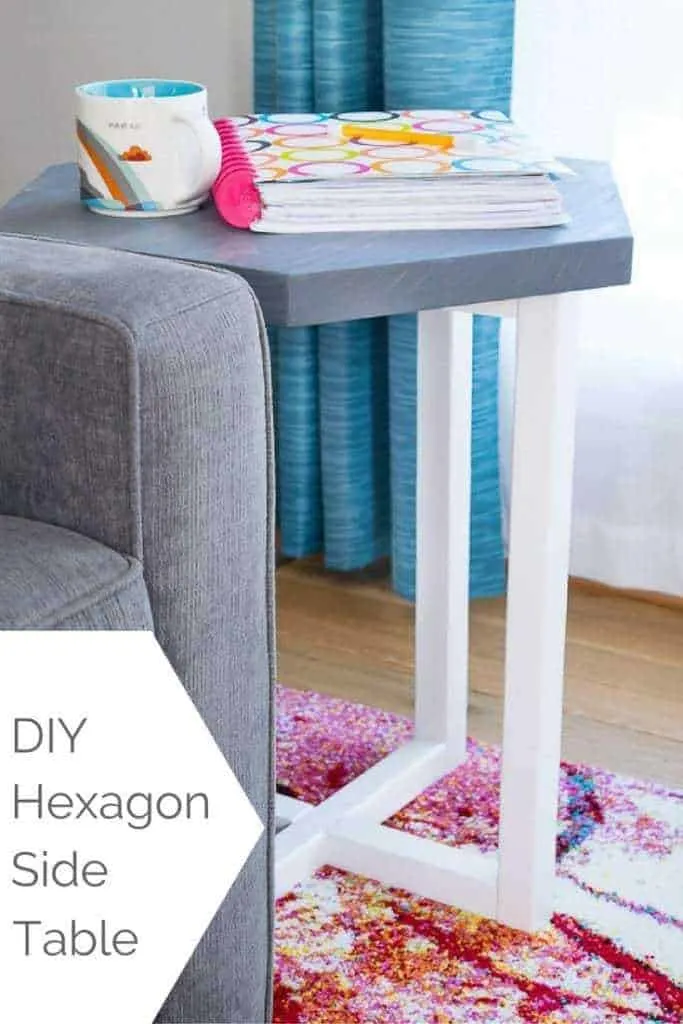
Hexagons are the new modern shape in home decor, and they're popping up everywhere! But trendy usually means pricey, and I never want to spend a ton of money on a passing fad.
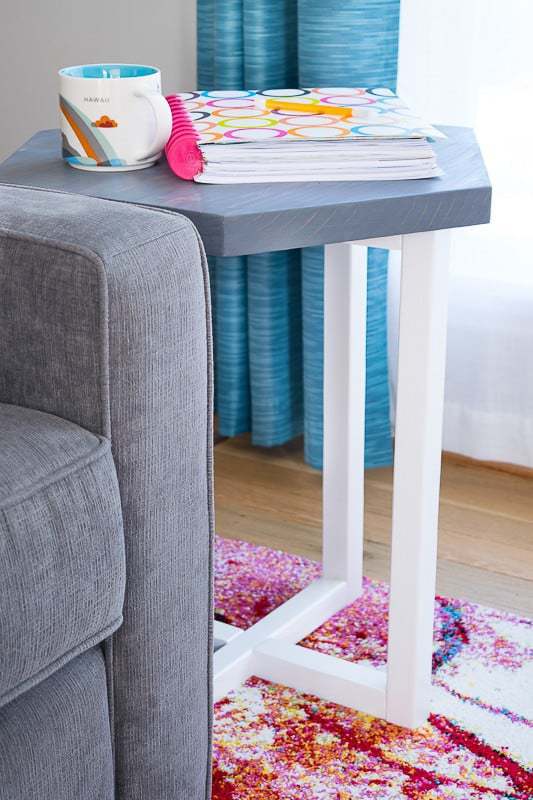
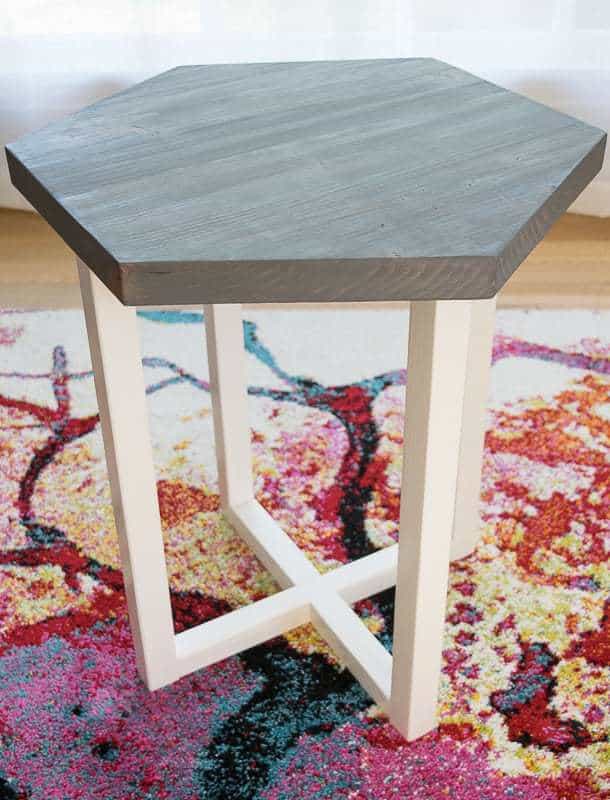
Instead, I built this DIY side table with a hexagon top! The base is a classic X shape, and the top can be switched out for a circle or square if I want to change the look in the future.
This post contains affiliate links for your convenience. Purchases made through these links may earn me a small commission at no additional cost to you. Please visit my disclosures page for more information.
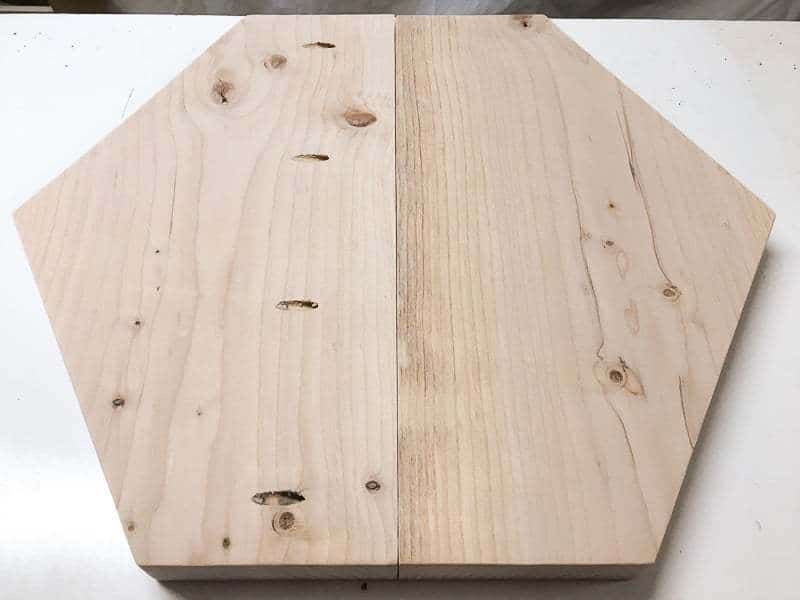
Inspiration struck when I unearthed a stack of 2 x 12 end cuts from a shelving project I did for a friend. I've struggled to find a good use for these big chunks of wood in the past, but this time the light bulb finally turned on! By edge joining two pieces together, I could create a small table top.
Pieces of 2x2 boards left over from my outdoor storage bench and stuffed animal zoo would become the legs and base. I even discovered four L angle brackets that I didn't use on my bi-fold door blanket box that would work perfectly for joining everything together. I love when I can make a project for free!
Materials Needed
- 2 - 2x2 boards @ 8 feet long
- 1 - 2x12 board
- Protractor and ruler
- 2 ½" pocket hole screws
- Kreg Jig
- Check out my post on how to use a Kreg Jig to help you decide which one is right for you.
- 24" clamps
- 1 ½" L angle brackets
- ½" wood screws
- Wood glue
- Wood filler
- Paint or stain (or both!)
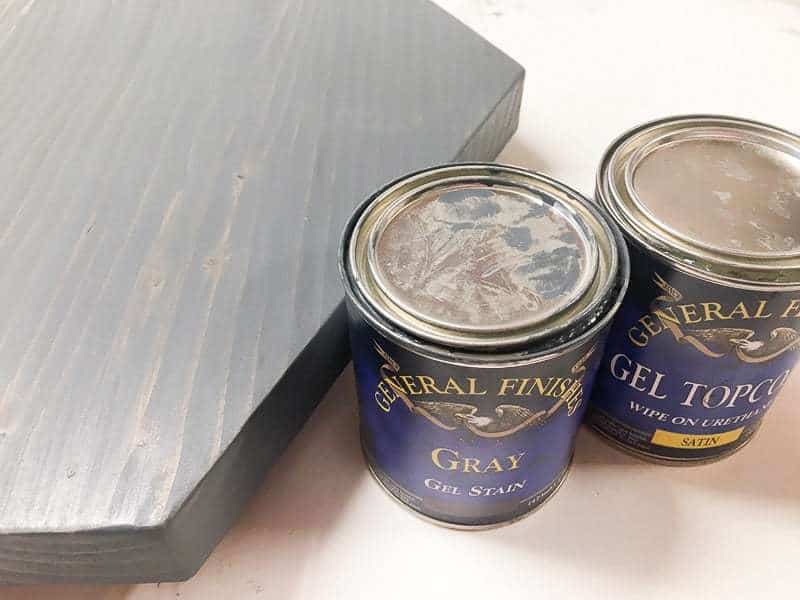
- I used General Finishes Gray Gel Stain for the top, and General Finishes Satin Top Coat for the finish. A huge thank you goes out to General Finishes for providing me with samples of these products to try out!
- Various grits of sandpaper
- Table saw or circular saw
- Miter saw
Don't forget your safety gear when woodworking! Here are my recommendations for safety glasses and ear protection. No excuses!
Instructions for DIY Hexagon End Table
Download the free woodworking plans here!
Cut List
- 2 - 2x2's @ 15"
- 4 - 2x2's @ 6 ¾"
- 4 - 2x2's @ 22"
- 2 - 2x12's @ 19 1/16"
Make a Paper Hexagon Template
Start by creating a paper template for your hexagon top. Flashback to geometry class! A hexagon is six equal sides set at a 120° angle to each other, right? (Don't worry, I had to Google it too!) I wanted each side to be 11" long so each half would fit on a 2 x 12 board.
I recommend drawing out the shape on a piece of paper first. Then cut it out and trace it onto the wood. You can fold the paper in half to check that your hexagon is symmetrical before you start cutting!
Draw your first 11" side, then position the line in the center of your protractor on the end of the line. Mark the point for 120°.
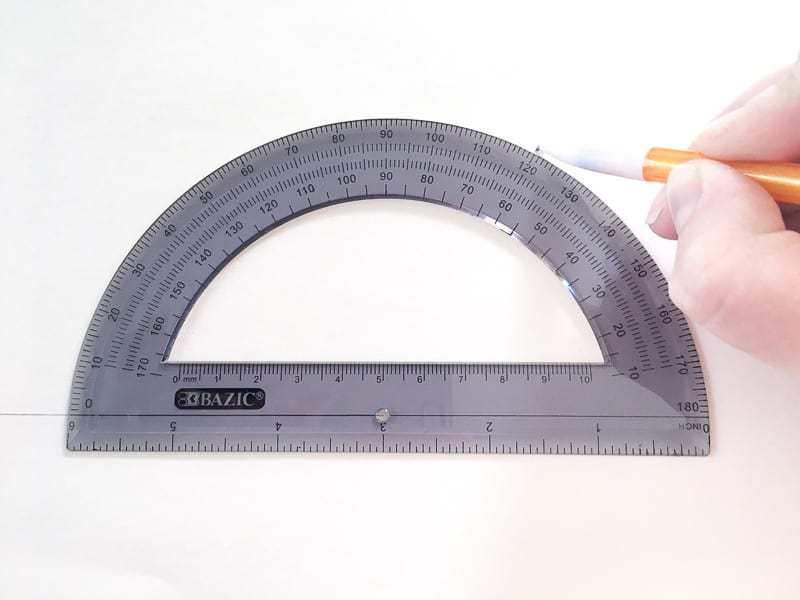

Draw an 11" long line connecting the end through that point. Then line up the protractor center with the end of that line, and mark the next 120° angle. Repeat until you get back to the beginning.
Cut out your paper hexagon template, and mark the center line through two parallel sides. Cut along this line to create two identical templates.
Cut the hexagon top
Using a table saw or circular saw, trim ¼" off of one long edge of the 2 x 12 board. This will give you a nice, smooth edge to join together later.
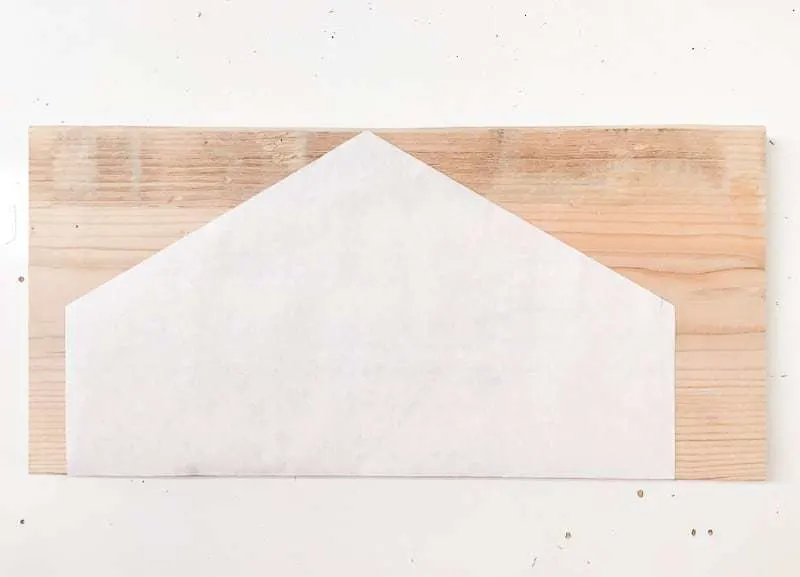
Cut two 19 1/16" pieces, choosing spots on the board where the smooth edge is free from any knots or imperfections, and the grain lines are similar.
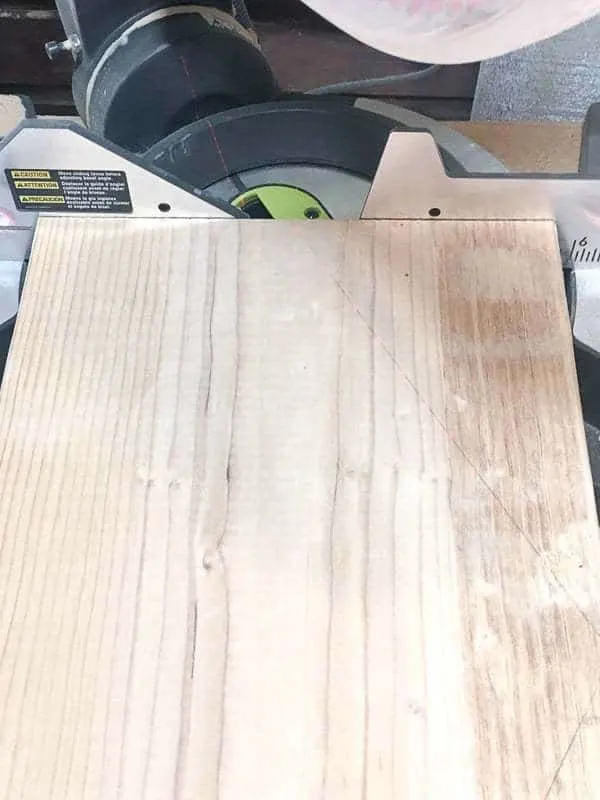
Position half a hexagon template on each section of board with the long edge lined up with the smooth cut edge. Trace around the template.

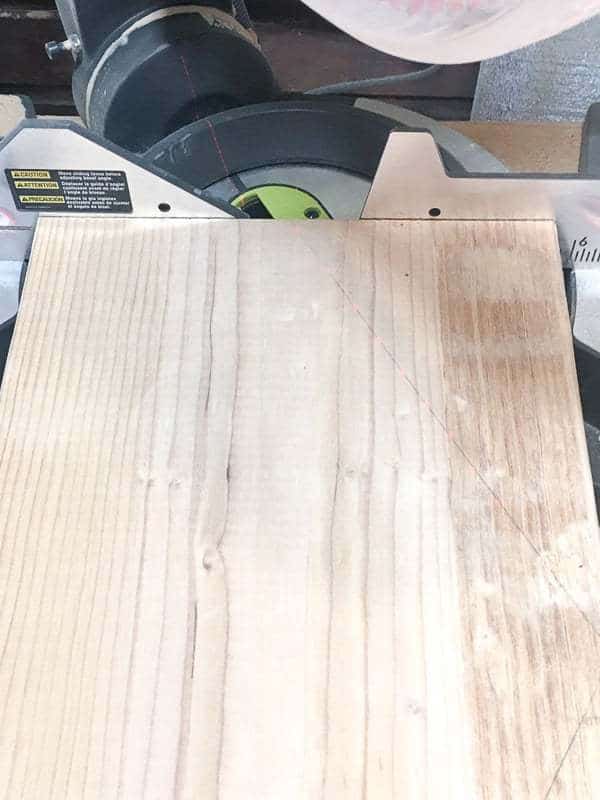
Set your miter saw angle to 30°. With the short end of the board against the fence, cut along your traced line. Flip the board over and repeat for the other side. Save the cut off angled pieces for clamping later on.
Sometimes, even with careful measuring, the two sides aren't perfectly identical. If this happens, just stack both pieces together, set them on end and sand down the taller piece until they're even.

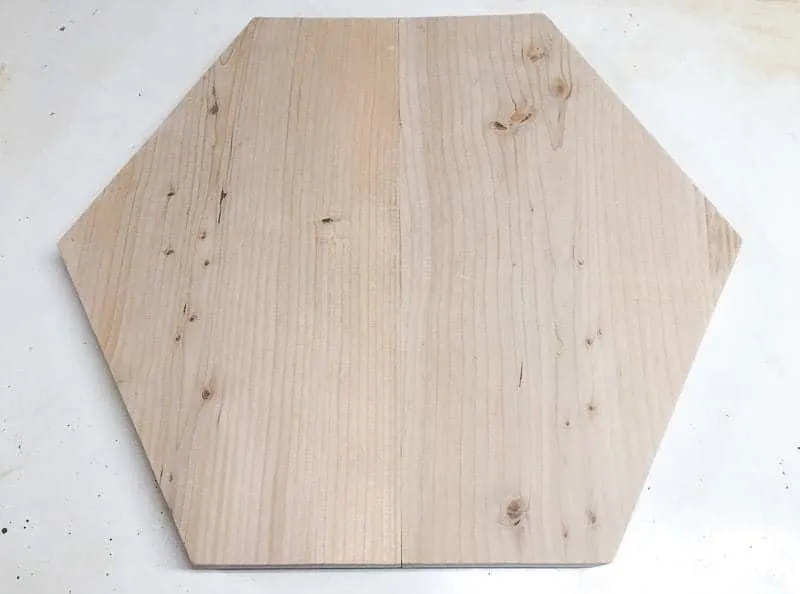
With a sharp center edge and similar grain lines, the seam almost disappears!
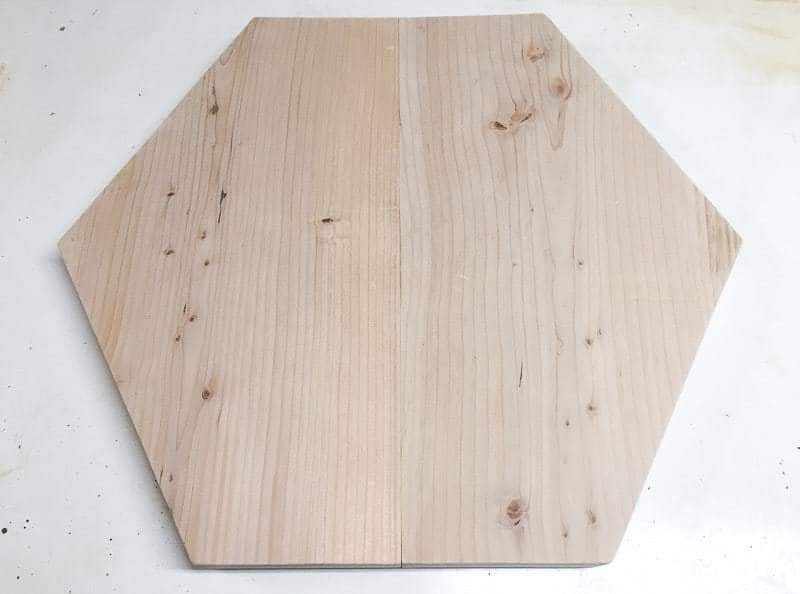
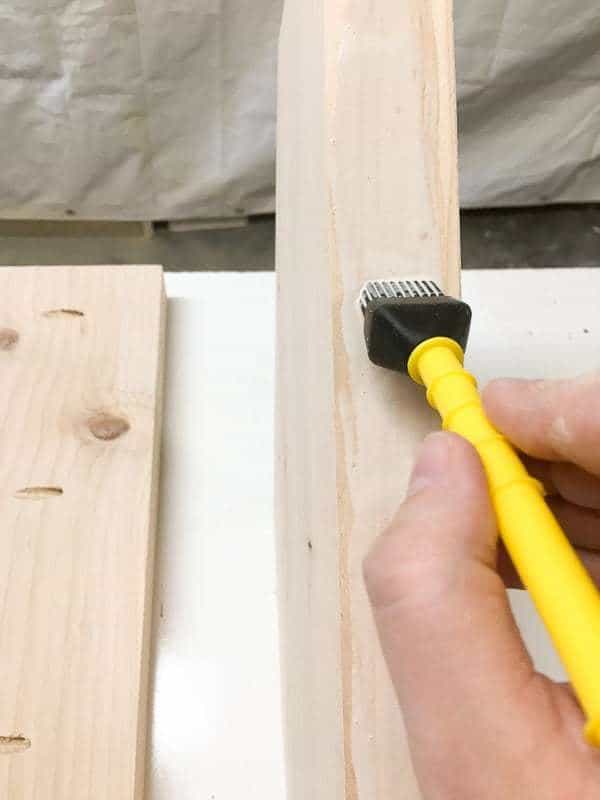
Flip the pieces over and drill pocket holes along the center line of one of the hexagon halves. The wood glue should be strong enough to hold the two halves together on their own, but I figured the screws would help prevent the seam from splitting when it expands and contracts with the seasons.

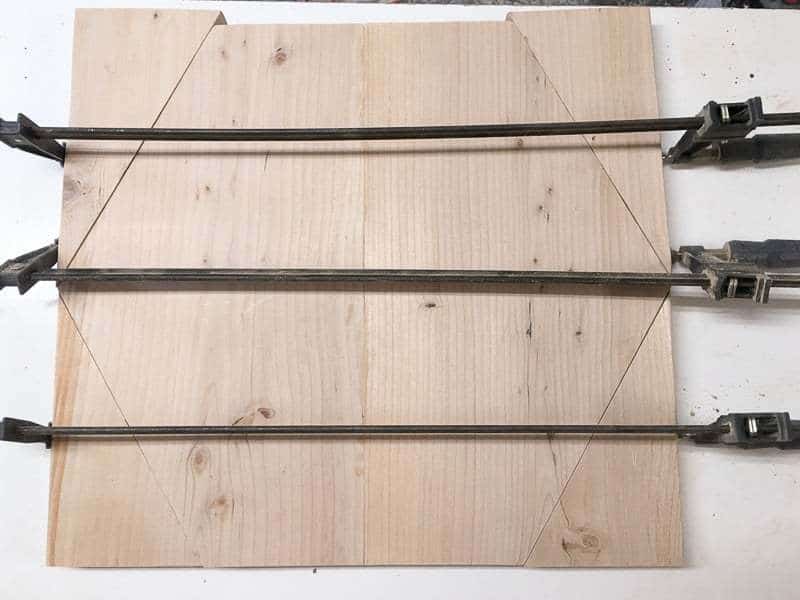
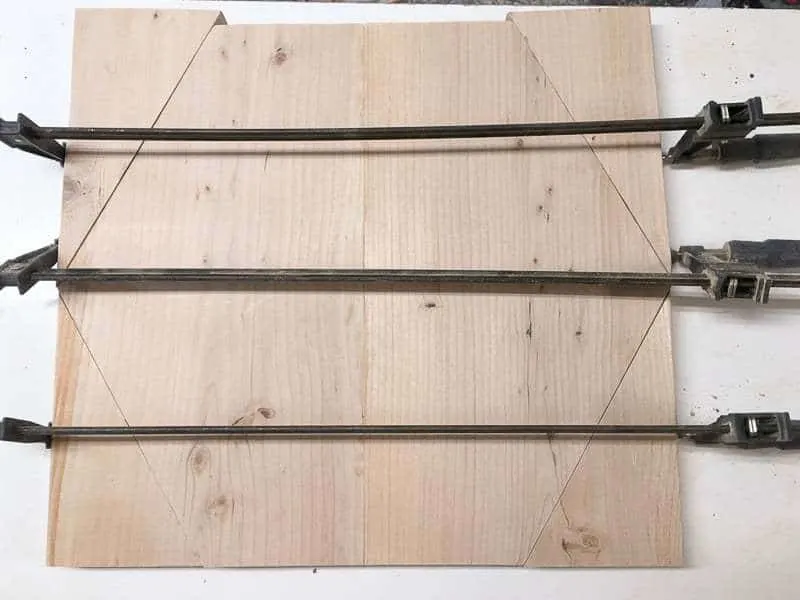
Apply wood glue along the center edge of the other half.

Place the cut off angles you saved from earlier on each corner of the hexagon to create a square. Clamp all the pieces together, making sure the two halves of the hexagon are perfectly even with each other down the middle. Screw together with 2 ½" pocket hole screws and leave in clamps until glue is dry.
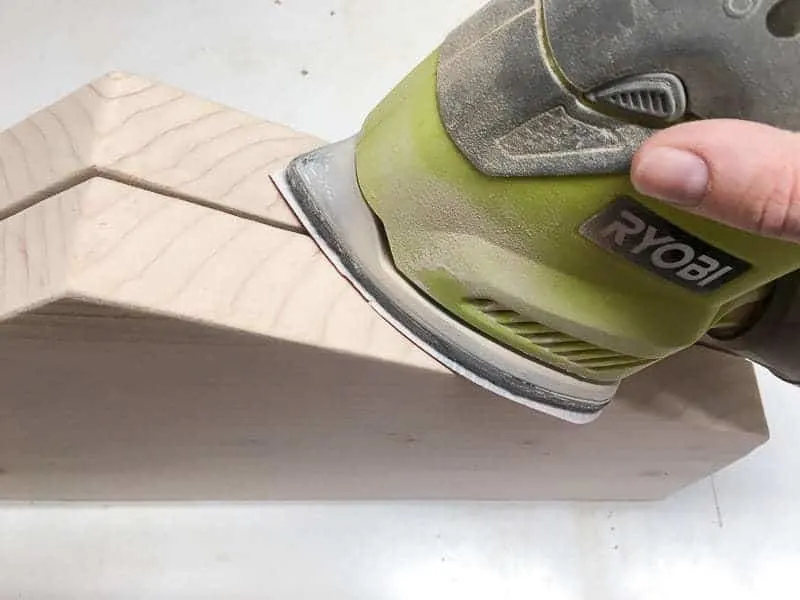
Remove the clamps and fill the seam with wood filler if there are any noticeable gaps. Sand the entire surface smooth when the wood filler is dry. I also rounded over the sharp edges with my sander for a softer look.
Paint or Stain the Hexagon Table Top
I've been on the hunt for a gray wood stain that doesn't look too blue or green, and I think I've finally found it! This General Finishes gray gel stain is just the right shade of dark gray, with just the tiniest hint of blue. You can see another example of this grey wood stain in my dining table makeover!
I applied two coats to get to this hue, and finished it off with their gel topcoat. You can see some areas of the grain where the stain didn't soak in. A pre-stain wood conditioner would have helped to even out the color.

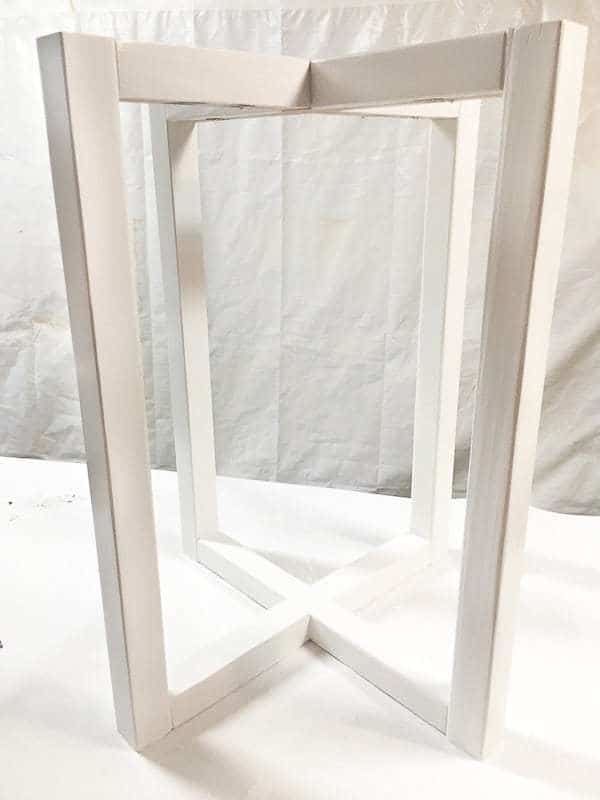
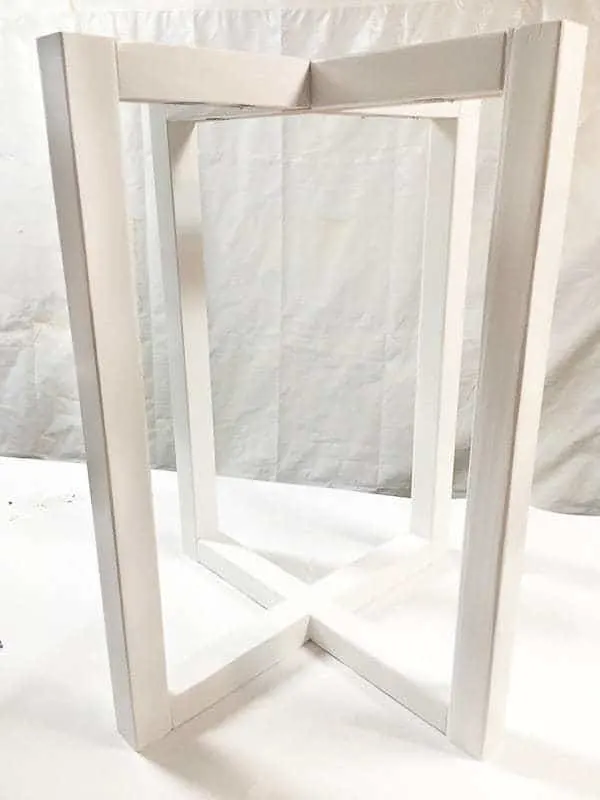
Assemble the End Table Base
Moving on to the base! If you're not a fan of hexagons, you could use this base with any shape top.
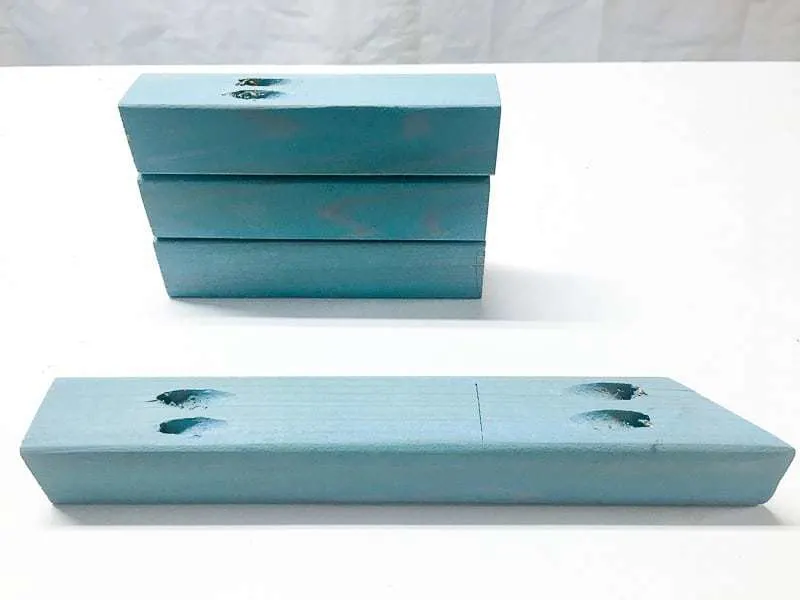
Cut the 2x2's as listed in the cut list above, and sand all the sides smooth. I used a few of the pieces from my outdoor storage bench that I cut wrong, which is why they're stained blue! A quick sanding removed the old stain, except in the pocket holes that won't be visible anyway.

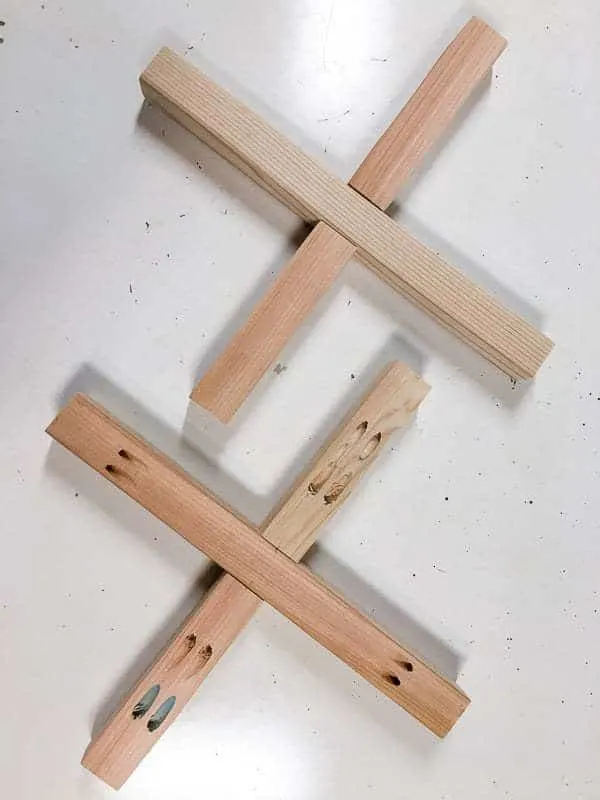
Drill pocket holes into both ends of all the 6 ¾" and 15" pieces. Mark the center of the 15" pieces, and the center of the ends of the 6 ¾" pieces.
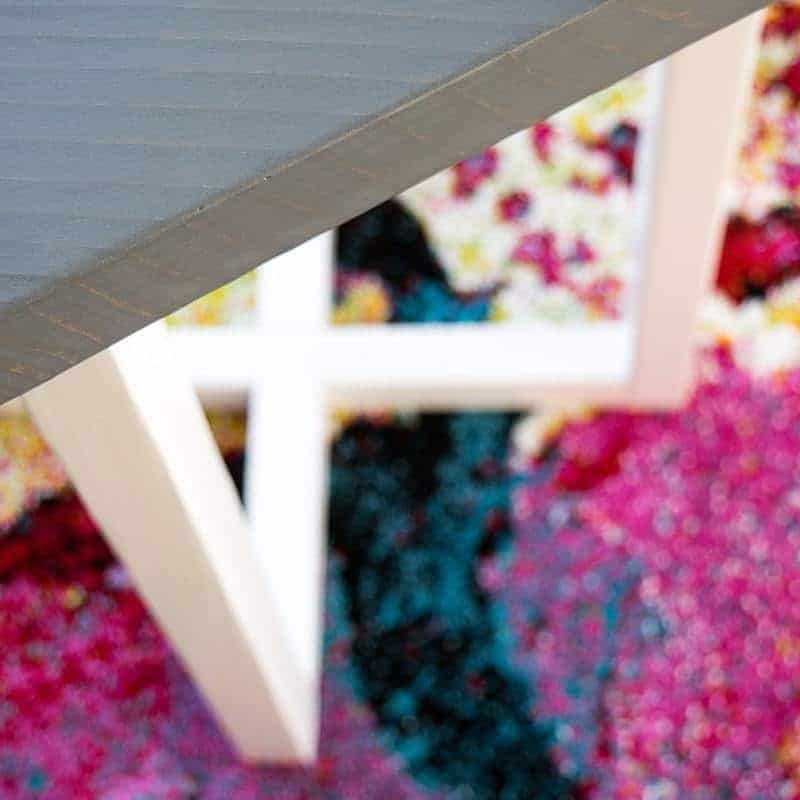
Match up the marks to create two X's. Screw together with 2 ½" pocket hole screws, making sure that all the pieces stay flat.

With the pocket holes of one X facing up, attach each of the legs with 2 ½" pocket hole screws.

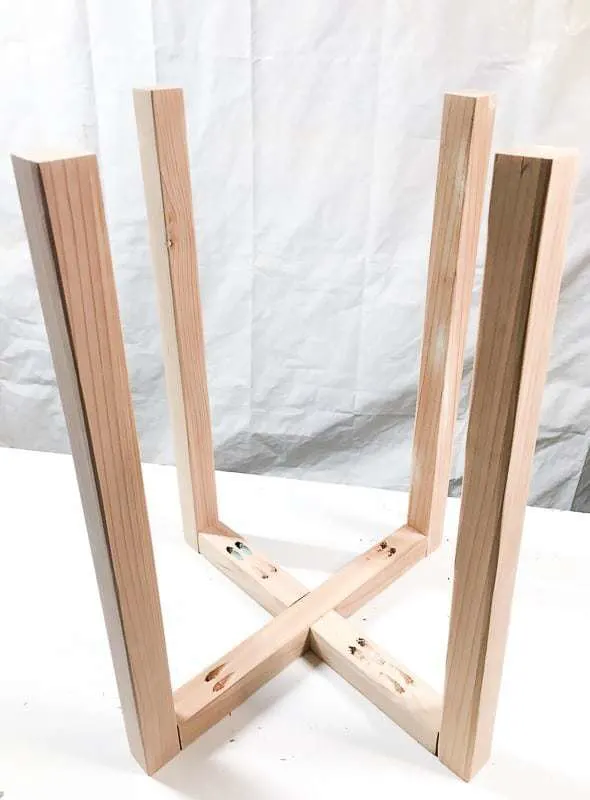
Then attach the other X to the top of the legs with the pocket holes facing up. Then flip the entire base over and paint or stain. If you're painting, you may want to fill the gaps with caulk for a more finished look. I gave my side table base three coats of Benjamin Moore's Simply White in semi-gloss.
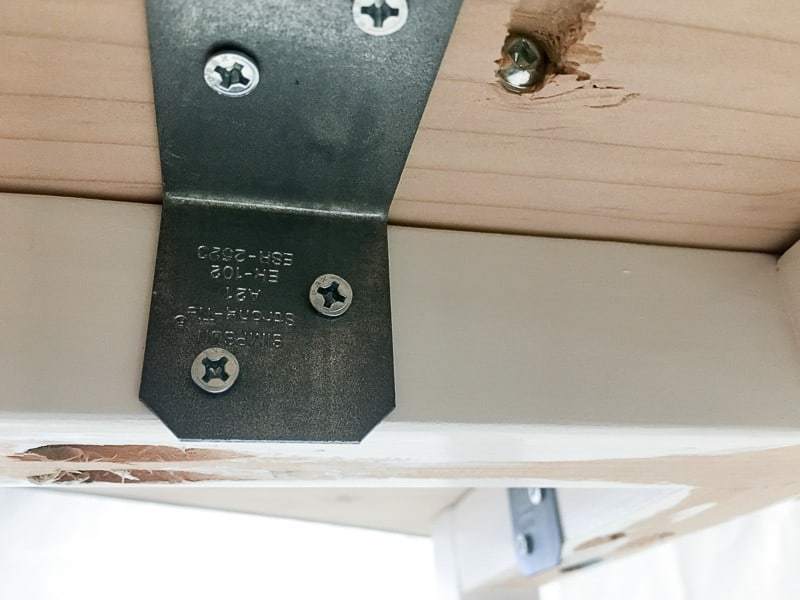
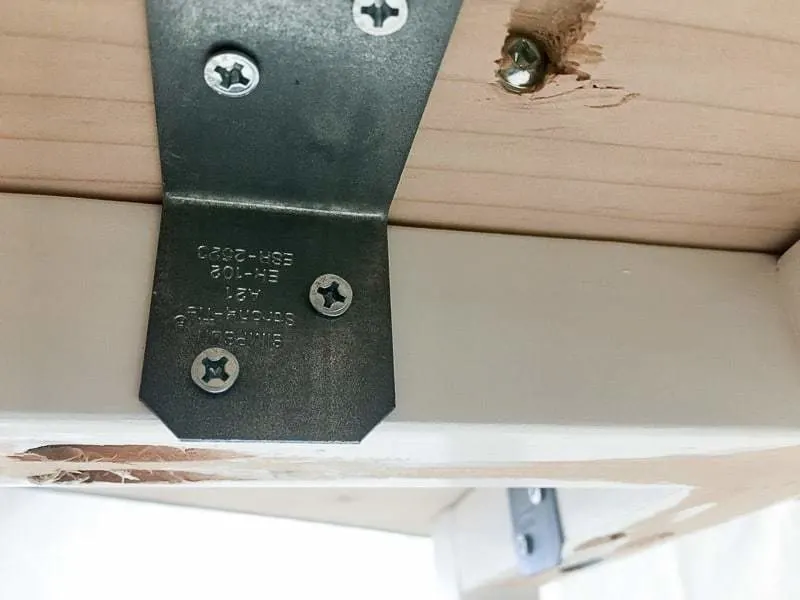
Attach the base to the hexagon table top
Place the hexagon table top on the base, lining up the seam between the two halves with one of the cross pieces. Attach the L angle brackets on opposing legs with ½" wood screws.
You're done!
Our living room is white and gray, with bright pops of color everywhere. This DIY hexagon end table fits in perfectly! Not too shabby for a bunch of scrap wood!


Check out these other easy woodworking projects!
Emily
Friday 13th of July 2018
What a great project! I could totally handle building a table like this :) Thank you for sharing at Merry Monday party. I'm going to feature your hexagon table at next week's party. We hope you'll come by and share another project or two!
Donna @ Modern on Monticello
Monday 25th of June 2018
Great table. I love how your made the top to be removable so you can change it out as styles change. Thanks for sharing at #HomeMattersParty
Jann Olson
Friday 22nd of June 2018
What a great little universal table! Thanks for sharing with SYC. hugs, Jann
Dean
Monday 18th of June 2018
This is absolutely adorable. I love it!! Thank you so much for sharing with us at #MMBH! xo
Marissa | Squirrels of a Feather
Sunday 17th of June 2018
Wow, this is a really cool modern side table! I like that the top is a hexagon, but you have an X-cross at the bottom. I wonder if I could get a marble effect on the top? I could see contact paper being difficult to work around a hexagon shape. Going to puzzle over that one ;)