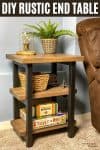

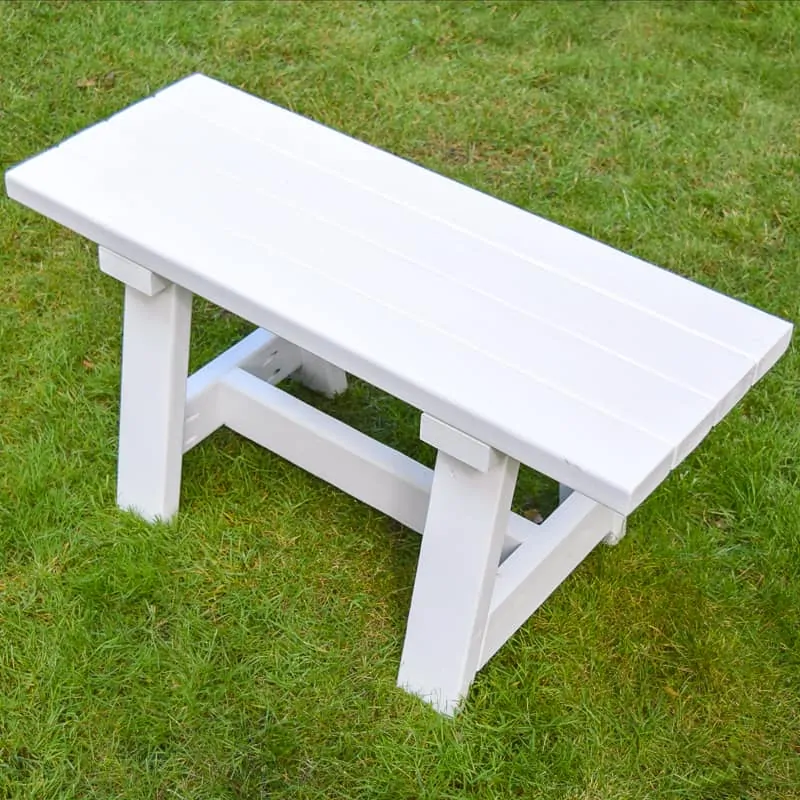
Build this simple DIY rustic end table with just a few 2x4 and 2x2 boards! Get the woodworking plans to make this easy DIY end table today!
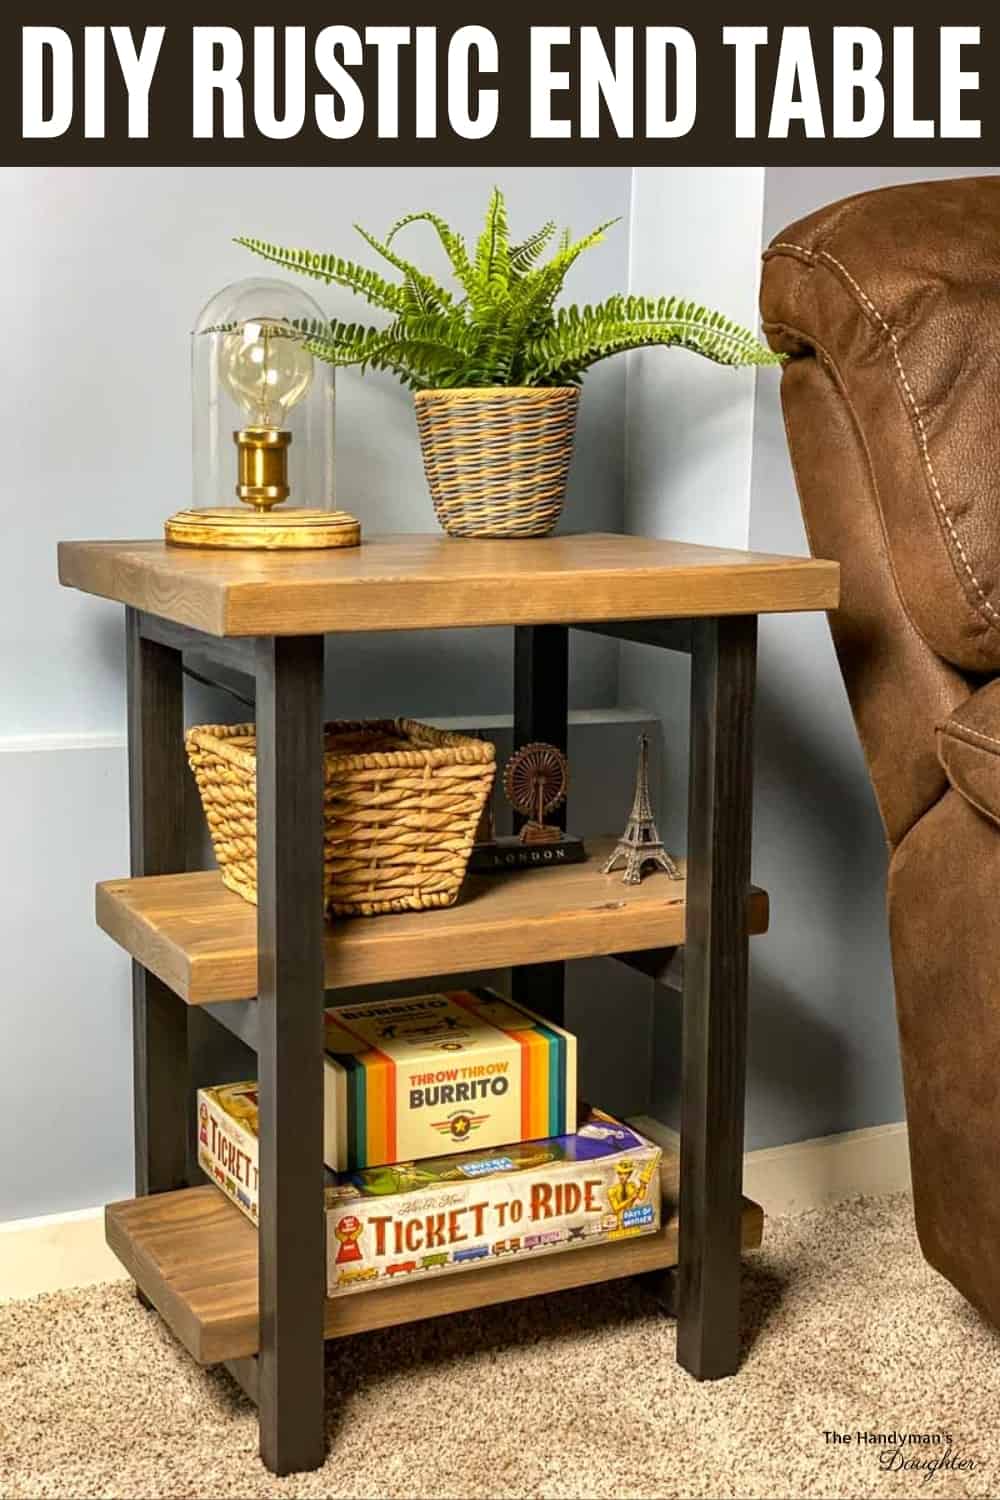
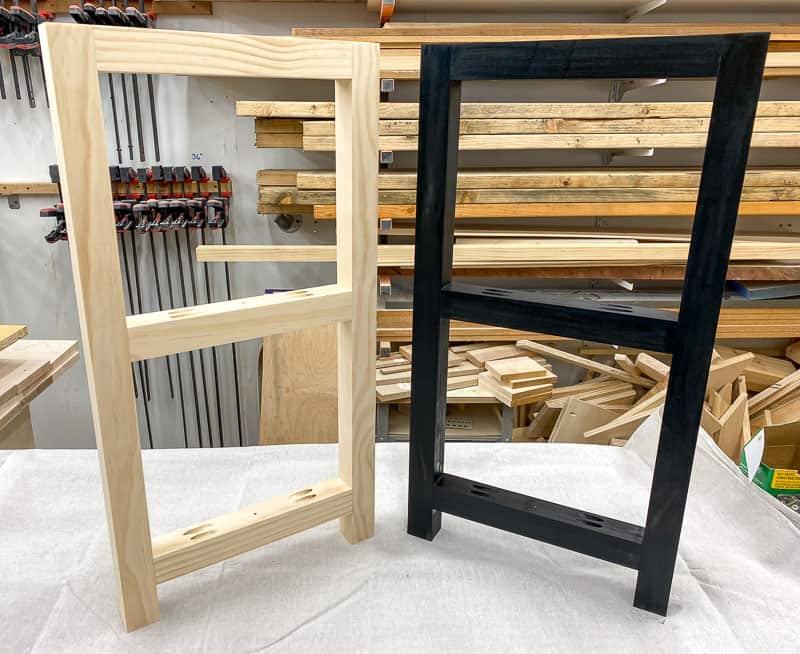
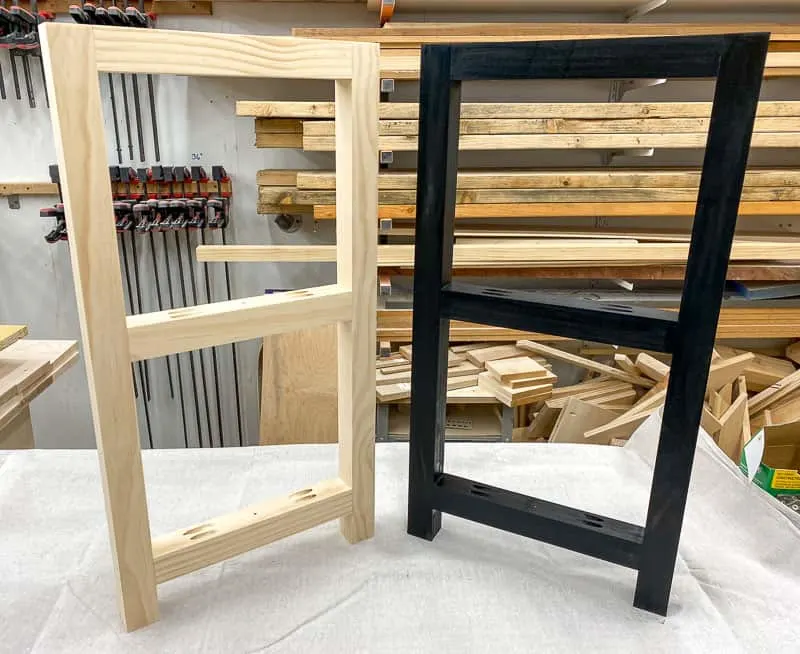
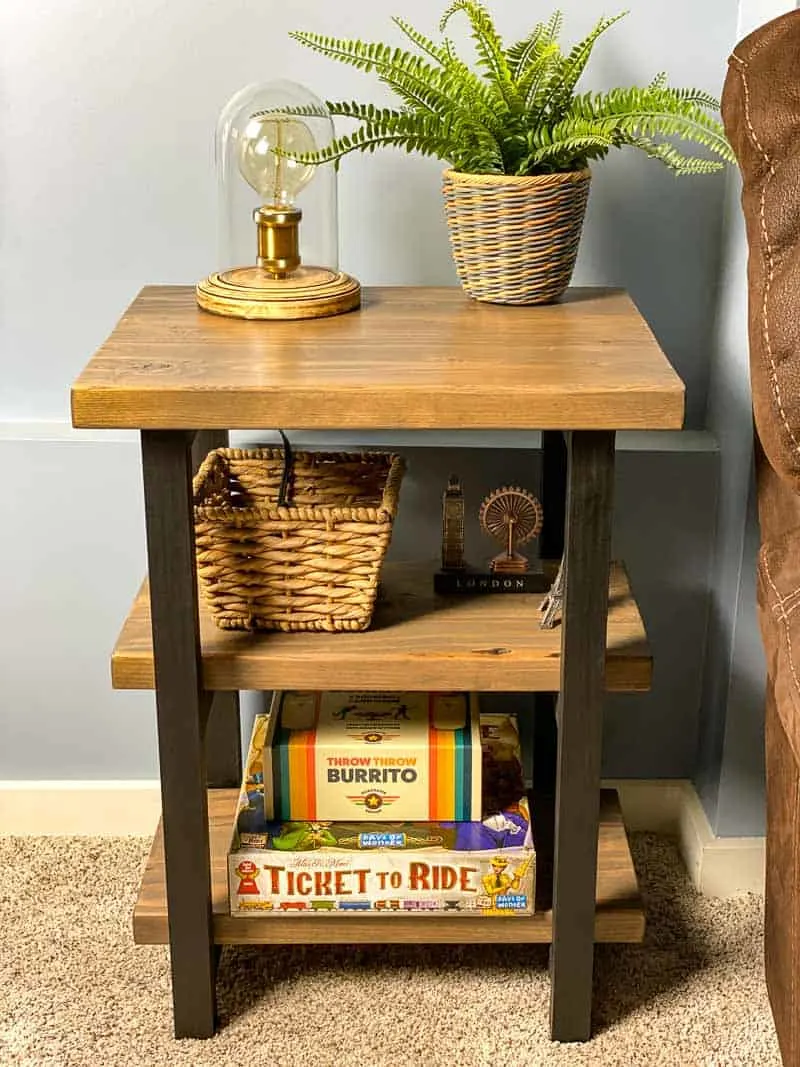
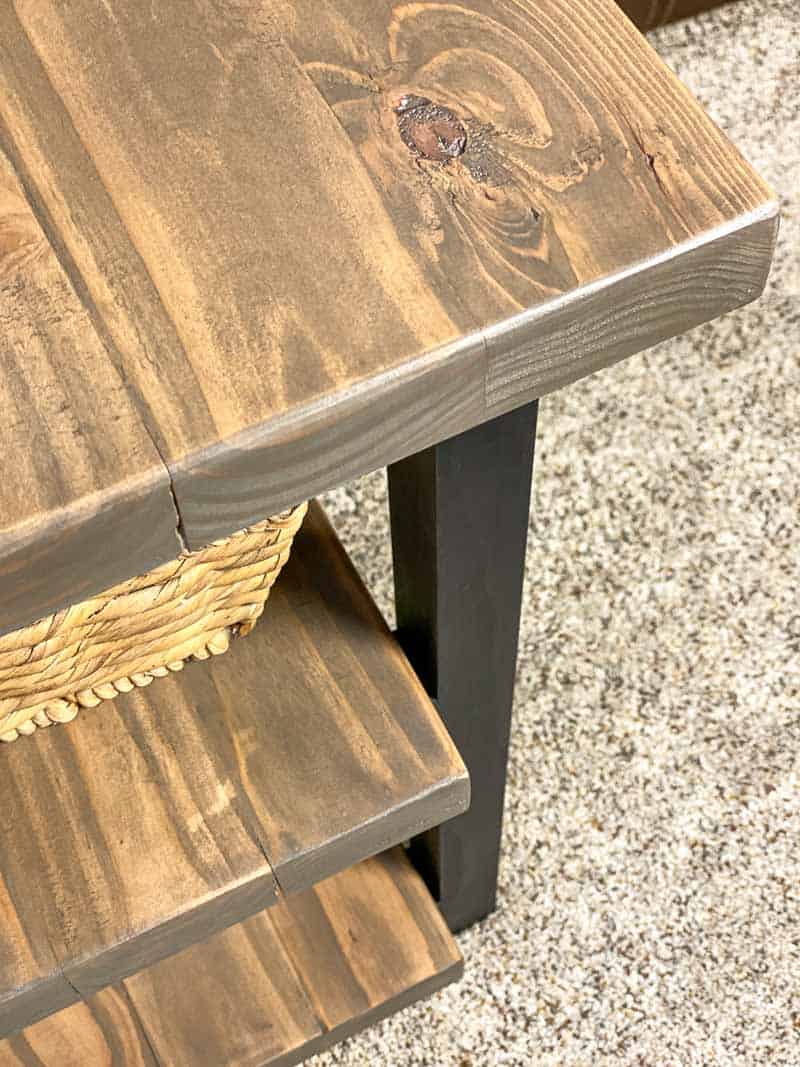
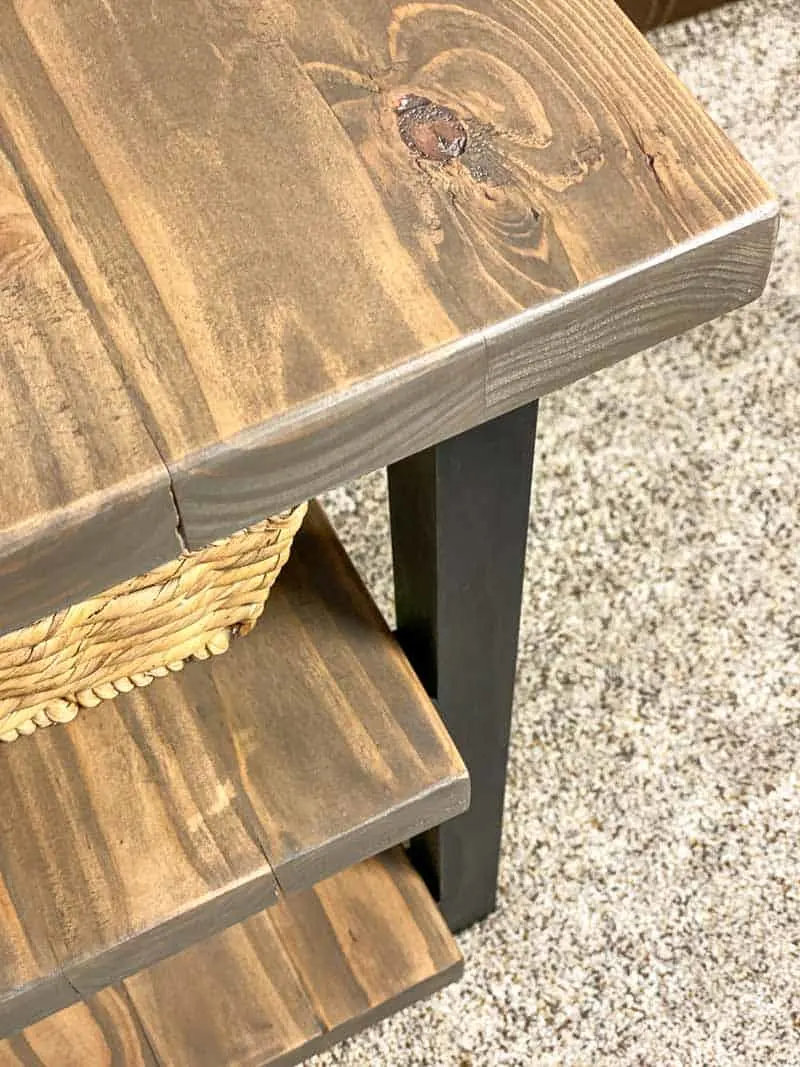
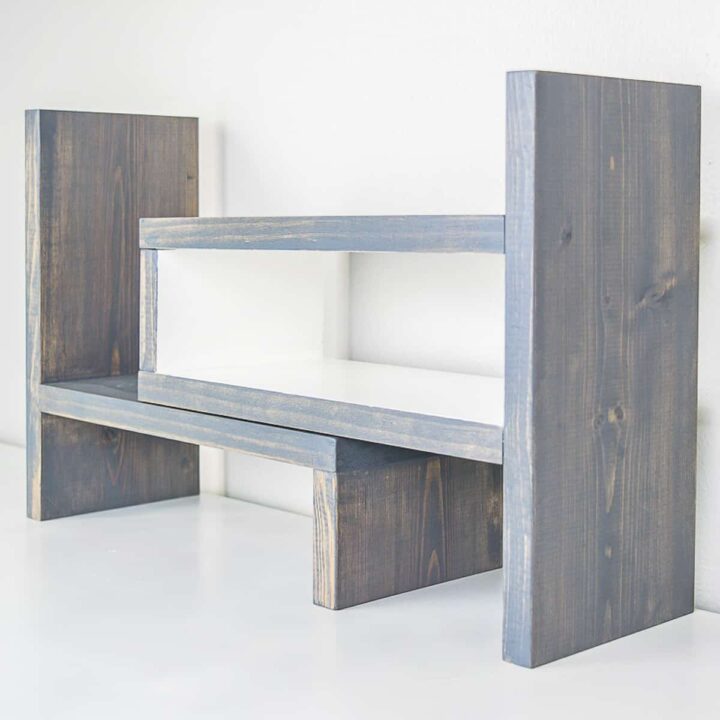
This rustic end table packs a lot of storage into a compact space! It features two shelves and a top made of reclaimed wood, and a black frame that looks like metal. It's super easy to build, and makes a great beginner woodworking project!
This post contains affiliate links for your convenience. Purchases made through these links may earn me a small commission at no additional cost to you. Please visit my disclosures page for more information.
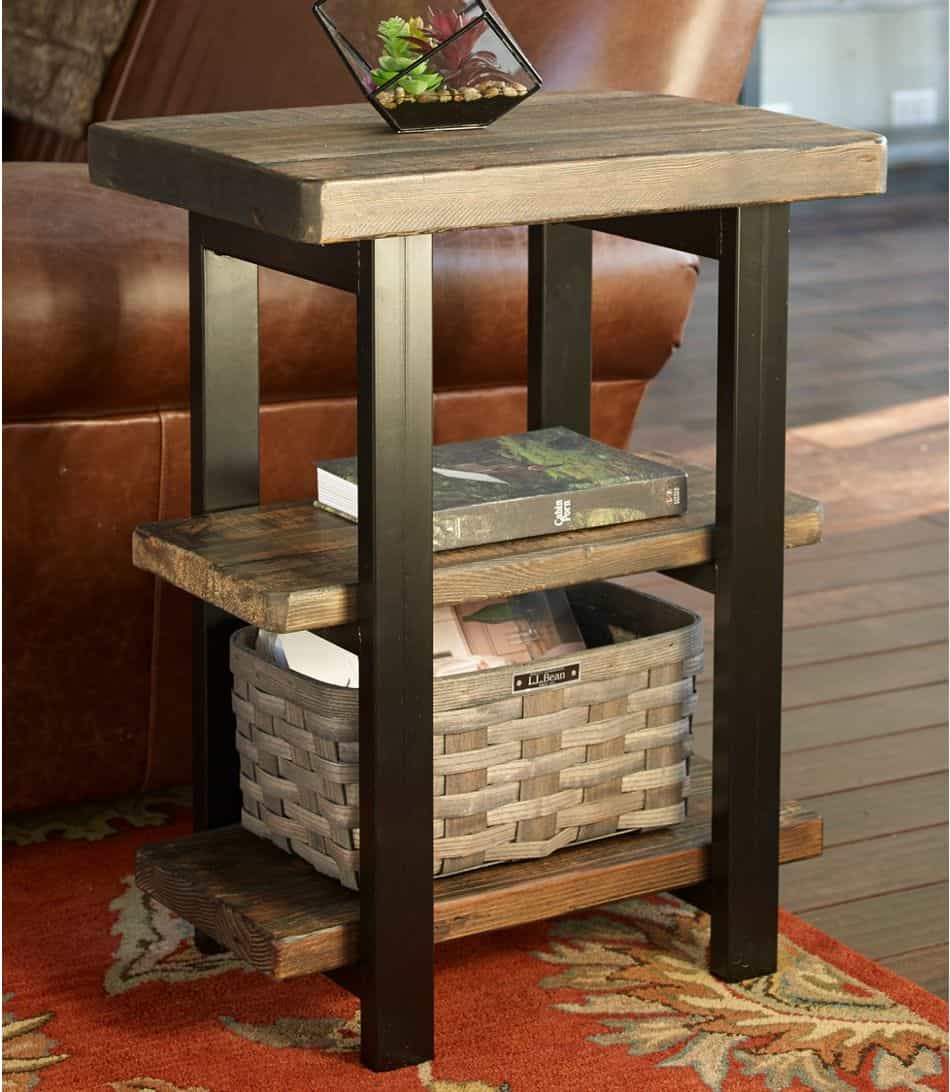
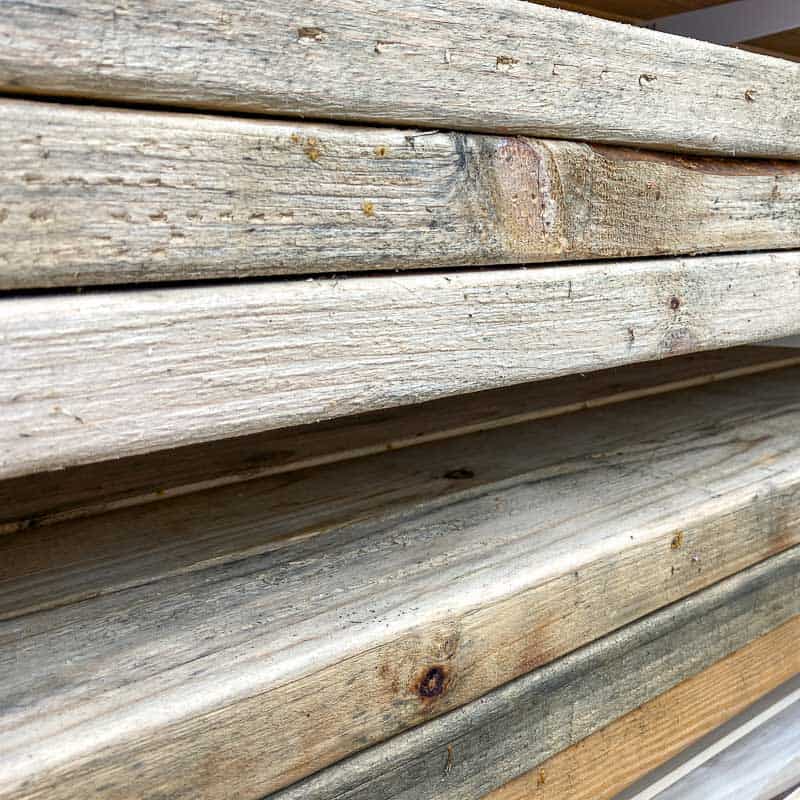
I have a stack of reclaimed 2x4 lumber that I wanted to use up, so I started browsing the internet for ideas. I stumbled upon this rustic end table from L.L. Bean that looked just like the pine boards I have in the workshop, but with a crazy price tag!

Here's how to make your own rustic end table for a fraction of the price!
Materials needed for DIY rustic end table
- Three 2x4 boards
- Two 2x2 boards
- Pocket hole jig
- 2 ½" pocket hole screws
- Wood glue
- Clamps
- Square
- Drill
- Right angle drill attachment
- Sander and sandpaper
- India ink
- I created samples of four different black wood stains to find the best one for this project!
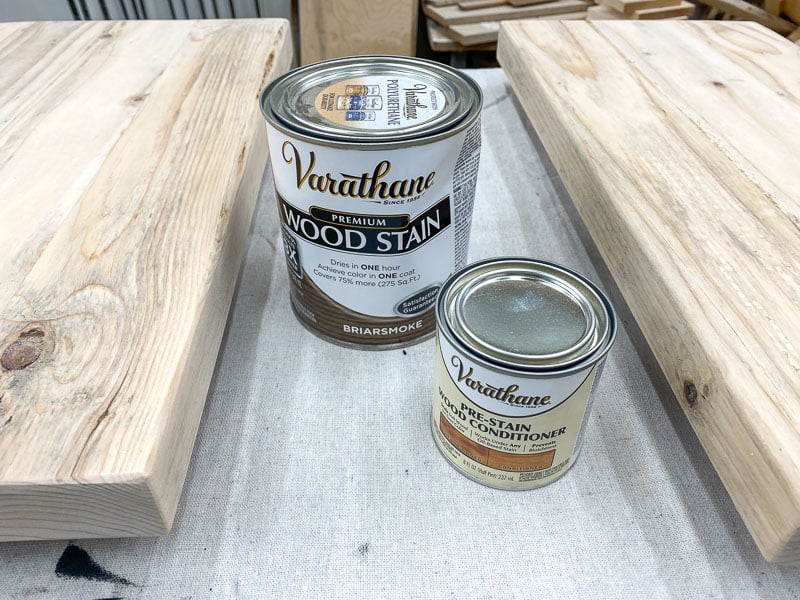
- Wood stain
- I used Varathane's Briarsmoke stain.
- Protective top coat with a matte or satin finish
- I used Polycrylic with a satin finish.
- 220 grit sandpaper for sanding between coats of finish
How to make a rustic end table
Download the plans
You can download the DIY rustic end table plans by clicking the button below! The printable plans include a cut list, step by step instructions with 3D models, and a handy checklist to keep you on track.
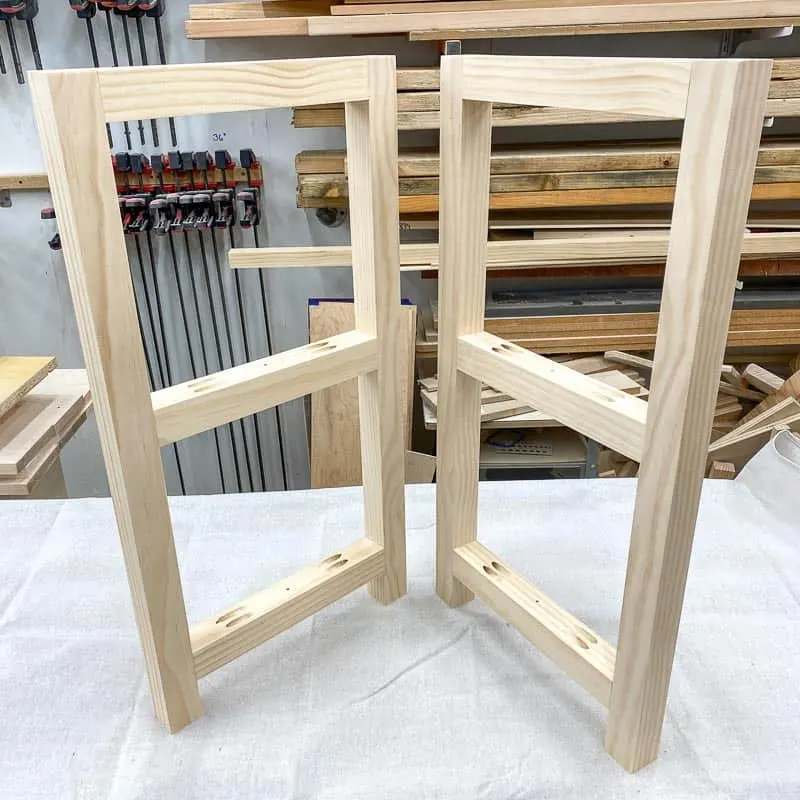
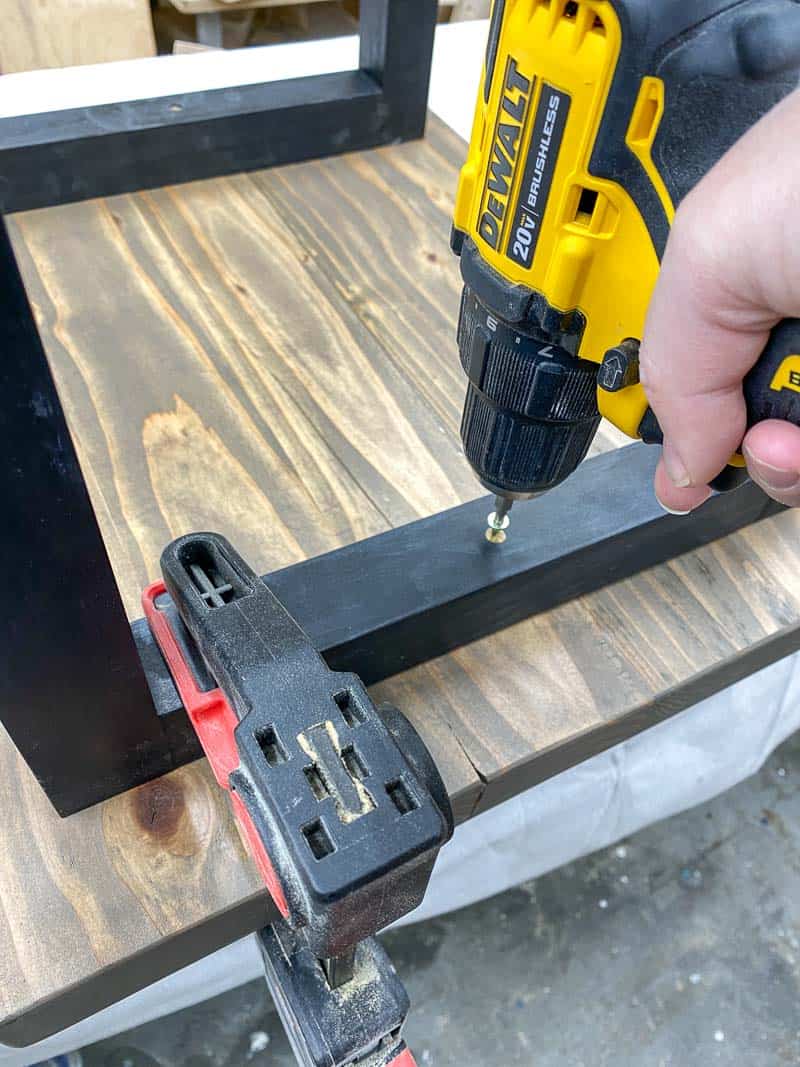
Build the frame
I wanted the frame to look like metal, so I bought the nicer 2x2 boards instead of cheaper furring strips. These typically don't have any knots, and the corners are square instead of rounded.
I cut them all down to size at the miter saw, then drilled pocket holes in both ends of all the shorter pieces.
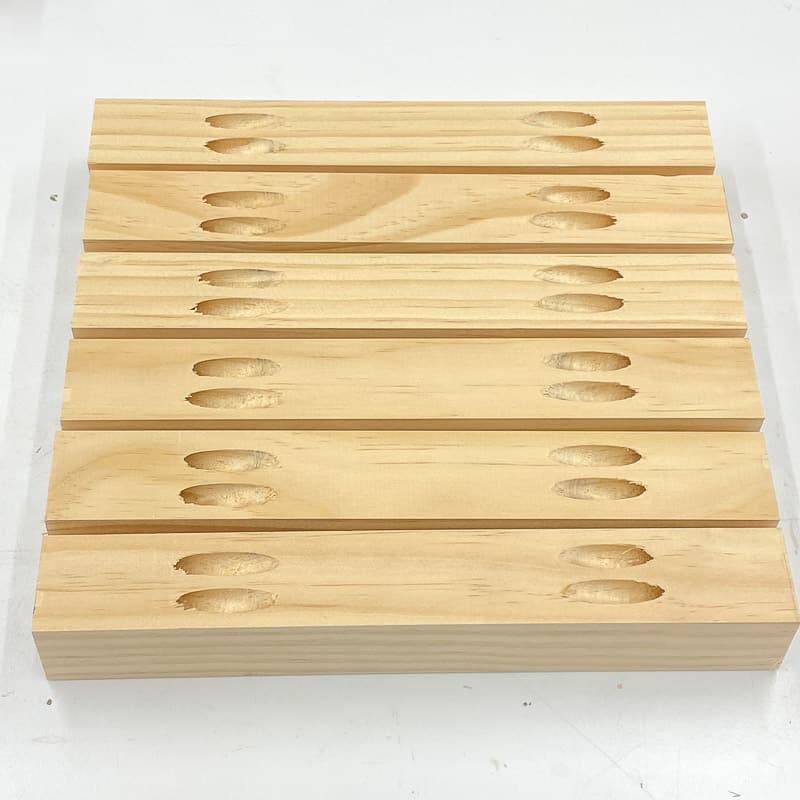
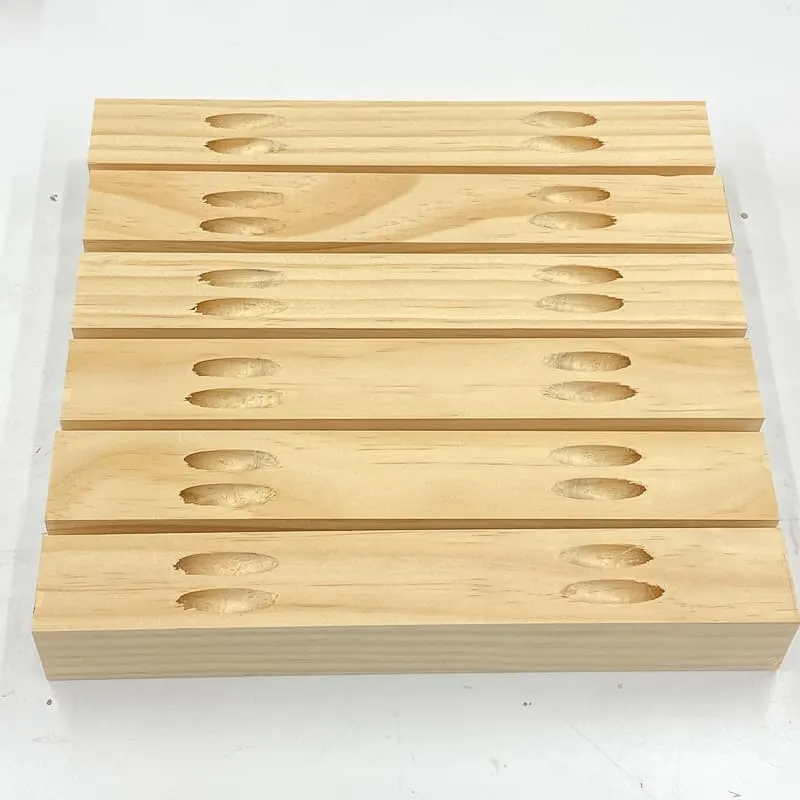
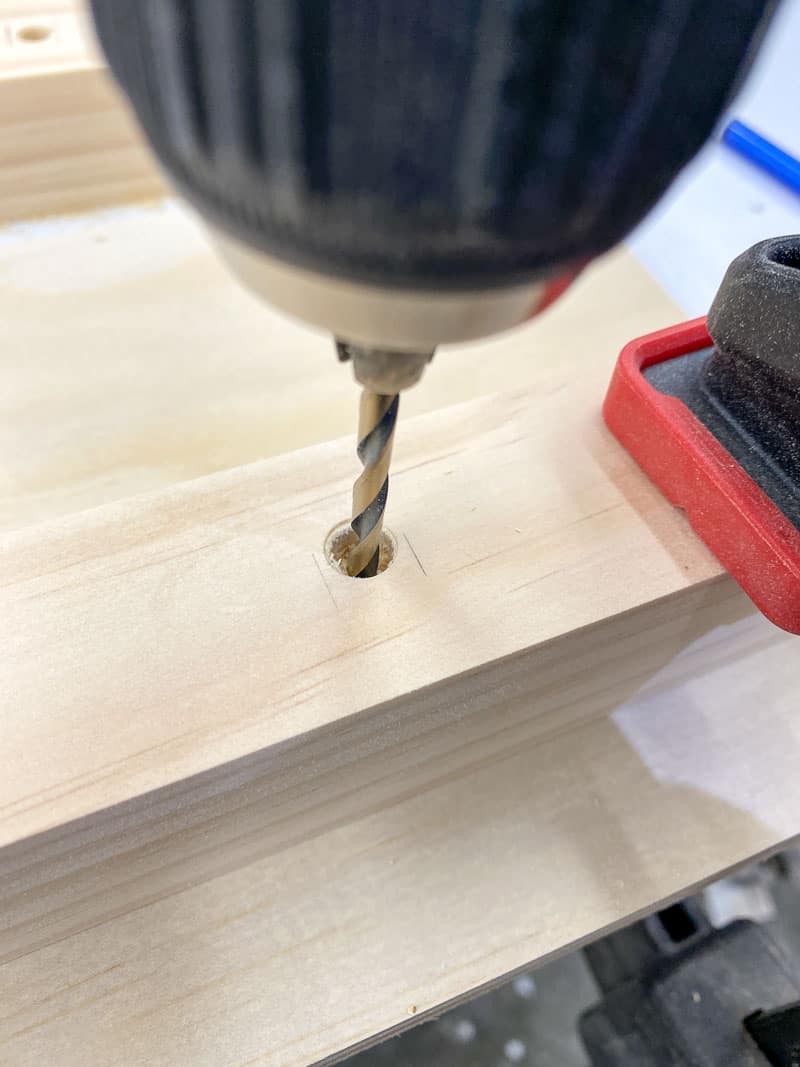
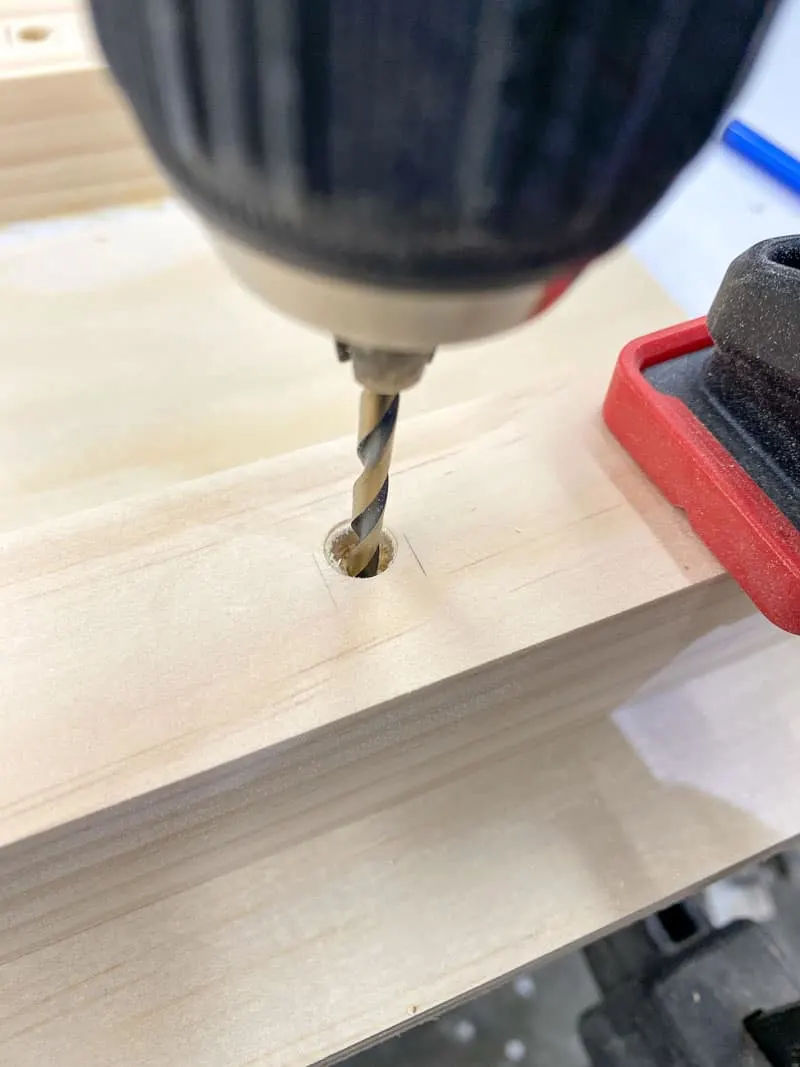
On the opposite side, I drilled a counterbore hole through the middle of each piece. This will allow me to use the same 2 ½" pocket hole screws as the rest of the project, with the washer heads hidden inside the hole.
Instead of a countersink bit, I first used a small Forstner bit that was the same size as the head of the screw. Then I followed up with a regular drill bit through the middle of the hole.
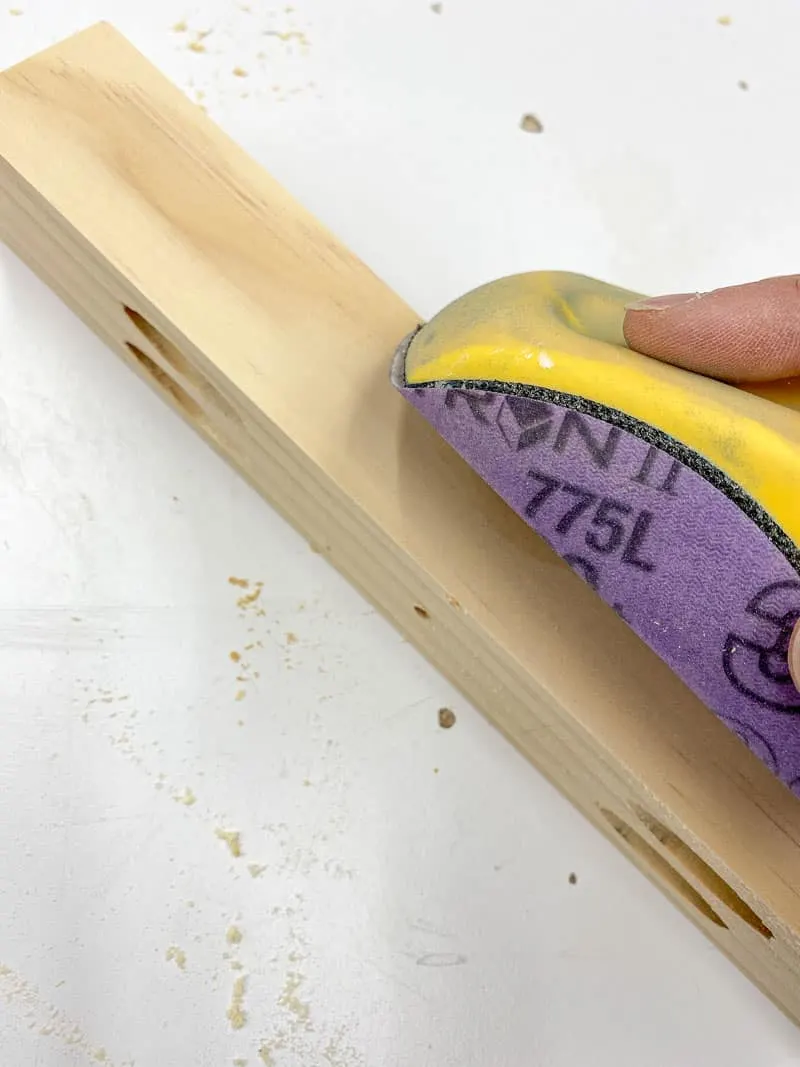
Then I gave all the pieces a quick sanding, making sure to soften the sharp corners slightly with a sanding block.

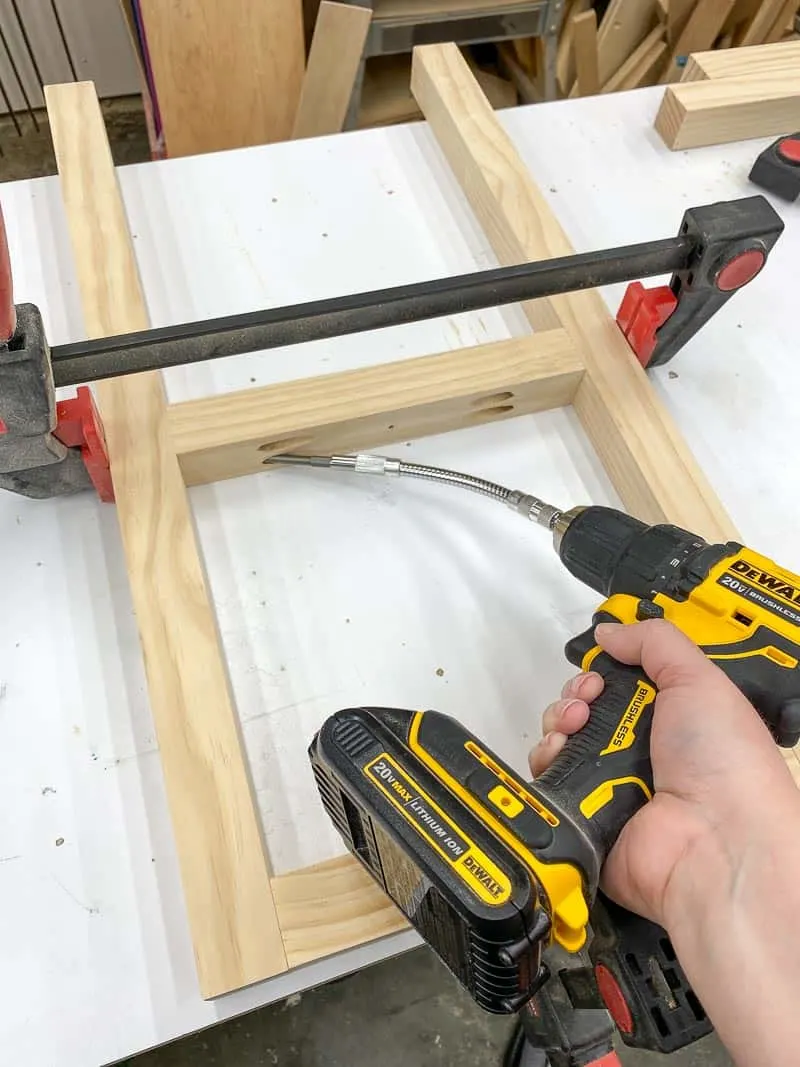
Now I could finally build the frame! The top rung was easy to attach, but the middle and bottom ones were too tight for my drill to fit. I used a flexible right angle drill adapter to attach the pieces together with 2 ½" pocket hole screws.

When the legs are complete, they should look like this!

Assemble the top and shelves
I got these 2x4s from a neighbor who was remodeling their house. They had been sitting outside for a while, and weren't looking so great. Luckily, that just makes the end table more "rustic!"
All the pieces for the top and shelves are cut to the same length. I tried to keep the most interesting knots and dents, while discarding the worst of the splits and mangled parts. Then I played around with the pieces until I found an arrangement I liked.
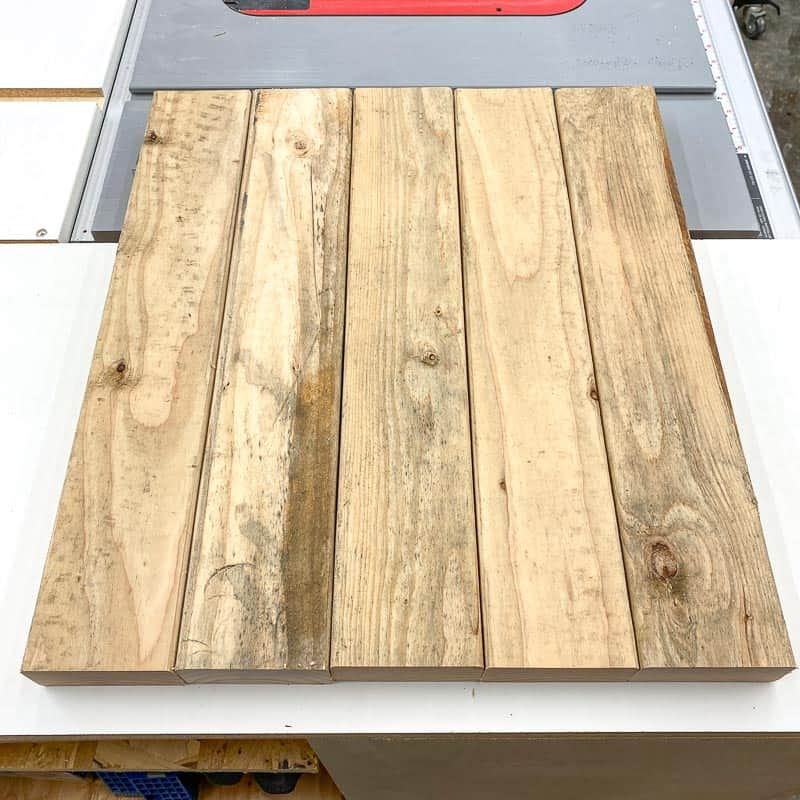
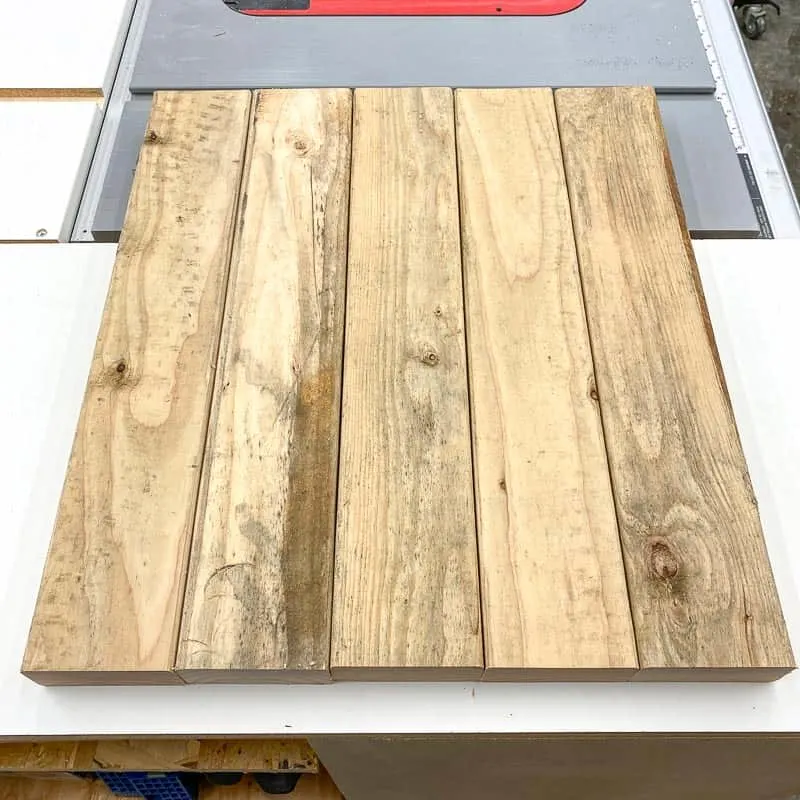
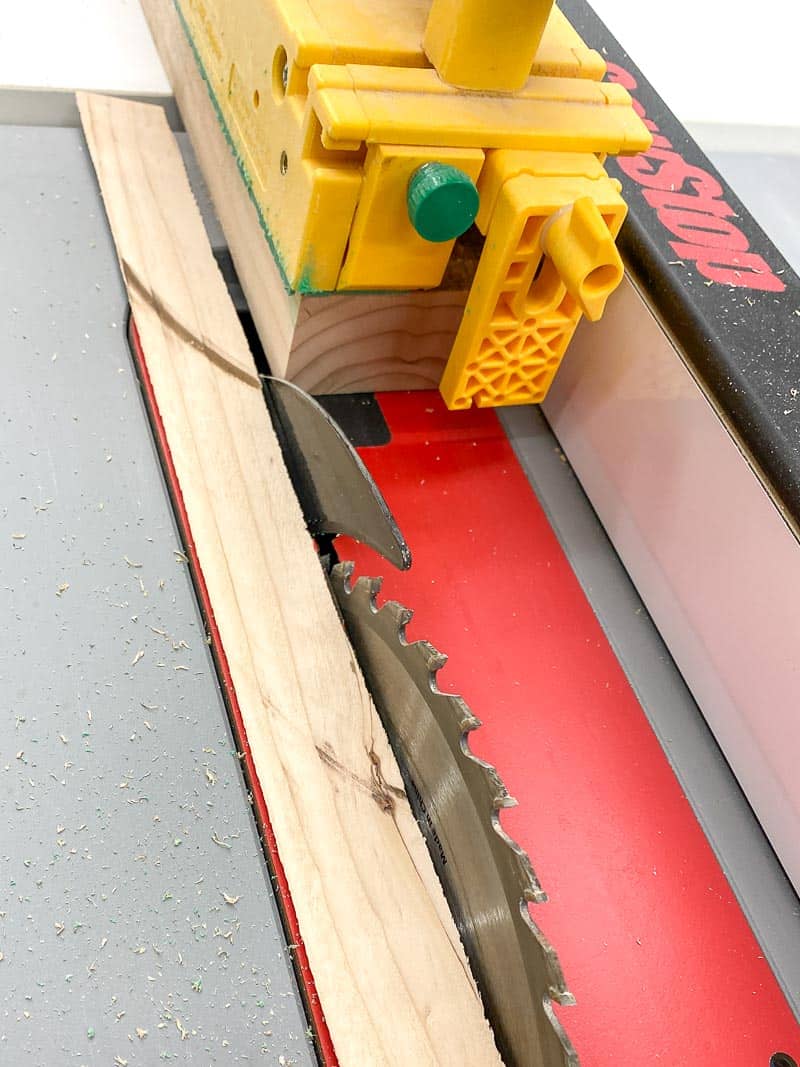
I trimmed off the edges of the boards that will be in the middle of each panel, so the glue will adhere well and there won't be a groove between each board. I left the rounded corners on the end pieces, and chose the boards with the most character for the sides. This part is optional if you don't have a table saw!
I applied wood glue to the cut edges, then clamped them together with parallel clamps. If you didn't trim the boards first, I recommend sanding these edges smooth to get the best surface contact possible for the glue to adhere properly.
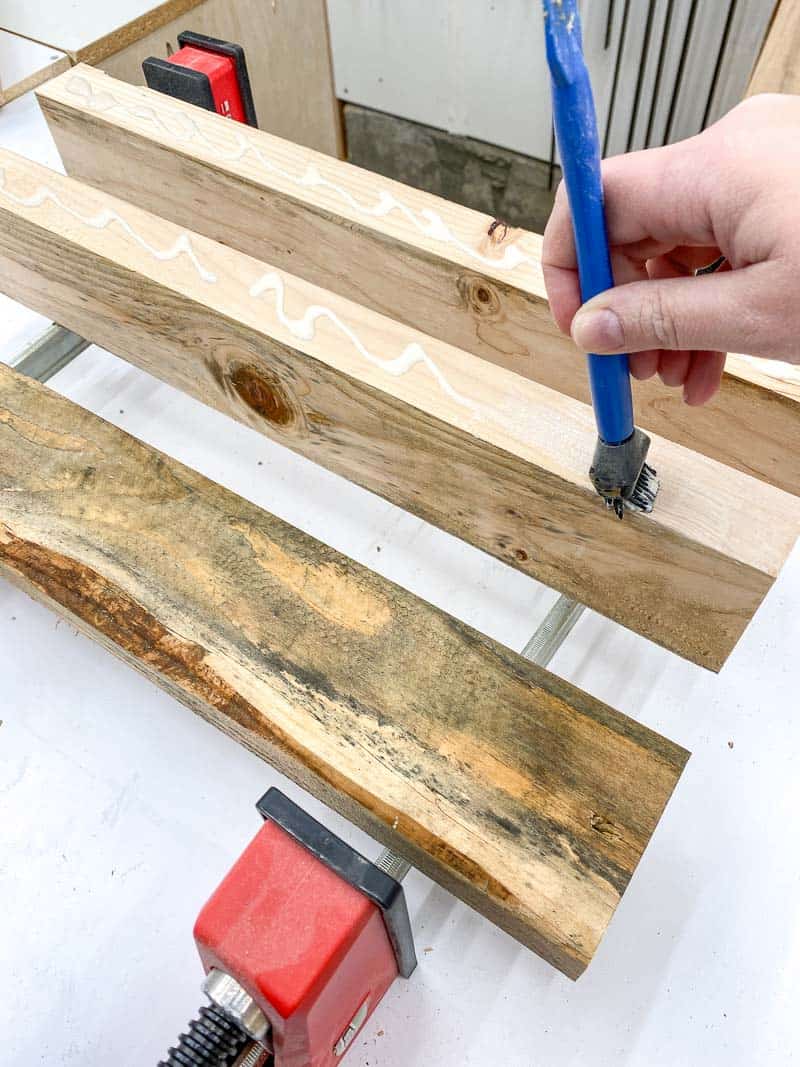
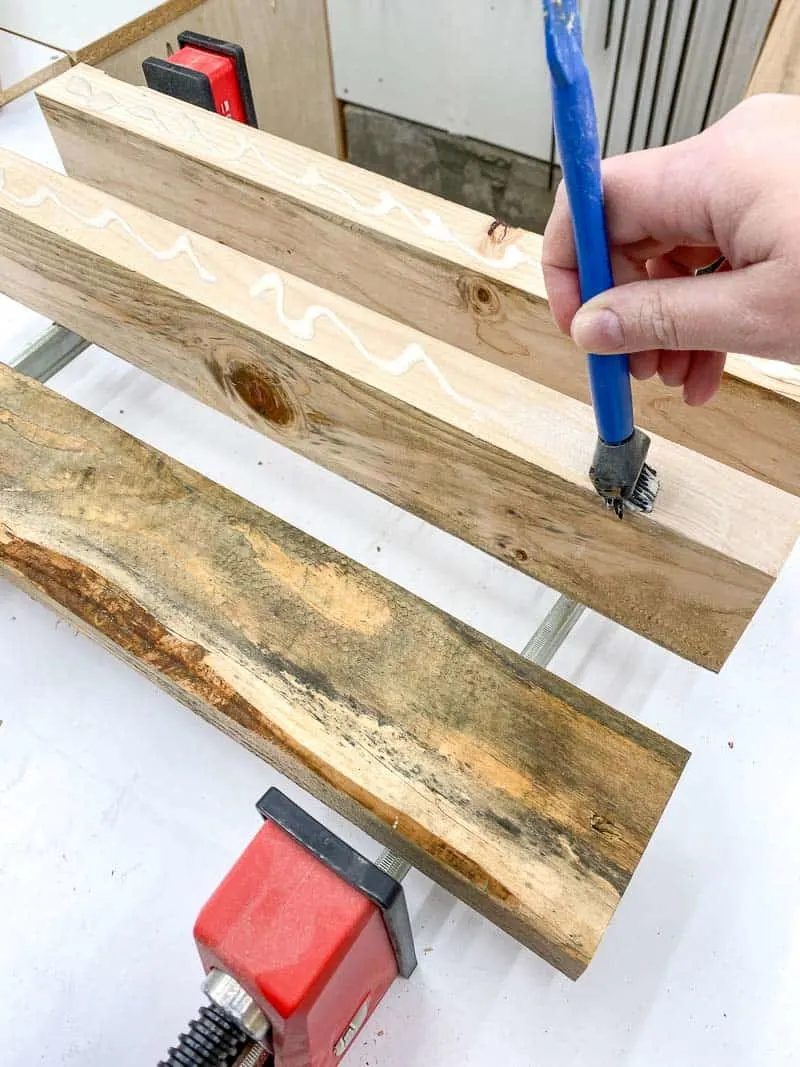
The ends were a little wonky, so I pulled them into alignment with more clamps along the seams. By the time I had glued up the top and the two shelves, I had used almost every clamp I own! Leave the glue to dry overnight.


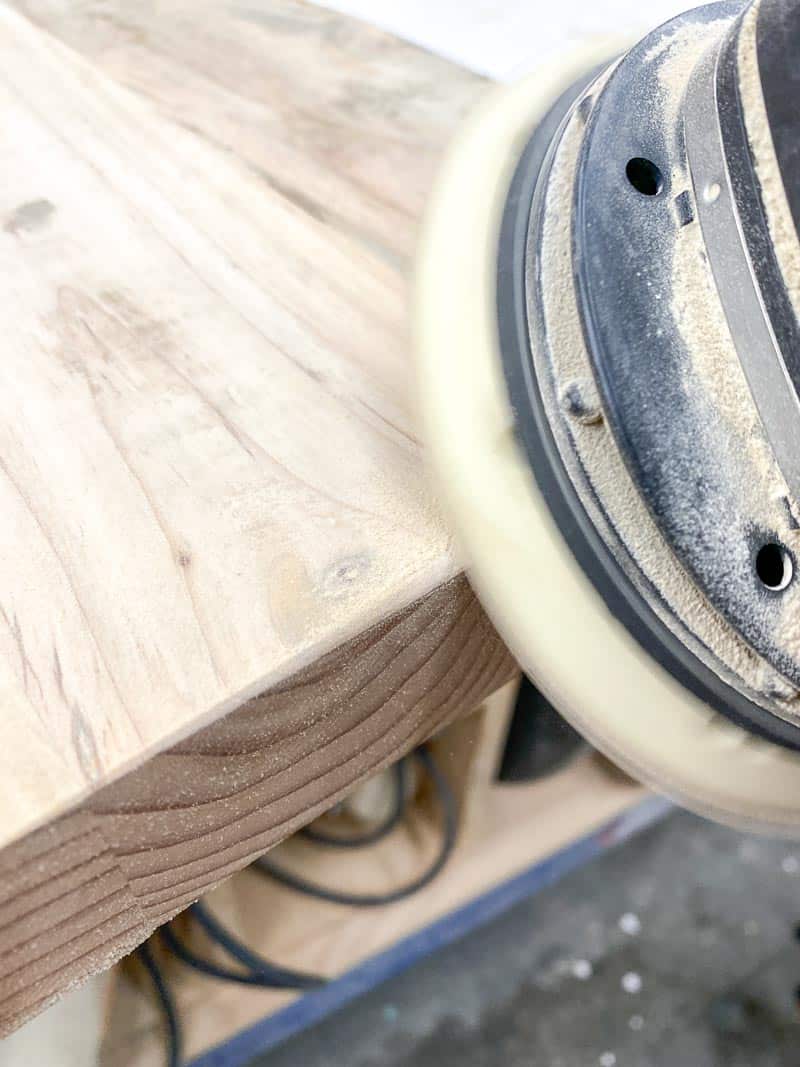
Once the glue is dry, give all the surfaces a thorough sanding, starting with 80 grit and working up to 220 grit. I tried to keep as much texture as I could while still making it smooth to the touch.
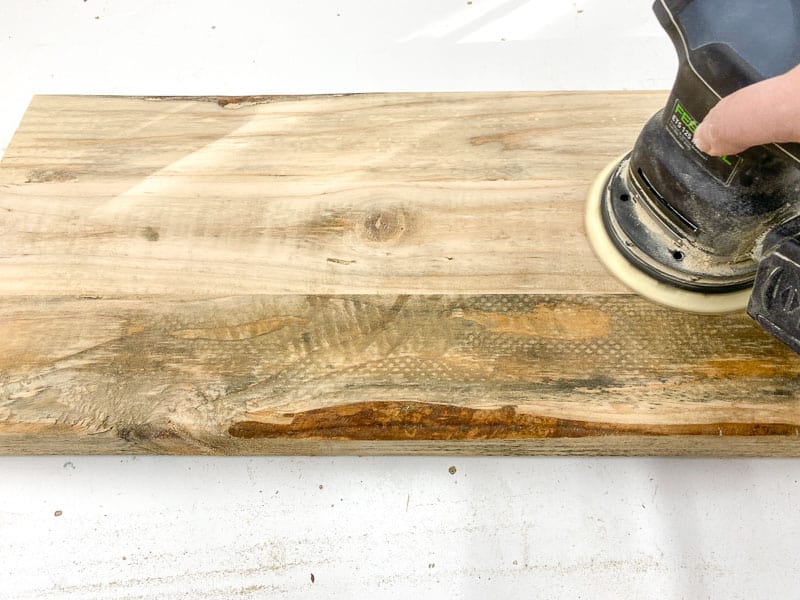

I also rounded over the fresh cut edges so they matched the other corners. Once I removed the sanding dust, all the pieces were ready for finish!

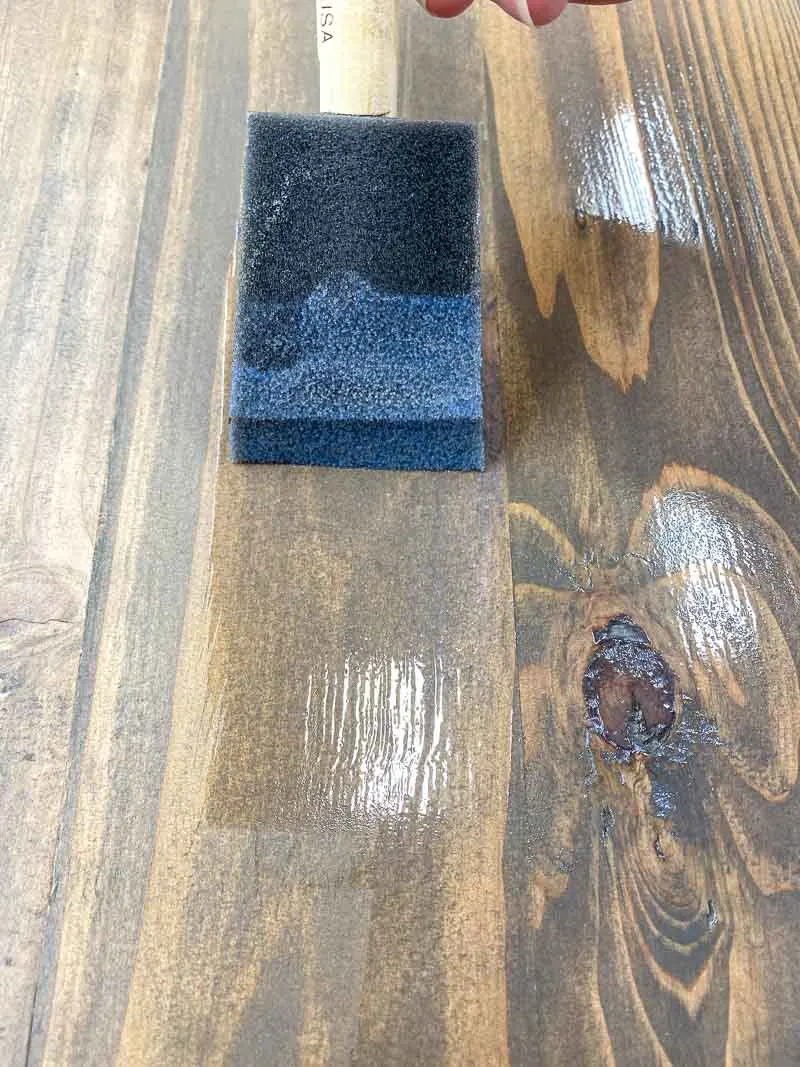
Apply finish to the frame and shelves
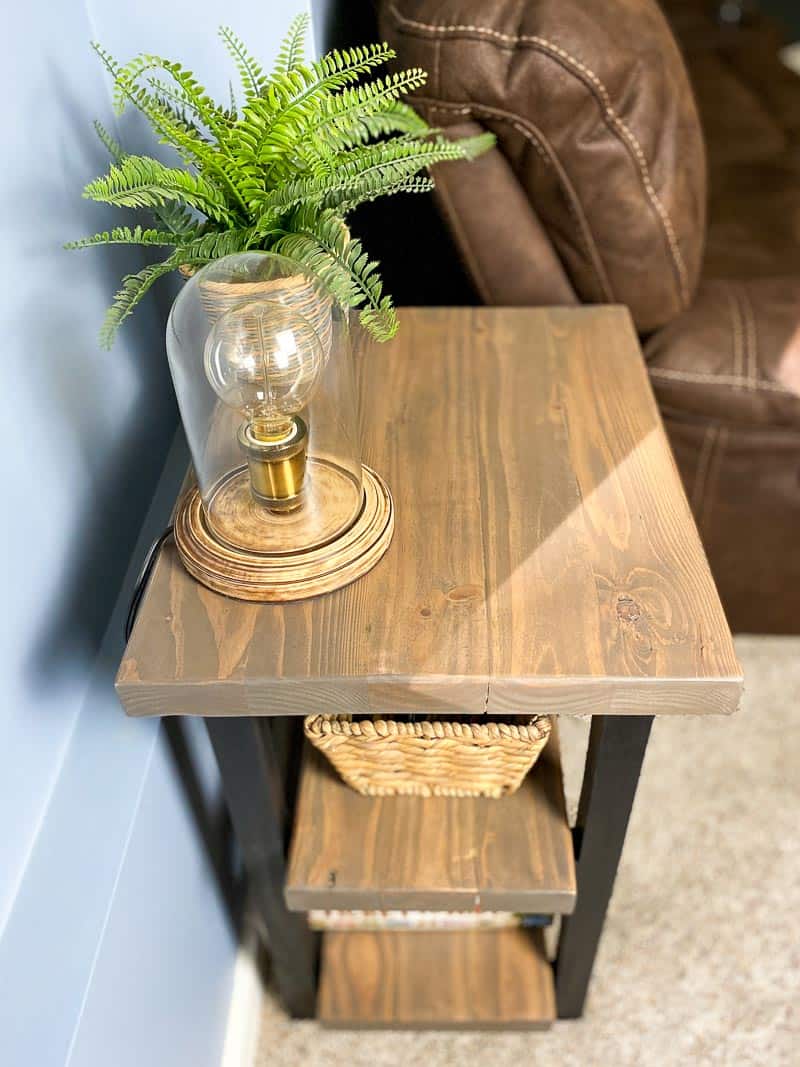
I originally planned to paint the frame black, but I decided to try staining it with India ink instead. This stuff is super black, but still allows the grain to show through.
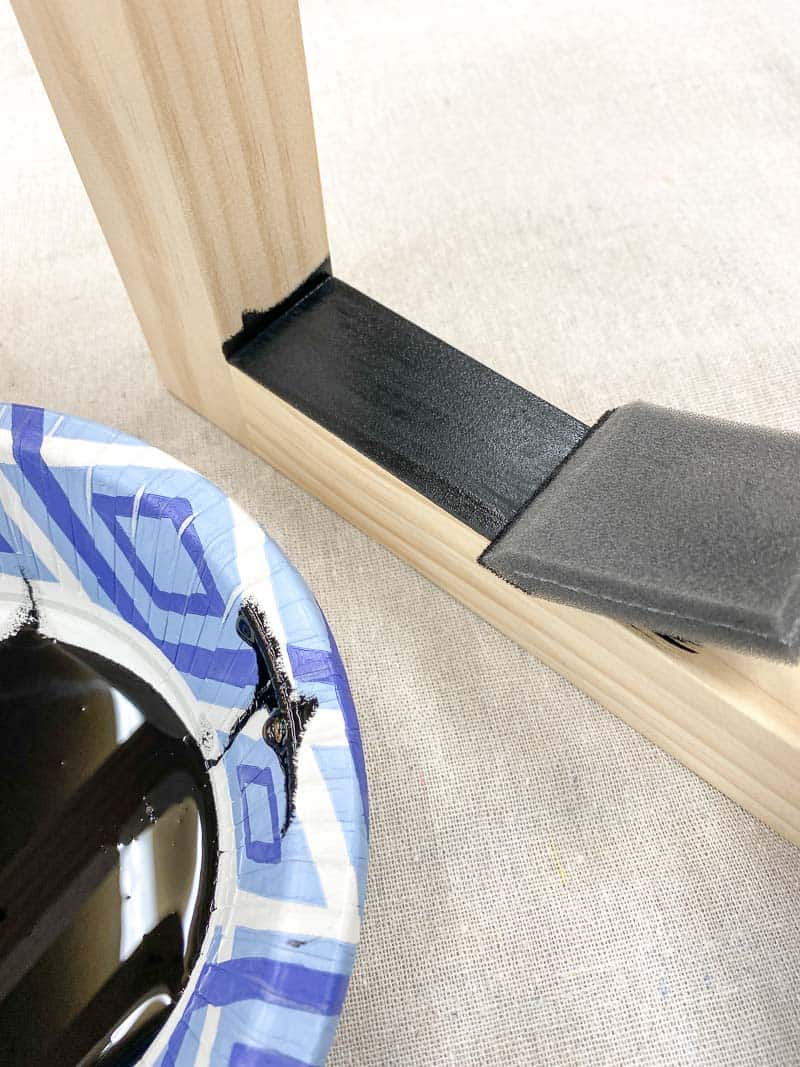

The ink soaks in really fast, without any drips. I needed two coats to get the deep black I was looking for, but I didn't have to wait in between coats like regular stain. Once it was dry, I applied just one coat of wipe on polyurethane to seal it in and give it the metal look I was going for.
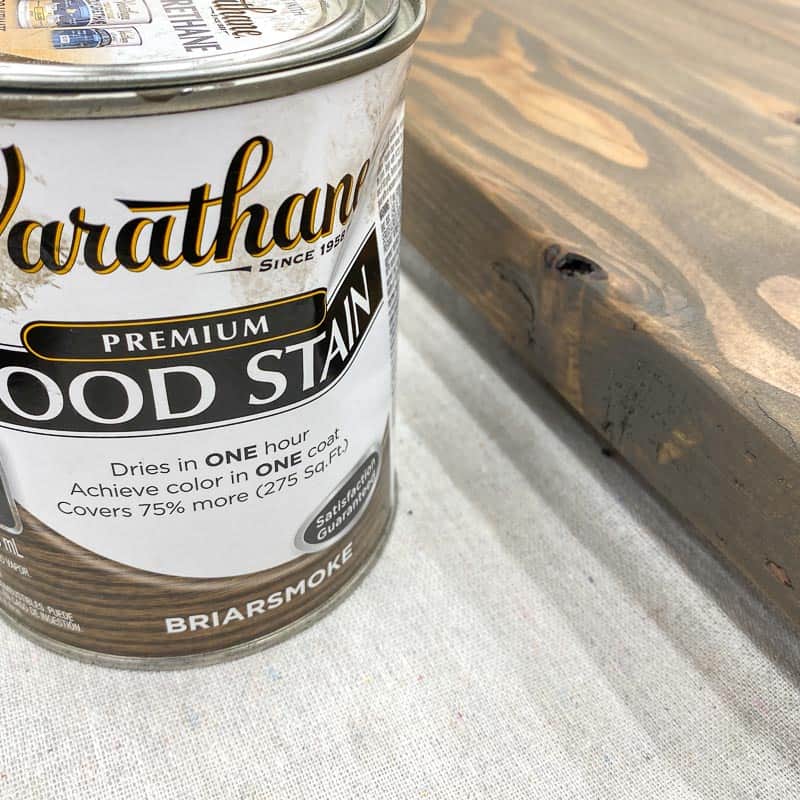
For the shelves and top, I went with Varathane's Briarsmoke stain. It was the closest match to the inspiration piece, and gives the wood a nice rustic look. I also used wood conditioner to prevent the stain from becoming blotchy on this old wood.

This stain looks gray in the can and goes on opaque, but it turns a nice brownish-gray when you wipe off the excess. If you want a really gray stain, check out my comparison of six different gray wood stains to find the hue you're looking for!

Once the stain was dry, I applied three coats of Polycrylic to both sides. Polycrylic dries clear, so it wouldn't leave yellow blobs in the knots and holes of the reclaimed wood. You can learn more about the difference between polycrylic and polyurethane here. Sand lightly with 220 grit sandpaper between coats.

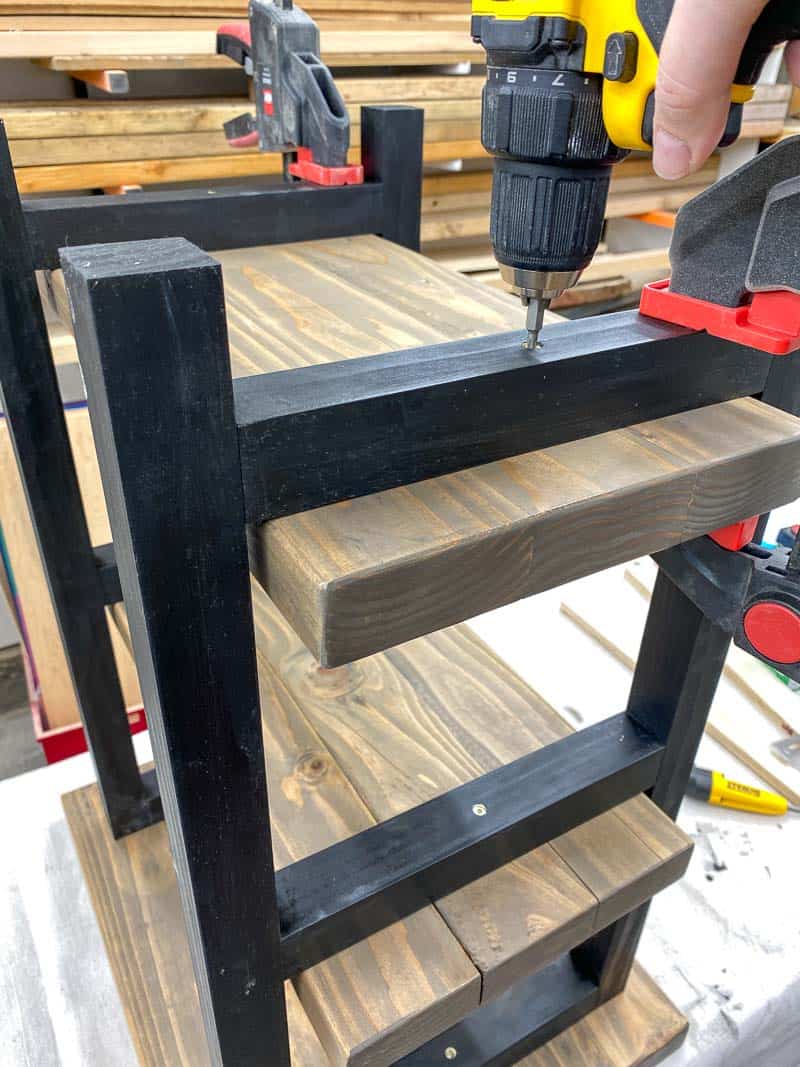
Attach the Shelves and top to the legs
Flip the top over so the underside is facing up. Place the legs upside down on top, leaving an even overhang on the ends and sides.
Once everything is lined up, clamp the leg down so it doesn't shift. Then screw the top into place through the counterbore hole in the top of the legs.

Flip the piece over so it's standing upright, and slide the middle shelf into place. There was a little extra space on either side of the shelf since I trimmed off the edges of the 2x4s, but they should fit snugly if you skipped that step.
Clamp the shelf into place, then screw it down using a right angle drill attachment and 2 ½" screws.
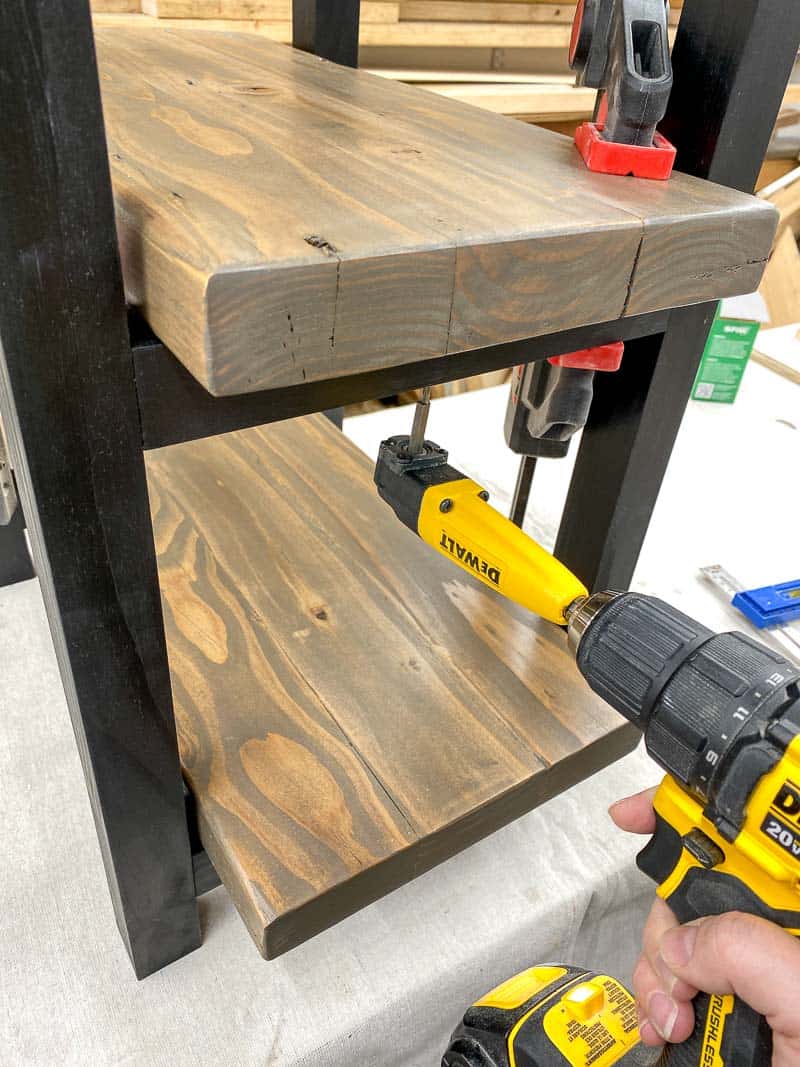

Align the bottom shelf, clamp it into place, then flip the whole thing over again to screw it in.

I noticed some fuzzy fibers on the black legs (I wasn't thinking and lay the legs on the canvas drop cloth before the finish was completely cured), so I rubbed them down with a super fine scrubbing pad. It removed the fibers and buffed the finish for the matte black metal look I was going for!
That's it! You're done!
This DIY rustic end table fits perfectly in this awkward space next to the couch in our basement family room!
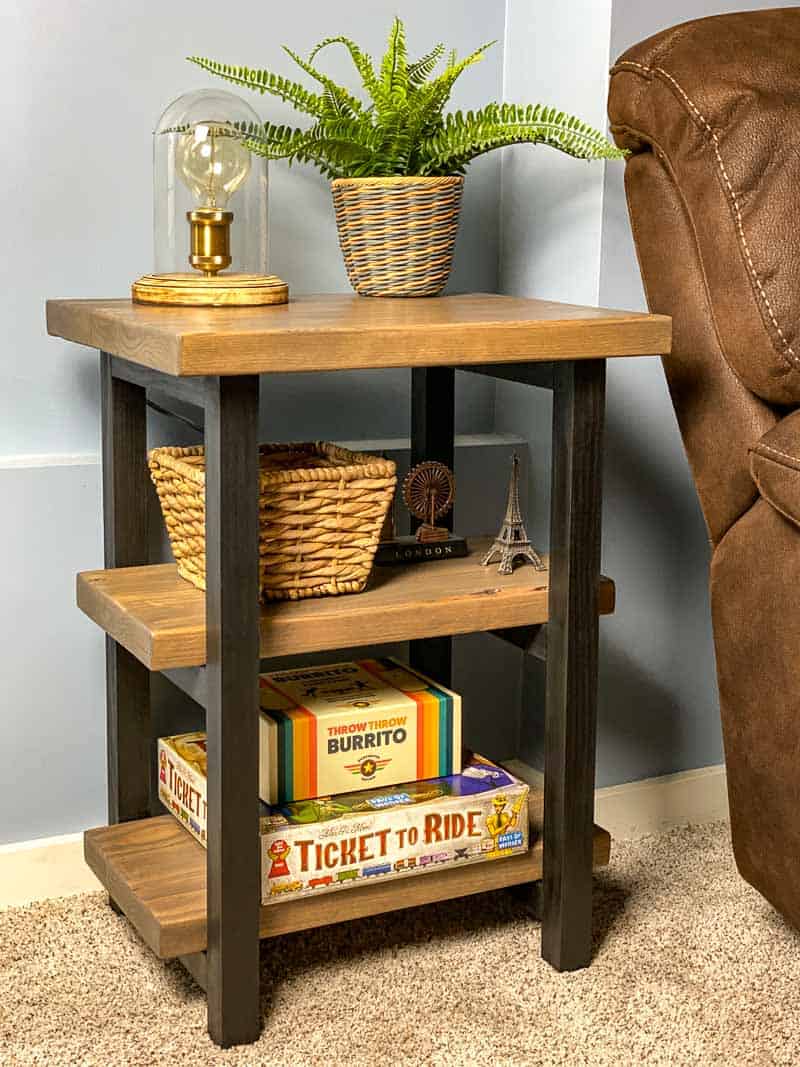

It hides the gap between the recliner back and the wall, and sits back from the arm far enough so that you won't hit your head on the corner while laying down on the couch. It also doesn't block the button for the recliner, which is the reason why we didn't have end tables down here to begin with!

The shelves hold our favorite board games (if you ever wanted to throw a burrito at your friends and family, you need this game!), and a few souvenirs from our travels.
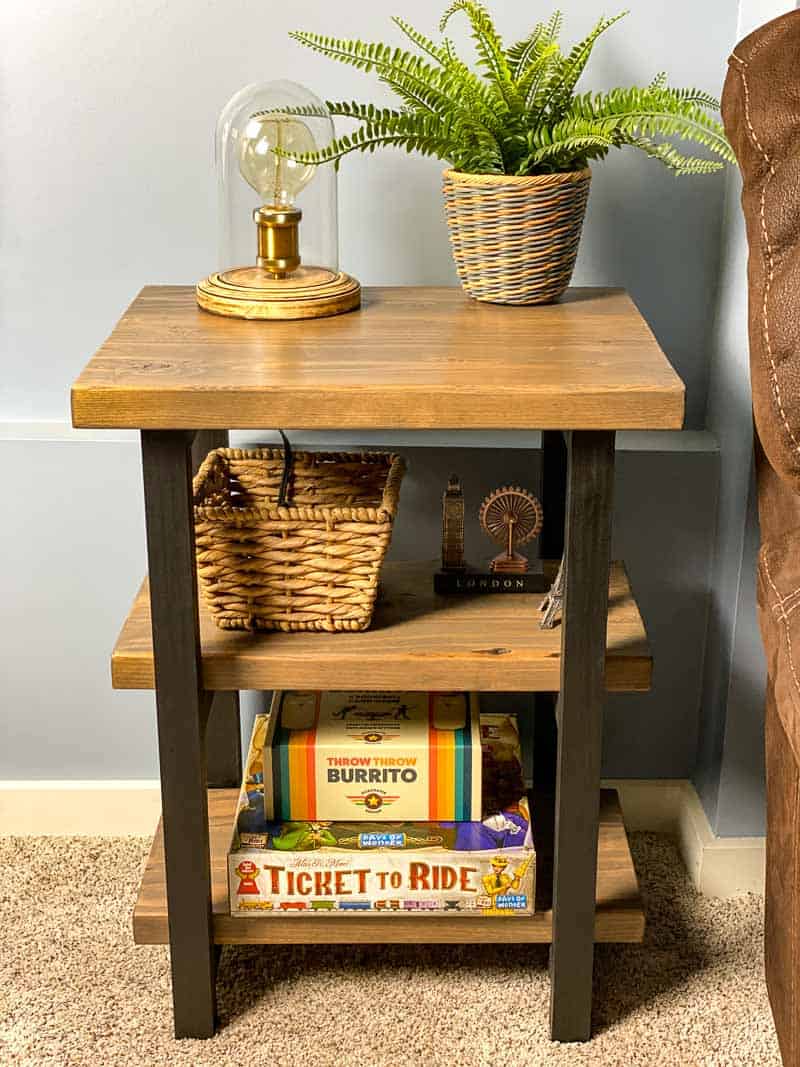
What was once a dirty, ugly pile of 2x4s is now a rustic side table full of character! Some of the seams cracked as the wood dried, but it just adds to the look. 🙂
So how does it compare to the original, store-bought version? They look pretty similar, but the price tag certainly doesn't! I think a second coat of stain would have darkened the wood enough to be a perfect match.


If this isn't quite what you were looking for, you can find 20 more DIY end table ideas here!
I'm thinking of making a console table in the same style with the rest of the lumber. Let me know if you want to see that project in the comments below! In the meantime, grab the plans to make your own rustic end table and get building!


Jess
Monday 23rd of November 2020
Hi there. New to this site but loving it! This style table is EXACTLY what I’m trying to make but more in the size of a sofa table or console table. Are the dimensions easily adaptable?? Thanks so much! Looks beautiful.
Vineta
Monday 23rd of November 2020
You can absolutely make it longer and taller! Just cut the boards longer for the shelves and top, and make the legs taller as well. You might want to add a third leg in the middle, just to support the weight a little better. I'm thinking of making a console table version for myself!
Lee
Thursday 5th of November 2020
Hi Vineta, thank you so much for this amazing project! I'm brand new to woodworking so I have a couple questions: 1) what's the advantage of using a forstner bit instead of a countersink? I will need to buy one and want to understand the difference. 2) in the picture right before the legs are put together you link to a "flexible right angle adapter" that doesn't look like the bendy, silver adapter shown in the picture. I'm confused. Thanks in advance for taking the time to school me!
Vineta
Thursday 5th of November 2020
I used the forstner bit instead of a countersink bit because it sinks the head of the screw further into the wood. If you need to buy one or the other, I would recommend the countersink bit. Either one would work, and the countersink bit is more useful on other woodworking projects.
I used the flexible right angle adapter because I had loaned my favorite one to a friend. I really DON'T recommend the flexible one, because I was having trouble keeping the bit in the screw head and it would spring back randomly. The ones I linked to are the kind I would recommend (and you can see I got it back at the end when I attached the shelves!)
Carol Whewell
Wednesday 4th of November 2020
Perfect size for small area and I like it better than the $300 version!!
Vineta
Thursday 5th of November 2020
Aw, thanks Carol! I like my version better too! :)
JD
Wednesday 4th of November 2020
Very cool Vineta. Thanks for sharing. I could really use something like this on our covered patio to maybe hold shoes. Would also make a really nice printer stand in my wife's office space.
Vineta
Wednesday 4th of November 2020
Those sound like great ideas! This little table is perfect for so many locations around the house!
Mart
Wednesday 4th of November 2020
Good explanation, good construction, great stain finishing. It looks like the real thing, very good but for a fraction of the cost. It can go any where in the house. Thanks for posting it.
Vineta
Wednesday 4th of November 2020
Aw, thanks! It really is a versatile piece of furniture!