This DIY vertical planter wall allows you to grow tons of plants in removable boxes! Get the woodworking plans to make your own!
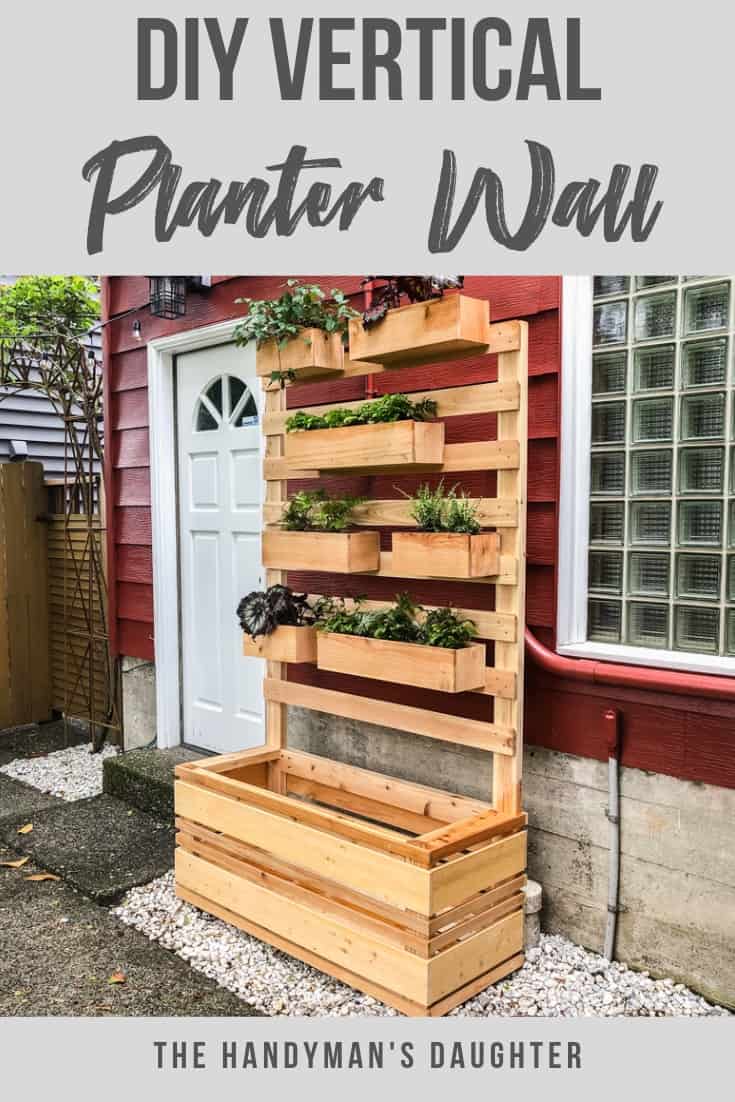
Short on garden space? Go vertical!
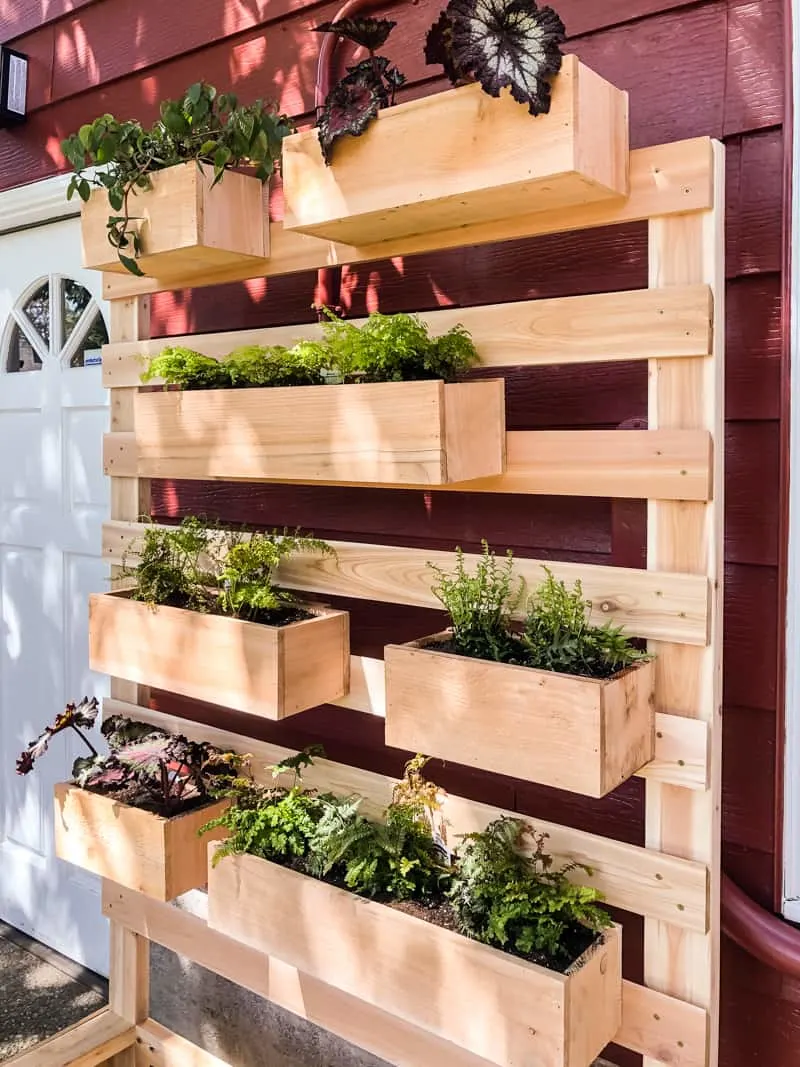
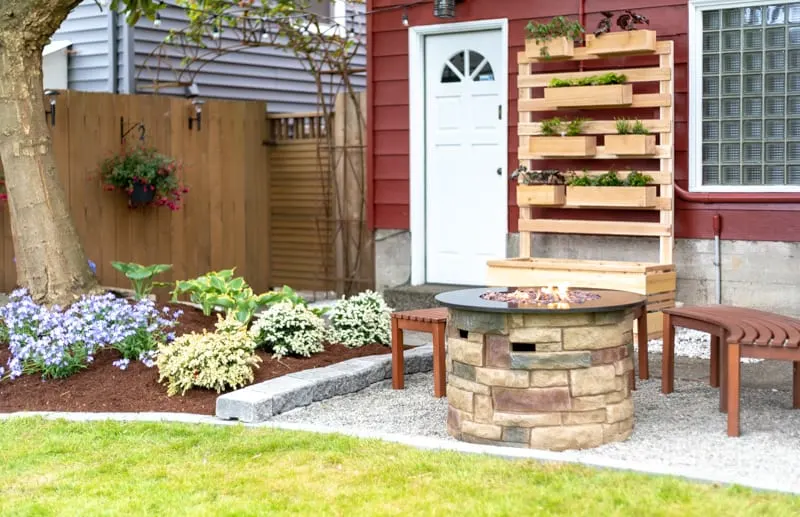
This DIY plant wall is easy to build and fits on a deck, patio or balcony. It's also a great way to hide eyesores like pipes or air conditioner units. It's freestanding, so you can place it anywhere without anchoring it to the house.
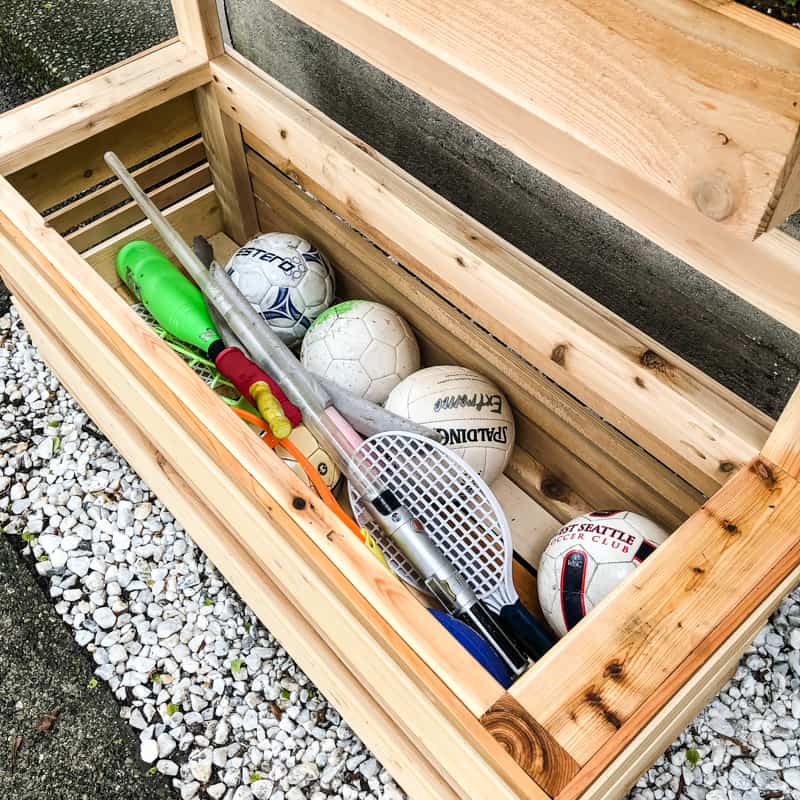
Each individual hanging planter box lifts off easily so you can tend to your plants without reaching up high. The box at the bottom can be used as an additional planter, or for storage.
Get the plans for this vertical garden and get building!
This post contains affiliate links for your convenience. Purchases made through these links may earn me a small commission at no additional cost to you. Please visit my disclosures page for more information.
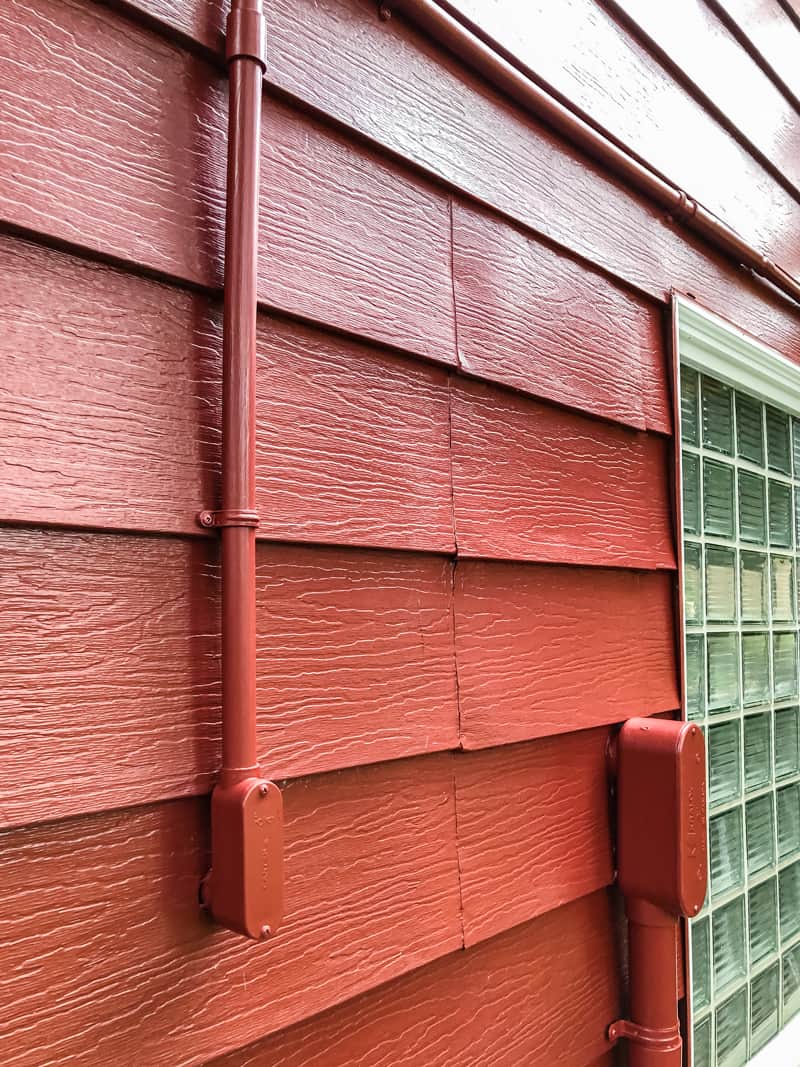
I've had this idea rolling around in my head for the last year, and I'm so glad it's finally done! I wanted to cover up the conduit and the patched aluminum siding on the back of the house in a way that didn't block access if we needed it.

We kept an outdoor storage bench for toys in this spot, but it fell apart and was repurposed into a potting bench. We still needed a place to store all my son's soccer balls, foam swords and light sabers, so combining storage and a vertical garden wall in one piece was the perfect solution!


Click the image below to get the vertical garden plans!


Not quite what you were looking for? Check out these other DIY wall planter ideas!
Materials Needed for DIY Vertical Planter Wall
- Eight 1 x 4 cedar boards
- Five 2 x 4 cedar boards
- Seven 6 foot long cedar fence pickets
- 1 ¼" outdoor wood screws
- 2 ½" Kreg Blue-Kote pocket hole screws
- 1 ¼" brad nails
- Wood glue
Tools Needed
- Table saw
- Miter saw
- Never used a miter saw before? Check out my guide on how to use a miter saw to get started!
- Kreg Jig
- Check out my tutorial on how to use a Kreg Jig and a comparison between the two most popular models to see which one is best for you!
- Drill
- Brad nailer
- Speed square
- Clamps
How to Make a Vertical Garden
This tutorial will show the basic steps for how to build a wall planter. The exact dimensions are included in the woodworking plans, along with illustrated assembly instructions.
Cut the Slats
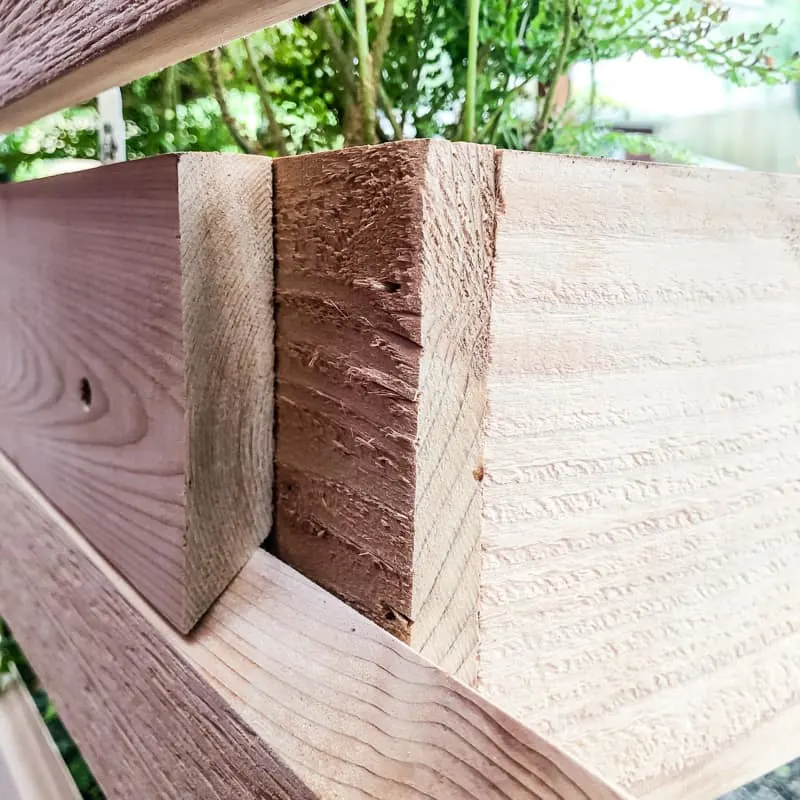
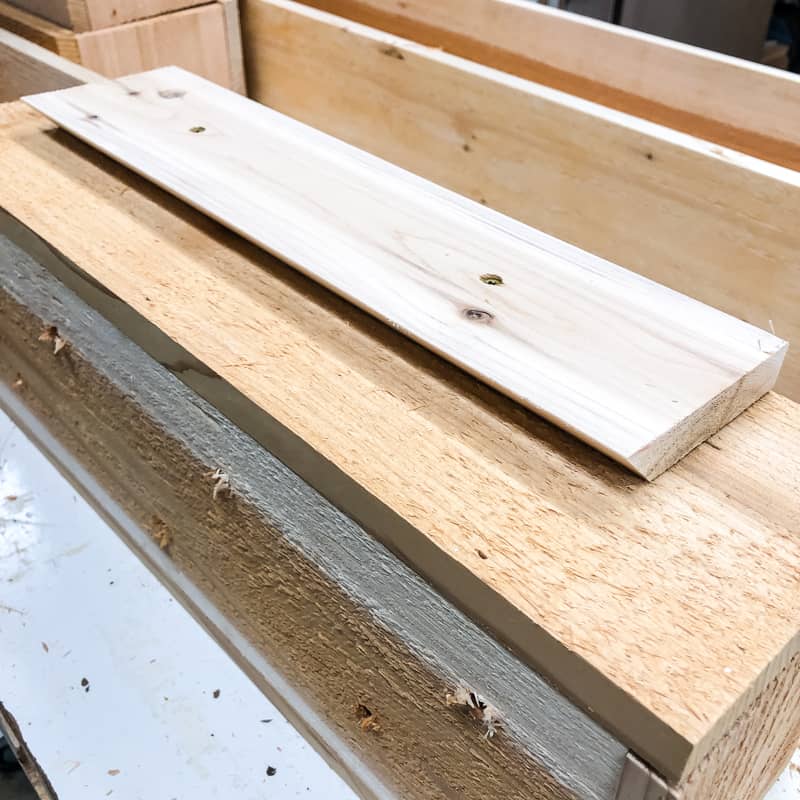
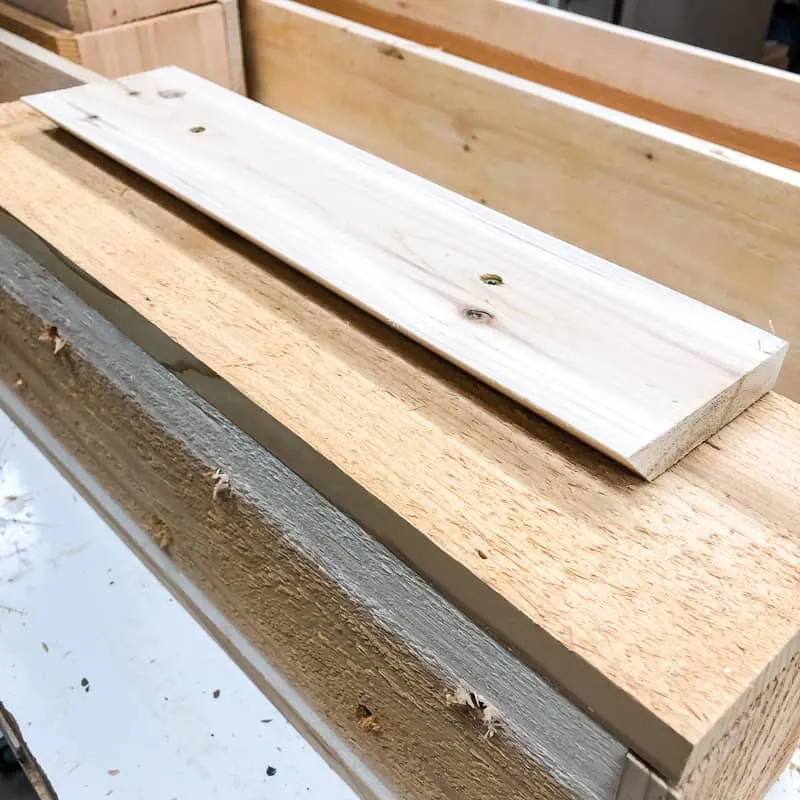
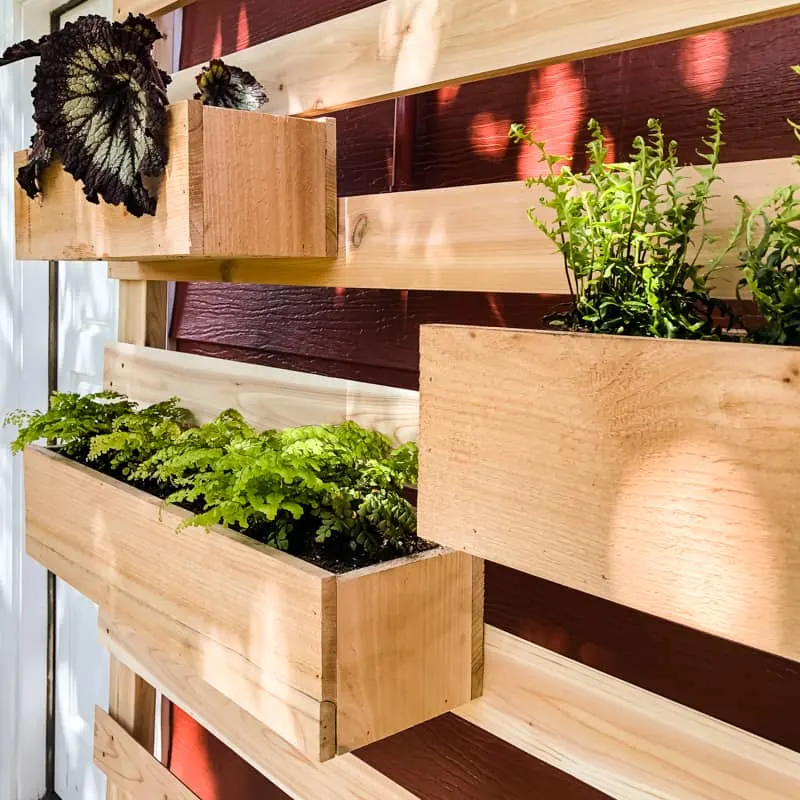
The trick behind the removable planter boxes are French cleats. This simple hanging method can hold a significant amount of weight and are really easy to make!
I set my table saw blade at a 45° angle and cut off the top edge of each piece. Cut a few extra boards to save for the cleat on the back of the planter boxes.

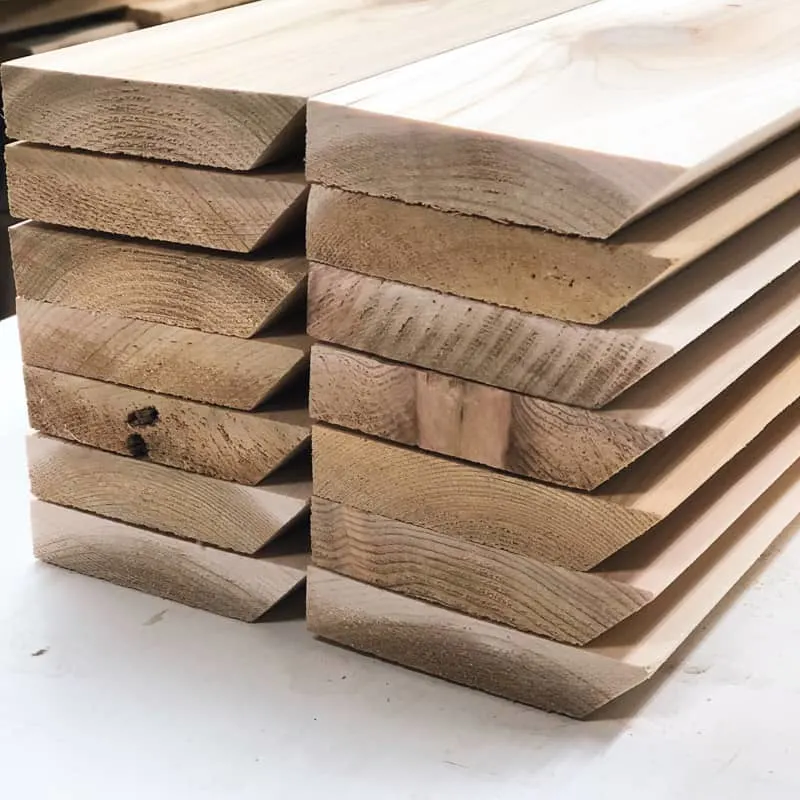
When the angle on the slats on the wall lines up with the corresponding 45° angle on the back of the planter box, it locks into place! Several boxes can rest on a single slat because the weight is distributed evenly.

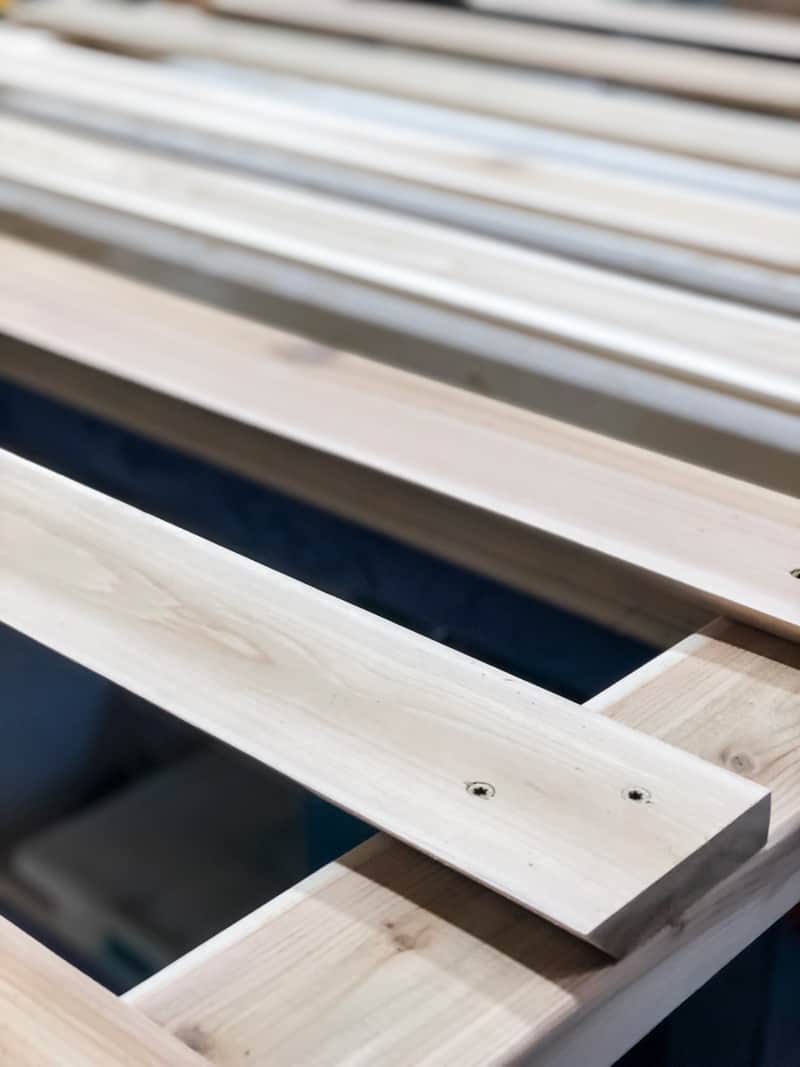
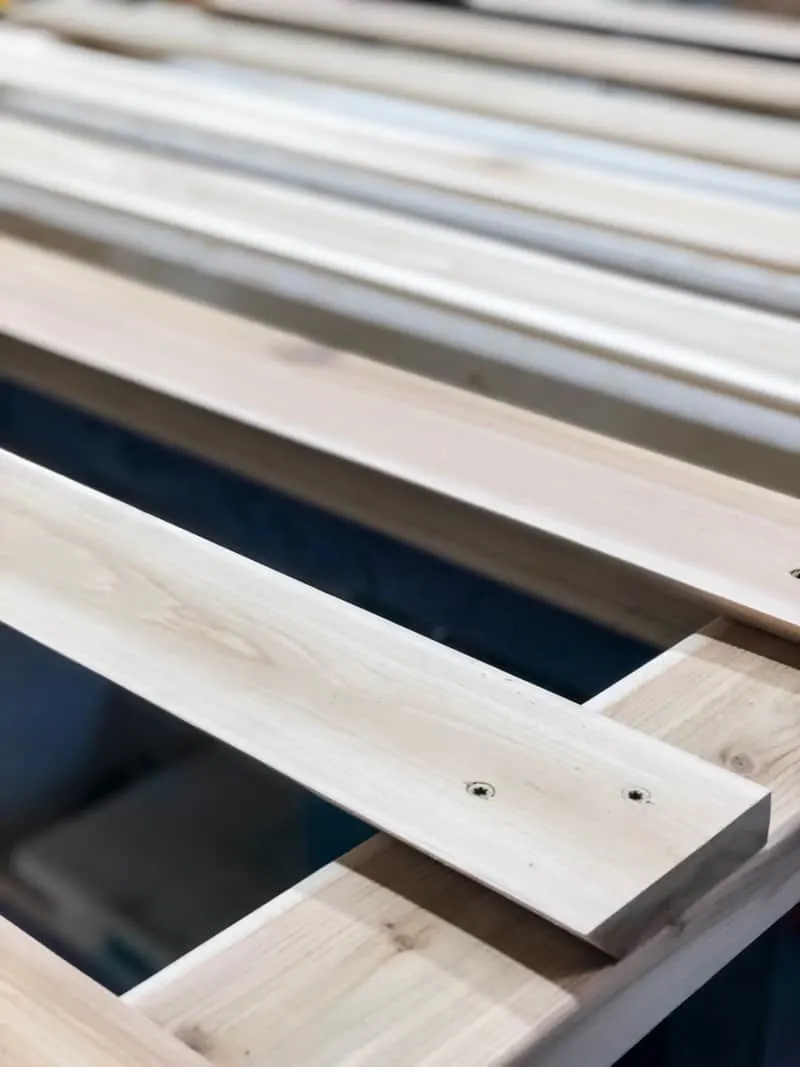
Attach the Slats to the Uprights
Attach the first slat to the top of the uprights with 1 ¼" outdoor screws. Countersink the screws so they don't interfere with the French cleat on the back of the planter boxes.
The angled edge should be facing up and the point facing out. I used two extra slats as spacers so I didn't have to rely on the tape measure each time.

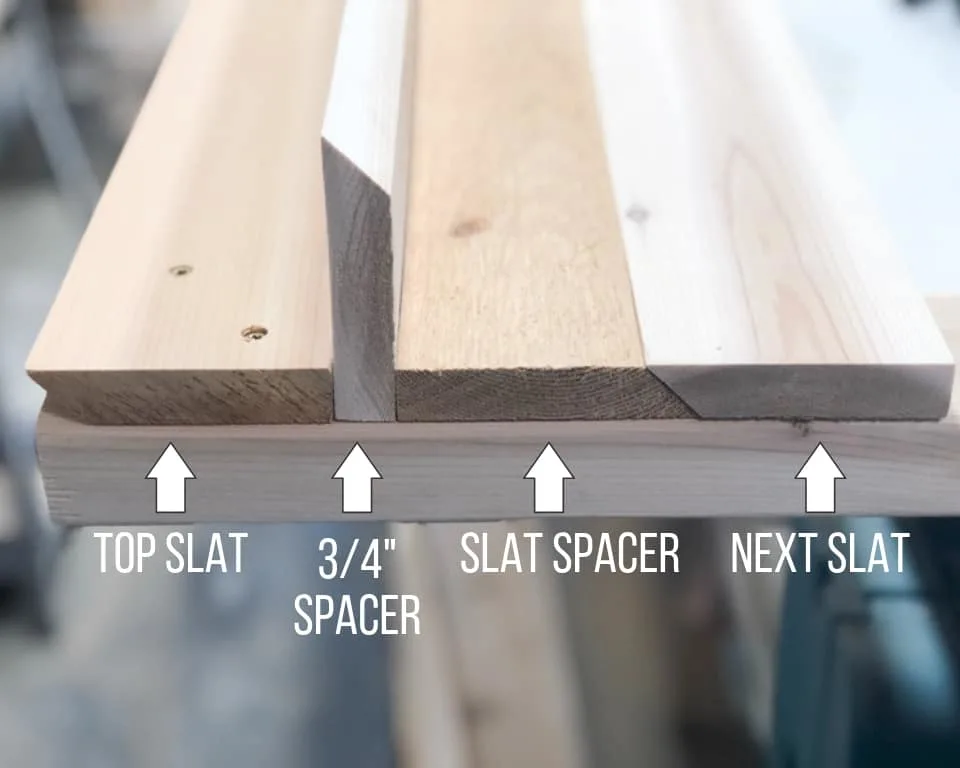
Continue adding slats down the length of the uprights, leaving enough space at the end for the large bottom box.
Build the Bottom Box Frame
The box at the bottom keeps this freestanding vertical garden . . . vertical. The weight keeps the whole thing from toppling over. However, if you live in an area that gets a lot of wind storms, I recommend anchoring it somehow so it doesn't fall over in a strong gust!
If you wanted to attach this vertical planter to a wall or fence, you can leave off the bottom box. Just screw the uprights to a flat surface!
Drill pocket holes into both ends of the longer 2x4 pieces. Attach two of them between the uprights of the planter wall with 2 ½" pocket hole screws. Attach the other two to the front legs the same way.
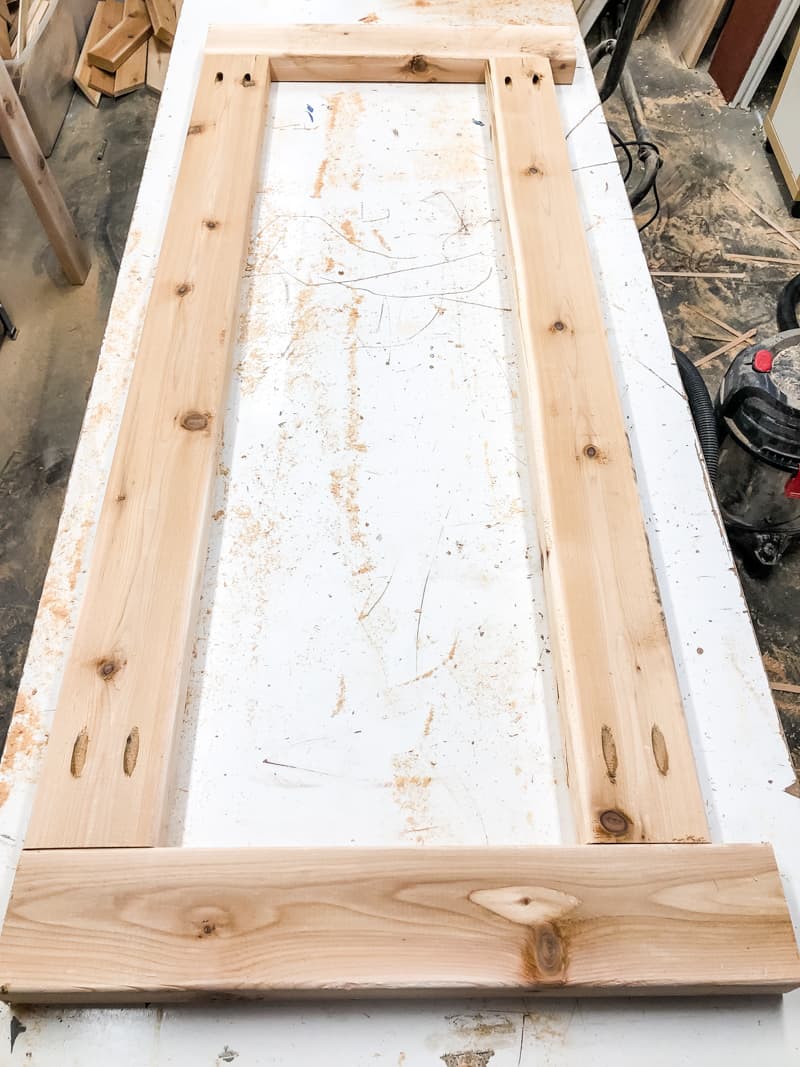

Drill pocket holes in both ends of all the shorter 2x4 pieces, then attach them to the sides of the box frame.
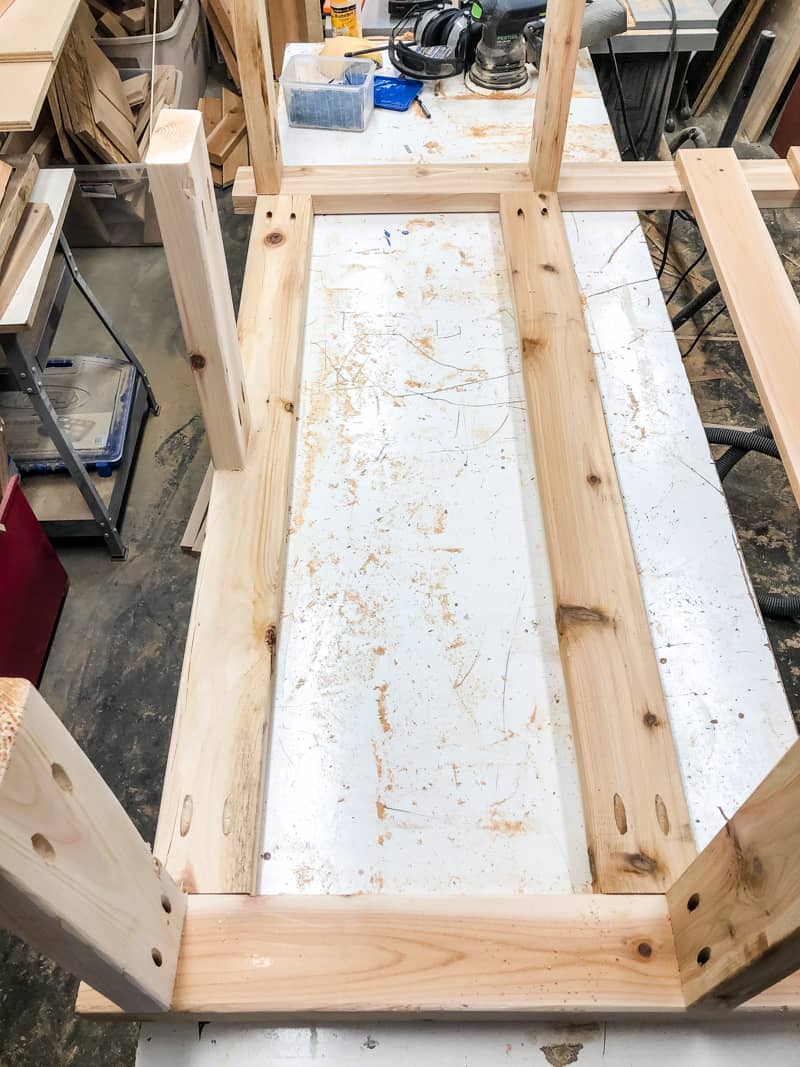

Screw the front leg section to the sides with 2 ½" pocket hole screws, then stand it up!
Enclose the Planter/Storage Box
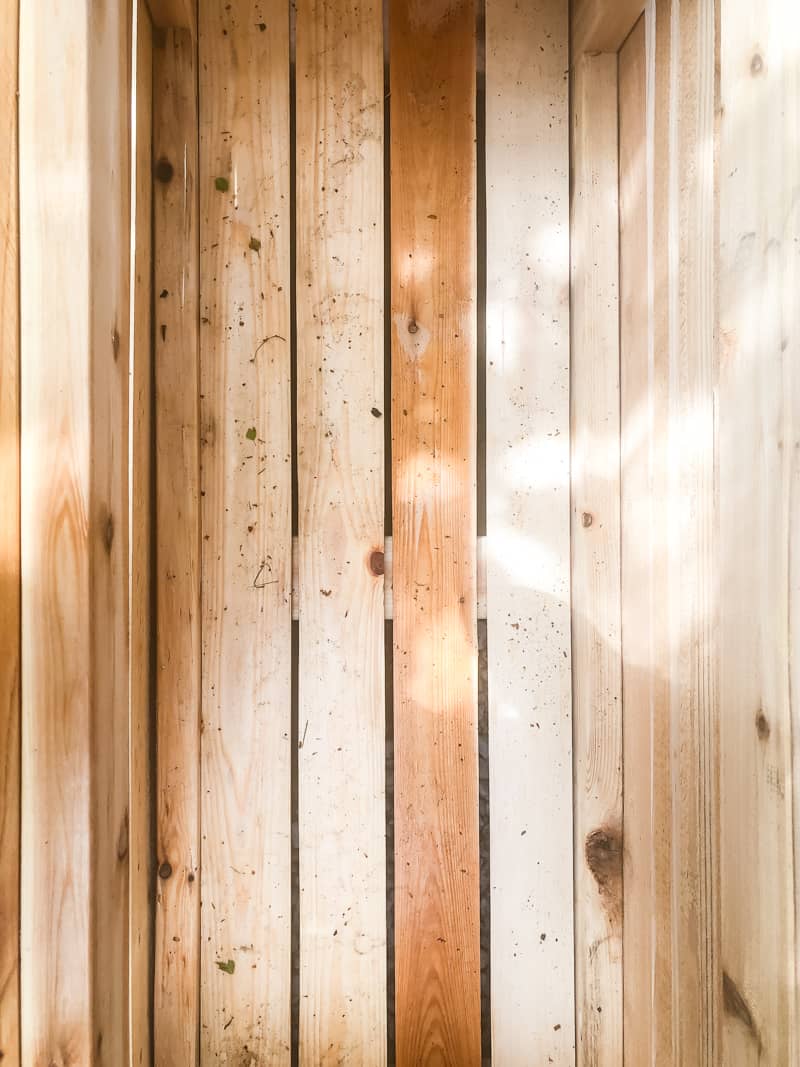
Cedar fence pickets are an inexpensive way to enclose the planter box. Since mine is an outdoor toy box, I decided to create slats instead of solid walls. You could also put a plastic storage bin inside to keep the contents dry and clean.
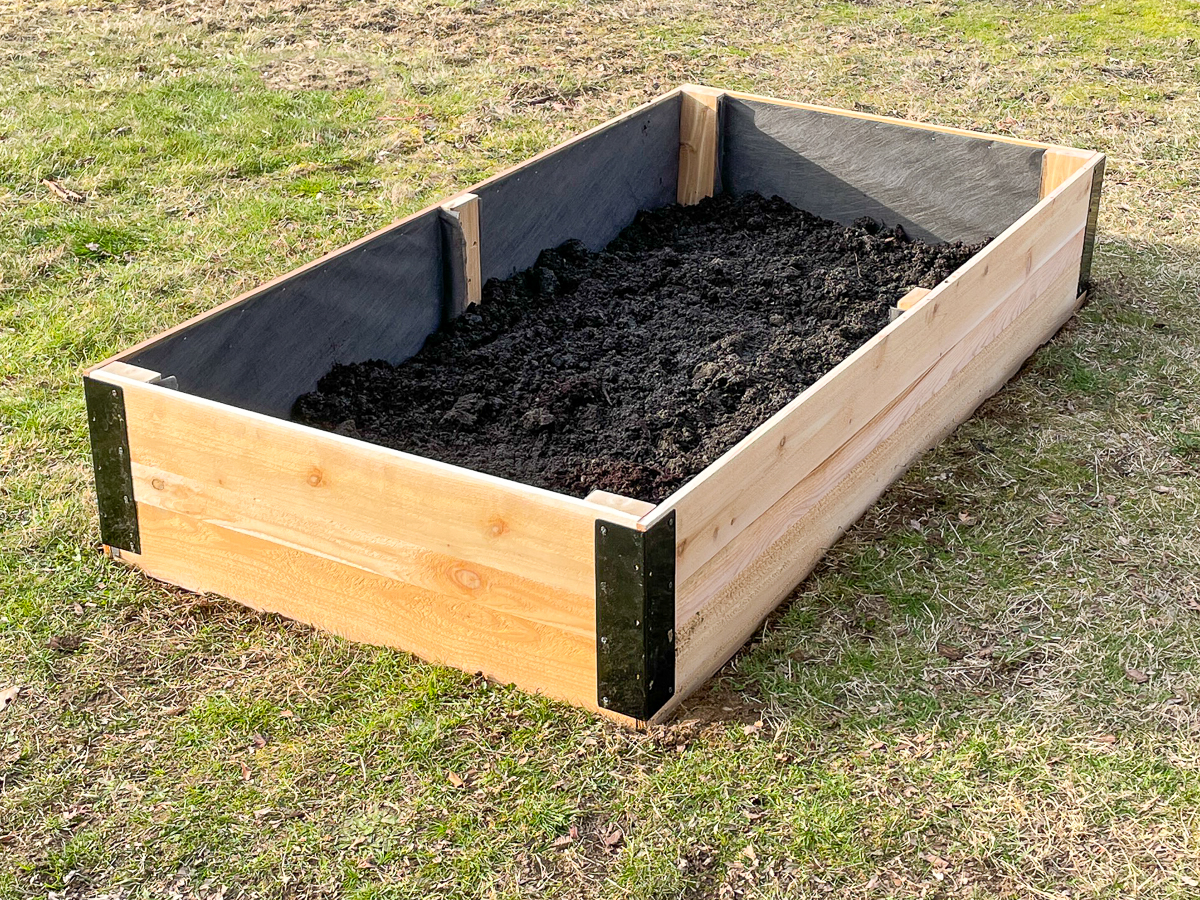
If you plan to fill the box with potting soil, you'll want to butt the edges together to form a solid wall. Consider adding landscaping fabric to the inside, similar to how I made these raised garden beds, to keep the soil inside.

Cut the cedar fence pickets to the width of your planter box sides, then nail them into place with 1 ¼" brad nails.
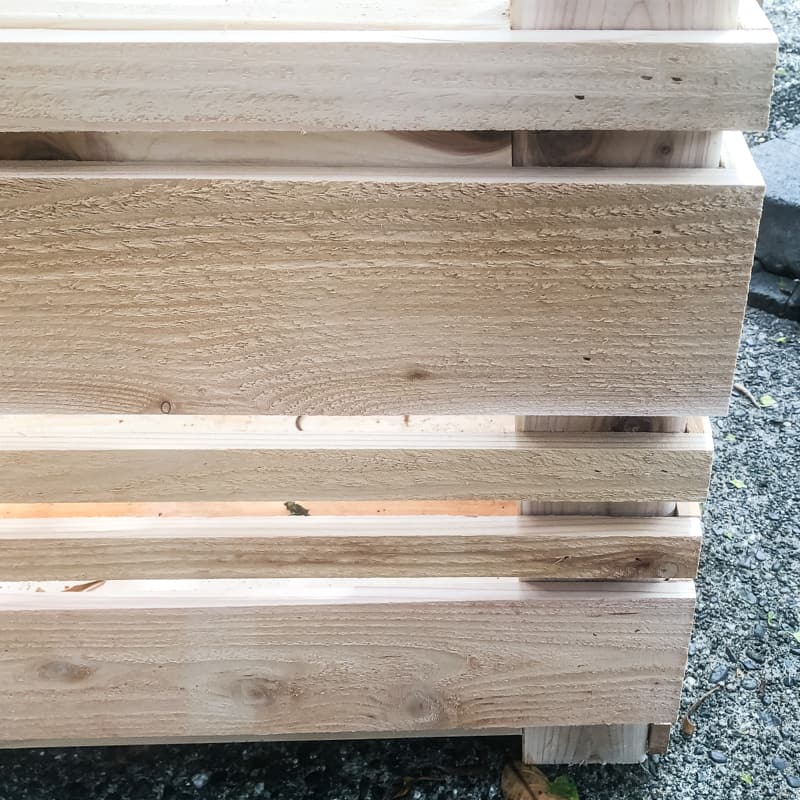

Cover the bottom of the box with more fence pickets. Drill holes through the boards for drainage if you're using it for plants. I just left a ½" gap between the boards so the toys don't sit in rain water.

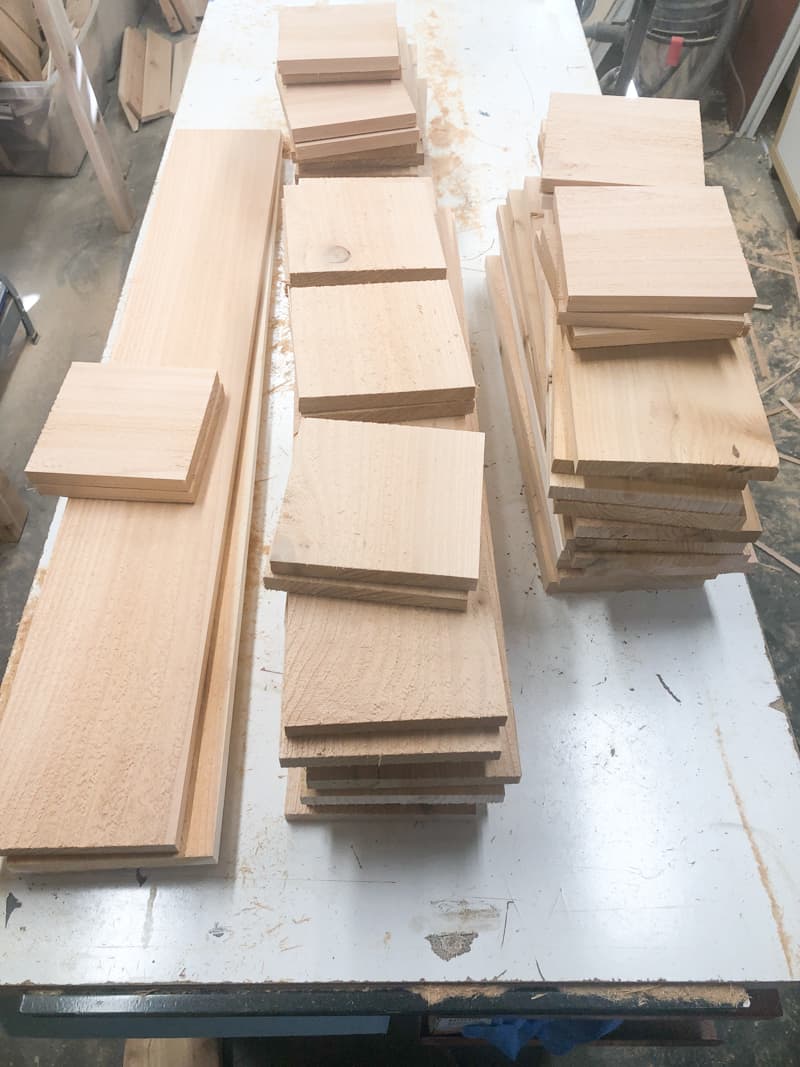
Build the Removable Planter Boxes
I created a variety of different boxes for my plant wall using more fence pickets. A mix of 12", 18", 24" and 30" boxes will keep the proportions the same while changing up the look!
These boxes are made the same way as these railing planters I made for our deck. Head over there to get the step-by-step instructions!

Attach French Cleat to Back of Planter Boxes
Hopefully you remembered to save a few of those French cleat boards for the back of the planter boxes! Cut a piece a few inches shorter than the planter box, then attach it to the back with the point facing down.
Fill the Boxes with Potting Soil and Add Plants
Finally, it's time to plant! This spot in the backyard doesn't get a lot of direct sun, so I stuck with shade loving plants. As they grow, they'll fill in the spaces between the boxes and create a lush, living wall!

Enjoy Your New Vertical Garden!
I positioned my outdoor wall planter right in front of the pipes, hiding them from view. It does a great job disguising the eyesores and bringing some greenery to this blah space!

My son's outdoor toys have a new home, so they won't be scattered throughout the backyard (I hope!) This would also be a great spot for some larger plants.

I love how simple it is to change out plants. Instead of getting up on a ladder to access those tall boxes, you simply lift each one off the slat. If one plant grows too tall, I can move all the boxes around to create a new layout!
The planter wall was quite popular when it was first shown in my backyard makeover reveal. It really brings the entire space together!

Download the woodworking plans and start building!
Check out these other outdoor planter ideas!
Kenya Rae
Sunday 26th of May 2019
I absolutely love this!
Carmen
Friday 24th of May 2019
this is gorgeous and I LOVE the functional storage at the bottom! you're so insanely talented!
Megan
Wednesday 22nd of May 2019
Thank you so much for sharing your tutorial! I love that this vertical planter is also storage for your kid's toys.
Lisa
Thursday 16th of May 2019
I love that the base of this gives you some outdoor storage for toys! That is so clever! Great build. I would love to do this for an herb garden by my back door.
Meegan
Wednesday 15th of May 2019
Absolutely amazing! I love all the details and use of space. Very impressive. Thanks for all the details in the tutorial, too. PInned, for sure!