With my barn door built, now it's time to hang it! Learn how to install barn door track to turn any opening into the focal point of a room.


Welcome back to Part II of my sliding barn door tutorial! You can find the first half, showing how I built this amazing wood shim door, here.
In this post, I'll be detailing how to install the sliding barn door hardware on the door and the track on the wall. It's not as hard as it looks, and the end result is just gorgeous!
This post contains affiliate links, which means I may receive a small commission for purchases made through links in this post. This post is also sponsored by Artisan Hardware. All opinions are 100% my own.
Choosing the Right Barn Door Hardware
Before ordering my sliding barn door hardware from Artisan Hardware, I carefully measured the doorway as well as the clearance above the door. I only had 8" between the top of the door frame and the ceiling, which limited my choices.
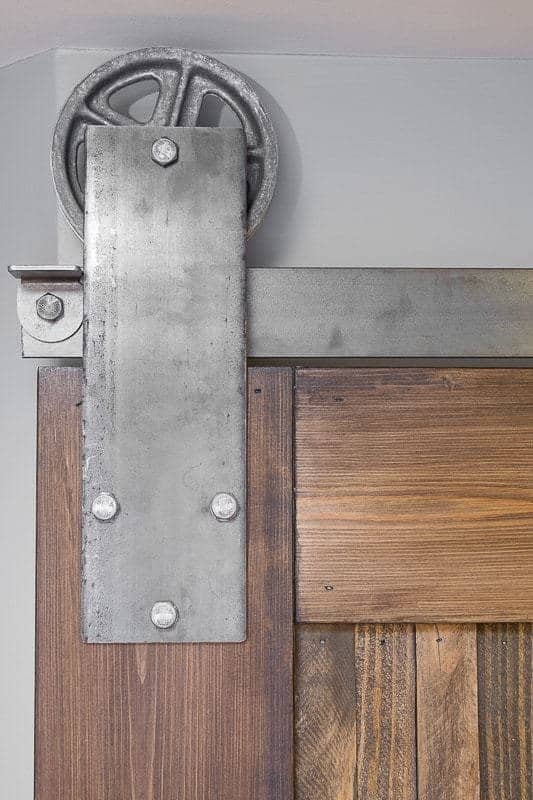
Luckily, the Aspen will be a perfect fit! It only requires 7" of clearance, so the wheel will be able to move freely. Seeing all the pieces together now, I'm glad I went with the chunky plate and wheel of the Aspen. Thinner straps would get lost among the wood shims.
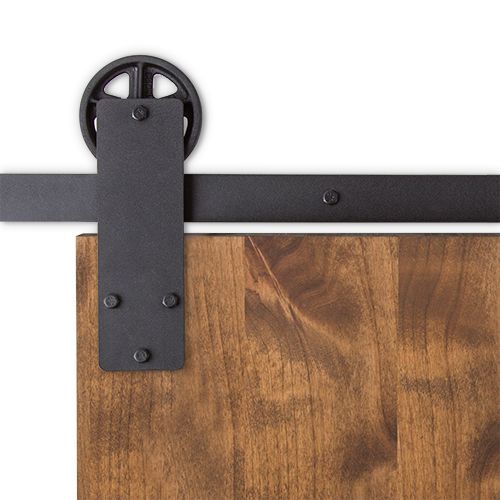

Next, pick the finish. I chose raw steel to coordinate with the other aged metal accents in the room. There are lots of other options, including bright colors for a fun, playful look.
Artisan Hardware will custom cut the top rail to any dimension for you. Make sure to order yours at least twice as long as the width of your door. Mine is just over 3 feet wide, so to be on the safe side I ordered a 6 ½ foot long rail. You can position the stops anywhere along the length so it doesn't roll too far away!
Attach the Hardware to the Door
Installing the door hardware is easier than installing the track, so start there. Place the strap on the face of the door with the wheel side facing towards the back.
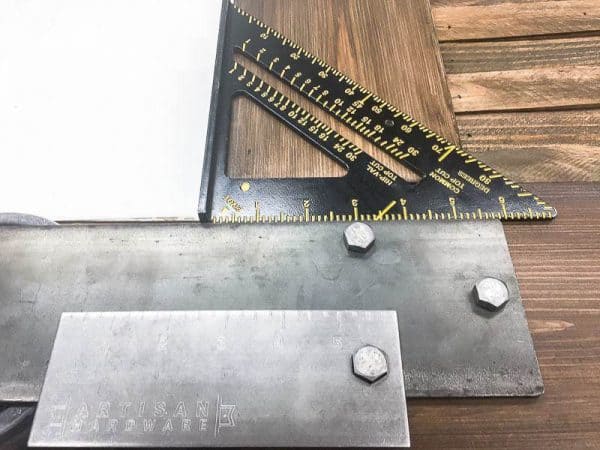
The wheels have a groove in the middle for the rail to rest in. The kit comes with a handy metal measuring tool you can insert in the groove to simulate the rail. Rest the other edge of the metal on the top edge of the door.
Use a square to make sure everything is lined up properly, then mark the holes with a pencil.

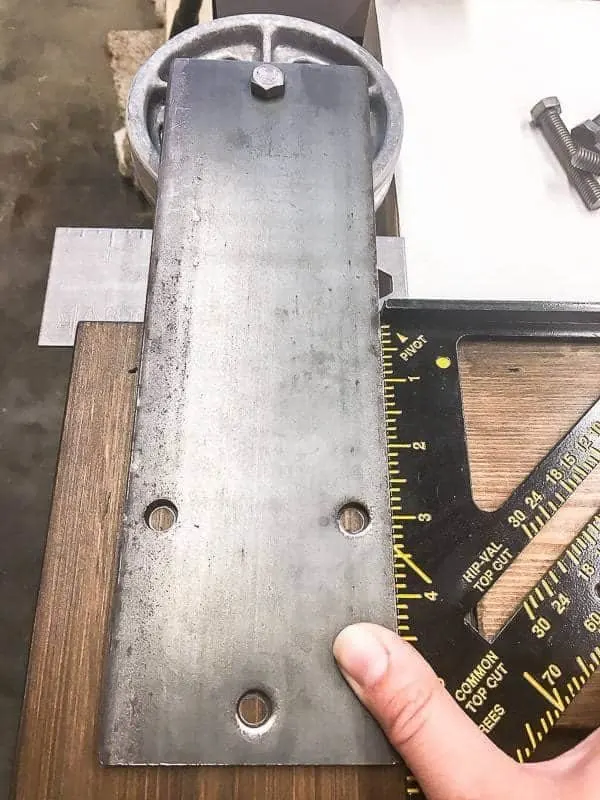
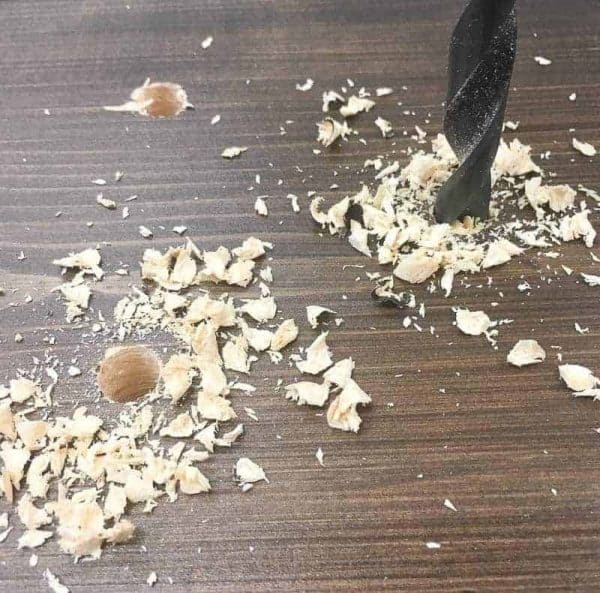
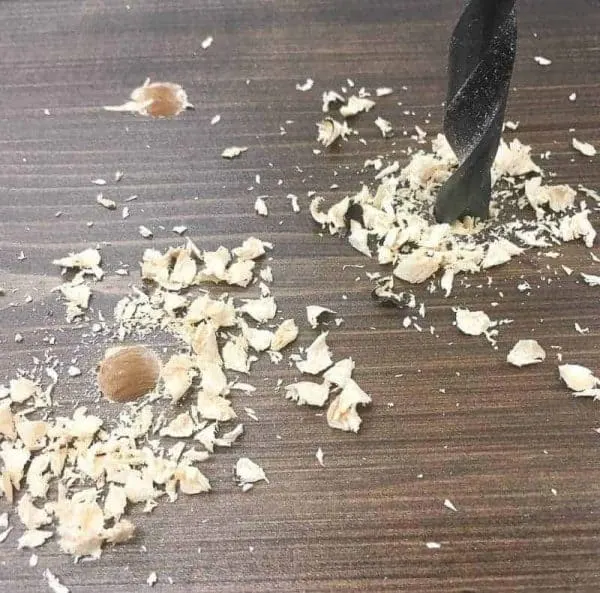
Drill holes all the way through the door at the markings using a ⅜" drill bit. A little tear-out is ok, since it will be hidden behind the strap.
Line up the holes and insert the provided screws. Tighten with the washers and nuts, using the handy hex hole in the measuring tool and an adjustable wrench.

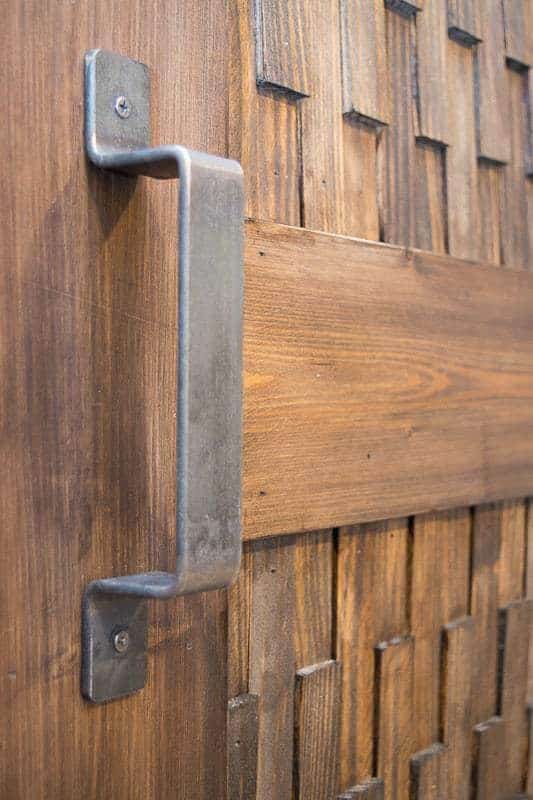
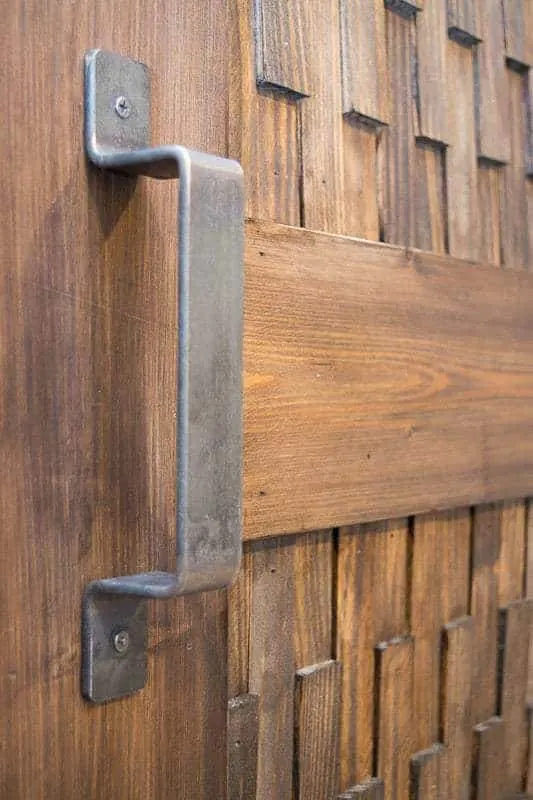
The signature handle is almost the exact width of the center board of my door. I love the patina of the raw steel against the wood, and how the handle looks worn in the middle like it's been used for ages.
How to Attach the Track to the Wall
Moving on to the wall... I had the added complication of dealing with a pocket door instead of a regular one. This meant there wasn't a stud on both sides of the existing doorway. I decided to mount it a little higher to attach it to the header instead.
Drill holes for the bolts
Use a stud finder to locate each stud in the wall. Hold the track up against the wall and transfer the markings to the track.


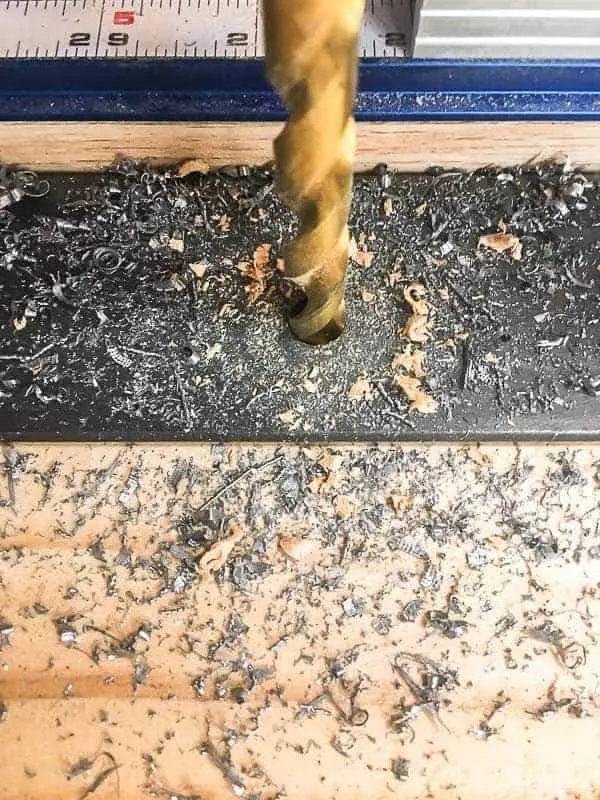
Drill ⅜" holes in the track at each mark, using a scrap piece of wood underneath so you don't drill into the work surface.
You'll know you made it all the way through when you see sawdust! My holes are slightly higher than center so that they can hit the header without raising up the height of the door.

Back to the wall! Drill ¼" pilot holes into the studs where you will be attaching the rail. This will make it easier to install the bolts later on.
Two of my holes are on the trim, so I needed to elevate the third to match the depth of the trim. I painted a scrap piece of 1 x 2 the same color as the wall and nailed it to the stud. It's hidden by the rail, and keeps everything aligned properly.
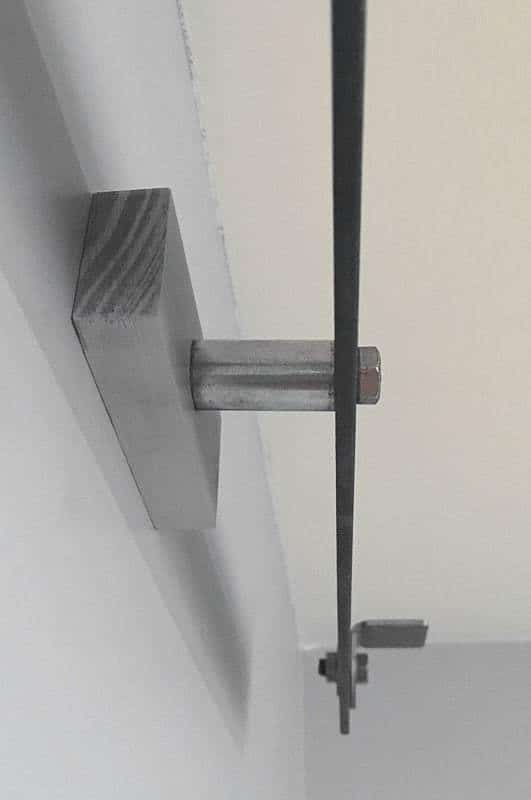
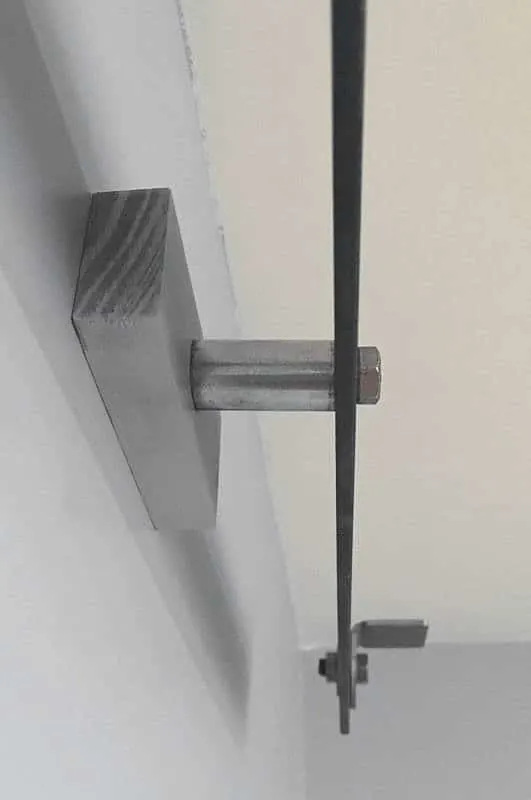
Insert one of the giant screws from the hardware kit into the hole in the track, through the spacer, and into the pilot hole. Use a socket wrench to drive the screw into the studs.
Attach door stops to each end of the track so the door doesn't go rolling off! I'm pretty sure I was supposed to mount this piece on the back of the track, but it looks fine on the front too.

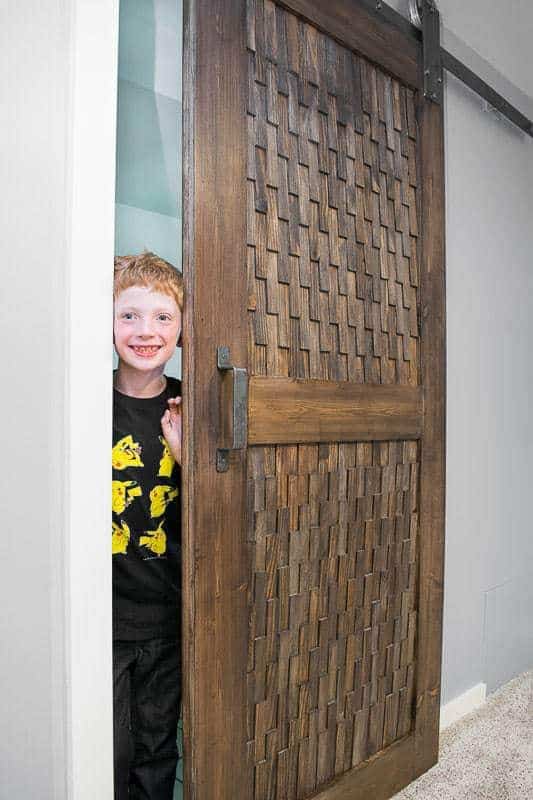
Hang the Barn Door on the Track
Now it's time for the track and the door to come together! Just lift the door onto the rail along the grooves in the wheels.


I couldn't be more thrilled with how this project turned out! Our bathroom door went from an eyesore to the focal point of the room. Our son loves testing it out!

Check out the rest of the bathroom remodel!
Mother of 3
Saturday 30th of June 2018
Great tutorial; we just put sliding barn doors on our shed last year and I love how they look. Thanks so much for sharing with us at the Summer Time Fun Linky. Pinned.
Amy
Monday 11th of June 2018
I love sliding Barn Doors. It reminds me of our actual barn doors when I was growing up. Thank you for sharing how to install these doors on A Round Tuit.
Toni | Small Home Soul
Thursday 14th of September 2017
Great tutorial and very helpful. Years ago the hardware was not readily available and it was not cheap at all. Thankfully all the DIY projects has made so many products easy to find online now. Your door looks amazing!!