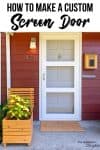

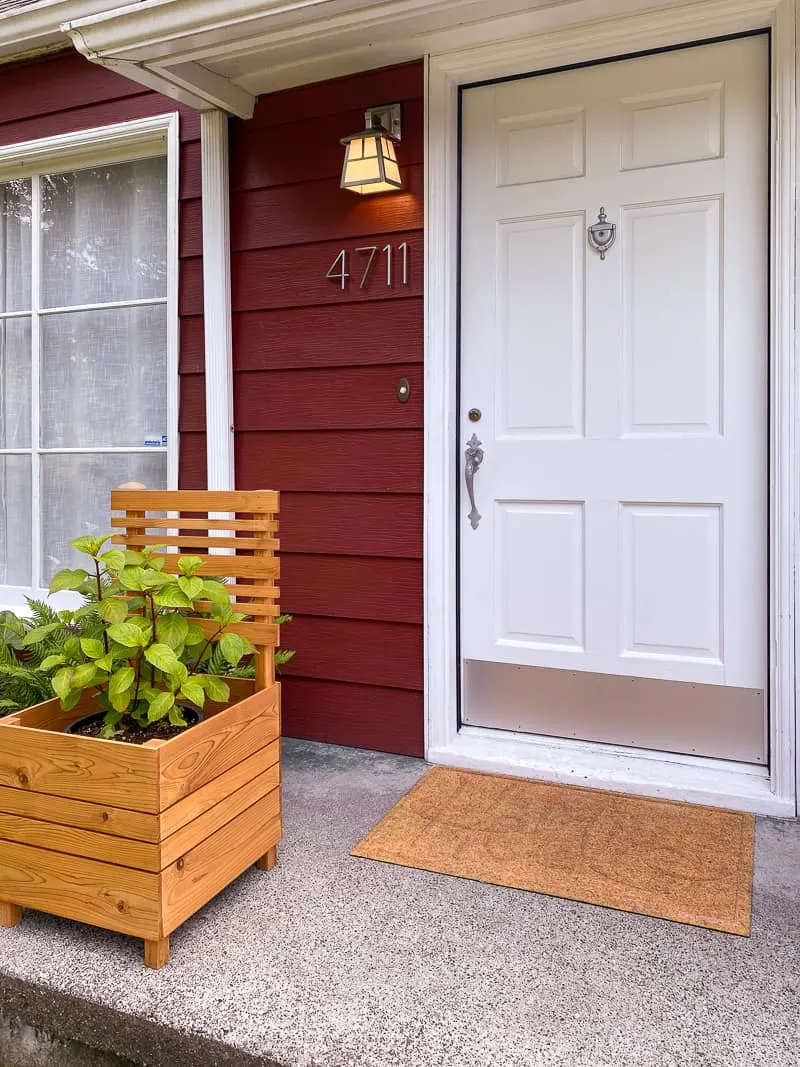
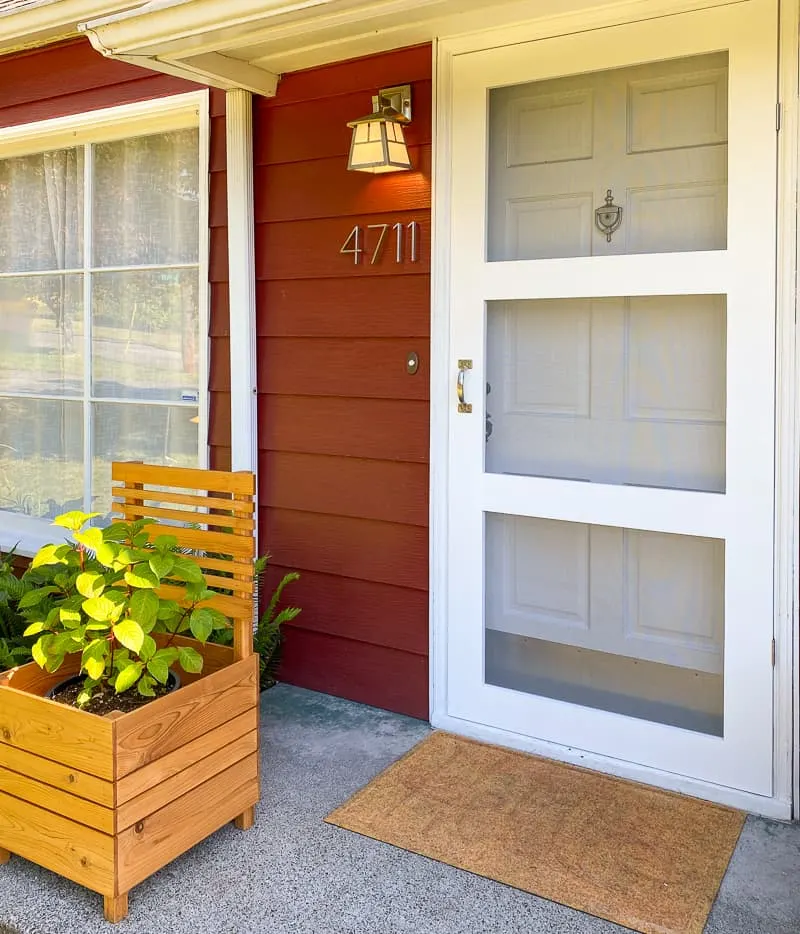
Let the breeze through your front door with this DIY screen door! It's easy to build a screen door that fits your existing door frame perfectly.
This project has been on my to-do list for YEARS! We don't have central A/C (although I finally figured out how to install a portable air conditioner in our casement windows upstairs), so the easiest way to cool down the house is to leave the front door wide open to catch the breeze off Puget Sound a few blocks away.

But the sidewalk is a mere 10 feet from the front door, and people walk past our house all.the.time. I felt uneasy keeping the door open if we weren't in the living room, plus bugs can fly straight in!
This post contains affiliate links for your convenience. Purchases made through these links may earn me a small commission at no additional cost to you. Please visit my disclosures page for more information.
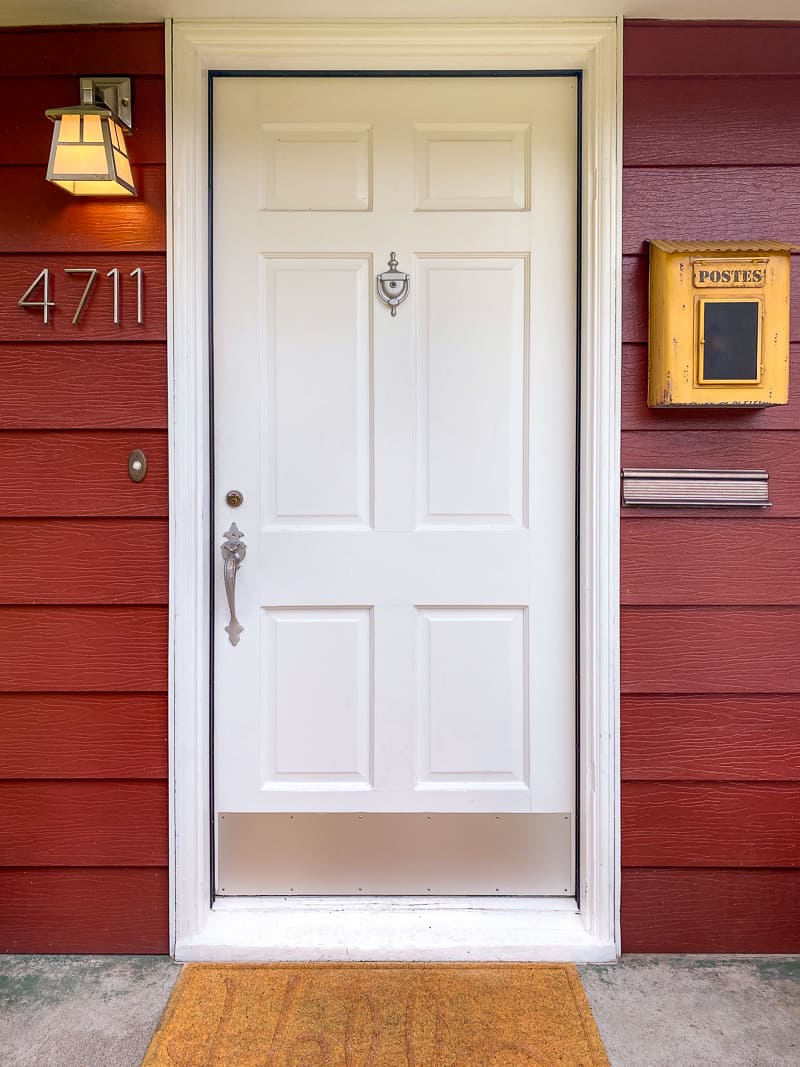
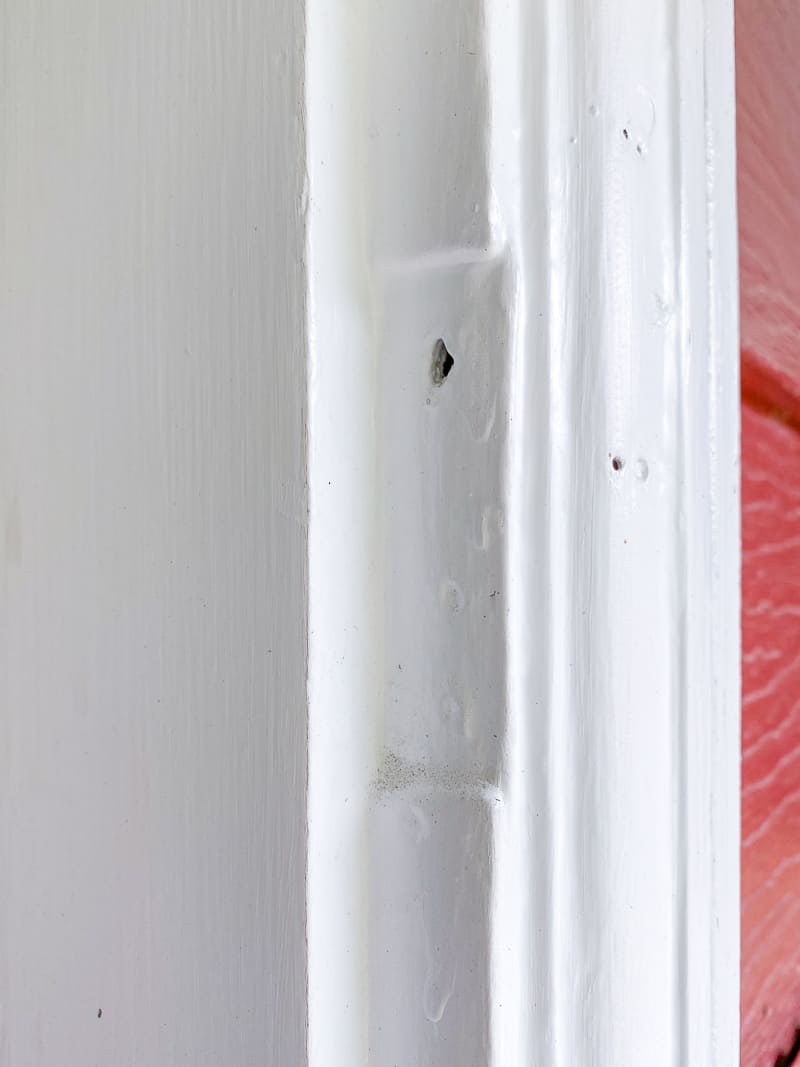
There must have been a screen door here once upon a time, because there's still a cutout for the hinges in the door frame. But there's no sign of it stored anywhere on the property, so it must be long gone.

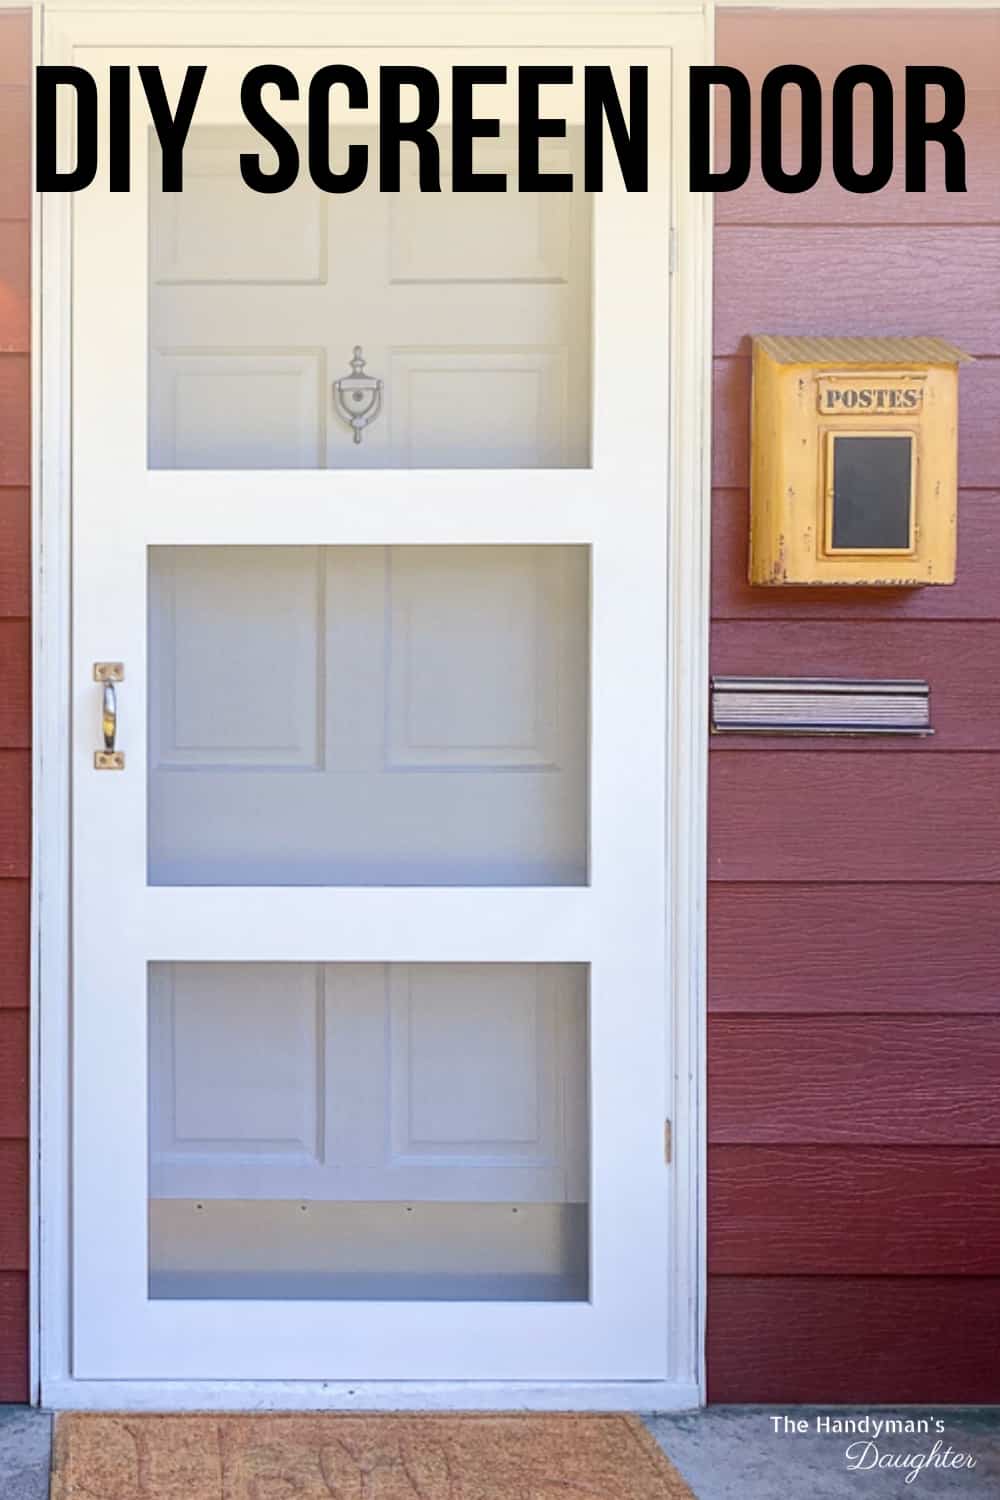
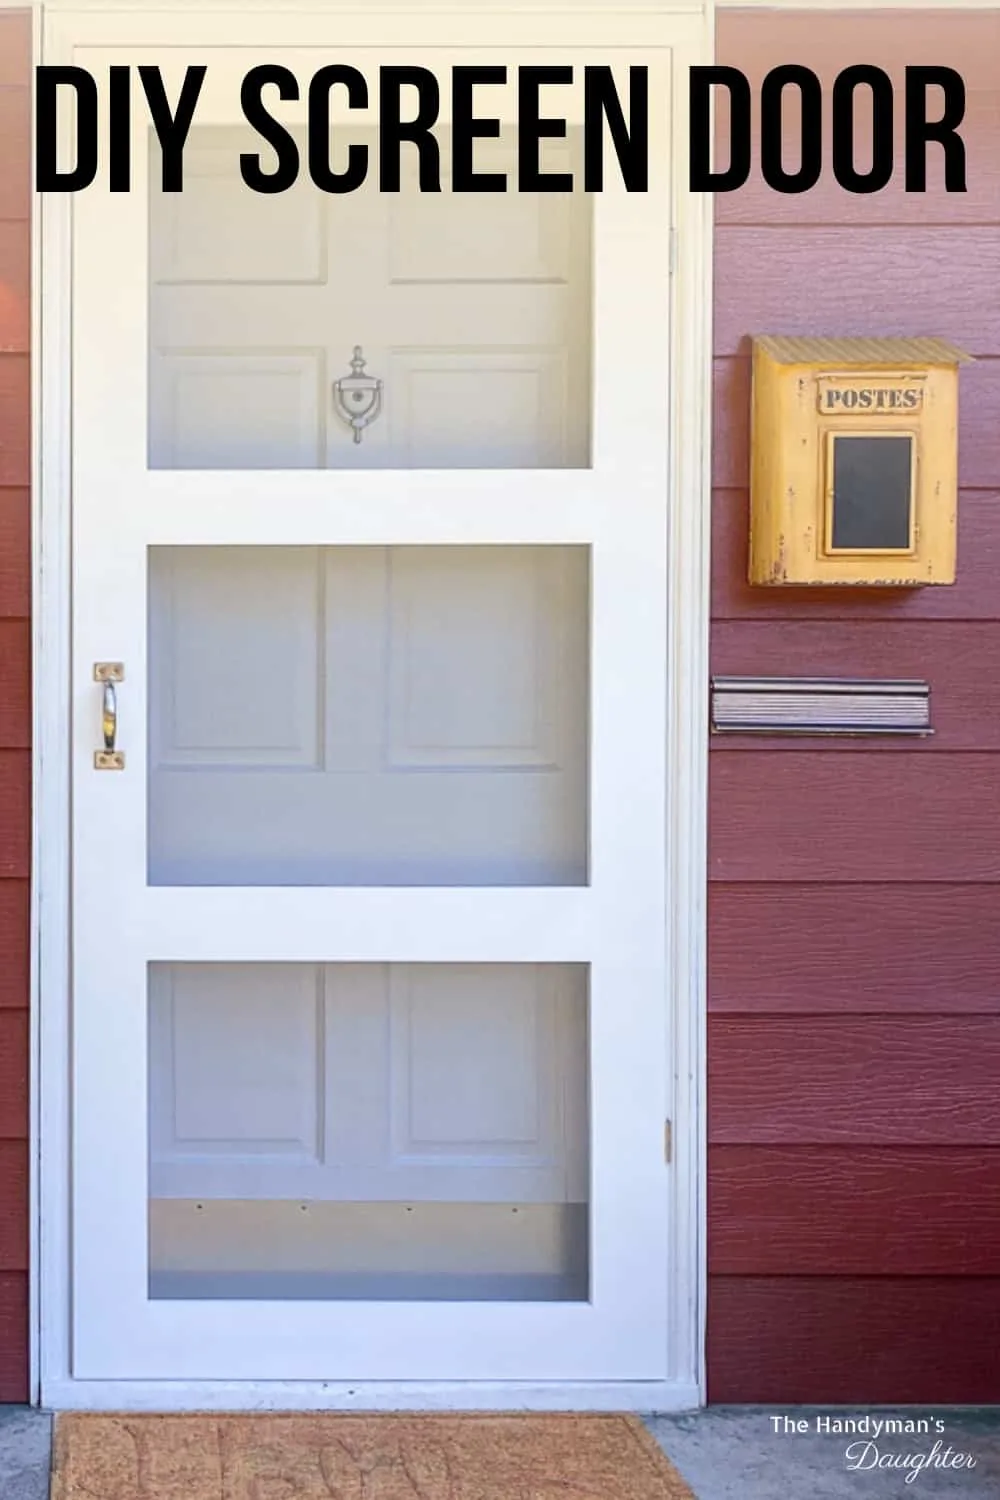
I could have bought one of those cheap metal screen doors, but instead I'm building my own wooden screen door! The design I created matches the large picture window on the front of our house, and gives it a more modern look.

Here's how to make a wooden screen door for your own home!
Materials Needed for DIY Screen Door
- Four 1x5 or 1x6 boards
- Pocket hole jig
- 1 ¼" pocket hole screws
- Pocket hole plugs
- Waterproof wood glue
- Square
- Screen material
- Screen moulding
- Staple gun
- A staple gun that also shoots brad nails would be best. Otherwise, you'll also need a brad nail gun and ¾" brad nails.
- Caulk and caulk gun
- Exterior paint
- Hinges
- Door handle
- Pneumatic door closer (optional)
- Push plate (optional)
How to Make a Screen Door
Measure The Door Opening
It's super important to take accurate measurements of the door opening before you start building. Determine where the screen door will be installed (usually on the front edge of the door frame, NOT right next to the main door) and start your tape from that point.

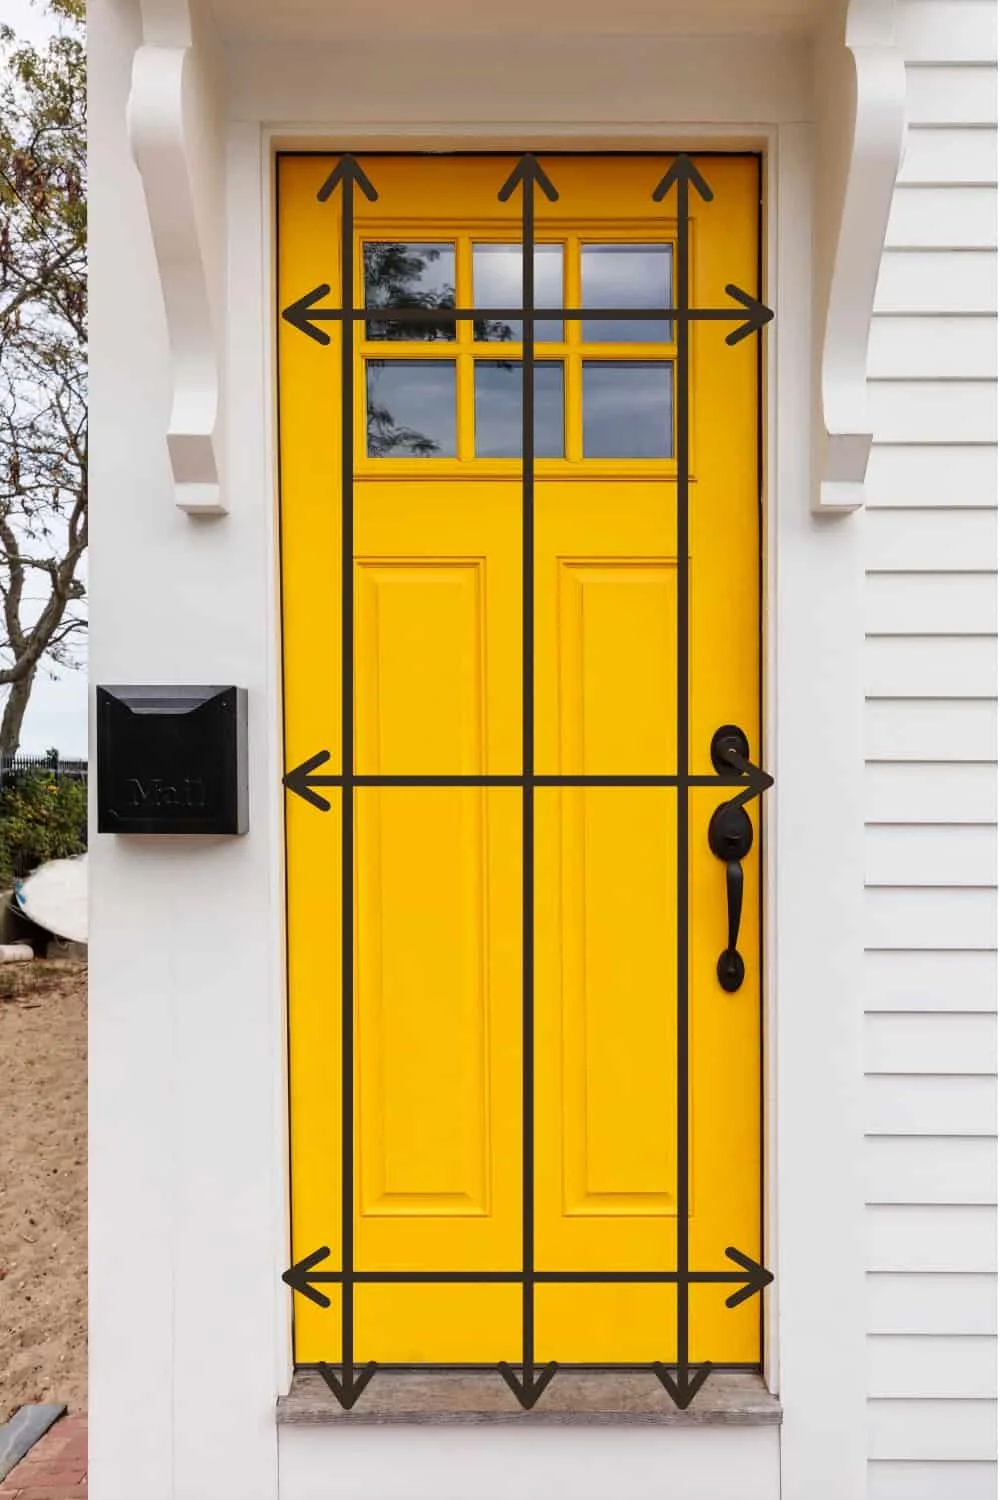
Measure across the top, middle and bottom of the opening horizontally, then vertically on the left, middle and right side. Choose the smallest of the three measurements from each direction, then subtract ¼" to allow for a little bit of space all the way around for the wood to expand and contract with the seasons.
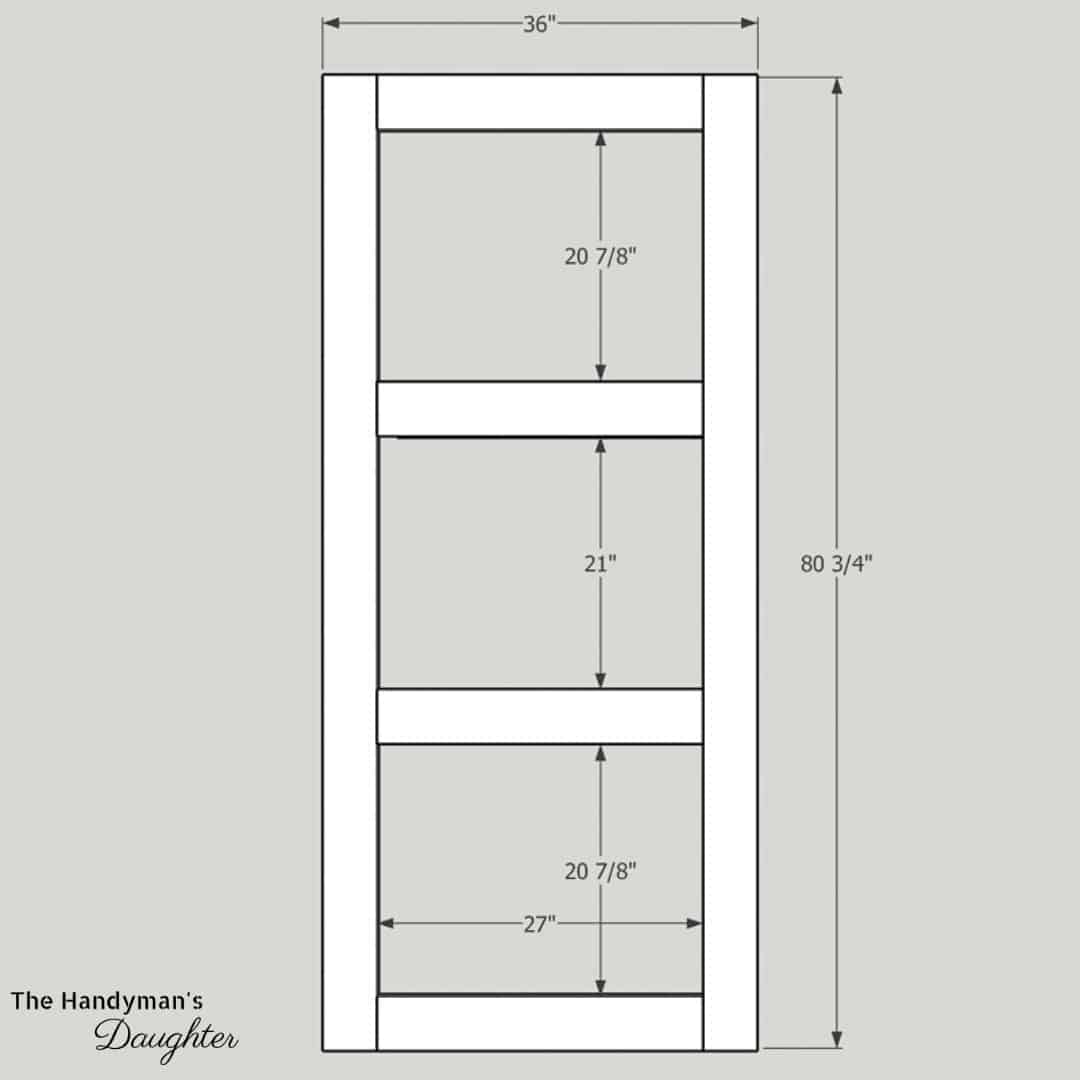
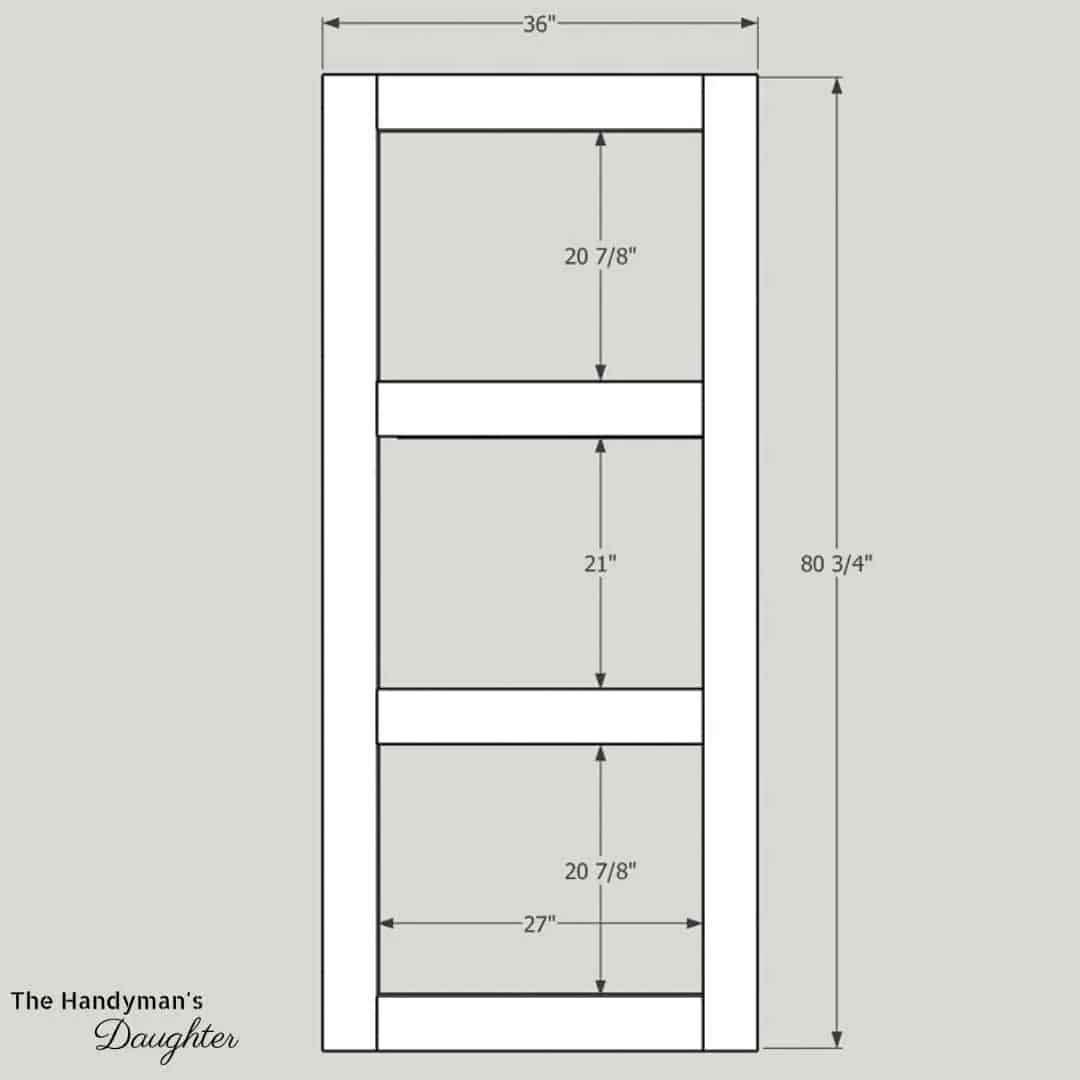
Sketch out a few designs before you start cutting. I wanted three panes to match our front window, so I played around in SketchUp until I found the perfect dimensions for the opening. Your measurements will probably be different, but you can use mine as a starting point.
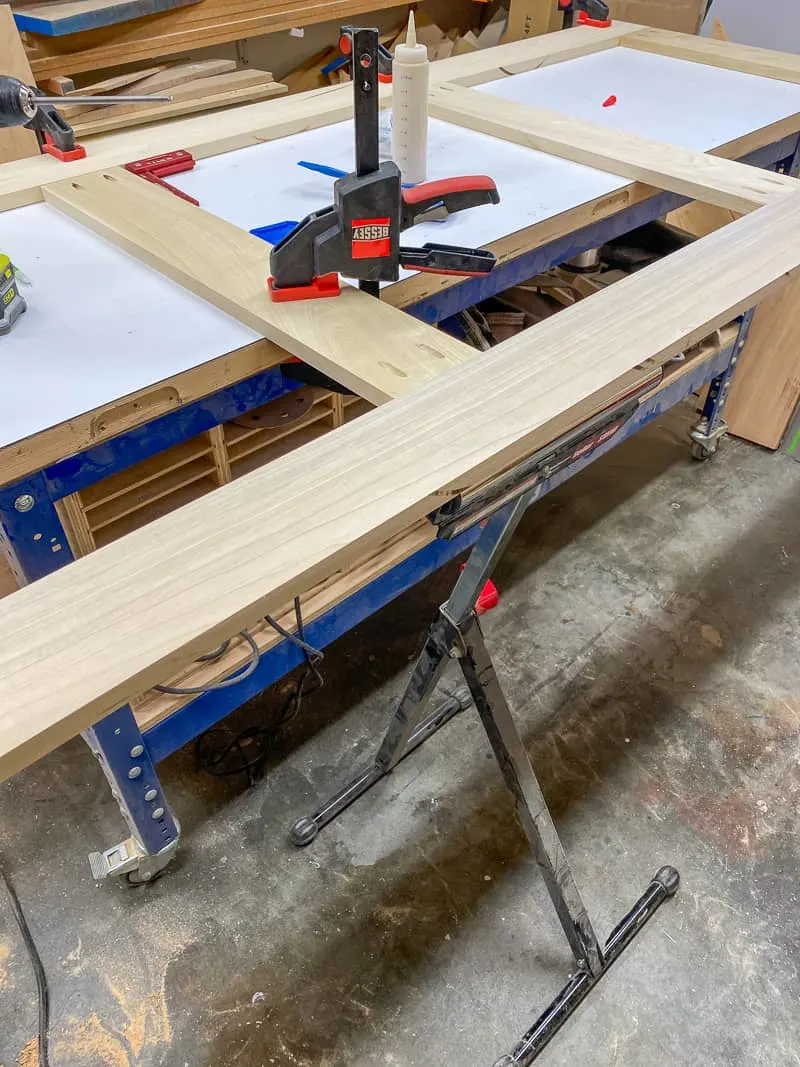
Cut and assemble the screen door boards
I prefer to use poplar over pine for my painted projects, because the tight, smooth grain allows for a smoother finish. It's slightly more expensive, but it saves me a ton of prep work! I bought 1x5 poplar boards from my local lumber yard, but you could use 1x6 boards instead (just adjust your dimensions accordingly!)
Cut the two vertical boards to the exact measurement of your door opening (minus ¼"). Then cut the horizontal boards to the width of the opening, minus the width of the two vertical boards and ¼". In my case, the horizontal boards are 27" and the vertical ones are 80 ¾".
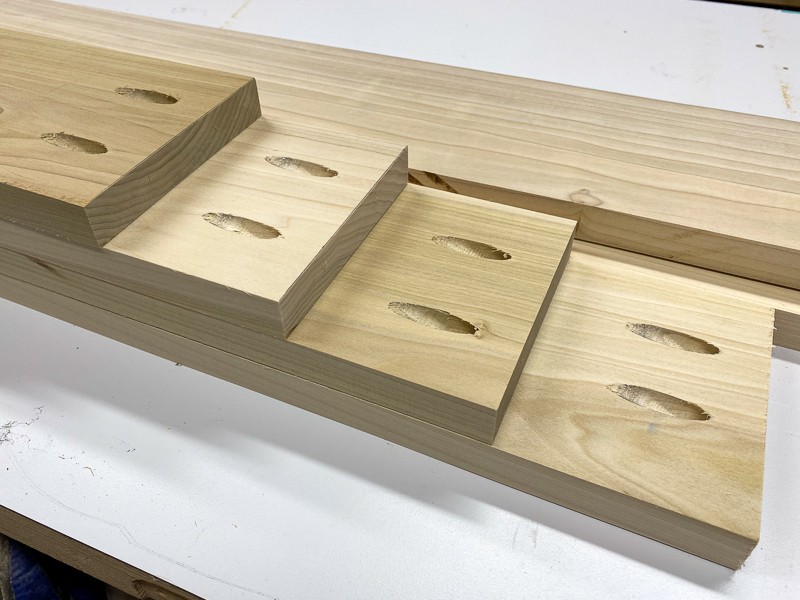
Drill pocket holes in both ends of all the horizontal pieces.

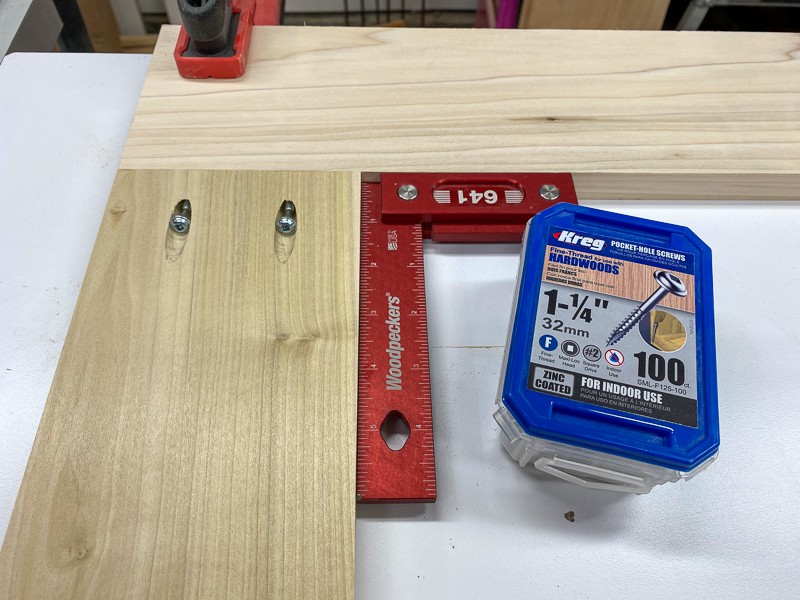
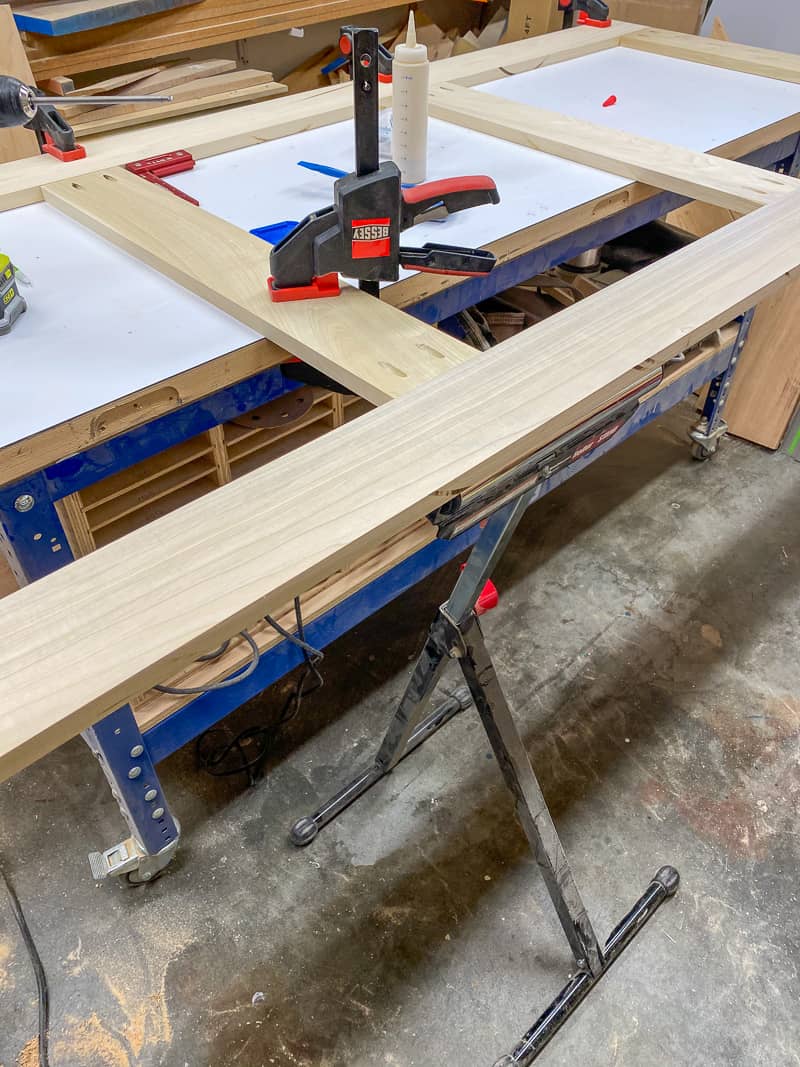
Use wood glue and pocket hole screws to attach each of the horizontal boards to the vertical ones. Make sure everything is perfectly square as you assemble the screen door.

My door is wider than my workbench, so I had to do a little creative problem solving to attach the second vertical piece. I ended up using a roller stand and lots of clamps to keep the whole thing from tipping off the edge!
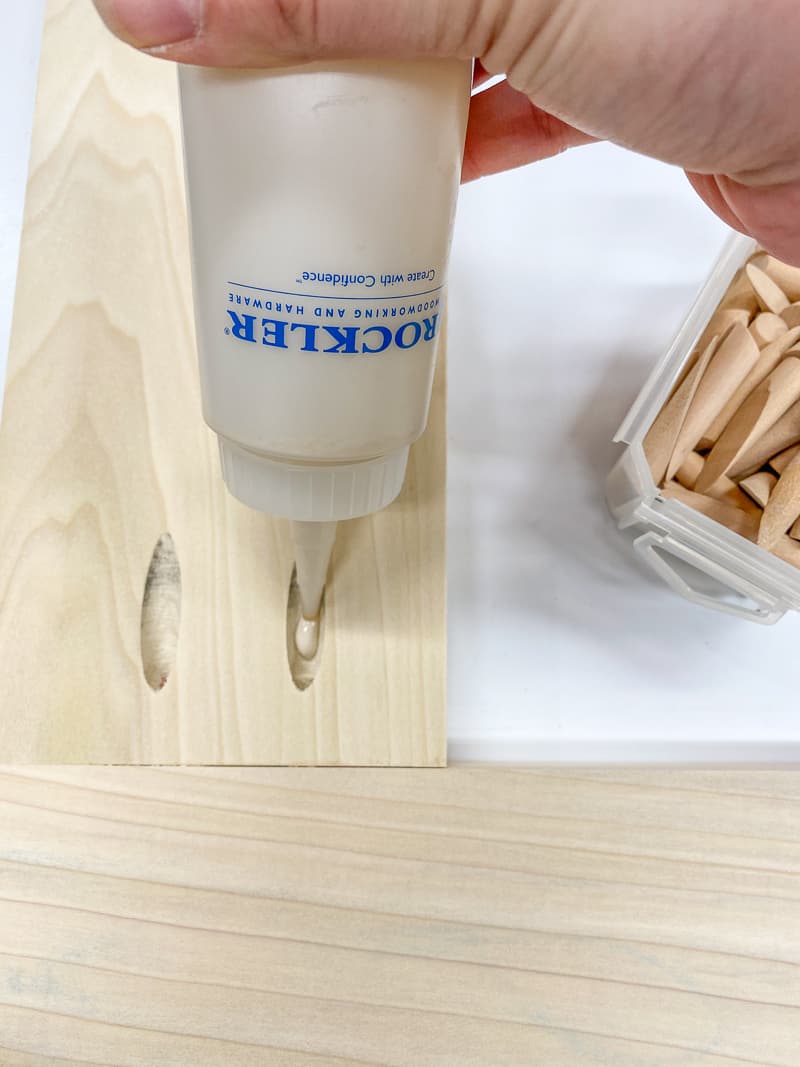
Fill the Pocket Holes
Typically, I don't fill pocket holes unless they're really visible and detract from the aesthetic of the finished piece. Since you can see both sides of the screen door clearly, you definitely want to cover them up!
I've used wood filler in the past, but it can shrink a bit and create an obvious oval shape in the painted finish. I decided to try pocket hole plugs this time, and they worked better than I expected!
First, squirt some wood glue into the pocket hole. I love these squeeze bottles for getting the glue exactly where you want it!

Slide the pocket hole plug into the hole with the flat side facing up. They'll stick up a bit, but that's ok!

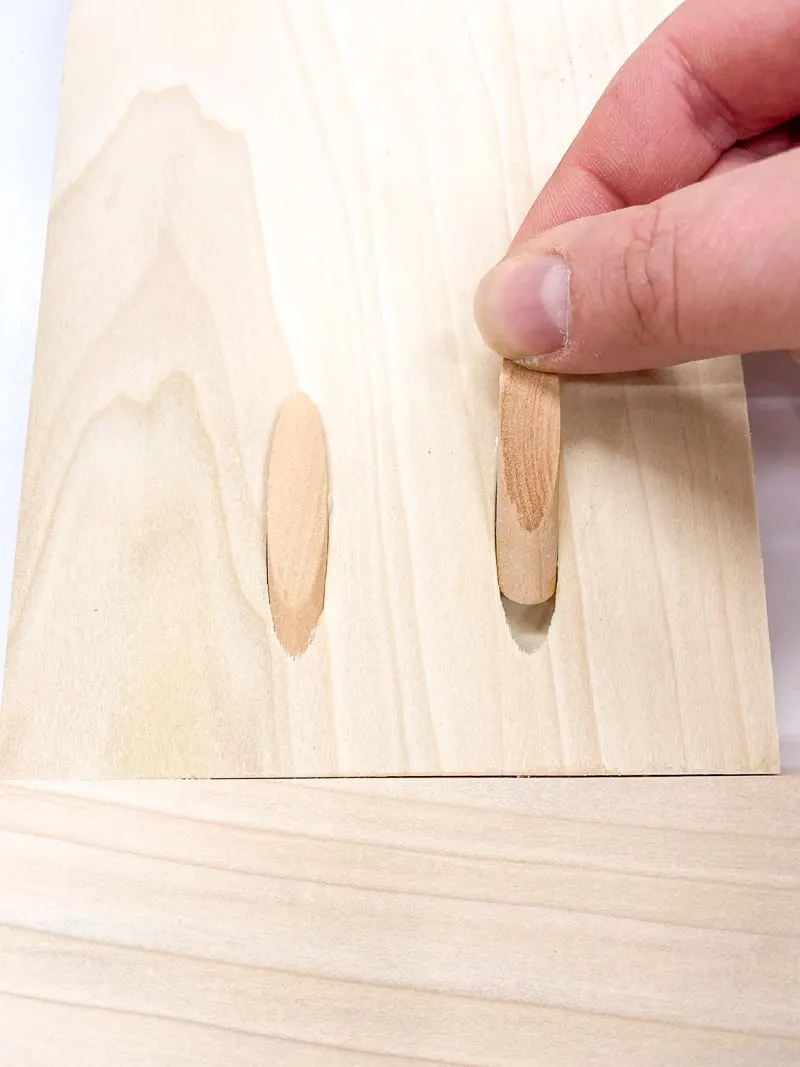
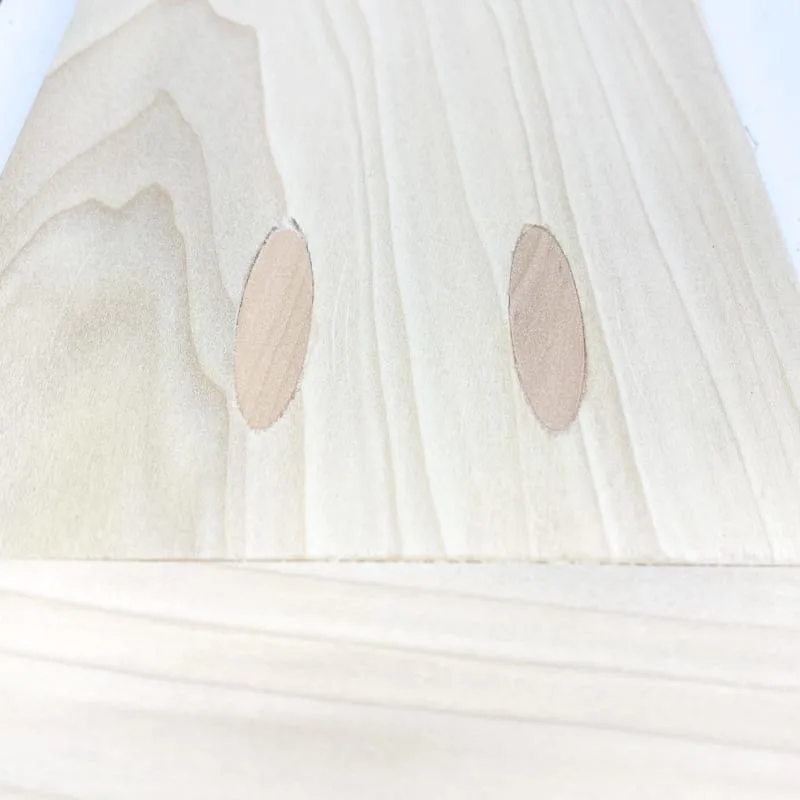
Once the wood glue is dry (I left them overnight, but you don't have to wait that long), sand the plugs flush with the surface. Any remaining gaps can be hidden with wood filler. You can see that the hole on the left has a little space towards the back, but the right one is almost perfect!

Prime and Paint the Frame
It's so much easier to paint the door frame before the screen is installed. A 4" roller is the perfect width for these boards, and makes the process much faster. Don't forget about the inside edges!
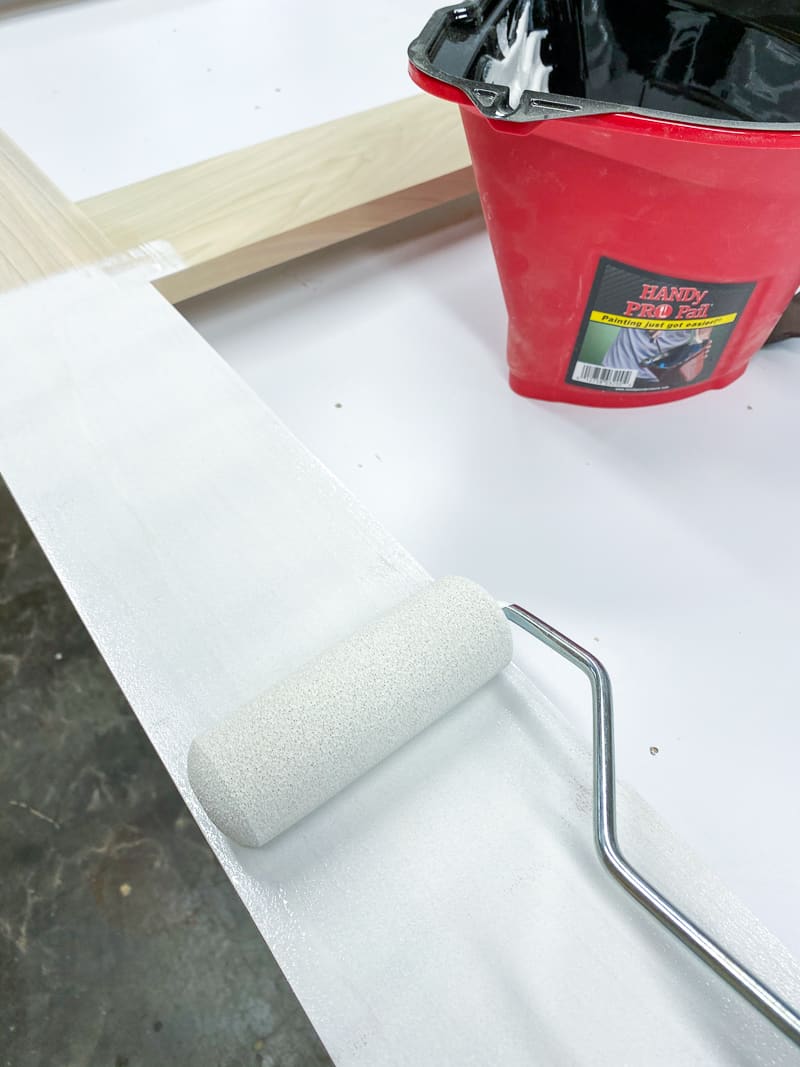
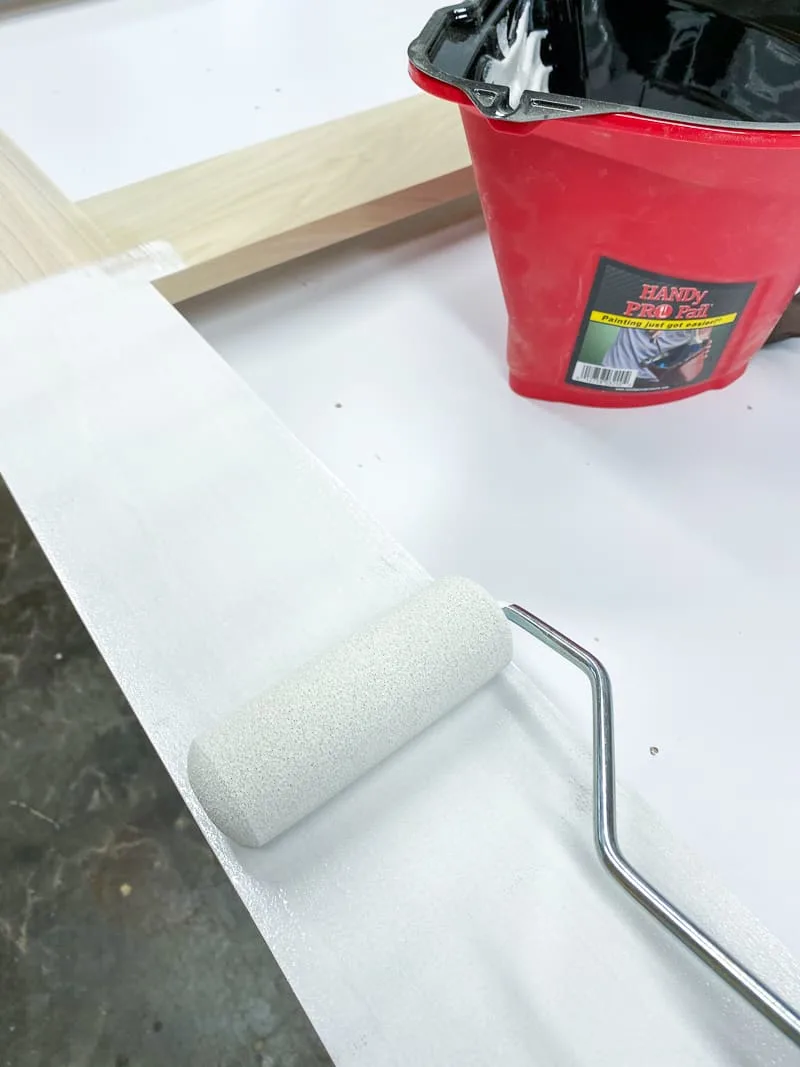
I used the white porch and patio paint I had left over from painting our tile floor and tile backsplash (and there's still more in the can!) This stuff holds up incredibly well to wear and tear, and will hopefully keep the screen door looking great for summers to come.
Install the Screen
Even if you don't have pets, I recommend getting stronger screen material like this so you don't get accidental snags and holes. The kind I bought is kinda flimsy, so I might regret going the cheap route later on.
Roll the screen material out so it covers the entire door. You'll need the excess on the sides to pull the screen taut.
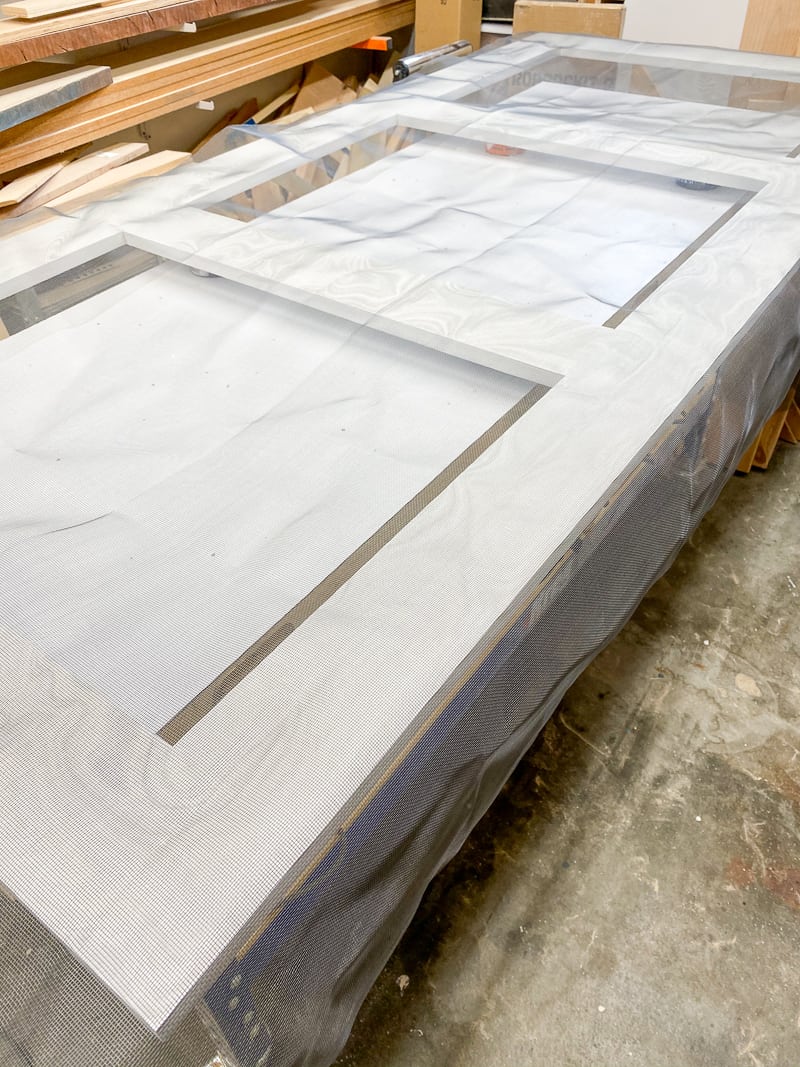
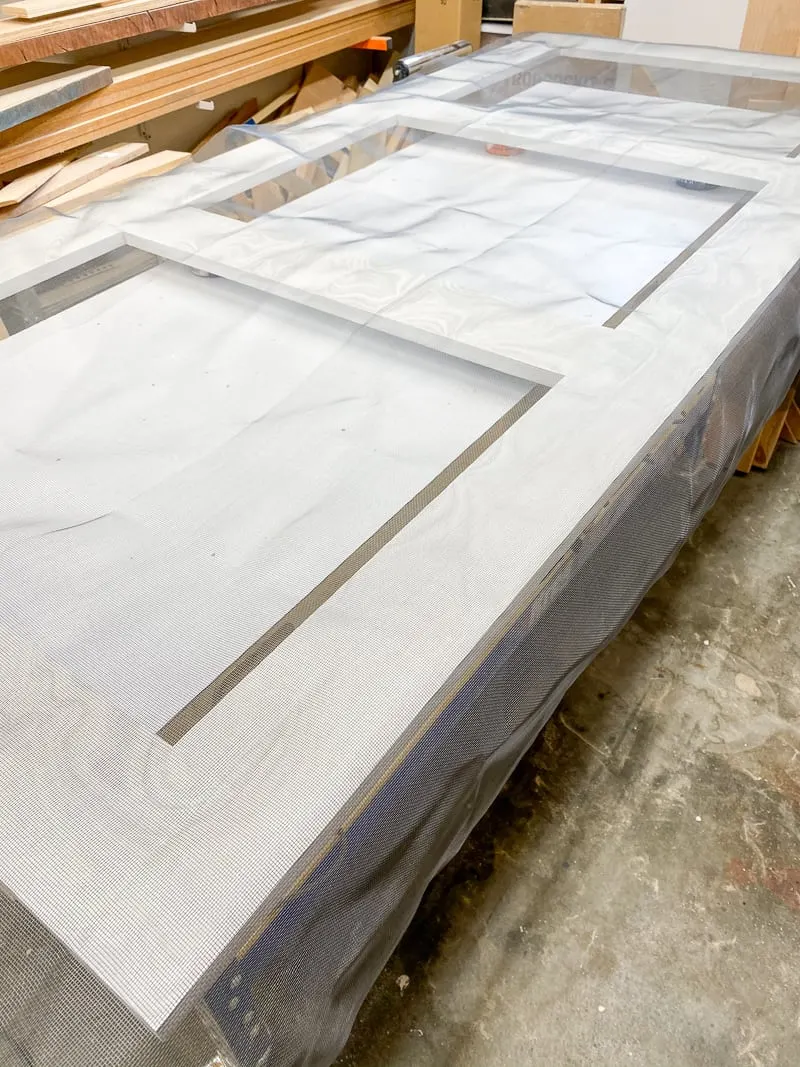
Use a staple gun and ¼" staples to attach two adjacent sides to the perimeter of each opening. Then hold the screen taut from the opposite corner as you staple the remaining sides. Make sure the staples aren't too far from the edge, so they can be covered up by the moulding later on.
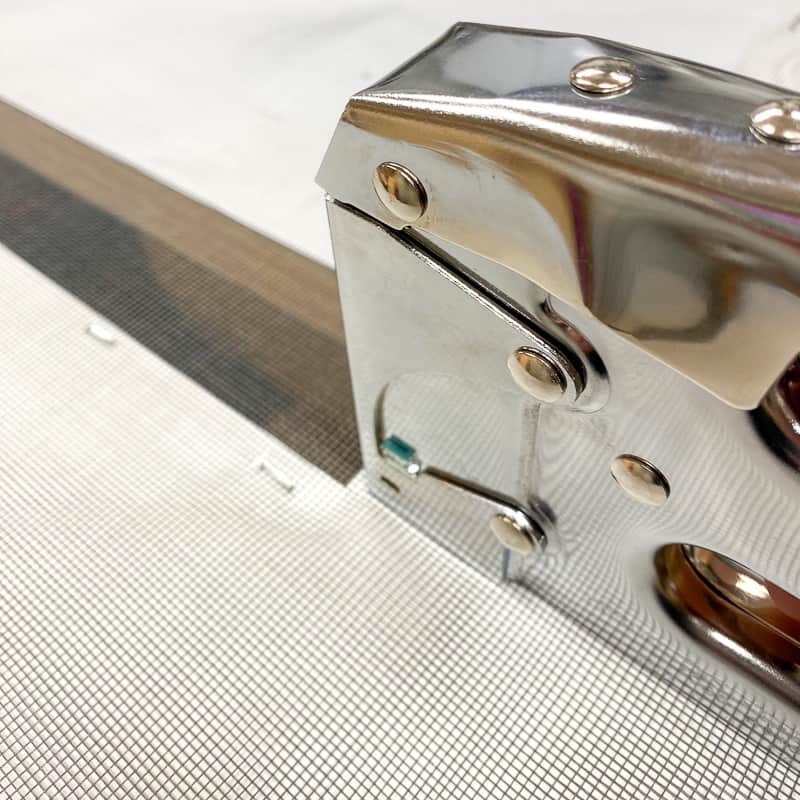

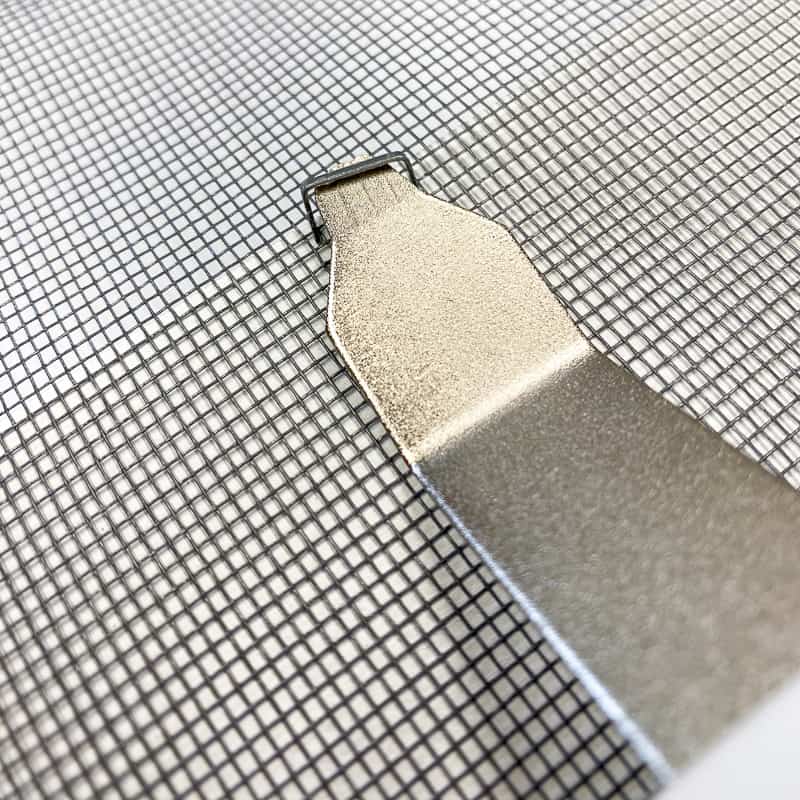
Remove and replace any staples that are sticking up too far. This staple remover worked great and didn't rip the screen. I also used my spring nail set to force any protruding staples flush with the surface.
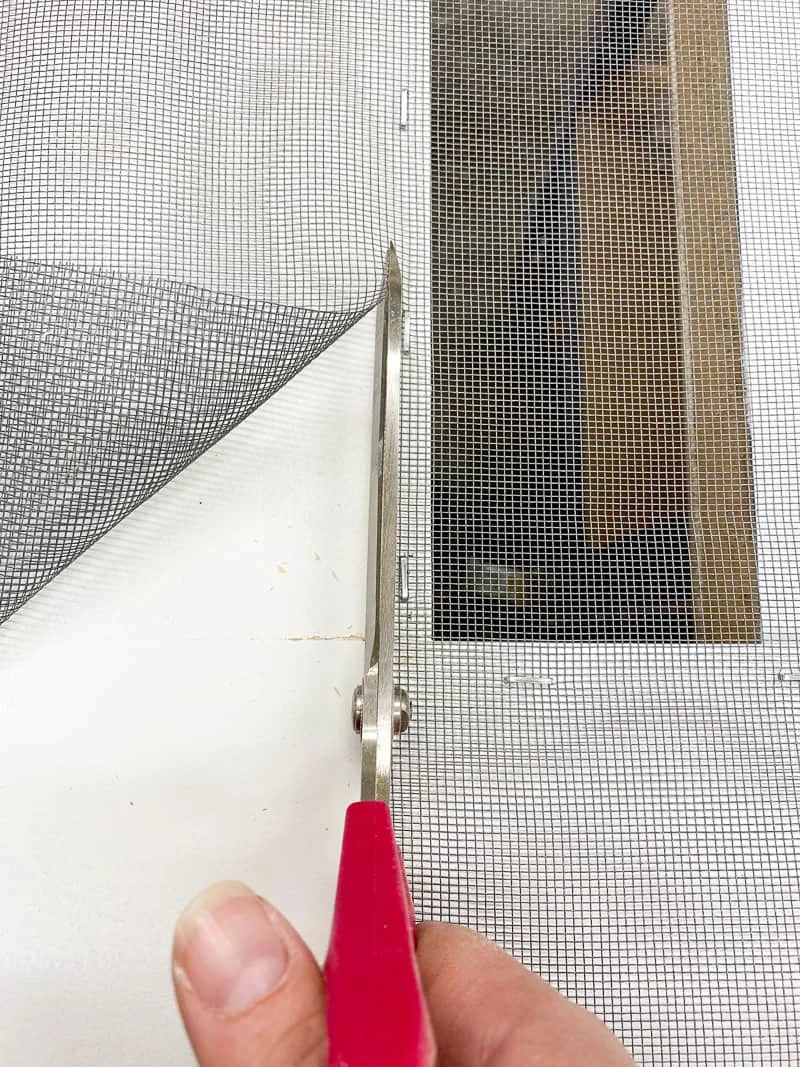
Then, use scissors to trim away the excess.

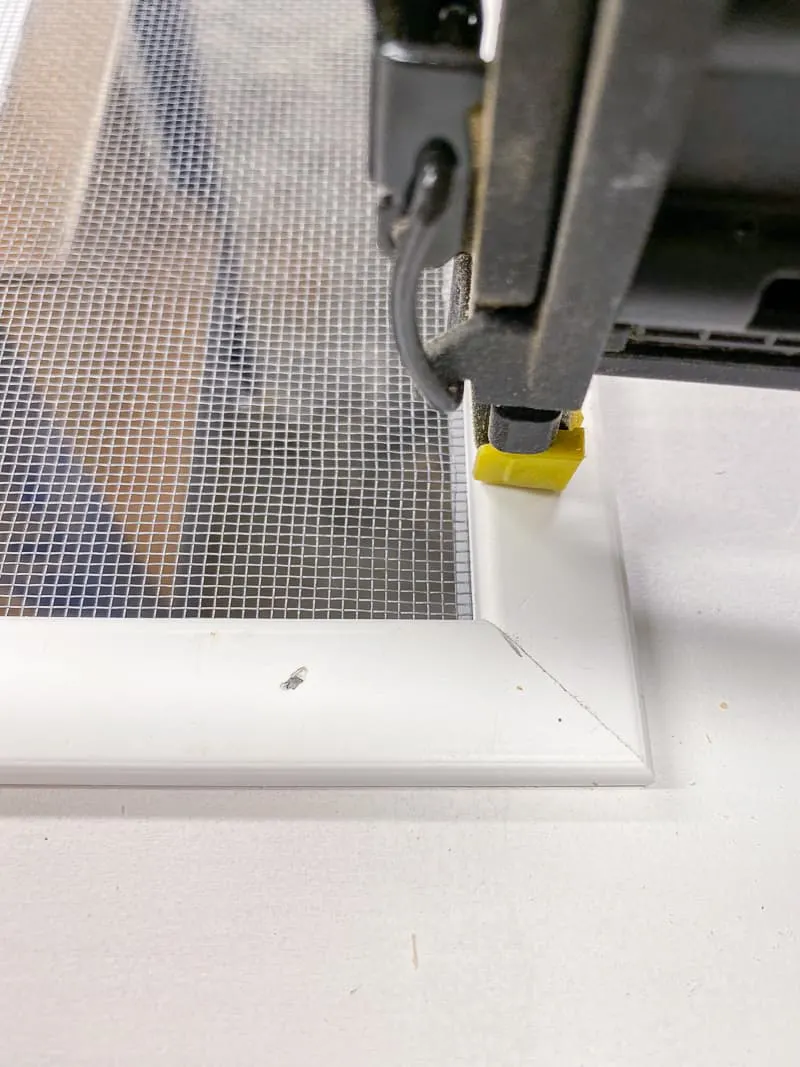
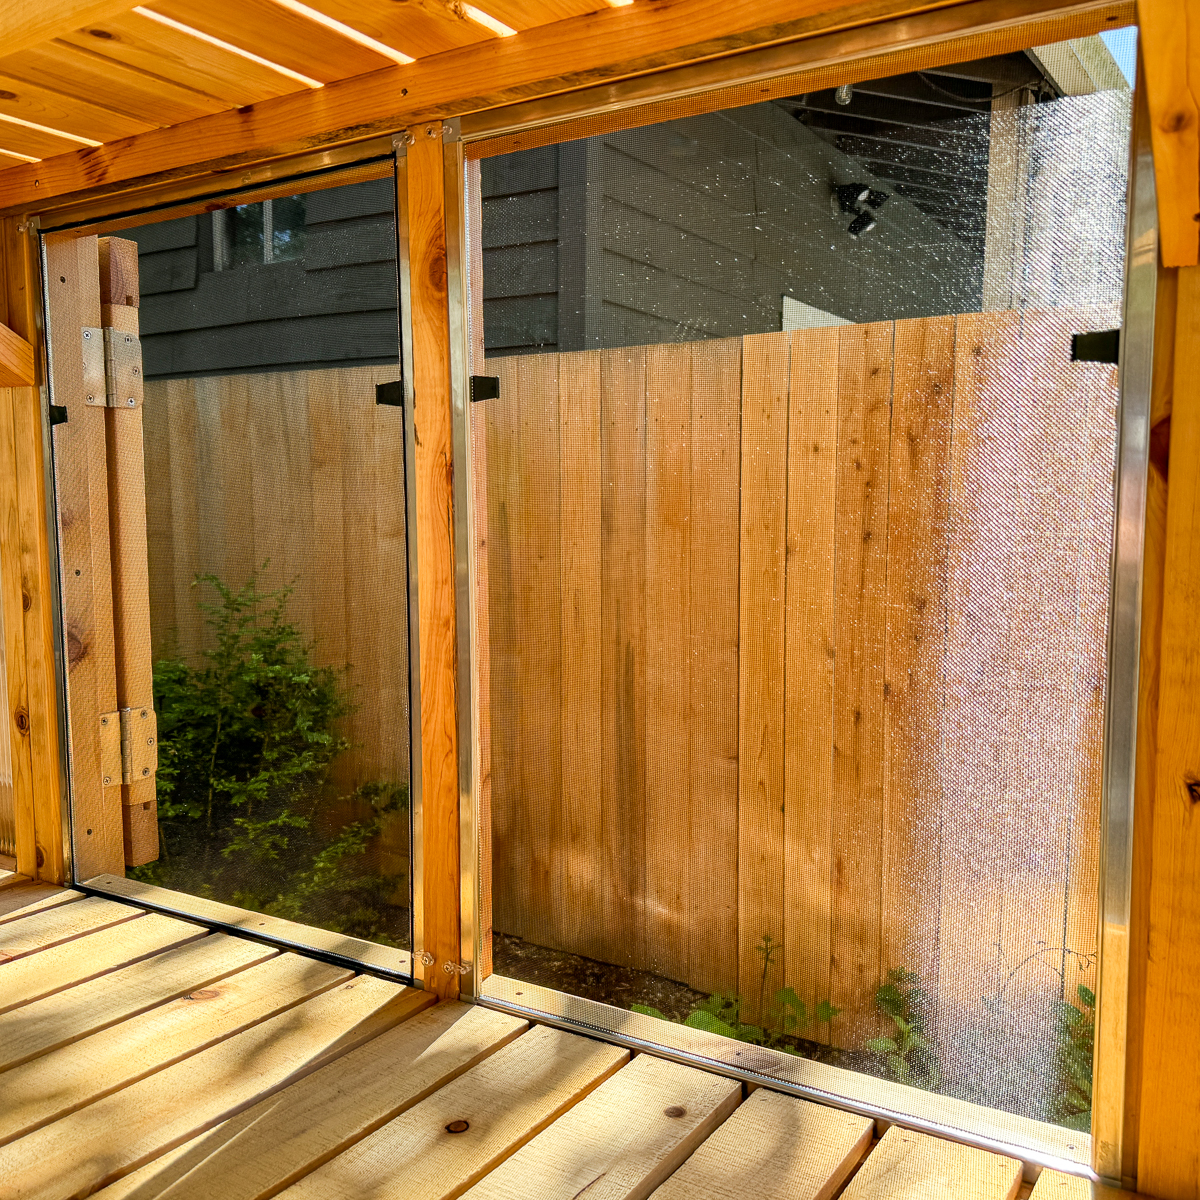
Install the Screen Moulding
The easiest way to hide the staples and ragged edges of the screen is with screen moulding. I used PVC moulding, so I didn't even have to paint it!
Cut the corners at a 45 degree angle, with the short side the exact length of the inside of the screen opening. You could do this with a miter box or a miter saw. Then attach the moulding to the door with ¾" brad nails.
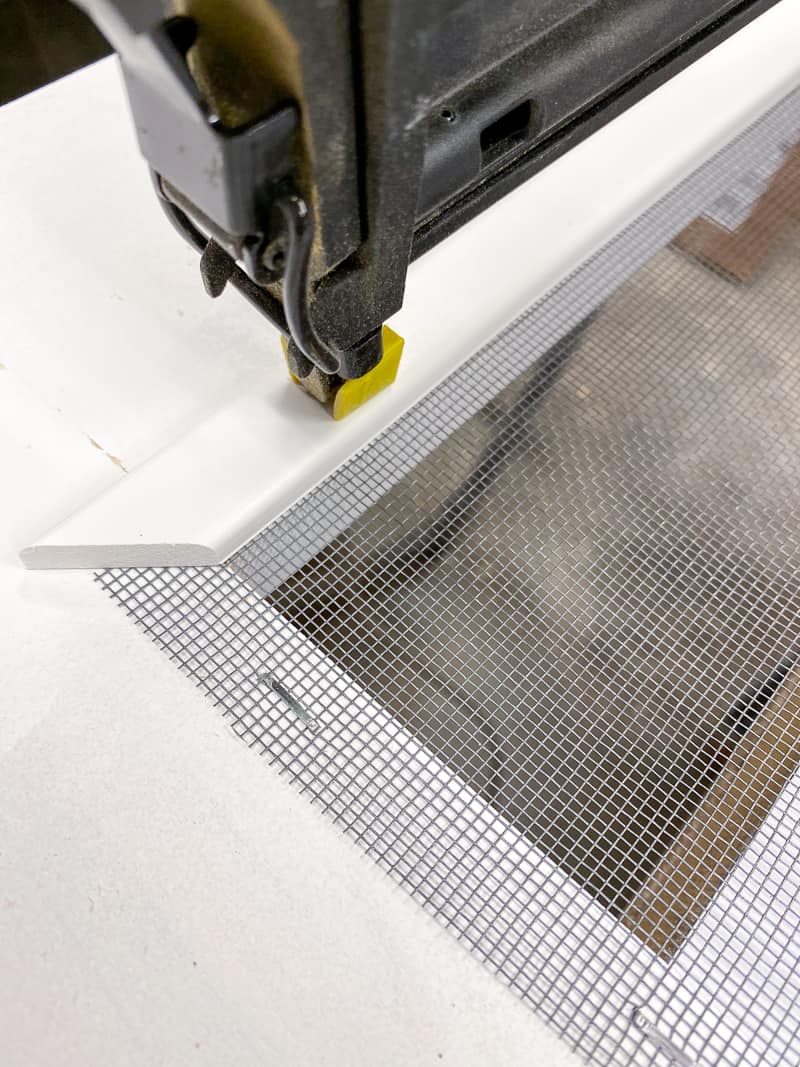
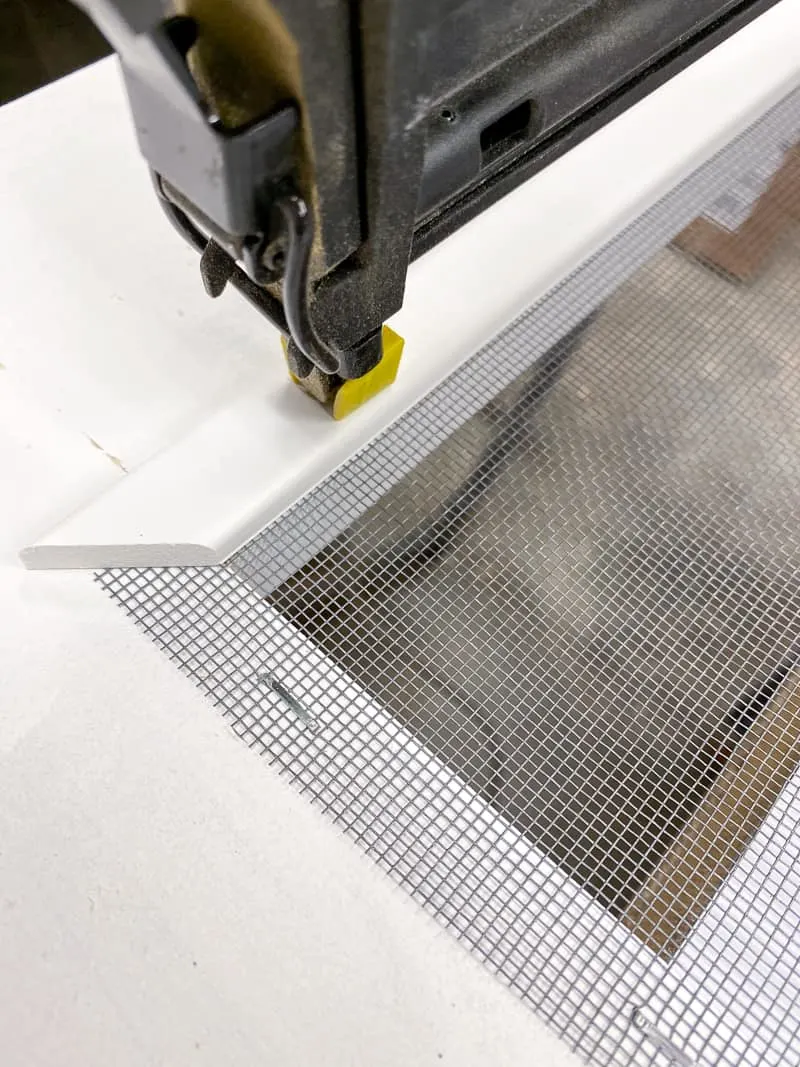
I usually struggle with mitered corners, but this screen moulding went together perfectly!

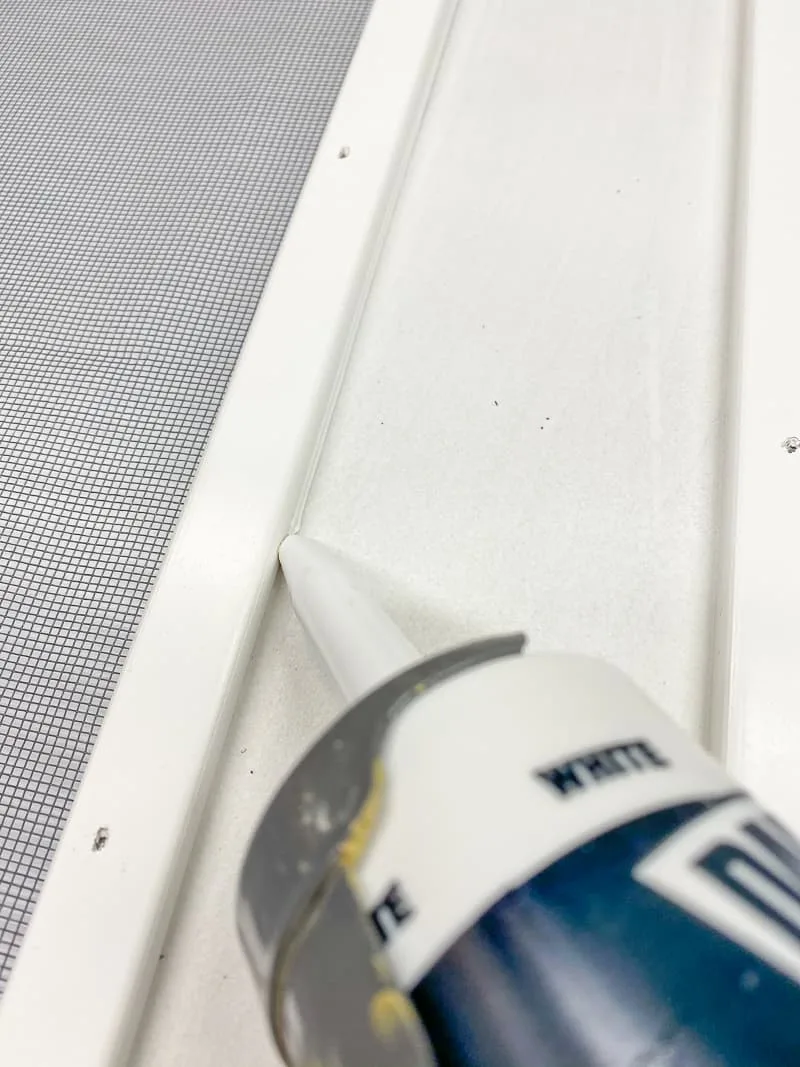
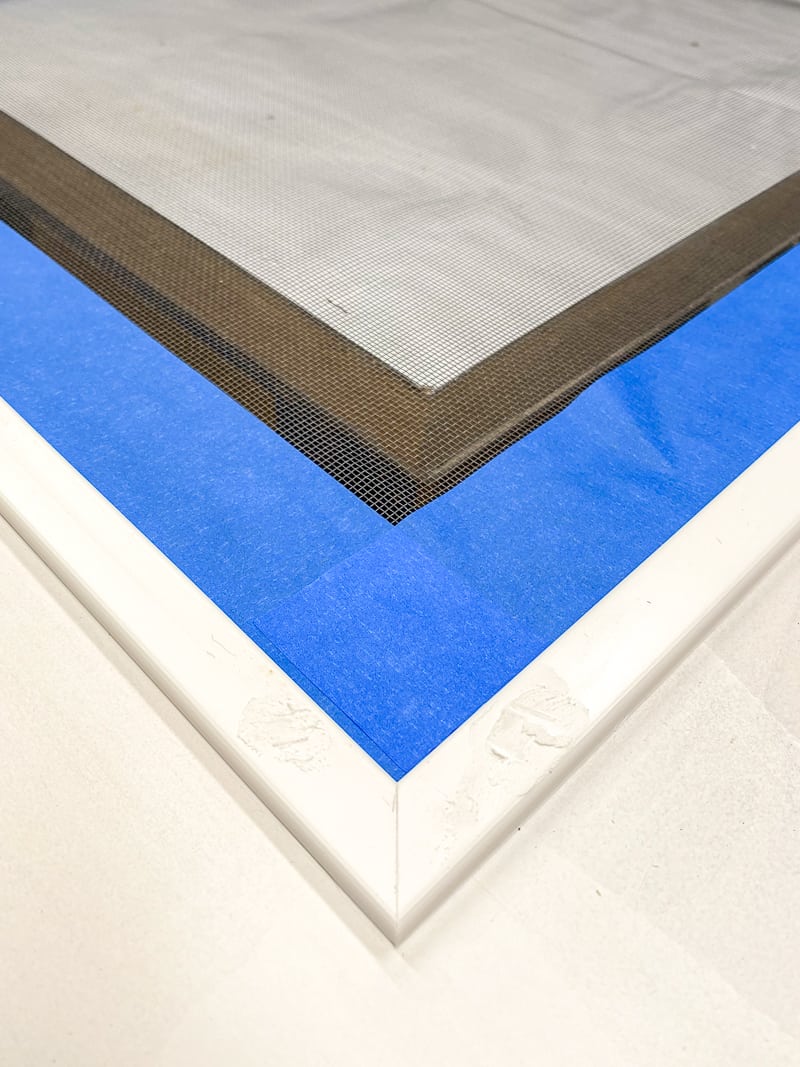
Caulk gaps and fill nail holes
To give the door a more finished look, I caulked the seam between the moulding and the frame. You can learn more about how to use a caulk gun here.
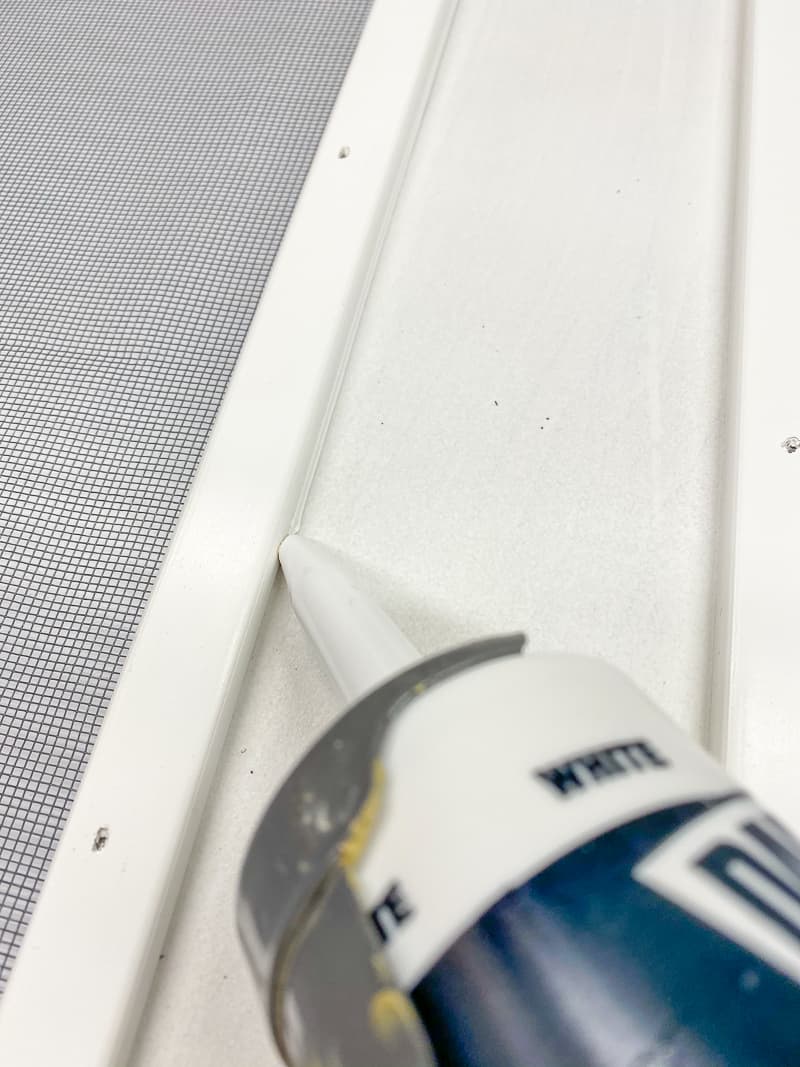
Then I filled all the nail holes with spackle. Once it dried, I sanded it smooth then gave that side of the screen door one last coat of paint. The painter's tape helped keep the sanding dust off the screen, and prevented any paint from messing it up.

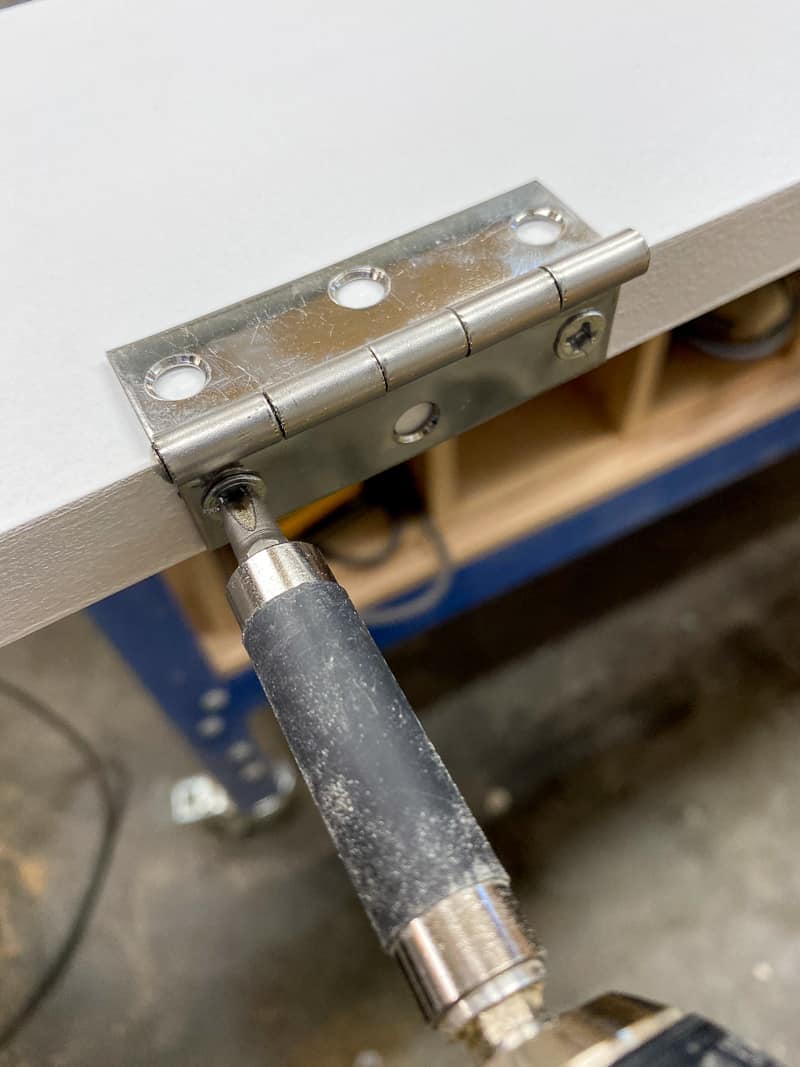
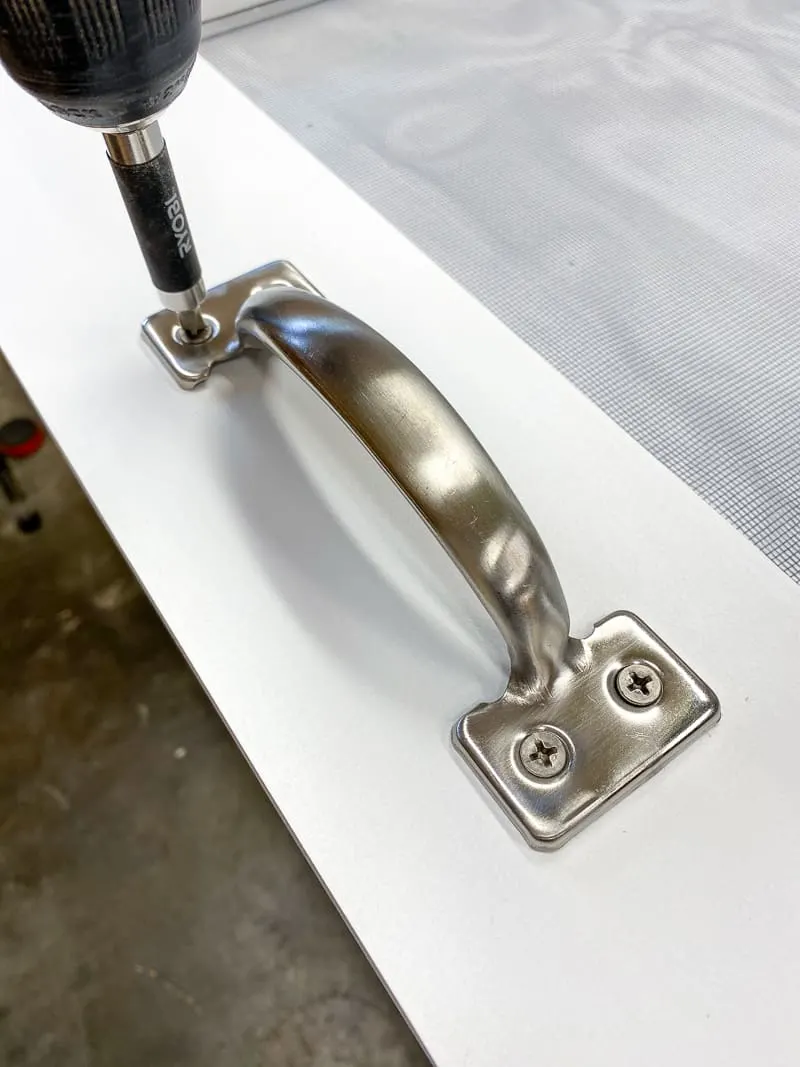
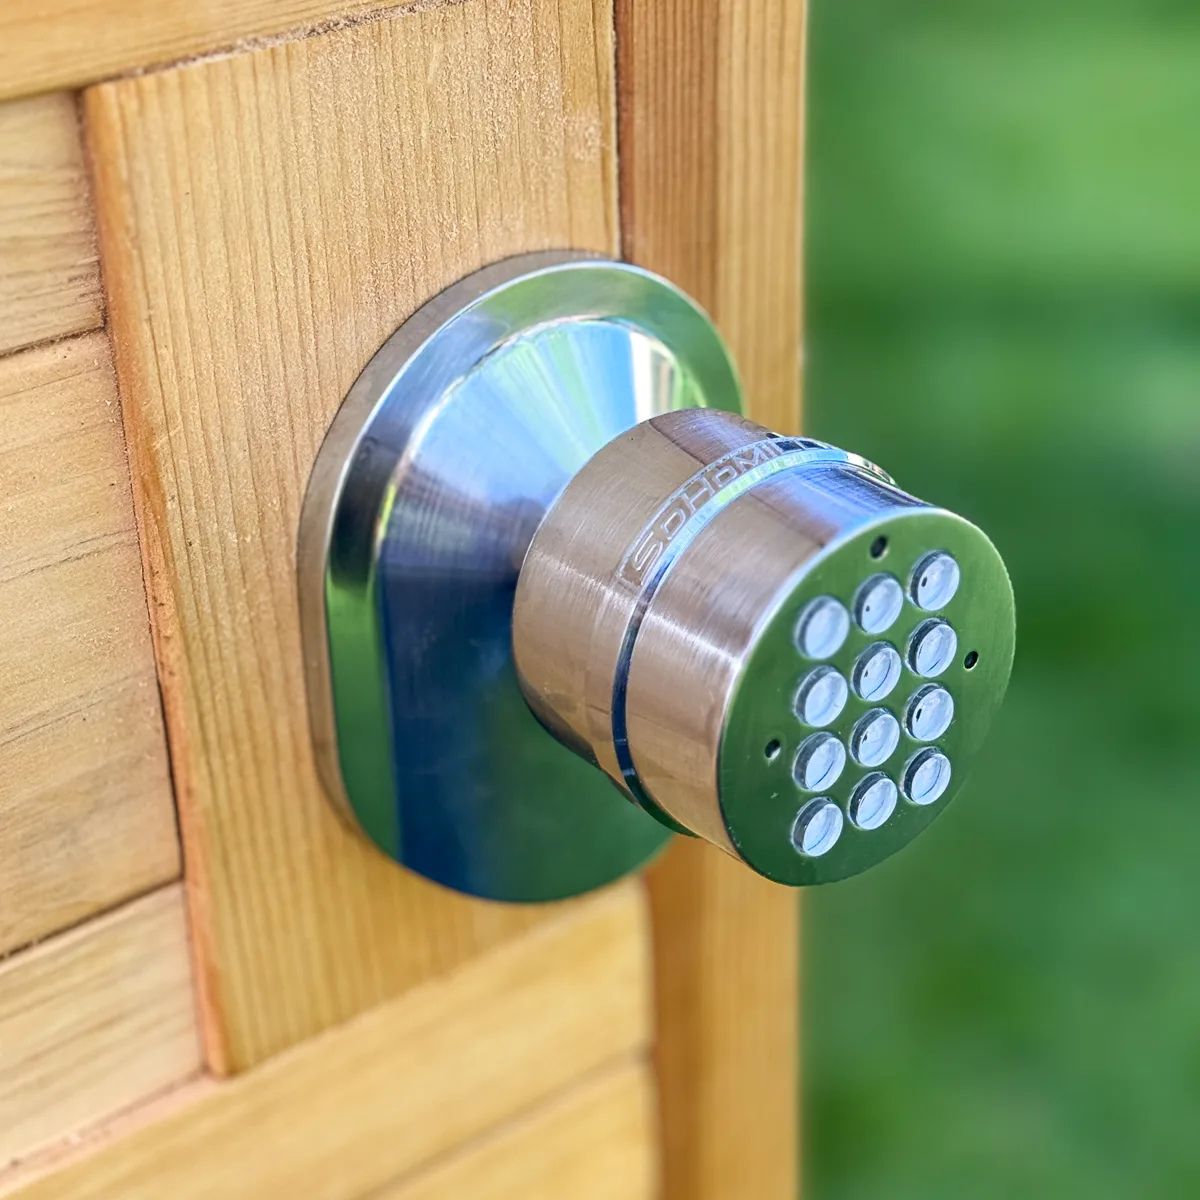
Attach hardware
The cutouts for the screen door hinges were really narrow, plus the door itself is only ¾" thick. I used these thinner door hinges instead of the bigger self-closing ones I originally bought. The door is pretty lightweight, so they should hold up fine. Just make sure to buy stainless steel so they don't rust!

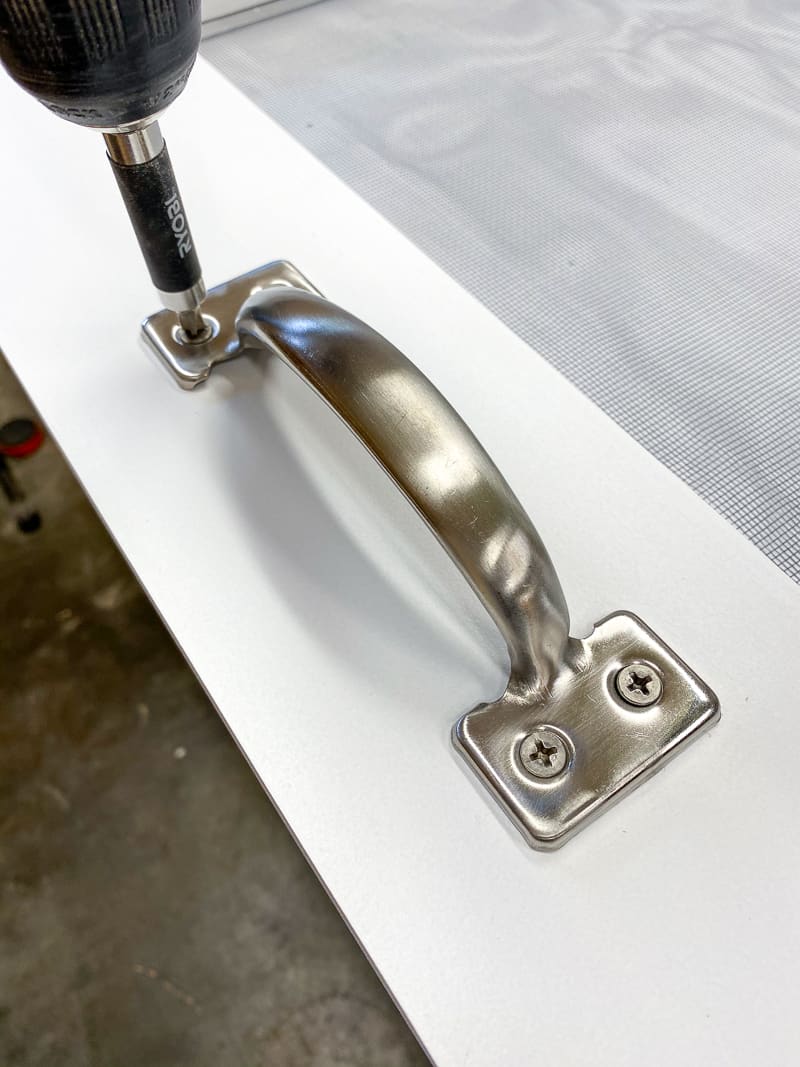
Then I attached the handle to the front of the door, centered on the middle panel.
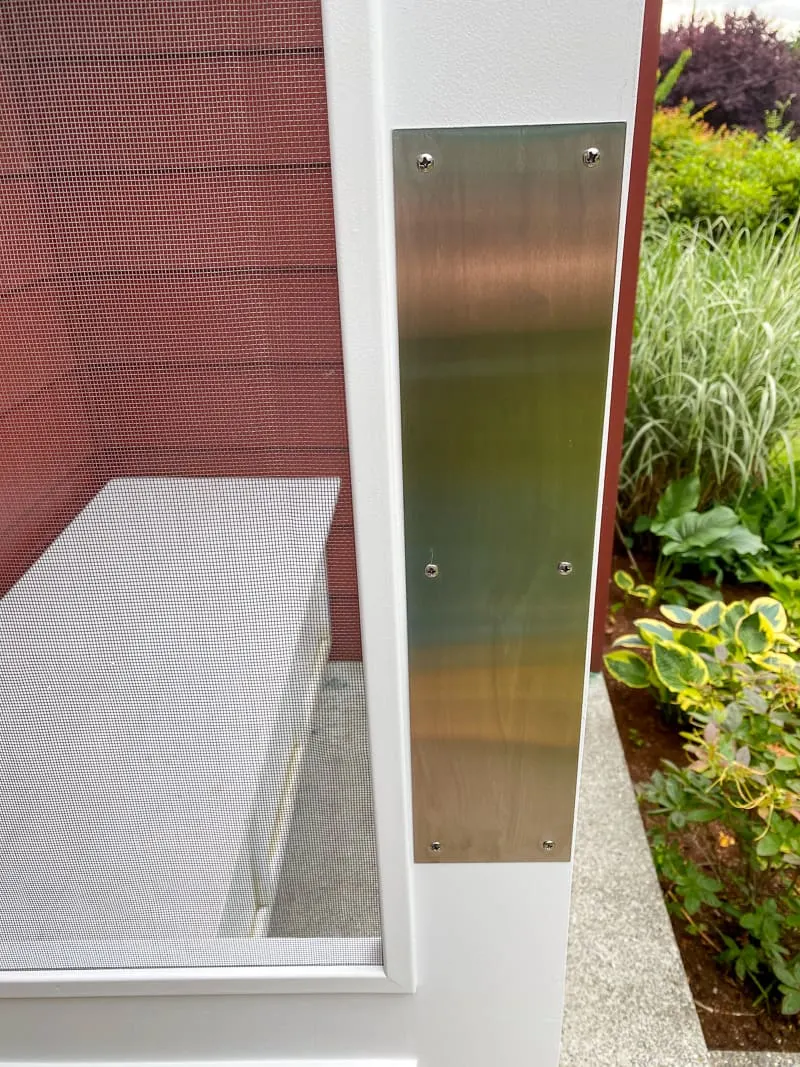
Once the door was installed, I realized that the inside of the door will end up with lots of fingerprints and smudges over time from repeated opening. So I added a push plate to the back of the door, opposite the handle, to make it easier to keep clean.

Mount the screen door in the frame
Our front door frame already had a cutout for a screen door hinge, but if yours doesn't, watch the video below to learn how to cut one out with just a hammer and chisel! If you don't mind a bigger gap between the hinge side of the door and the frame, you can skip this step.
It took a few tries to get the screen door to swing nicely and close completely. It turns out that the threshold at the bottom of the frame was slightly warped and swollen, so I had to trim ½" off the bottom of the door to clear it. If you run into this problem, a track saw or circular saw with a straight cut jig will help cut it cleanly.
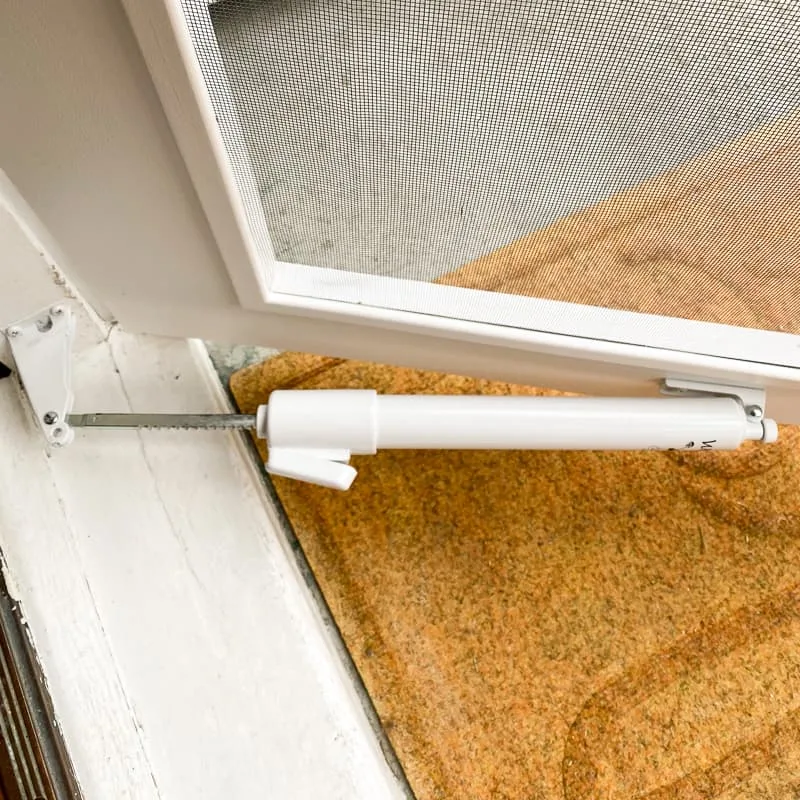
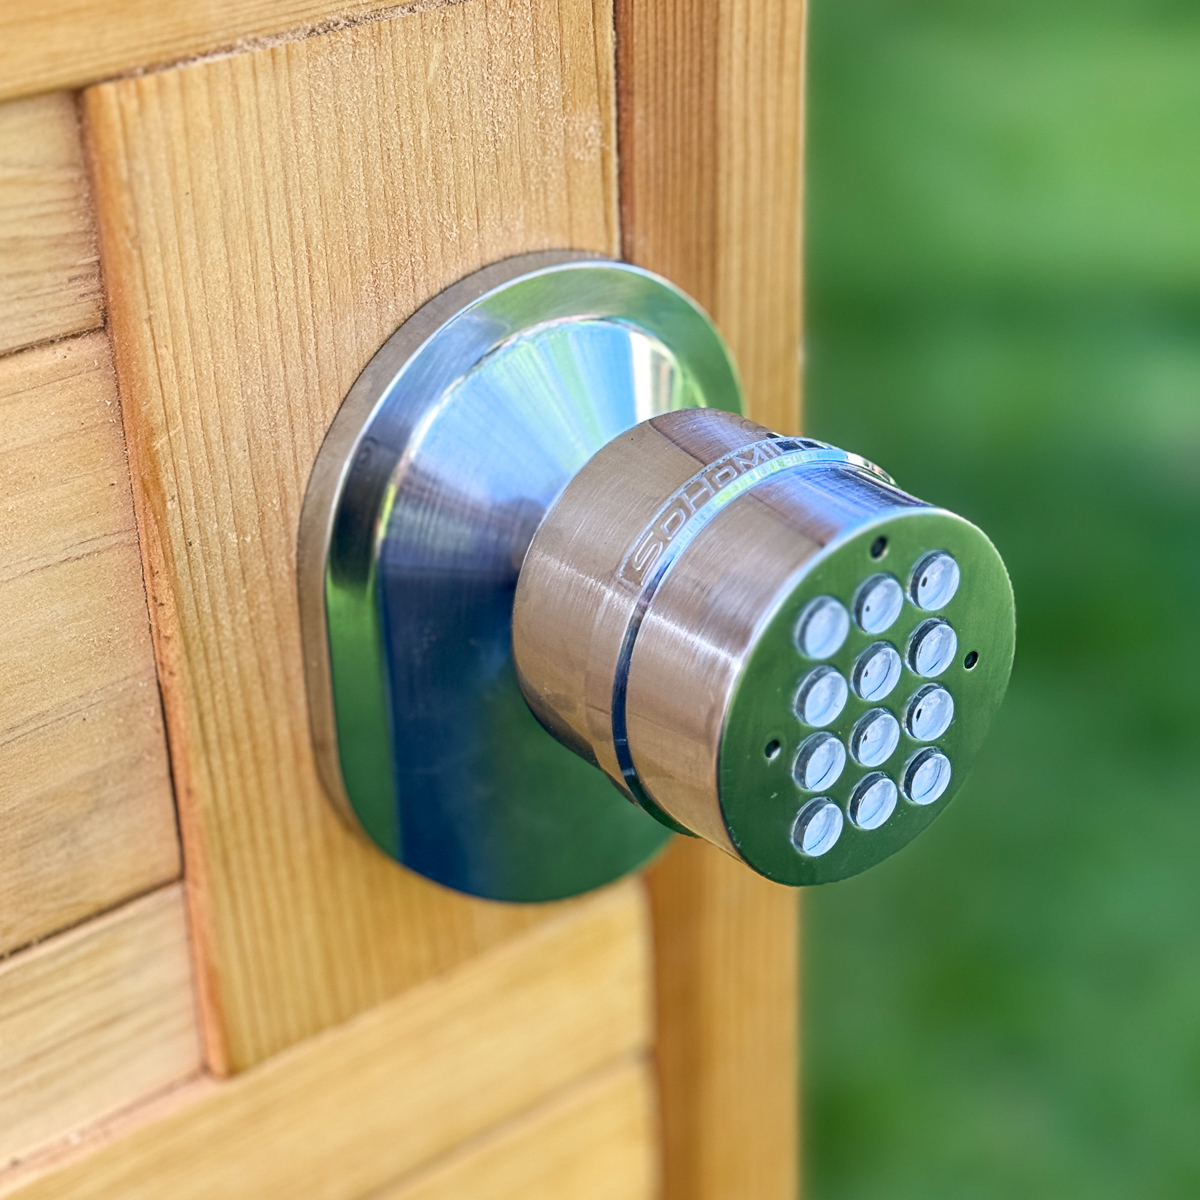
Install Slow-close mechanism (optional)
You don't want your new screen door to slam against the frame in every gust of wind, so a pneumatic door closing mechanism will keep it shut.
I installed this slow-close mechanism with a button on the side to keep the door open if we're bringing in lots of things (like groceries). It was pretty easy to set up, and it works perfectly!

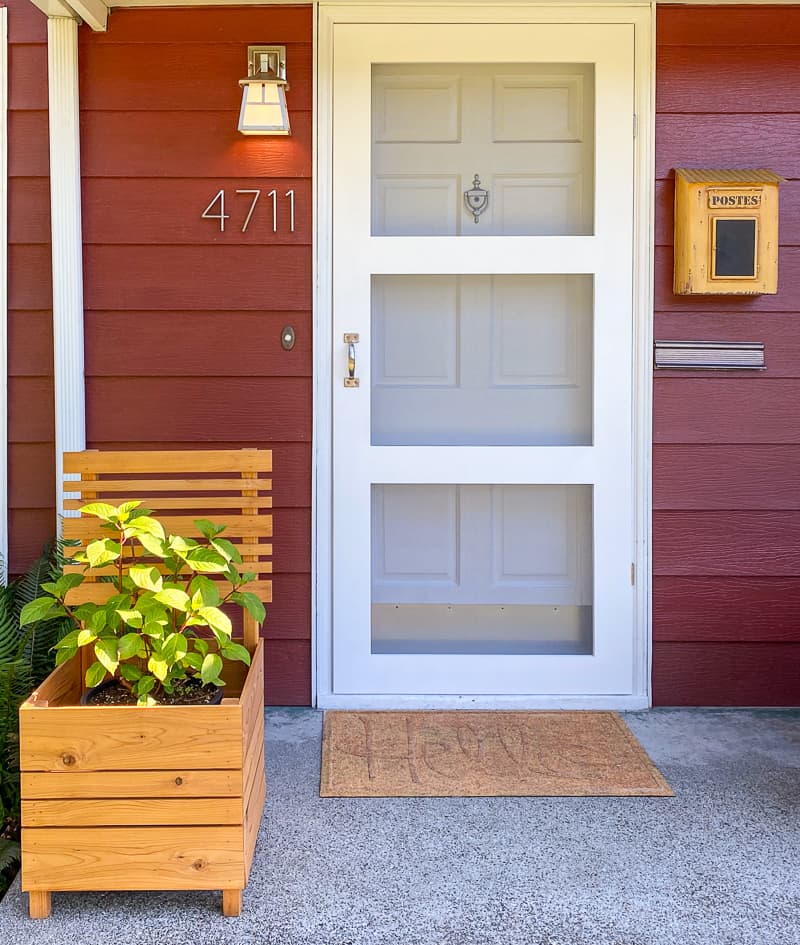
Enjoy the cool breeze coming through your DIY screen door!
I can't believe I waited so long to make a screen door! I love the cool breeze coming through the living room, without all the bugs! It also gives us a little more privacy when people walk past our house, since it's harder to see through the screen.
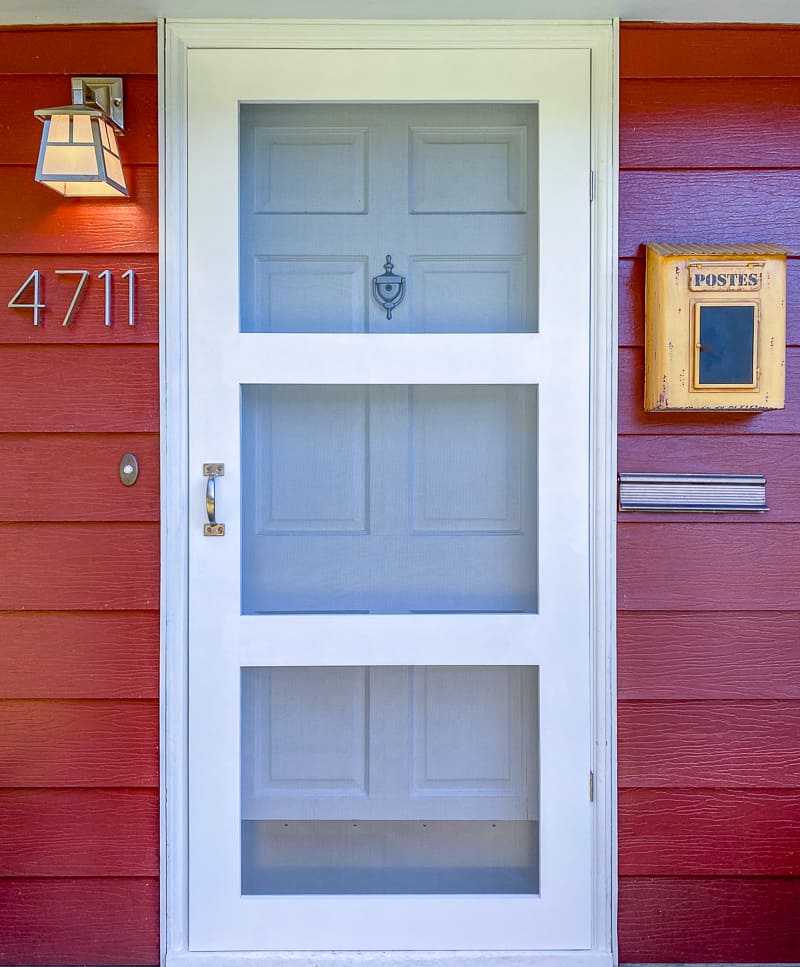

The panes of the screen door match the panes of the large picture window perfectly, so it almost looks original to the house.

It's easier than I thought to build a screen door, and makes a huge difference to both the curb appeal and inside temperature of the house! I have another project for our front porch coming up soon, so stay tuned!


Jean
Saturday 20th of June 2020
wow, I never imagine this kind of screen door before but thank you for sharing us your creativity in doing this. Im excited to try this in my project and I will give you my result once it done. Thank you so much and keep it up!
Julie
Saturday 13th of June 2020
I love all of your projects! Can you tell me is there a way to download just the instructions without the ads so that I can print it out? This one is running on 22 pages and I really just want the text. Thank you!
Vineta
Monday 15th of June 2020
You can use a site like printfriendly.com to create a PDF of the instructions without the clutter. Good luck with your screen door!
Tia Robertson
Tuesday 9th of June 2020
I don’t know WHY I never thought to do this before! I’ve been fighting the urge to spend too much money on a ready-to-install unit for our back door, but I’ve been sitting on a stack of 1X material for over a year with no plan! Thank you- I can get this done this week without even leaving the house for supplies!
Vineta
Tuesday 9th of June 2020
That's great! Sounds like you have a new project! ;)