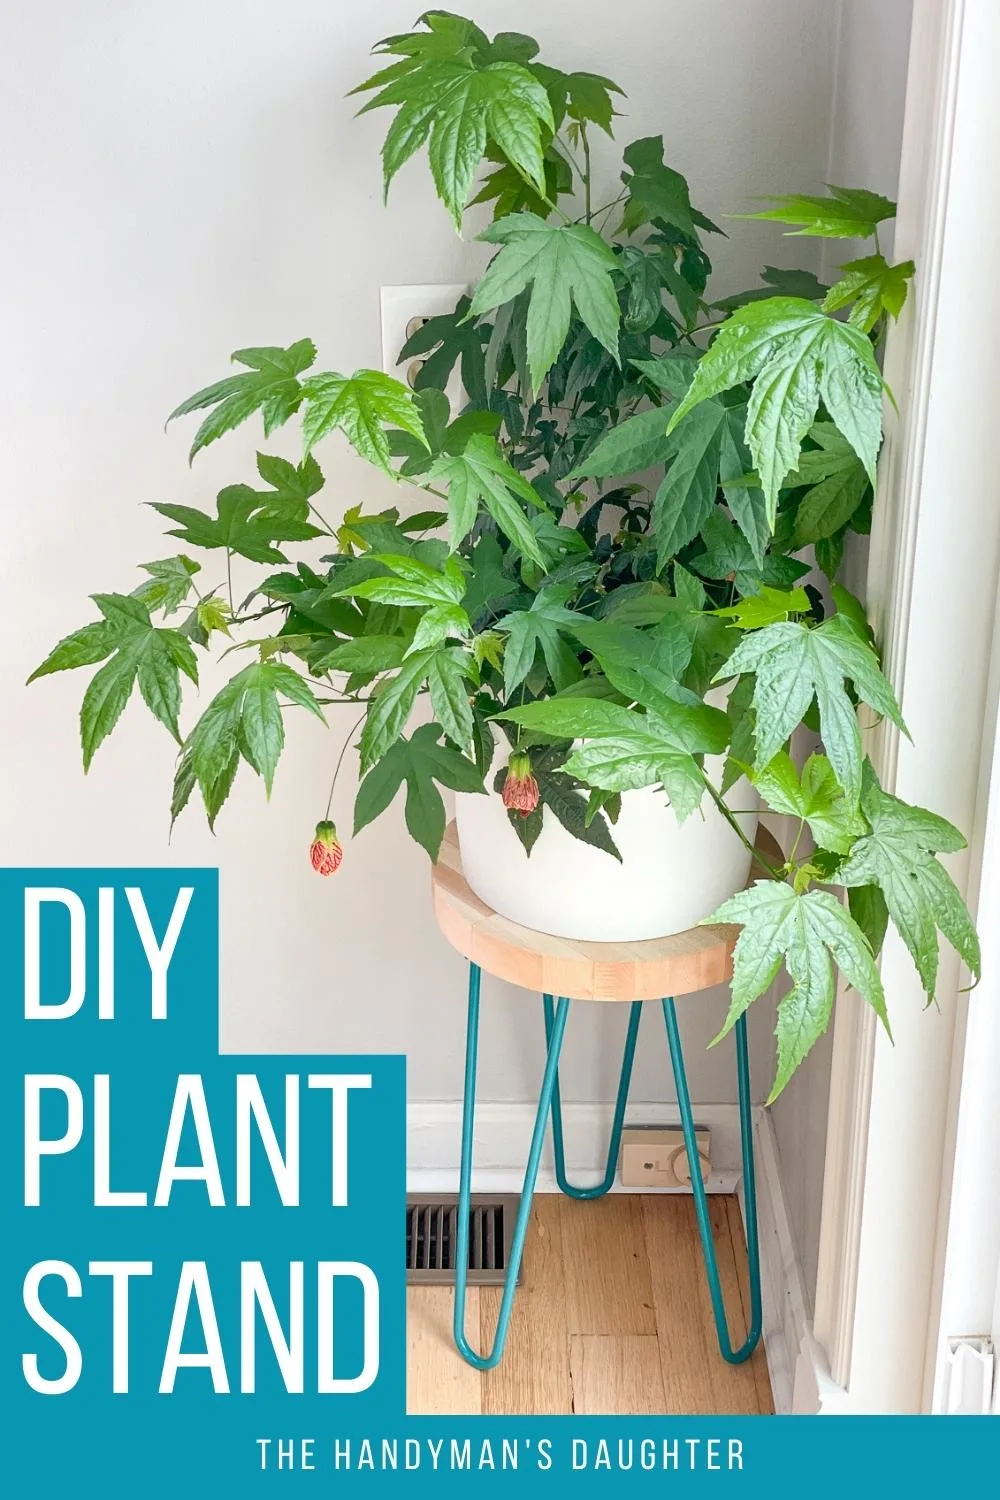
Make this super easy DIY hairpin leg plant stand in less than an hour! Display your favorite plant in a sunny corner with this quick project.

A few weeks ago, I went to the Northwest Flower and Garden Show here in Seattle. As I was wandering around the booths and dreaming about spring, I ran across a plant that stopped me dead in my tracks!

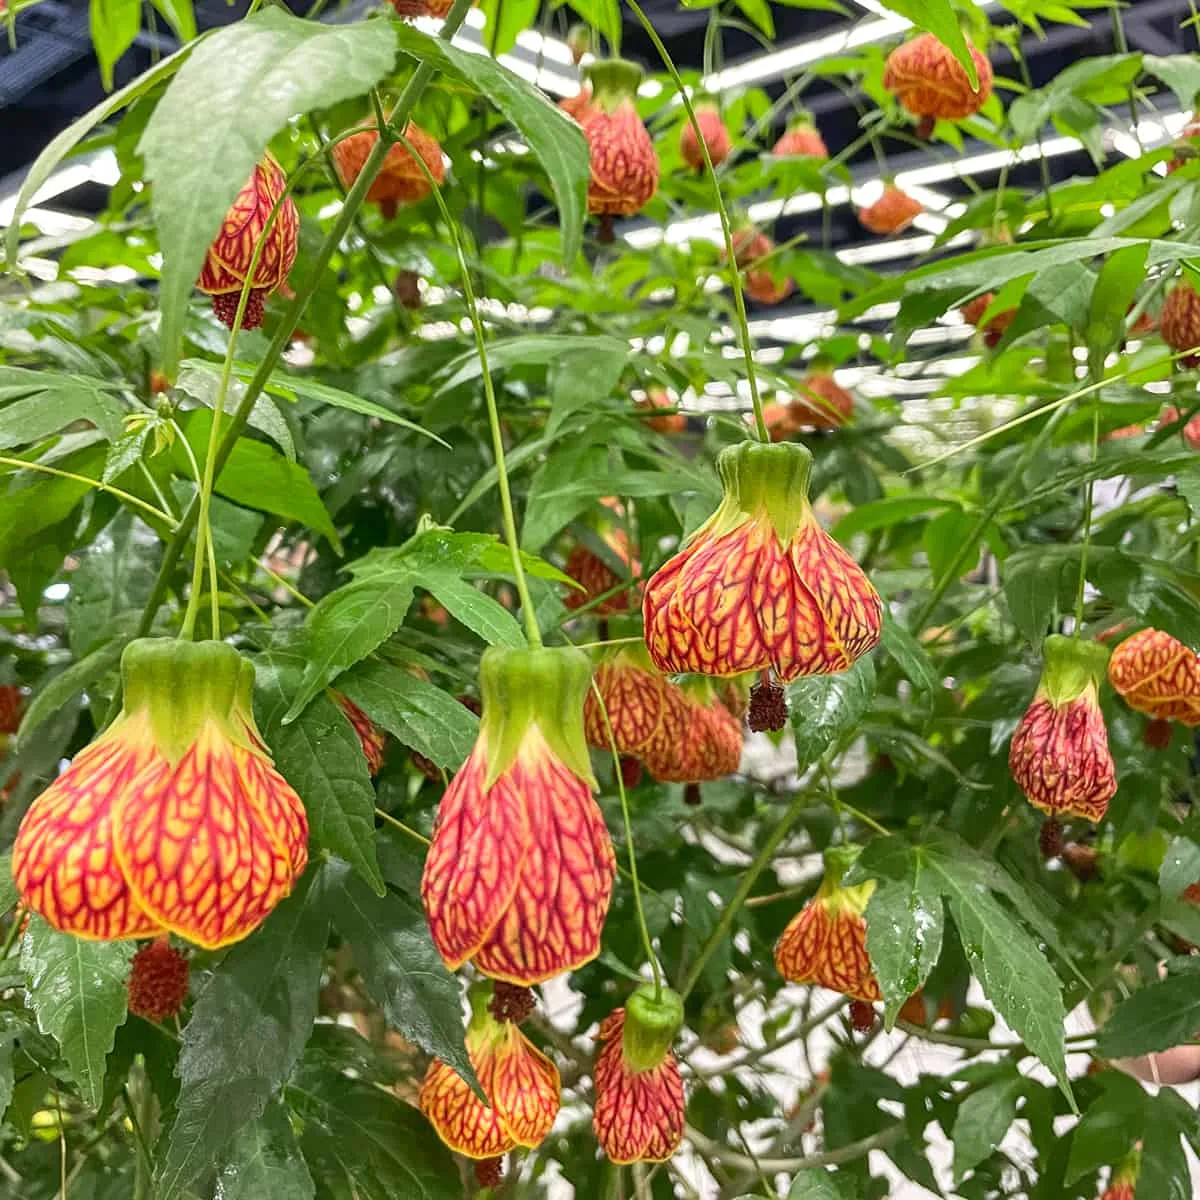
It's a Red Tiger Flowering Maple, and its flowers look like little Chinese lanterns. They had some plants for sale at the show, so I didn't have to hunt one down online or at the nursery! I quickly grabbed one that had lots of buds forming and brought it home.
While it could survive outside in our zone 8 garden, I wanted to enjoy the blooms in our dining room year round. This corner next to the sliding glass door gets plenty of sun, so I plopped it on the floor while I pondered what kind of plant stand to make.

It thrived in this corner, and had a flush of beautiful flowers over the course of a week or two. But since the blooms hang down, you couldn't really see them! Instead of overthinking a more elaborate plant stand with platforms for other plants, I decided to keep it simple and make this simple DIY hairpin leg plant stand instead.
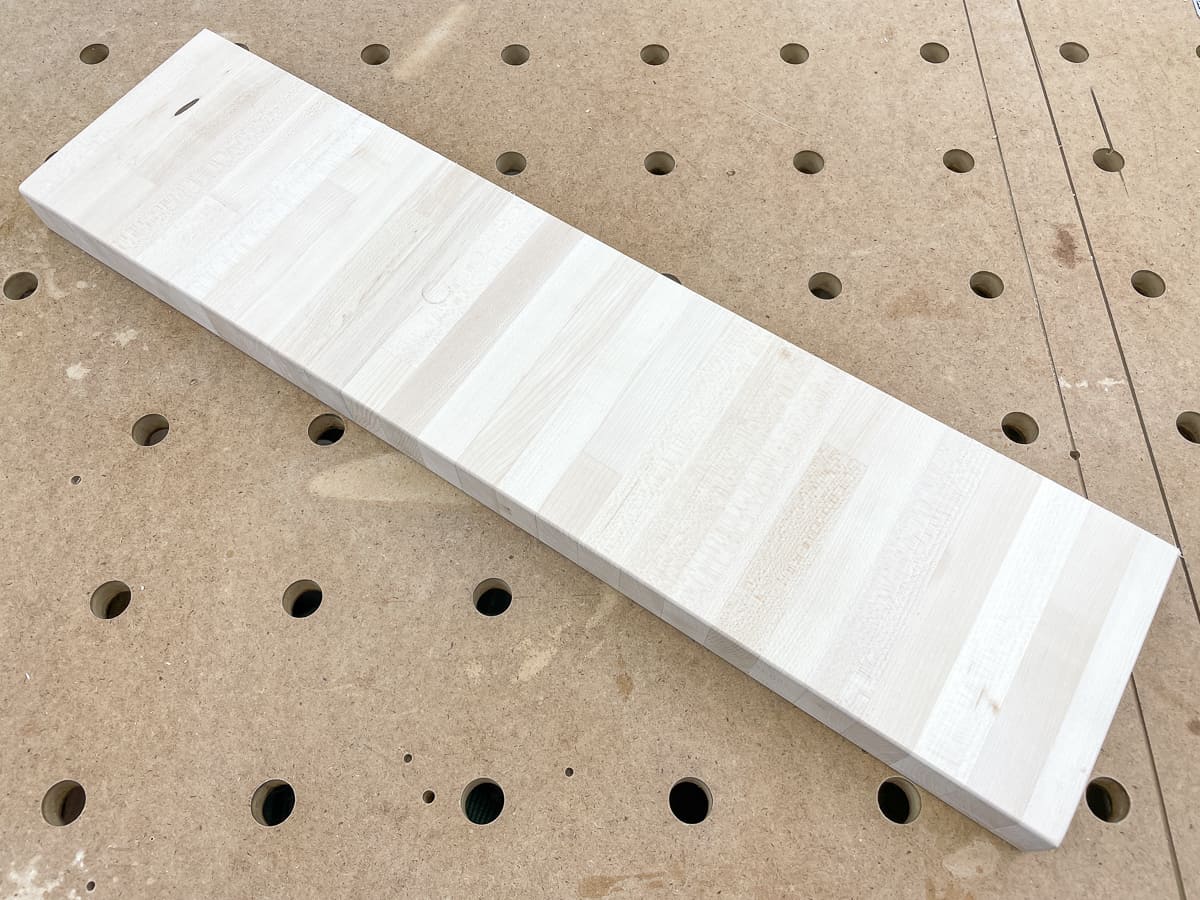
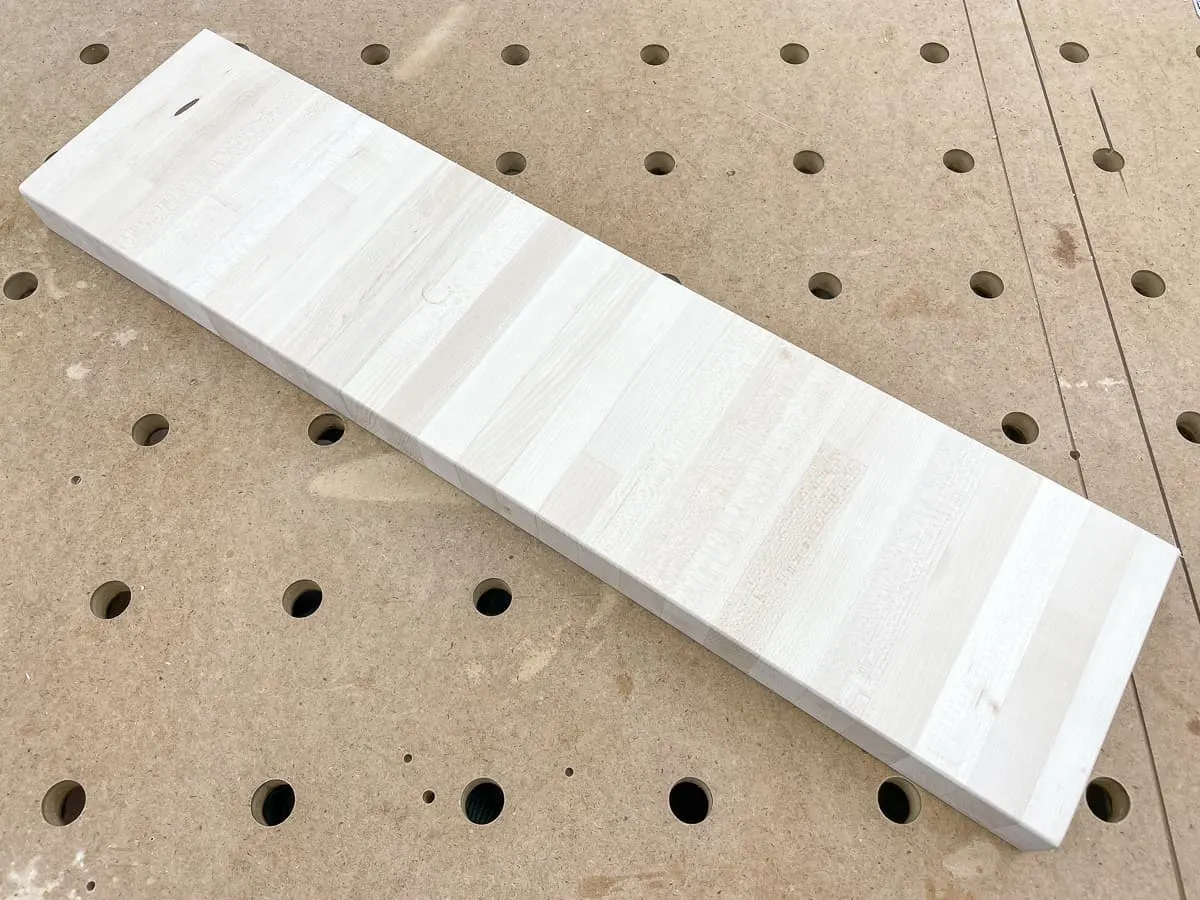
I rummaged through my scrap wood storage for something to use for this project. This long, skinny cutoff from our butcher block countertop wasn't good for much, but I couldn't bear to throw it away. It turned out to be the perfect piece for this plant stand!
Here's how to make it!
Looking for a different style? Check out these other DIY plant stand ideas!
This post contains affiliate links for your convenience. Purchases made through these links may earn me a small commission at no additional cost to you. Please visit my disclosures page for more information.
Materials Needed
- 12" to 14" round board
- You could even use one of these wood slices with the bark still attached for a more natural look!
- Paint or wood stain
- You'll need to apply polyurethane or polycrylic over wood stain to protect the surface.
- 3 hairpin legs
- I bought these 18" hairpin legs in Teal, but there's lot of other colors and heights available!
- ¾" screws with a pan head
How to make a hairpin leg plant stand
Glue up the panel
If you're not the power tool type, you can skip this step and just buy a round board or wood slice. You'll need it to be 12" across or more in order to fit all three legs underneath (and 12" is pretty tight, as you'll see later on.)
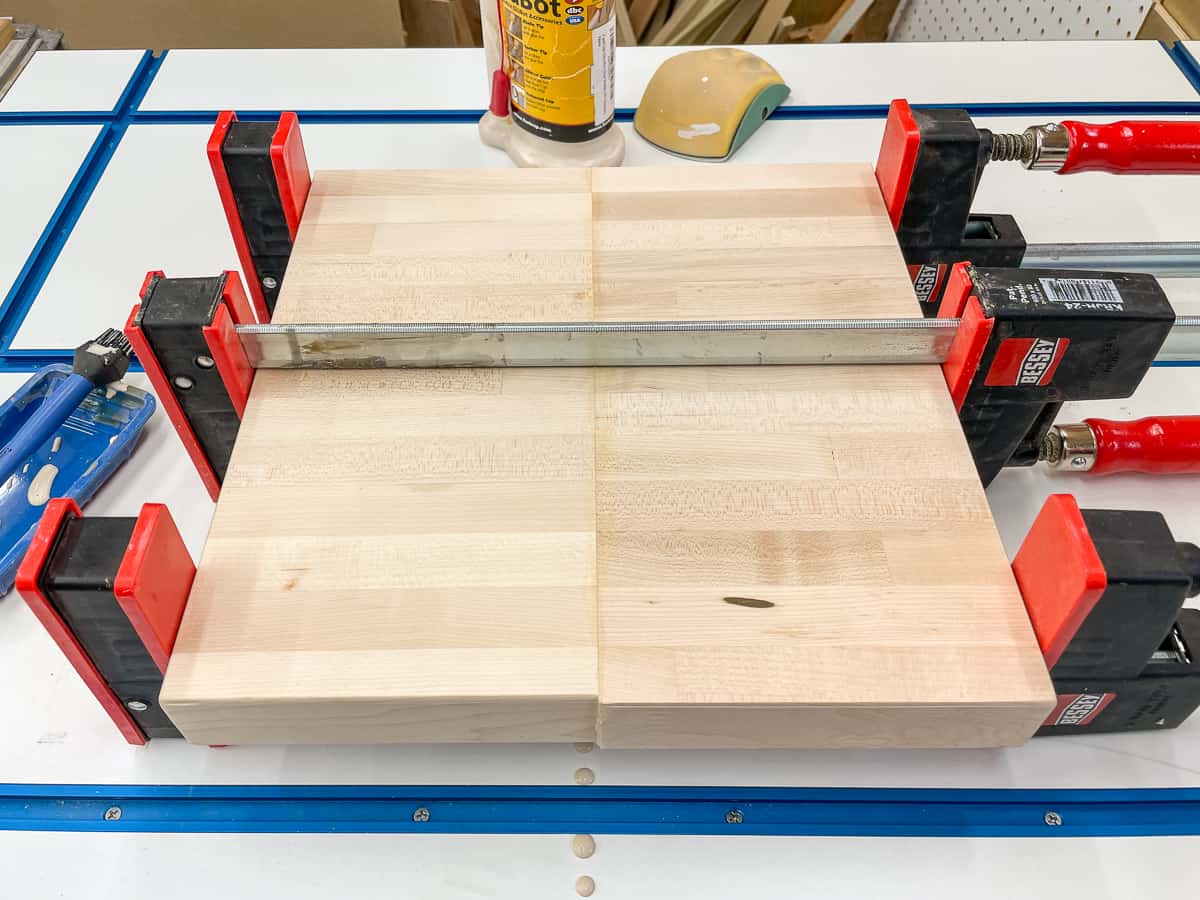
I started by cutting this long, skinny piece of butcher block in half, so I had two pieces that were a little over 6" wide and 12" long. When you line them up side by side, it makes a square about 12" x 12", which is just what I needed for a 12" diameter circle.
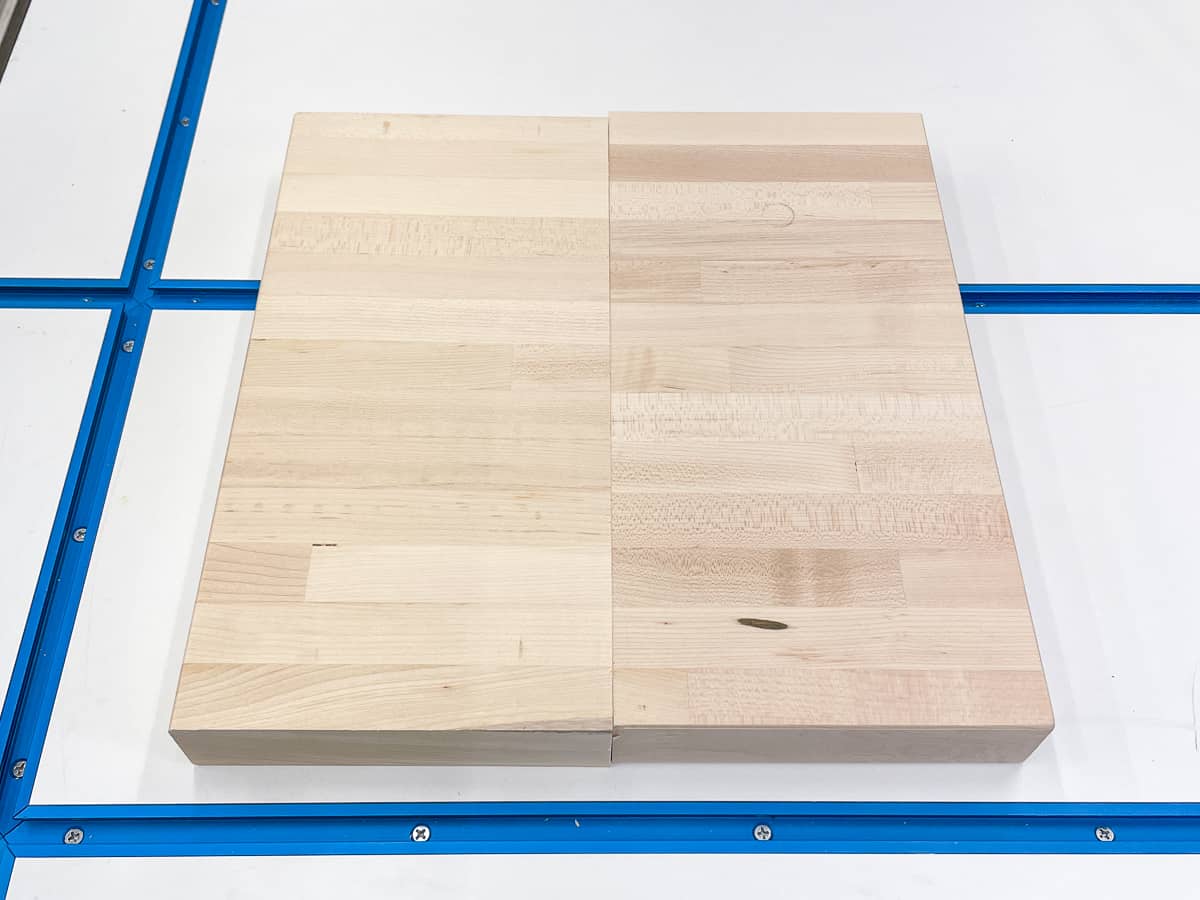
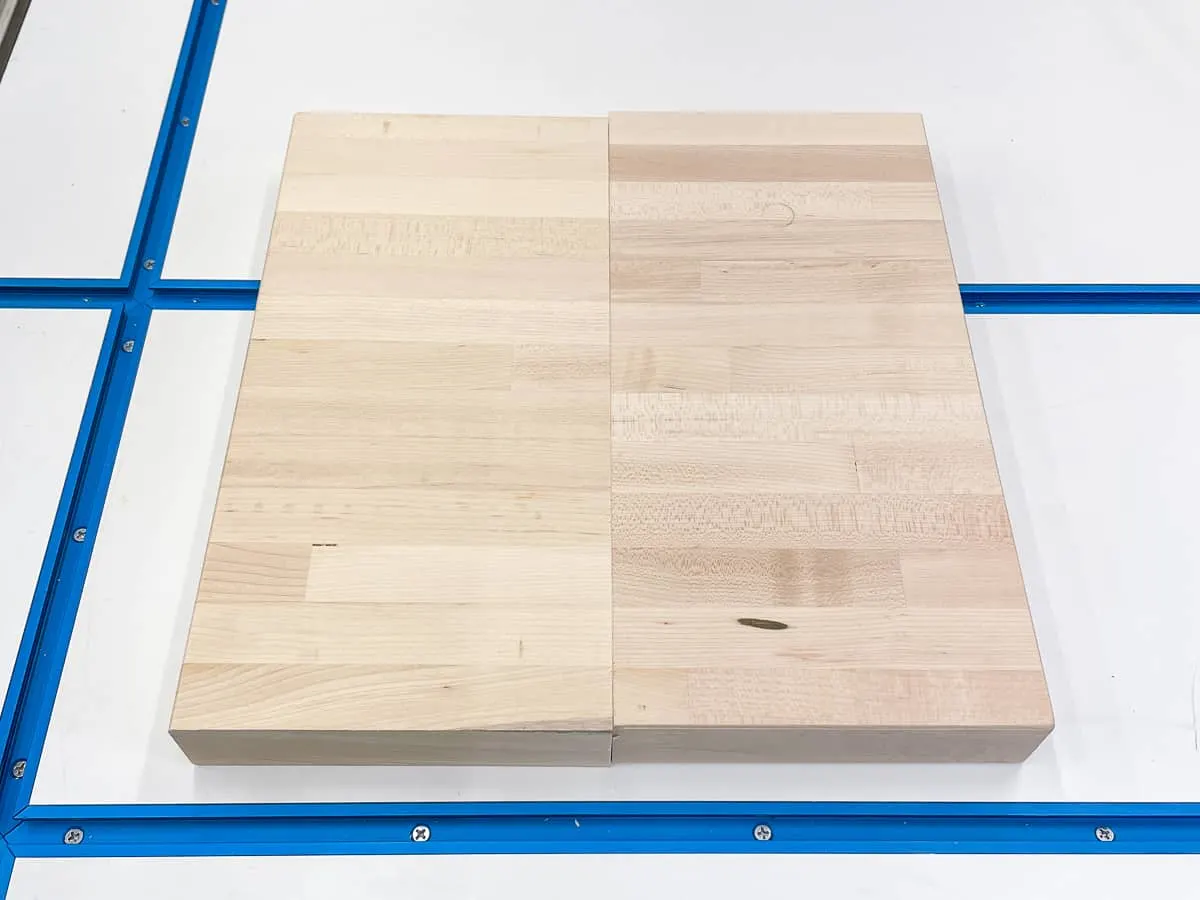
To join these two pieces together, I just applied wood glue to both sides and clamped them together. Normally I wouldn't recommend gluing end grain to end grain like this, but it should be ok on a small project like this. Just make sure to get good coverage and add more glue than you think you need, in case the end grain sucks it all up!
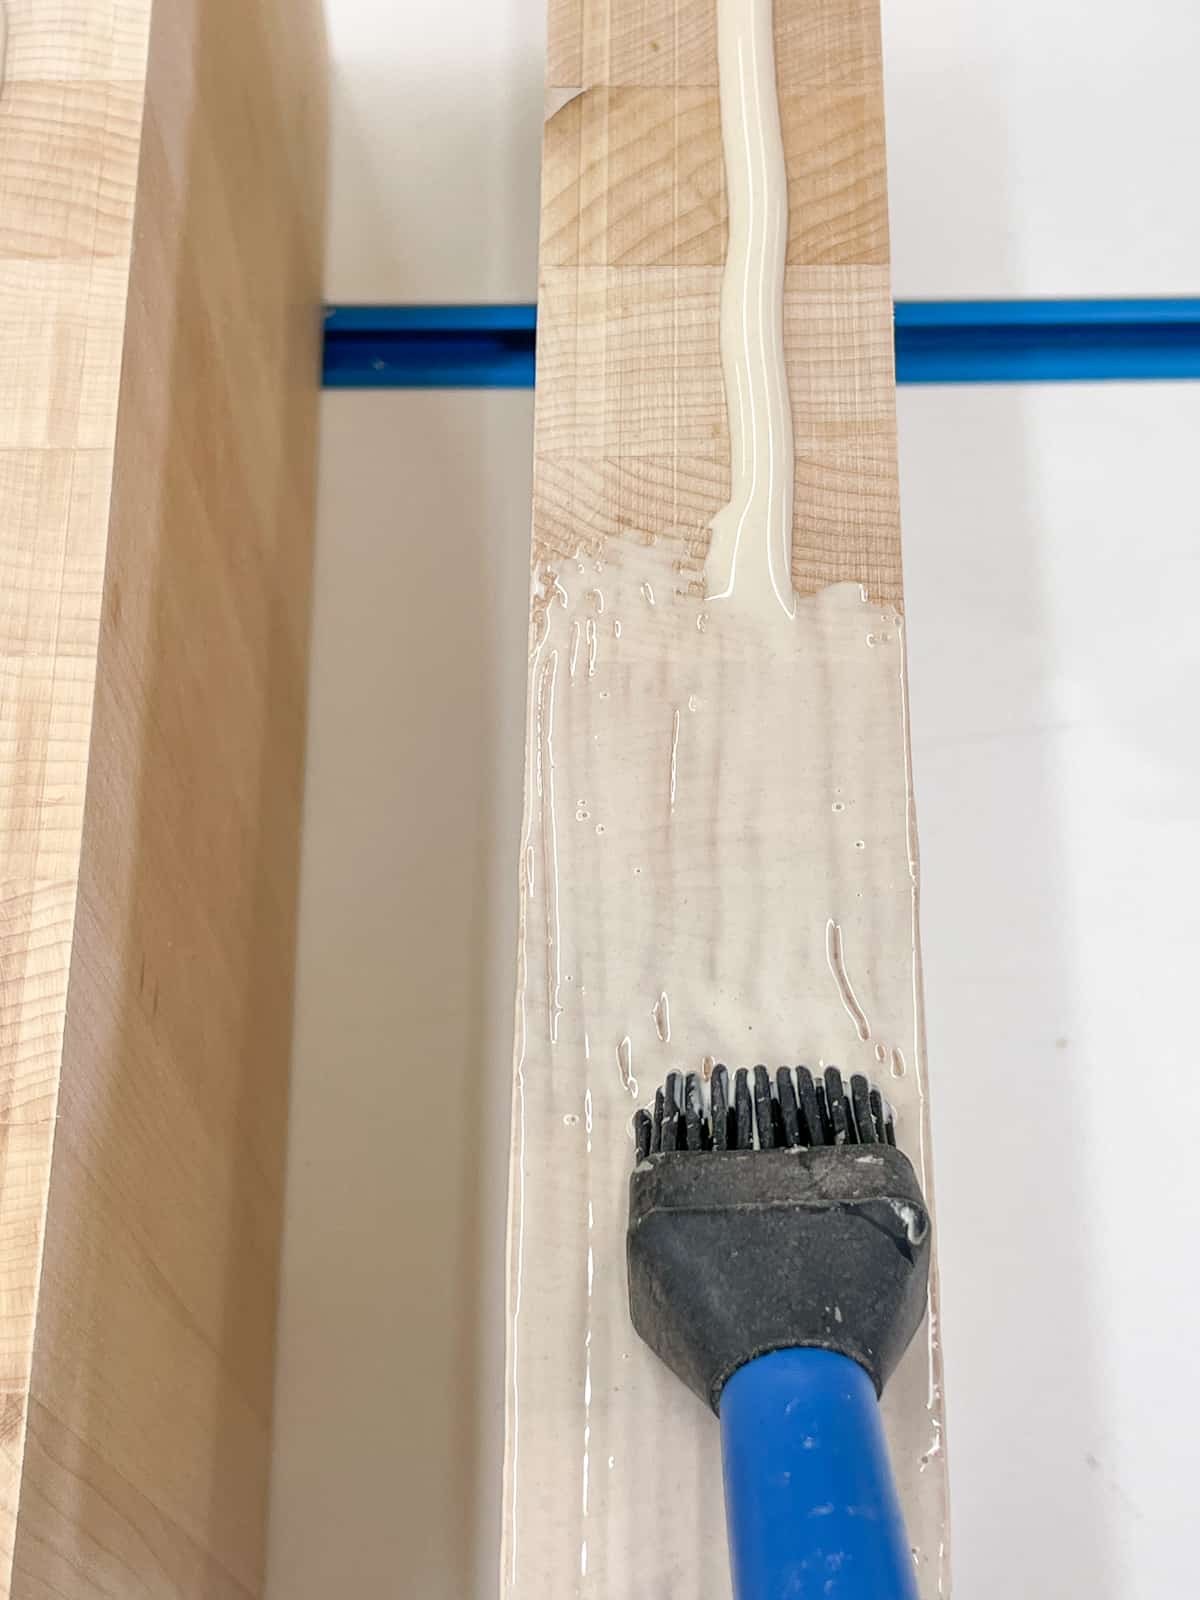

When you clamp up a panel like this, it helps to put one or two on the top as well as the bottom to prevent the joint from cupping. I cleaned up the glue squeeze out, then left it in clamps for a couple hours.

Cut out the circle
Again, if you just want to buy a wooden circle, you can skip this step. If you're using scrap wood like I am, you'll need to cut out a circle (or just leave it square).
Luckily, there's lots of different ways to do this! I wrote an article on six methods for cutting a circle out of wood, so you can choose the one that works for you and your specific tools.
I decided to make a bandsaw circle cutting jig and cut it out that way. It was quick and easy, and now I can use it for almost any diameter circle in the future!

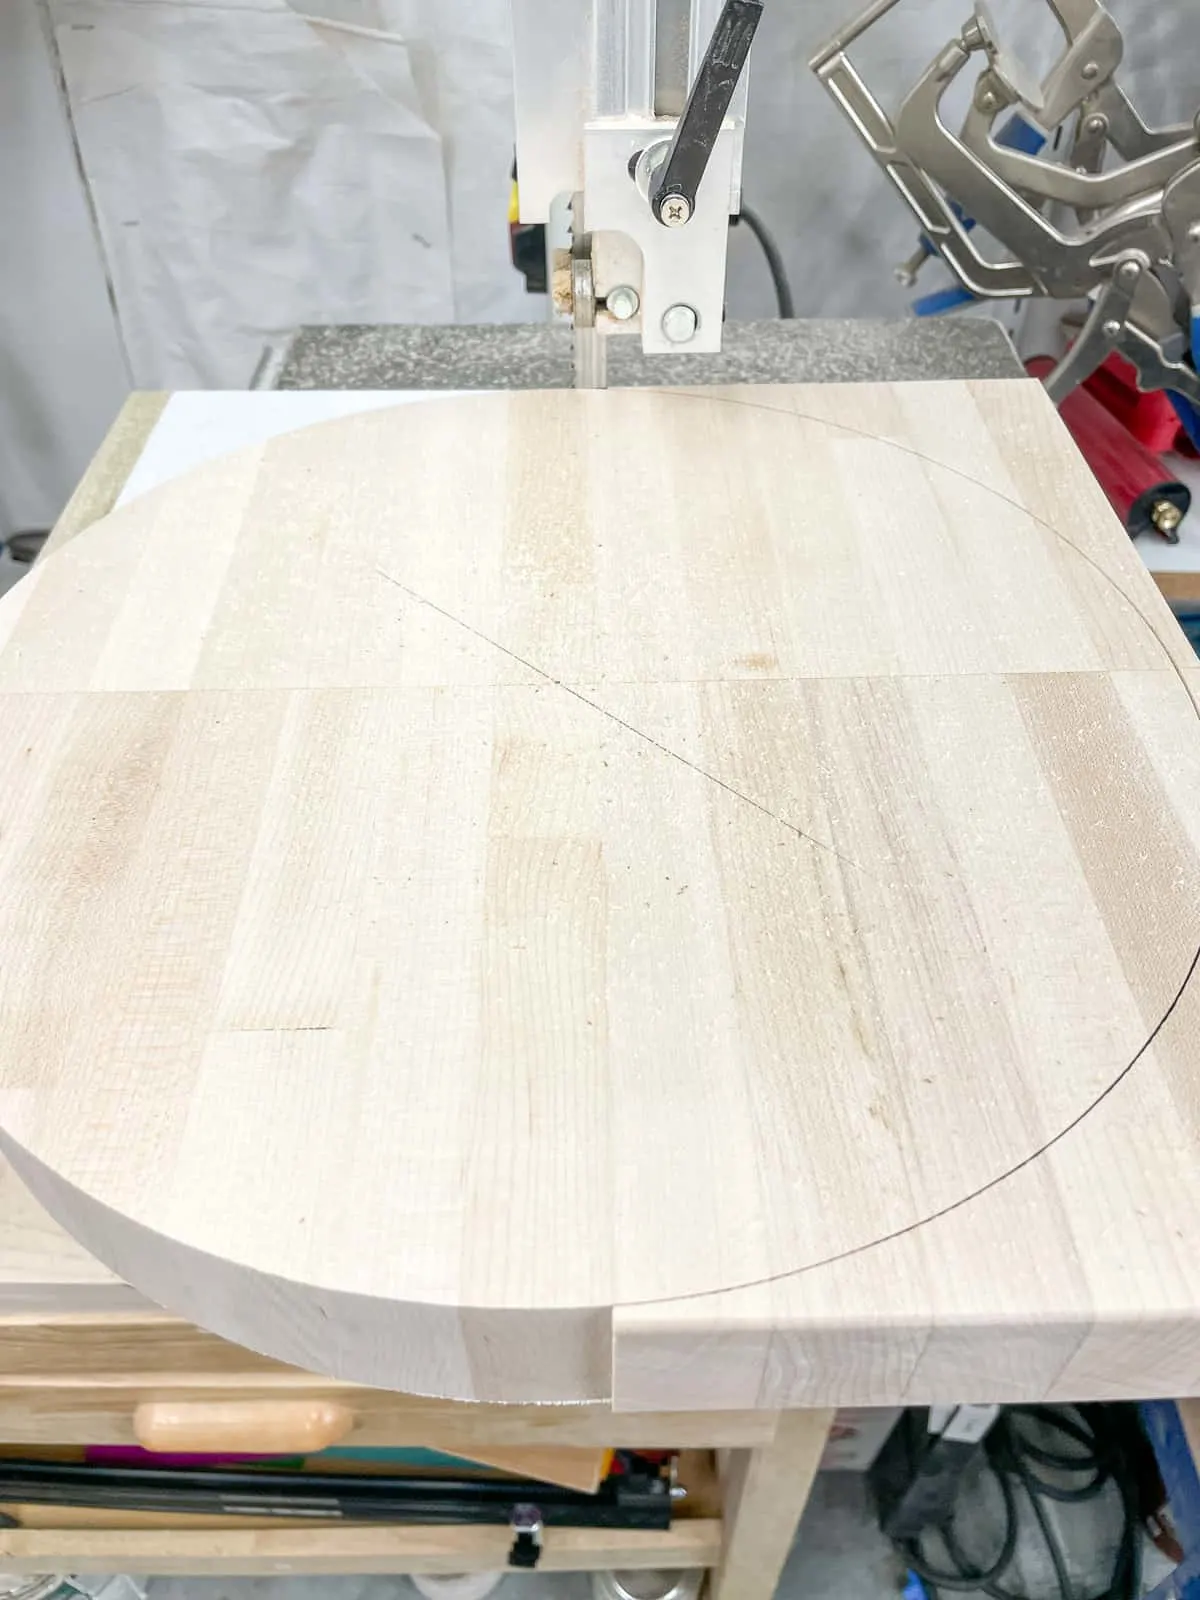
It worked out great, although the hard maple was almost too much for my little band saw. It left some burn marks on the edge, which I sanded off with the benchtop sander on my tool stand mixer lift.
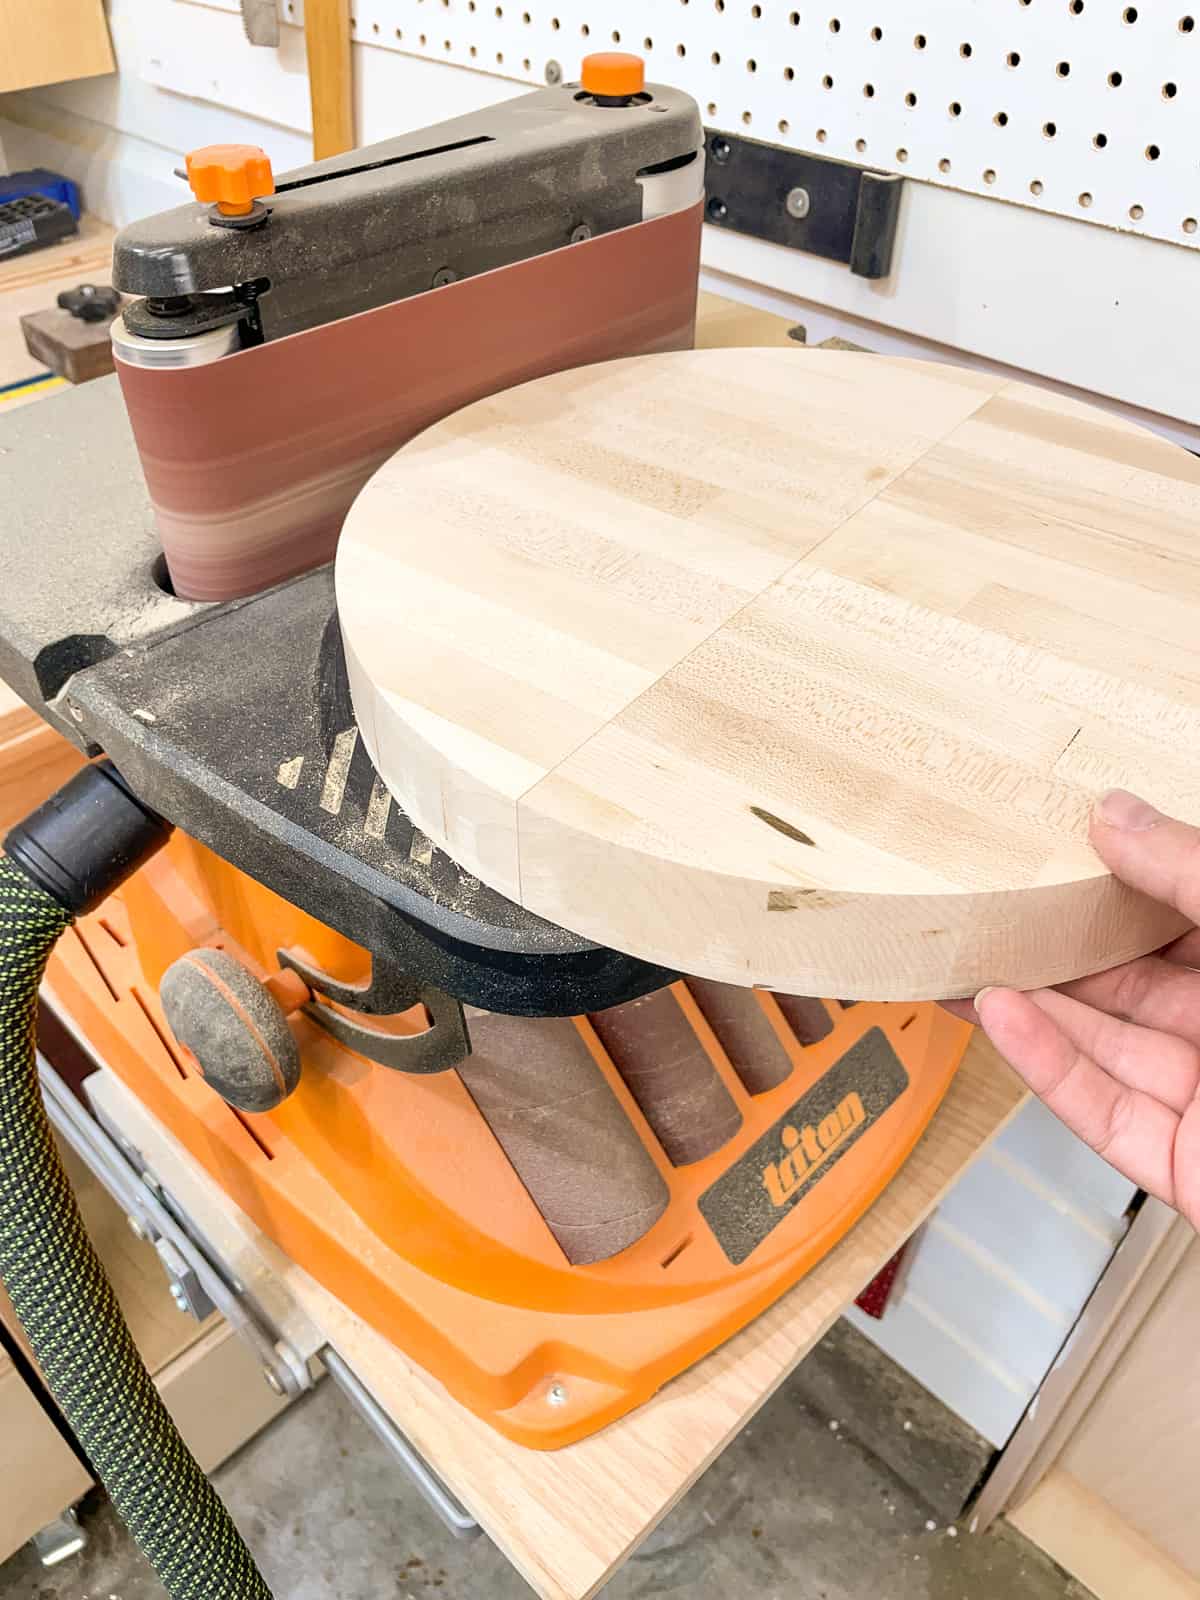

Make sure to keep the piece moving when sanding, so you don't end up with flat spots! I kept the circle constantly rotating so only a small section was touching the sandpaper at any one time.
Apply finish
At this point, you can paint or stain your circle to match your decor. If you use wood stain, you'll also need to apply polyurethane or polycrylic to protect the wood. This will prevent the stain from coming off if you get it wet from watering the plant.
I wanted the same finish as our butcher block countertop, so I just applied a couple coats of Walrus Oil cutting board oil to both sides and around the edge. It will repel moisture while keeping that natural light wood color without yellowing.

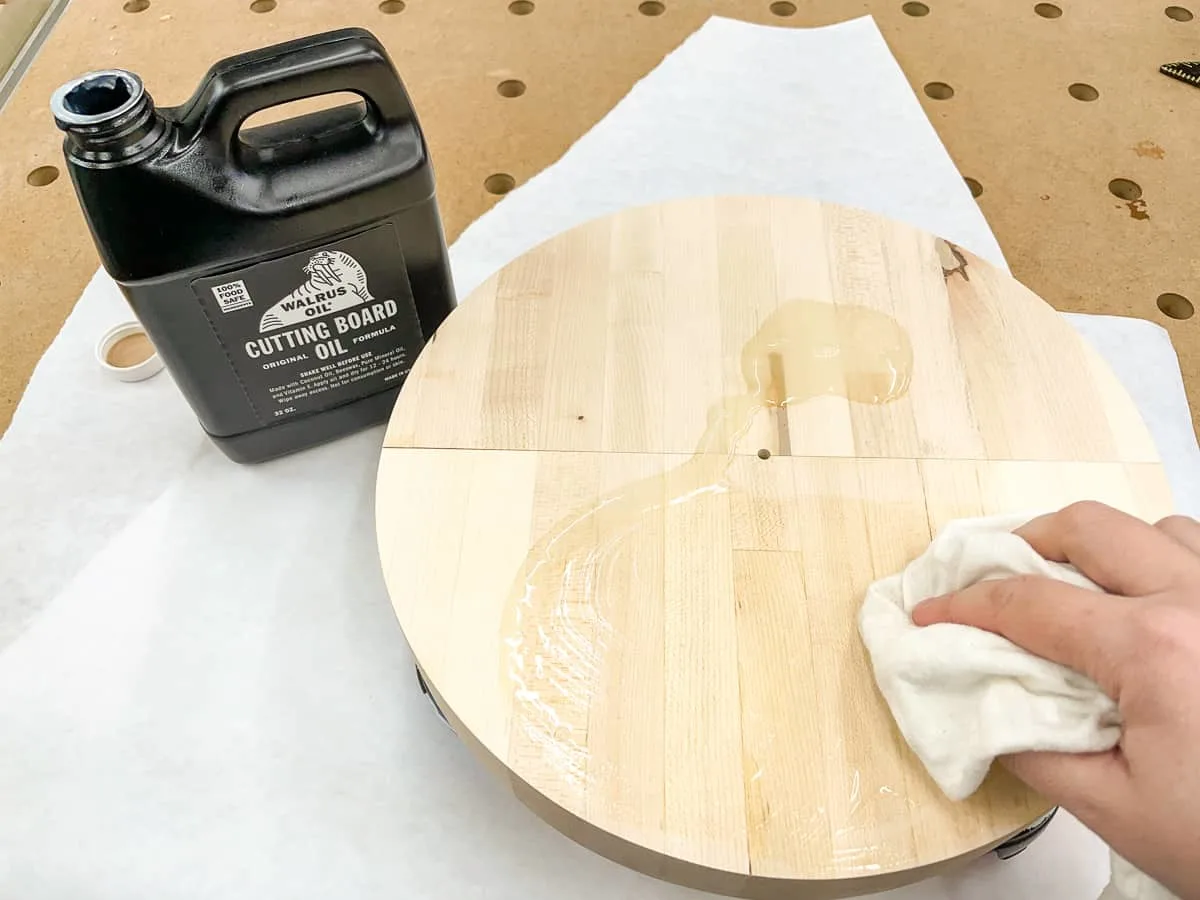
This stuff is super easy to apply! Just wipe it on with a rag, and wipe off the excess once the wood is fully saturated. I let it dry overnight.
Attach the hairpin legs
If you want to be absolutely precise, you can mark out six equal sections on the underside of the plant stand to place the legs.
Draw a center line, and place the pivot point of a speed square on one end of the line. Tilt the square until the angled side reads 60 degrees, and make a mark. Repeat this process on the other side, then connect the lines to create six sections.
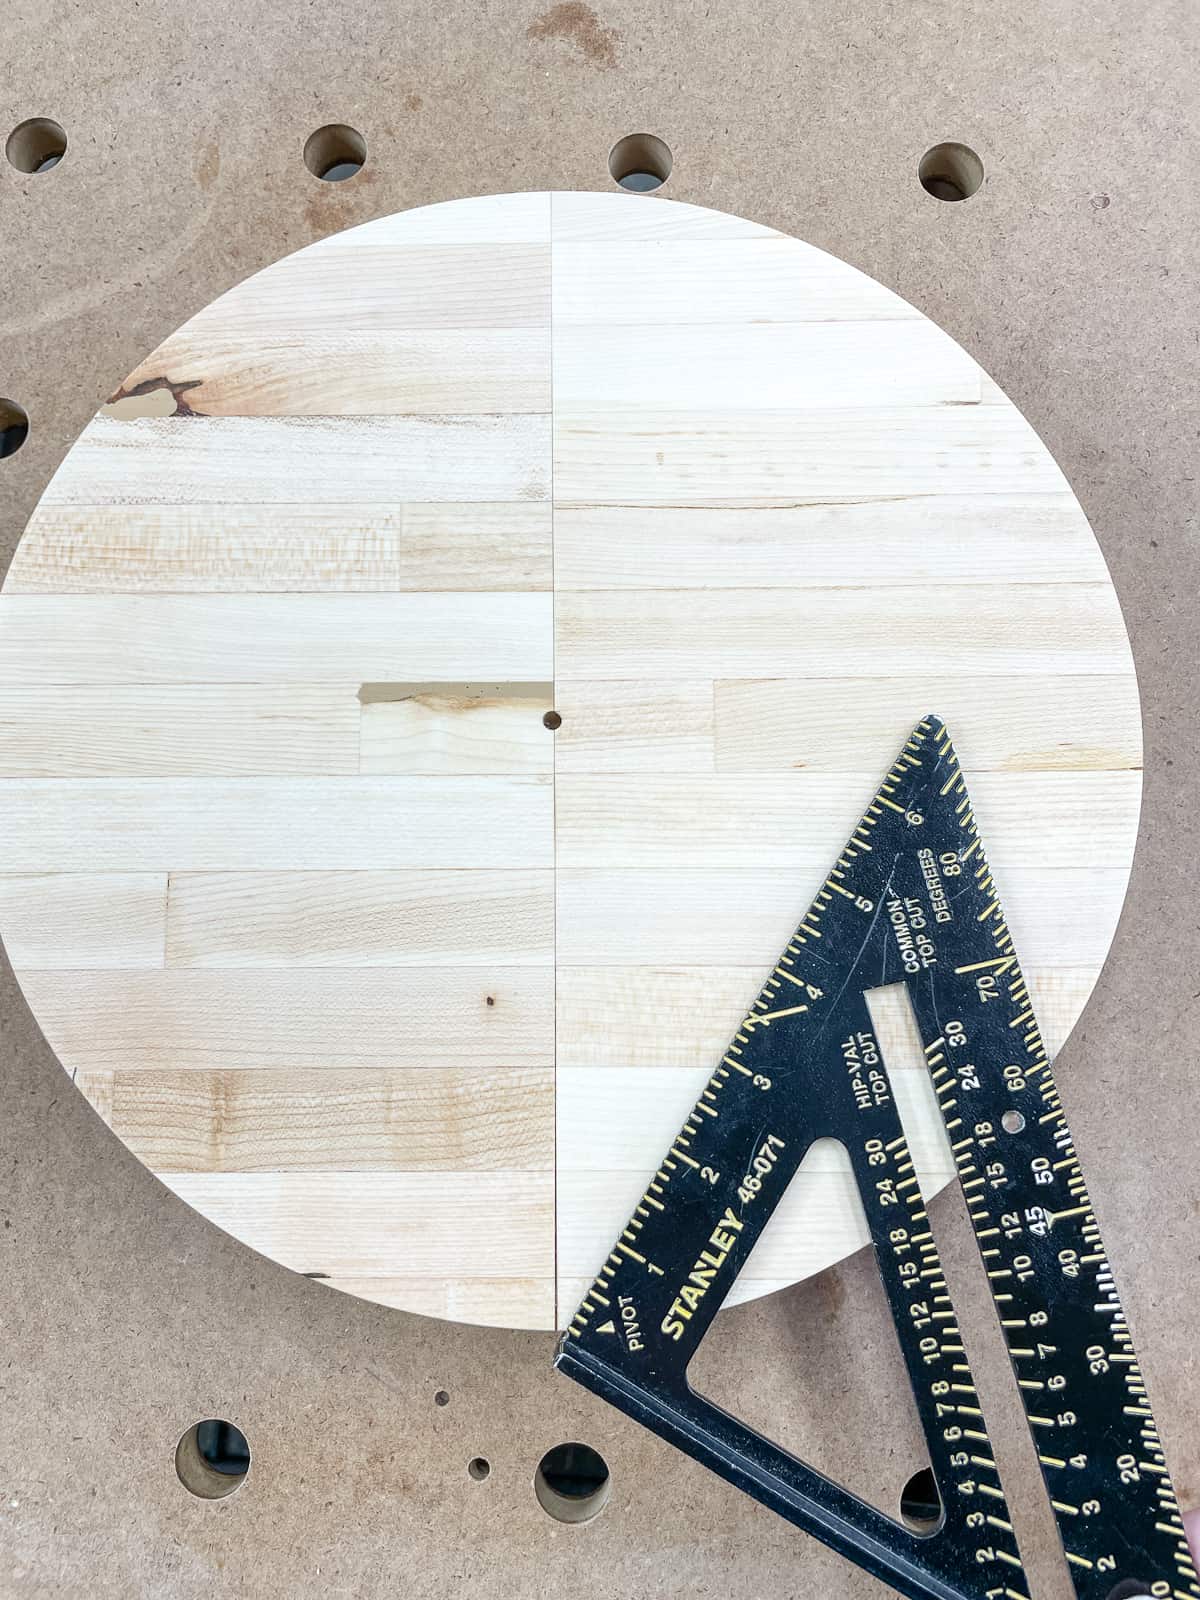
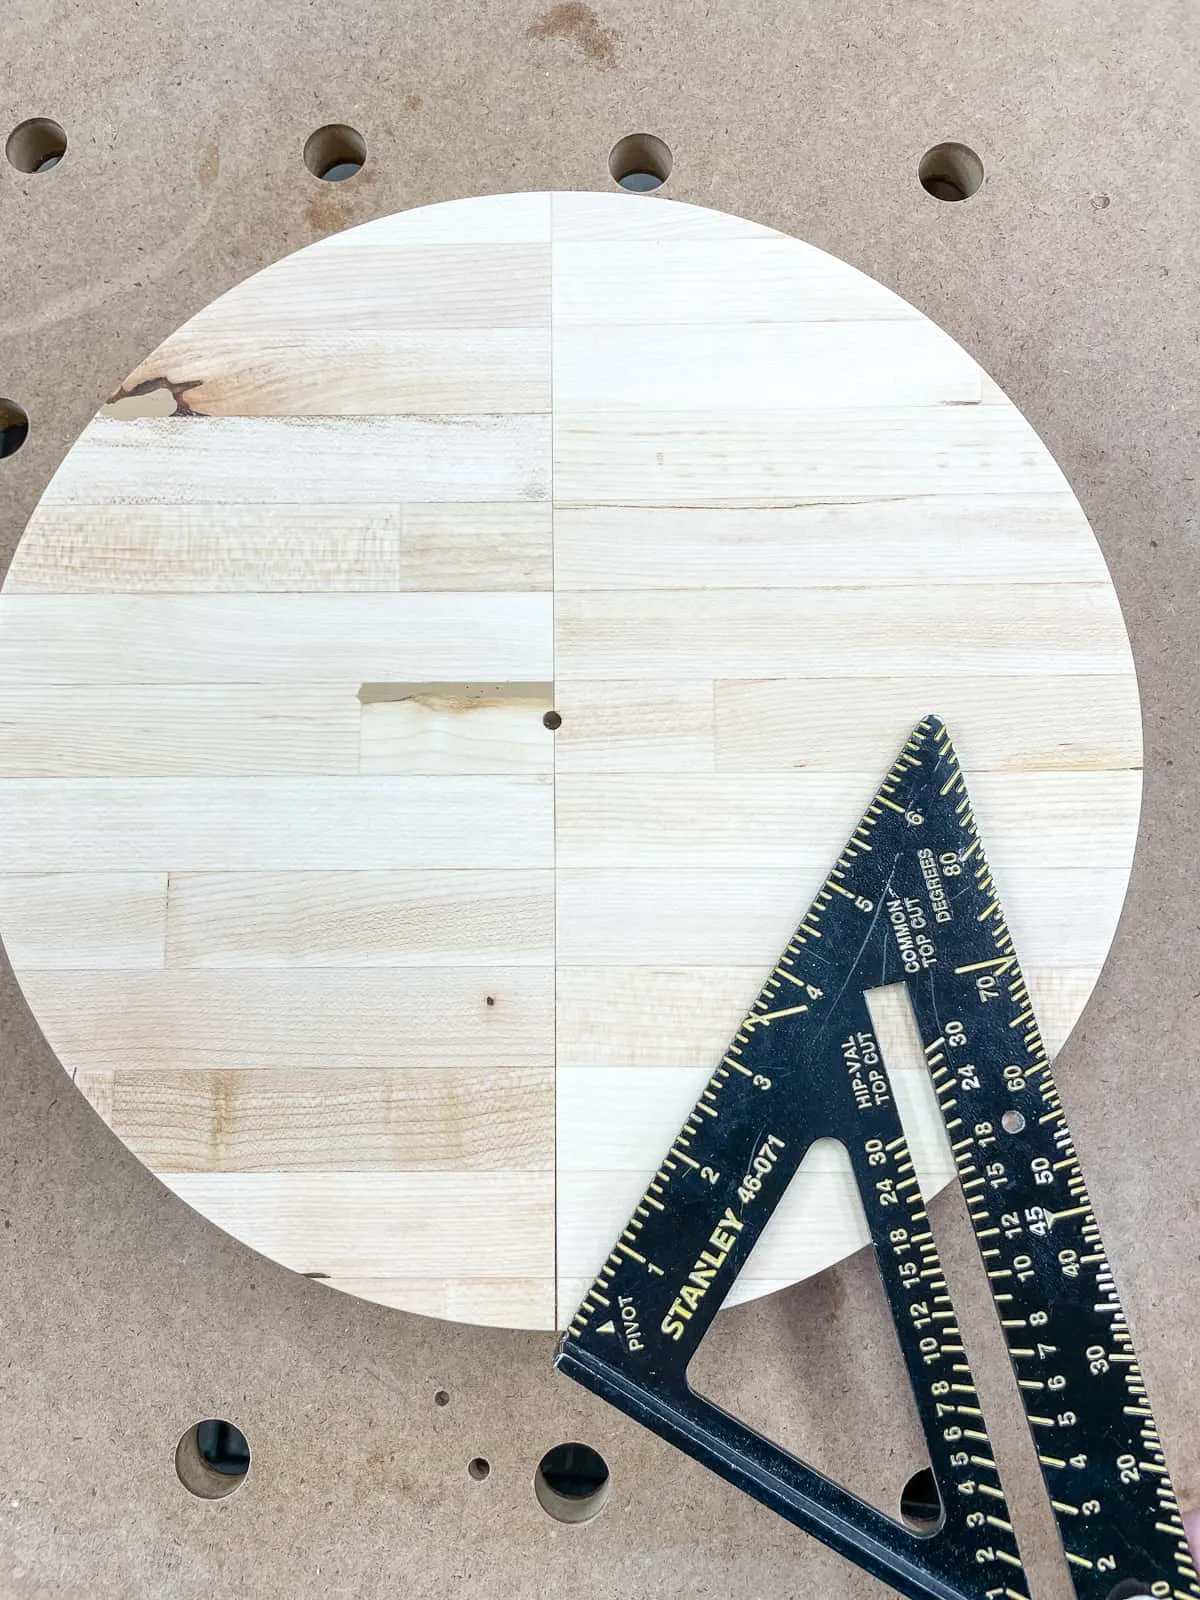
However, I found that the legs didn't fit on the circle when I tried to space them perfectly! I ended up attaching them like this, which worked out just fine. It actually fits better in the corner this way!

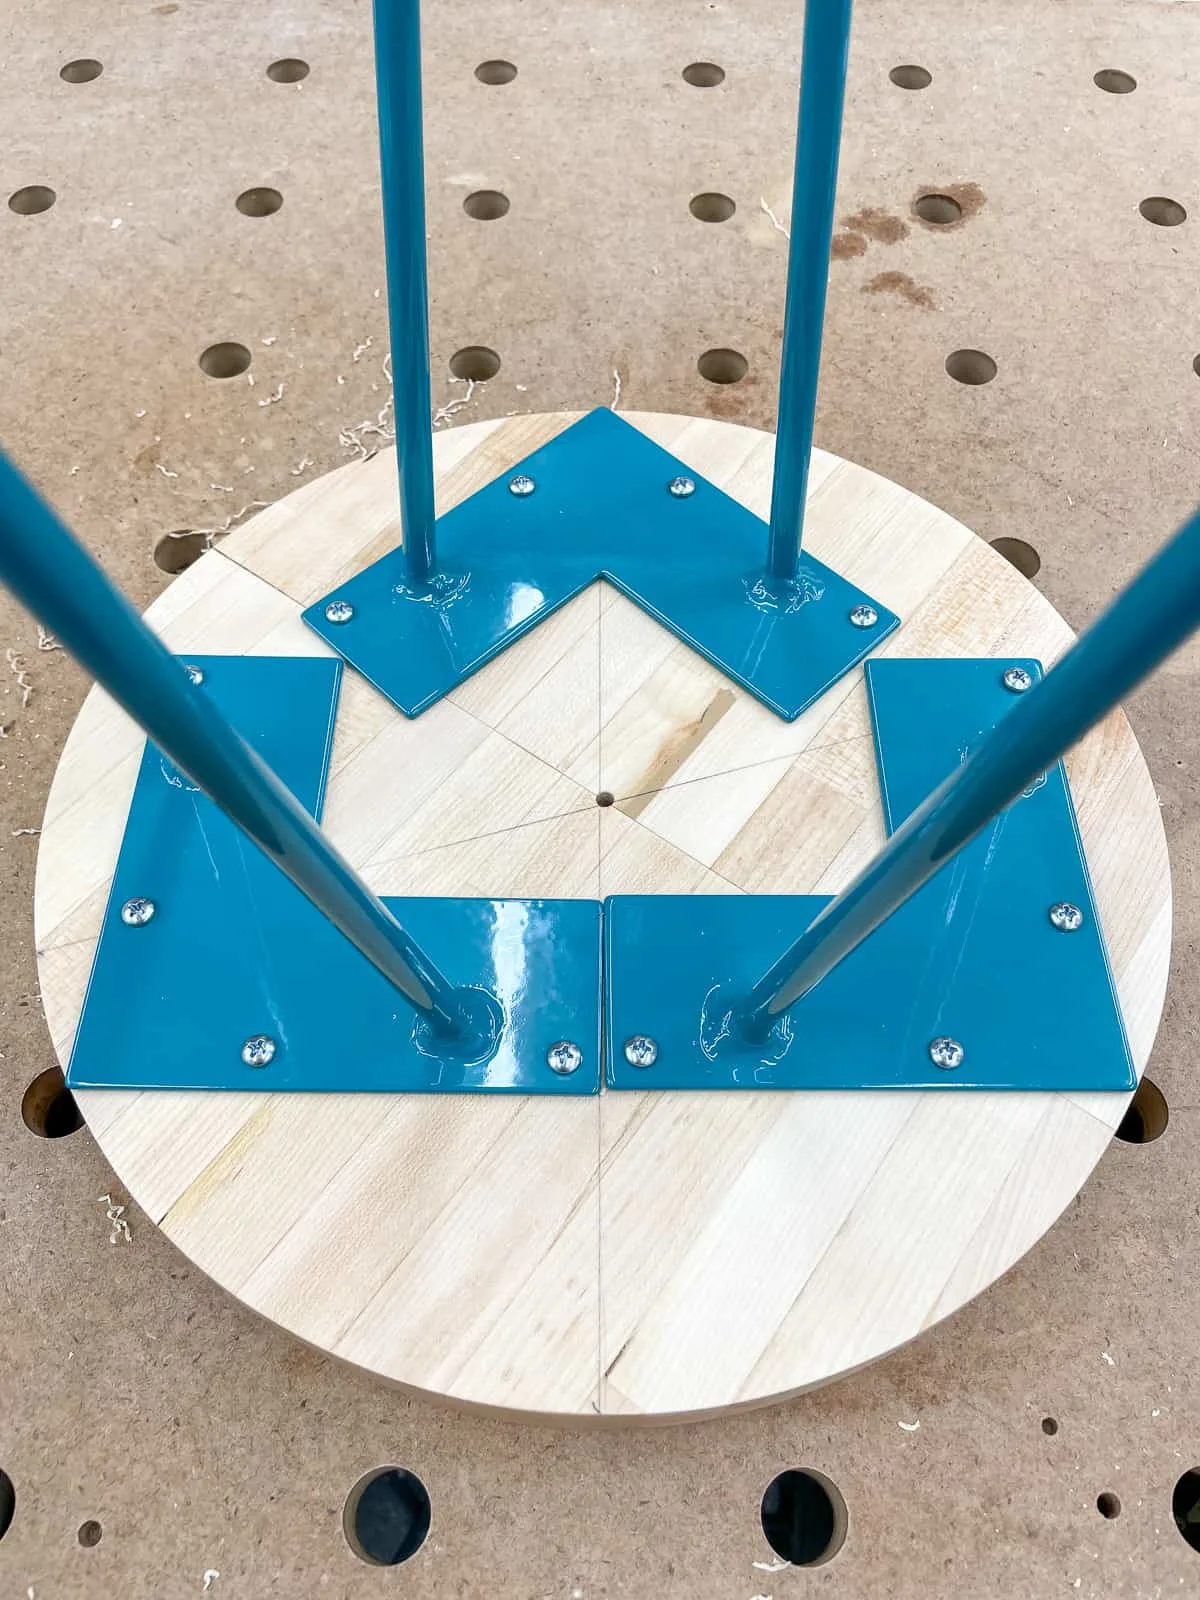
Maple is pretty hard, so I predrilled holes in each spot before screwing the legs into place. The legs didn't come with screws, but these ¾" wood screws with pan heads worked perfectly!
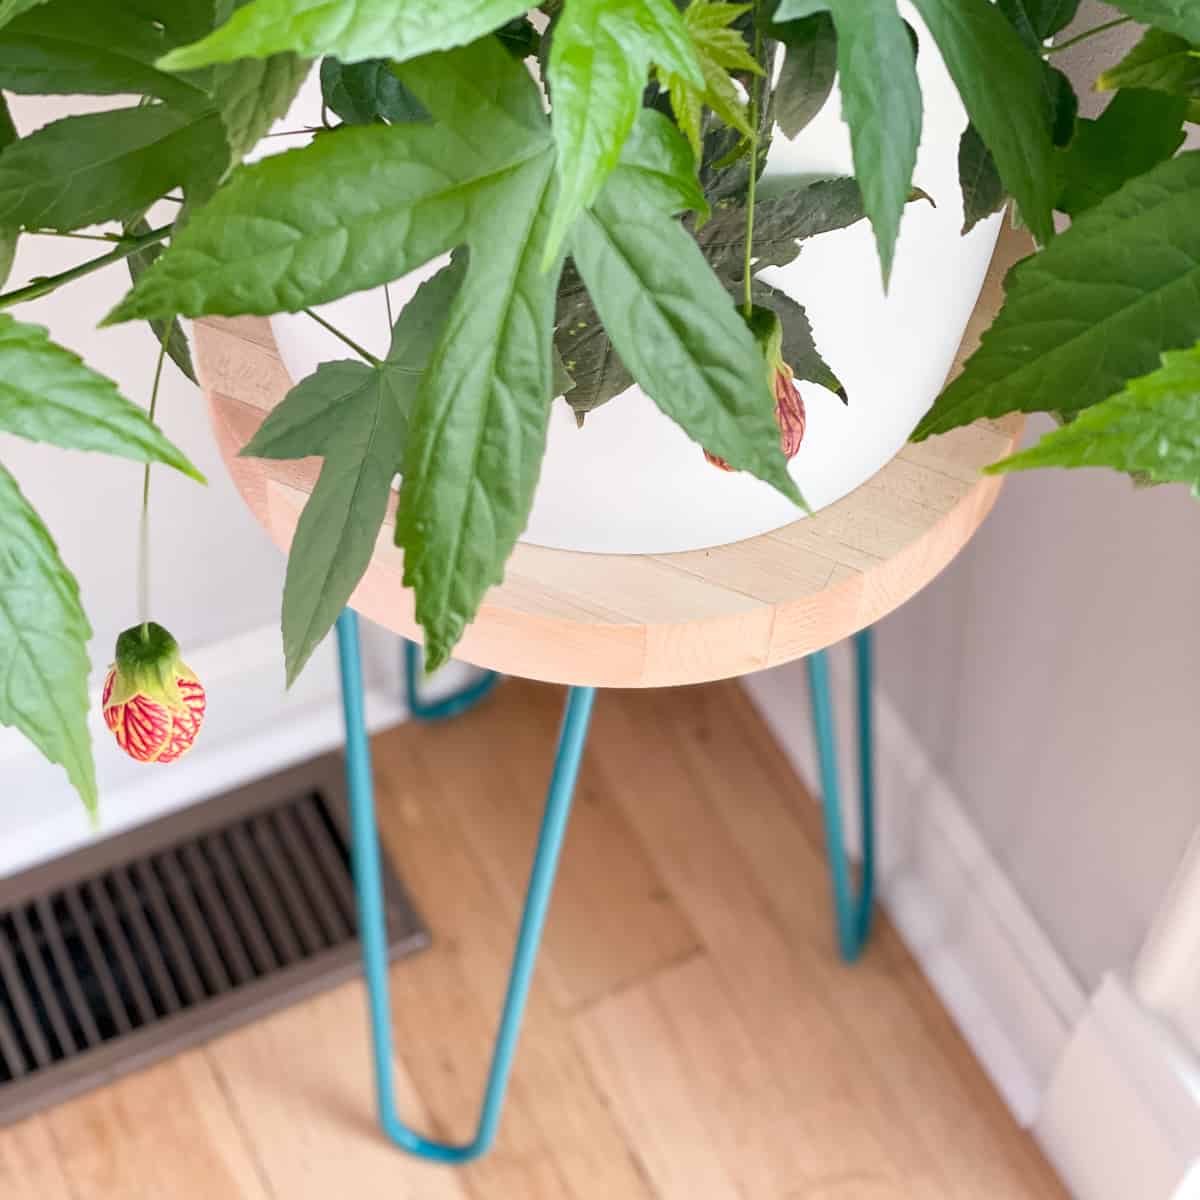
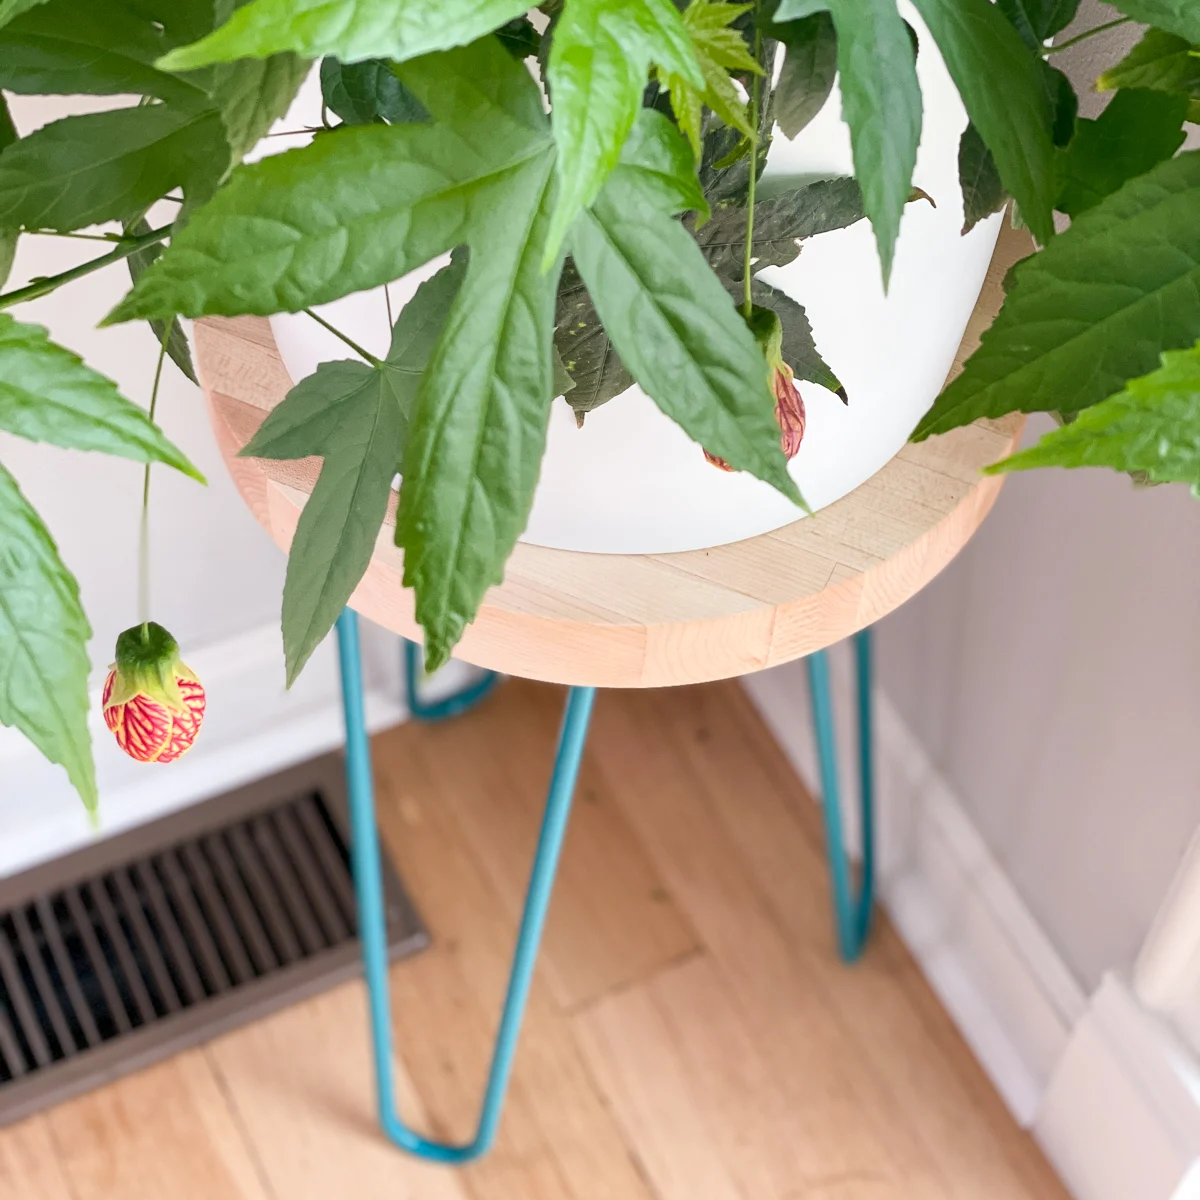
Place your new hairpin leg plant stand in a sunny corner!
I'm thrilled with how this little plant stand turned out! It fits snugly in the corner, and the feet managed to avoid both the heat vent and the weird old telephone box on the baseboards. I keep telling myself I need to get rid of that thing, but I don't want to go through the hassle of painting the baseboards again!

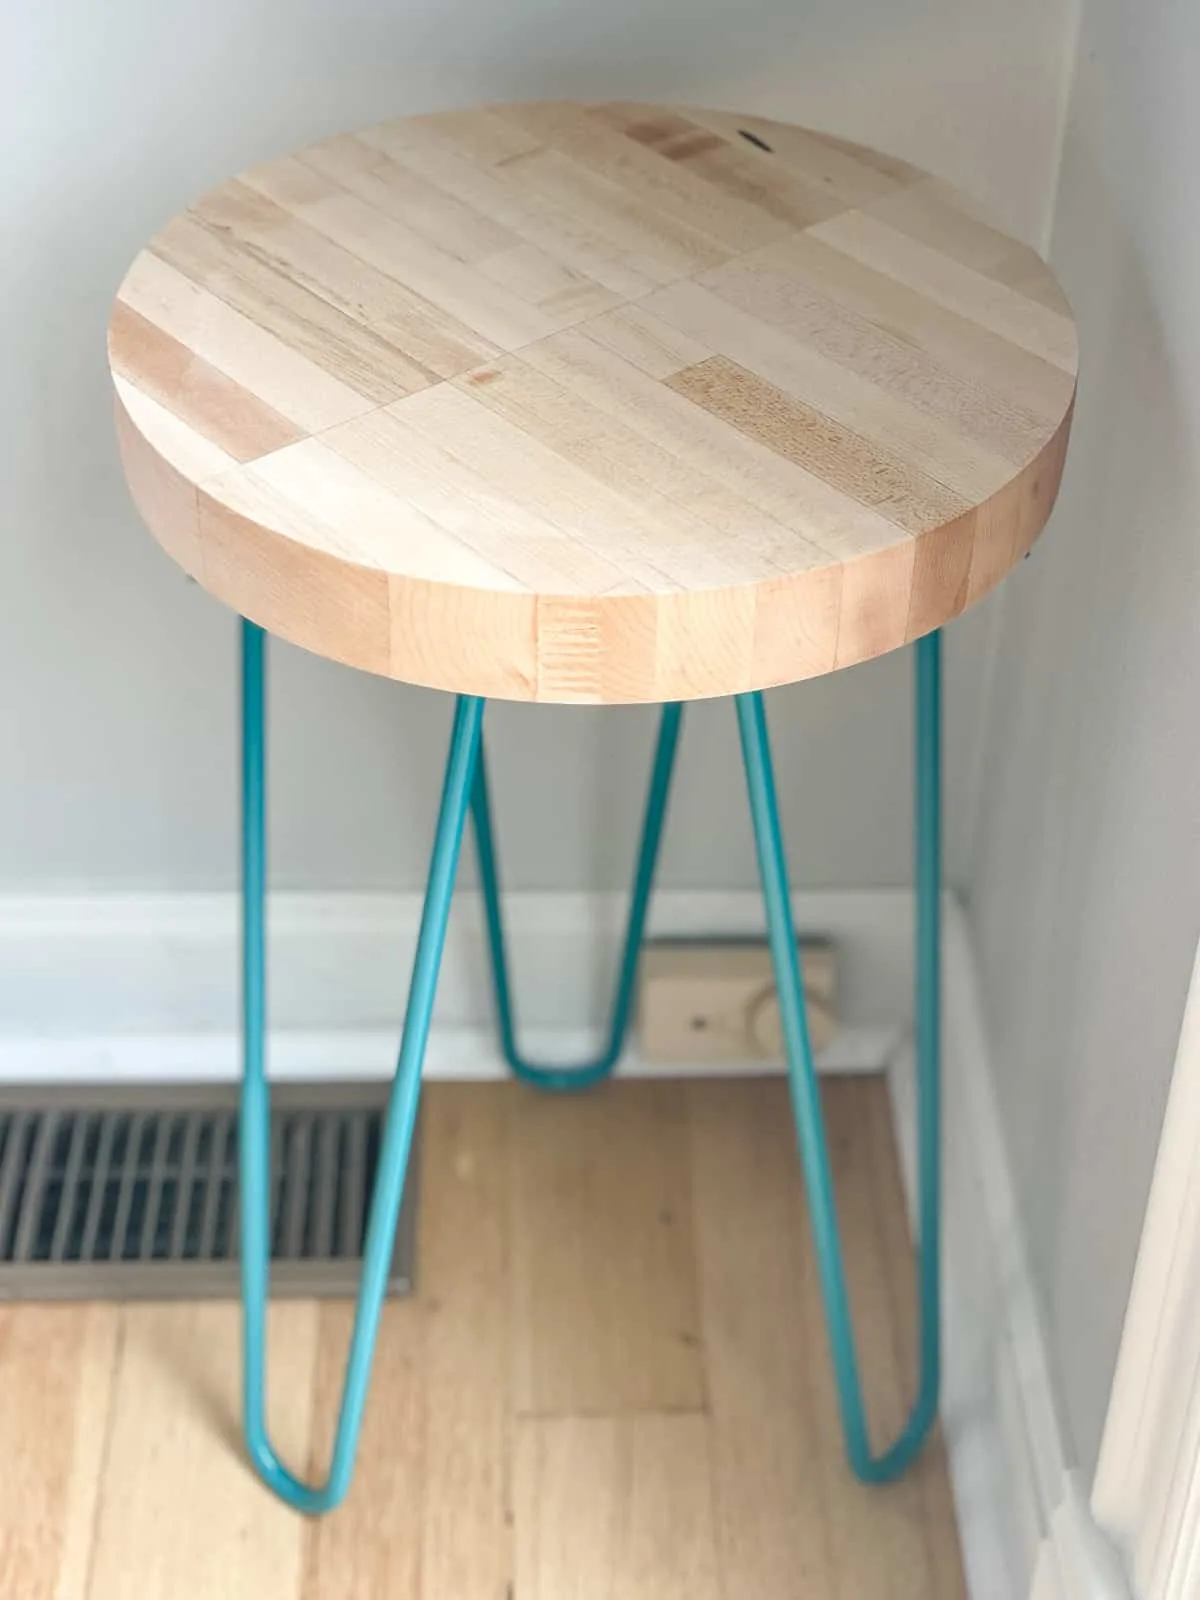
The 10" self watering pot fits perfectly on the 12" top with an inch of space all the way around. I plan to keep this plant pruned to this general size and shape, so it shouldn't need anything bigger for quite some time.
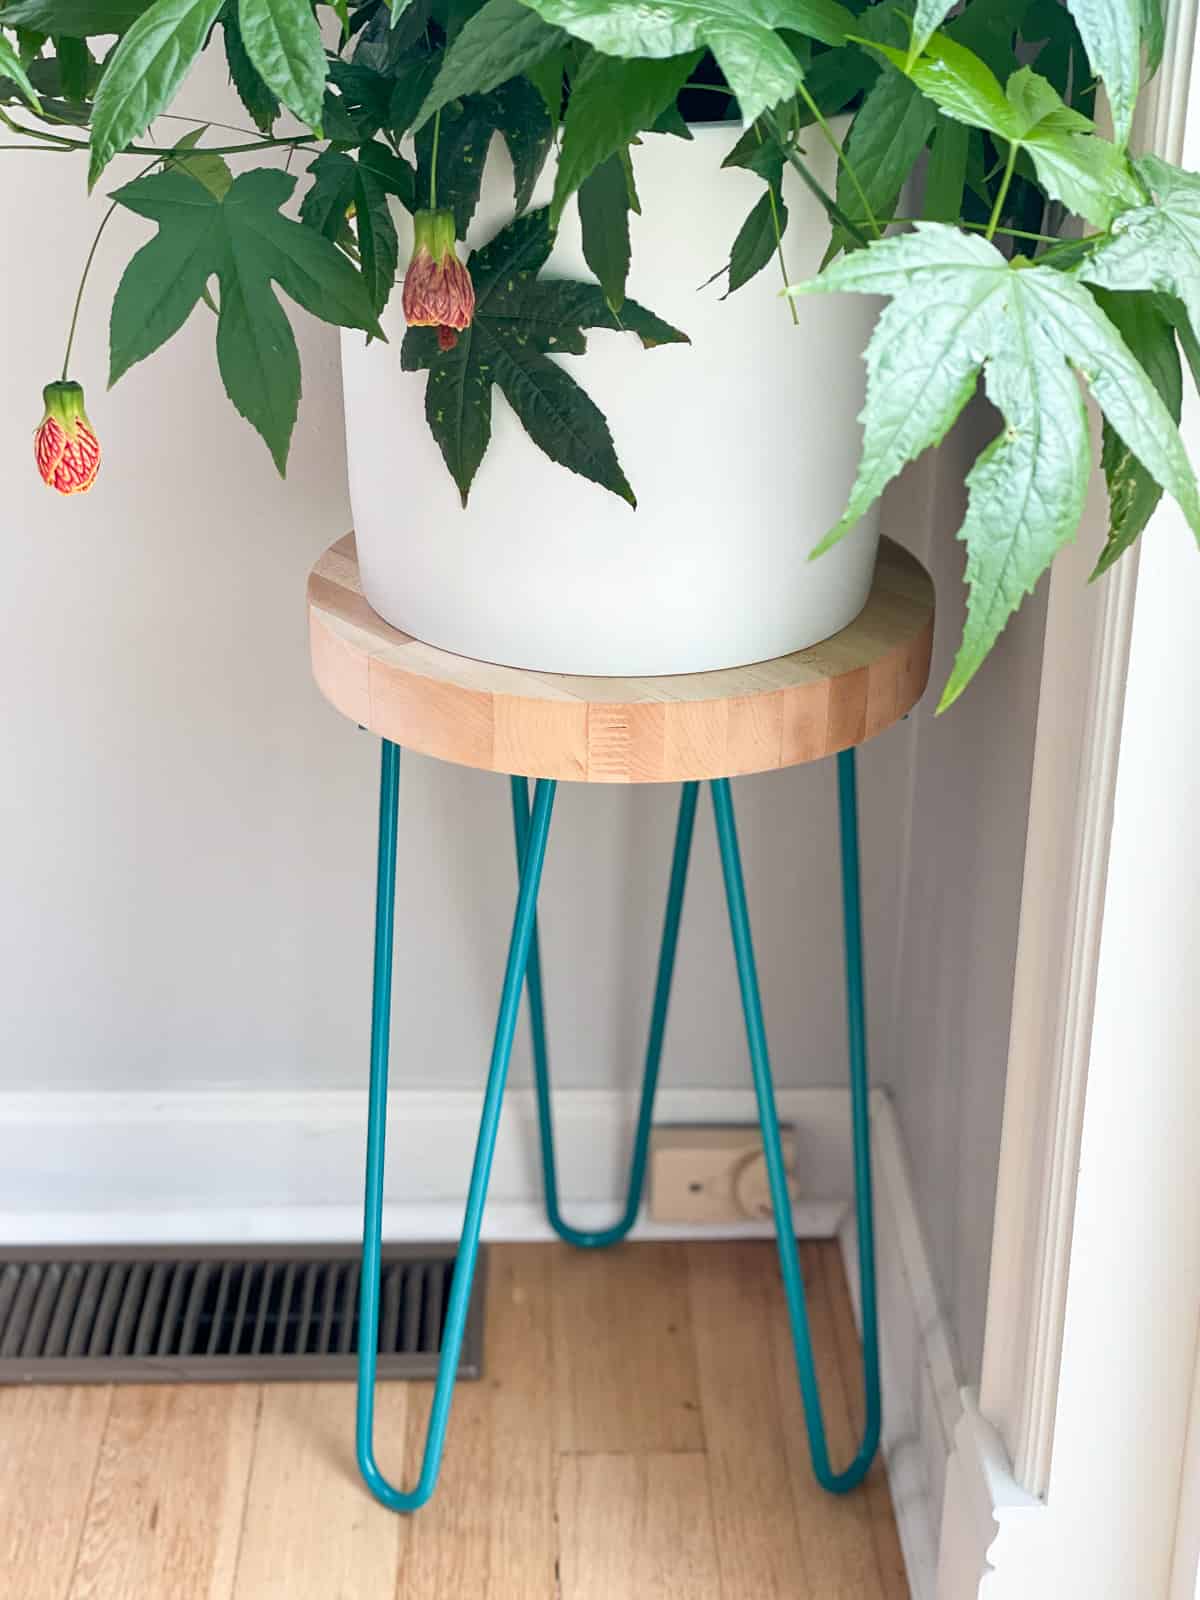

The teal hairpin legs are a similar shade and shape to our dining table chair legs that I updated with metallic paint. I love the midcentury modern look to all these pieces!
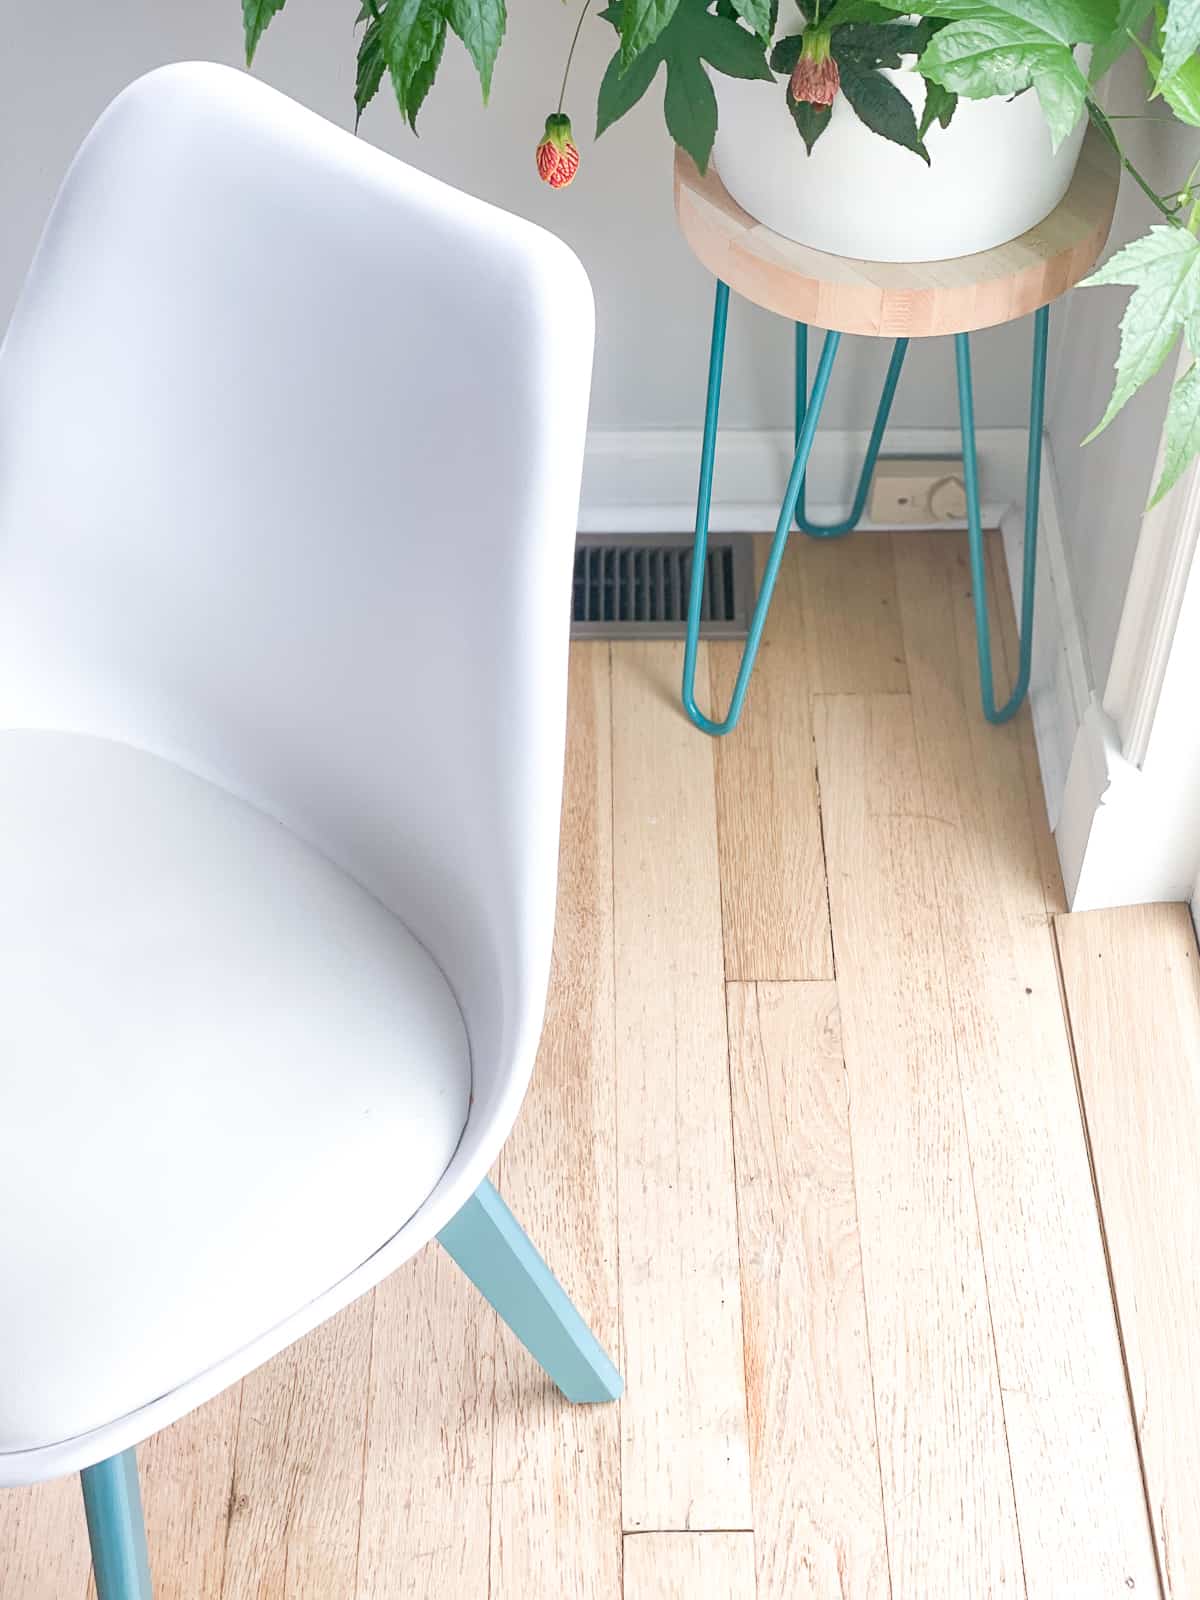
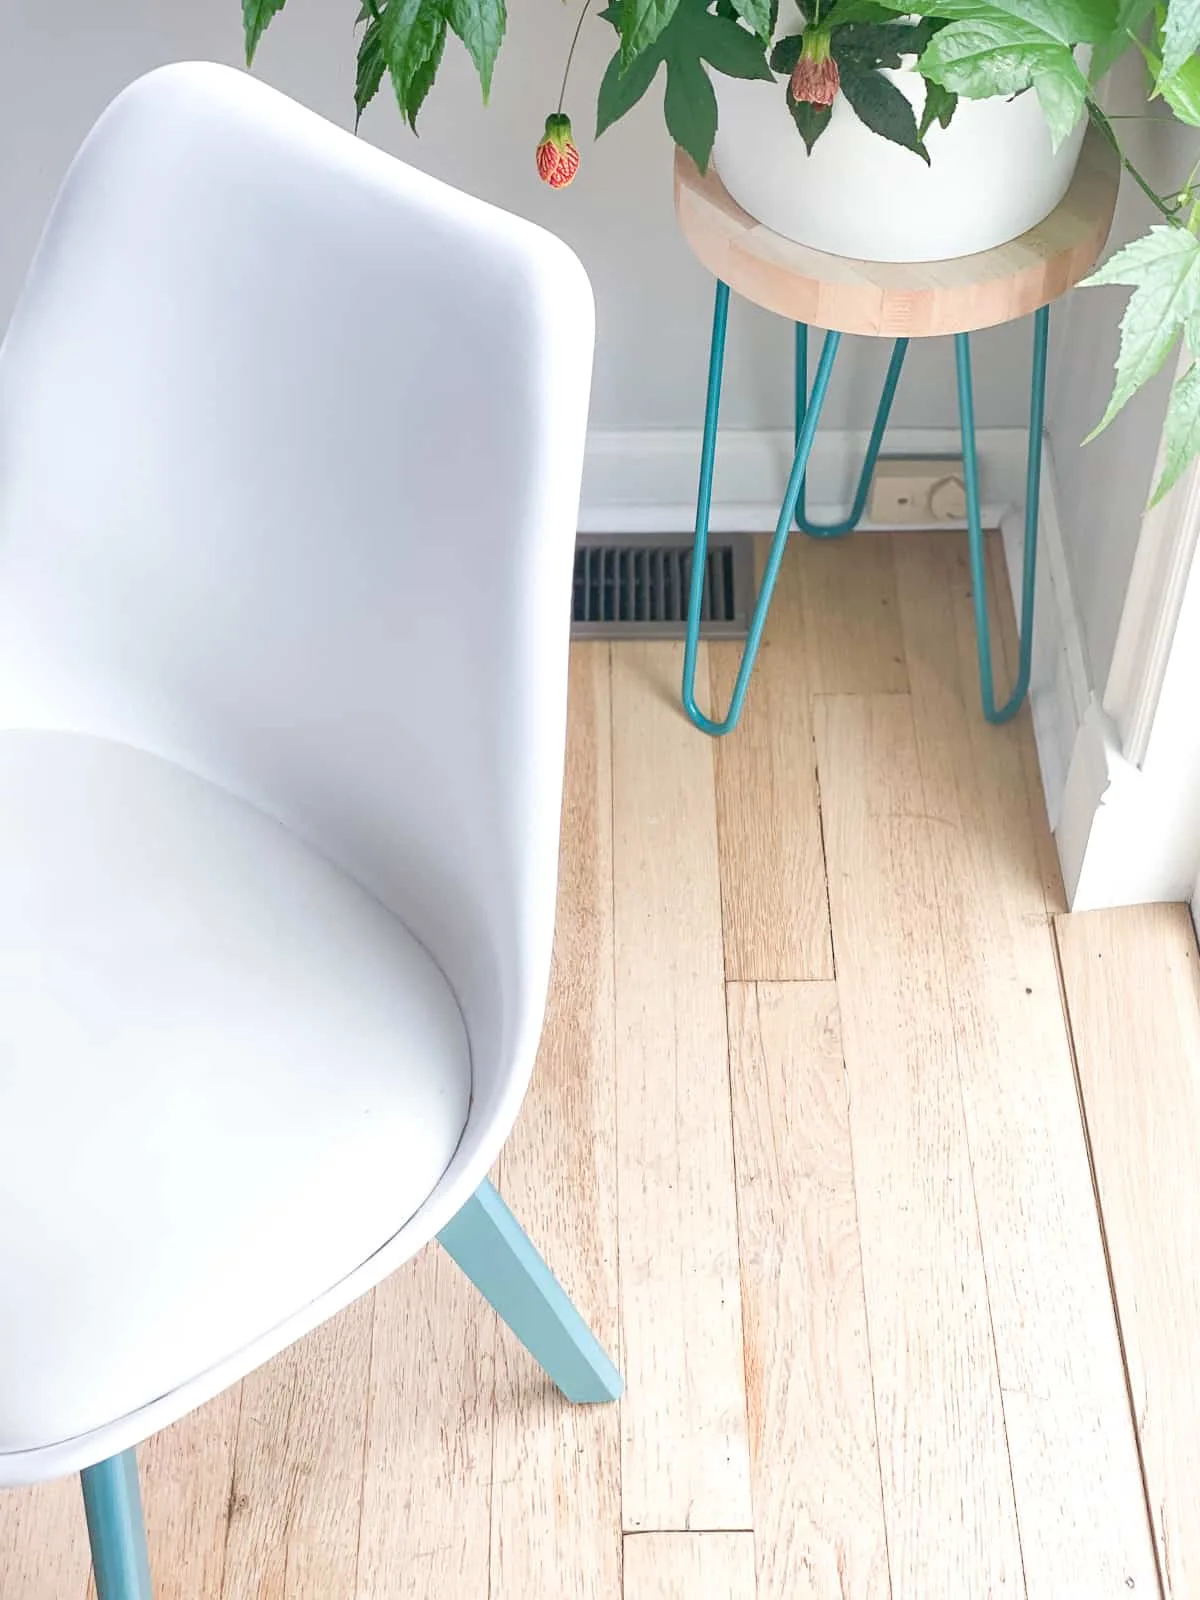
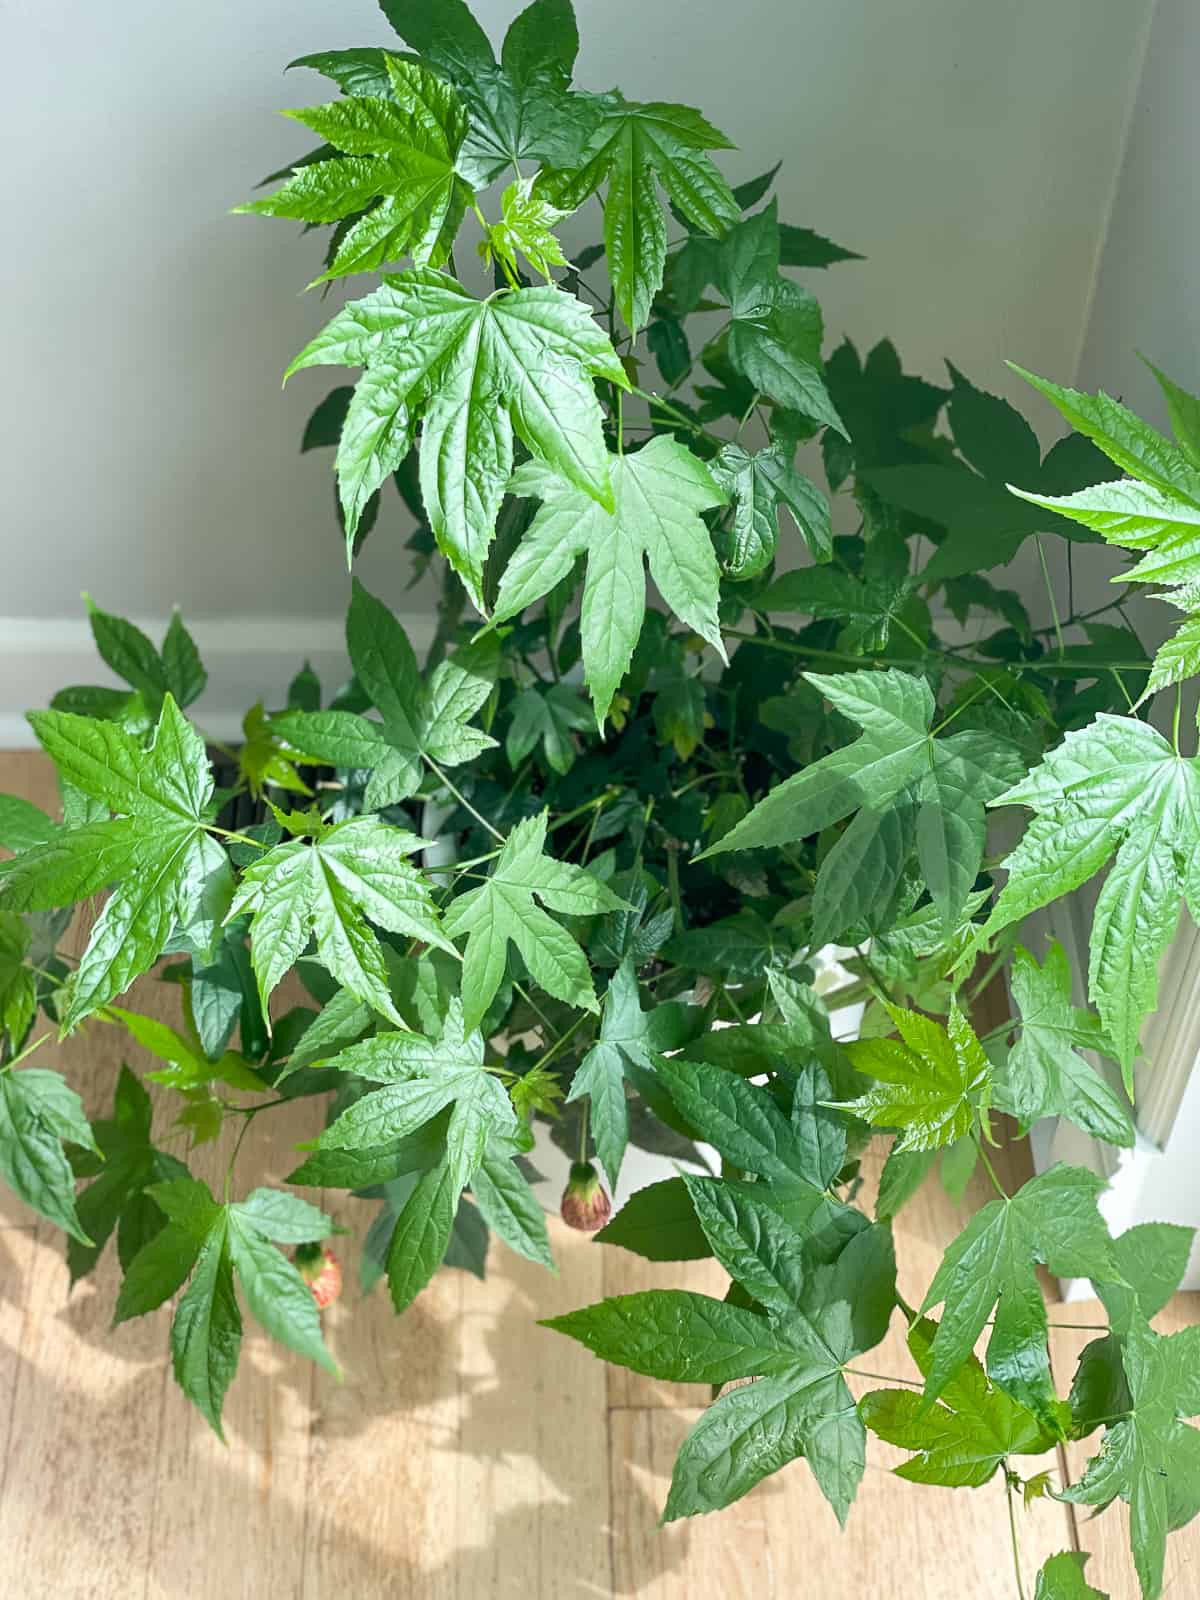
My plant really perked up once it wasn't on the floor right over the heating vent anymore. The soil doesn't dry out as quickly, and it gets more sun since the chair isn't blocking the light. As an added bonus, the foliage hides the weird outlet in the middle of the wall that always drove me crazy!
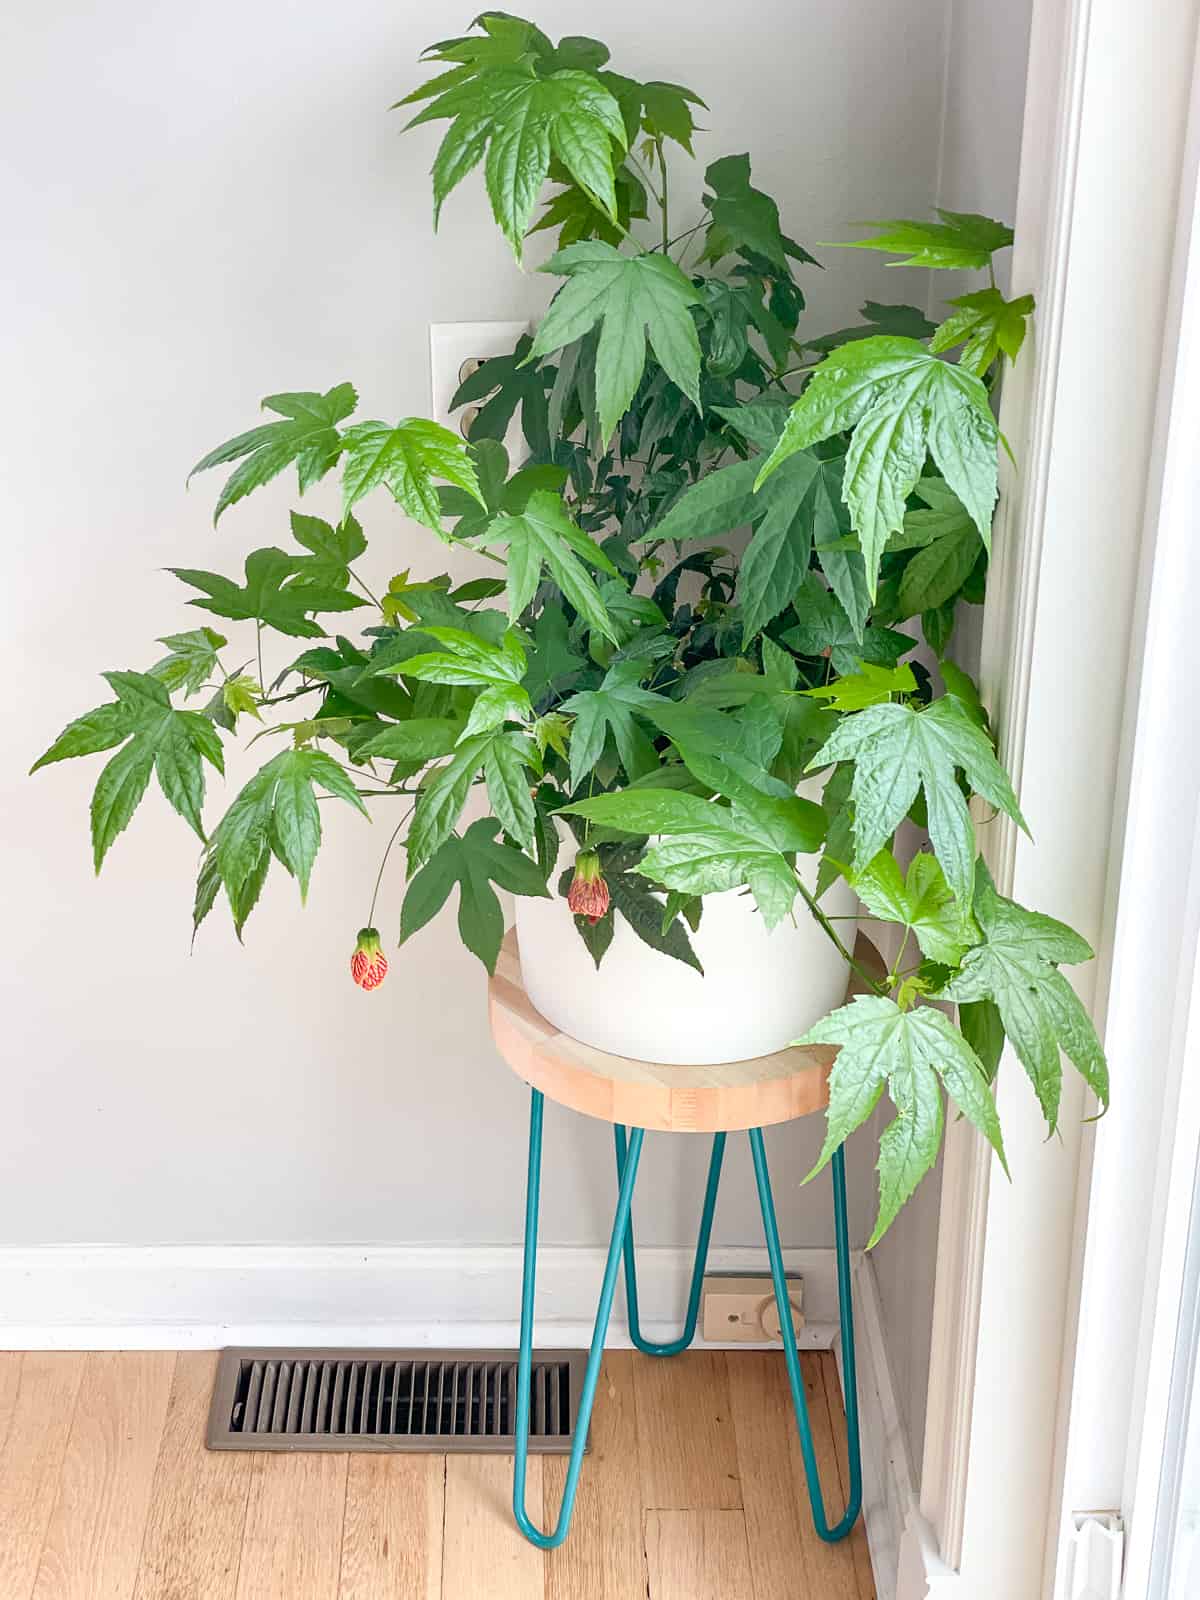
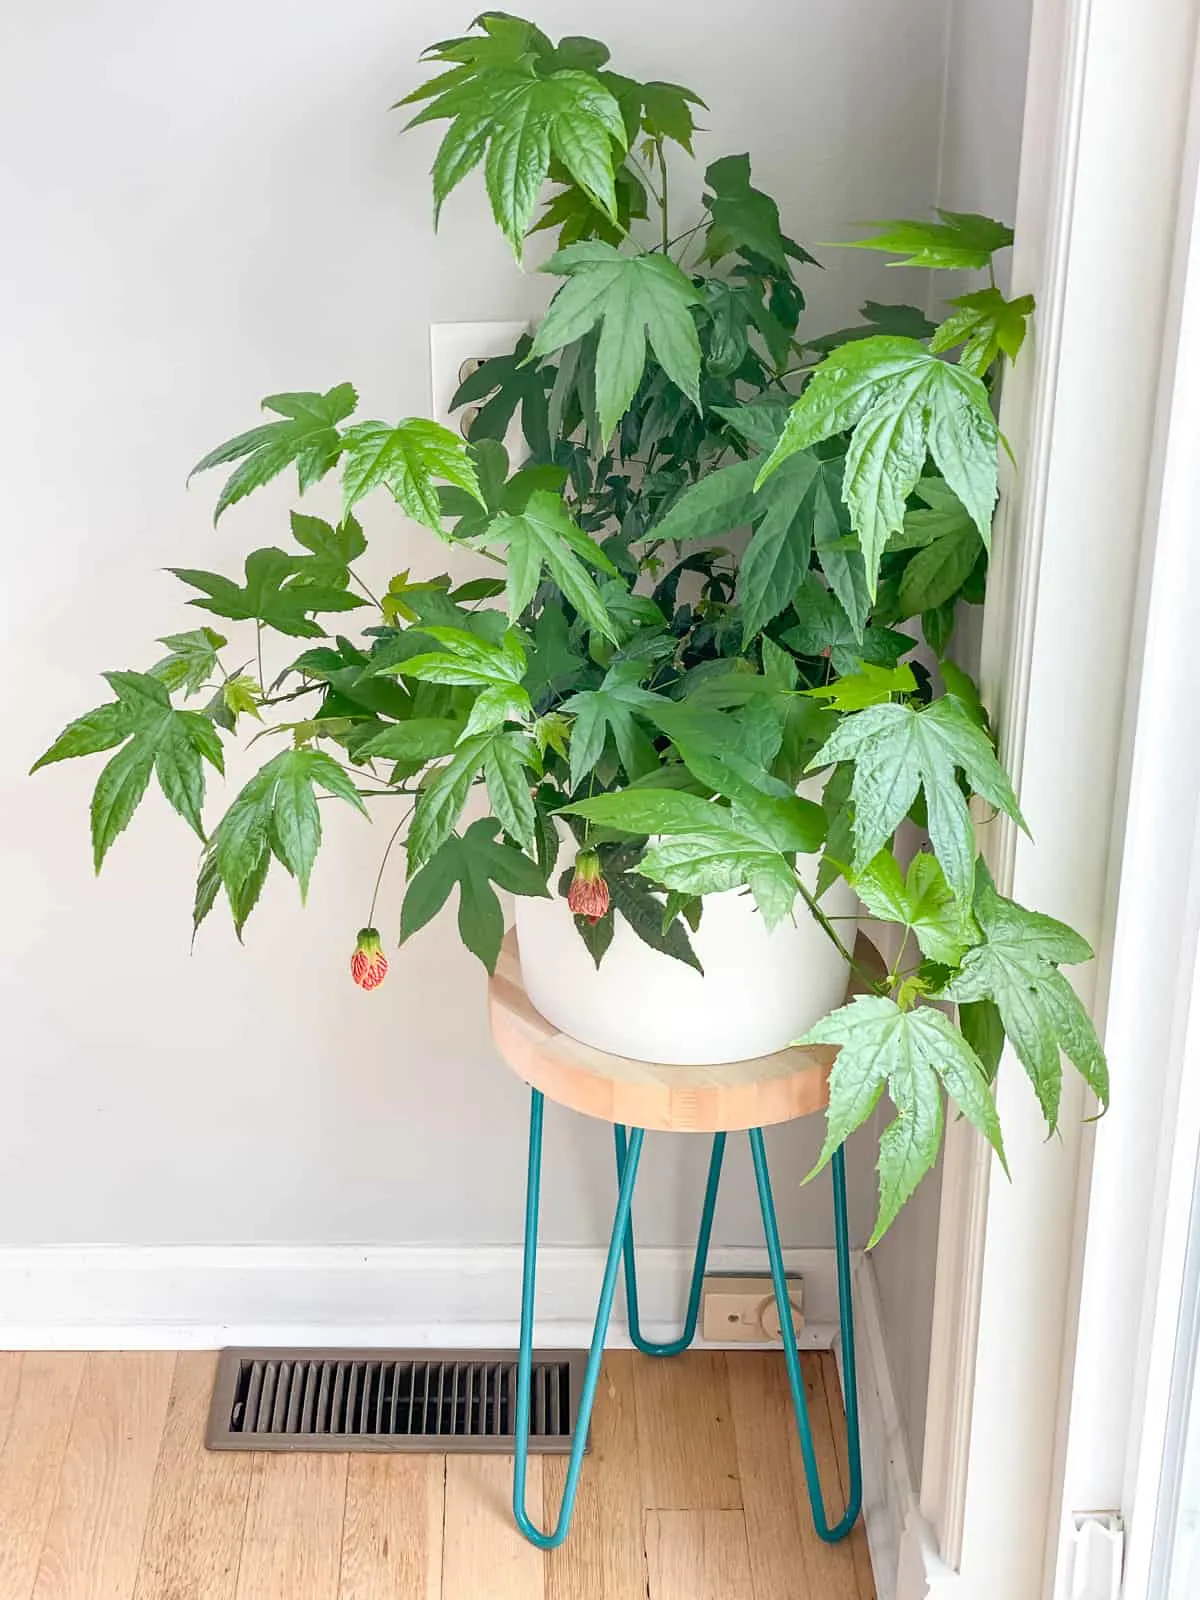
There are a few flowers left from the first bloom, but it's putting on a lot of new growth right now. It should bloom all through the spring and summer, and now I'll actually be able to see it!
If you make this DIY hairpin leg plant stand yourself, I'd love to see it! Feel free to email me a photo or tag me on Instagram!
Check out these other planter ideas!
M hayden
Monday 30th of May 2022
How do u water ur indoor plants without getting water all over that nice wood floor and wrecking it - we have several in our house and watering always a mess
Vineta Jackson
Thursday 2nd of June 2022
I have a tray under all our indoor plants to catch extra water. The pot I used for this plant stand has a tray recessed into the bottom, so you don't see it from the outside. Usually I bring each pot to the sink to water it, rather than using a watering can, but that will be harder when this plant gets too big! A watering can with a thin spout will work better than one with a big head with multiple holes. Hope this helps!
Es
Saturday 26th of March 2022
Wow! Loveliness all around! I wish I had a spot for this in my small house!