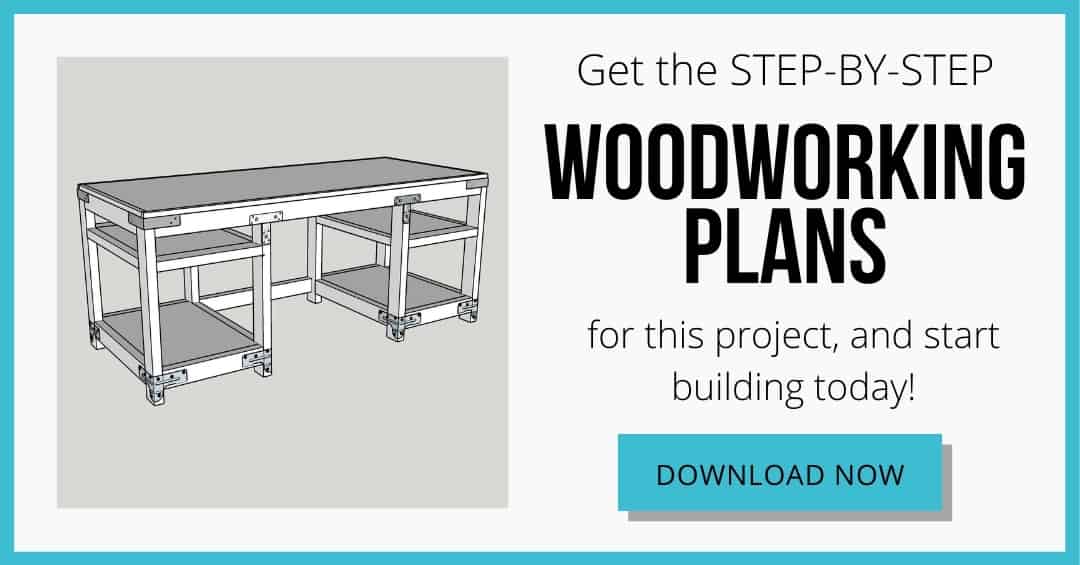
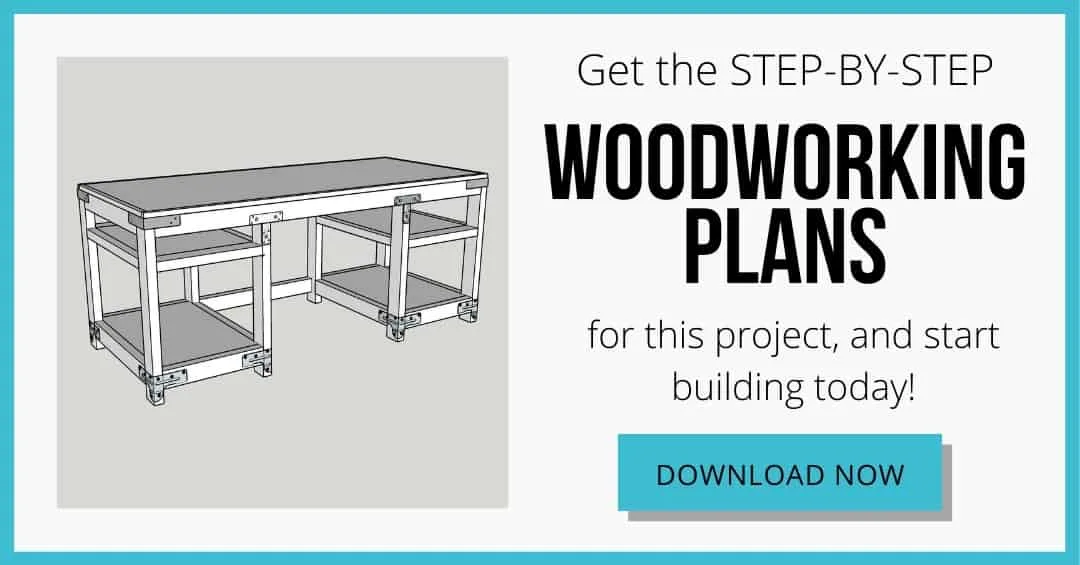
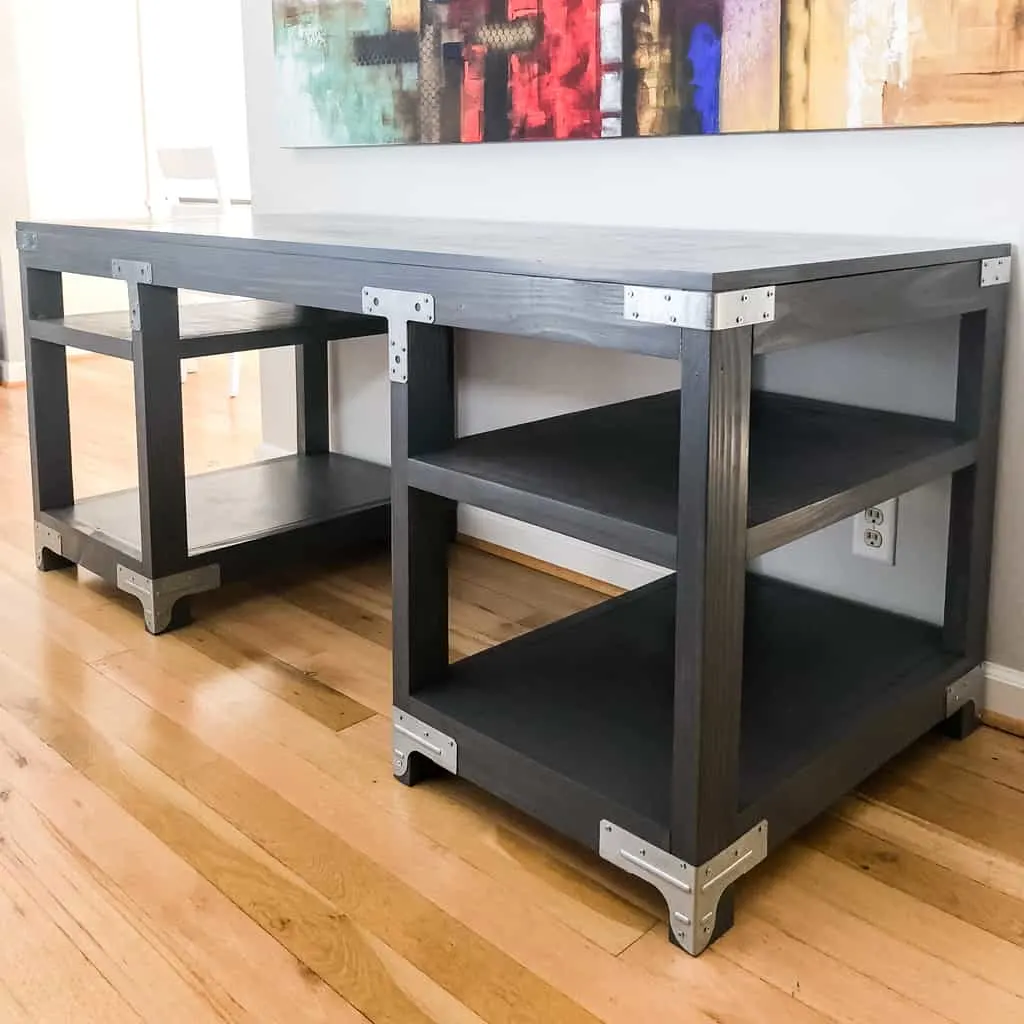
This DIY computer desk features multiple shelves, a deep desktop, and metal details for an industrial look! Build your own out of 2x4 lumber and plywood!


I'm a sucker when it comes to building furniture for other people, so long as they agree to be my sanding slave. 😉 So when a friend asked if I could build him a new desk, I quickly agreed. After texting multiple variations of the desk plans back and forth, we finally hammered out a design and I got to work!
This post contains affiliate links for your convenience. Purchases made through these links may earn me a small commission at no additional cost to you. Please visit my disclosures page for more information.
Our friend's home has a lot of industrial details, including a set of pipe bookcases I helped them make a few years ago (and forgot to blog about!) When I searched Pinterest for inspiration, I came across this desk made with Simpson Strong-Tie connectors.


He loved the look, but wanted to change up a few things. And of course, I put my own spin on it too. Here's how to make my version!
Materials needed for DIY Computer Desk
- One 4'x8' sheet of ¾" plywood
- Nine 2 x 4 boards
- One 1 x 4 board
- You could also substitute edge banding instead of framing the top.
- Sandpaper
- 2 ½" pocket hole screws
- 1 ¼" pocket hole screws
- Wood glue
- Wood filler
- Clamps
- Speed square or combination square
- Six small angle brackets
- Six rigid corner tie connectors (RTC2Z)
- Two T straps
- Four large angle brackets
- ⅝" screws
- Paint or stain
Tools Needed
- Kreg Jig
- If you're trying to decide which one to buy, here's my comparison of the Kreg Jig R3 and K5.
- Drill
- Miter saw
- Table saw or circular saw
- Orbital sander
- Brad nailer
How to Build the Industrial Desk
Download the Plans
You can download the DIY desk plans by clicking the button below! The printable plans include a detailed cut list and plywood cut diagram, step by step instructions with 3D models, and a handy checklist to keep you on track.
Cut 2x4 and 1x4 pieces
There are a lot of pieces to cut for this computer desk, but having the stop track on my miter saw stand made it super fast! I've plotted out each piece in the cut diagram of the woodworking plans so you get the most economical use of your boards.
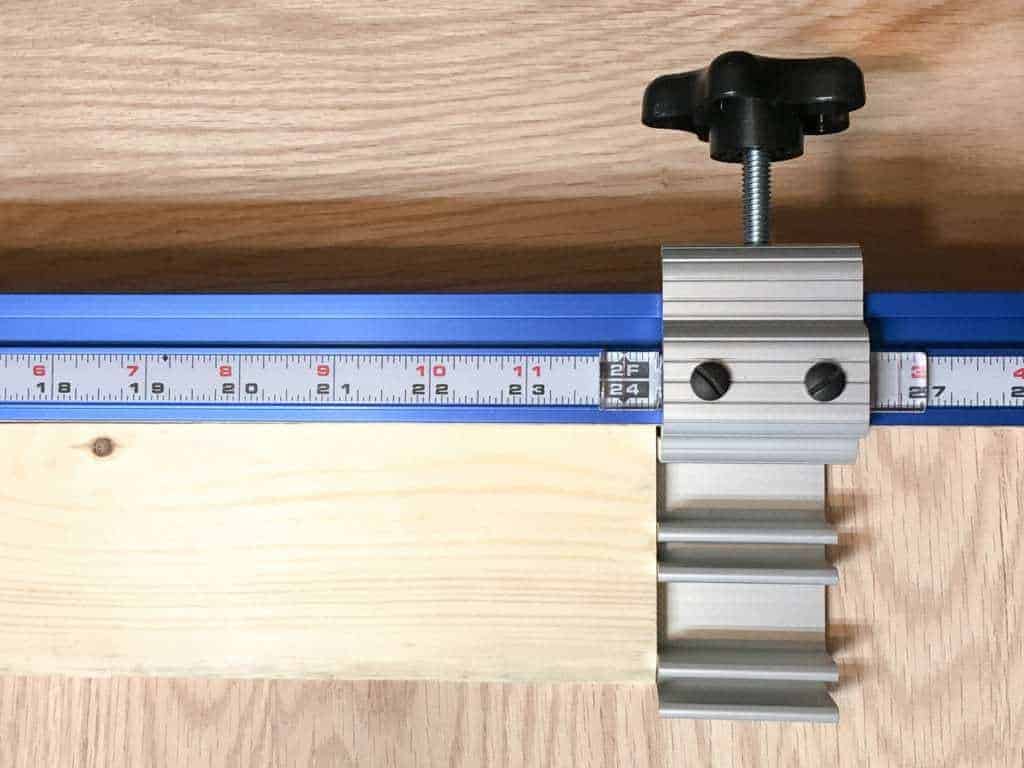
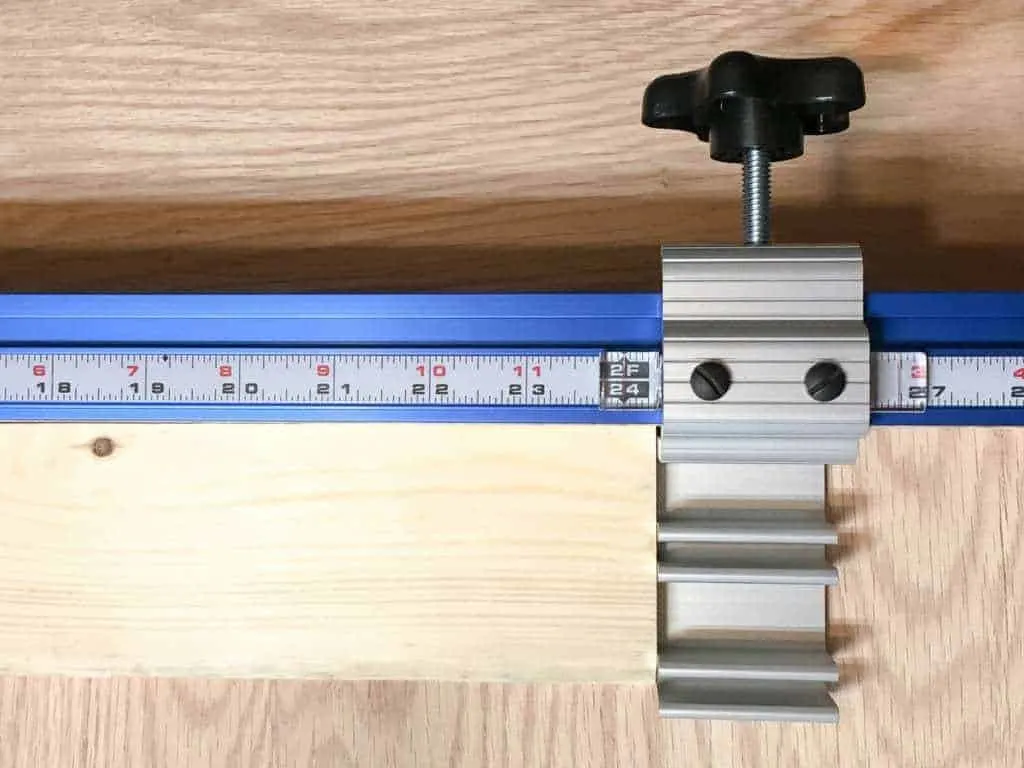
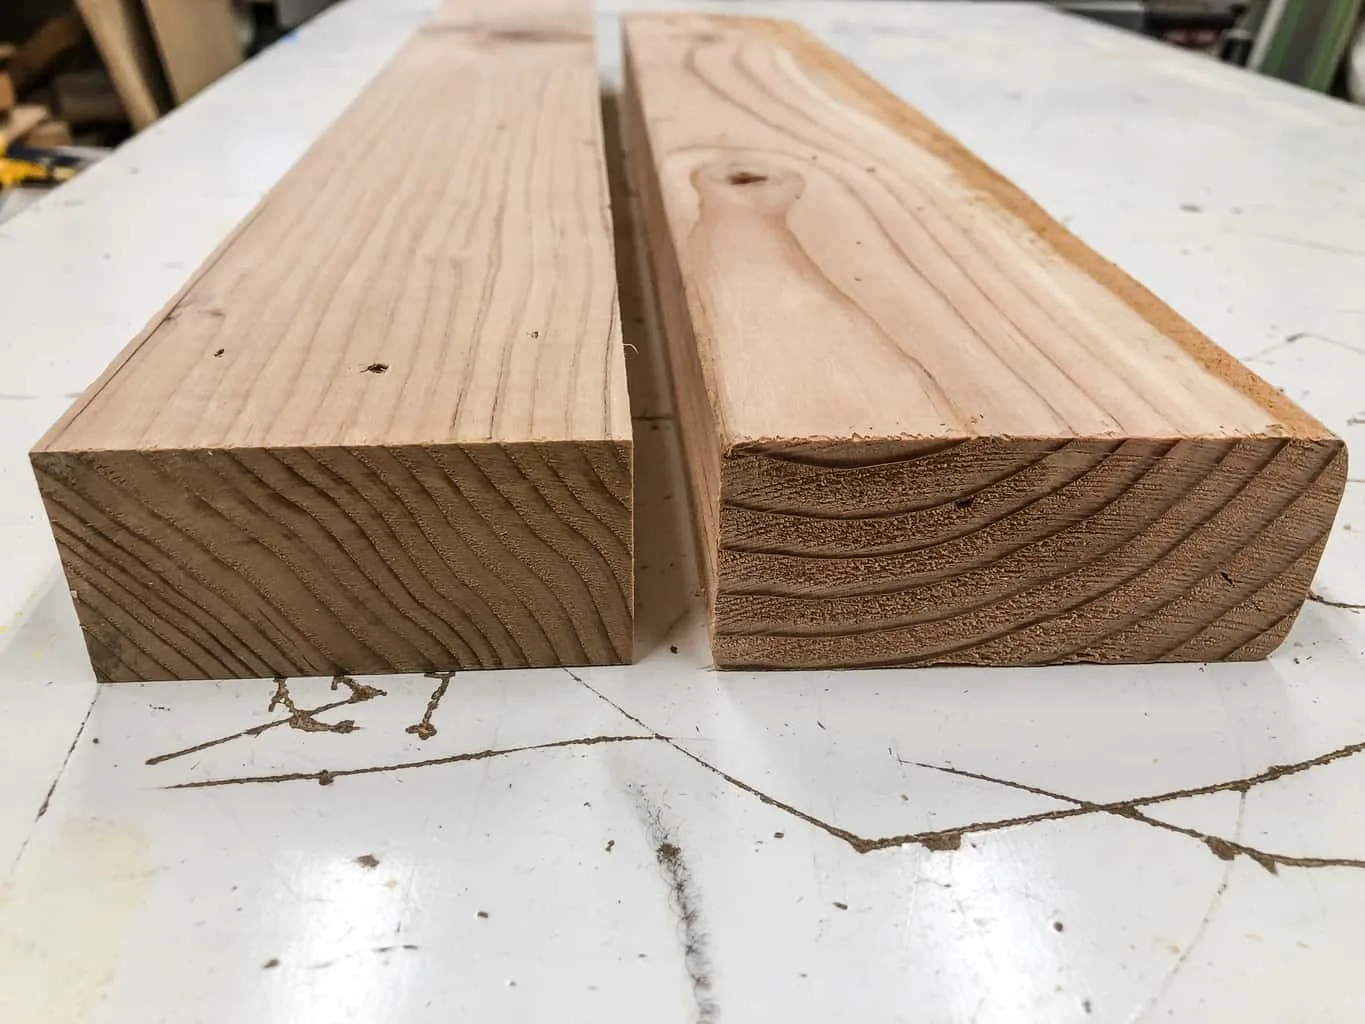
When I work with 2x4 lumber, I prefer to cut off the rounded corners with the table saw. I trimmed ¼" from both edges of the 3 ½" side, resulting in 3" wide pieces. See the difference?

You can find more 2x4 project ideas like this one here!
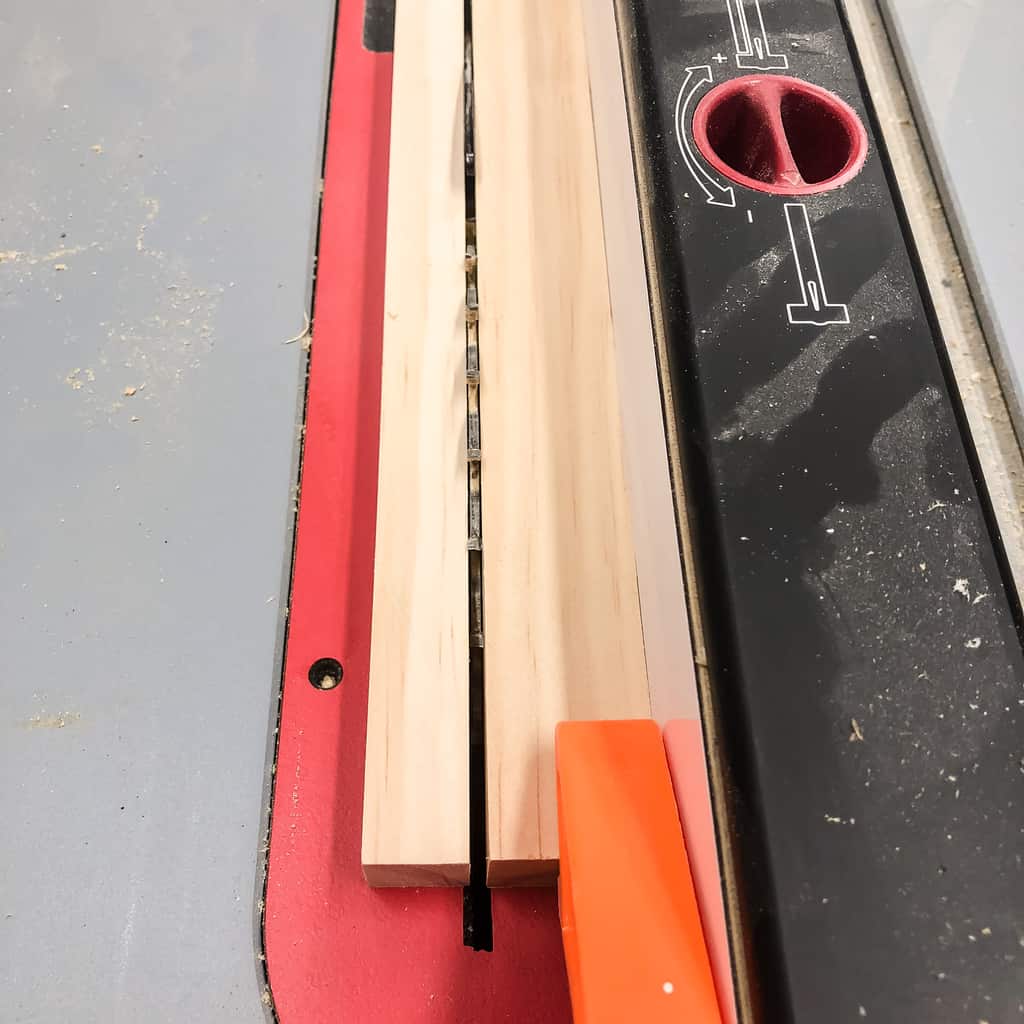
While you're at the table saw, cut four of the 24" pieces down to 1 ½" wide. You can also substitute 2x2 boards for this step.
Finally, cut the 1x4 board into ¾" wide strips. You'll need three of them to frame the outside edge of the desk top. Leave them full length for now. We'll cut them to fit later on. Alternatively, you can cut the plywood top ¾" bigger on all four sides and apply edge banding.

Cut the Plywood
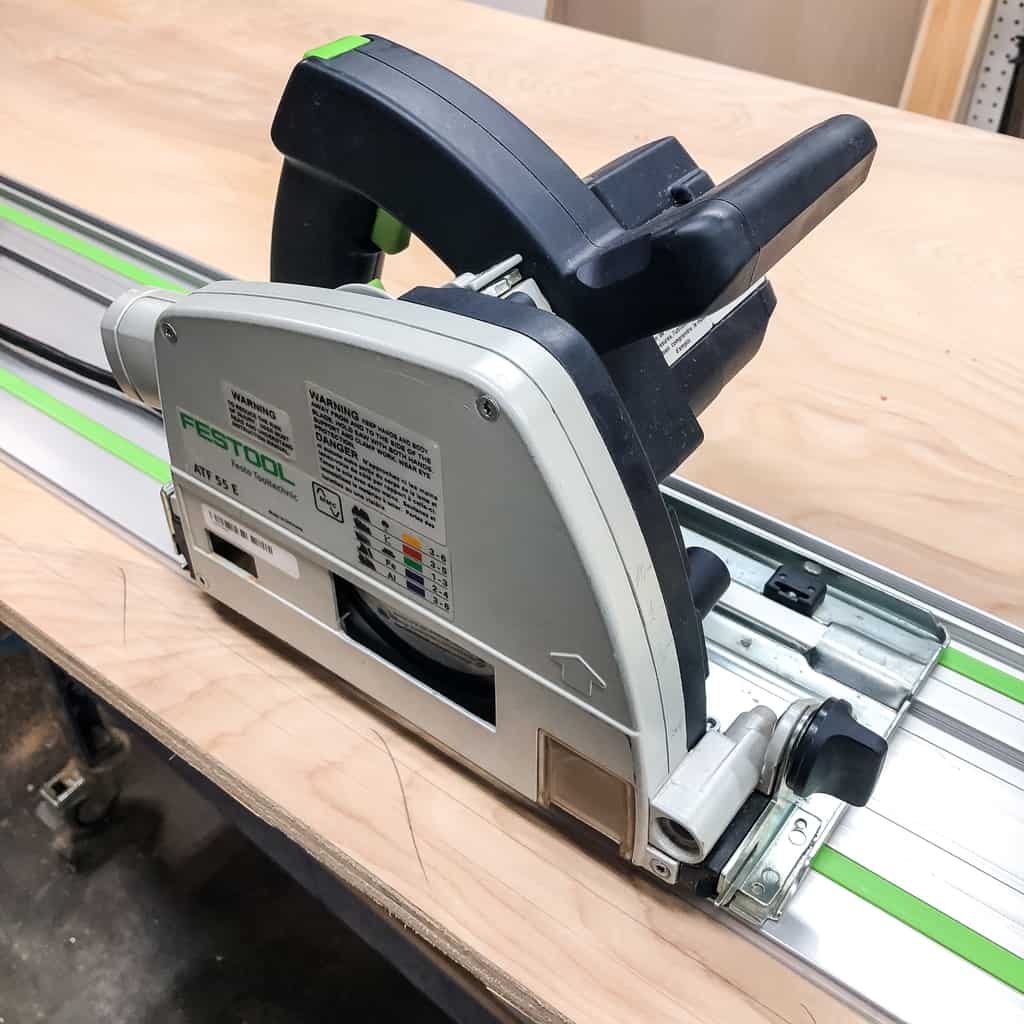
I prefer to cut my plywood to fit as I build, but it's hard to wrangle those huge sheets on the table saw! I picked up a used track saw just to make these kinds of cuts, but you can also ask your home improvement store to cut them into more manageable pieces.

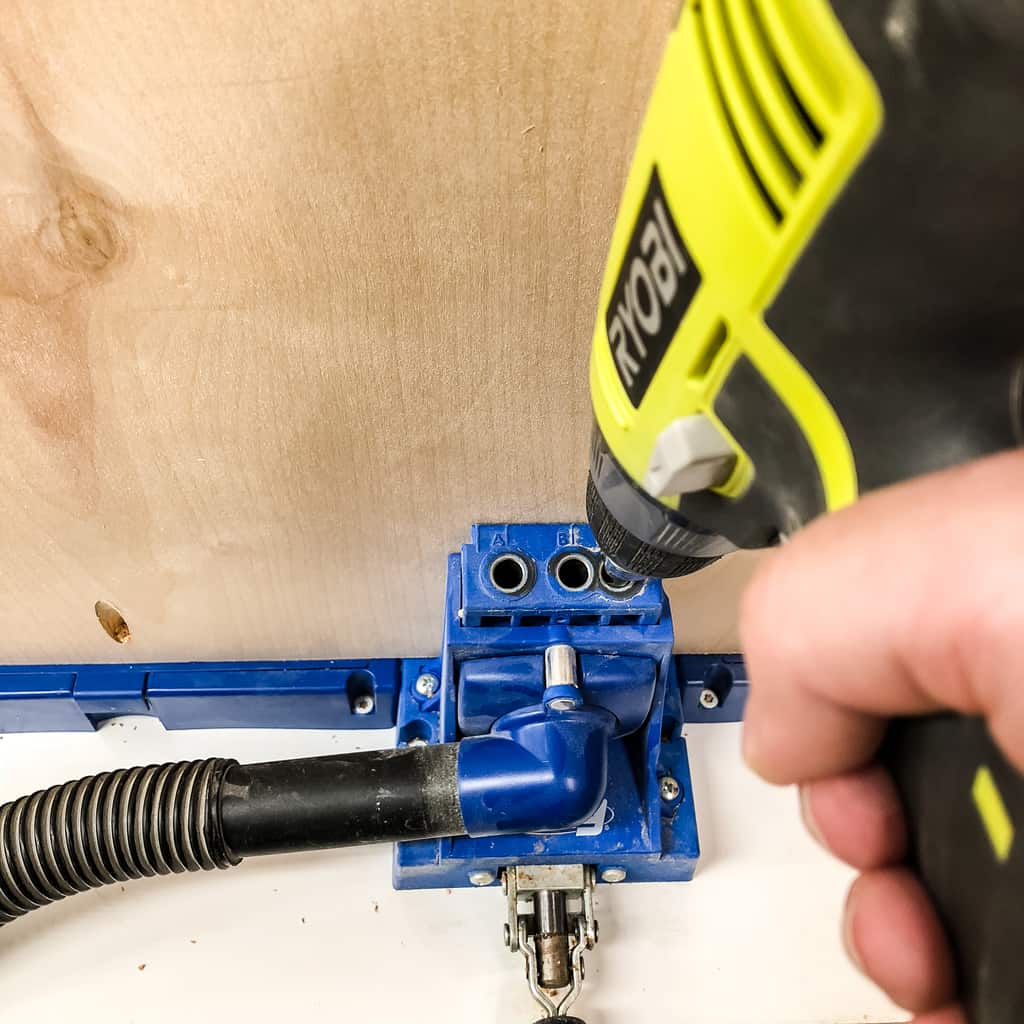
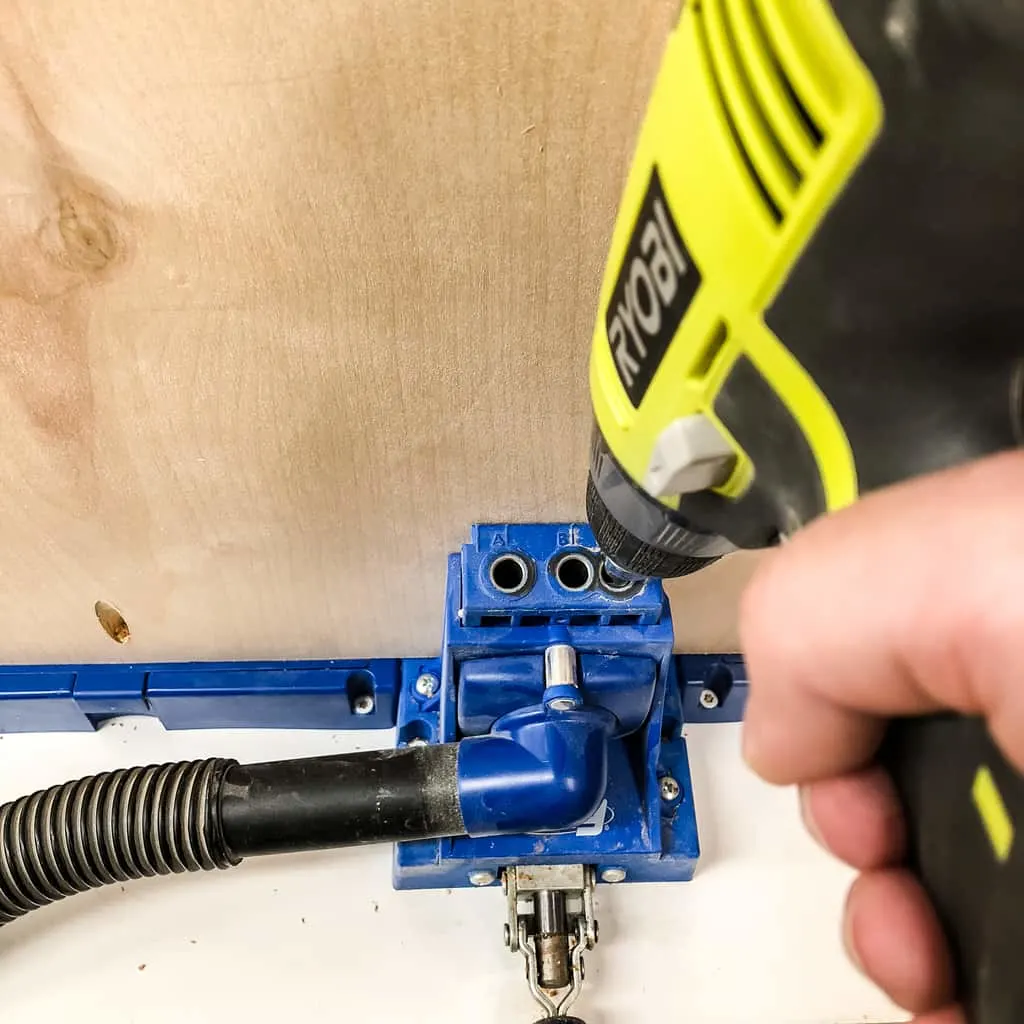
Drill Pocket Holes and Sand
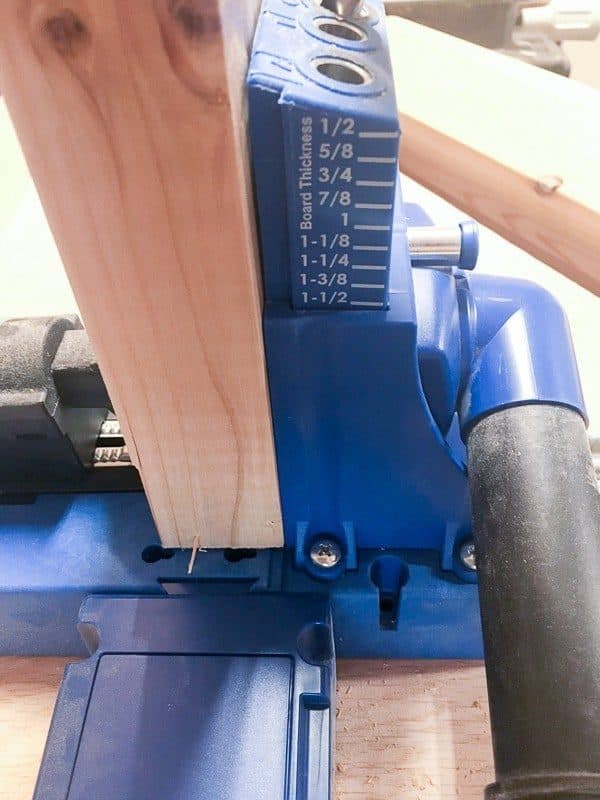
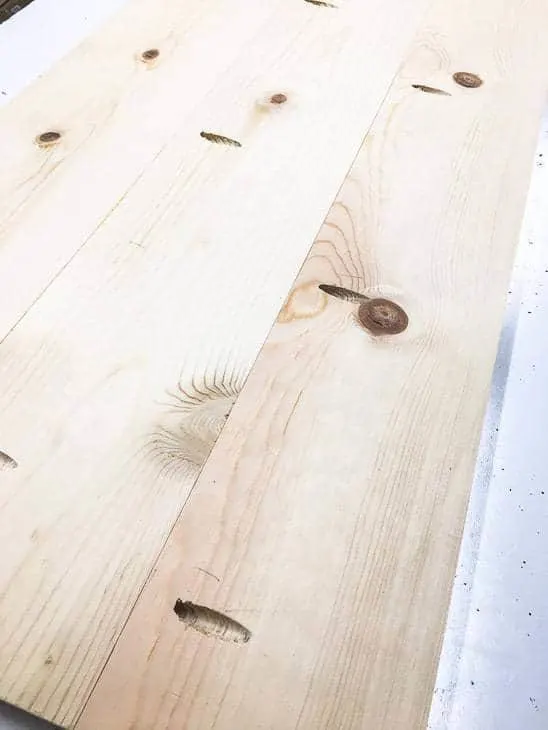
Drill two pocket holes at the 1 ½" setting in both ends of all the 2x4 pieces indicated in the plans.

Check out my guide to pocket holes for more information.
After all the pocket holes are complete, sand everything with 80 grit and 120-150 grit sandpaper. (This is what I have my friend do while I start on the next step.)
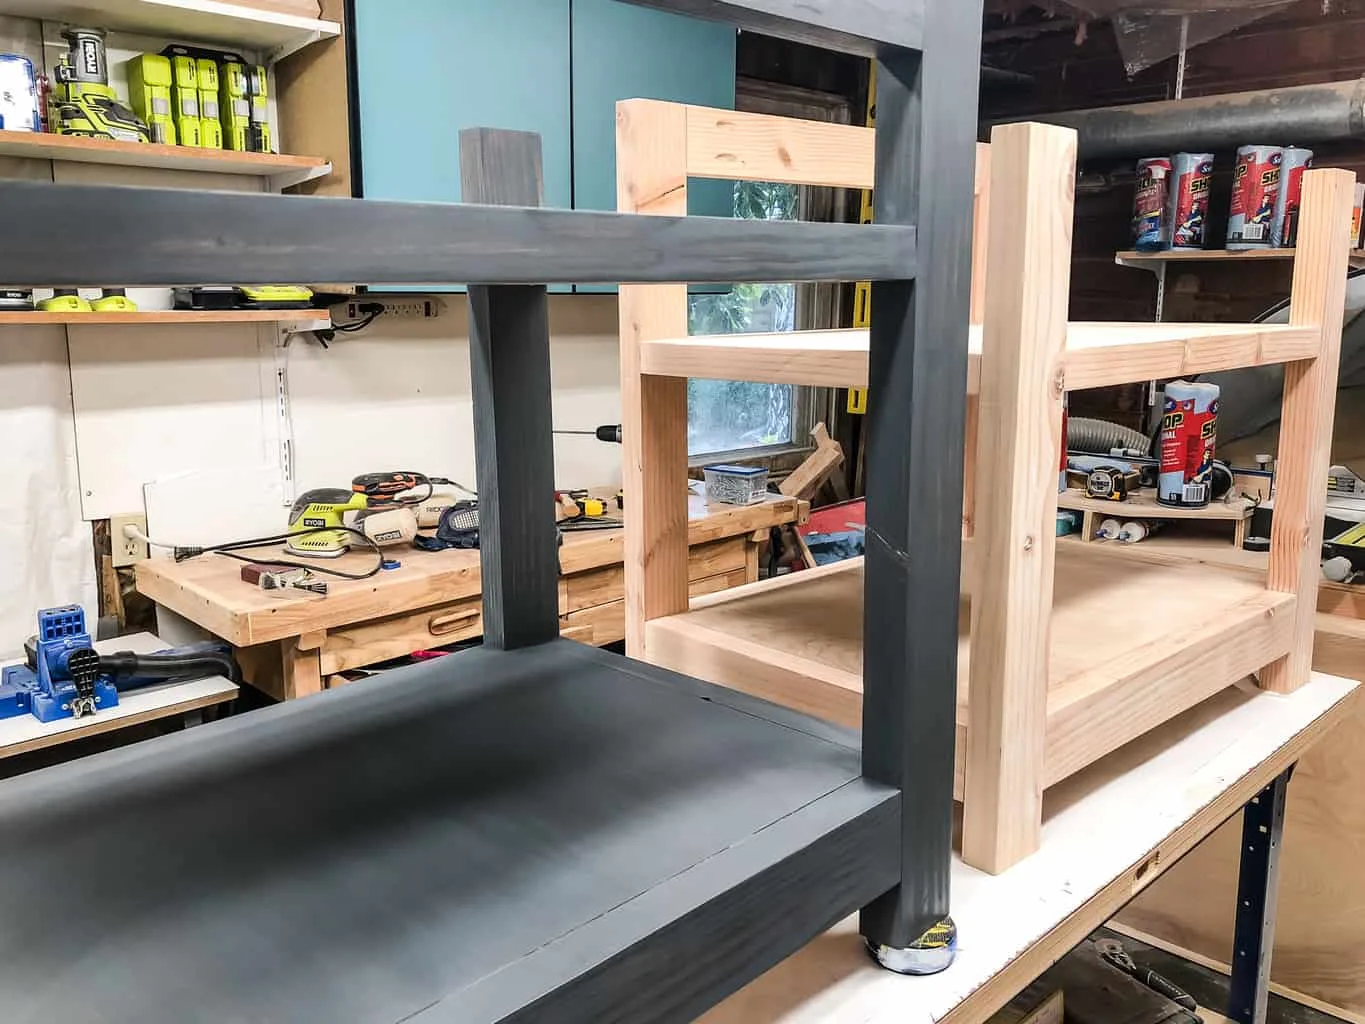
Assemble the Frame
Grab two longer and two shorter leg pieces for one side of the desk. The shorter legs are installed on the inside part of the desk. Create frames for the two shelves.
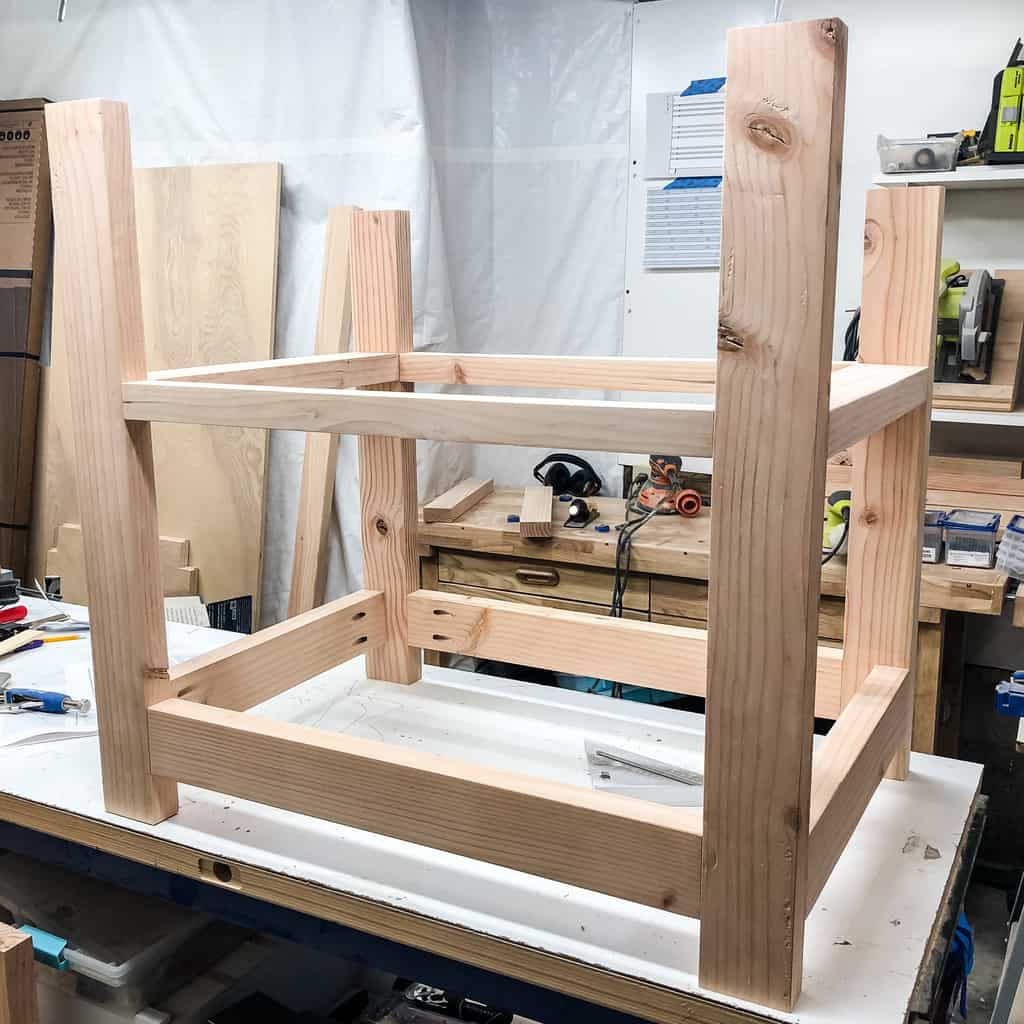

Create a mirror image of these shelves for the other side, with the longer legs on the outside of the frame. If you're confused, download the computer desk plans for a clear look at how each piece goes together!
Inset the Plywood Shelves
Measure the opening of each shelf, and cut the plywood to fit. If you cut the plywood pieces beforehand, you may need to trim them or adjust the frame.
Switch your Kreg Jig to the ¾" board thickness and drill pocket holes around the perimeter of the smaller plywood pieces.
Lay the frame on its side, and clamp three scrap boards across the top of a shelf. Then insert the plywood from underneath, and tap it into place with a hammer. It should fit snugly.
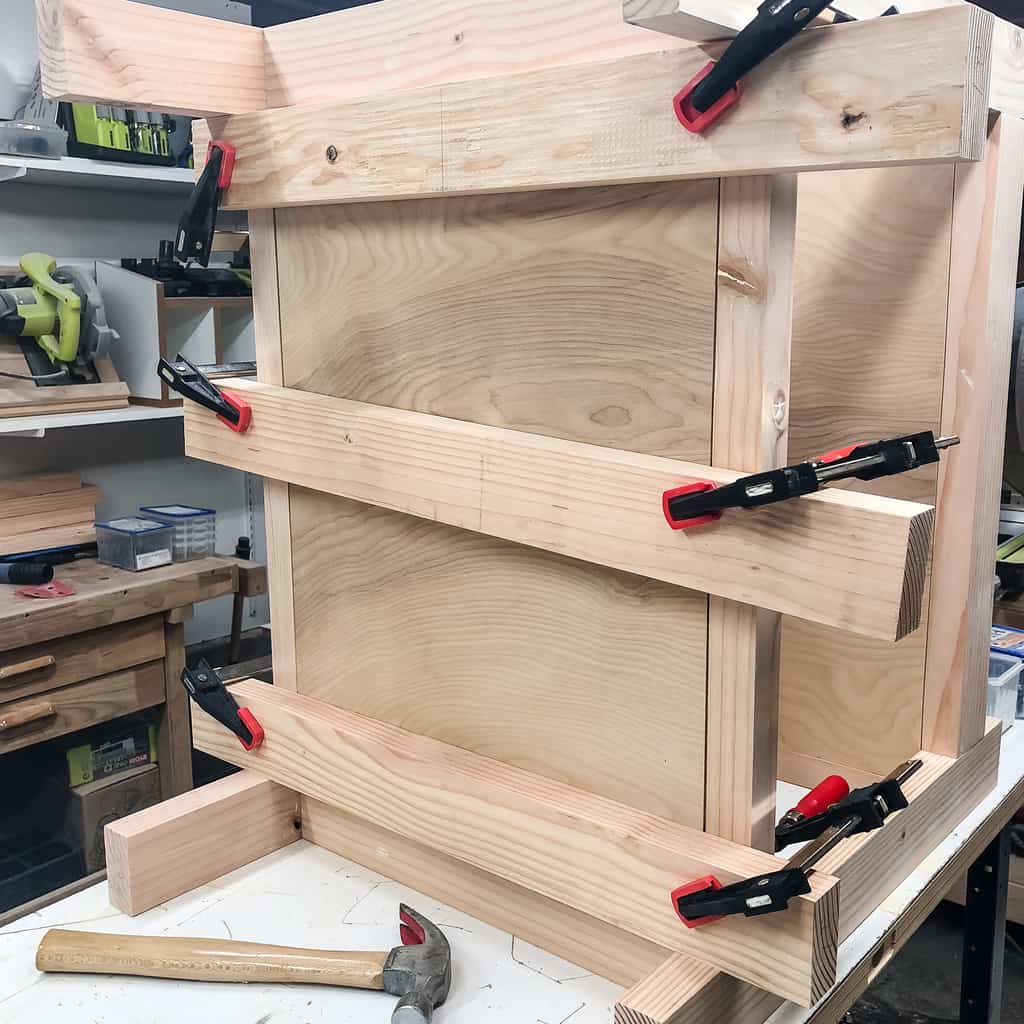

The scrap boards across the top will hold the plywood flush with the top of the shelf while you screw it into place with 1 ¼" pocket hole screws.
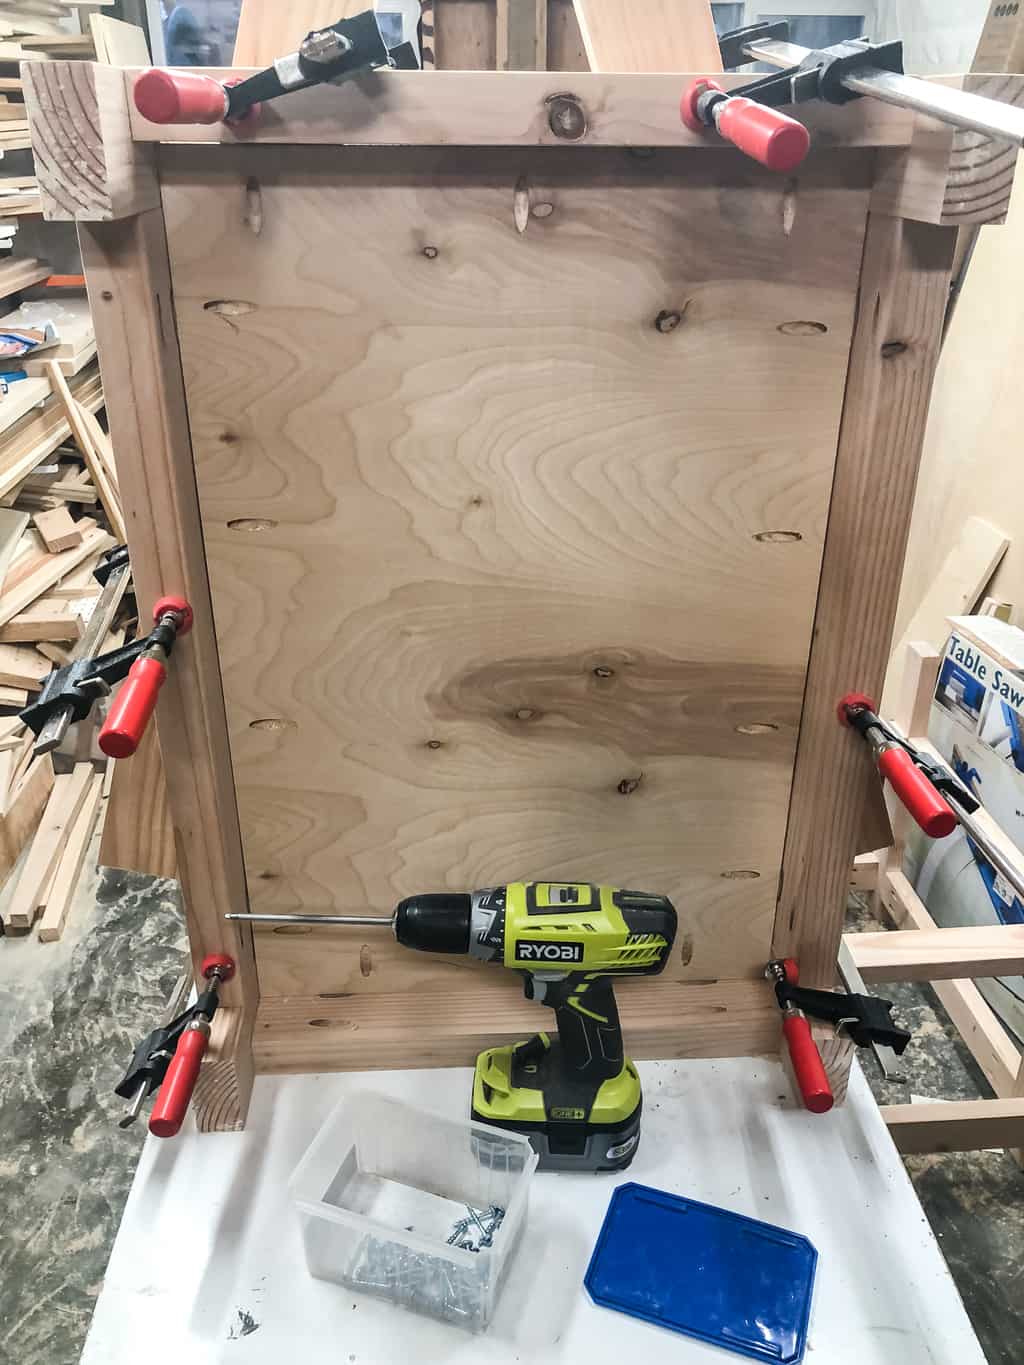

Now you have completed shelves!


Assemble the Top
There are a few different ways you can tackle the desk top. You could plank several 1 x 6 boards together with pocket holes like I did for my wood and metal desk...

You could cut the plywood to the exact dimensions of the desk (or add an inch of overhang) and apply edge banding to cover up the raw edges.

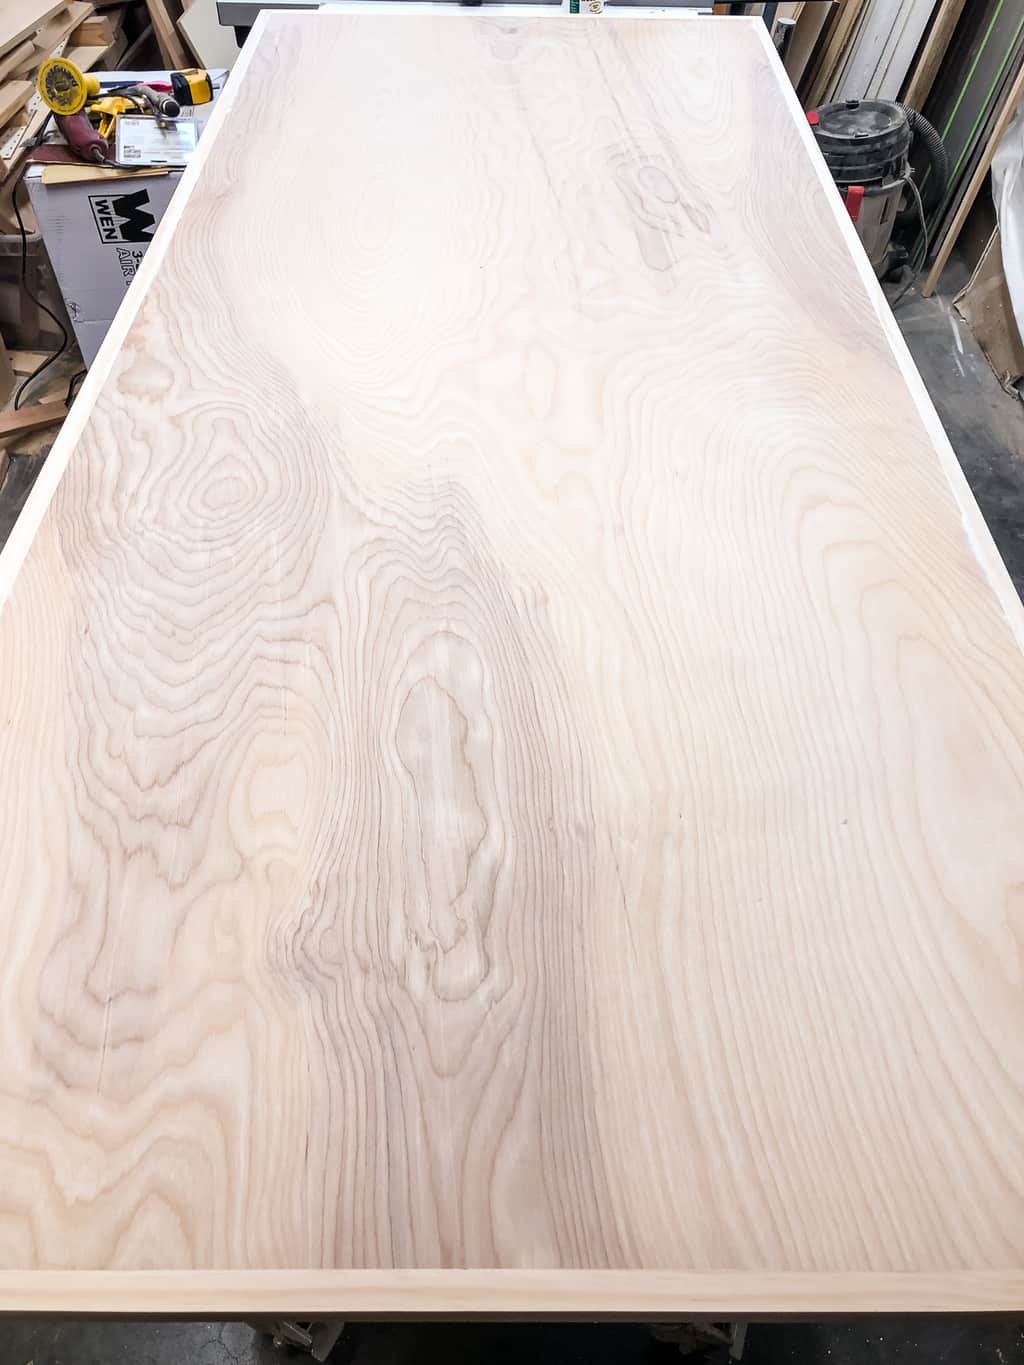
But I decided to cut the plywood slightly smaller than the desk top and finish the plywood edges with solid wood strips. This combines the smoothness of plywood with a more durable edge.
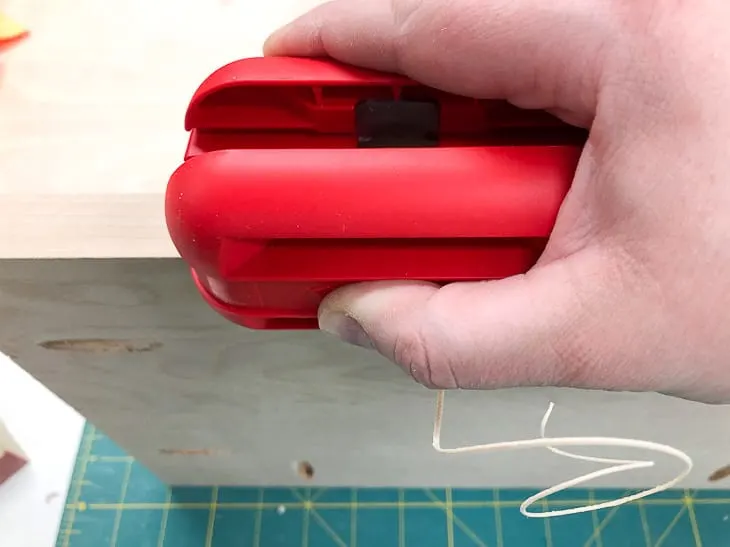
Cut one of the ¾" strips you ripped on the table saw earlier to match the short ends of the plywood top. Apply wood glue to one edge, then attach it with the brad nailer.
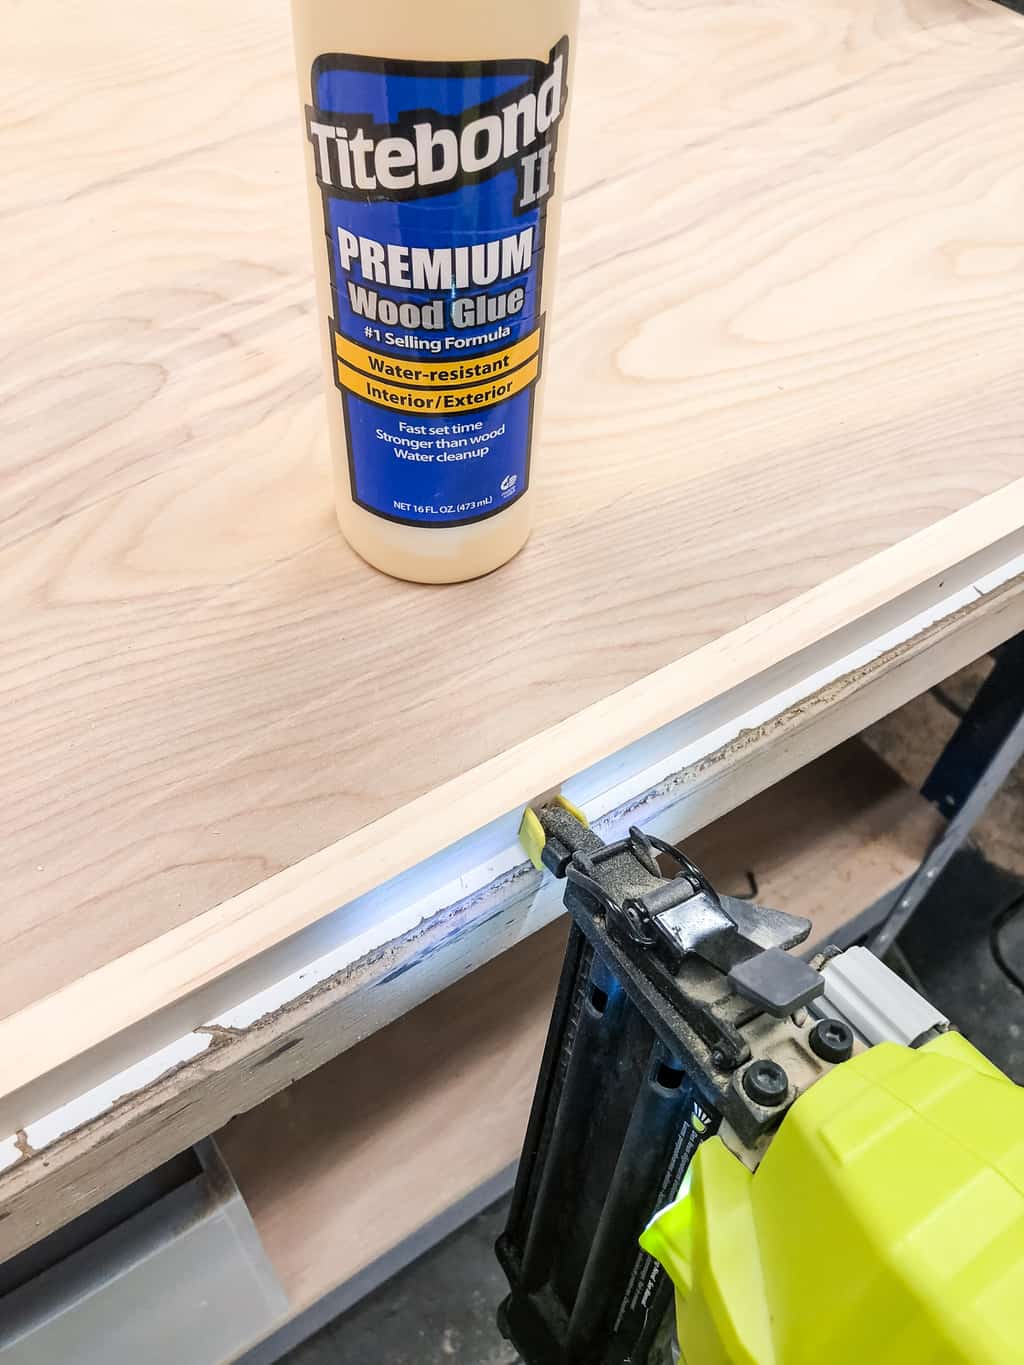
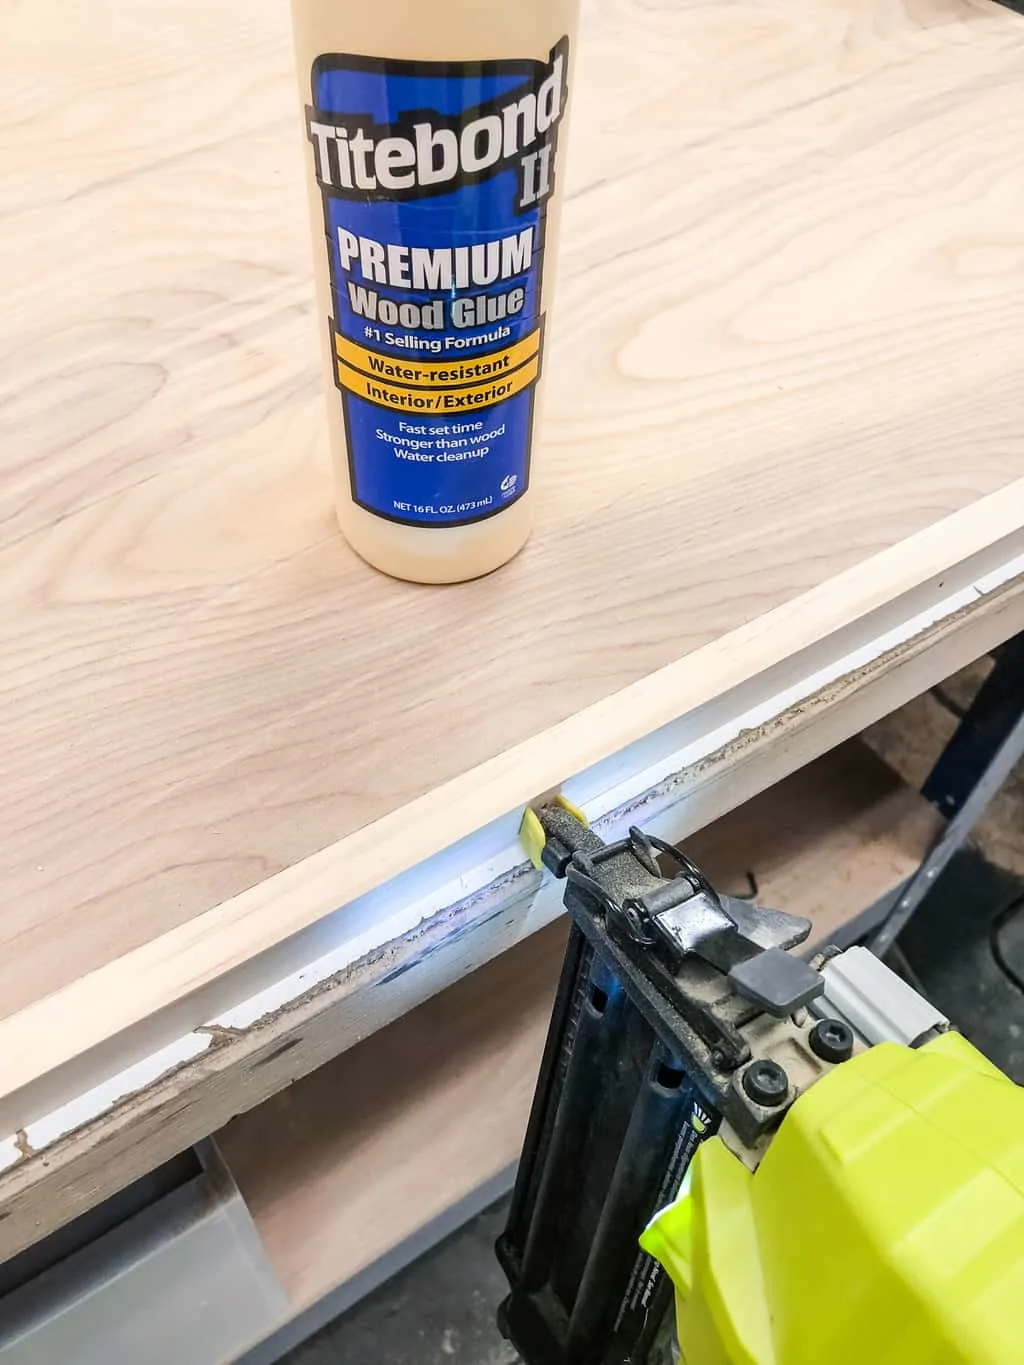
Then measure the assembled length and cut two more ¾" strips to fit. Attach them to the front and back. Fill in any gaps and nail holes with wood filler, and sand smooth when dry.
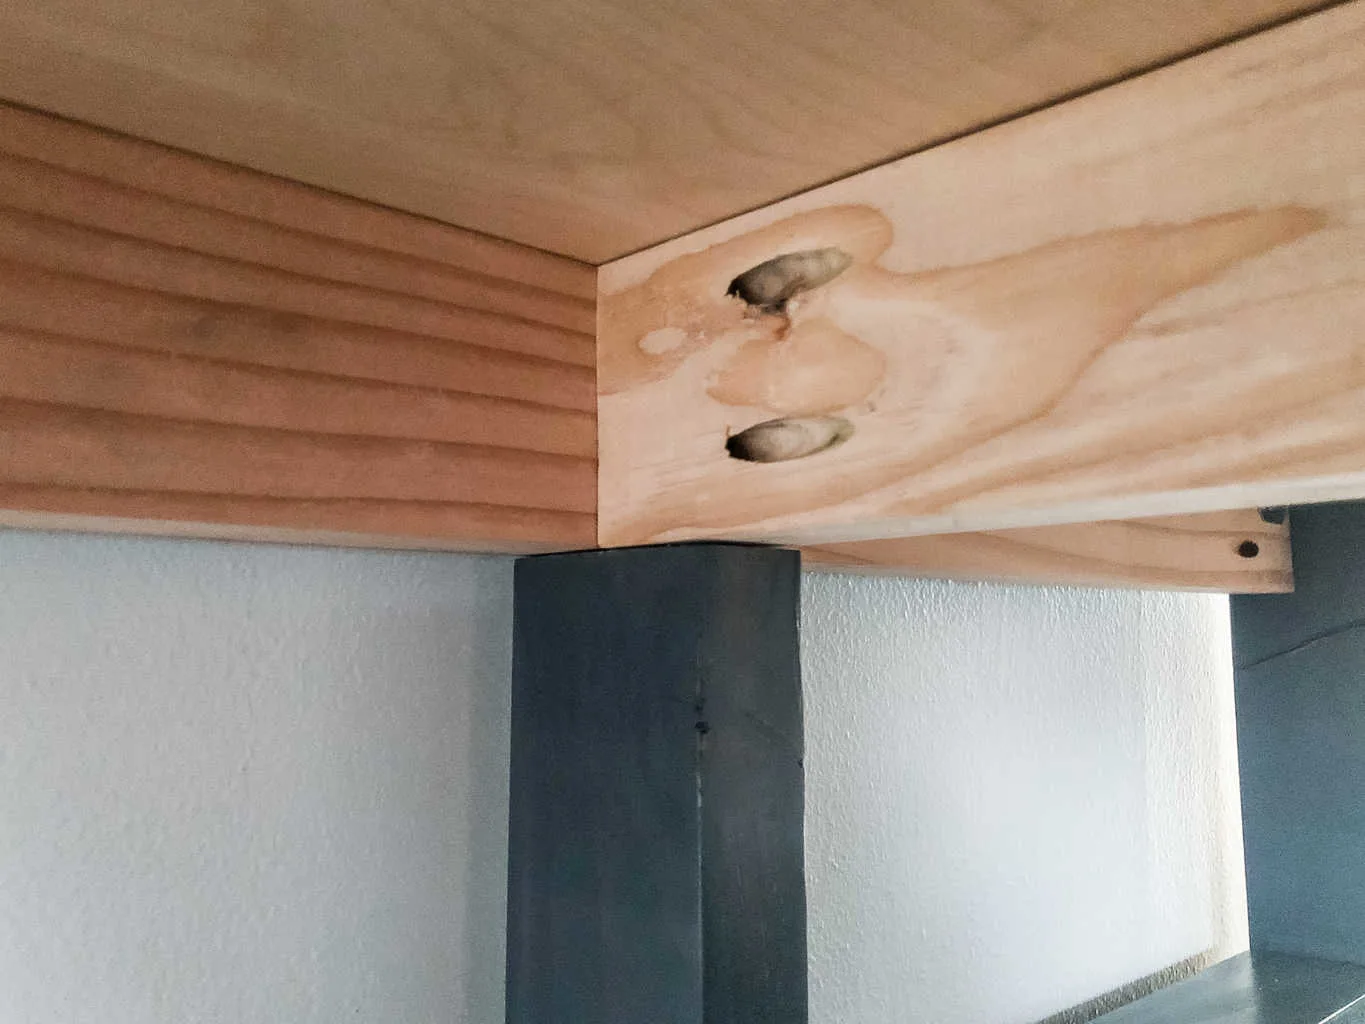
Assemble the Top Frame
Instead of attaching the top frame to the shelves, I built it into the desktop to make it easier to move. All he has to do is remove a few screws from the hardware on the front and the entire top lifts right off!
Flip the desk top upside down and place the frame on top. Using the remaining 24" pieces as spacers on either end, line up the frame with the top. Use small L brackets or figure 8 brackets to connect them together.

Finally, attach the two remaining 24" pieces between the taller legs of the shelves with 2 ½" pocket hole screws.
Stain or Paint, and Attach Hardware
After checking out my grey wood stain color samples, he decided to go with the same grey wood stain as our dining table. My favorite! You may want to apply pre-stain wood conditioner first to prevent blotchiness and even out the color.

The pine frame only required one coat of the gel stain, but the birch plywood needed two coats for even coverage. I finished it off with General Finishes gel topcoat. This is my preferred polyurethane for projects with lots of vertical parts because it doesn't run or drip.

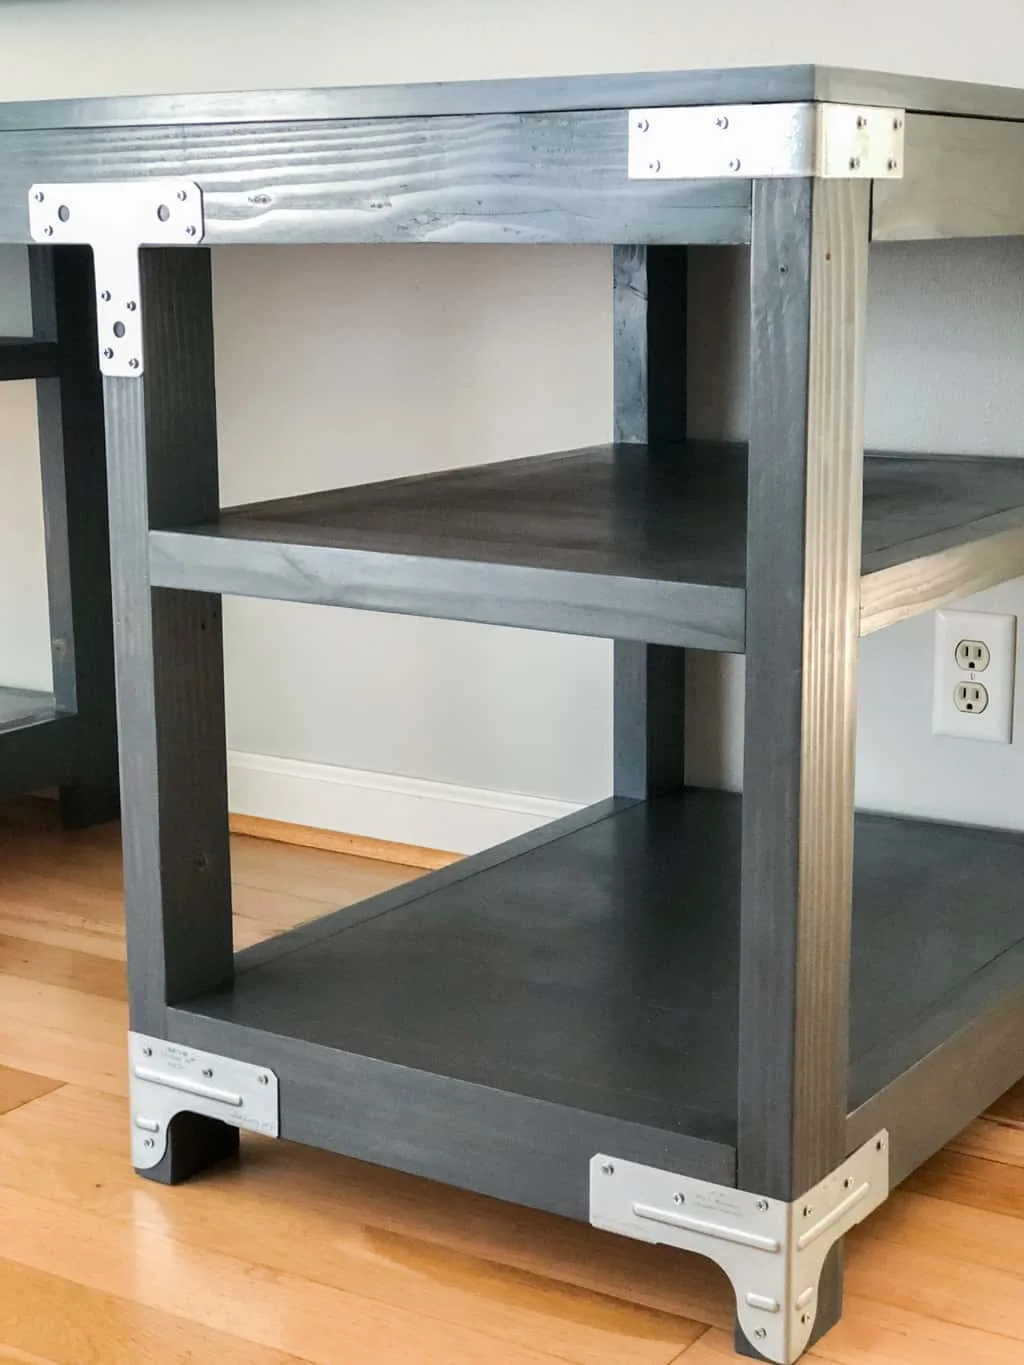
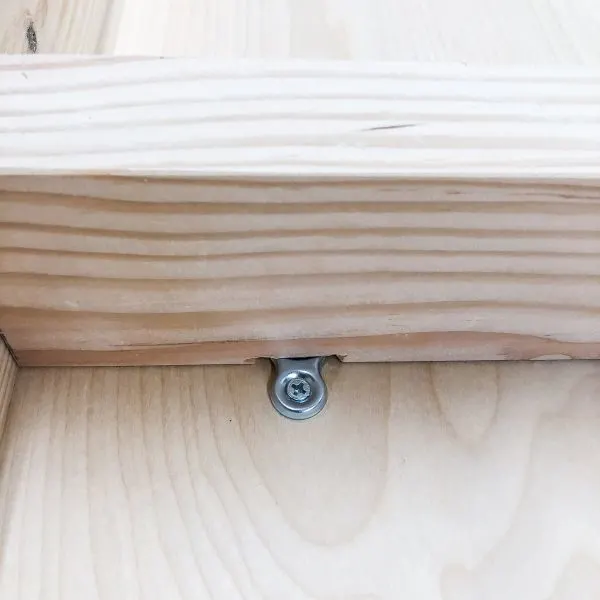
Now for the best part of this desk: the hardware! Corner tie connectors wrap around the feet. Large L brackets hold the top frame to the shelves at the corners. And T straps secure the inside legs to the top.
Underneath, you can see where the frame for the top rests on the shorter legs. The T straps hold these two parts together.

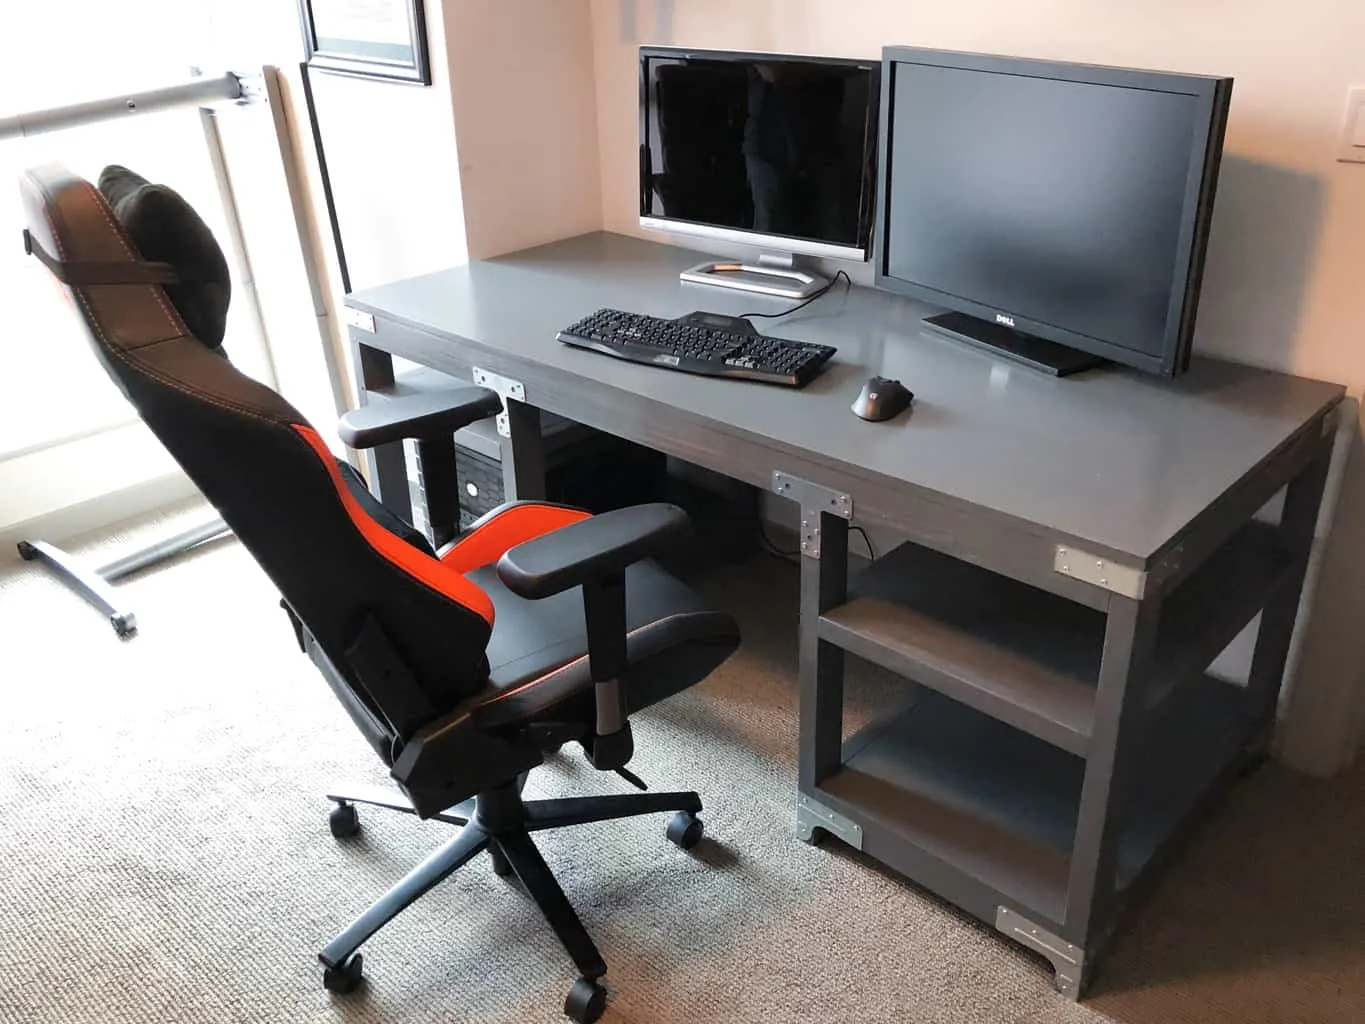
I did a dry fit of the assembled desk at home before delivering it. This thing is huge!
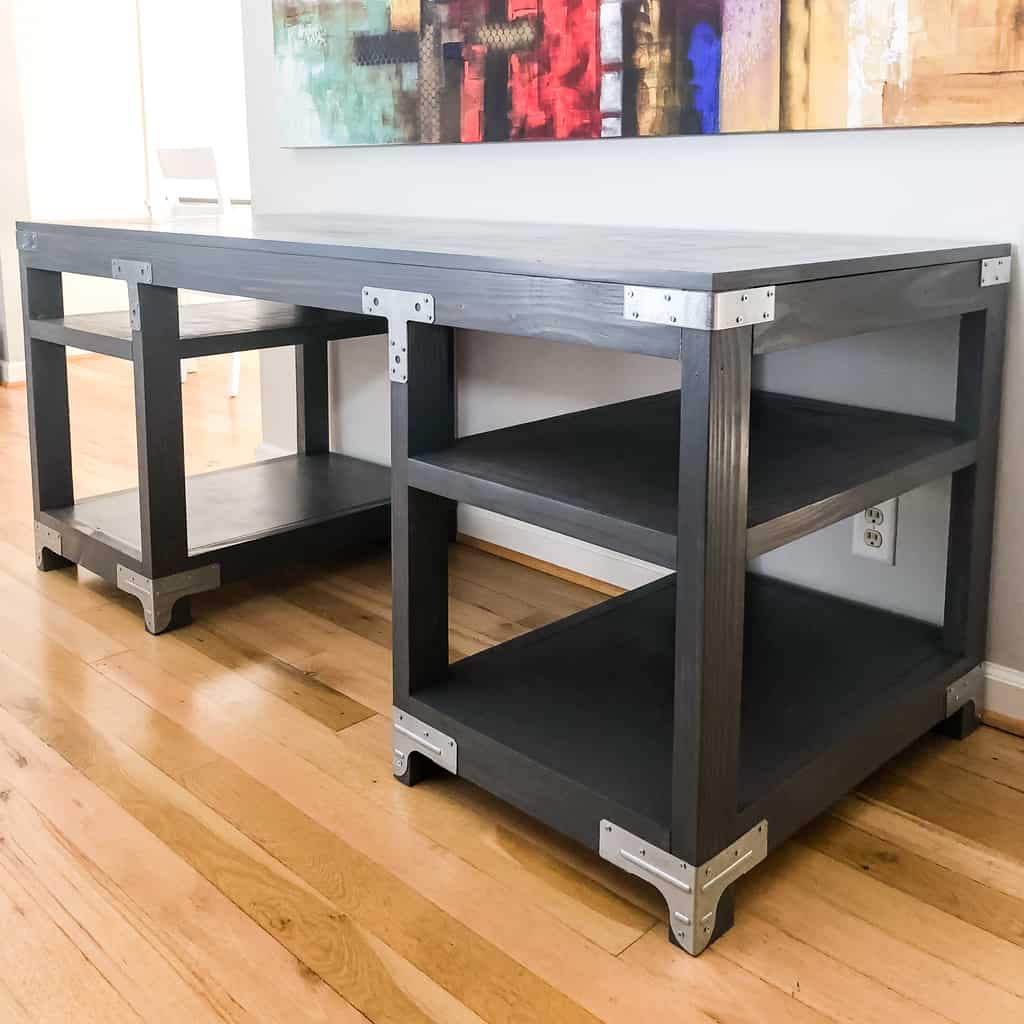
I was so relieved when all the pieces fit together perfectly in his office. Now he can work from home at his new DIY computer desk!

And in case you're wondering, no, I won't make you one too! 😉 Get the plans below and build your own!
Check out these other DIY desk ideas!
Judy
Tuesday 25th of September 2018
Wow! Very impressive. I will be featuring this tonight at my Fall into Fall party that opens at 8pm EST. Please stop by and pick up an I've Been Featured button. Thanks. http://diybydesign.blogspot.com
Jann Olson
Monday 24th of September 2018
What a really great desk! Thanks for sharing with SYC. hugs, Jann
Chas Greener
Wednesday 19th of September 2018
This is so great! Thanks for sharing on To Grandma's House We Go!
RON ANTINORA
Monday 17th of September 2018
JUST WOW ! AND THANKS !!