Get your skis off the floor and onto the wall with this easy to make garage ski rack! Customize this DIY ski rack to fit all your gear behind the door!
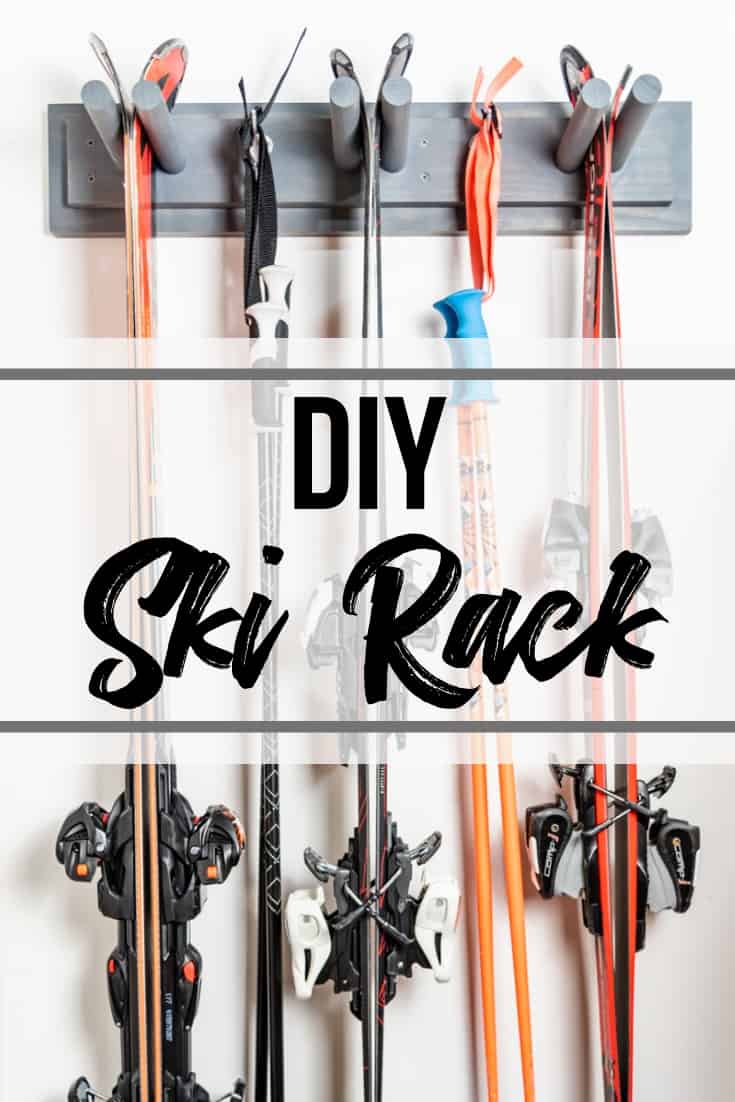
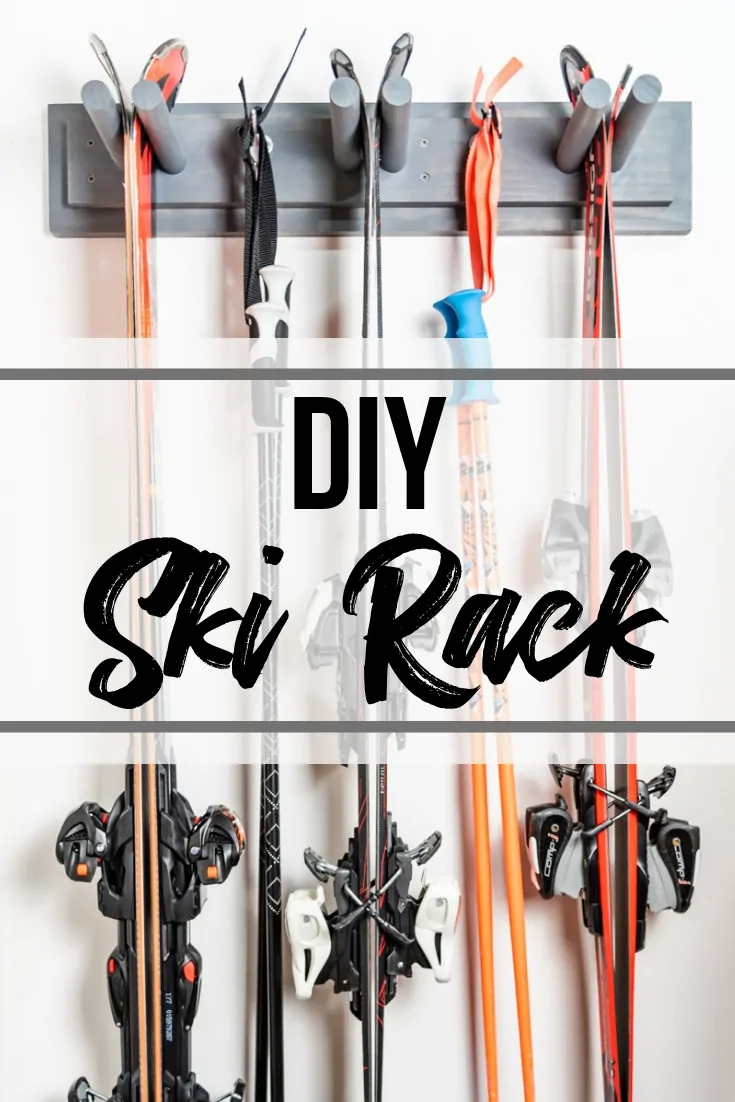
Ski season ended rather abruptly with a few random 70 degree days in the middle of March this year. I've been itching to clean up the yard, but the snow gear was still strewn all over the place from the last trip to the mountains, blocking the way to the lawnmower and garden tool storage rack. This DIY ski rack fits behind the garage door and gets all our skis and poles organized and off the floor!
This post contains affiliate links for your convenience. Purchases made through these links may earn me a small commission at no additional cost to you. Please visit my disclosures page for more information.
With small projects like this, I always turn to my scrap wood pile first! After measuring the space behind the door next to the garage shelves I just built, I dug out a 1x6 and a 1x4 board of roughly the same length.
I also had some 1 ⅛" round dowel end cuts and a few old coat hooks that I unearthed when I cleaned out this area a couple weeks ago. I love it when I can make a project for free!
I'm assuming you don't have an eclectic mix of random pieces at home like I do, so here's what you'll need:
Materials Needed for DIY Ski Rack
- One 1x6 board
- One 1x4 board
- One 1 ⅛" round dowel (48" long will get you enough to hold 3 sets of skis)
- Two or three coat hooks
- 1 ⅛" paddle bit or Forstner bit
- Drill
- Countersink bit
- 3" wood screws
- 2 ½" wood screws (optional)
- Wood glue
- Stud finder
Don't forget your safety gear when woodworking! Here are my recommendations for safety glasses and ear protection. No excuses!
How to Make a Wall Ski Rack
Measure your space and mark the studs
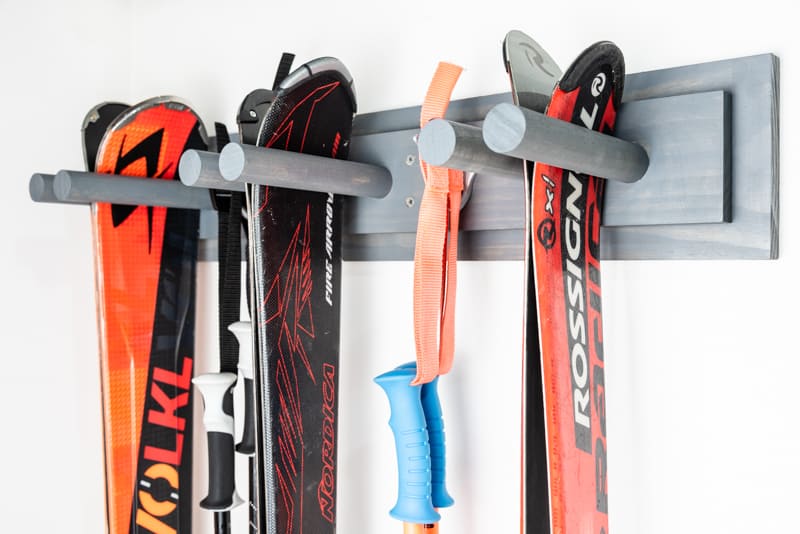
The size of your ski rack depends on how many sets you need to store, and how much space you have on the wall. We needed room for three sets of skis and two hooks for poles, which will fit nicely behind the door.
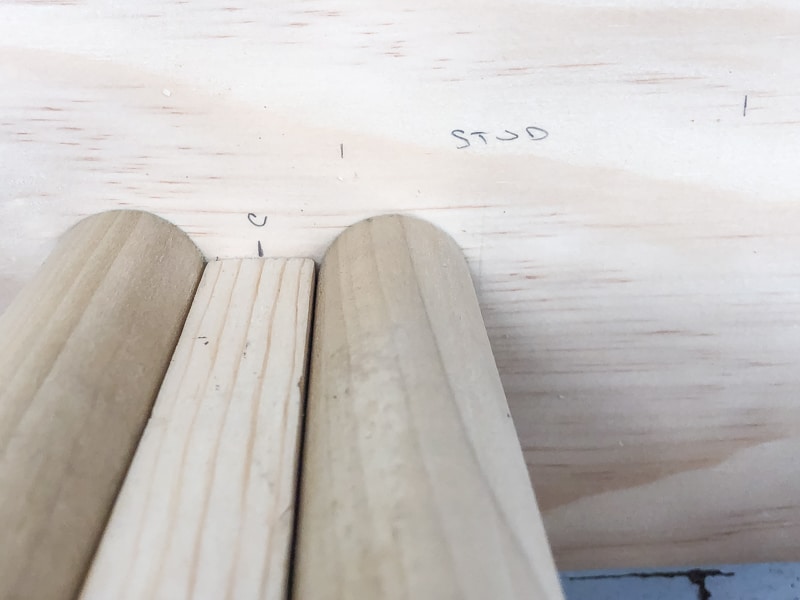
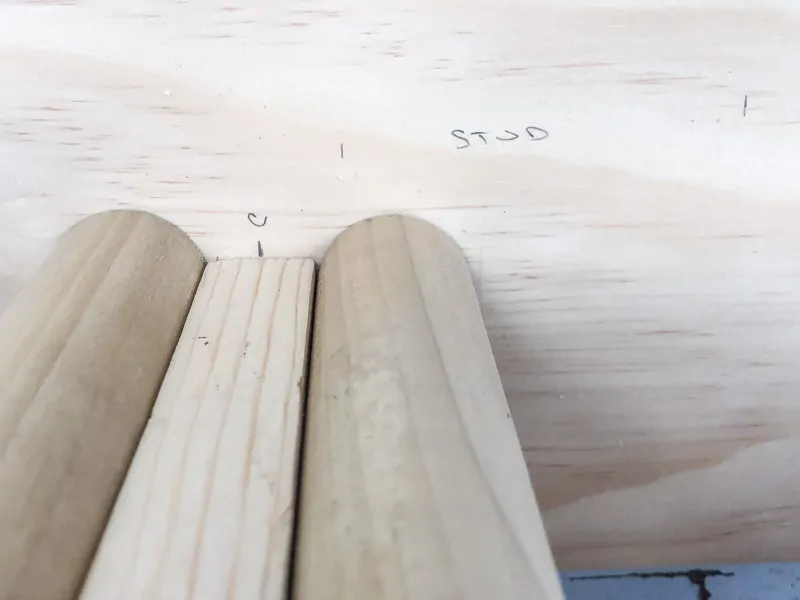
I used a stud finder to mark the position of each stud in the wall. Then I transferred the stud markings to the 1x6 board. If your board will only hit one stud, make sure to mark where you plan to insert drywall anchors instead.
Cut the 1x6 and 1x4 boards to size
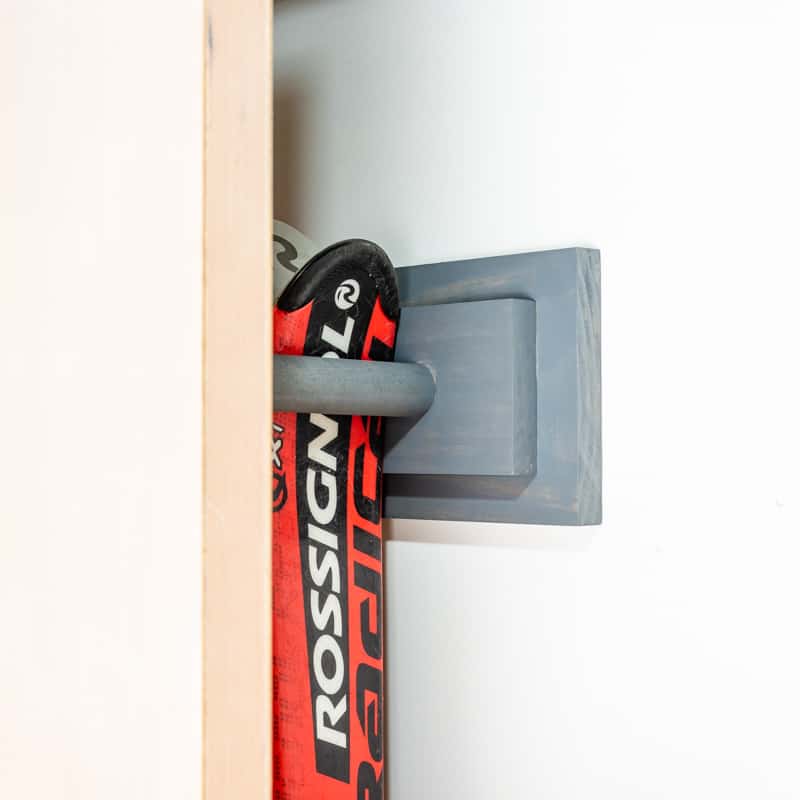
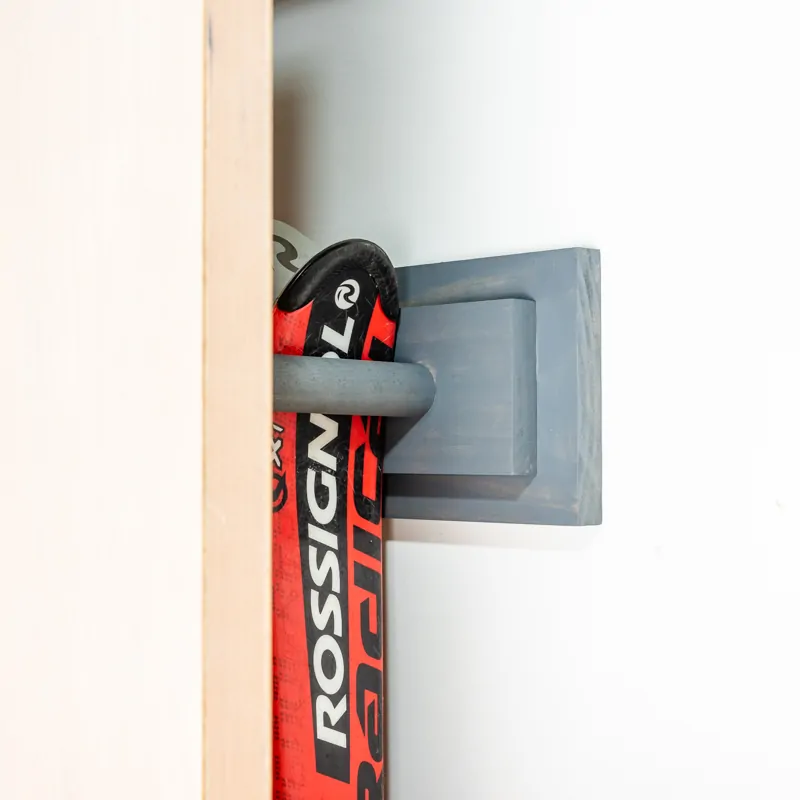
I've seen similar DIY ski racks that use dowels that are sunk only partway into a 1x board. I was worried that might not be strong enough to hold up our heavy skis, so I decided to double it up with a 1x4 on top. The 1x6 is 28" long and the 1x4 is 26".
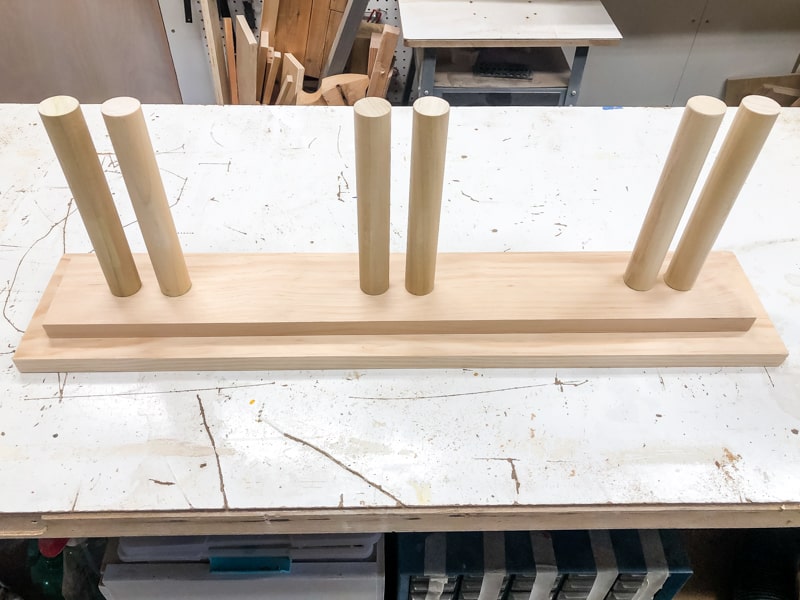

The 1x4 board will have holes drilled all the way through, so the wood glue will have plenty of surface area to adhere to. The 1x6 board will serve as a backing, and you can even screw through the back of the 1x6 and into the dowel if you want them to be really secure.
Determine spacing of dowels
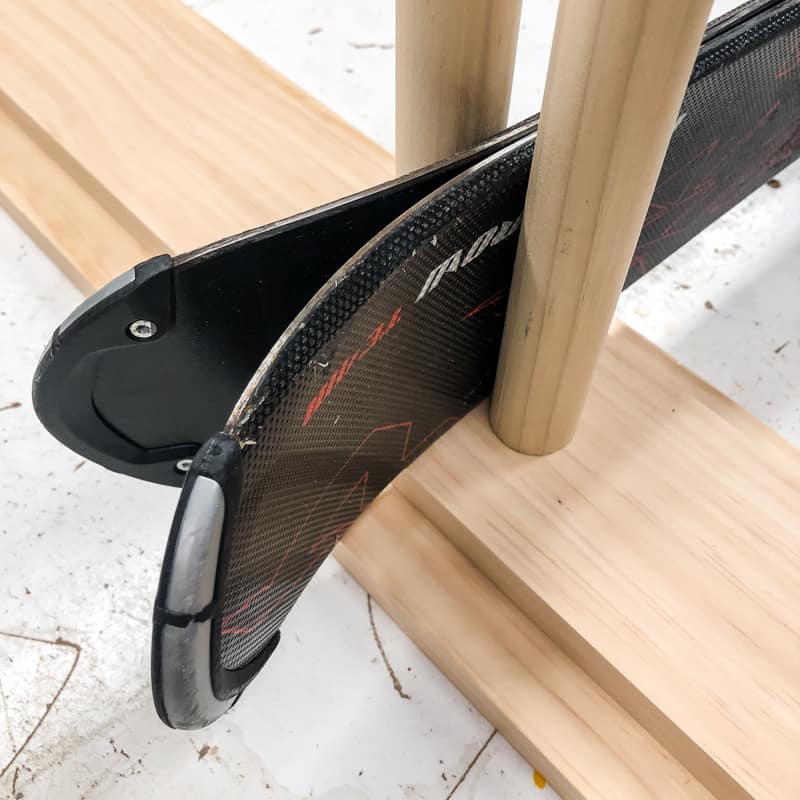
I had a bunch of dowel end cuts that I found in a toolbox buried in the back of the garage storage area. The shortest one was 7 ½" long, which turned out to be the perfect size for my husband's wide-tipped skis. I cut five more to match.
My son's skis have more camber (the arc under the center of the ski), so I used those to determine how far apart the dowels should be. I positioned the skis tight between two upright dowels, then measured the space between them. It turns out ¾" is just about right!

I marked the center of the 1x4 board and the stud locations. Then I placed a scrap of ¾" lumber over the center mark, with dowels on each side. This helped me decide where to drill the holes for the dowels while avoiding the studs.
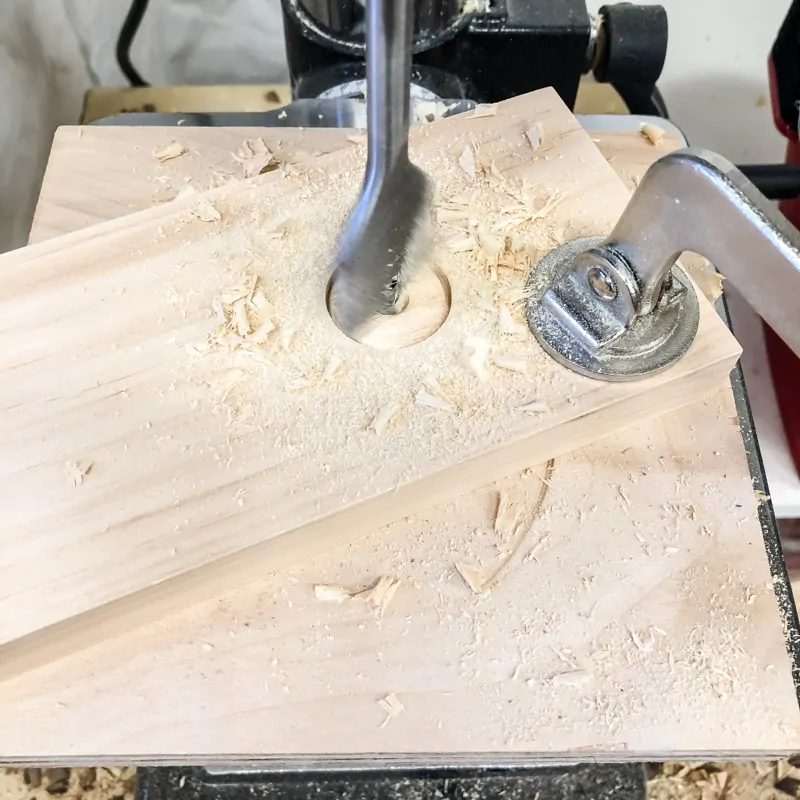
Drill holes for the dowels
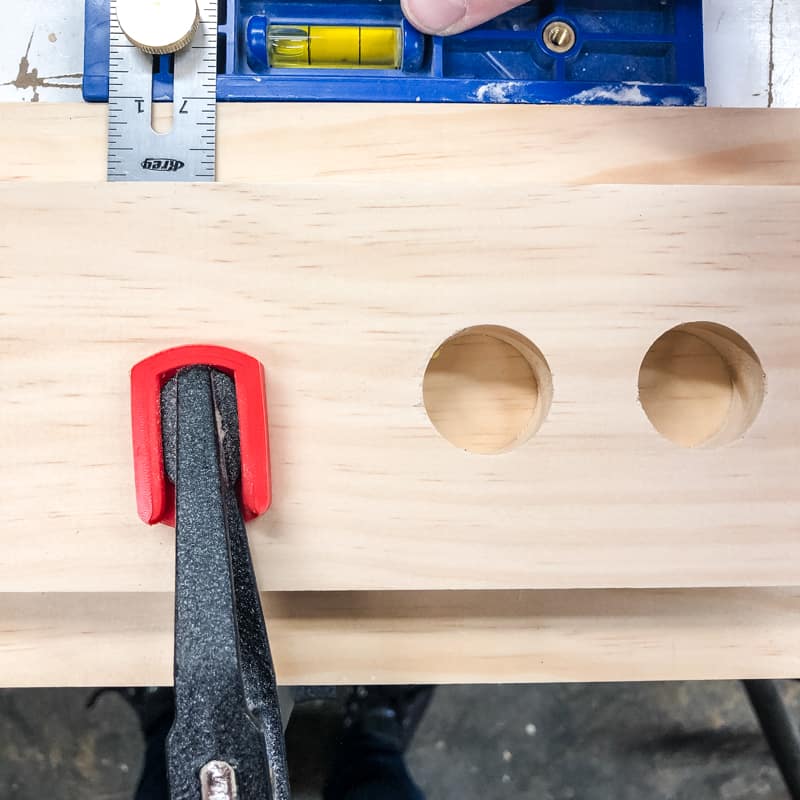
Once you have the positions of all the dowels marked on the 1x4 board, it's time to drill some holes! Use a 1 ⅛" paddle bit or Forstner bit in a drill or drill press to make holes all the way through the 1x4 board.

Then predrill two countersink holes at each stud location. These screws will go through the 1x6 backer board and into the wall. Check out my tutorial if you're not familiar with how to countersink screws.


Apply wood glue
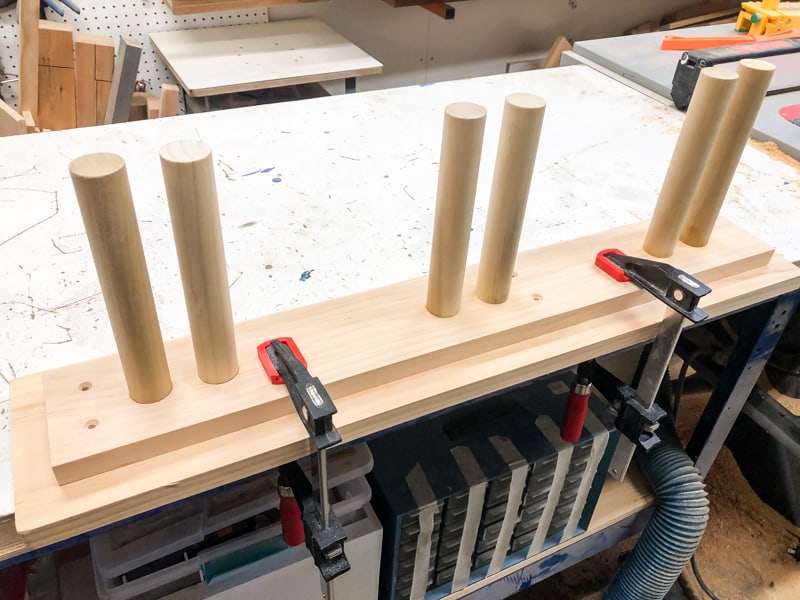
Flip the 1x4 with the dowel holes over, and apply wood glue to the back.


Place it on top of the 1x6 board with a 1" offset on all sides. Clamp it down to the workbench.

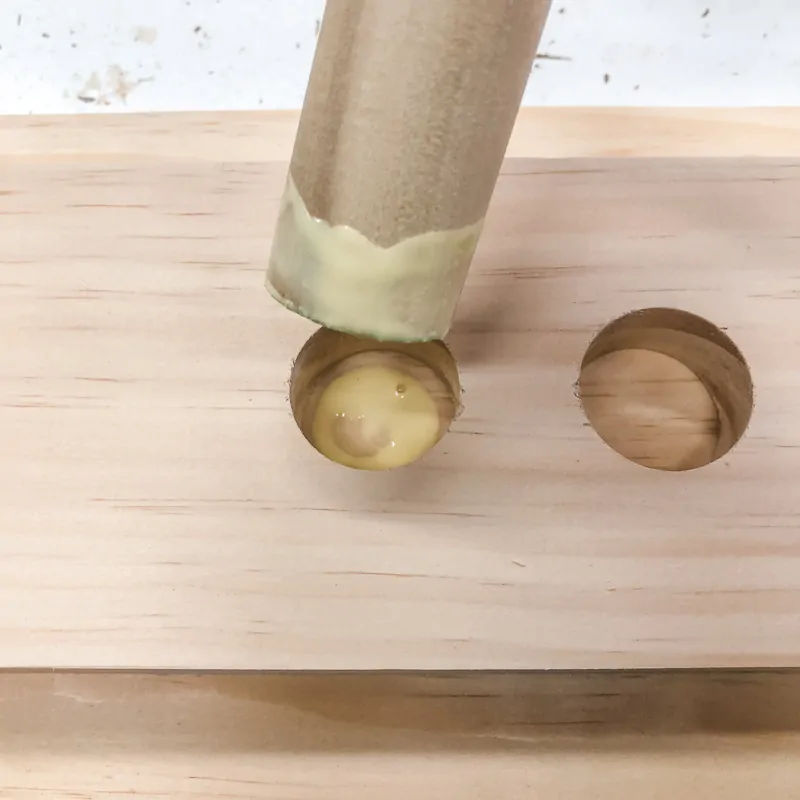
Add a squirt of wood glue to the bottom of each hole, and use your finger to spread glue around the bottom of each dowel as well. Insert the glued-up dowel into the hole, making sure to clean up the glue squeeze out as you go.

Let the wood glue dry overnight.

Screw dowels in place (optional)
If your dowels are still a little wiggly after the wood glue dries, you may want to consider screwing them in place from behind with 2 ½" wood screws. This is common when the hand drill wasn't perfectly perpendicular to the board when drilling the holes. Mine were feeling pretty secure, so I decided to skip this step.
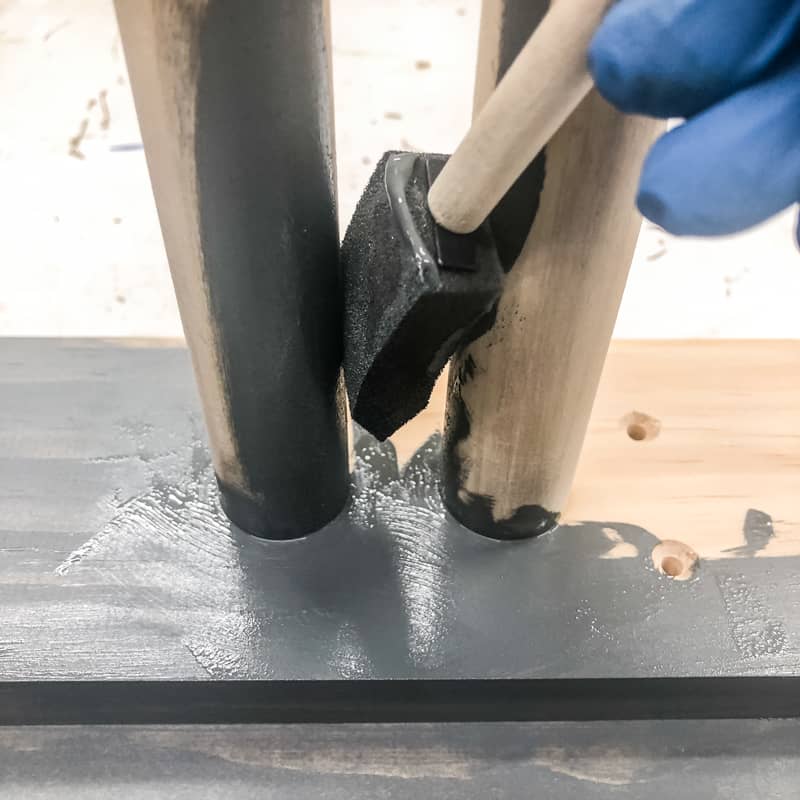
Paint or stain your garage ski rack (optional)
You can leave your ski rack natural, or give it a quick splash of color with paint or stain. I had a little bit of my favorite grey wood stain left over from my friend's industrial computer desk build, and the gel consistency made it much easier to apply to the round dowels without dripping!

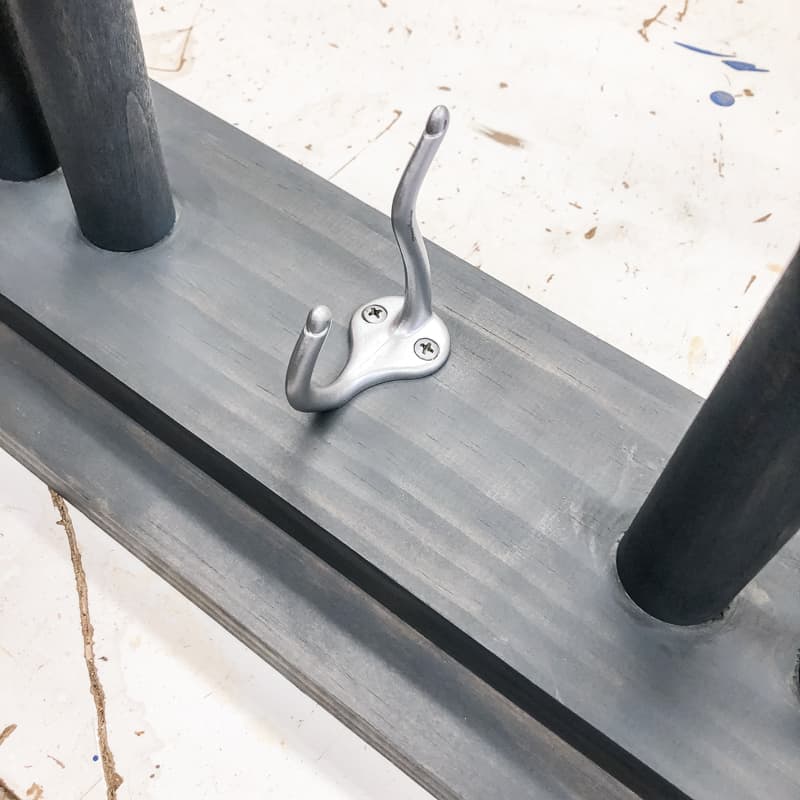
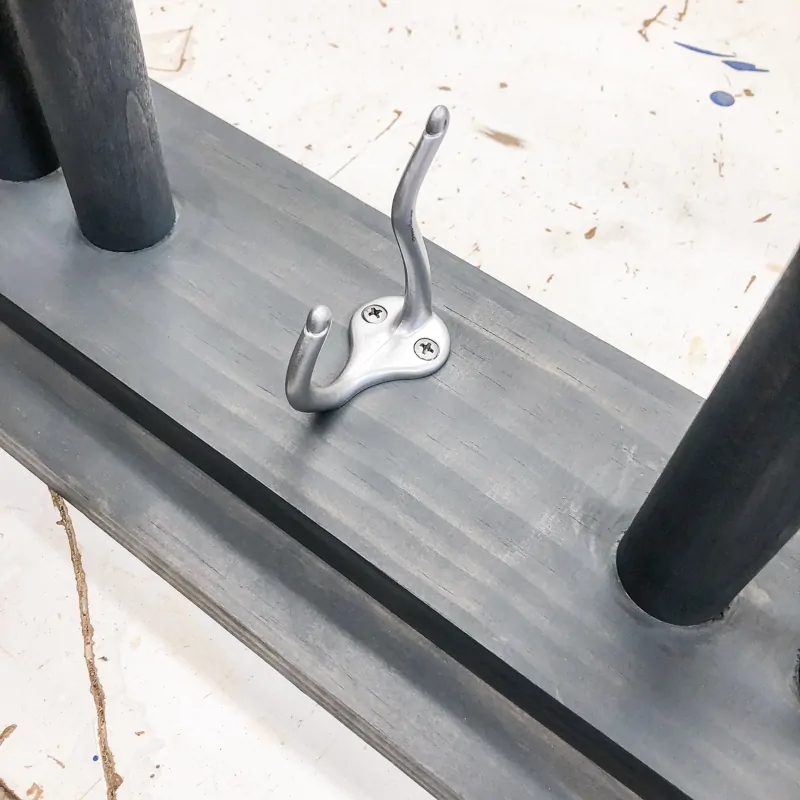
Add hooks for poles
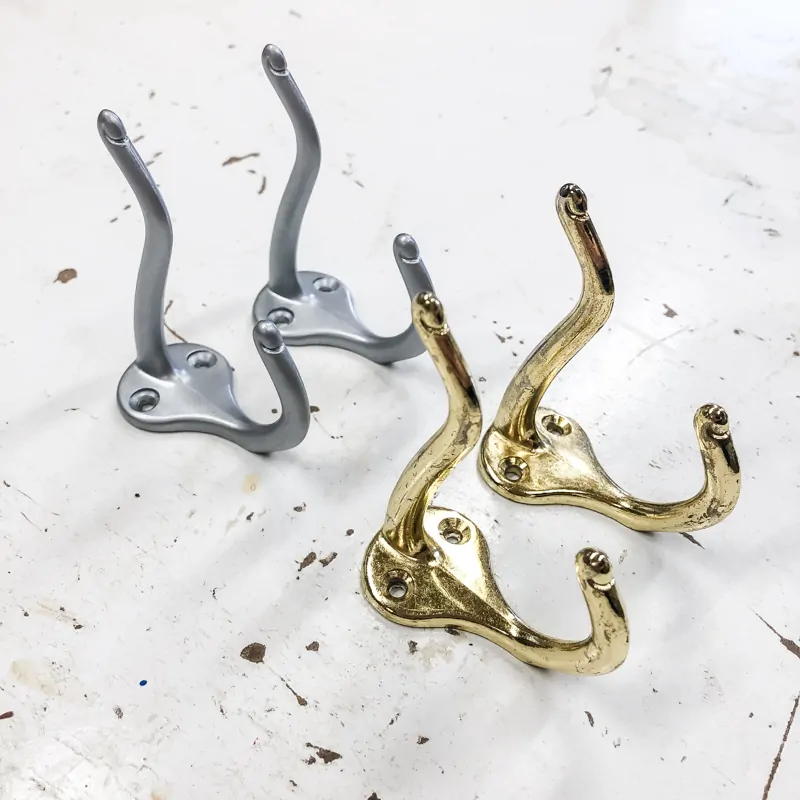
I had these ugly brass coat hooks that I removed from an old project. A few coats of silver spray paint and they were looking much better!

Screw them into place in between the slats to hold your poles.
Mount the ski rack to wall and load it up!
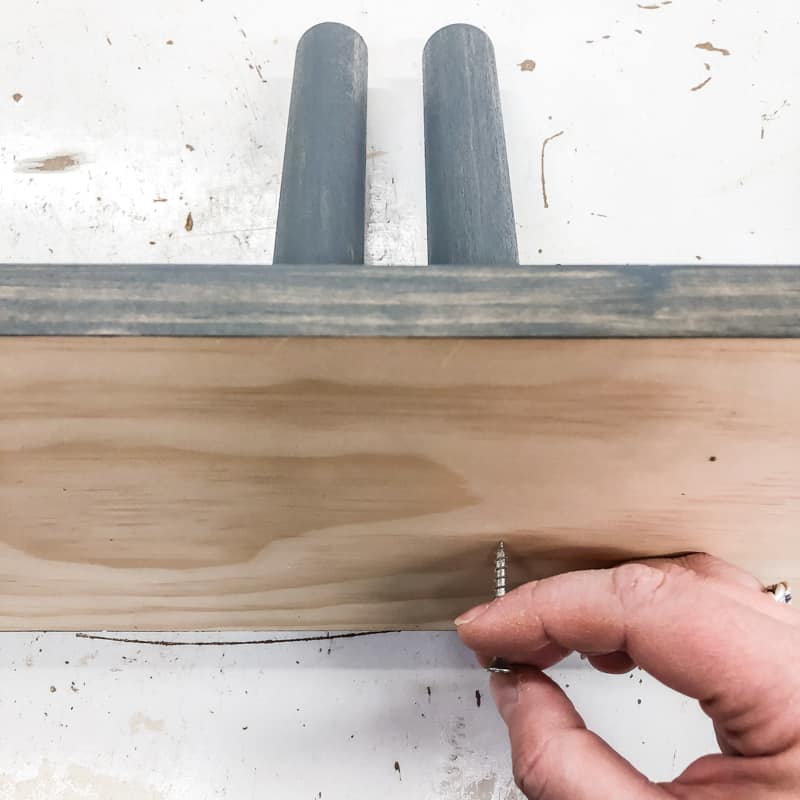
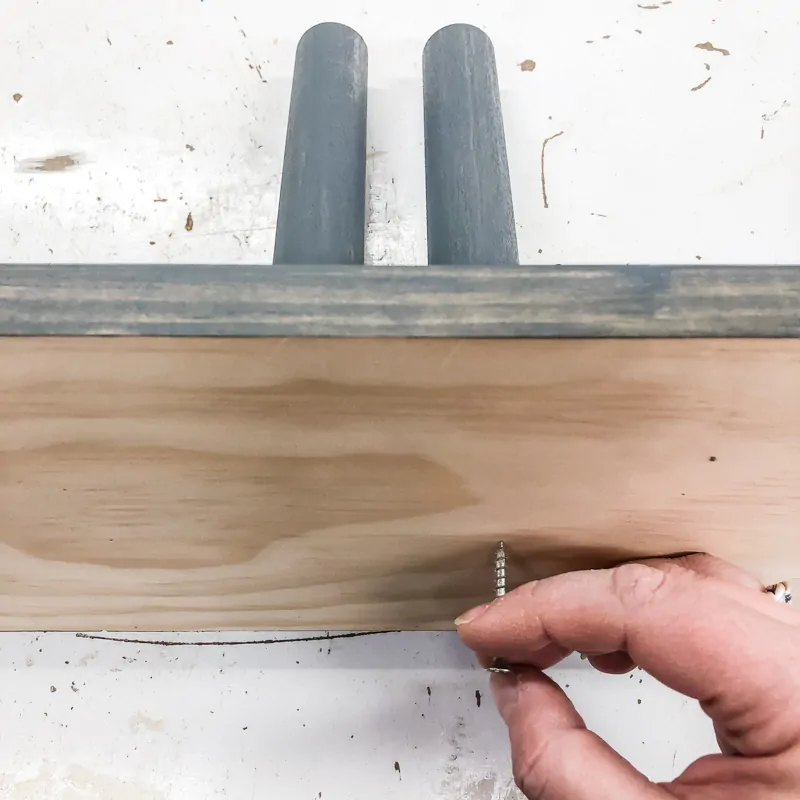
Use 3" wood screws to attach the ski rack to the wall through the countersink holes and into the studs, making sure it's level.

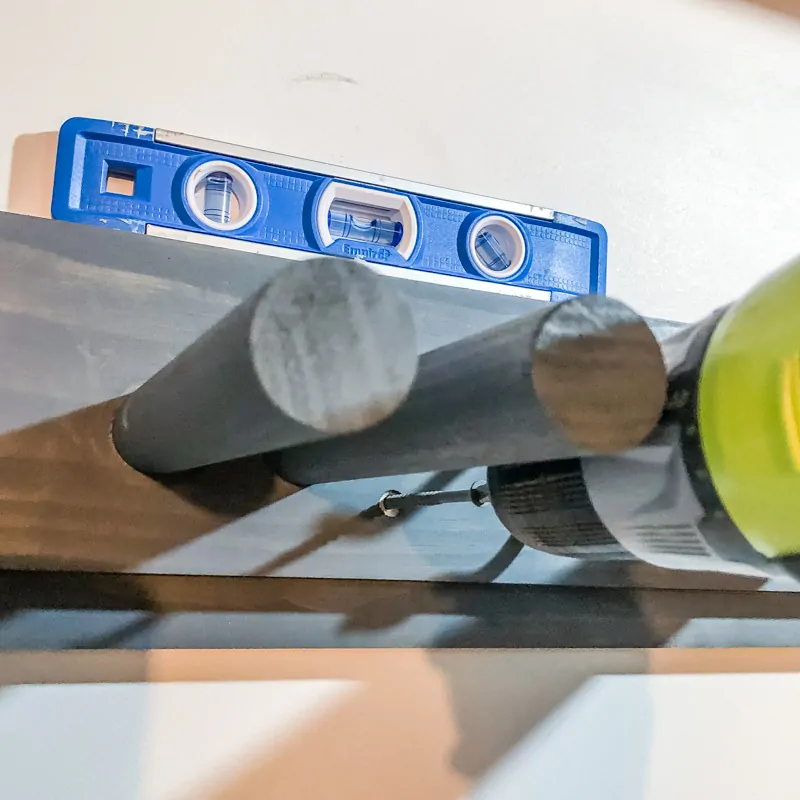
Test to make sure it's securely fastened to the wall, then start loading up your ski gear!
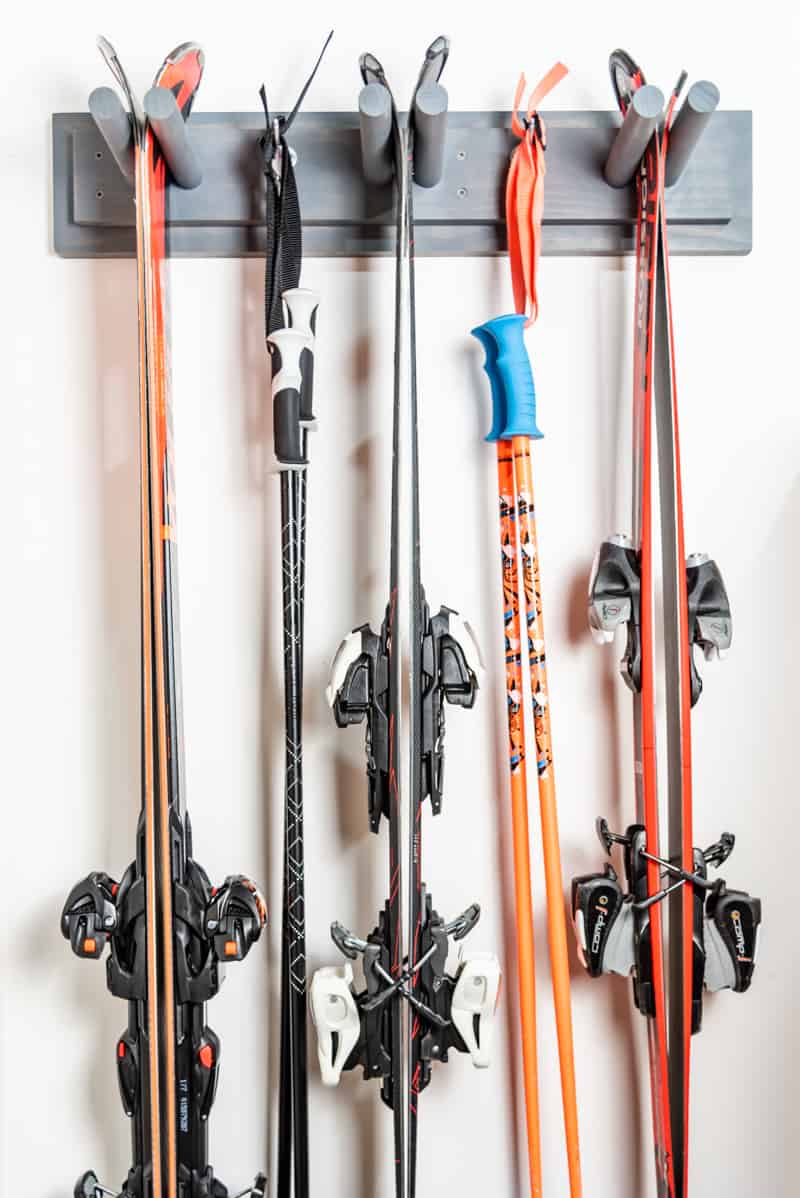
I love how little space this garage ski rack takes up, and puts the area behind the door to good use!
Now all our gear is ready to go when the powder starts flying next winter!

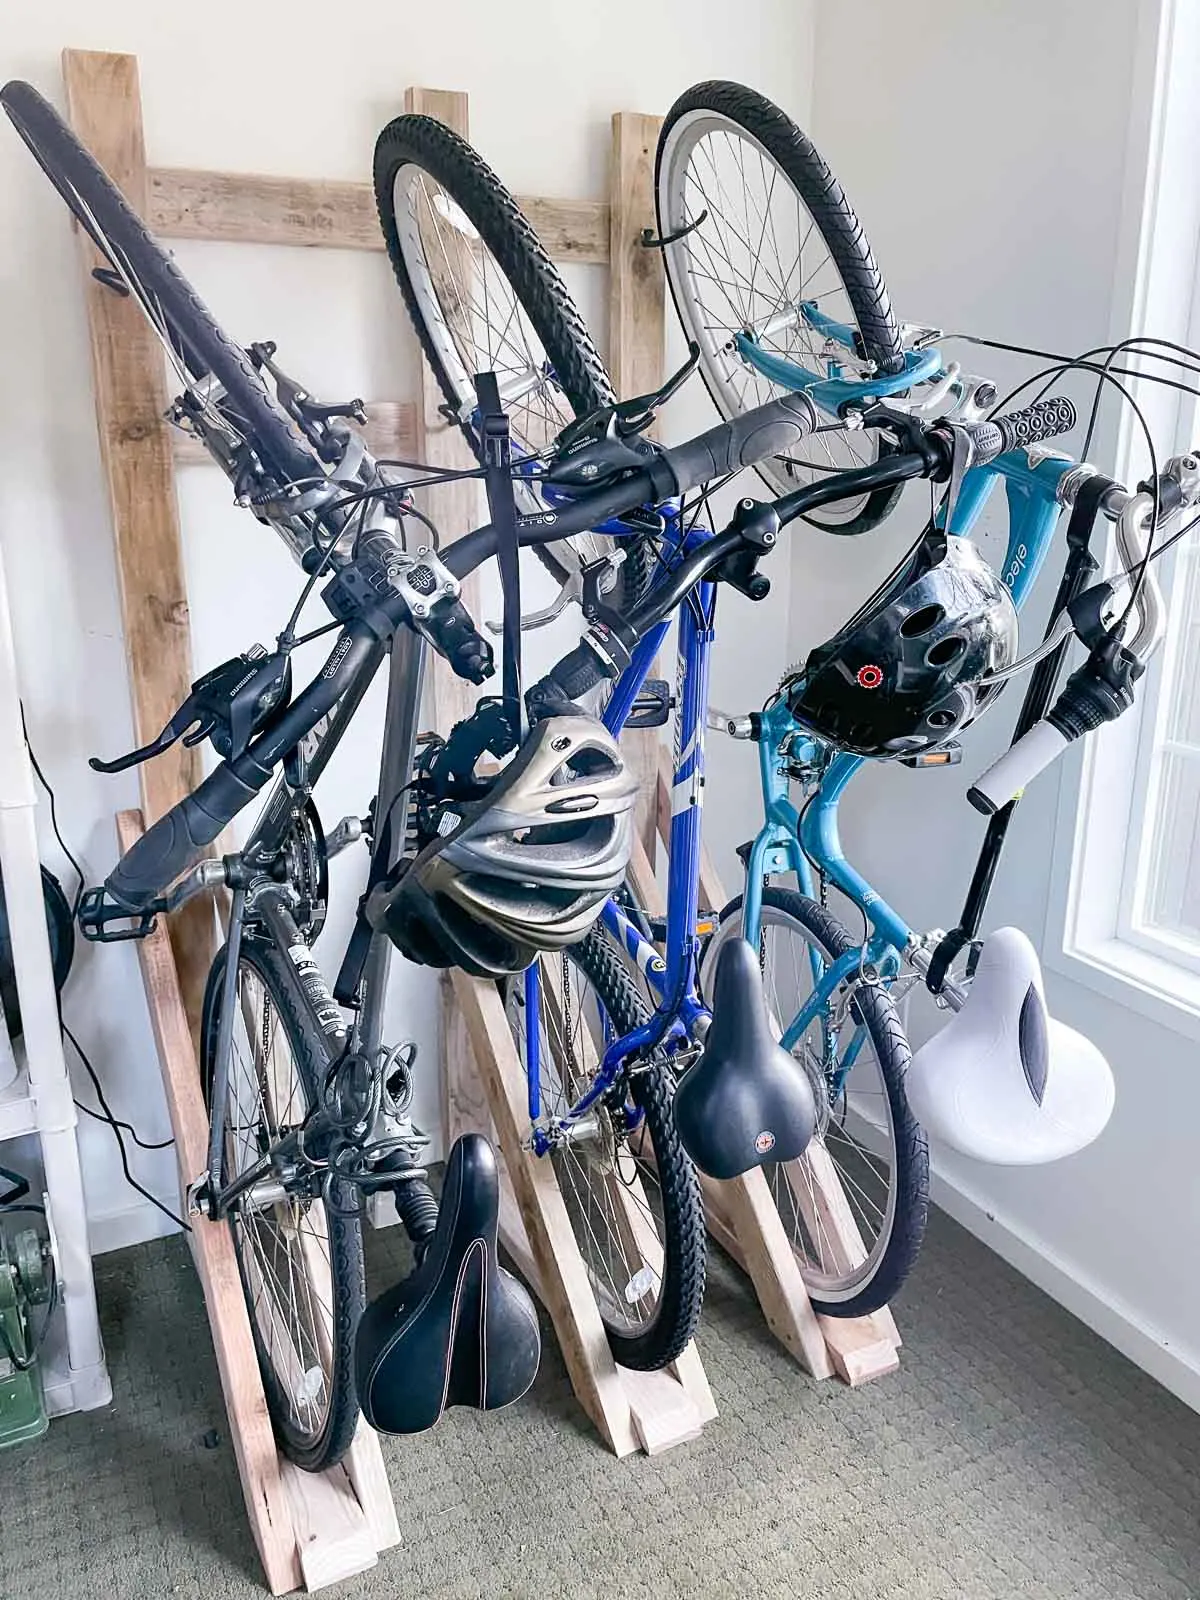
Now that your skis are organized, it's time to tackle your bikes! This simple DIY bike rack mounts on the wall for easy vertical bike storage! Also check out these other DIY bike rack ideas for more inspiration!

Check out these other DIY storage ideas!