

After four weeks of weeding, digging, planting and building, my backyard makeover is done! Check out the before and after of this amazing transformation!

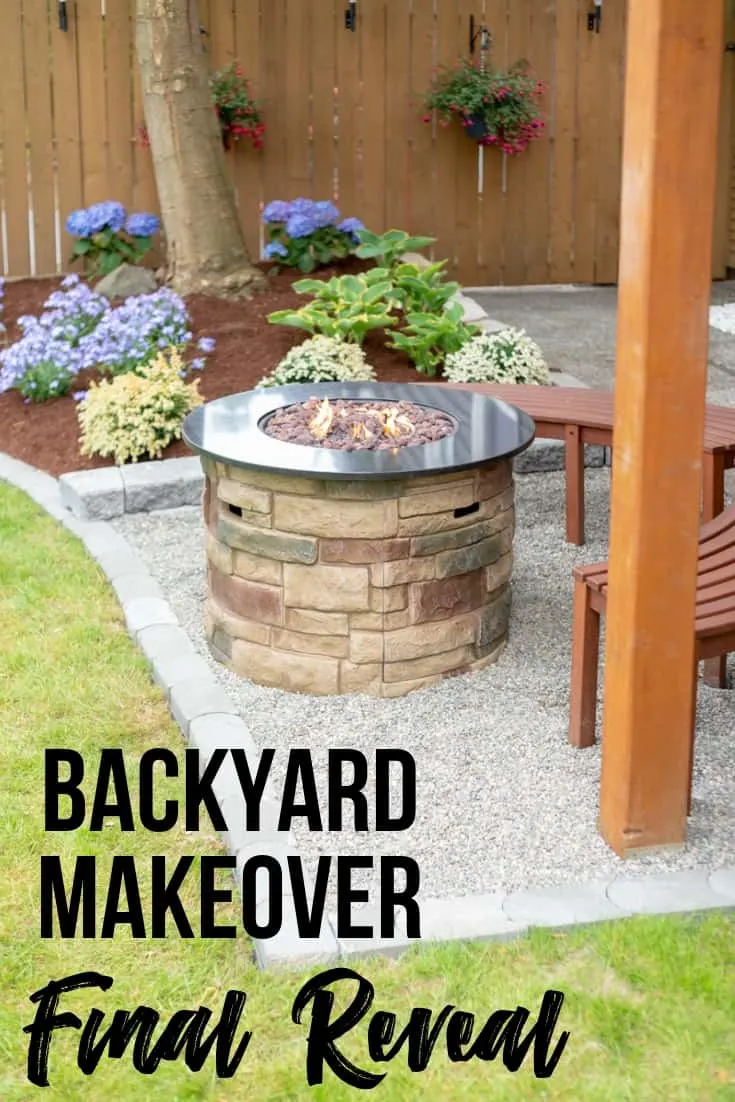
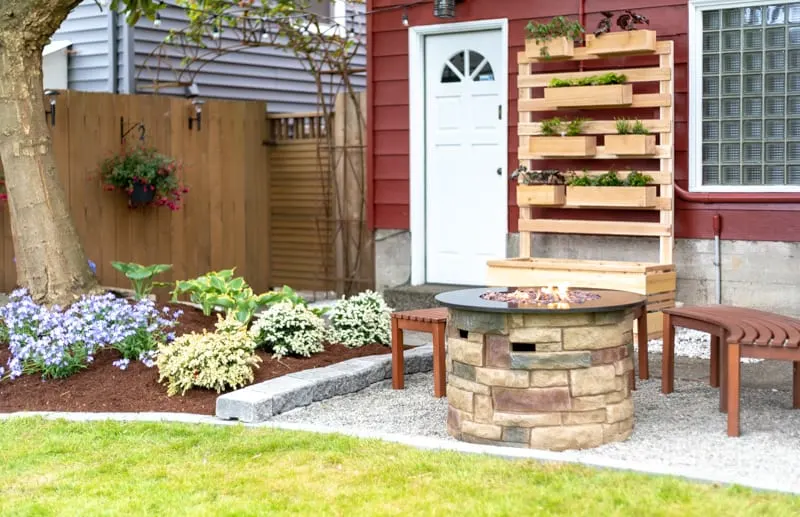
This backyard makeover was a ton of work, but the final result is totally worth it! Instead of a drab corner covered with leaves and dirt, we have the perfect backyard hangout spot complete with a pea gravel patio, garden bed, fire pit and benches!
This post is sponsored by Ryobi Tools and contains affiliate links for your convenience. Purchases made with these links may earn me a small commission at no additional cost to you.
Before and After
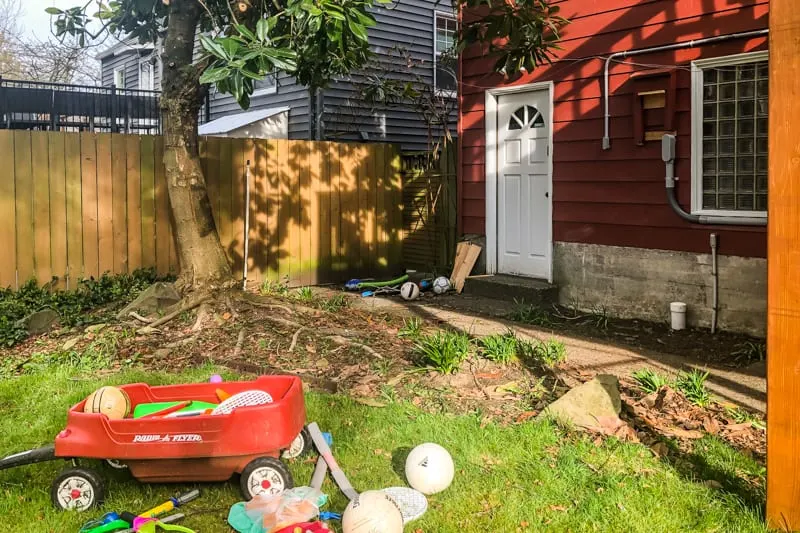
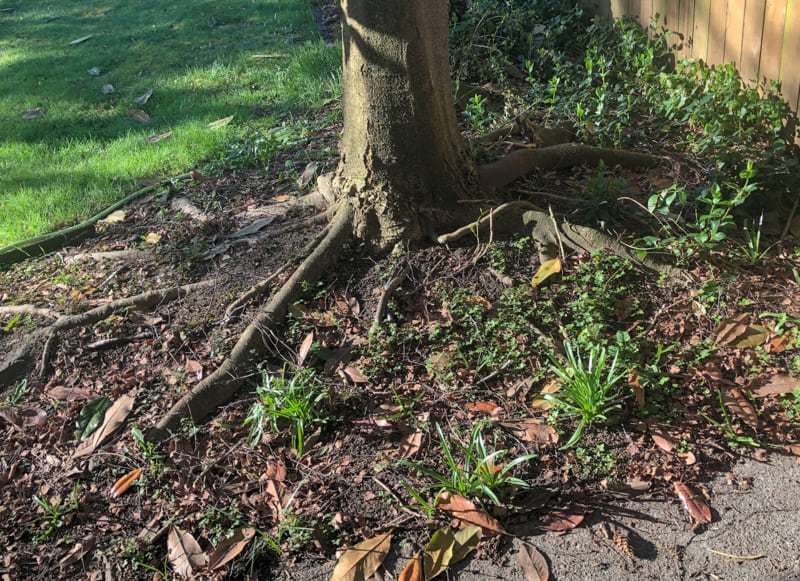
Here's the ugly before photo of the backyard area. It was a dumping ground for toys, buckets and tools! There are so many issues with this space!

But all that hard work was worth it, because it looks amazing now!

Let's take a closer look at the challenges I faced in this makeover, and how I solved each problem.
Lighting
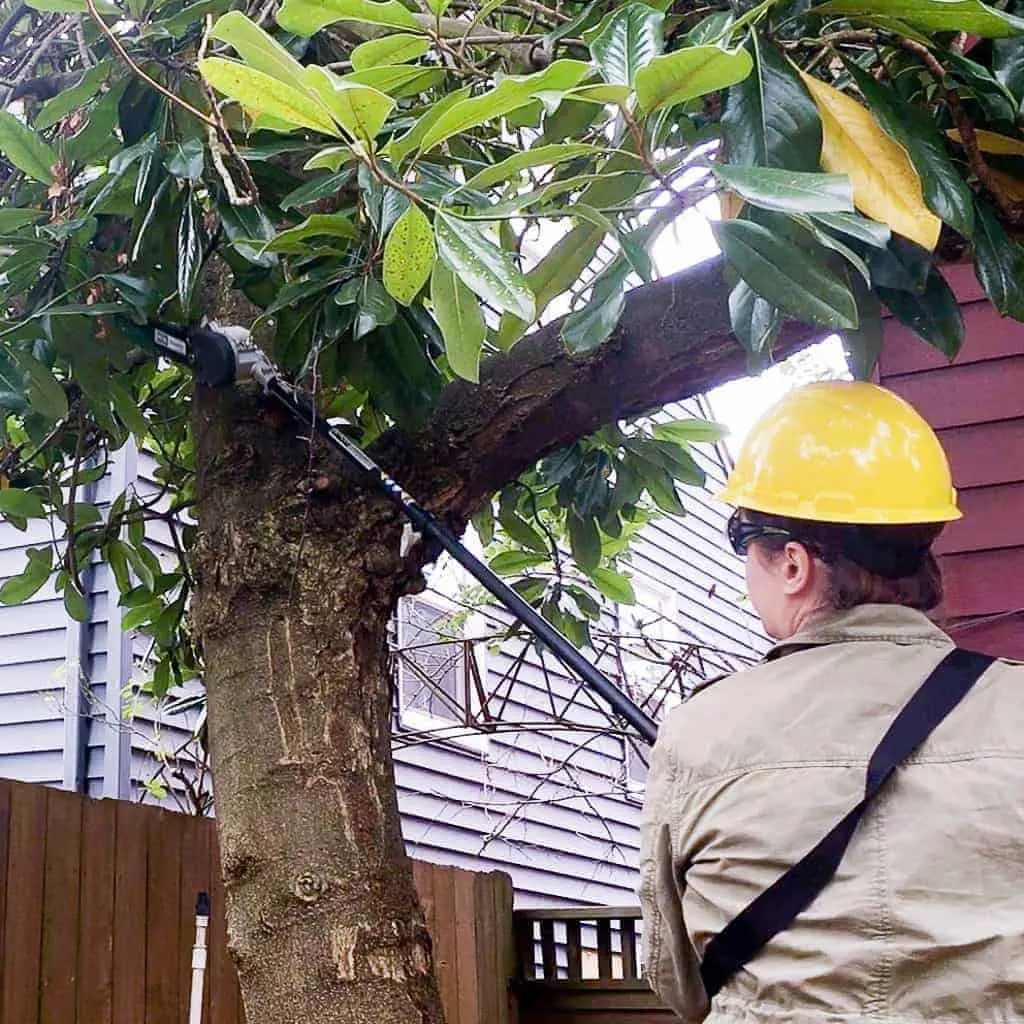
With the deck on one side and a huge Magnolia tree on the other, this area is always in the shadows. As a result, everything I've planted in the past has struggled to survive.

I trimmed the lower branches of the tree to allow more light to shine through, and to give us more head room for the patio.

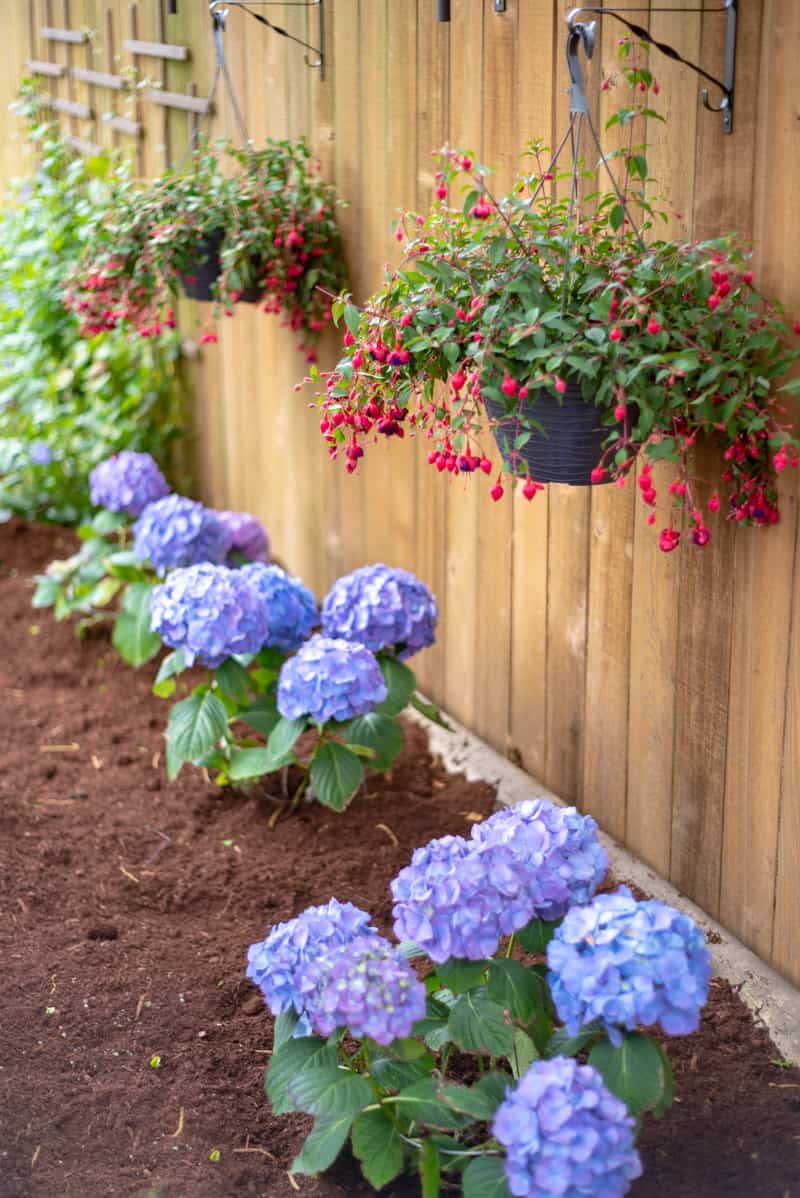
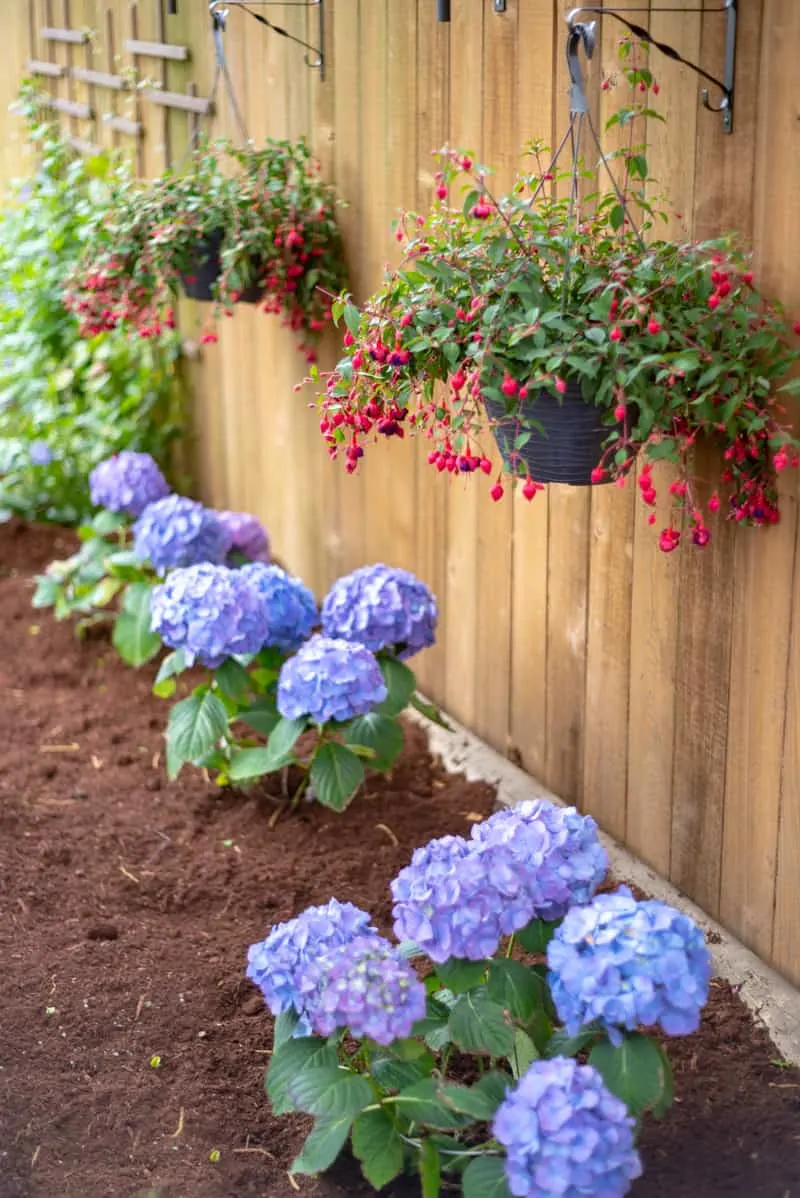
Instead of planting more flowers that are doomed to fail, I focused on shade-loving plants like fuschia and hydrangeas that will thrive in this corner. They get plenty of sunlight in the morning, but they're protected from the harsh afternoon glare by the fence.
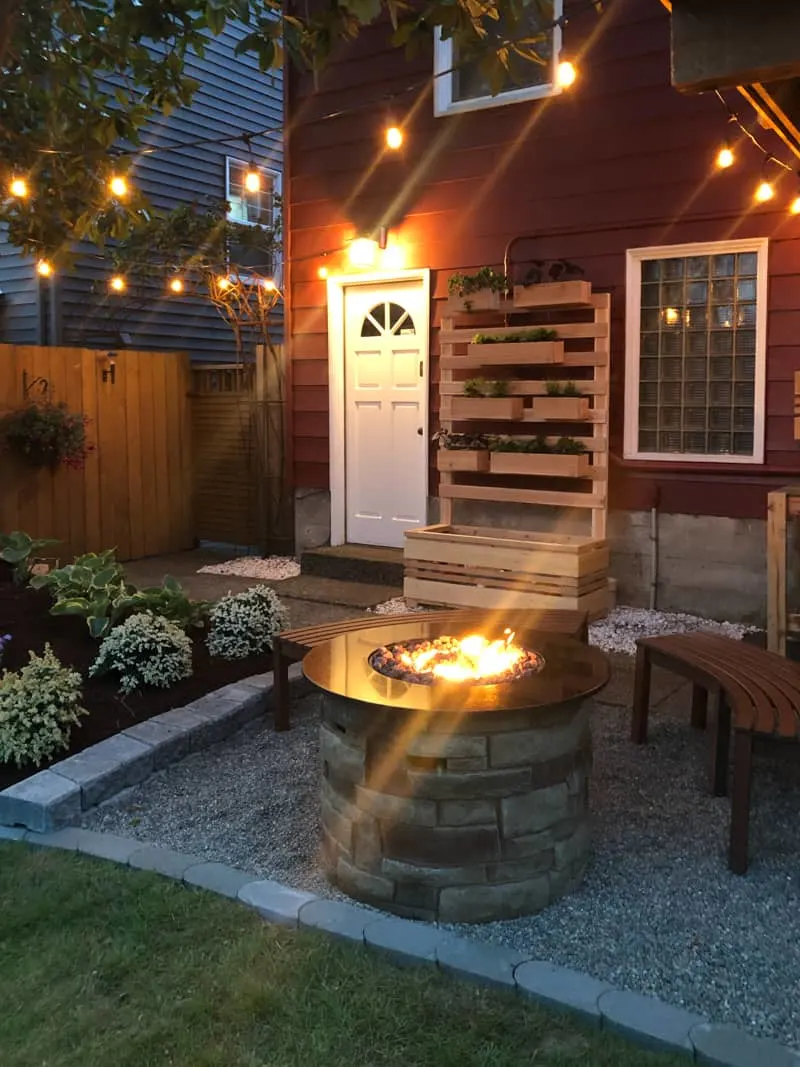
I switched out the old security light over the door with a new one with built-in GFCI outlets built into the side. It's perfect for plugging in string lights without having to run an extension cord all over the yard!


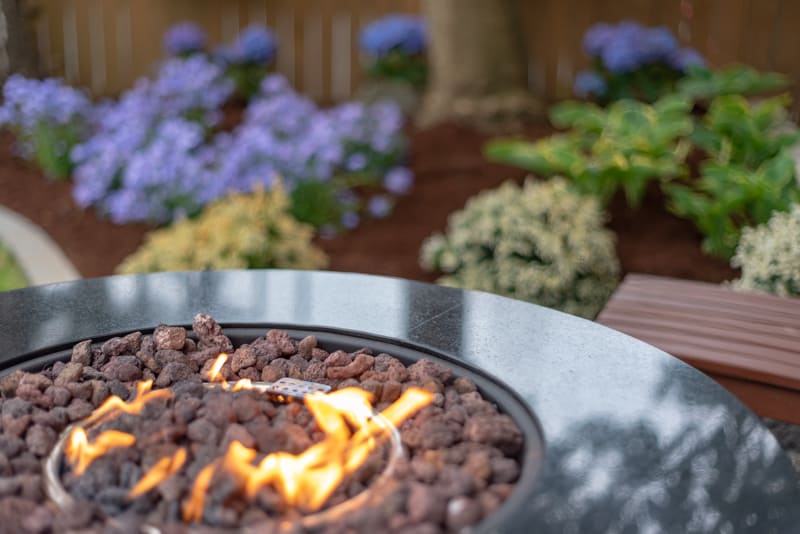
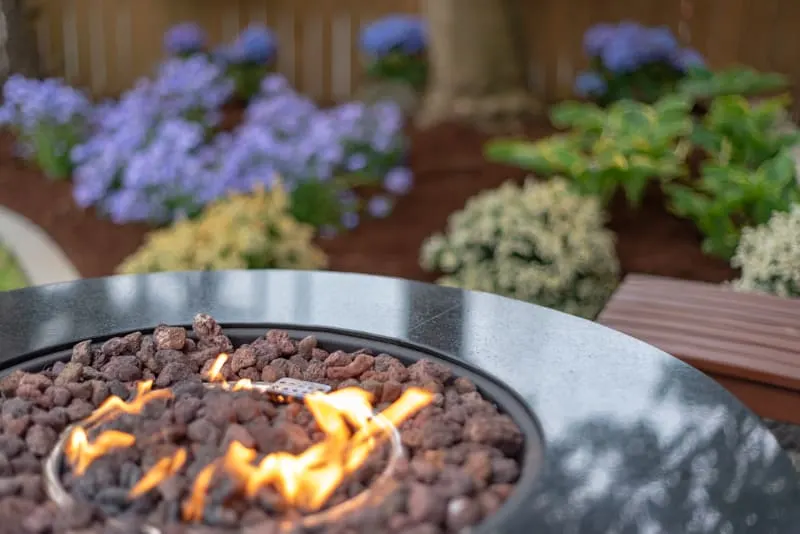
At dusk, the string lights and fire pit provide just the right amount of lighting in this corner of the yard! Perfect for making s'mores and making memories!

Hide Outdoor Eyesores
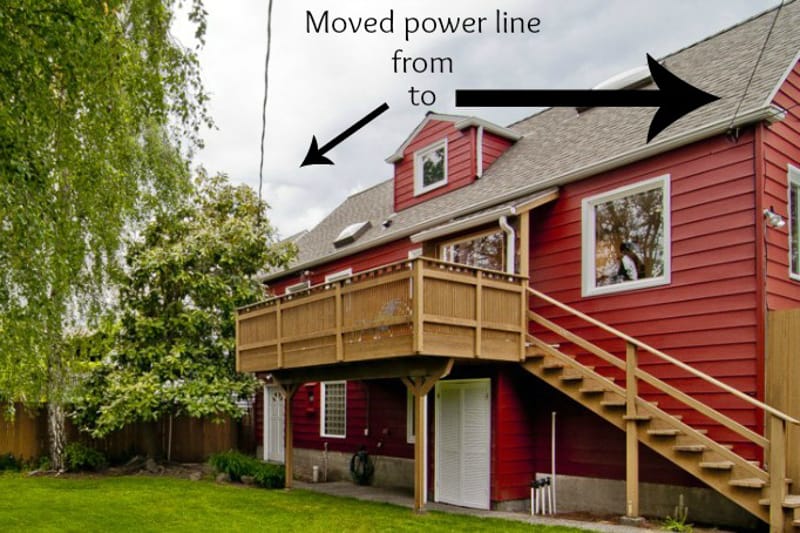
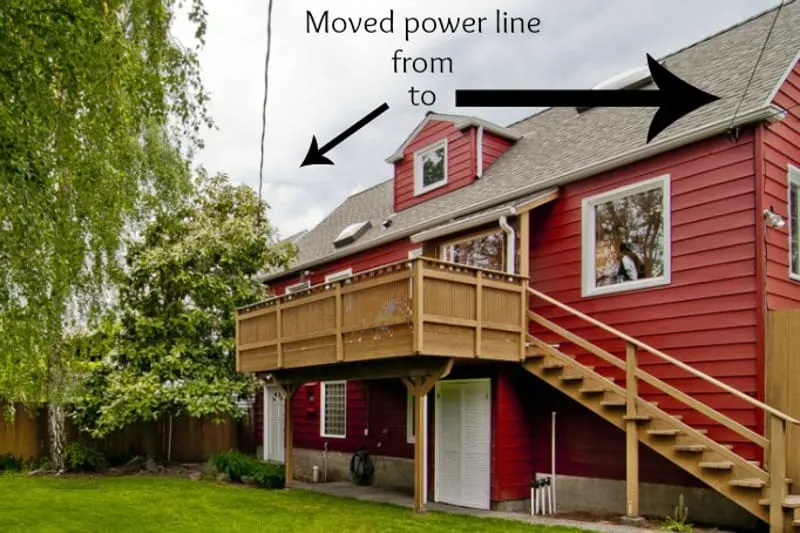
When we first moved into our house, the electric meter was in this back corner and framed into the siding. We rerouted the main power line to the side of the house so it didn't droop over the deck, and moved the meter to the alley.
We were left with an empty frame and a big hole in the side of the house! At the time, I just covered the exposed parts with cedar and a scrap of siding so nothing could get in. This "temporary" solution stuck around for another three years and drove me crazy!
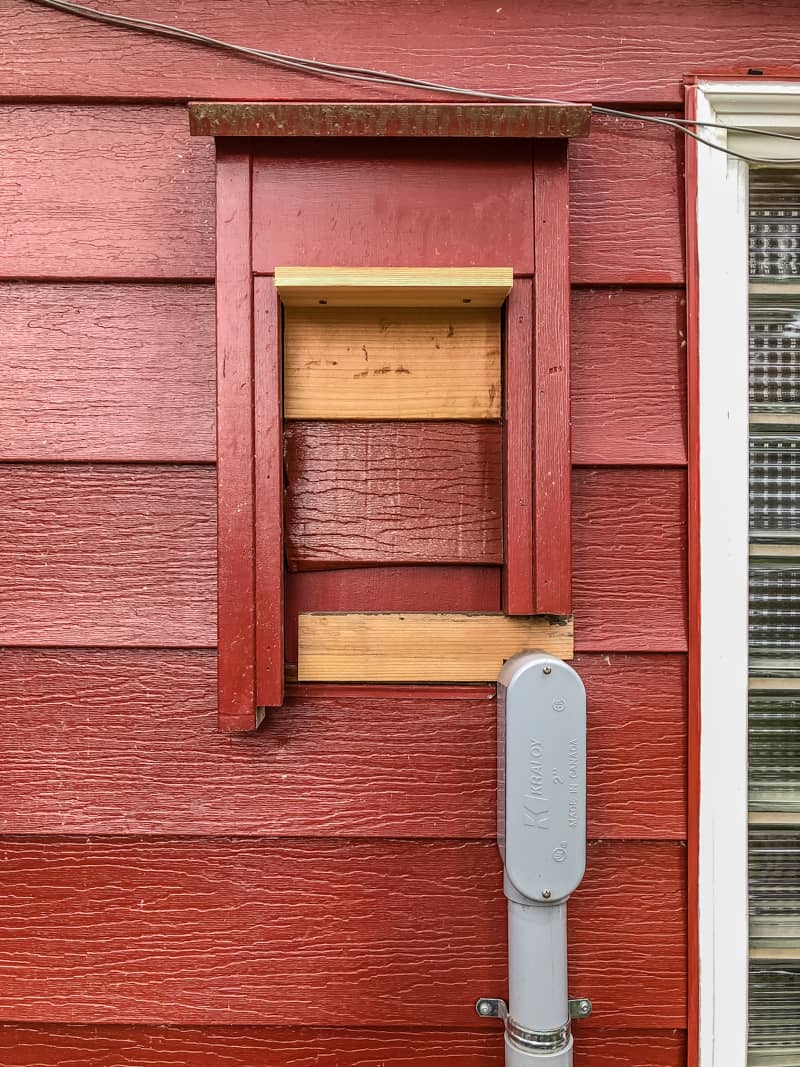
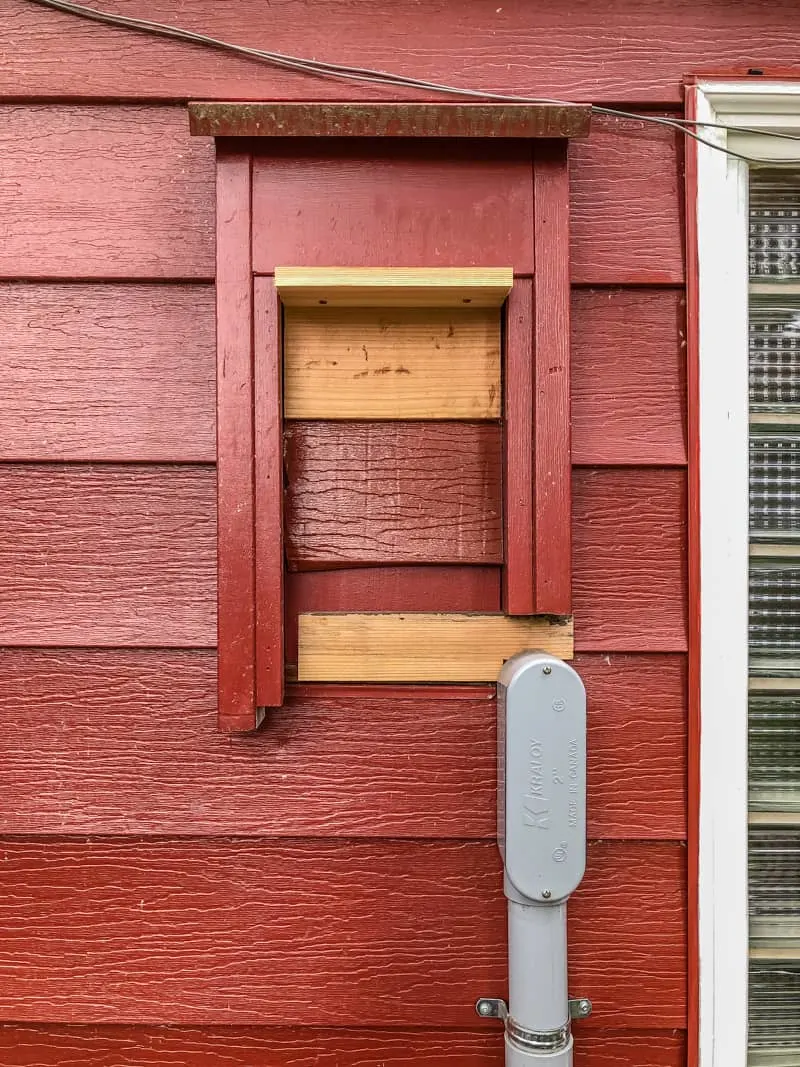
I repaired the aluminum siding where the electrical meter once was, cleaned it, then painted the gray conduit to match the house. It helped a lot, but it was still pretty ugly.
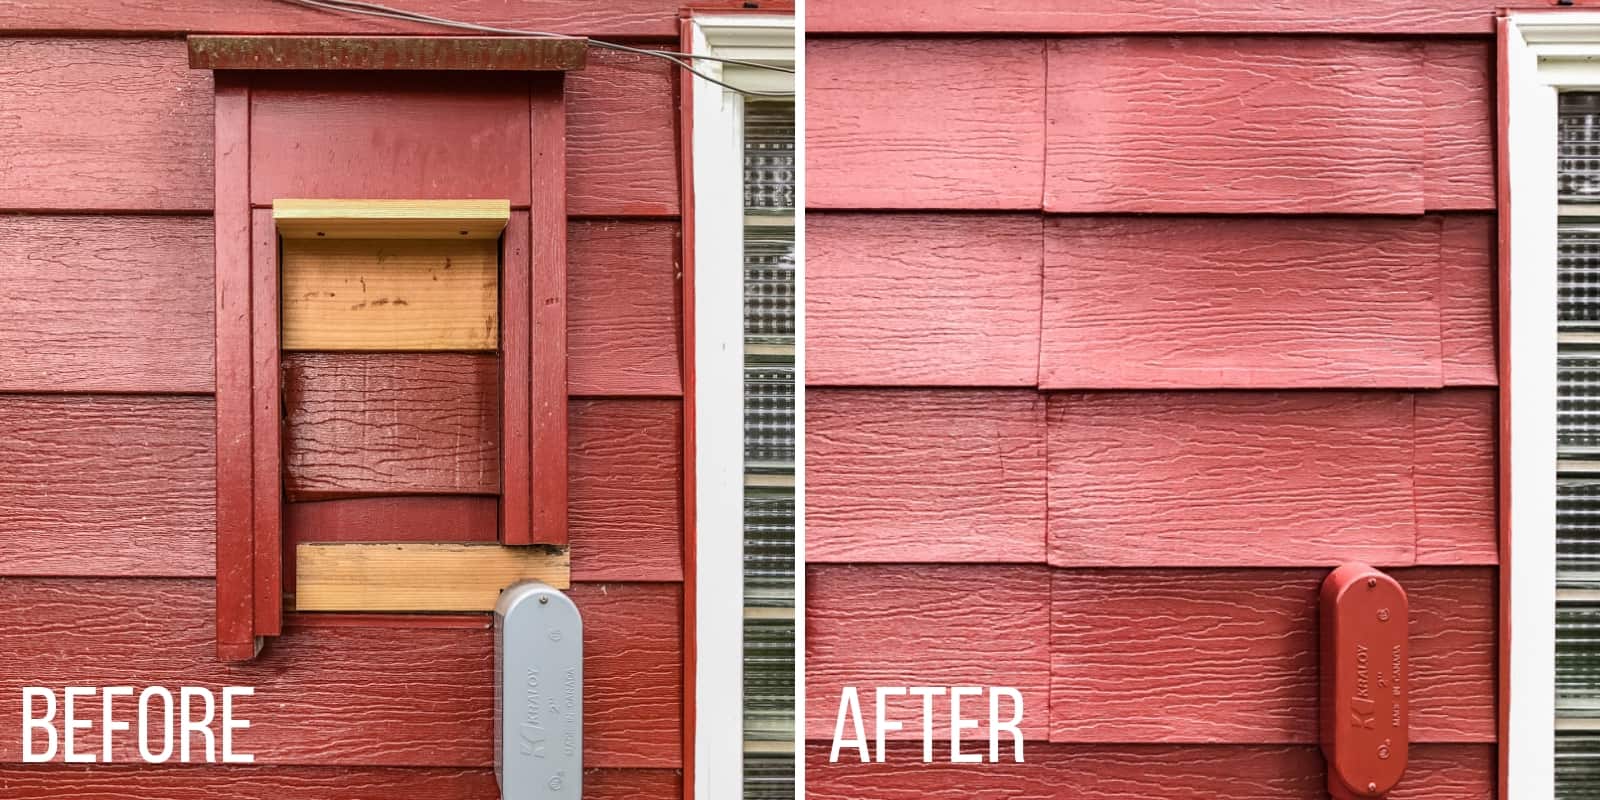

To hide these outdoor eyesores, I decided to build a vertical planter wall inspired by a crazy expensive version I found online. It uses French cleats to hold planter boxes on the slats, and it's easy to move them around on the wall as plants grow taller or if you want to switch them out.
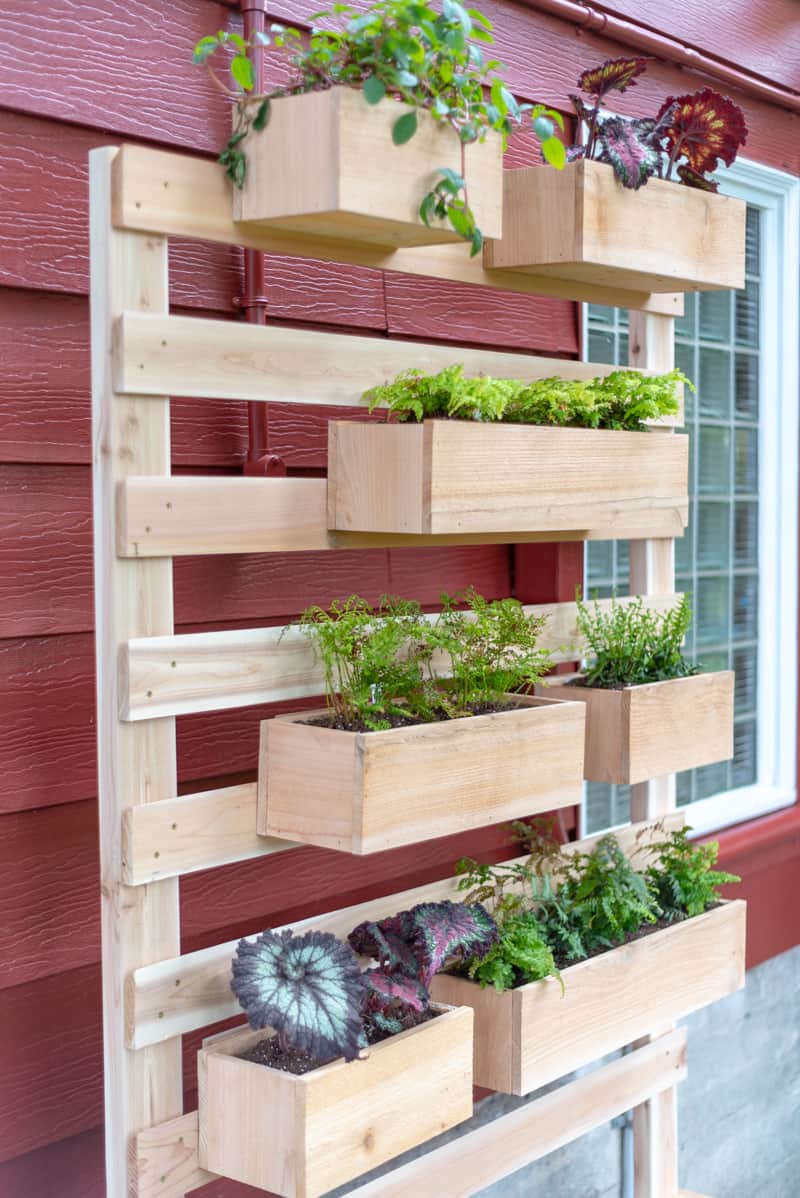
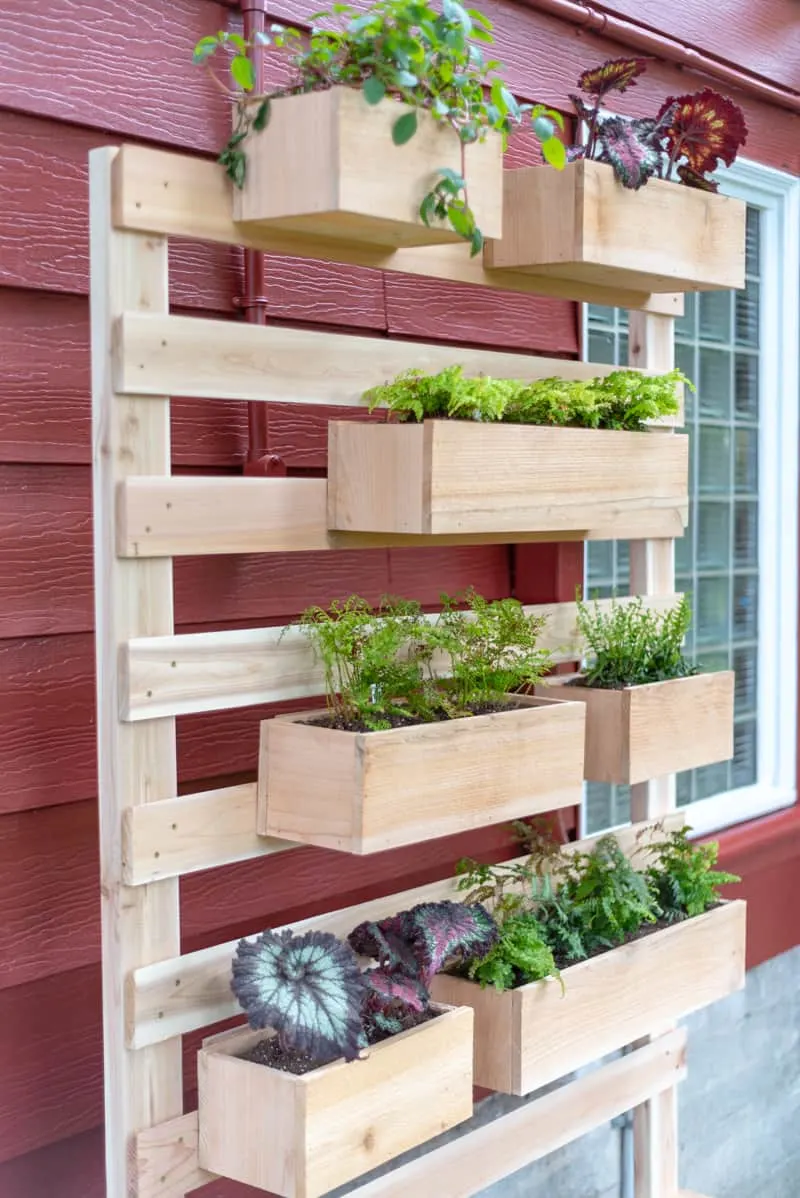
I filled the boxes with various shade-loving plants like ferns and coleus. The potting bench has been moved next to the planter wall and was finally put to good use! It will double as a serving station for s'mores and drinks.
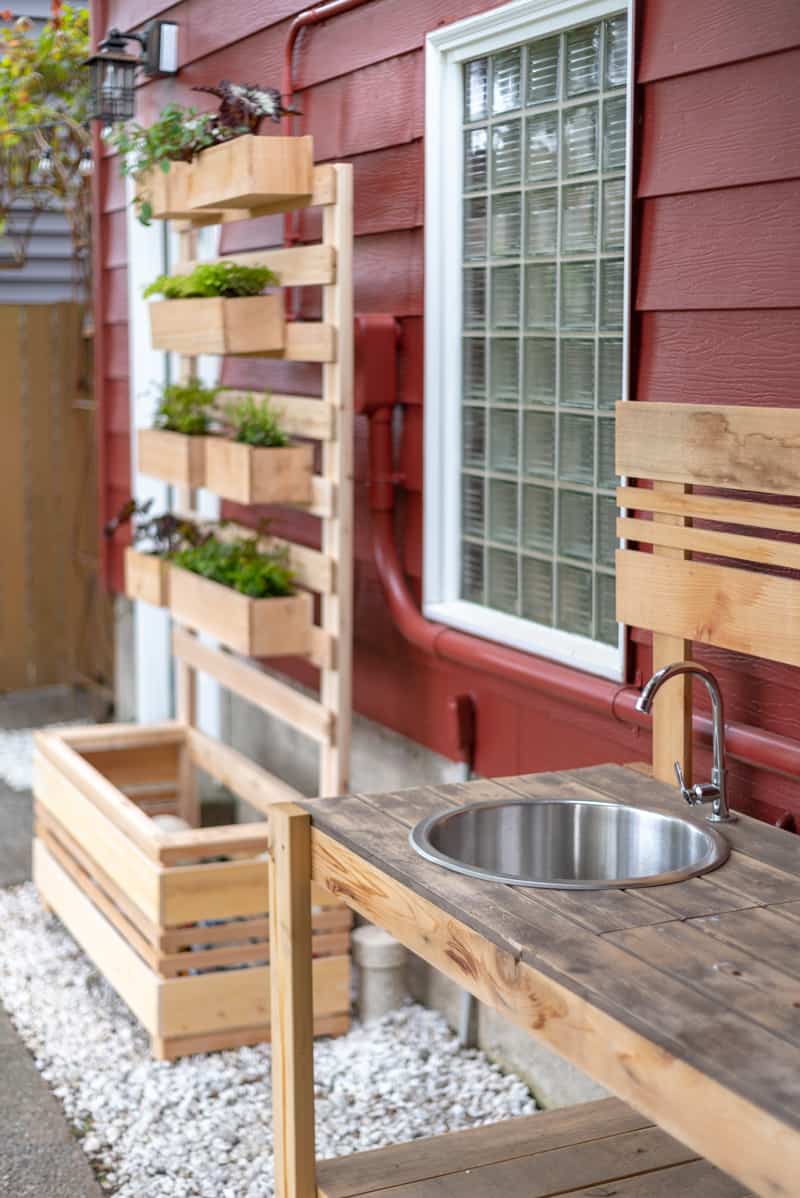

The bottom of the planter wall could be used as another large planter box, but it also makes a great spot to store all my son's soccer balls and foam swords.


Build a Retaining Wall to Prevent Soil Erosion
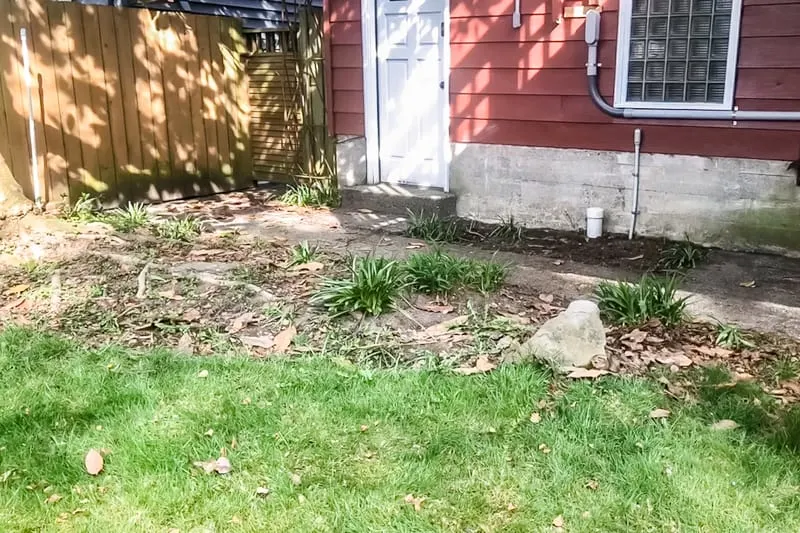
It's no secret that Seattle gets a lot of rain. 🙂 All that water can erode a garden bed in no time, like under our Magnolia tree. The soil washed onto the concrete over the years, leaving the roots exposed and dry. The pathway was always dirty from all the runoff.

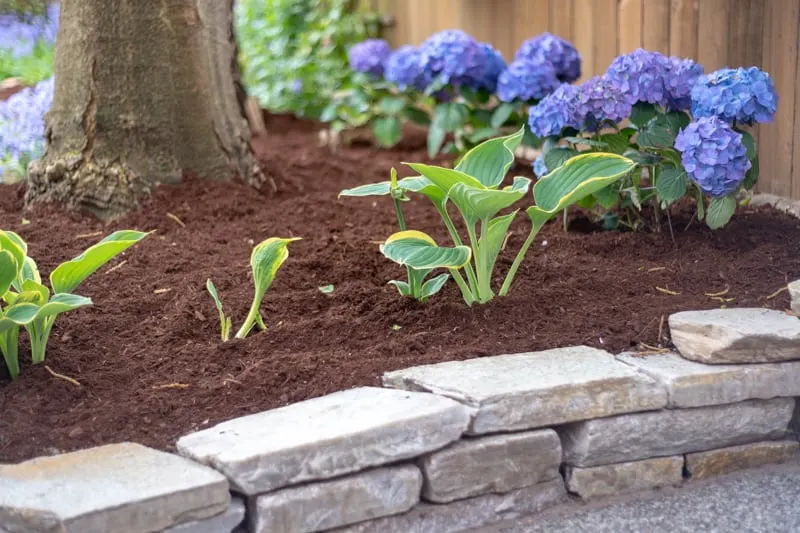
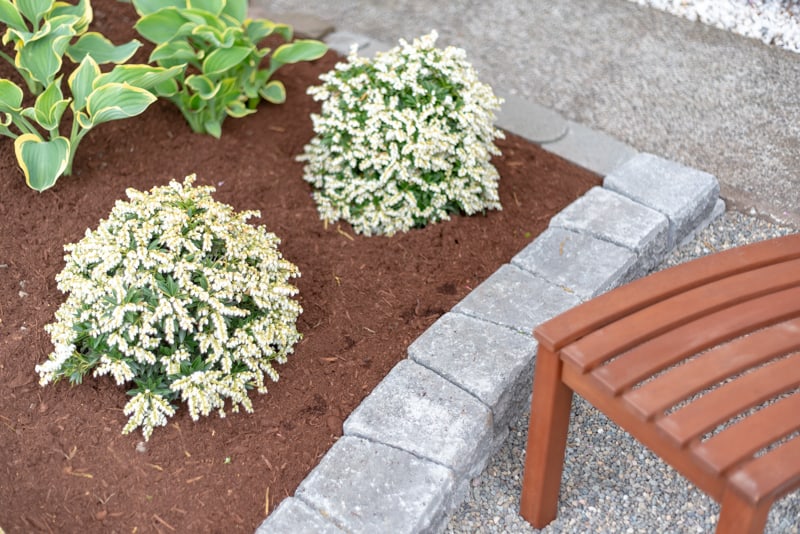
I built a short retaining wall out of dry stack stone to elevate the soil level and hold it back. It also helped define the border between the garden and the walkway. It took fifteen bags of garden soil to backfill this new garden area, where I added beautiful hydrangeas and hostas.

I built a second retaining wall between the garden bed and the patio area to separate the spaces. The first level of blocks is even with the paver border.
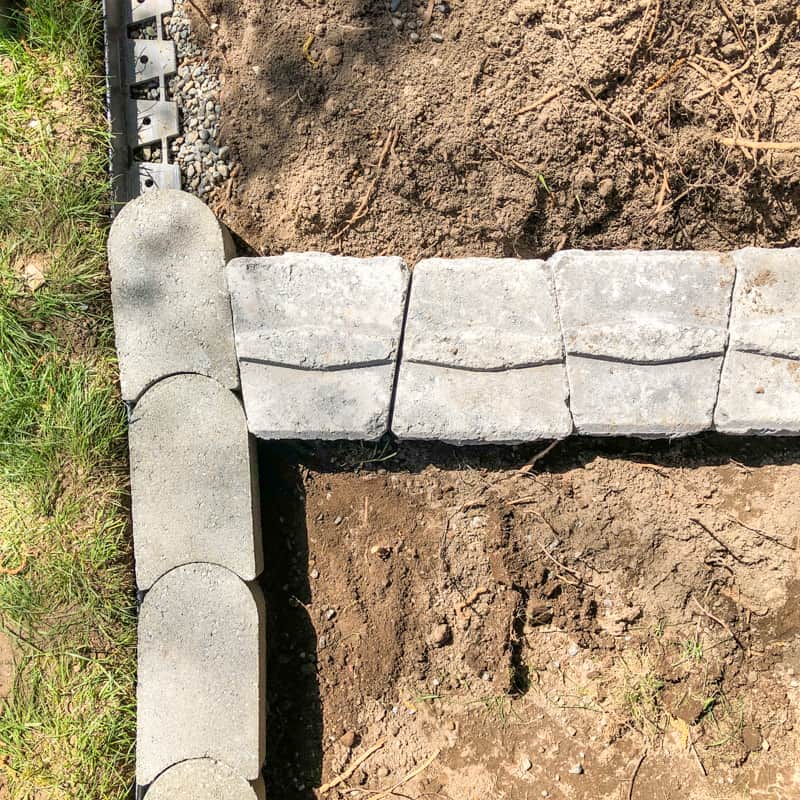
The capstones on top help keep the mulch and soil in the garden and the pea gravel in the patio!


Those three dwarf Pieris shrubs stay small and compact to create a nice division between the two spaces without overwhelming the garden.

Build a Pea Gravel Patio
Drainage is always something to think about in rainy Seattle! I didn't want to pave over the entire patio area and cause problems that wouldn't be apparent until next winter.
Instead, I installed a cheap and easy pea gravel patio lined with a paver border to keep those pebbles from scattering into the yard.


In the future, I plan to extend the pea gravel all the way across under the deck. The grass there doesn't grow very well, and it becomes a mud pit during the rainy season. Maybe we'll even put a hot tub under there! 🙂
Add a Fire Pit and Benches
Since this area is directly under a tree and next to our cedar deck, a wood burning fire pit is a big no-no. I actually prefer a propane fire pit anyway, since it's easy to start and control the flame and it doesn't produce smoke or embers.
This is the fire pit I bought, and it's perfect for roasting marshmallows and staying warm on a cool summer night!
I briefly thought about building my own benches, but it was too difficult to make curved ones myself. Luckily, these were exactly what I was looking for!

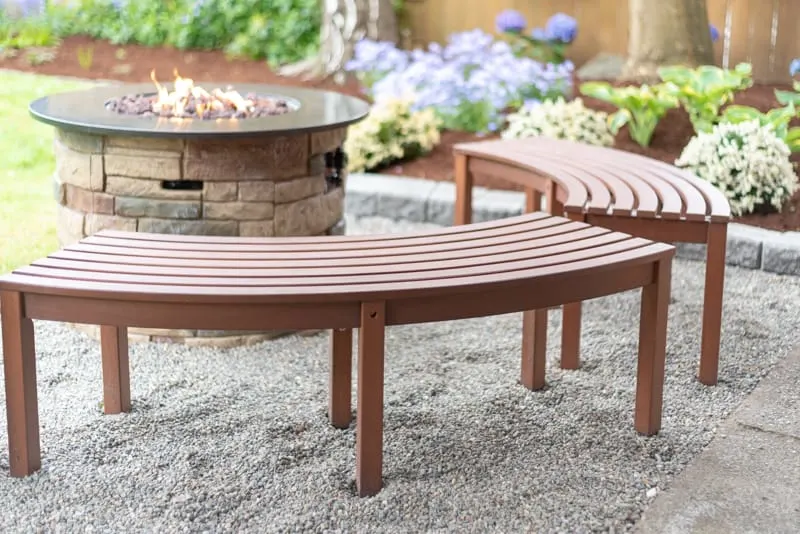
Two benches fit comfortably in the pea gravel patio, and a third one is off to the side, ready to plunk down in the grass when we have guests over.
Add Interest to the Flat Fence
Our fence is boring, but gives us some much-needed privacy in the backyard (gotta love city living!) In the past, I've built a modern garden trellis and a clematis trellis to bring some visual interest to the flat wall of boards, but I wanted to do something different with this space.
First, I gave the fence a good cleaning with the pressure washer. There's nothing more satisfying than watching years of green mildew and dirt just wash away!
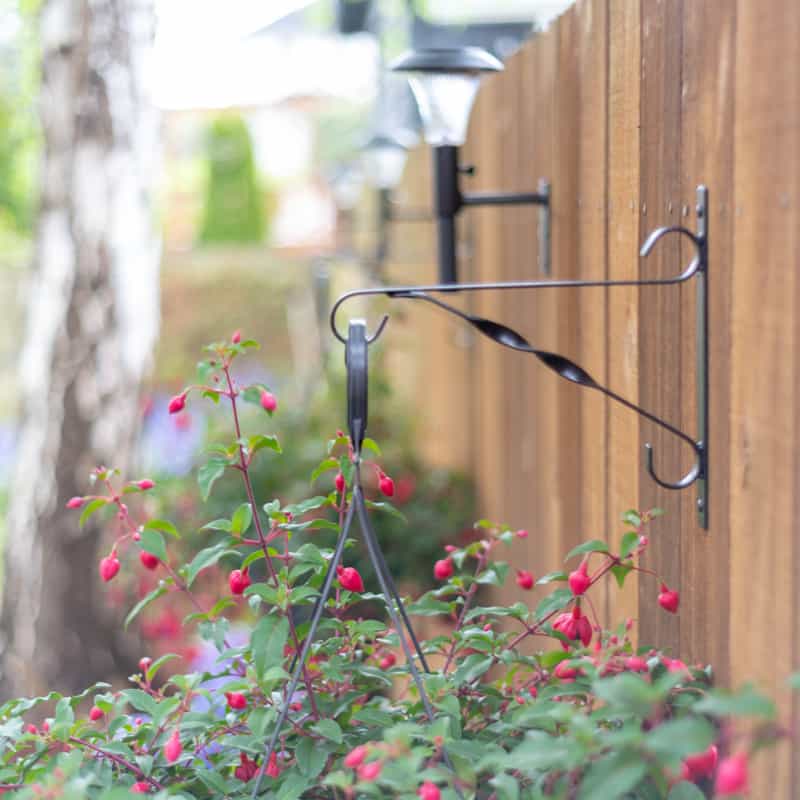
I screwed these hanging plant brackets to the fence to hold big, beautiful fuschia baskets. Between them, I installed solar lights directly onto the fence panels.

Backyard Makeover Complete!
I couldn't be happier with how our new backyard hangout spot turned out! This neglected corner of the backyard is now the centerpiece of the entire outdoor space. A huge thank you goes out to Ryobi Tools for sponsoring this entire project!
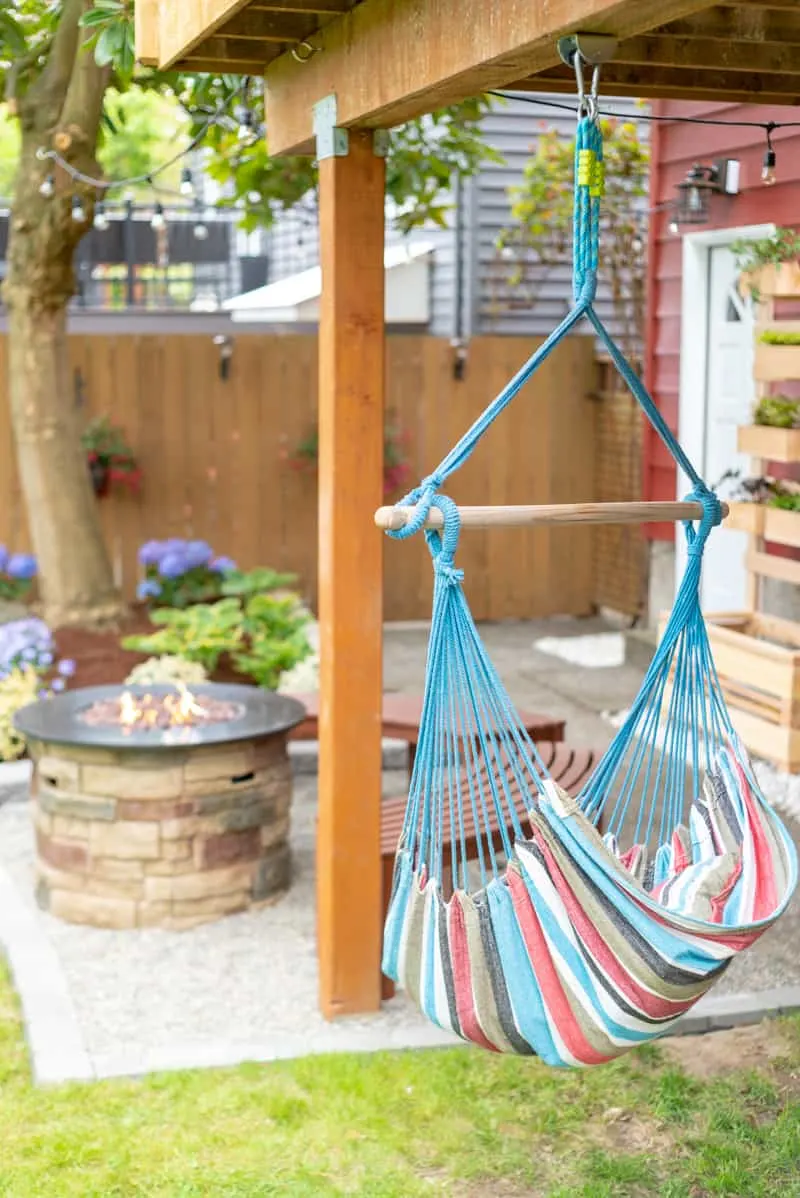
Now, if you'll excuse me, I'm going to take a well-deserved rest in the hammock by the fire...

Check out these other backyard project ideas!


Denise and Sean @HelpingHunny.ca
Thursday 9th of May 2019
Vineta, This space is so inviting!! We just finished our patio for the One Room Challenge and wish we had seen your solution for plugging in the string lights! We were able to plug ours in to an extension cord in the carport - it worked but the flick of a switch seems more elegant lol. *pinned! Cheers, Denise and Sean
Amy
Thursday 9th of May 2019
Oh my, you did a fabulous job. I'm a bit jealous of your new little corner of Paradise. I believe that I could hang out there forever!
Toni | Girl, Just DIY!
Saturday 4th of May 2019
Great job girl, it looks amazing and so inviting. I really love the fire pit area and the string lights. I hope you get to relax out there a lot!