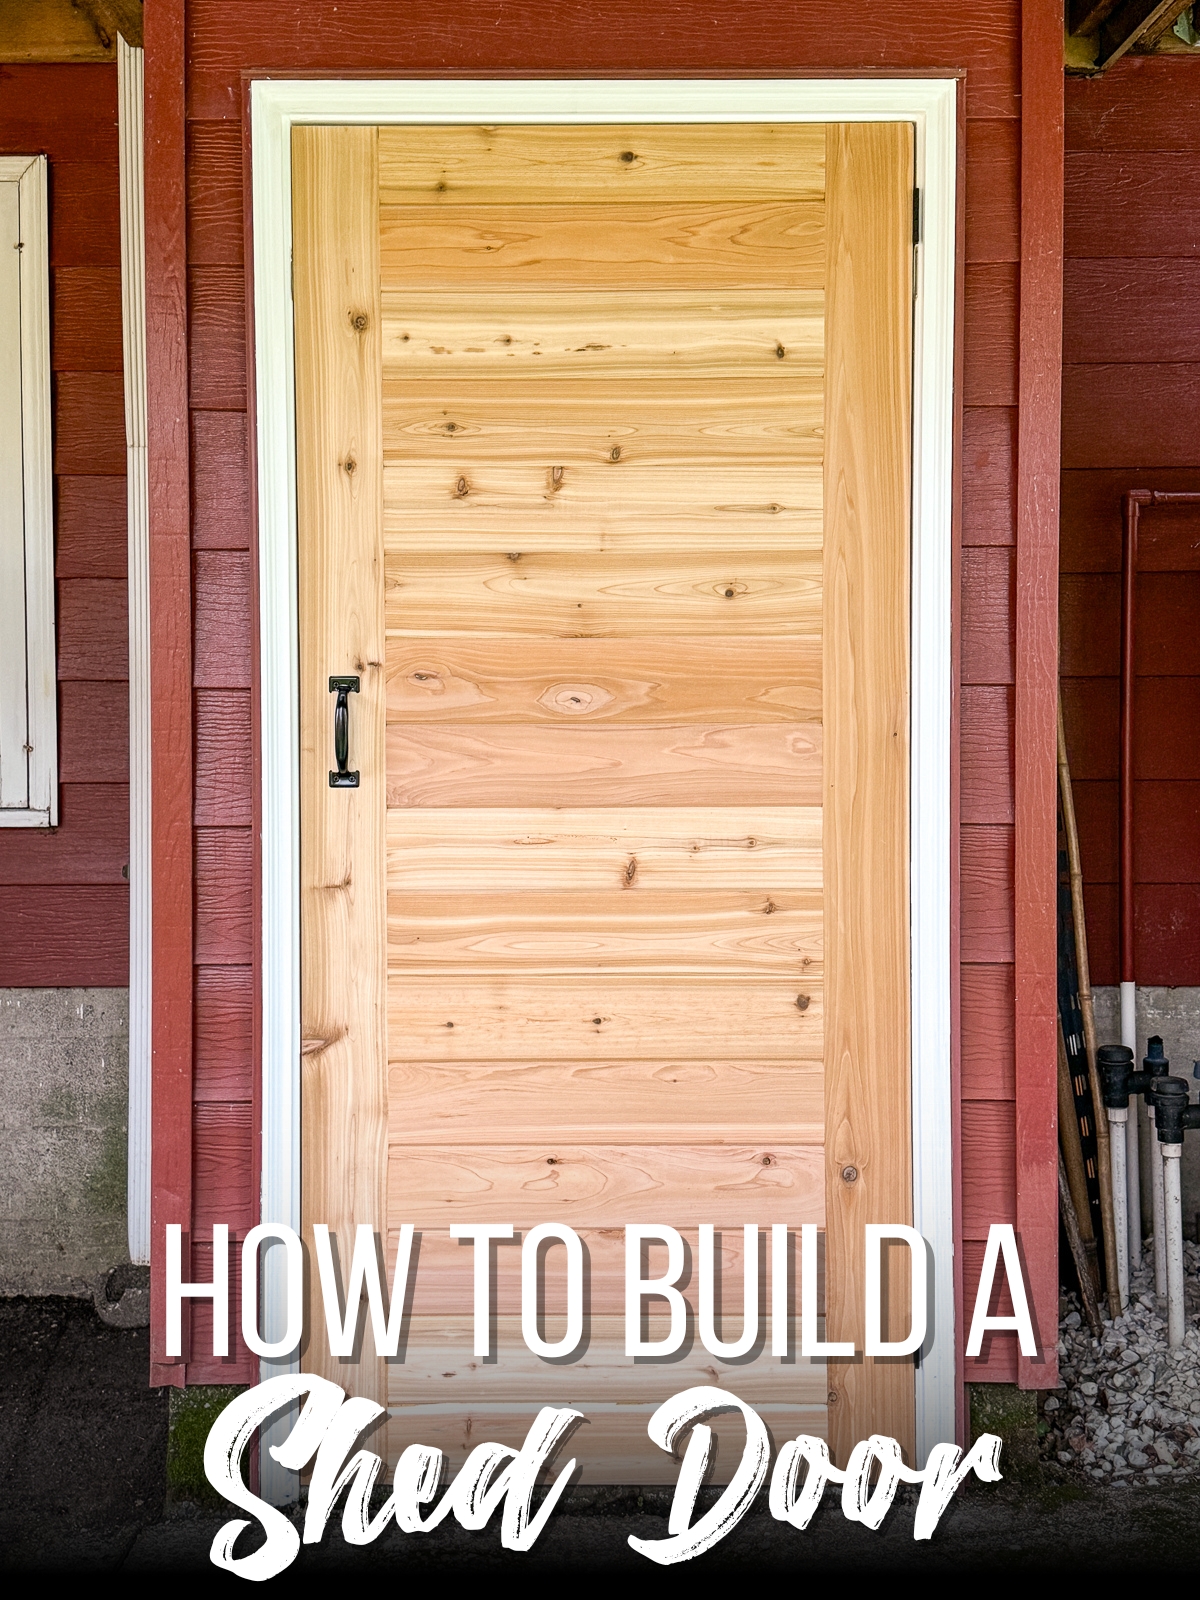
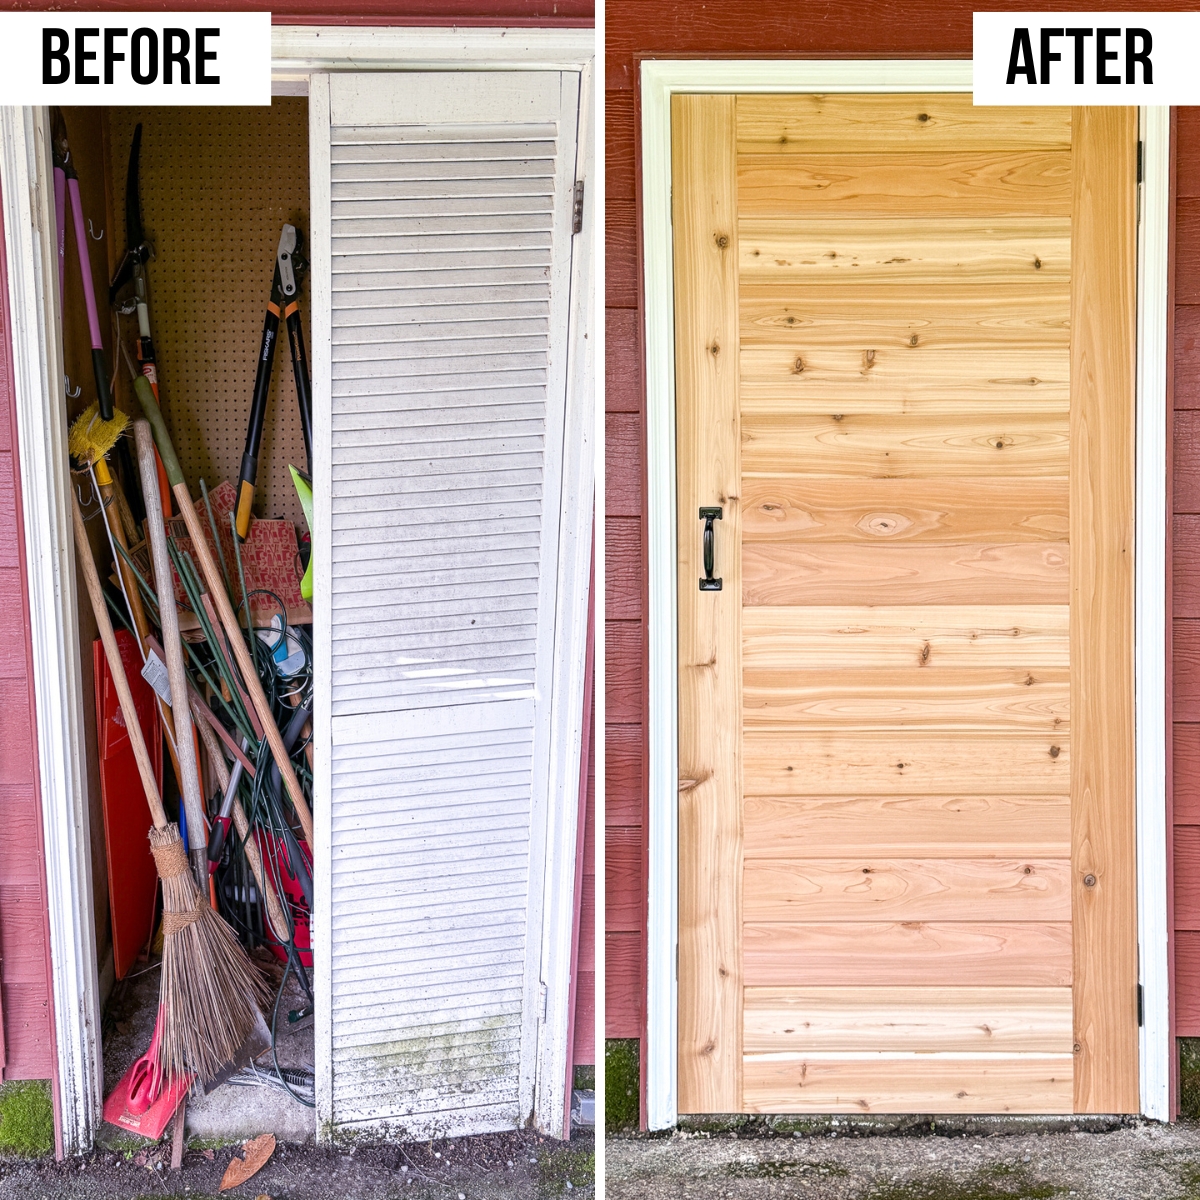
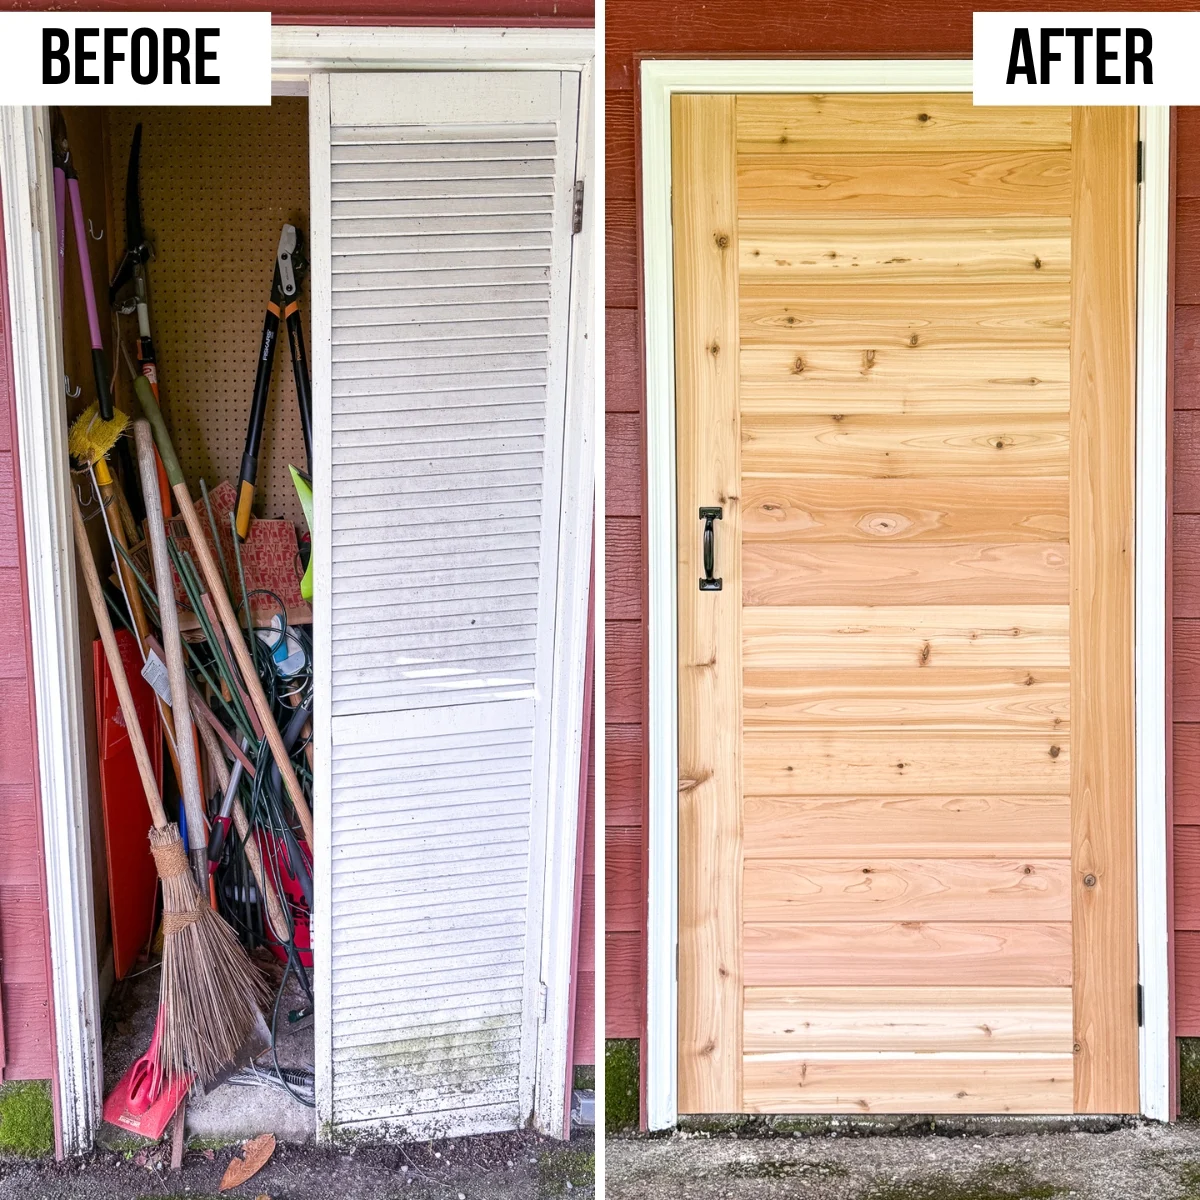
This simple DIY shed door is easy to build in an afternoon! Thin, lightweight materials make it simple to install in a standard door frame.
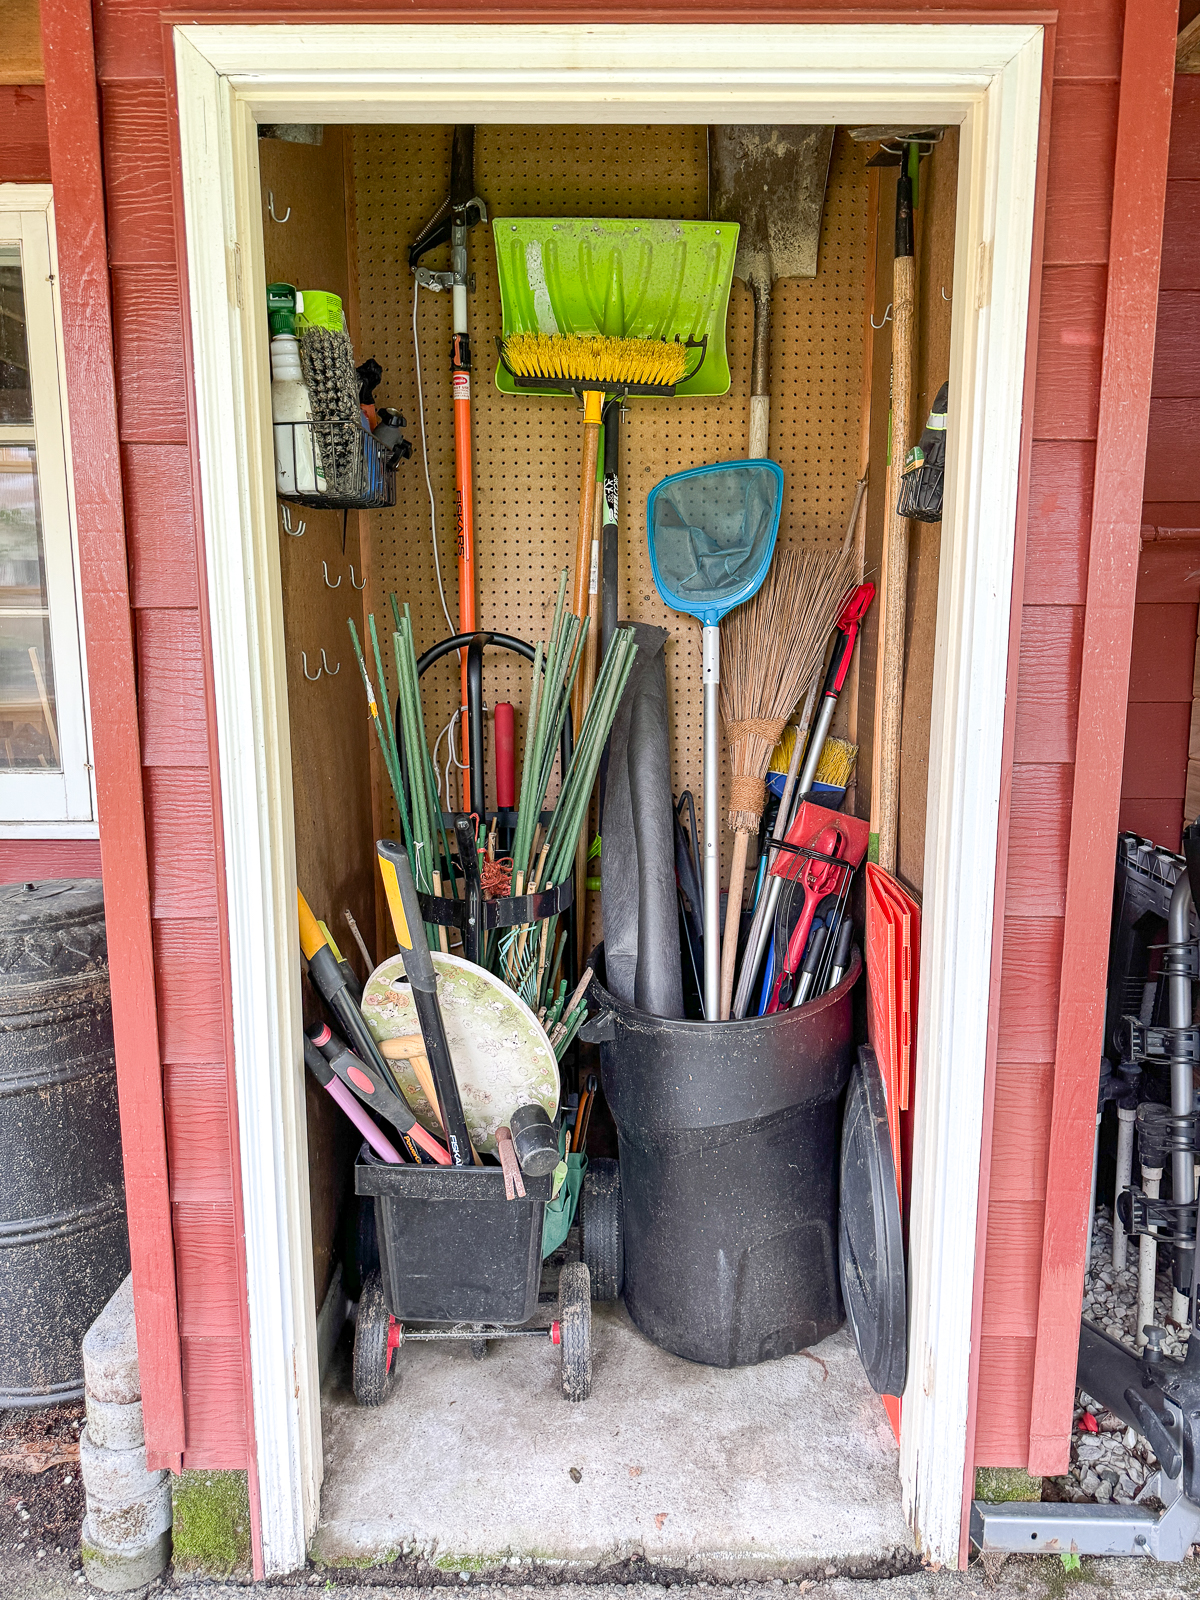
The door to our garden shed under the deck has been falling apart for years. The previous owner had installed louvered closet doors (why????), which gradually disintegrated in our wet Seattle weather.


Before I started building, I took off the door and rearranged the space. The outdoor shelves were moved to the new greenhouse, and the hanging garden tool organizer I made years ago finally came down. Everything is up off the ground and easier to access.

Now it's time to build a new shed door!
This post contains affiliate links for your convenience. Purchases made through these links may earn me a small commission at no additional cost to you. Please visit my disclosures page for more information.
Measure the opening
It's super important to get accurate measurements at various points to ensure that your shed door fits in the opening correctly.
Use a tape measure to measure across the width at the top, middle and bottom of the opening. Make sure you're measuring the frame where the door swings in, not the stop where the door will hit when closed. Use the smallest measurement for the width of your door.

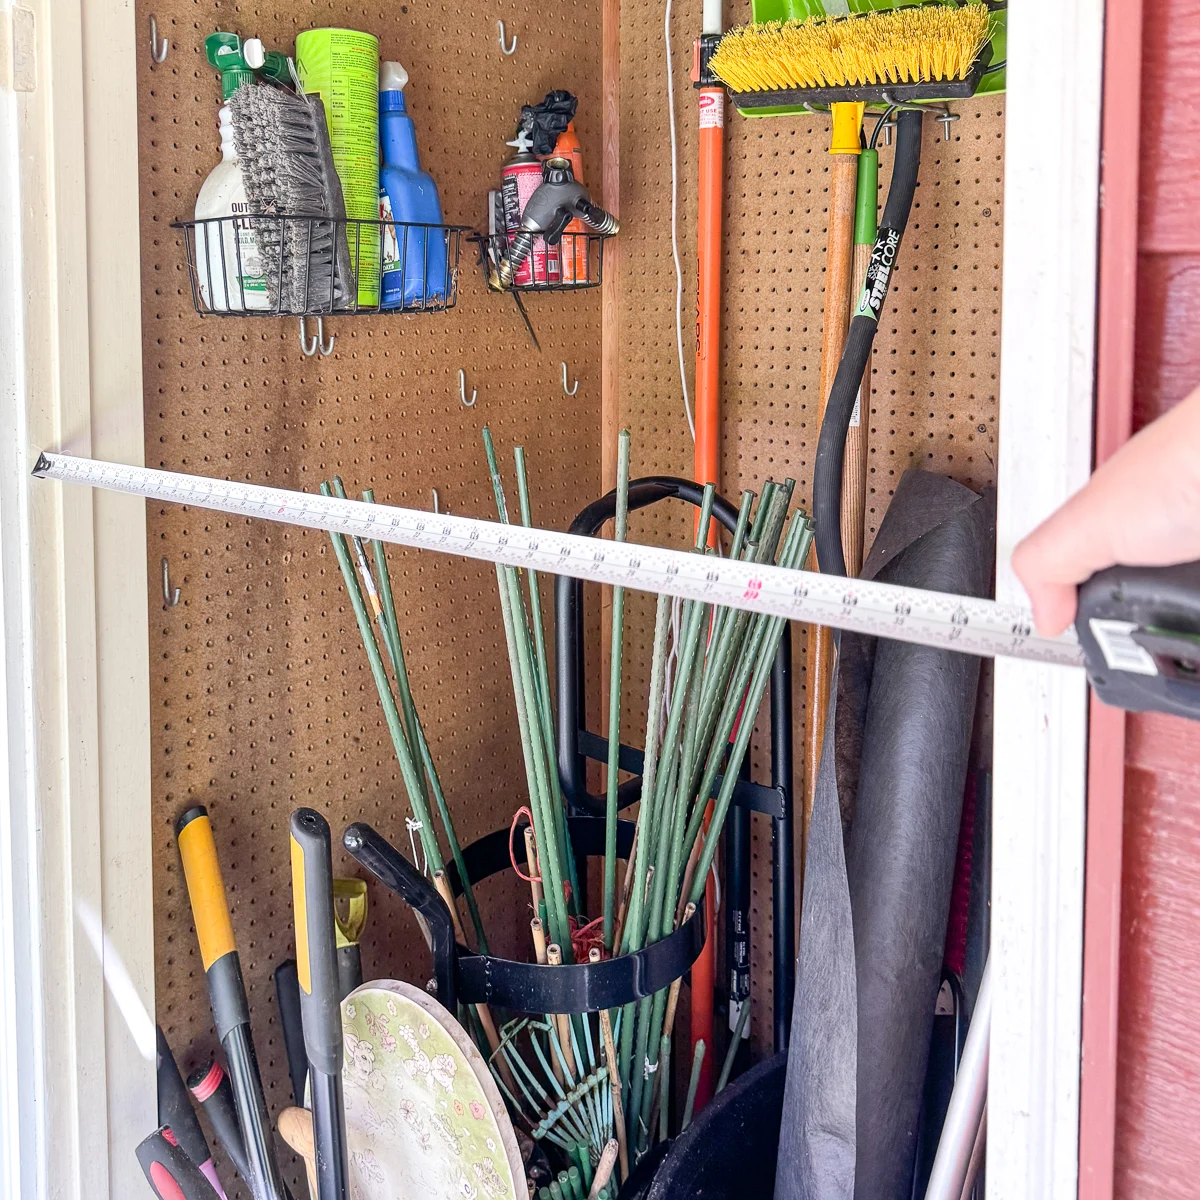
Repeat the process for the height of the door. Mine was a little tricky because the shed is built into a slight slope and there's no sill at the bottom. I measured up from the bottom of the stop on both sides and used the smaller measurement for the height of the shed door.
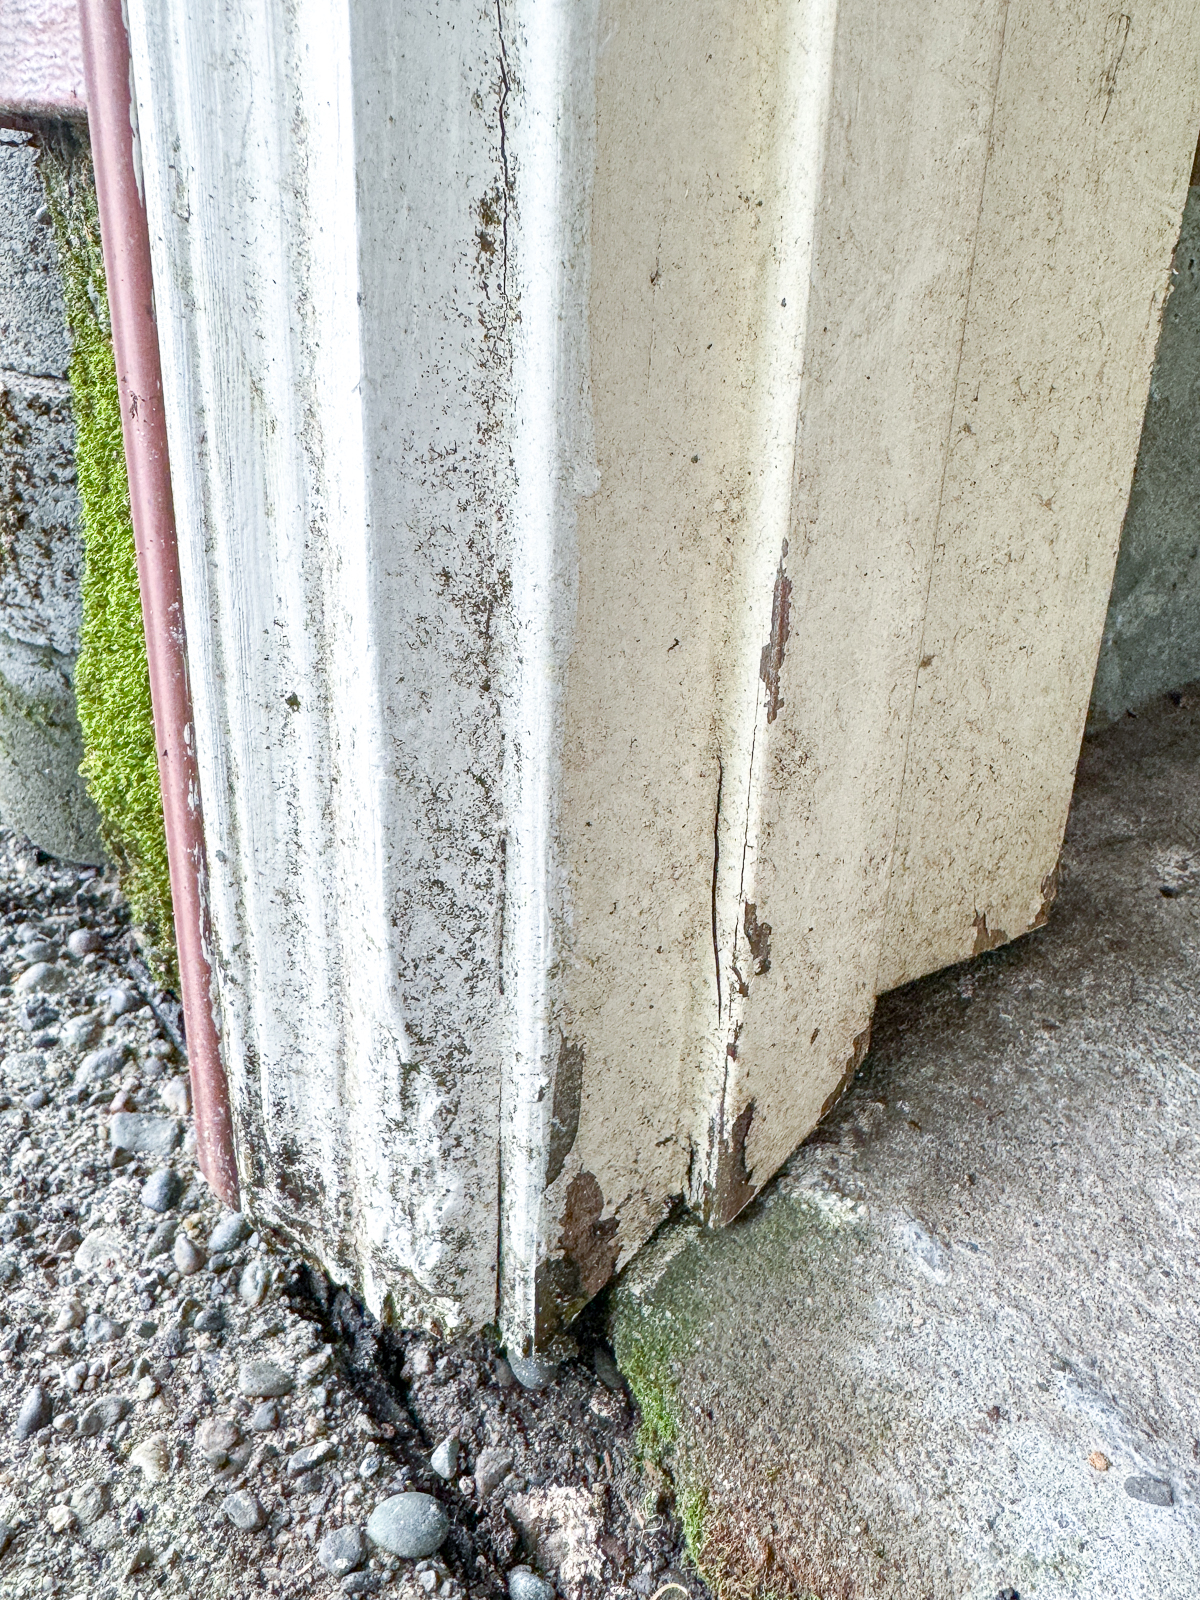
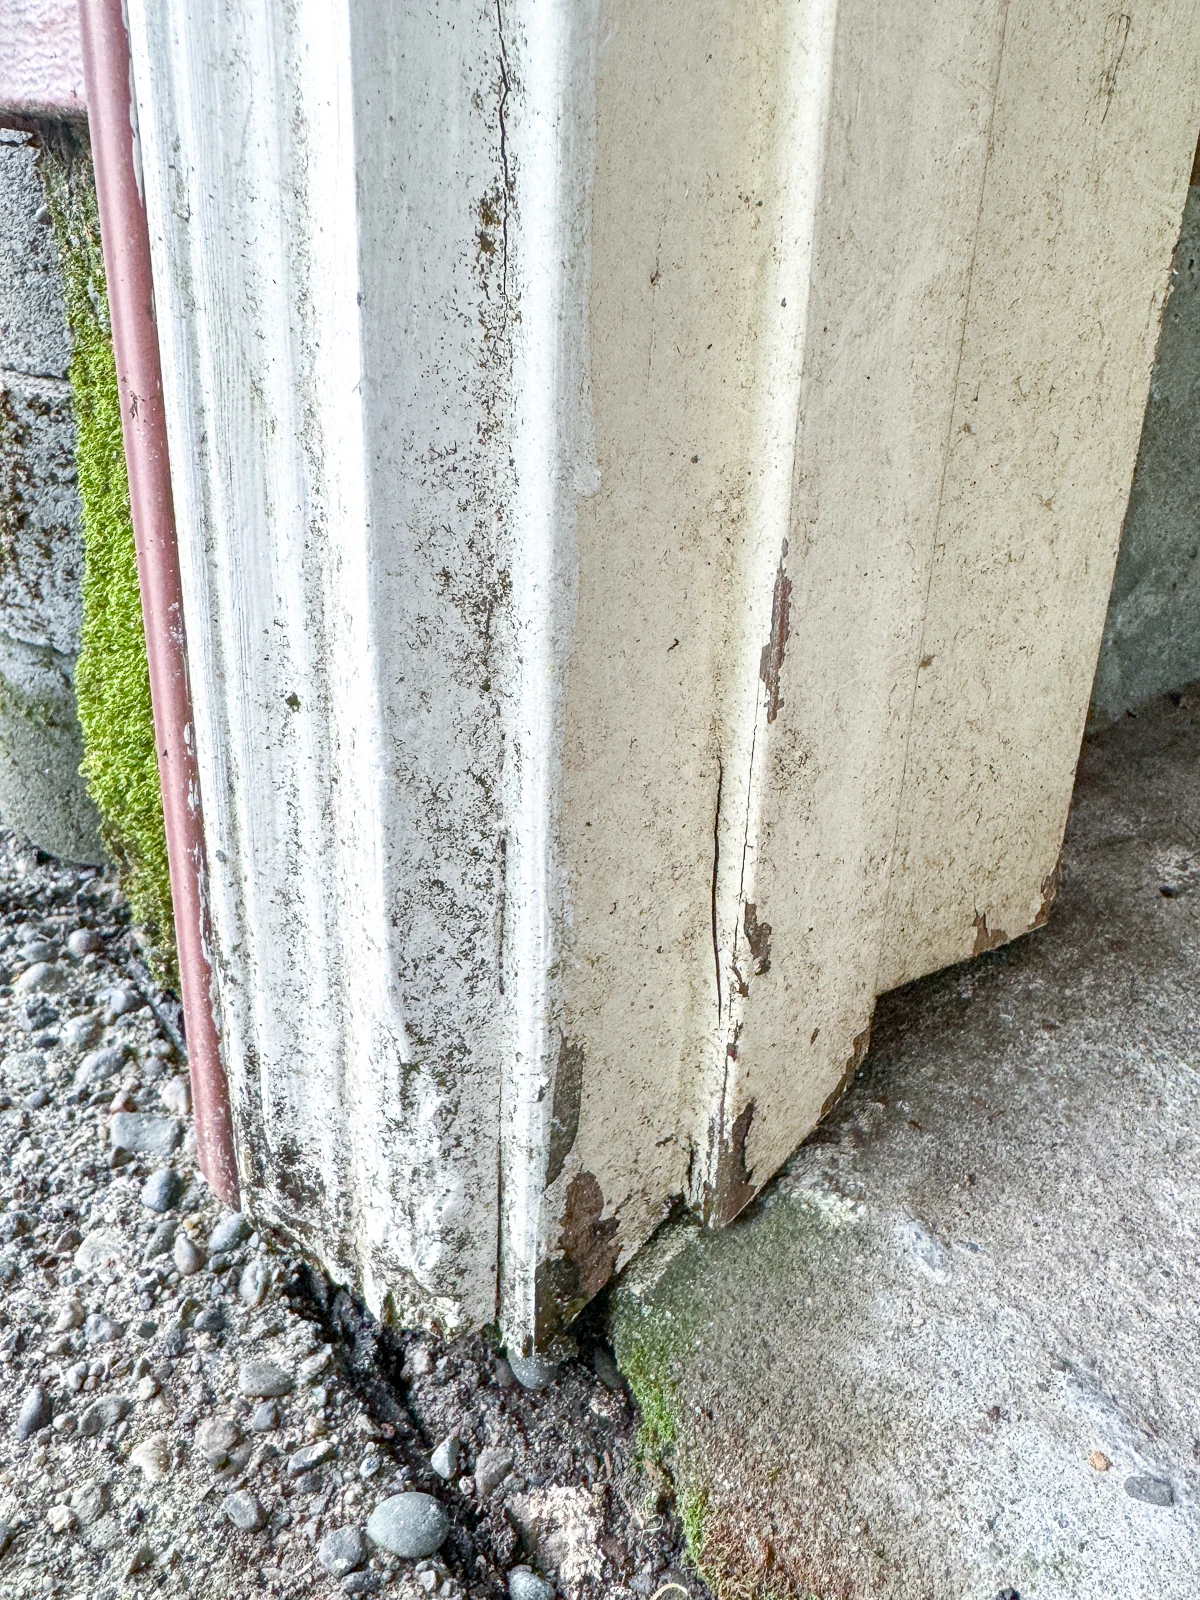
Repair any damage to the door frame (optional)
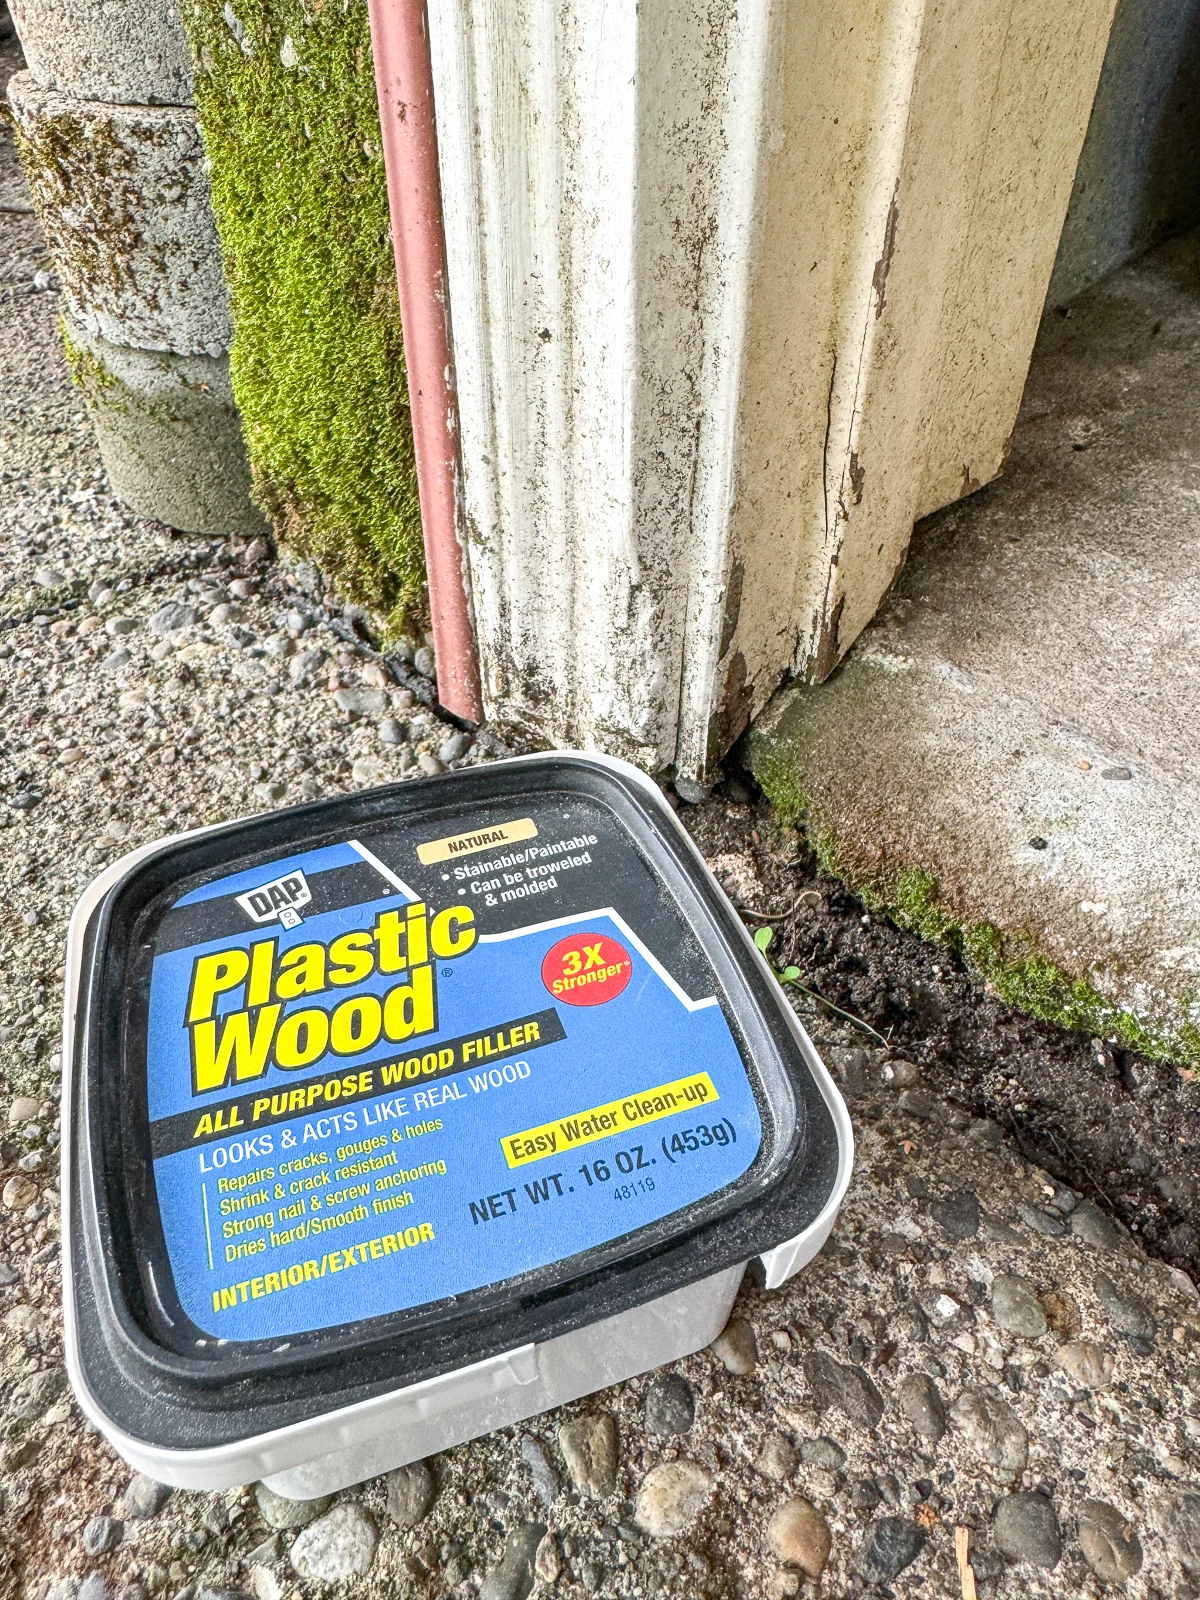
As you can see, the bottom of the door frame was a little beat up (and really dirty). Luckily, the wood under the peeling paint was still in good shape, so I just cleaned it up and patched the chipped spots with exterior wood filler.

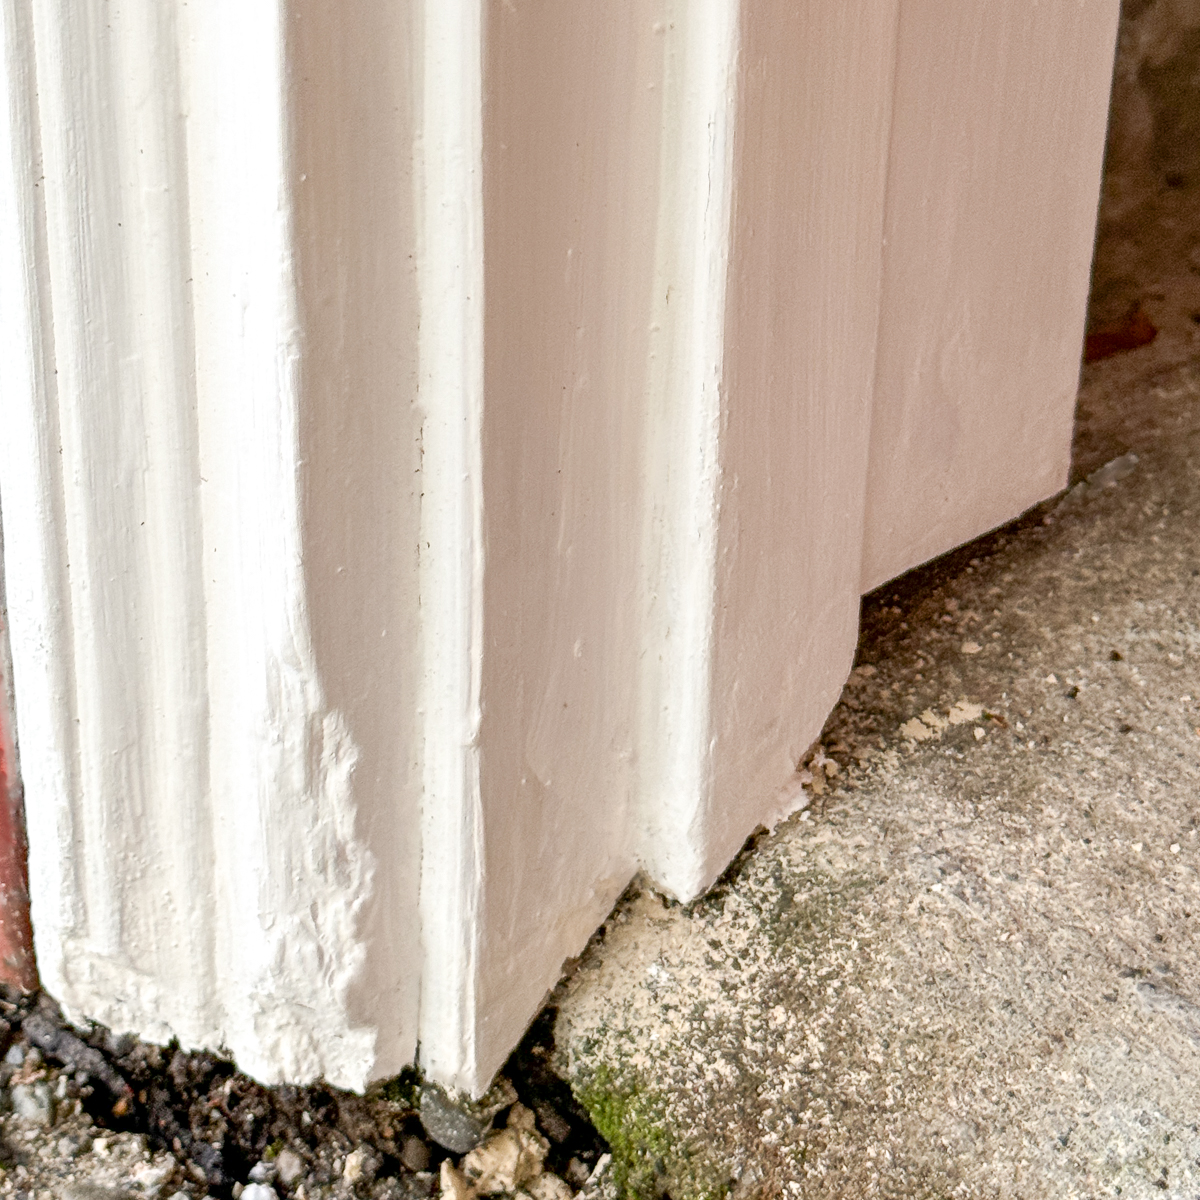
Once it dried, I sanded the filler flush with the surrounding wood. Then I applied a few coats of porch and patio paint left over from painting our kitchen backsplash tile and bathroom floor. It's not perfect, but it'll do!

While the paint dries and cures, I can start working on the door!
Calculate the dimensions for the door
I'm using ¾" thick cedar tongue and groove siding for the center panel of the shed door. You could also use weather-resistant plywood or pressure treated lumber.
When the tongue and groove are clicked together, they leave 5" of board showing. I drew up a quick model in Sketchup to figure out how many I needed, and how wide they should be.
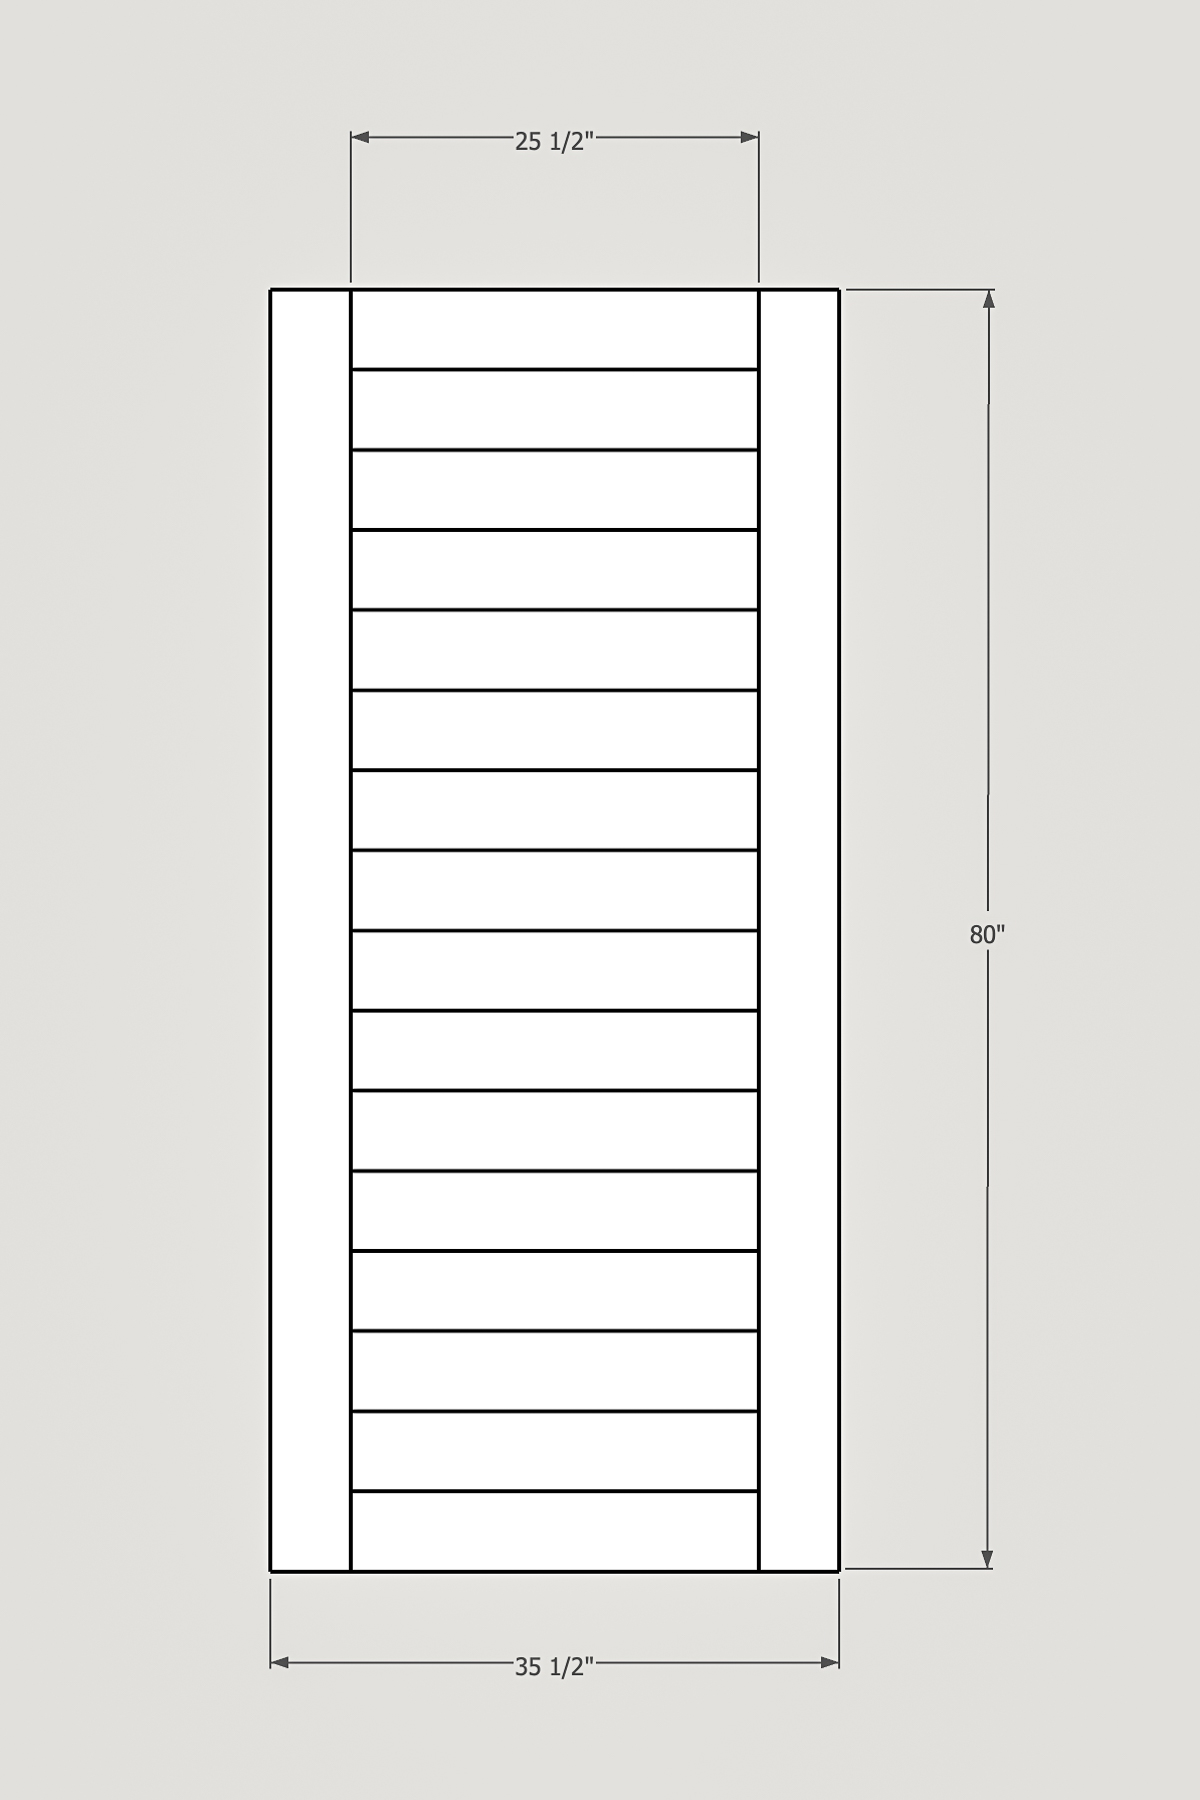
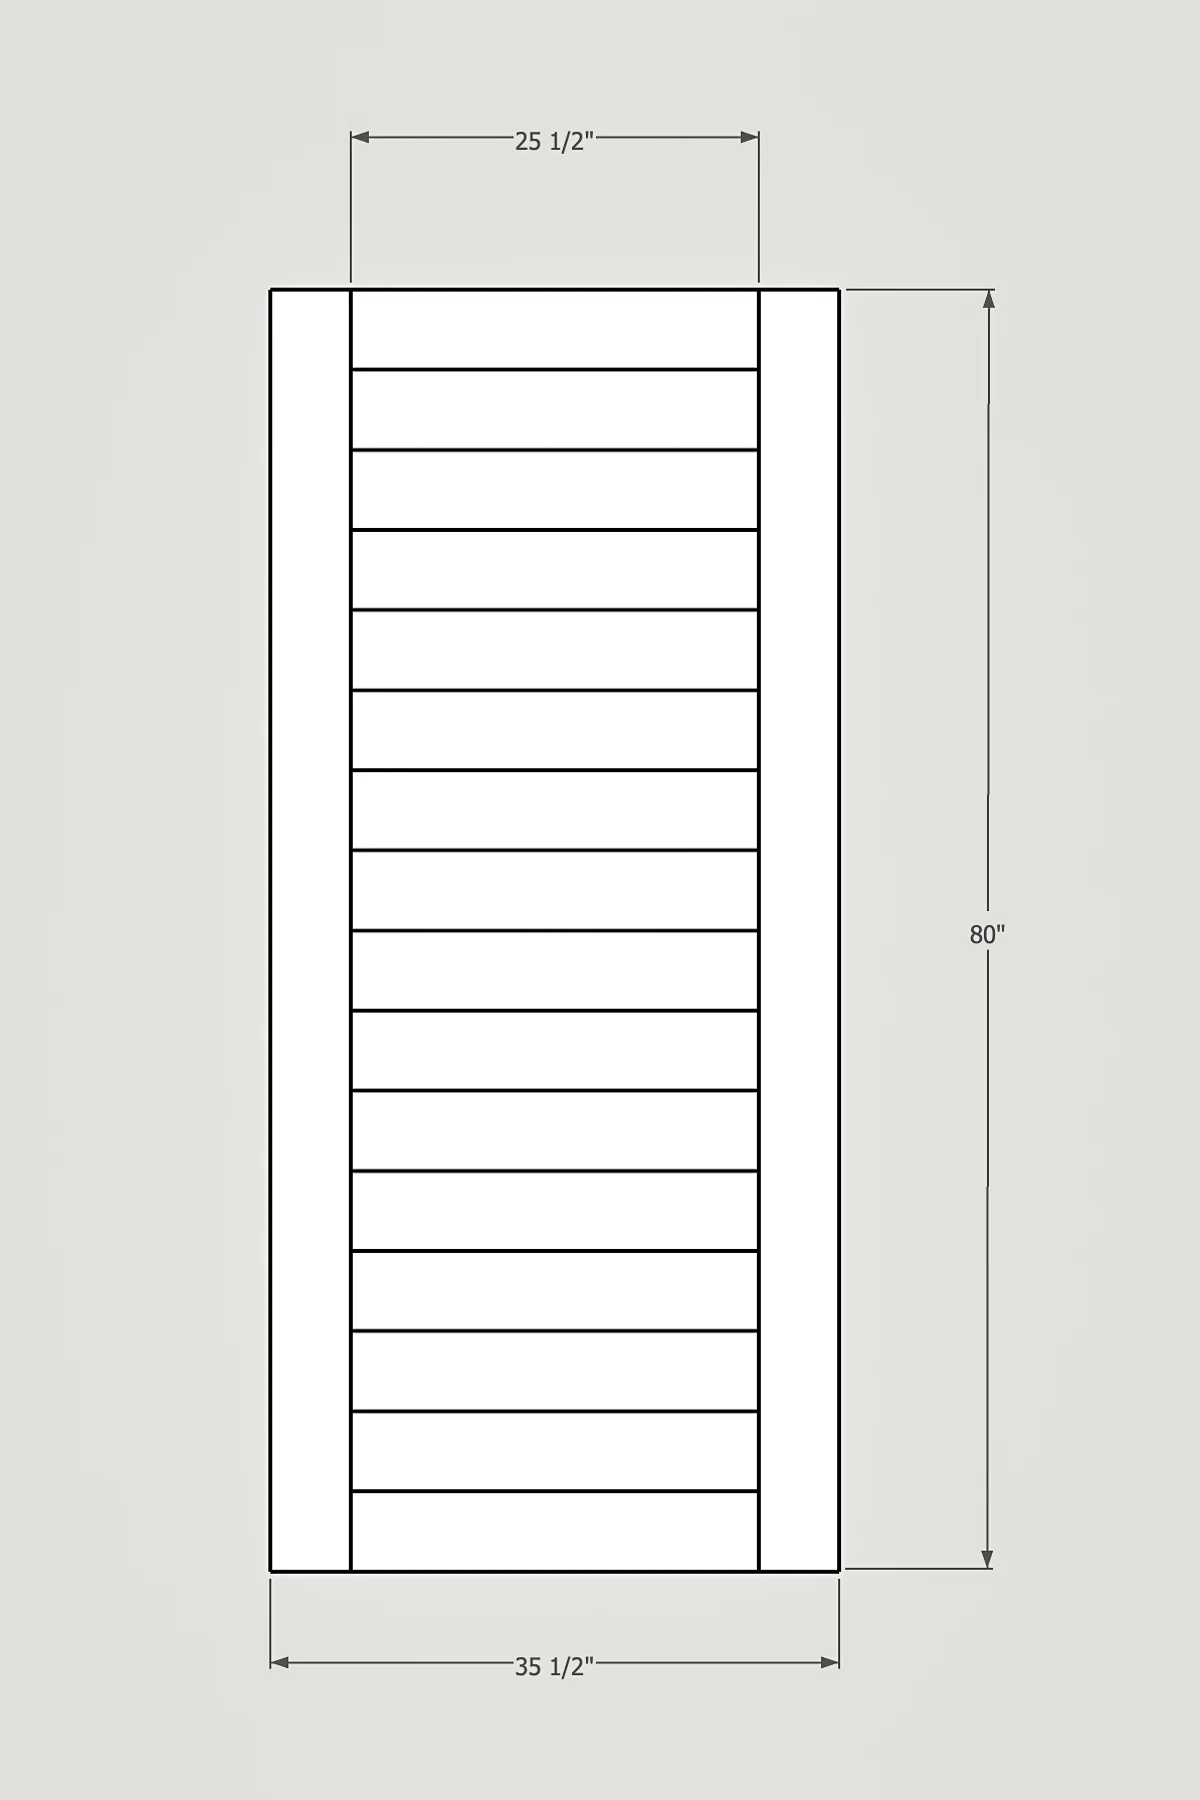
At the top and bottom, I'll cut off the tongue or groove to create a flat edge. I needed the door to be 79" tall, so removing ½" from each end turns out perfect! The sides will be 1x6 cedar boards trimmed to 5" wide to maintain the same proportions.
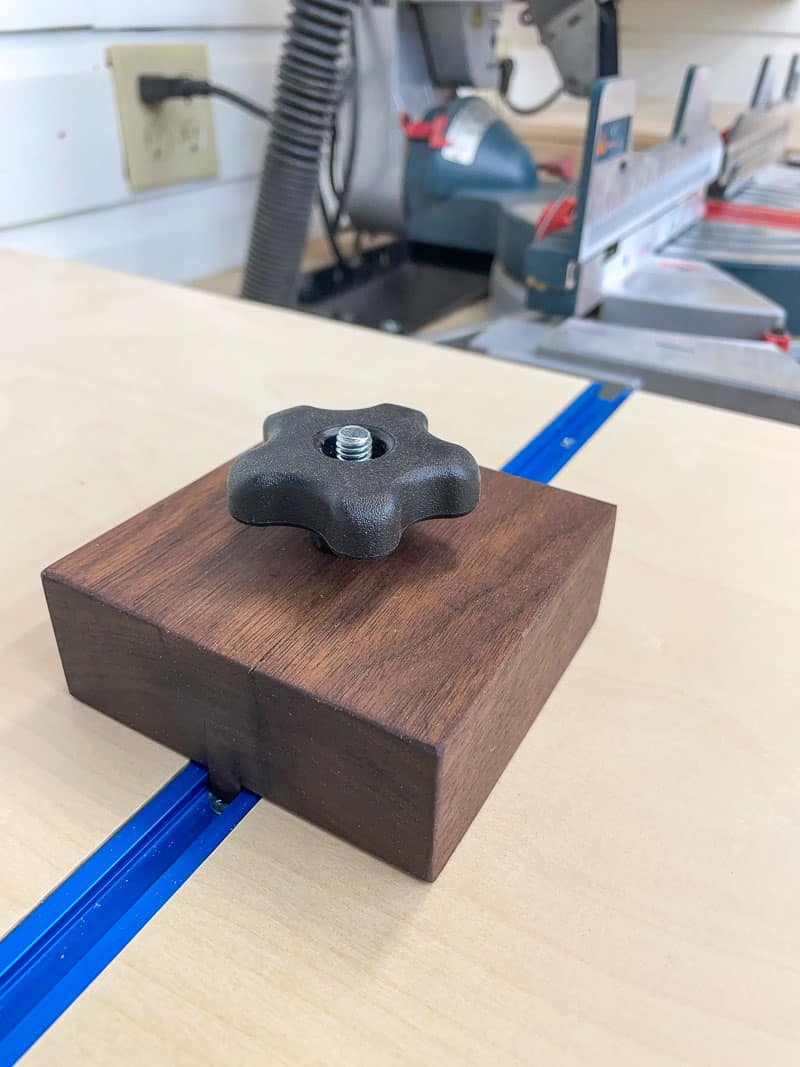
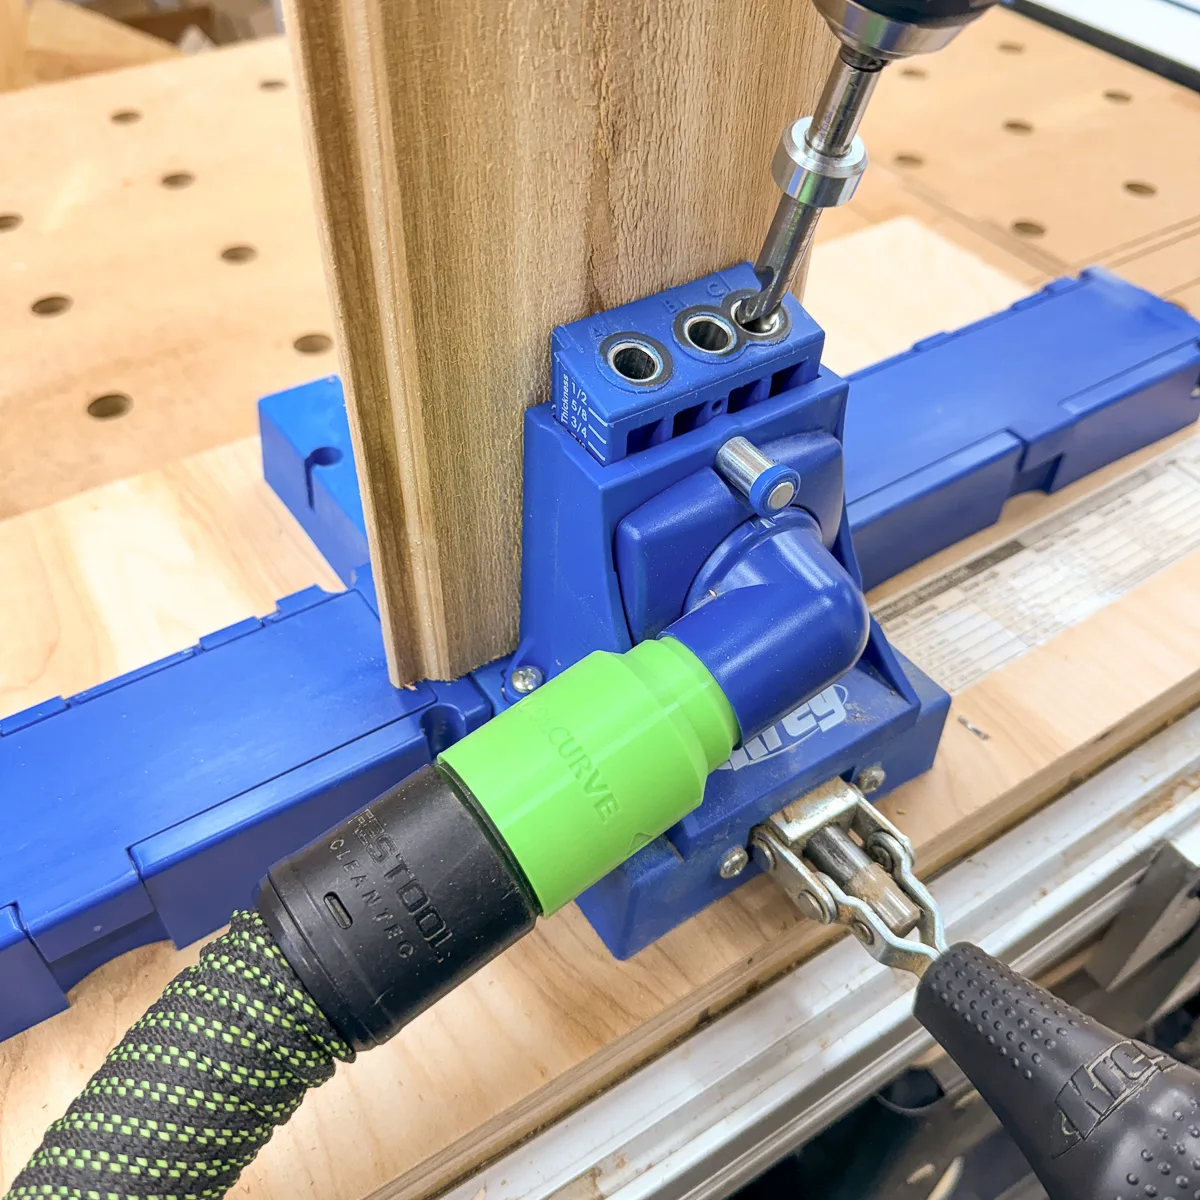
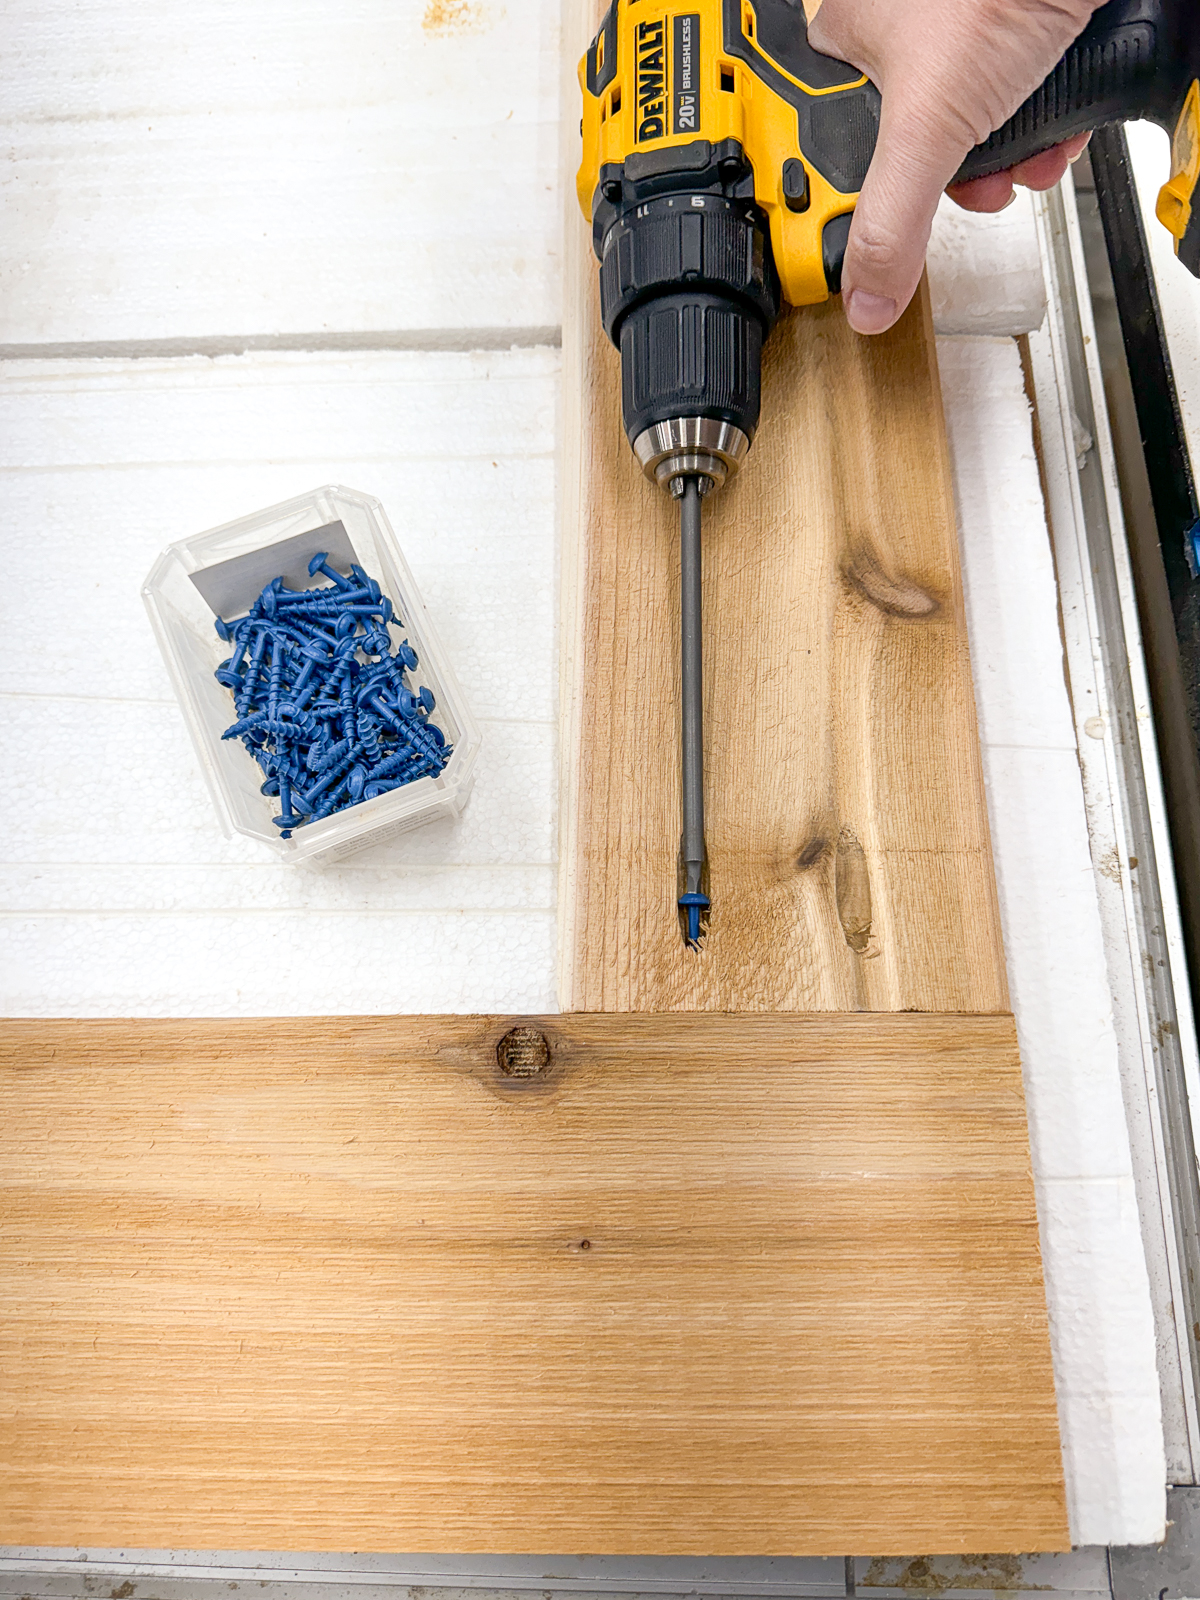
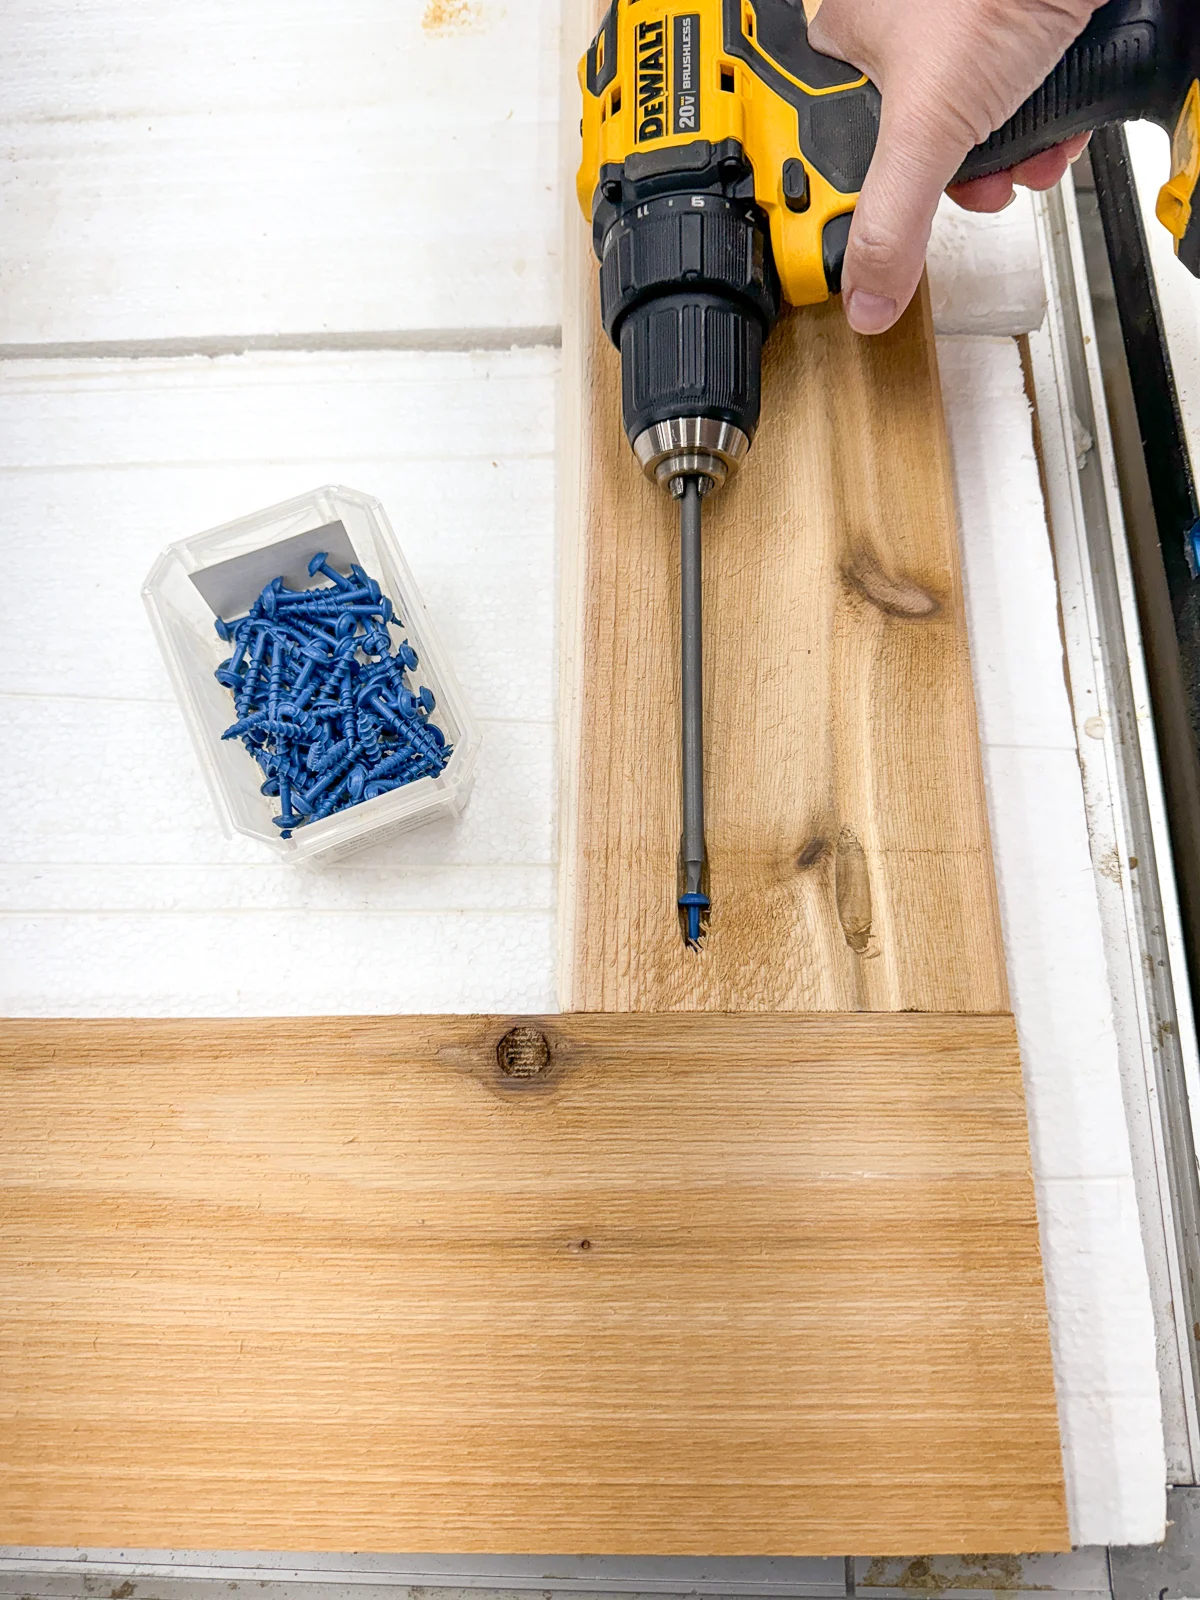
Cut the boards and drill pocket holes
I set up a stop block on my miter saw station to quickly cut all the center panel boards to the same length. Then I ripped the tongue or groove off of two of the boards for the top and bottom at the table saw.

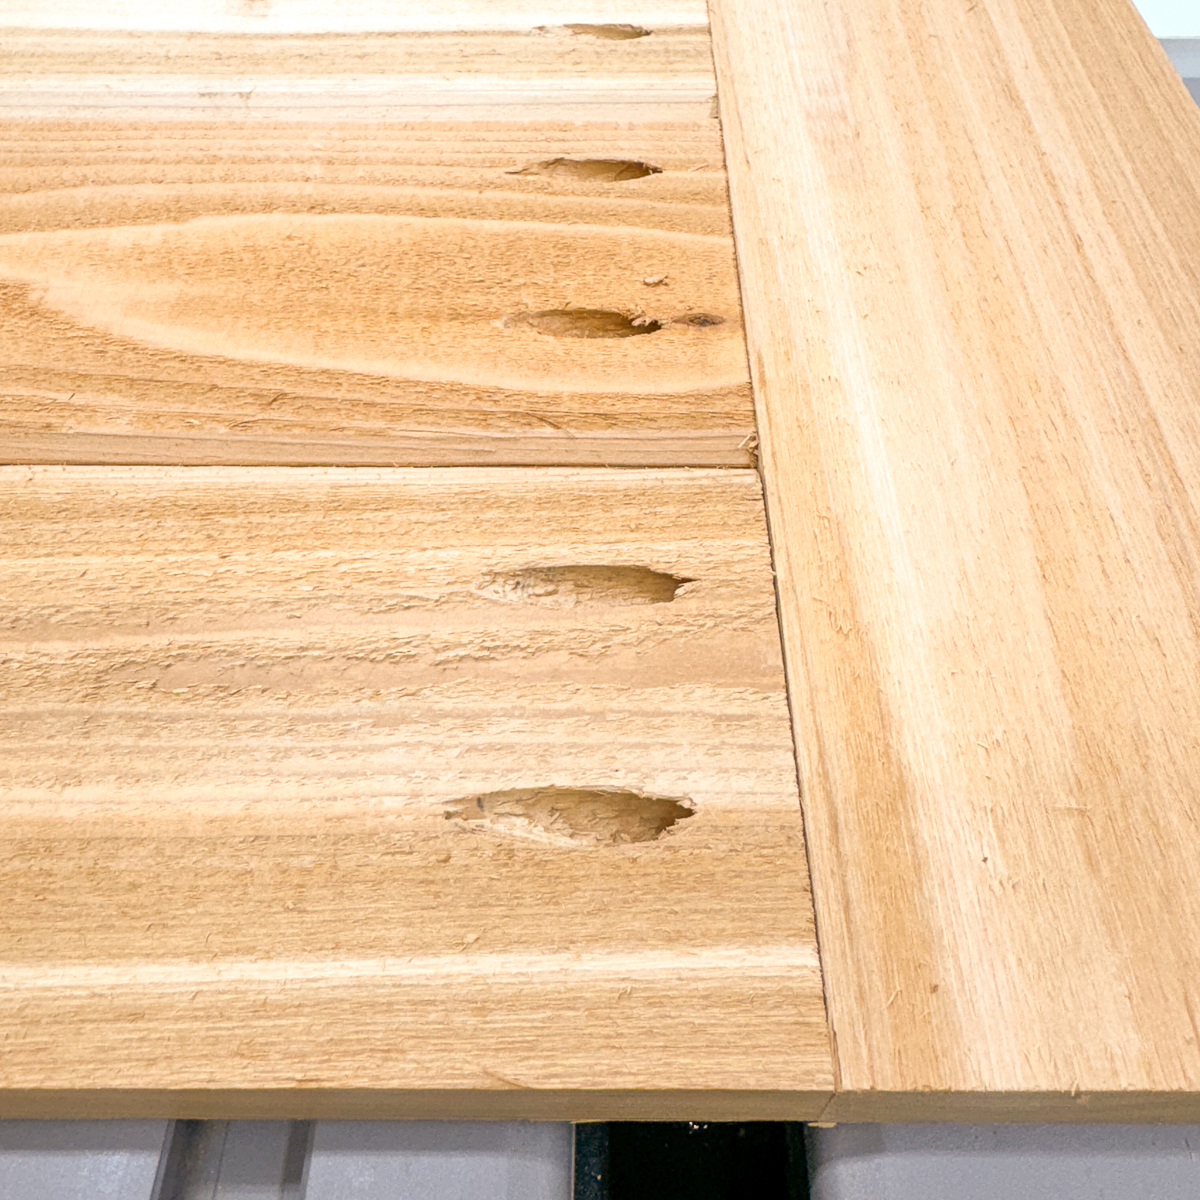
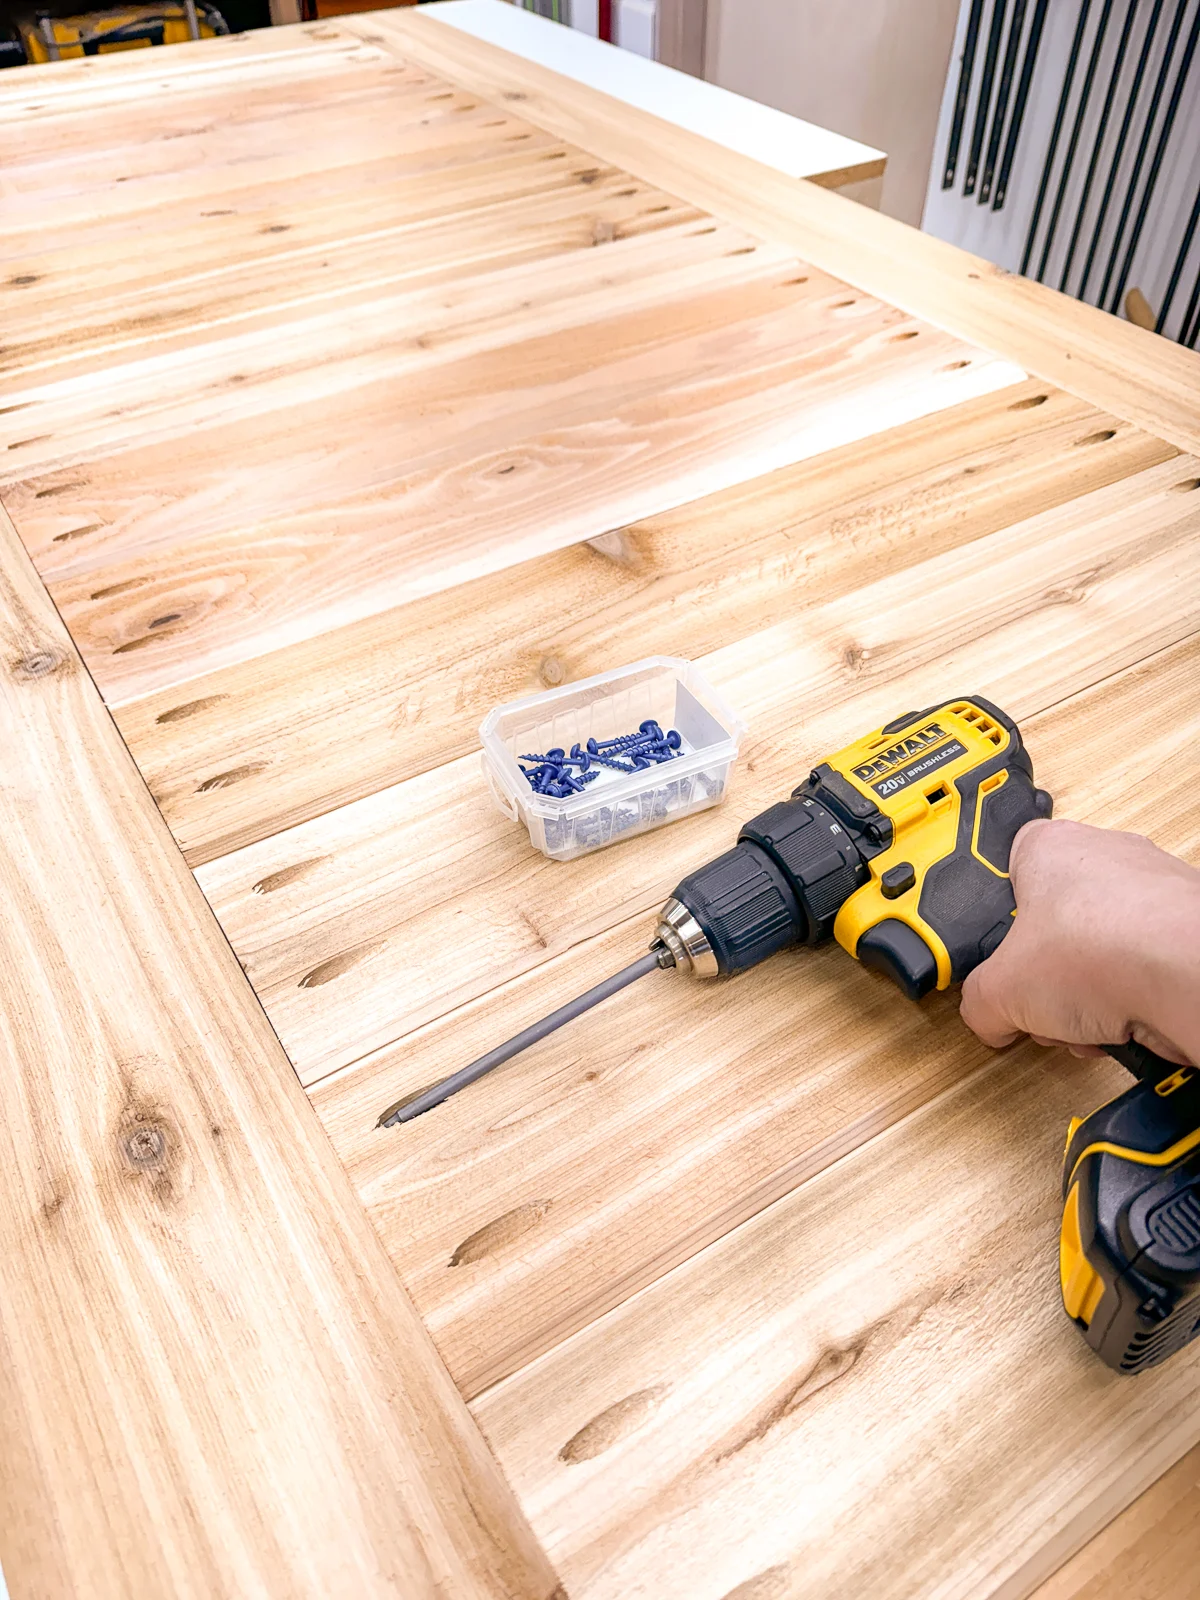
Then I drilled pocket holes in both ends of all the center panel pieces. These will only be seen when the door is opened, so I won't bother filling the holes.

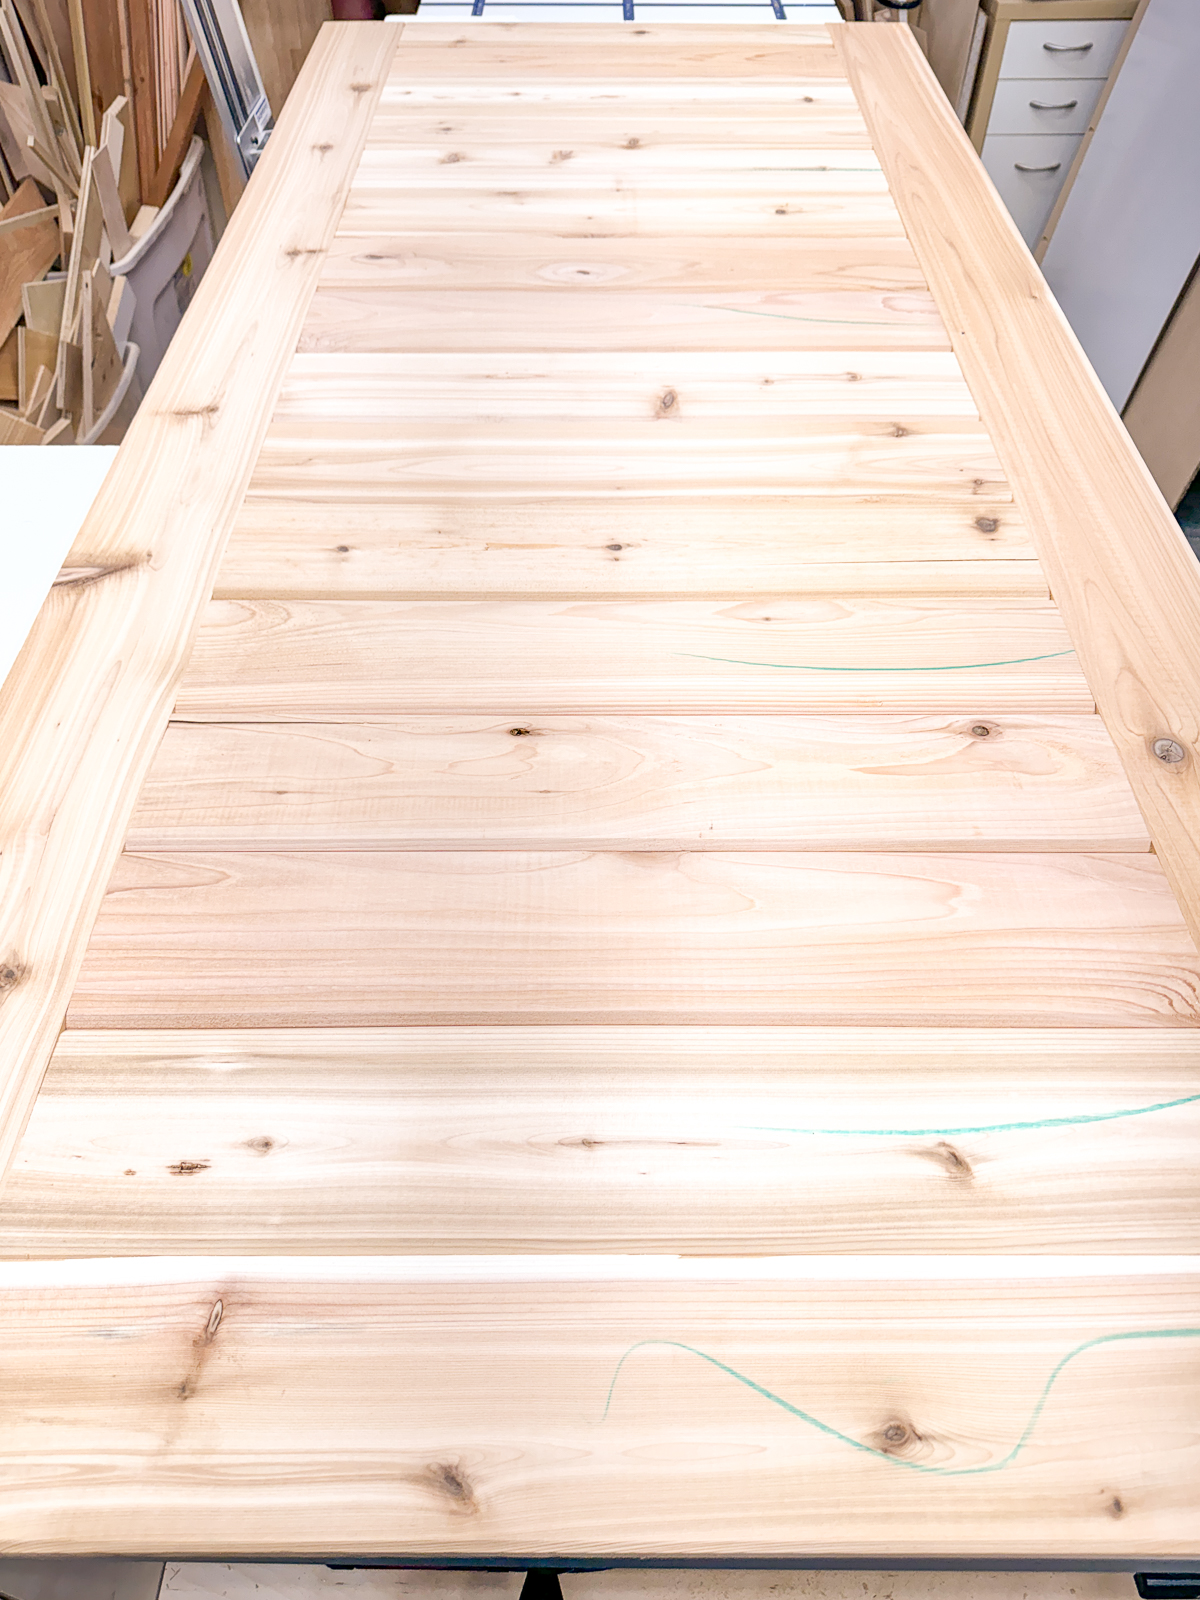
Assemble the shed door
Start with the top board, which has the tongue trimmed off but the groove still intact. Align the top edge with the end of a vertical side piece, and screw it in place with 1 ¼" exterior pocket hole screws.
The tongue of the next board should fit snug into the groove of the top board. Once it's seated properly, you can screw it into place.
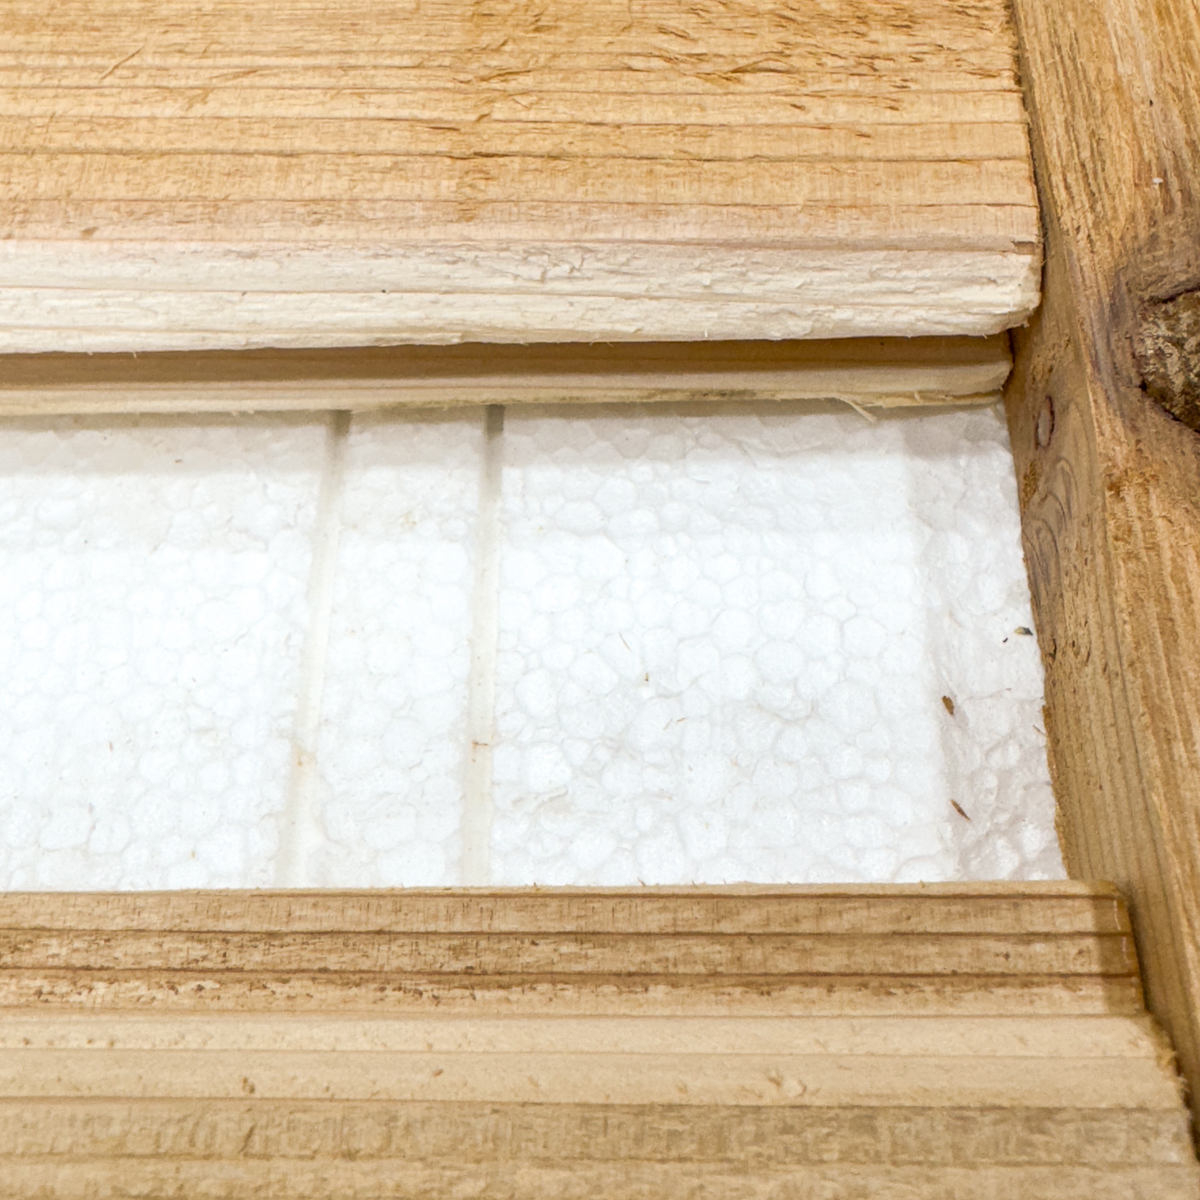

If they're not fitting together easily, you can tap on the edge of the board with a rubber mallet. Just be careful not to damage the groove at the bottom!


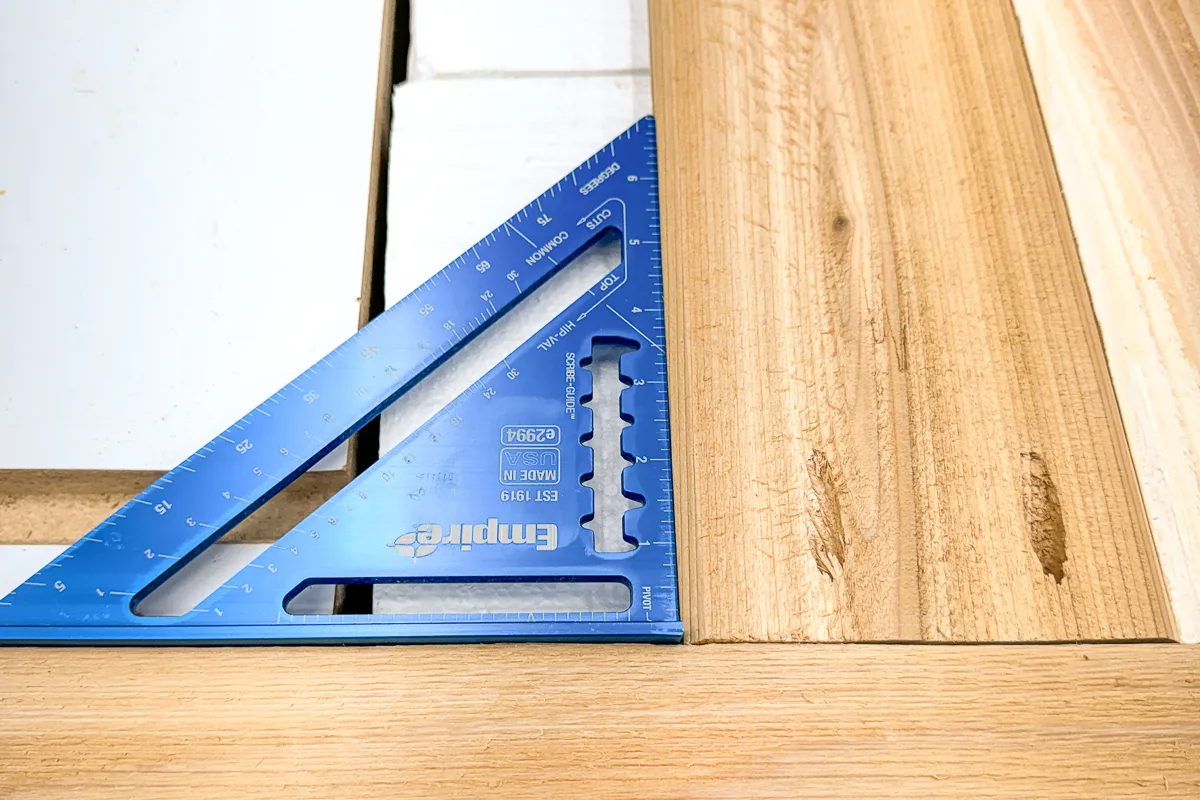
Every once in a while, use a speed square to check that everything is still at a 90 degree angle.

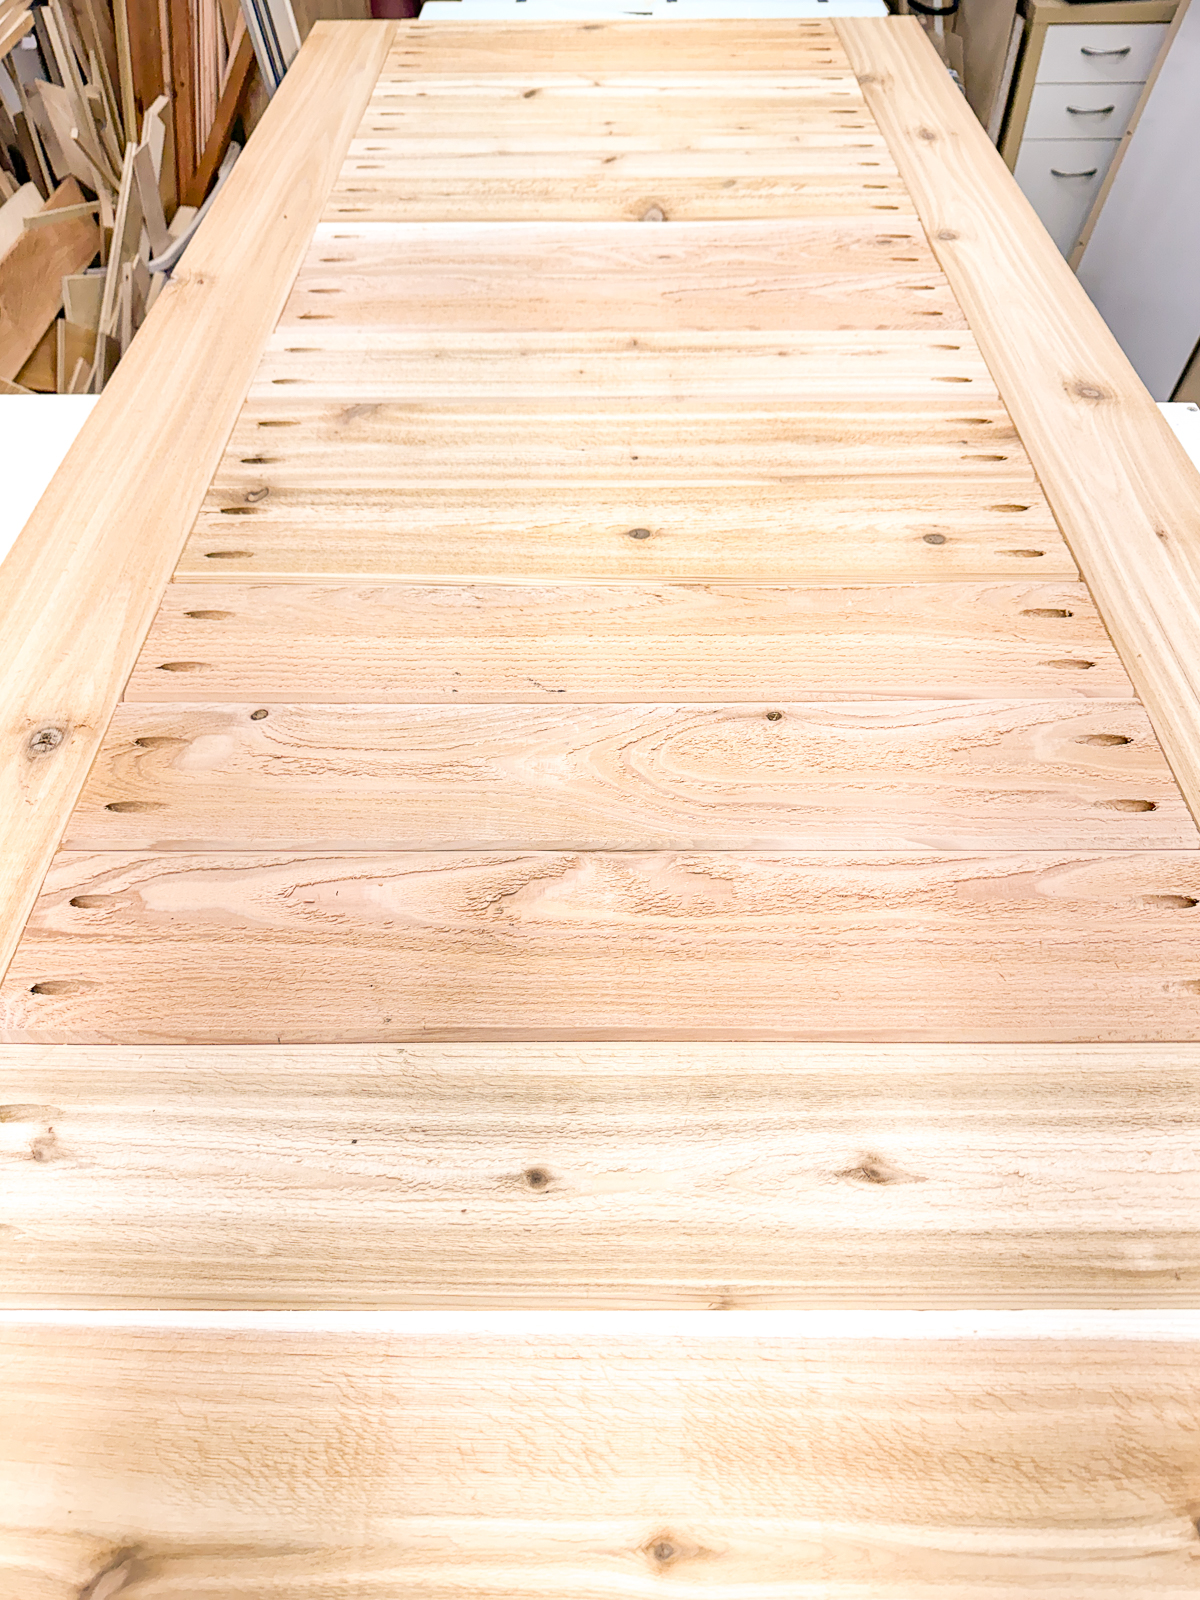
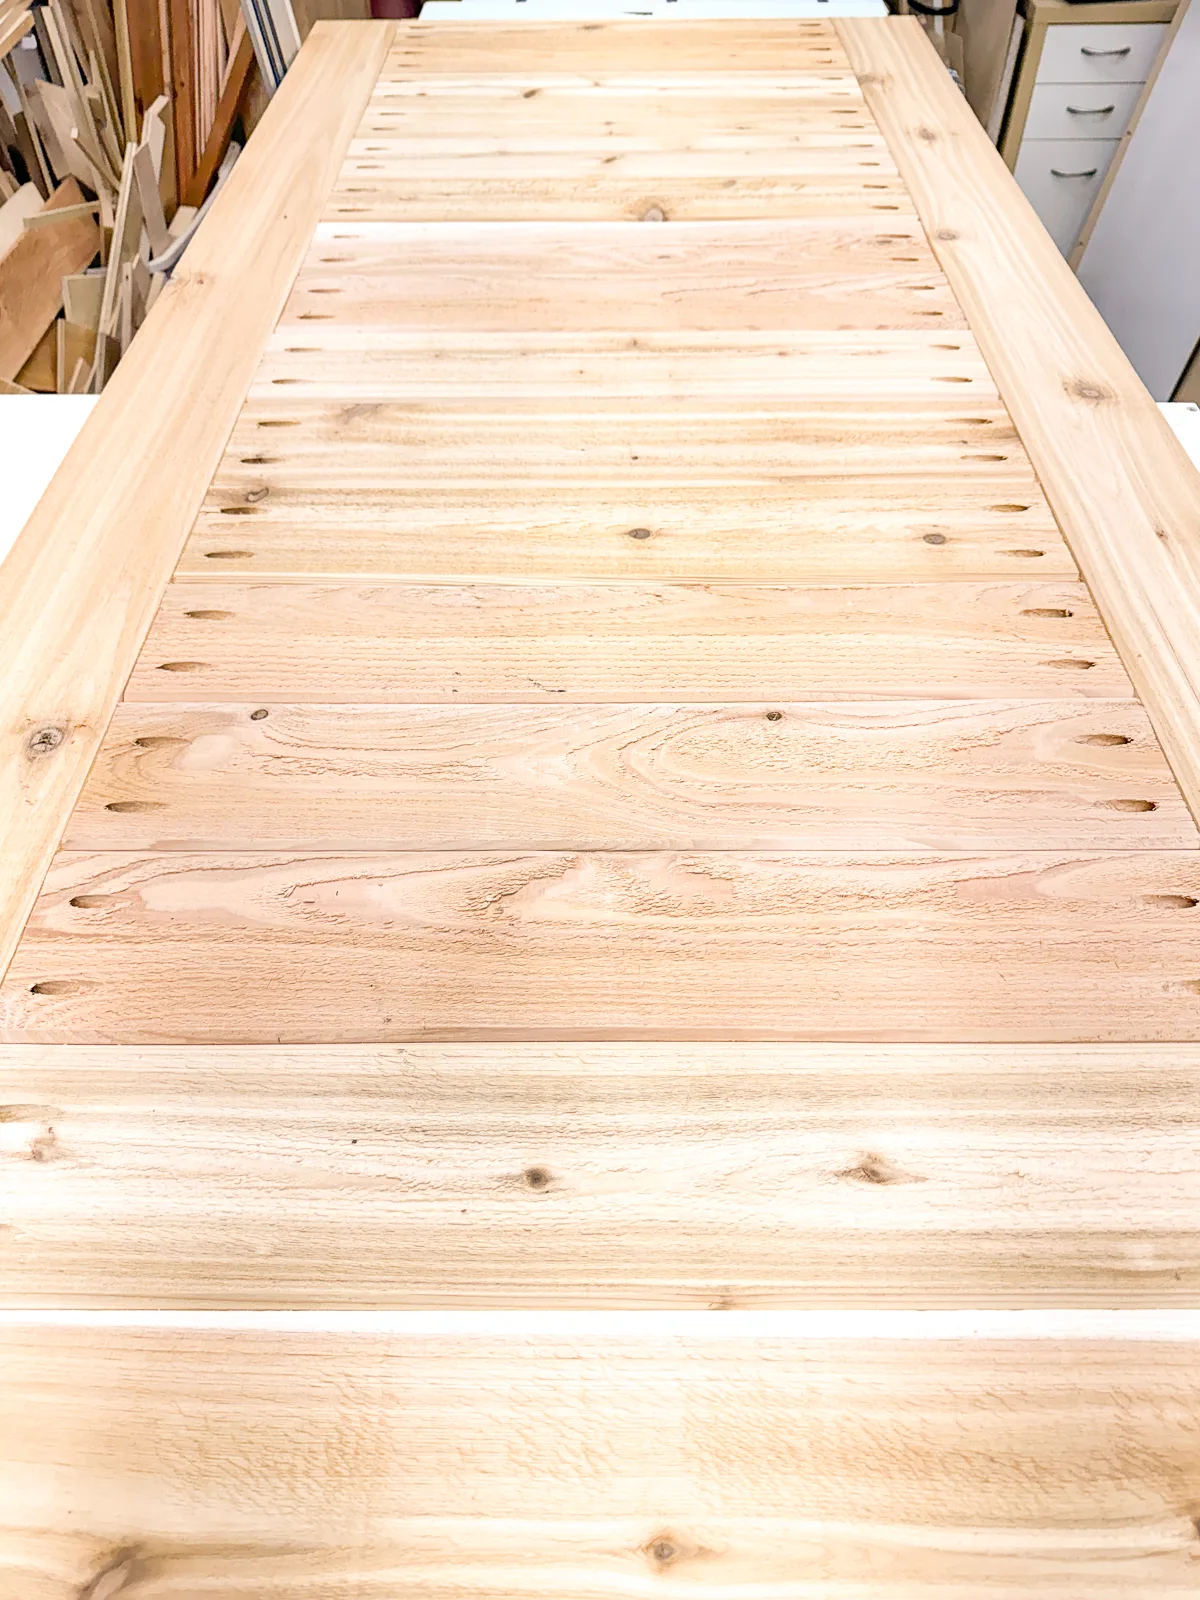
I was so relieved when the bottom board fit perfectly flush at the end without having to trim it!

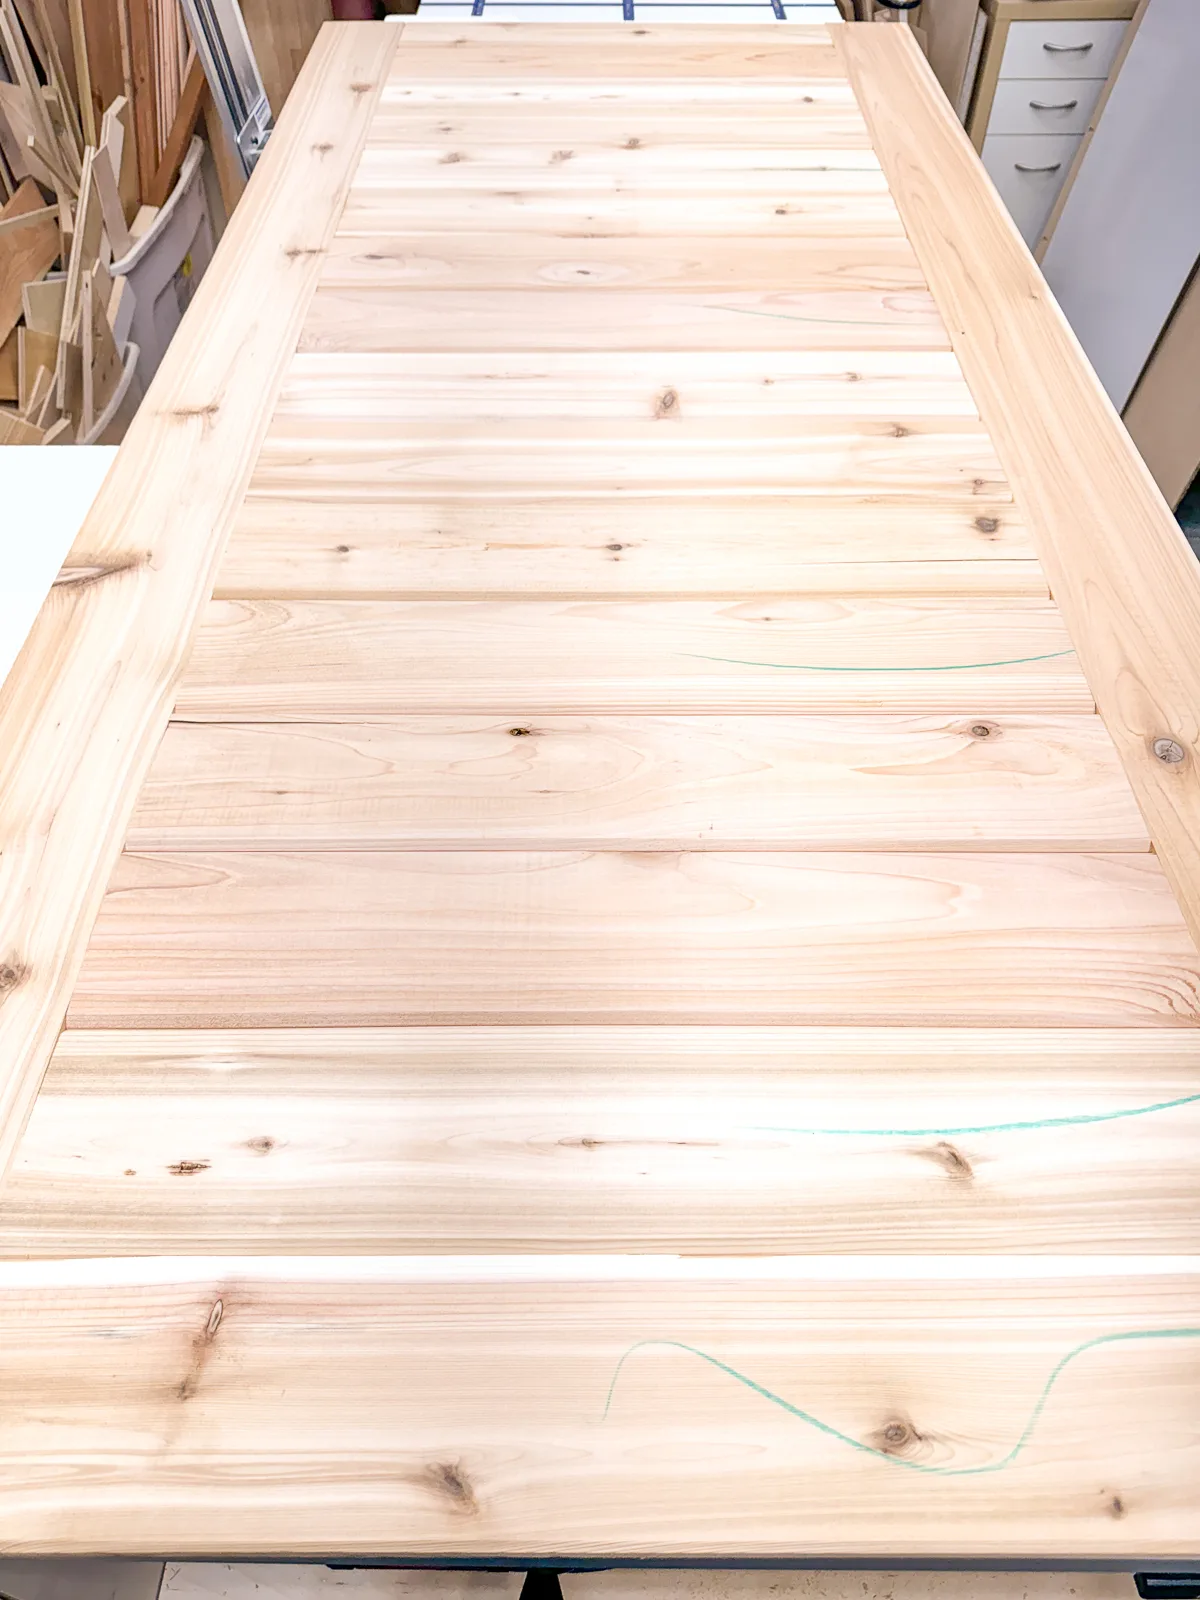
With one side of the door complete, it's time to attach the other side!

The other side went together much quicker, and soon I had a new door!
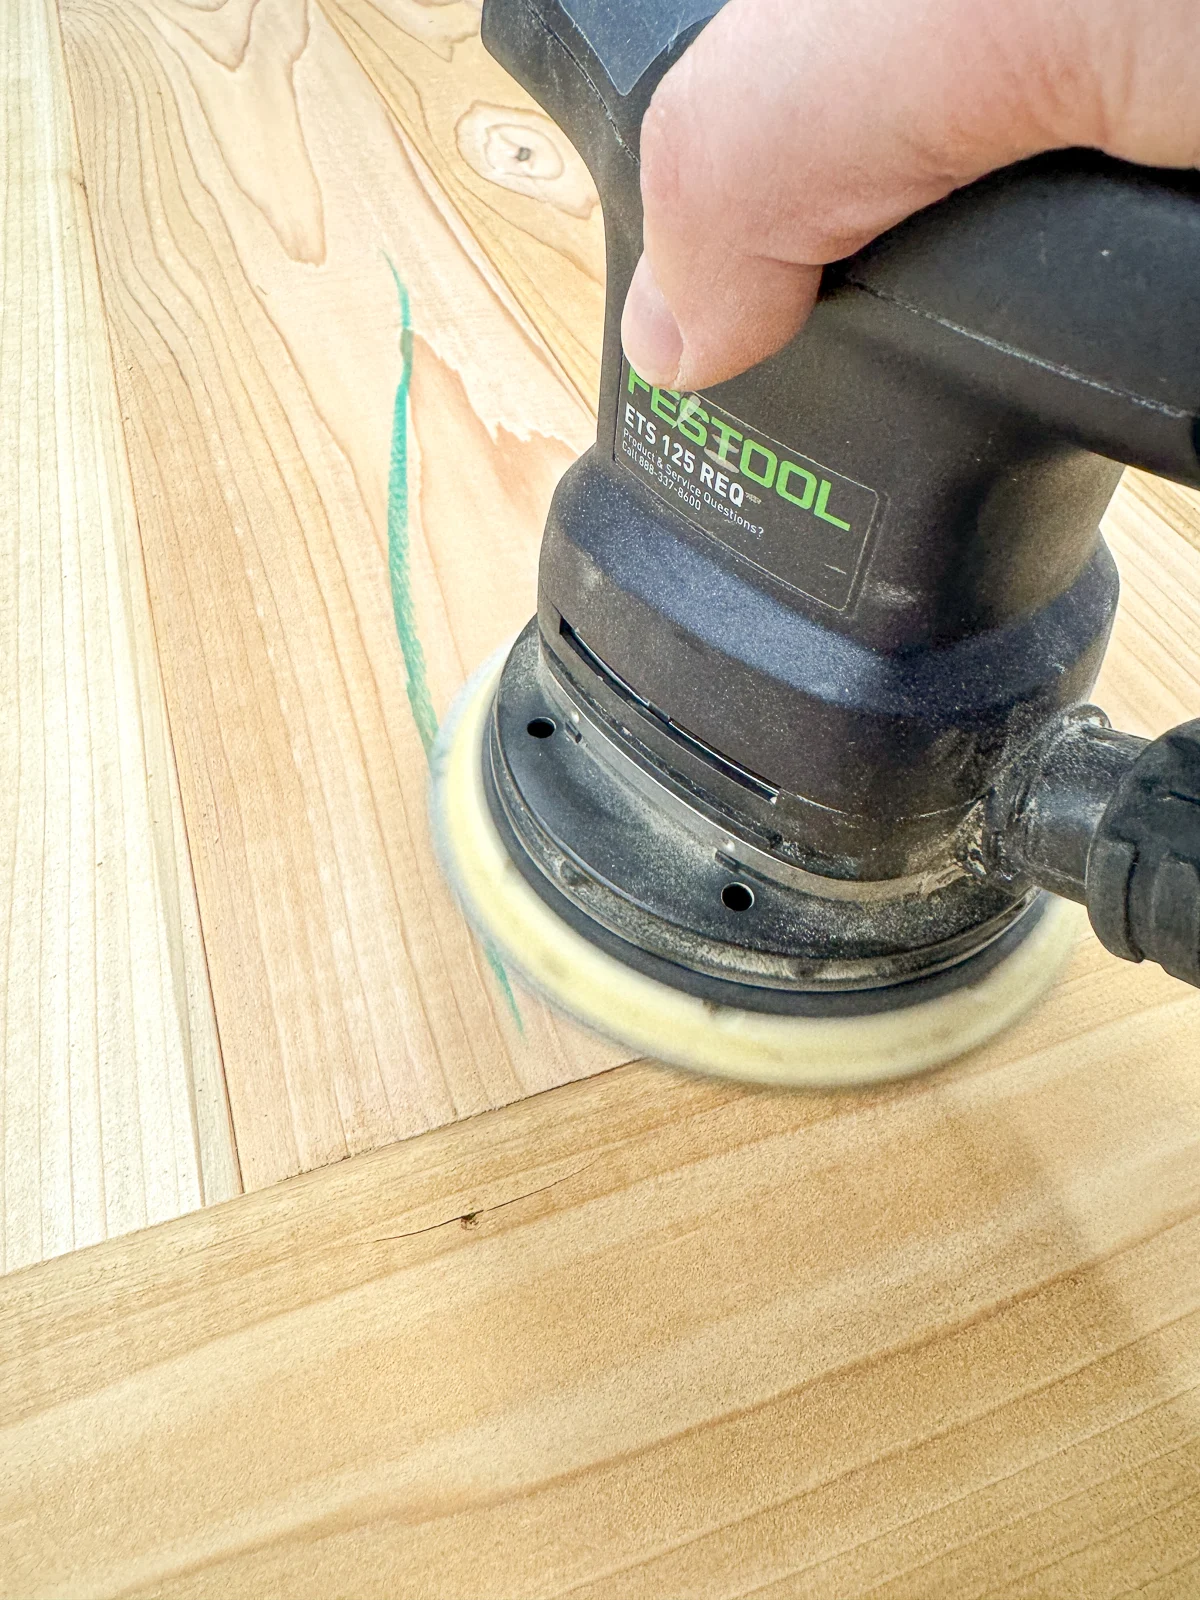
Sand and apply finish
Up until this point, I've only seen the back of the door. When I flipped it over, I could see all the sanding that needed to be done. Ugh!
There were a few spots where the slats are sitting above the sides, and marks from the mill where I bought the wood. Luckily, cedar is really soft and sands down quick!

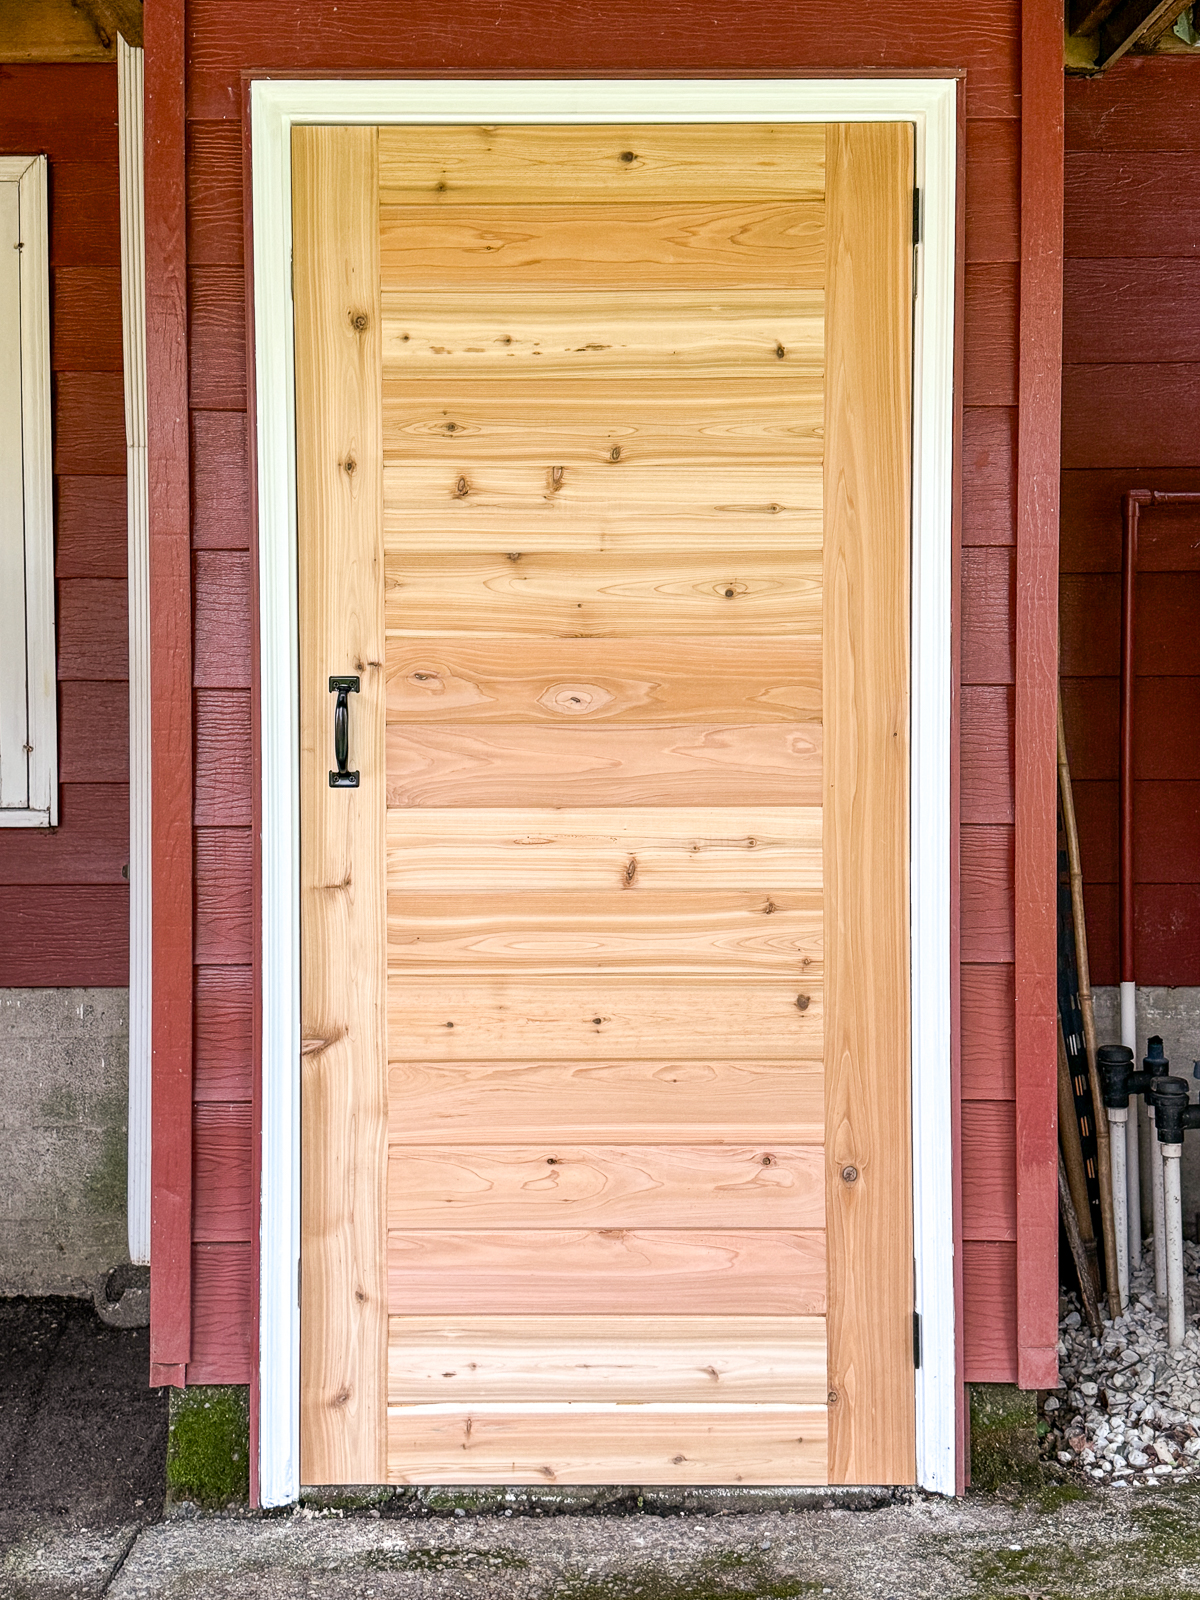
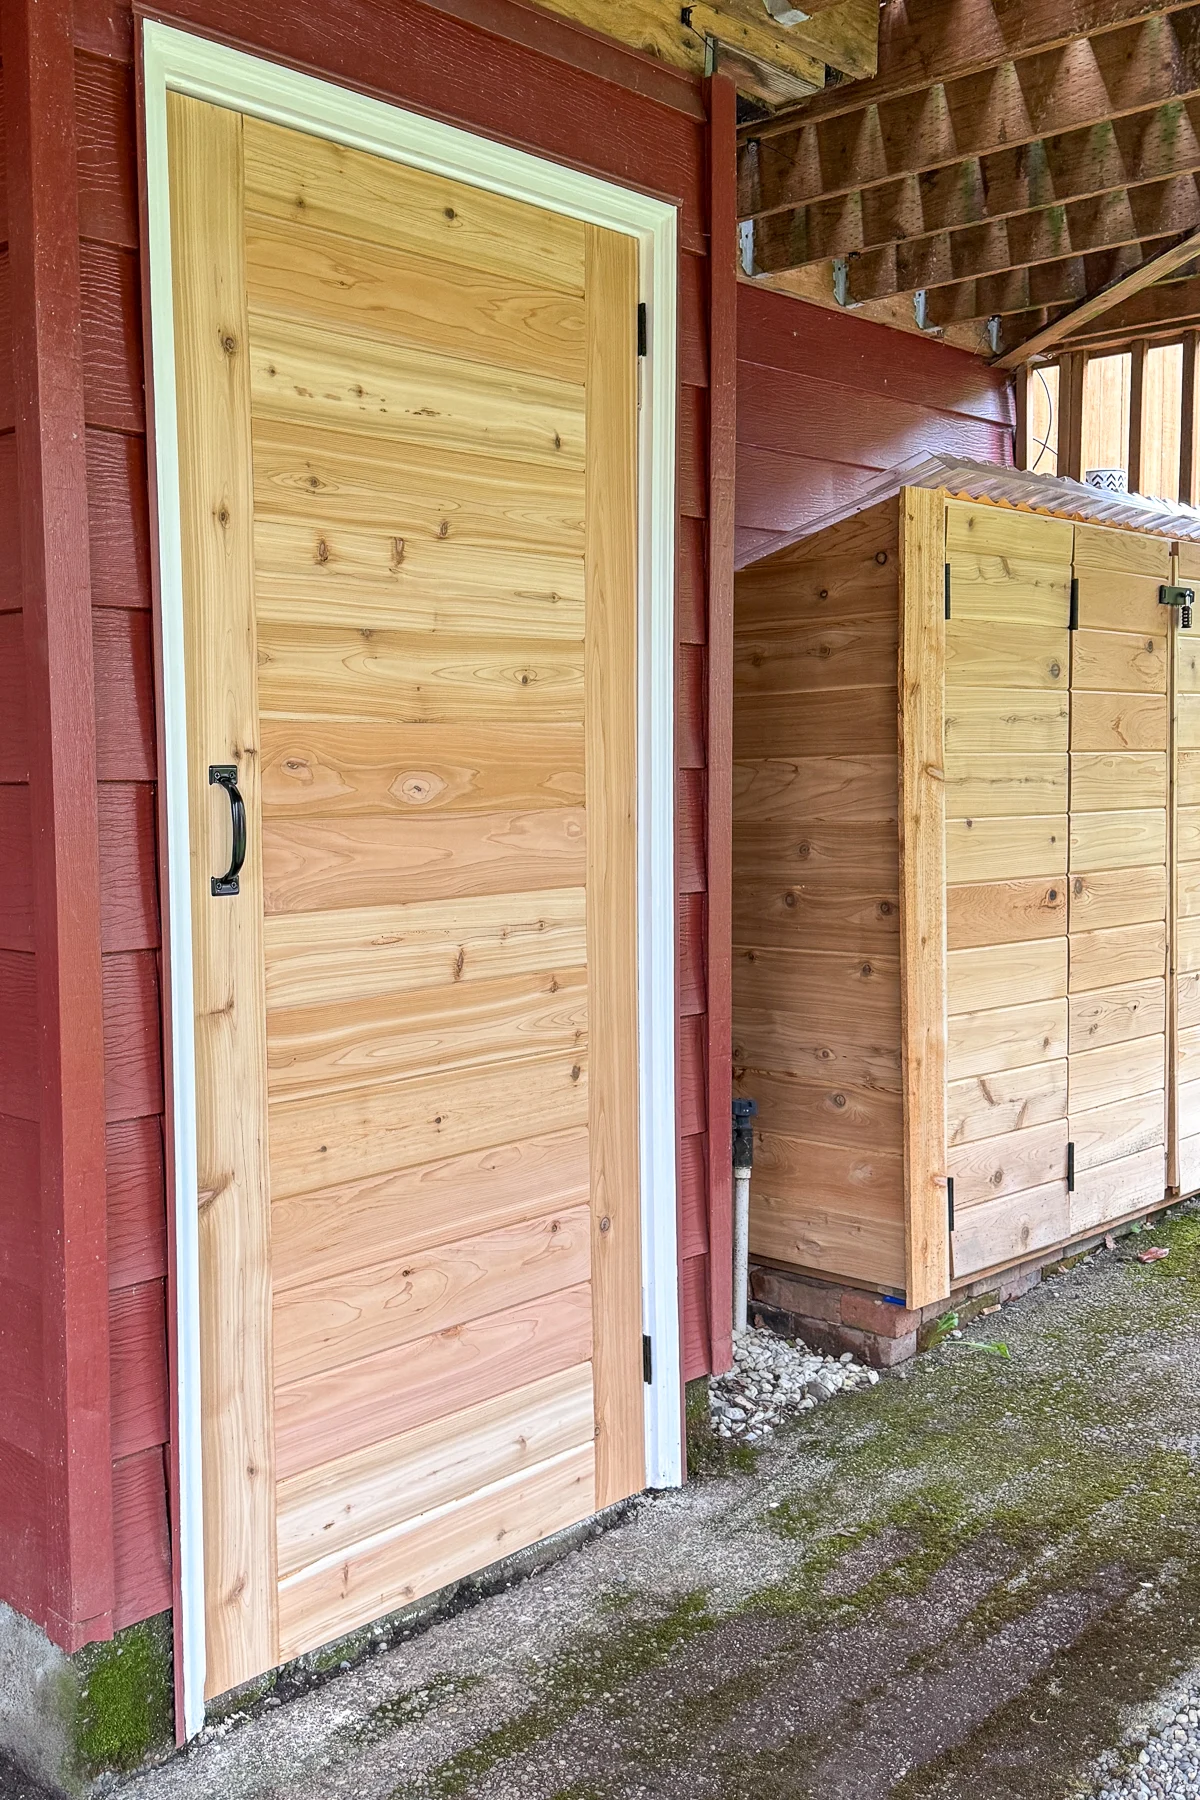
Cedar is weather and rot-resistant, and weathers to a gray patina over time. I chose to leave it natural to match the potting bench and bike shed under the deck. But any exterior paint or stain would work great too.
Install the shed door
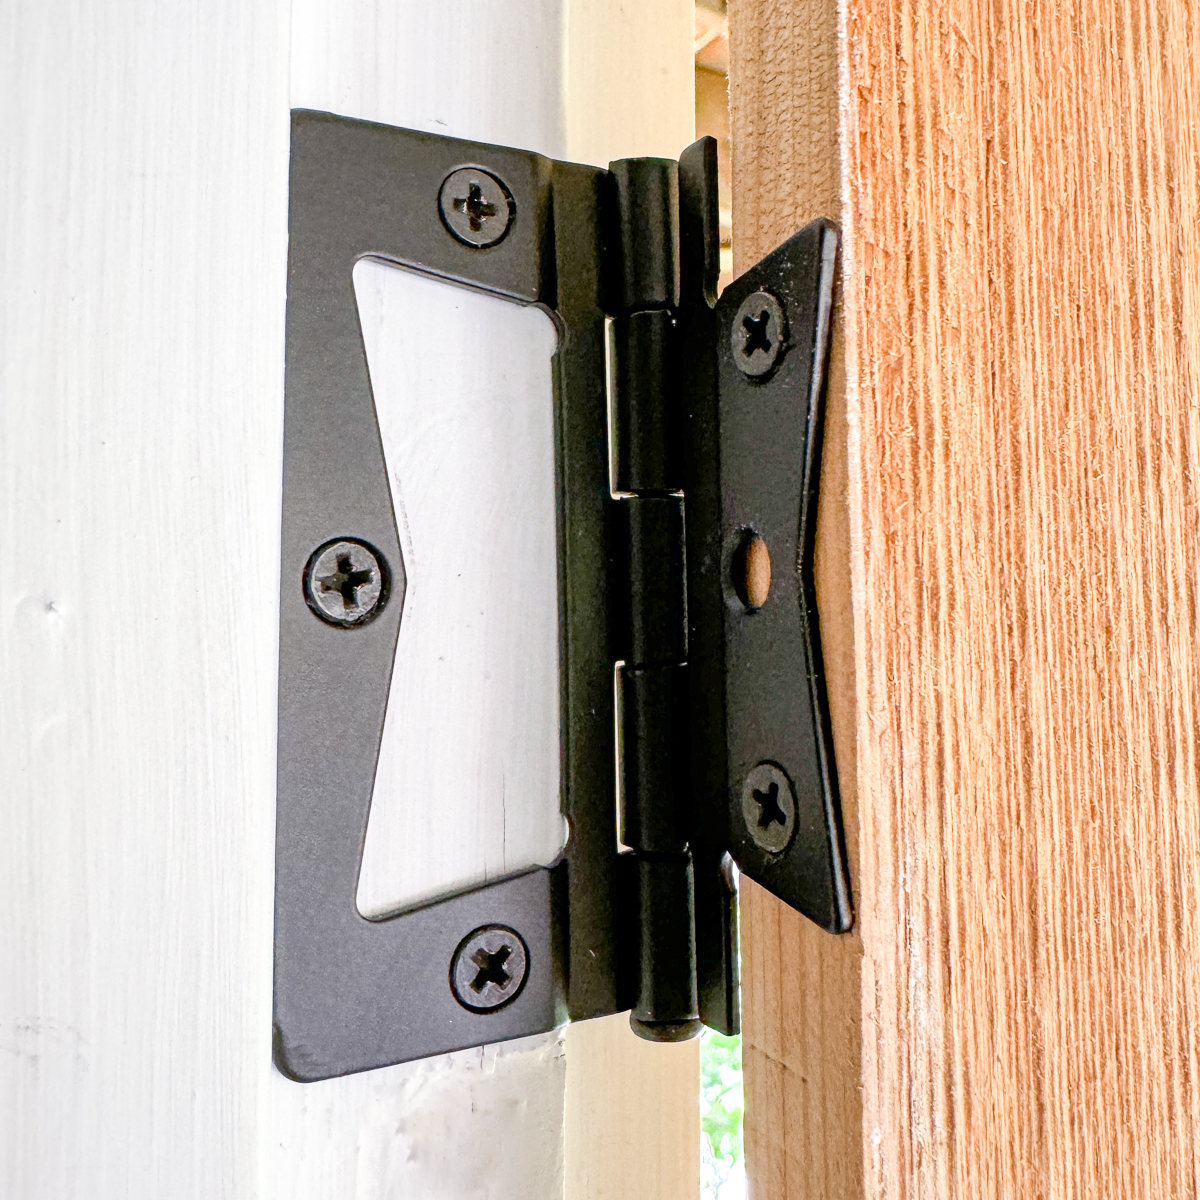
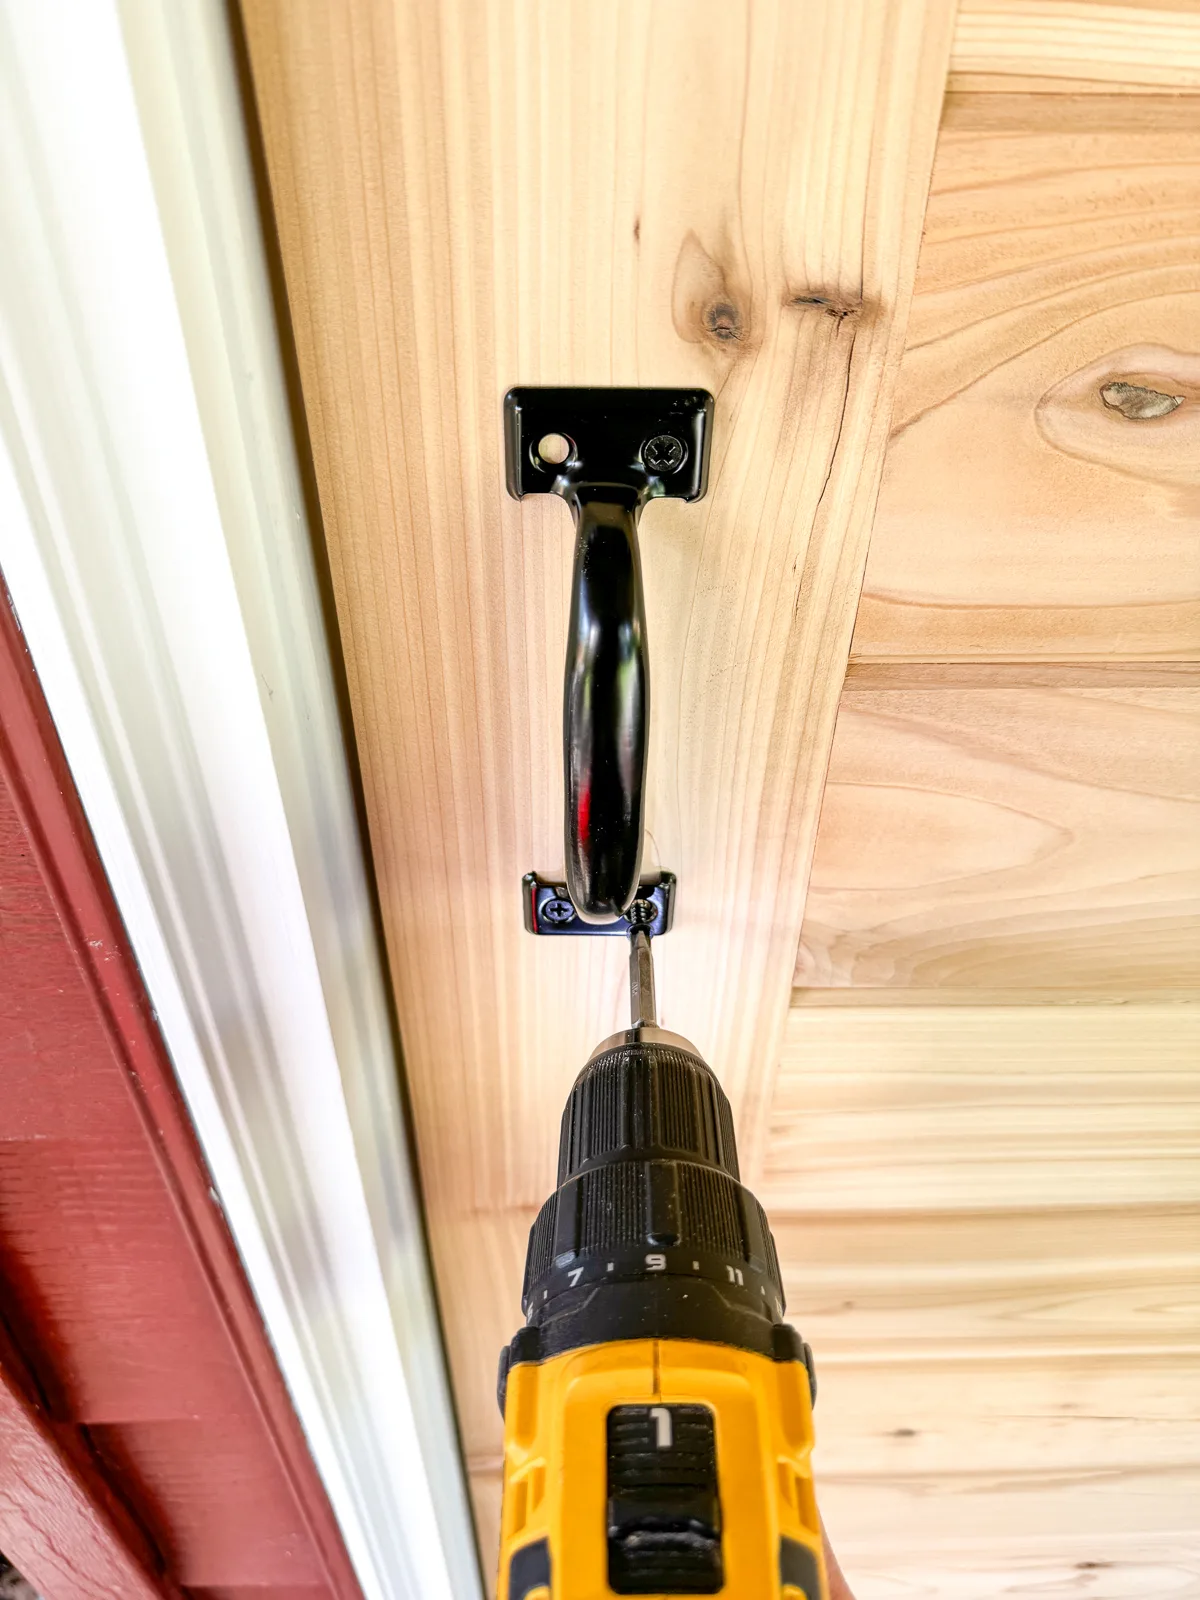
Since this door is only ¾" thick, standard door hinges are too big. Instead, I used these non-mortise door hinges that are narrow enough to fit on the side. Cedar is really light, so these hinges are plenty strong enough to hold it in place.

Instead of a door knob, I just installed a pull handle on the front. There's not really a need to lock up our shovels and rakes, and this will make it easy to grab something quickly while I'm out working in the garden.

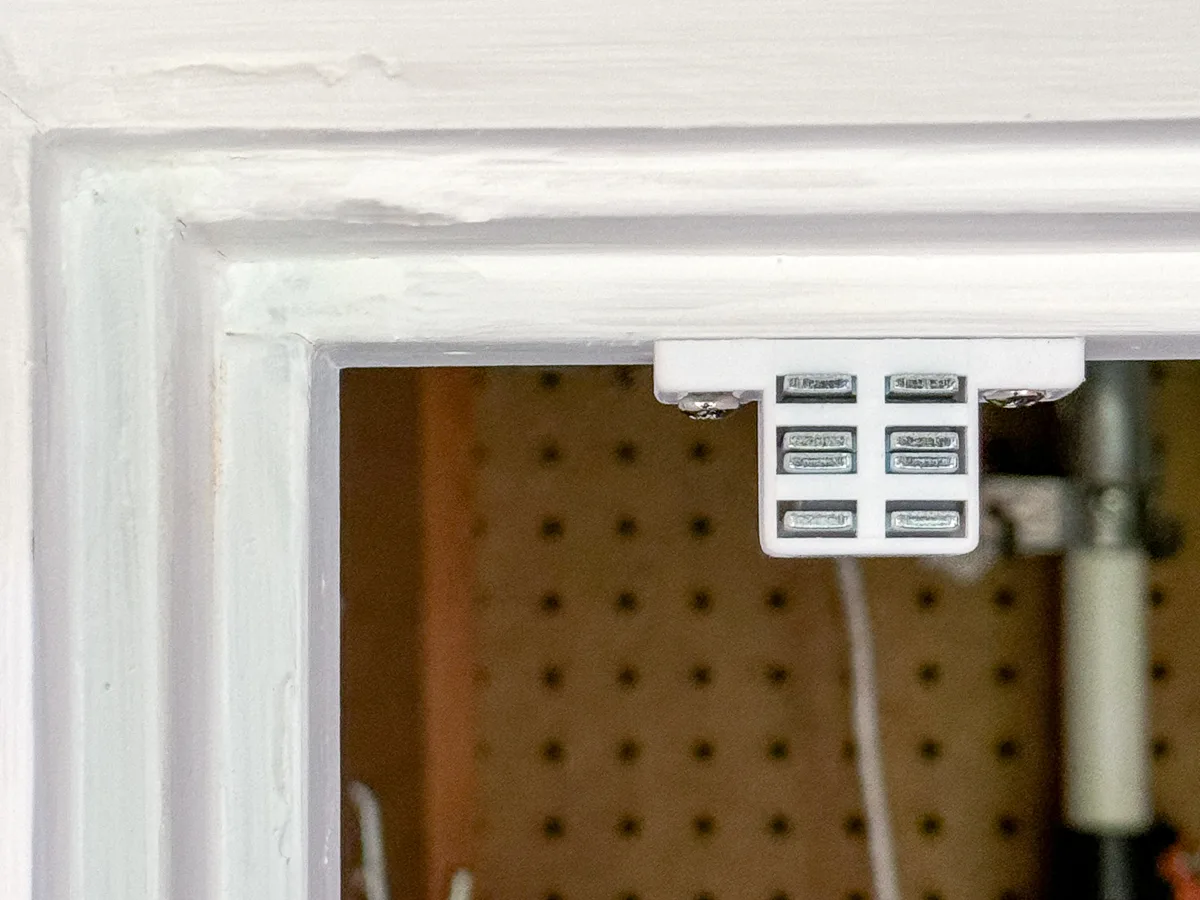
To keep the door closed, I added a heavy duty magnetic catch at the top of the door frame. It's so satisfying to hear it click into place, and it holds really well!

Now we finally have a proper door on the shed!
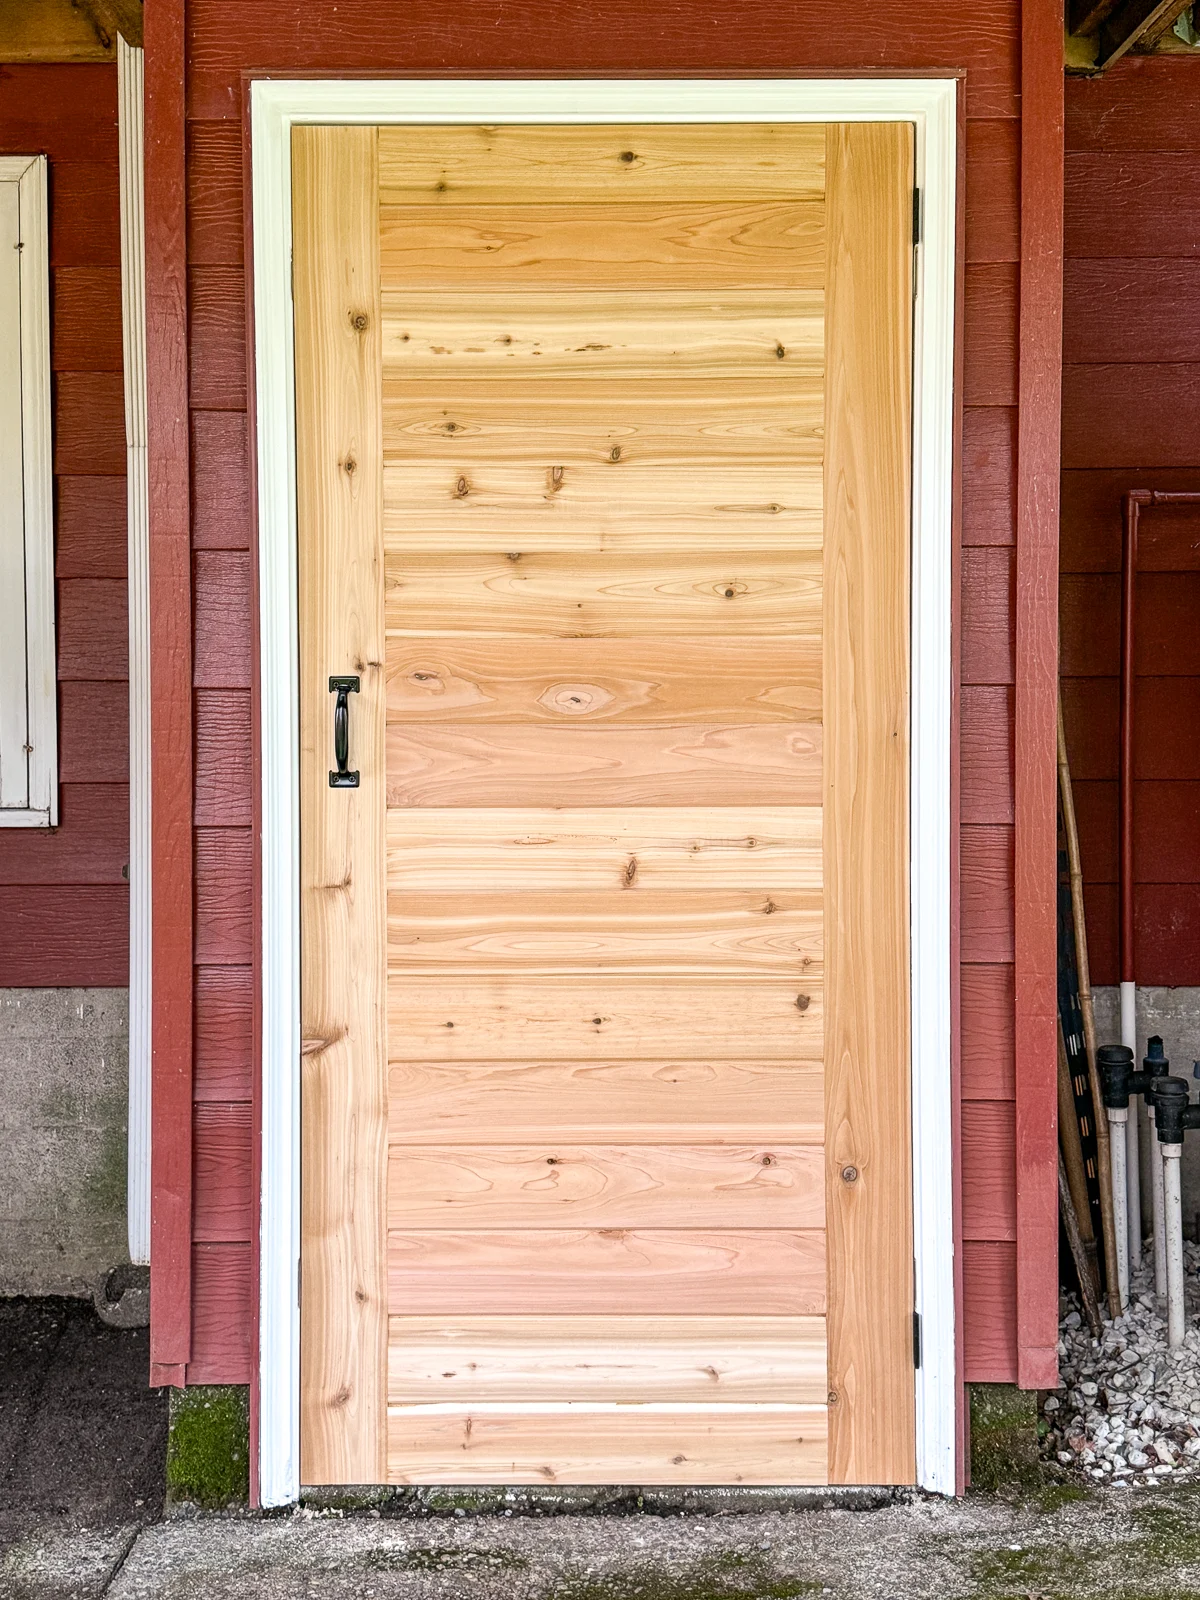
I'm so glad to have all those tools hidden away and protected from the rain. I can't believe it took me this long to do something about it!
It ties in perfectly with the bike shed doors, and the light colored wood really helps brighten up this dark space under the deck.

Now, where did I put that power washer? It's time to clean up all this moss! 🙂
Want more backyard project ideas? Check these out!