Learn how to build a workbench out of 2x4 lumber and plywood, and add custom shelves for extra storage! Get the free plans to make your own!

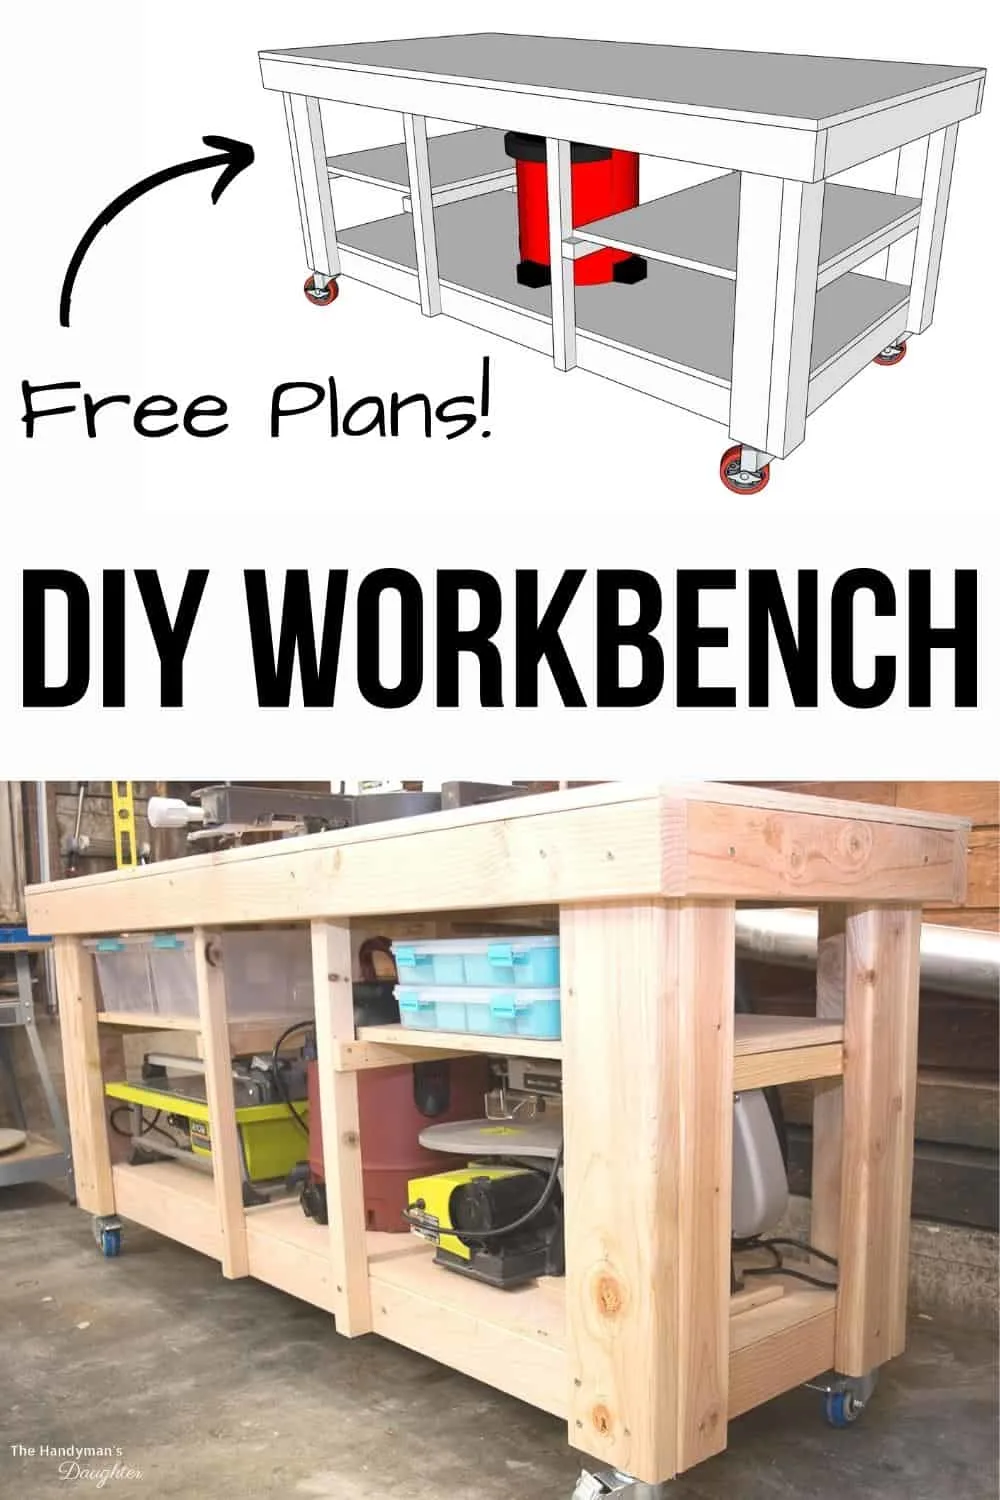
Every garage or workshop needs a basic workbench for DIY projects and convenient storage for all your tools. In this tutorial, I'll show you how to make your own DIY workbench with 2x4 lumber and plywood! It features a flat work surface on top, a large storage shelf on the bottom, plus smaller shelves on the sides!
Not quite what you were looking for? Check out these other DIY workbench plans and find one that works for you and your space!
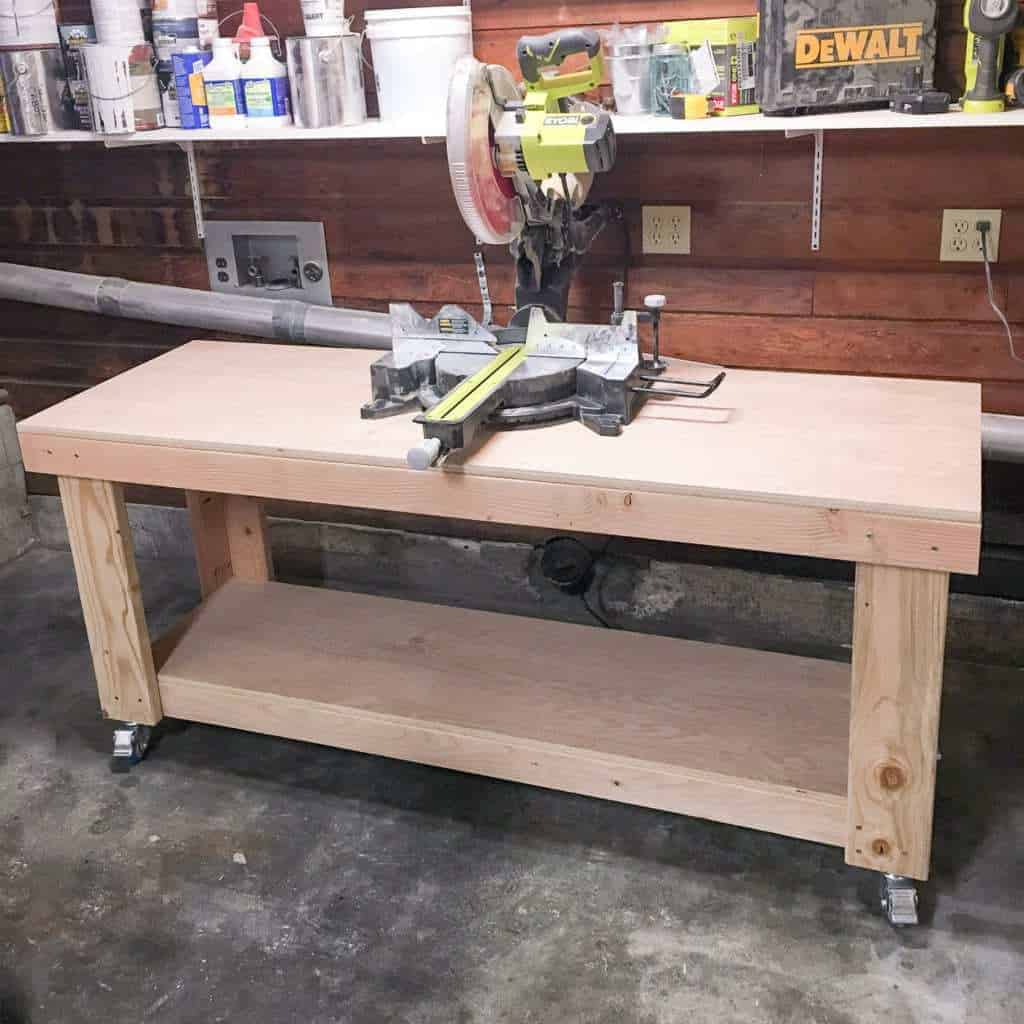
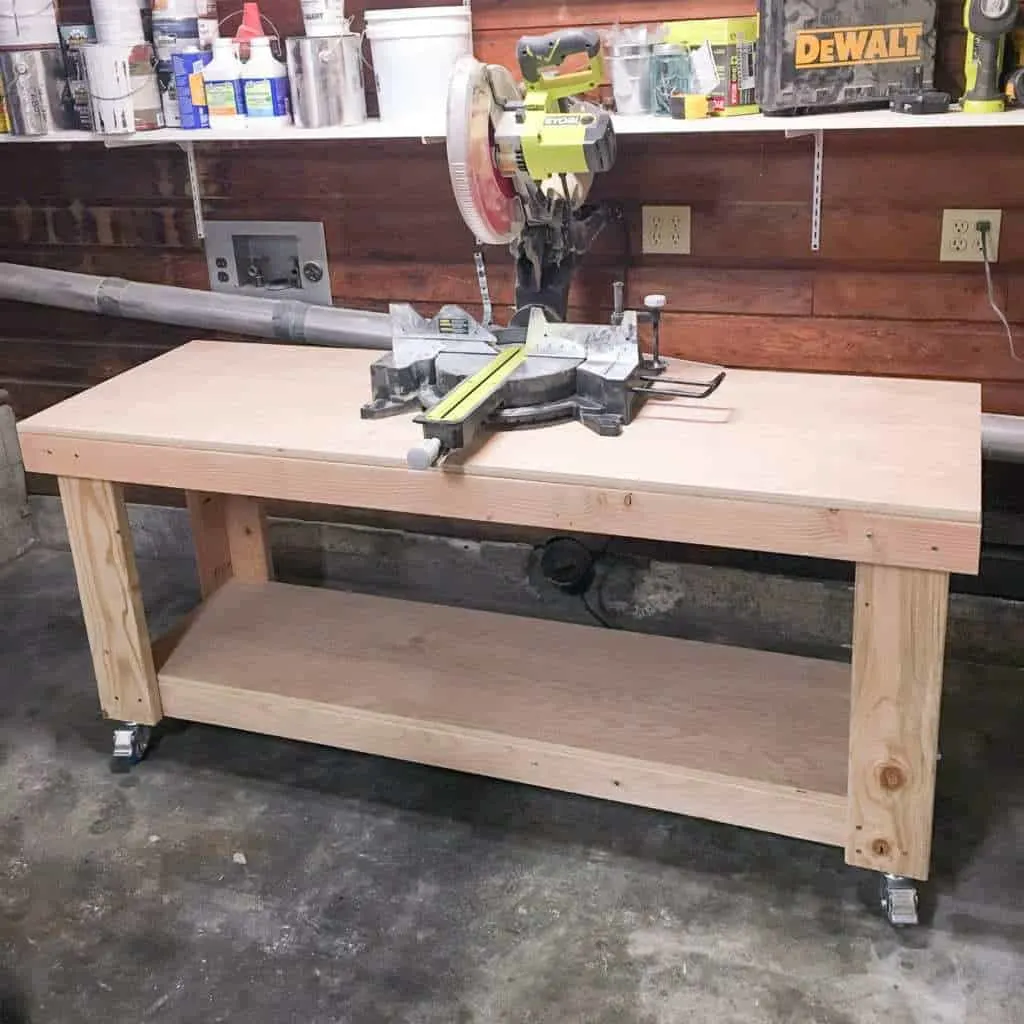
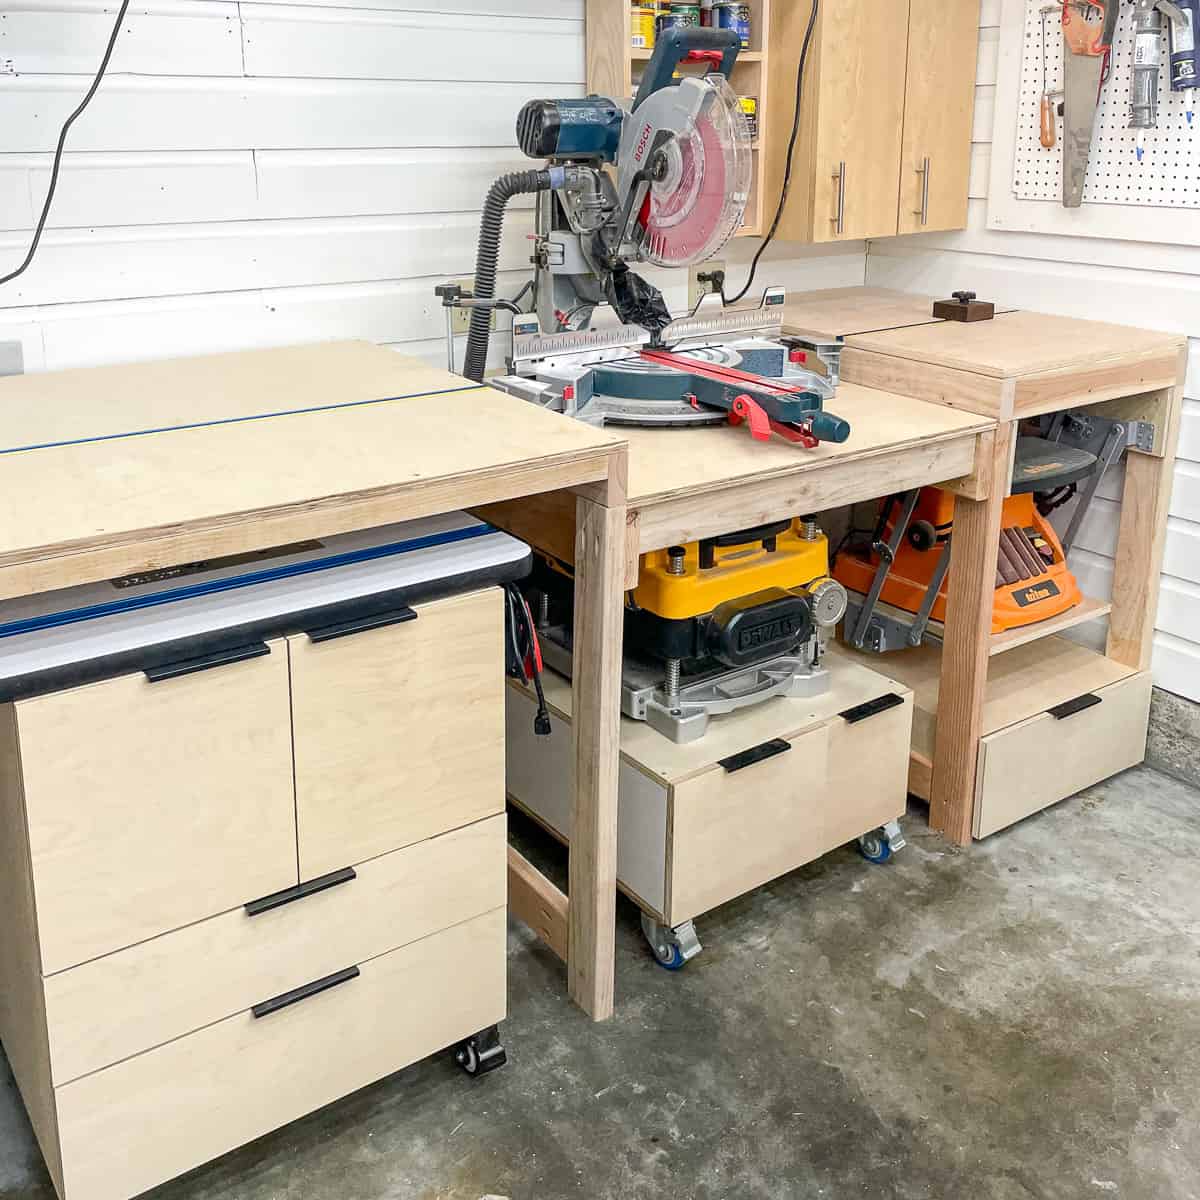
I used this simple workbench as a miter saw table for years, and it evolved over time to fit my needs. At first, I used it as a work surface for assembling woodworking projects and a convenient spot for my miter saw.
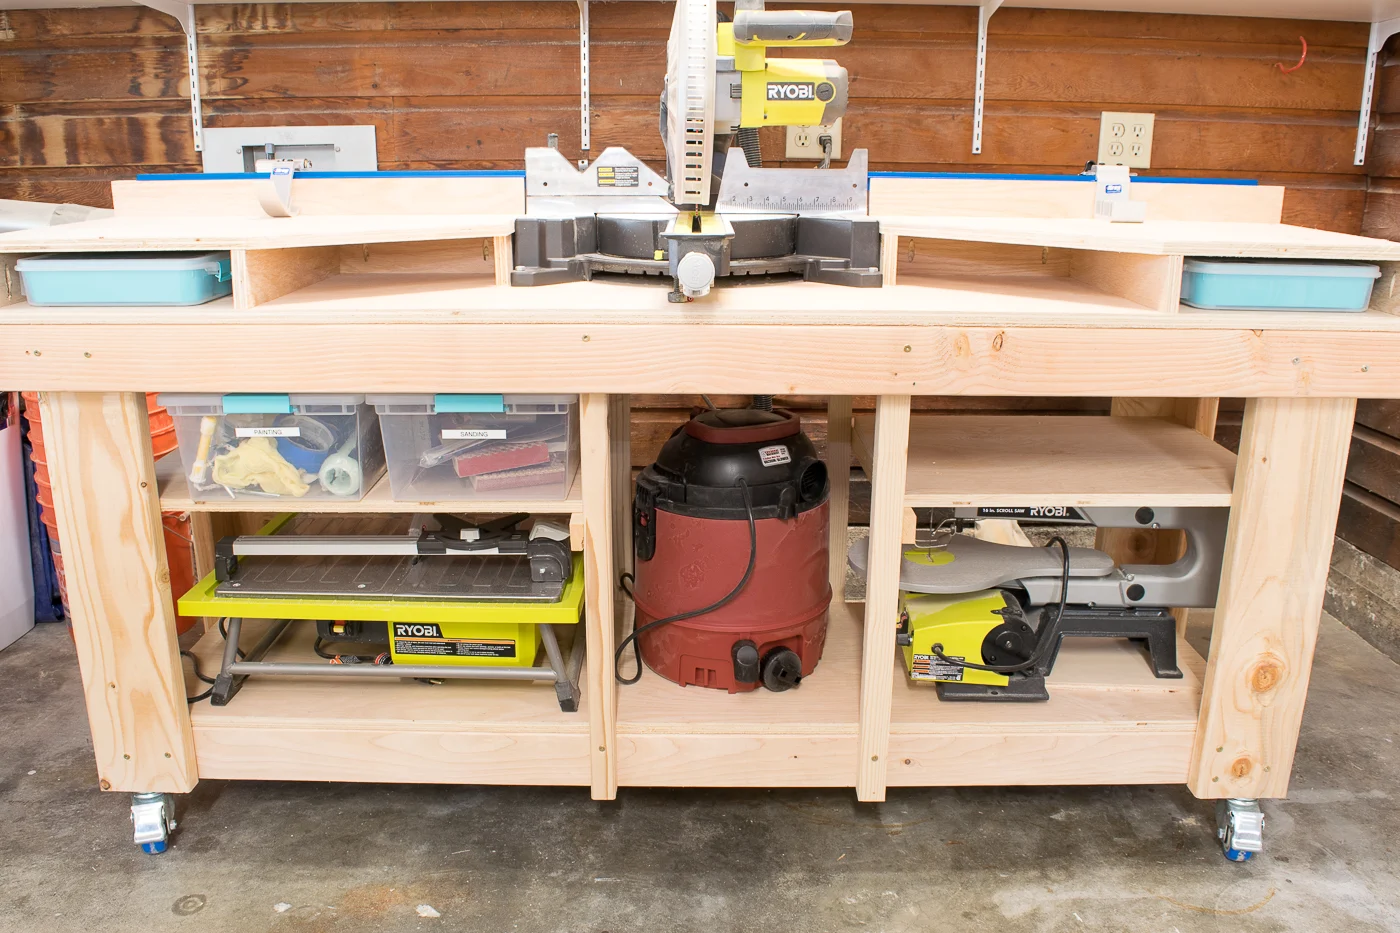
Then, I added shelves and an extended fence and a stop block system to make it easier to create repeat cuts without measuring each piece. All my assembly took place on a separate workbench with a steel frame.

Eventually, I replaced this piece with a custom miter saw station that fits in the same space. I was able to reuse a lot of the materials from the old mobile workbench to make this one! You can get the detailed instructions and plans for this project, as well as the router table stand, planer stand and tool lift stand.

But when you're just starting out, a sturdy workbench like this one is all you really need. It's a great beginner woodworking project that only requires basic tools to make. Let's get started!
This post contains affiliate links for your convenience. Purchases made through these links may earn me a small commission at no additional cost to you. Please visit my disclosures page for more information.
Materials needed for DIY workbench
- Nine 2x4 boards
- Three 2x2 boards
- Two sheets of ¾" plywood
- 2 ½" pocket hole screws
- 2 ½" wood screws
- 1 ¼" wood screws
- Countersink bit
- Wood glue
- Pocket hole jig
- Drill
- Miter saw or circular saw
Don't forget your safety gear when woodworking! Here are my recommendations for safety glasses and ear protection. No excuses!
How to build a simple workbench
Download the free woodworking plans
Before you start, download the FREE woodworking plans for this DIY workbench by clicking here. These printable plans include a cut list and cut diagrams, 3D models of each step, and detailed instructions in a checklist format so you can keep track of your progress!
Assemble the top and bottom frames
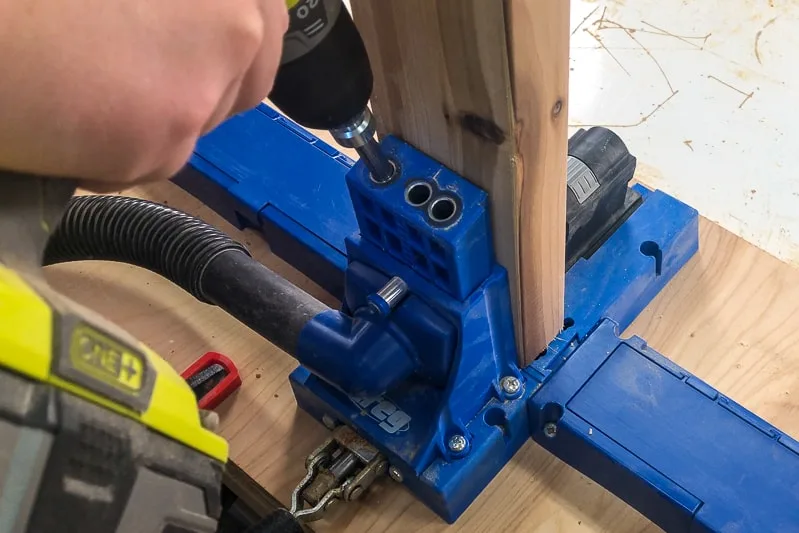
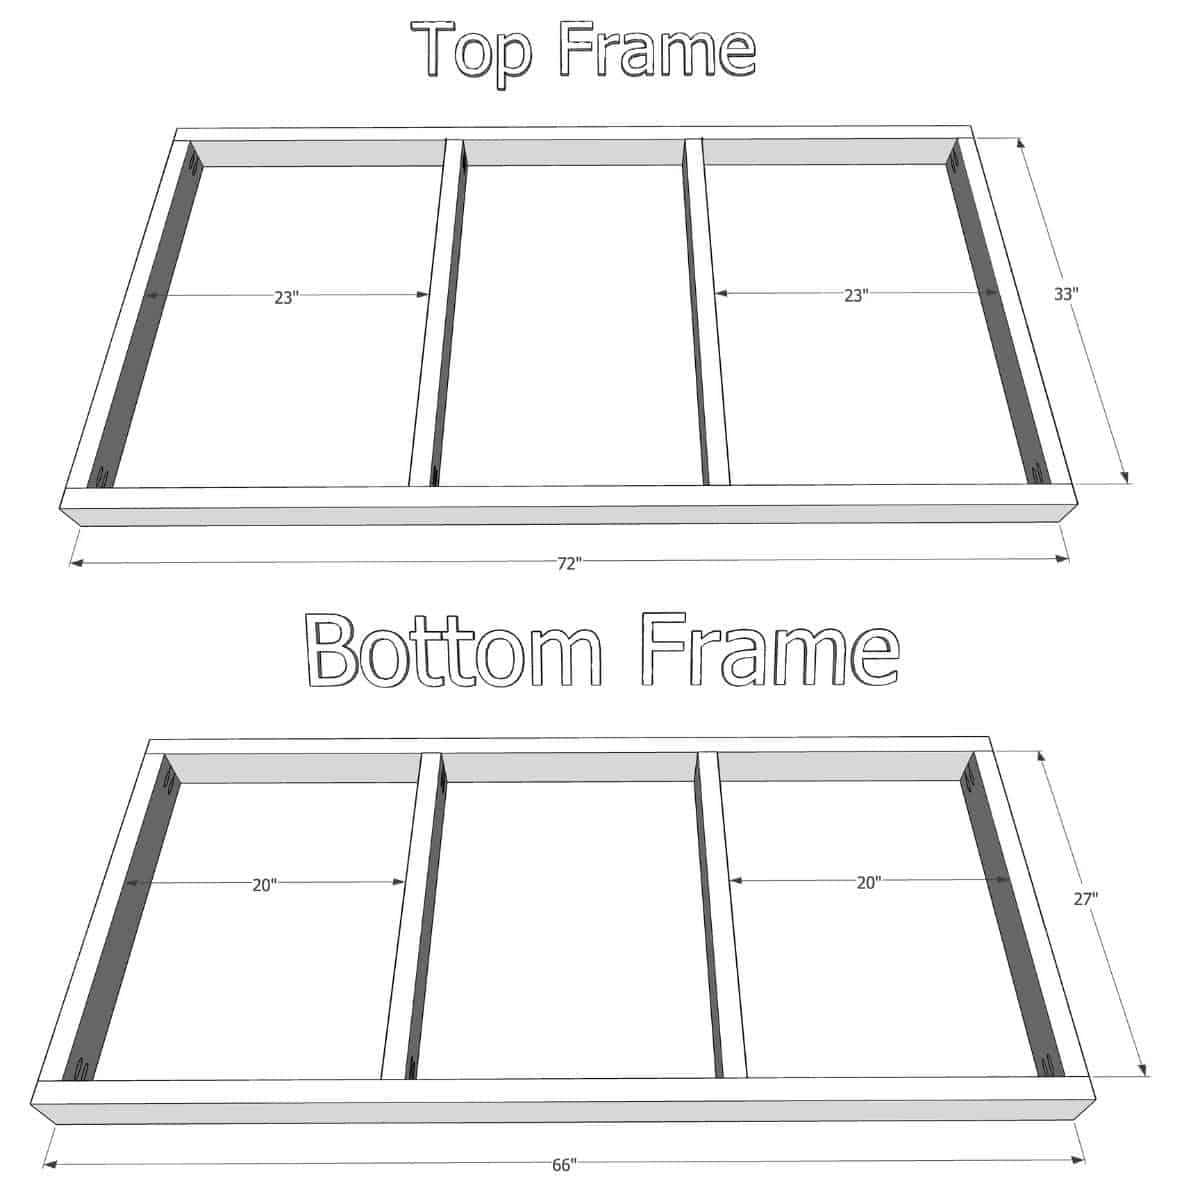
Cut the 2x4 lumber for the frames according to the cut list in the woodworking plans. Drill two pocket holes in both ends of all the shorter pieces. I used a Kreg Jig K5 for this, but you could also just screw through the frame and into the end grain of the shorter pieces. However, it wouldn't be quite as sturdy and you'd have visible screws everywhere.

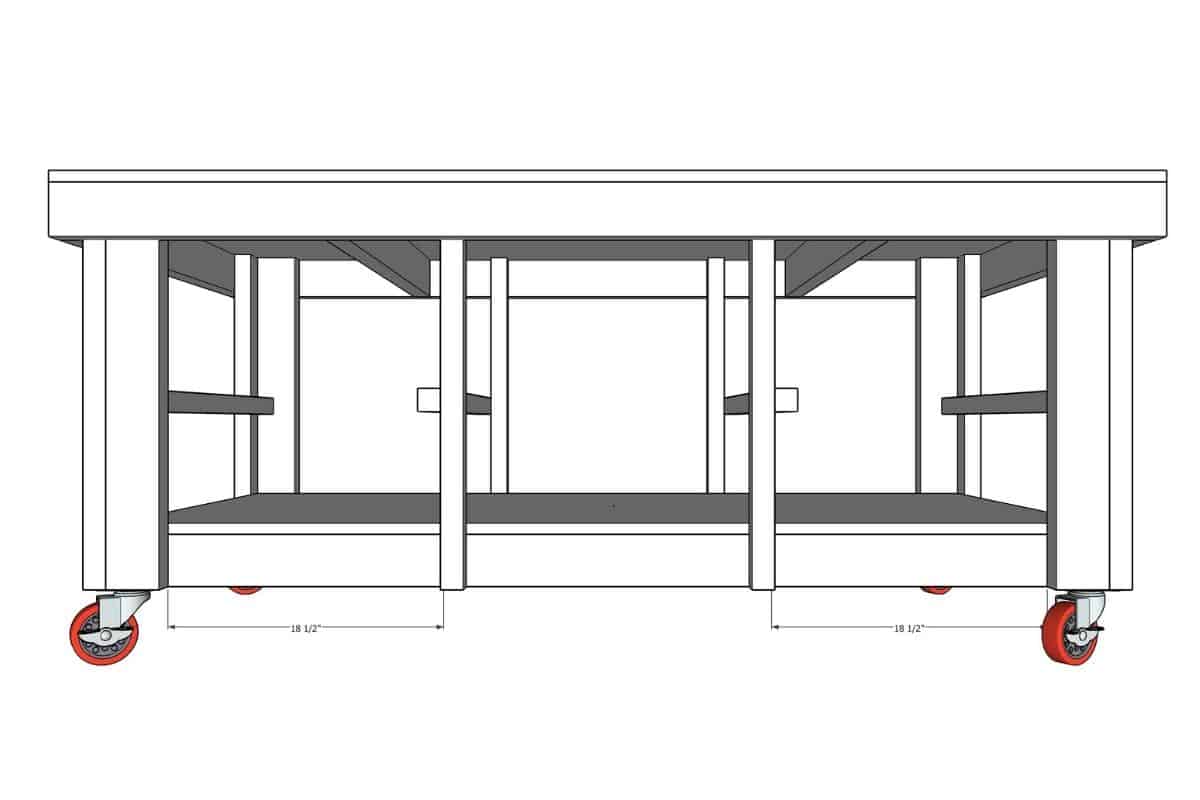
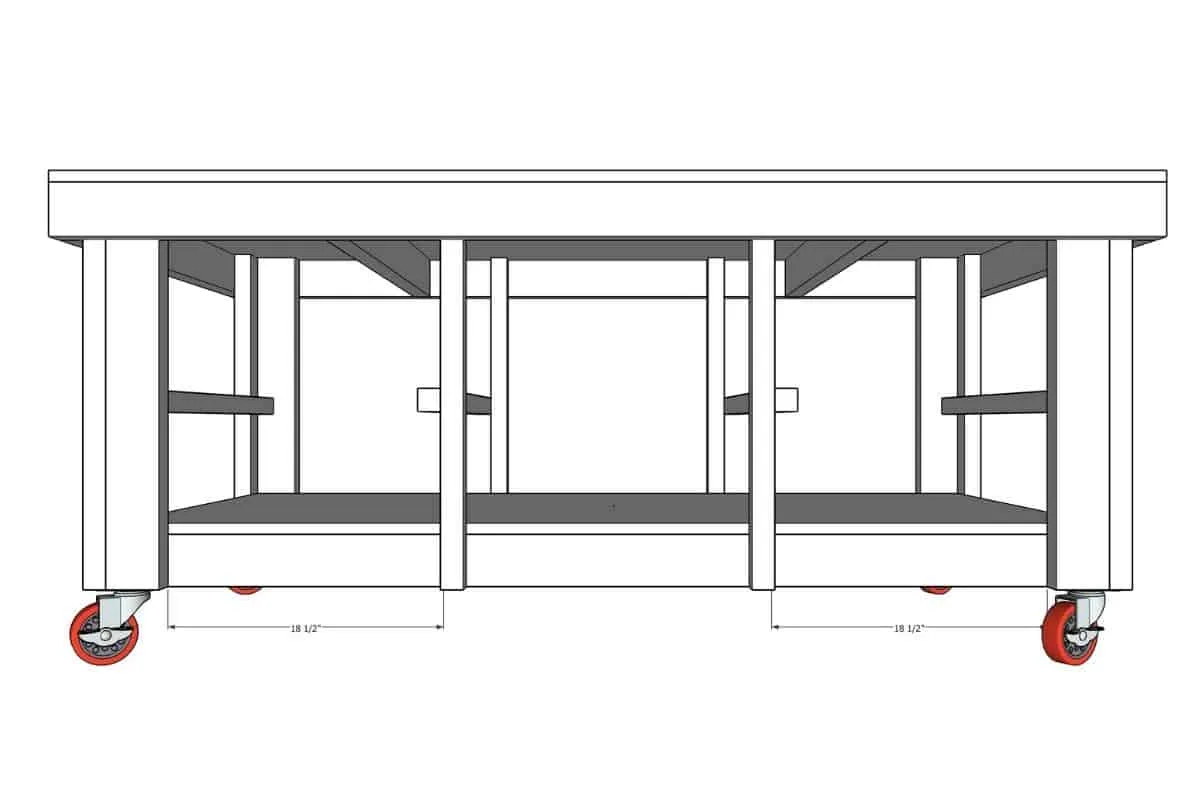
The top frame fits around the outside of the legs, while the bottom frame sits inside them. Attach the front and back to the sides with 2 ½" pocket hole screws, then divide the rest into thirds for two center supports.

Assemble the workbench legs
I originally made the legs out of 2x6 and 2x4 boards, but the chunkier lumber wasn't really necessary. Your workbench will be plenty sturdy with just two 2x4s joined together to form an L shape.
Drill pocket holes along the length of one 2x4 piece, then attach it to the other with wood glue and 2 ½" pocket hole screws.

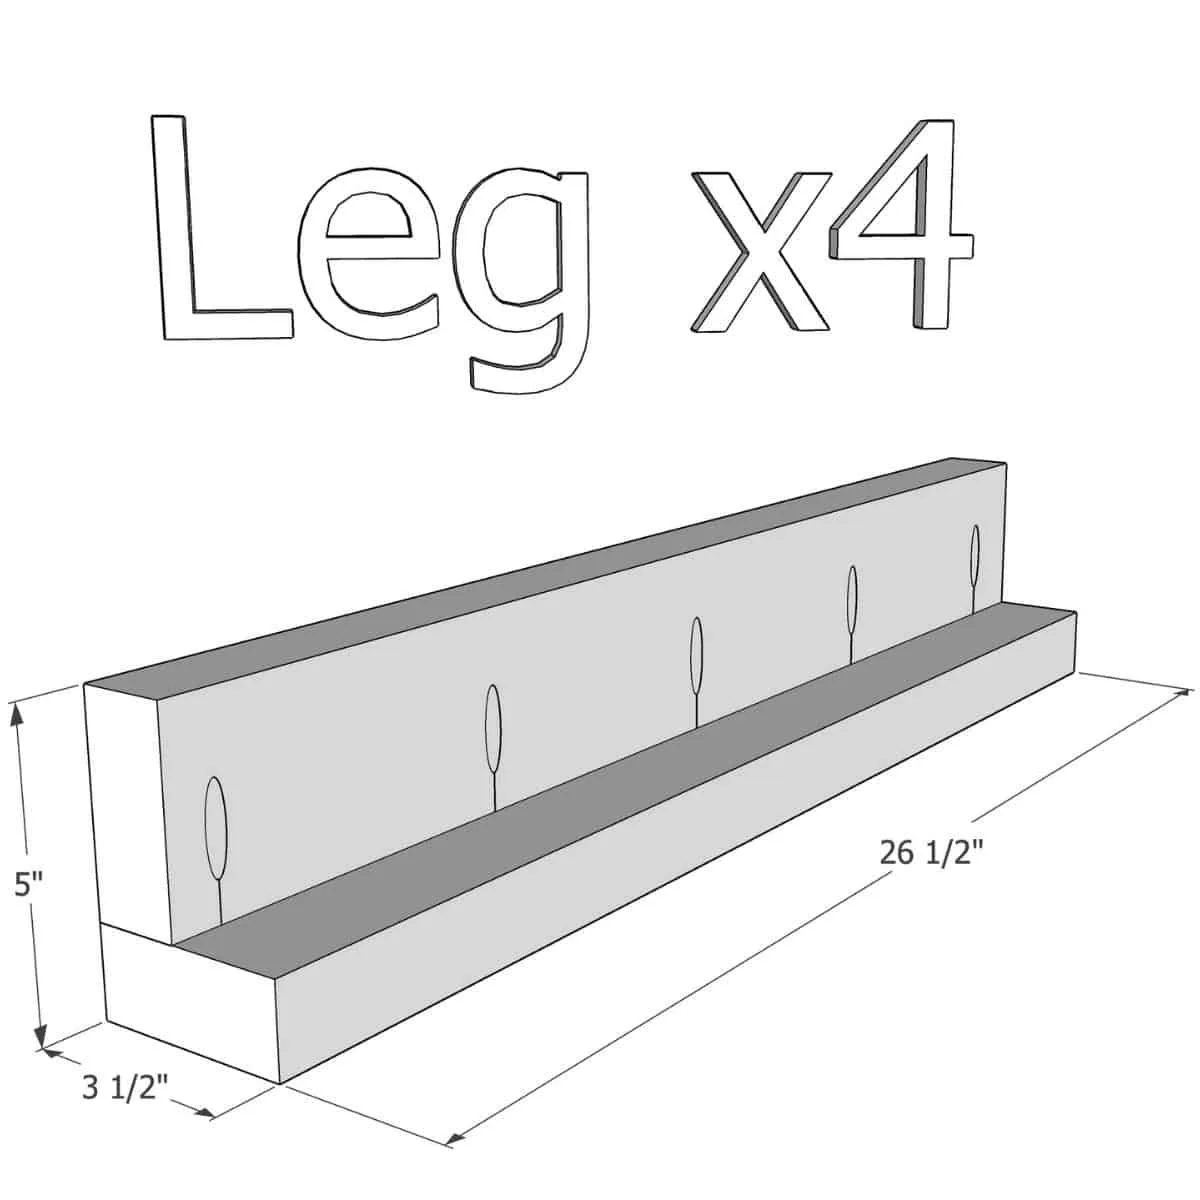
You can adjust the length of the legs to accommodate your height, or install casters to make this a mobile workbench. I used these casters, which add 4" to the total height. My workbench ended up being just over 31" tall, which is less than countertop height but makes it more comfortable to use a miter saw.
Attach the legs to the bottom frame
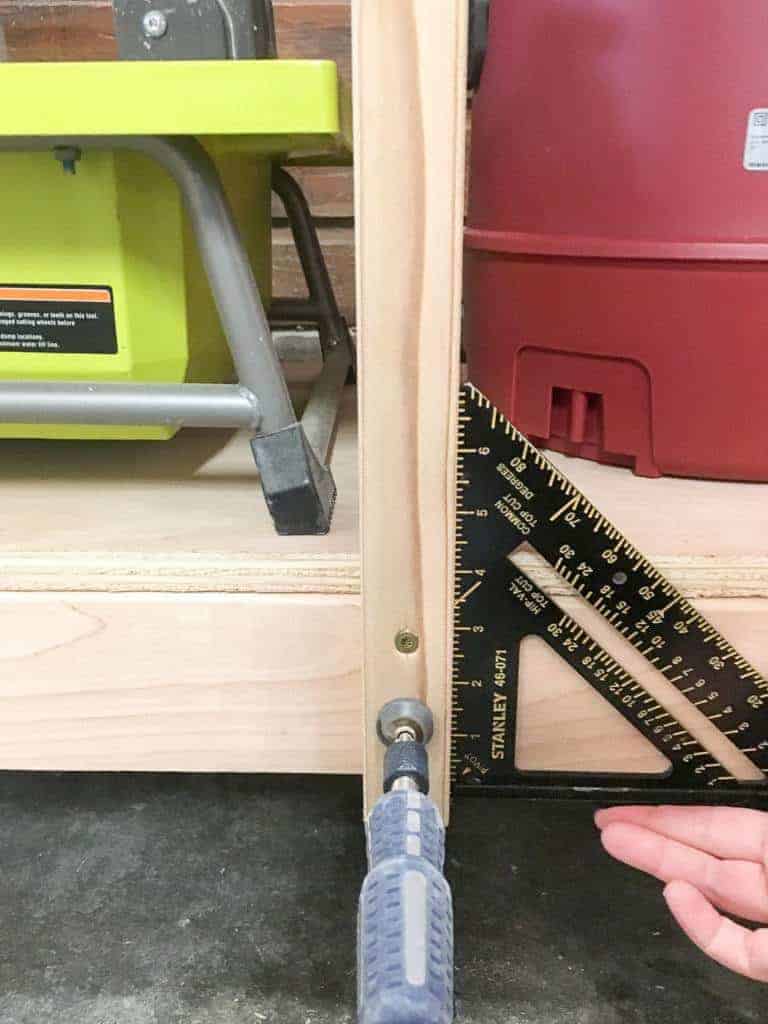
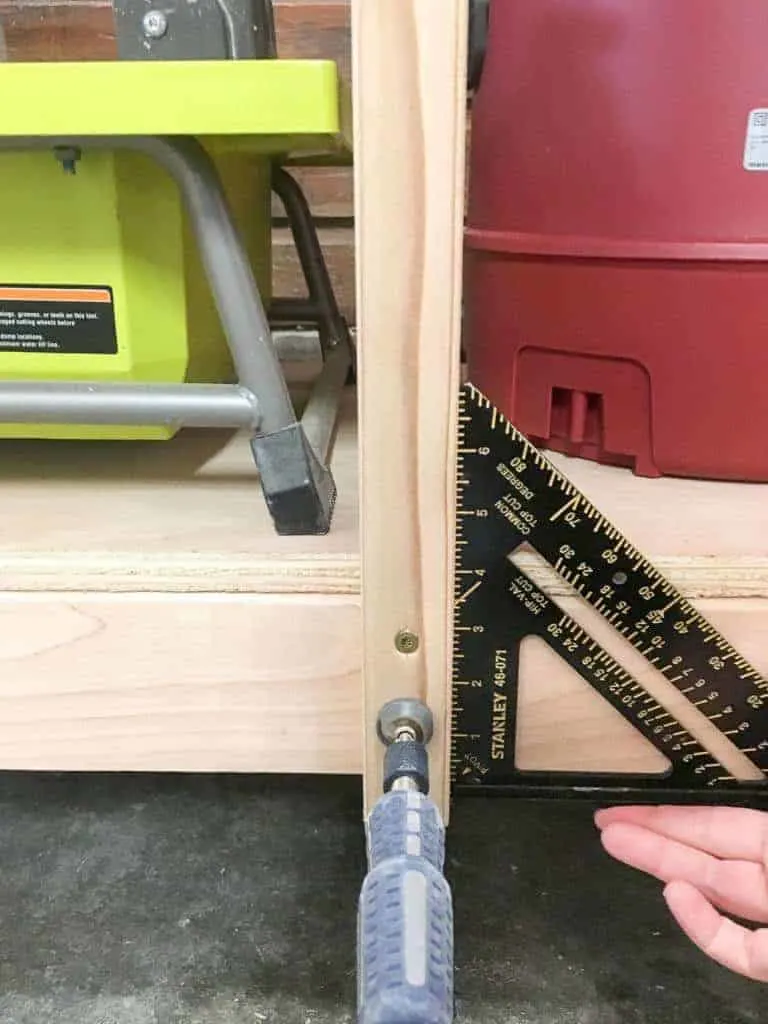
Set the assembled bottom frame on the floor. Place the legs outside the four corners, with the wider side on the front and back. Clamp them into place, check for square, then attach the legs to the frame with 2 ½" wood screws.
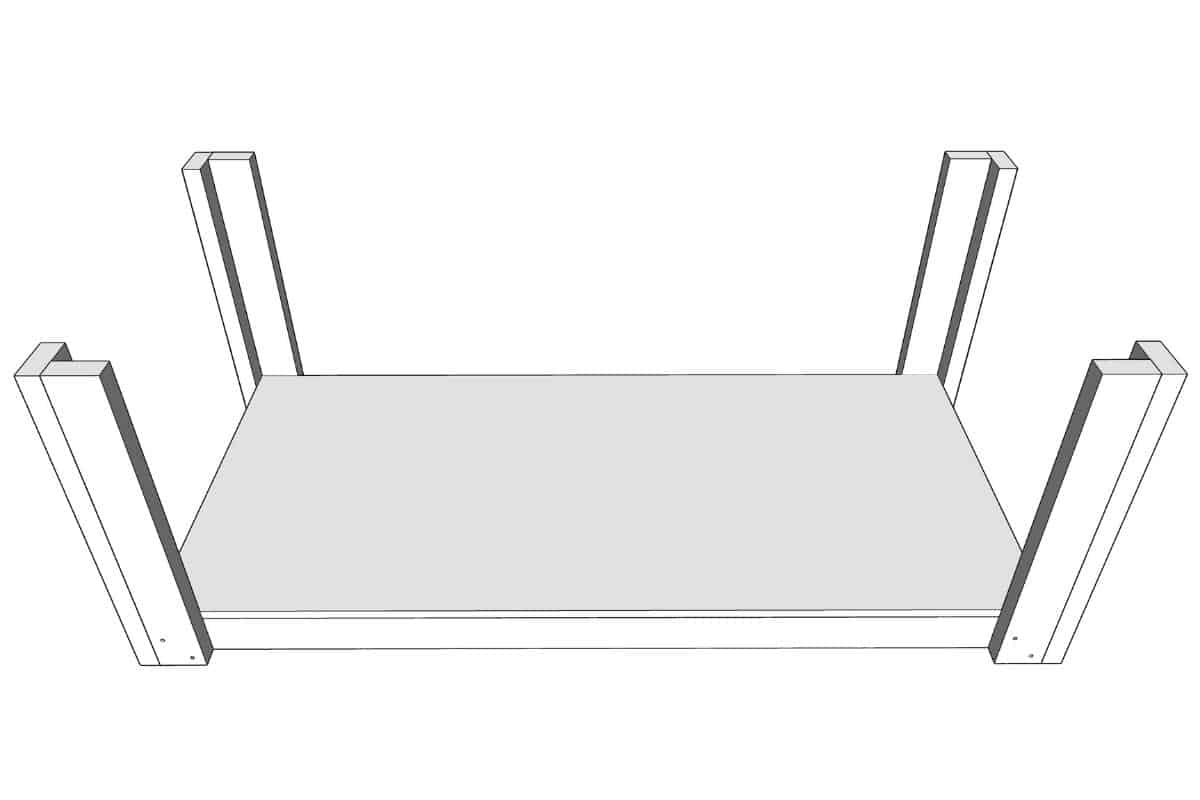
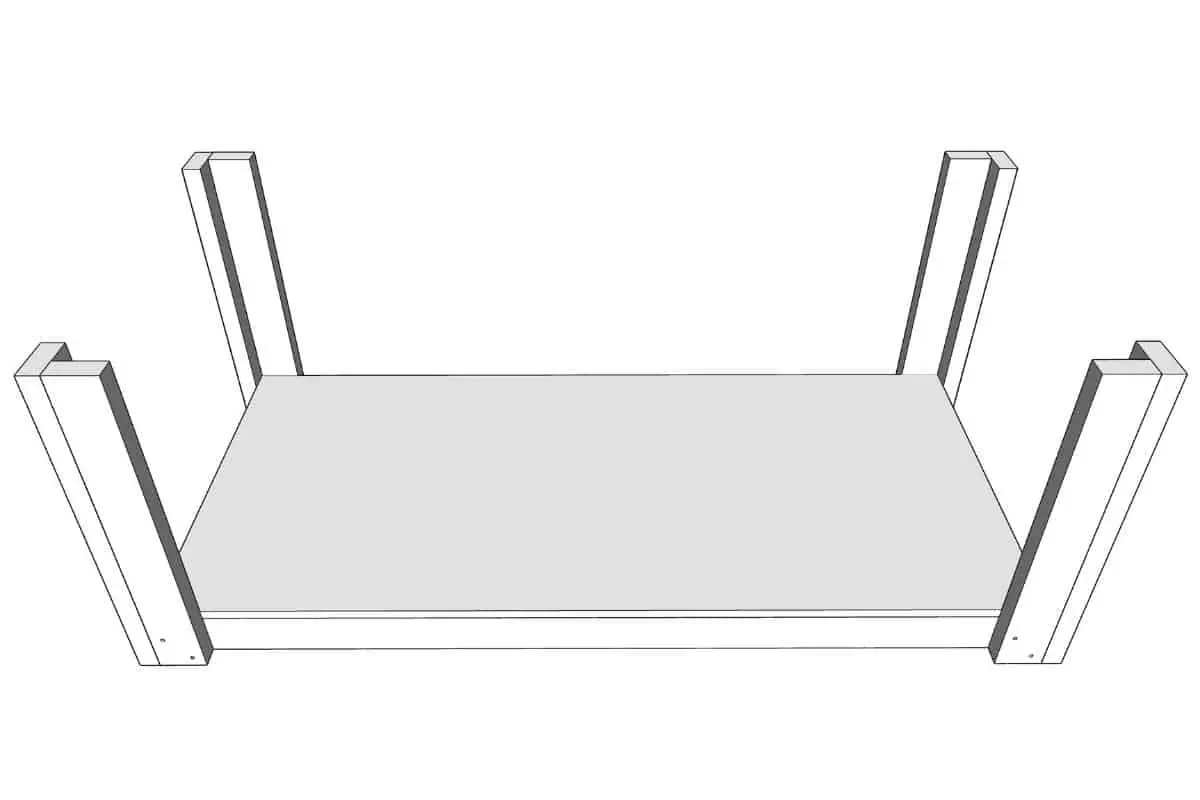
Once the legs are in place, cut a sheet of ¾" plywood to fit the bottom shelf. You can screw it down with 1 ¼" wood screws, nail it with a brad nailer or finish nailer, or just leave it as is. The legs should hold it in place, but you may want to tack it down if the plywood has any bowing or warps.
Attach the workbench top to the legs
The plywood for the workbench top should be attached to the frame with 1 ¼" wood screws. Consider countersinking the screws so the heads don't interfere with the work surface. Using screws instead of nails or glue will allow you to replace the top when it gets covered with paint, saw marks or holes.
You can make the plywood top bigger than the frame to give yourself an overhang for easier clamping around the outside edge. I cut mine flush with the edges, since I have a t-track table for assembly and I'm using this workbench as a miter saw table.
Once the plywood is attached, you can rest the entire top over the legs and screw it into place with 2 ½" screws. It should look something like this...

If you want to add casters to make a mobile workbench, now is the time to attach them. Tip the workbench onto its side, then screw the casters into the bottom of all the legs.
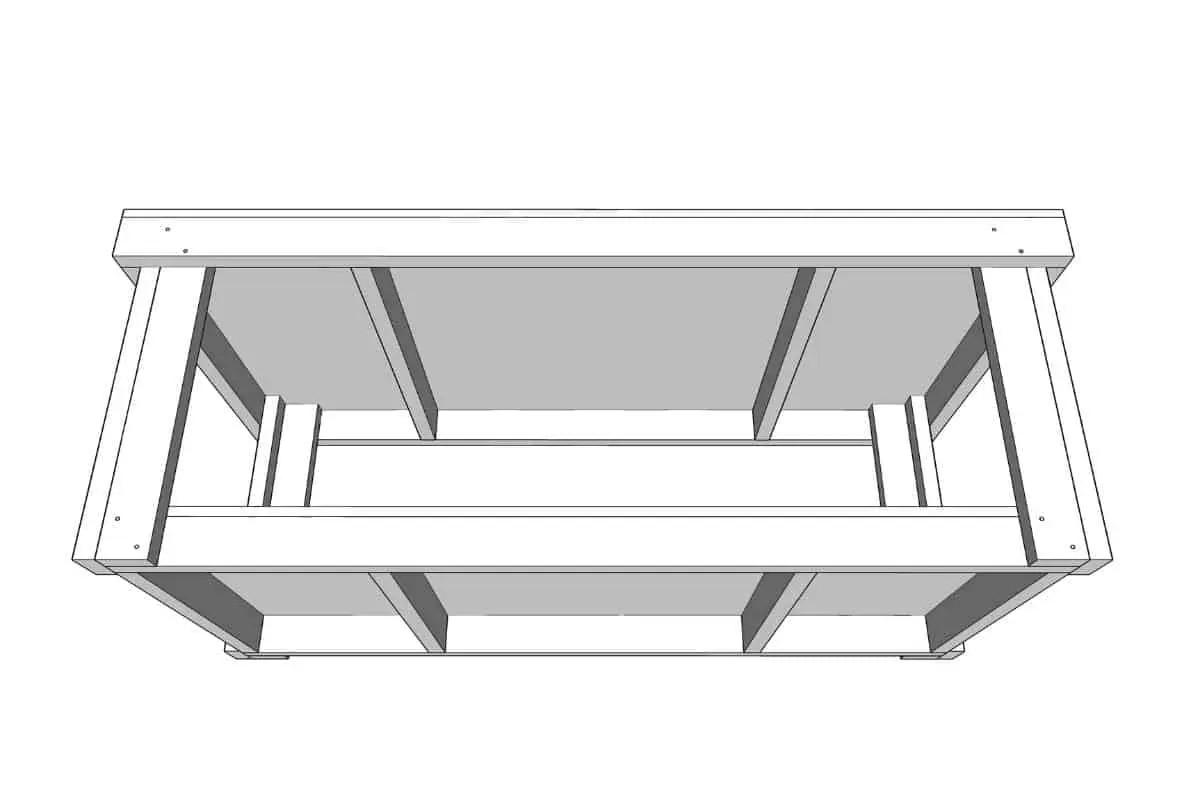
Add storage shelves
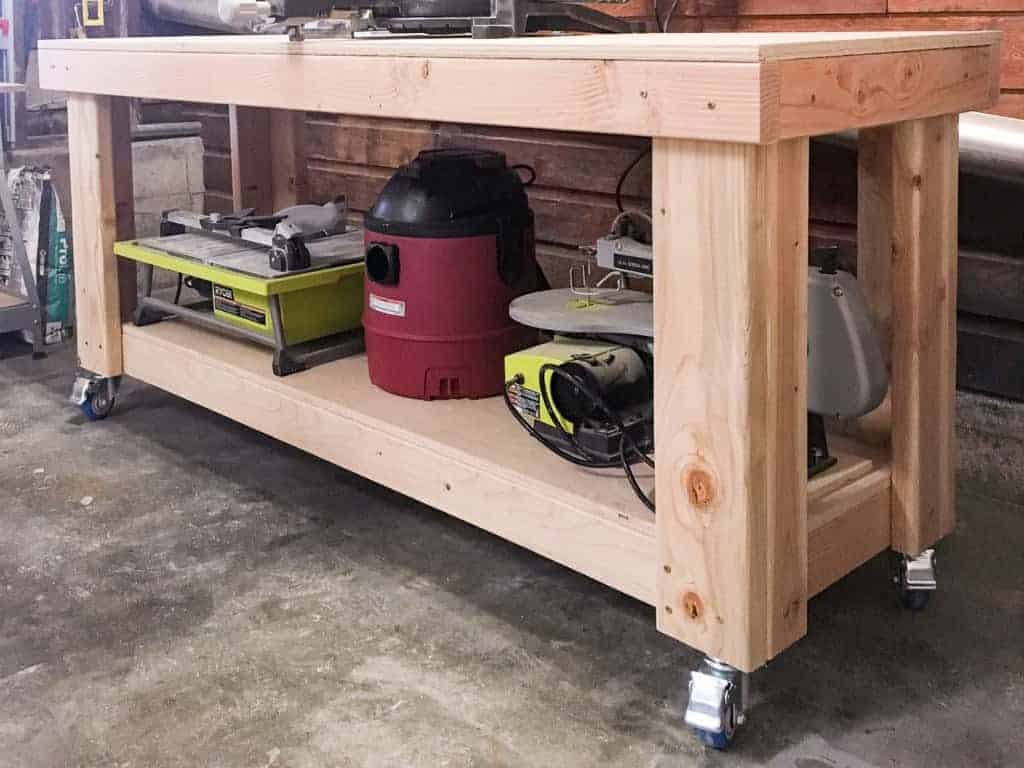
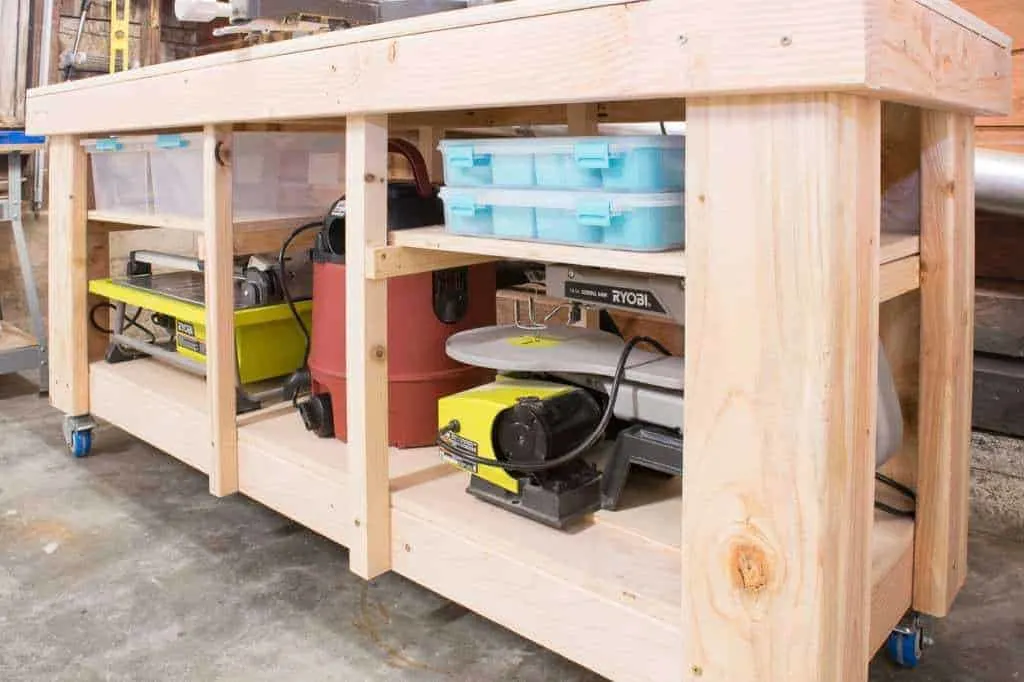
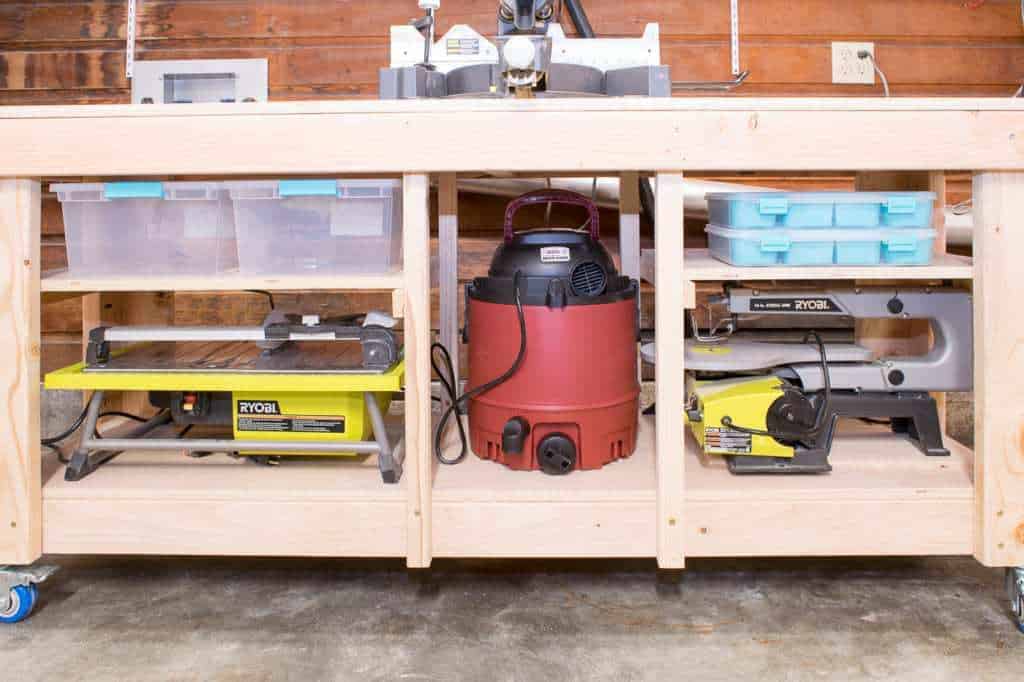
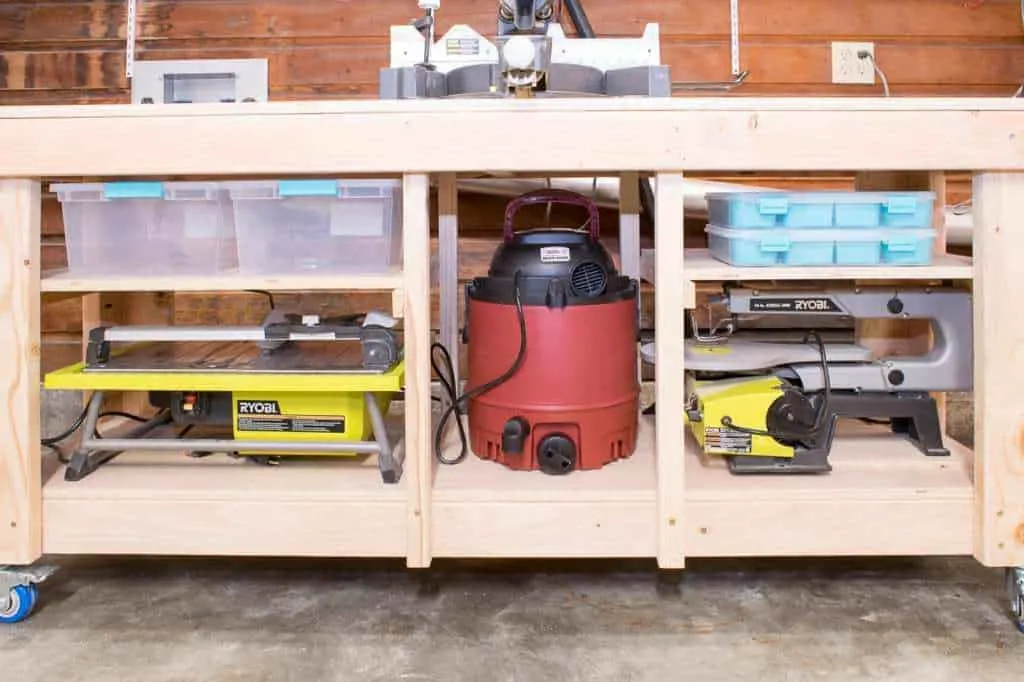
While you could leave the bottom shelf as is, there's a lot of wasted vertical space down there! I recommend placing the bigger tools you plan to store on the shelf first, then customizing the upper shelves to fit.
Both the shop vac and the miter saw will be plugged into an iVac automatic switch. When the saw turns on, the shop vac does too! Miter saw dust collection can be quite a challenge, but at least I won't forget to turn on the vacuum every time!
The shop vac fits perfectly on the bottom shelf, with my tile saw and scroll saw on either side. Take measurements of the width and height of the tools on either side before making the shelves.

Cut four 2x2 pieces to the same length as your workbench legs. Attach these vertical supports to the top frame from the inside, and the bottom frame through the front. Clamp them into place and check for square before securing them with 2 ½" screws.
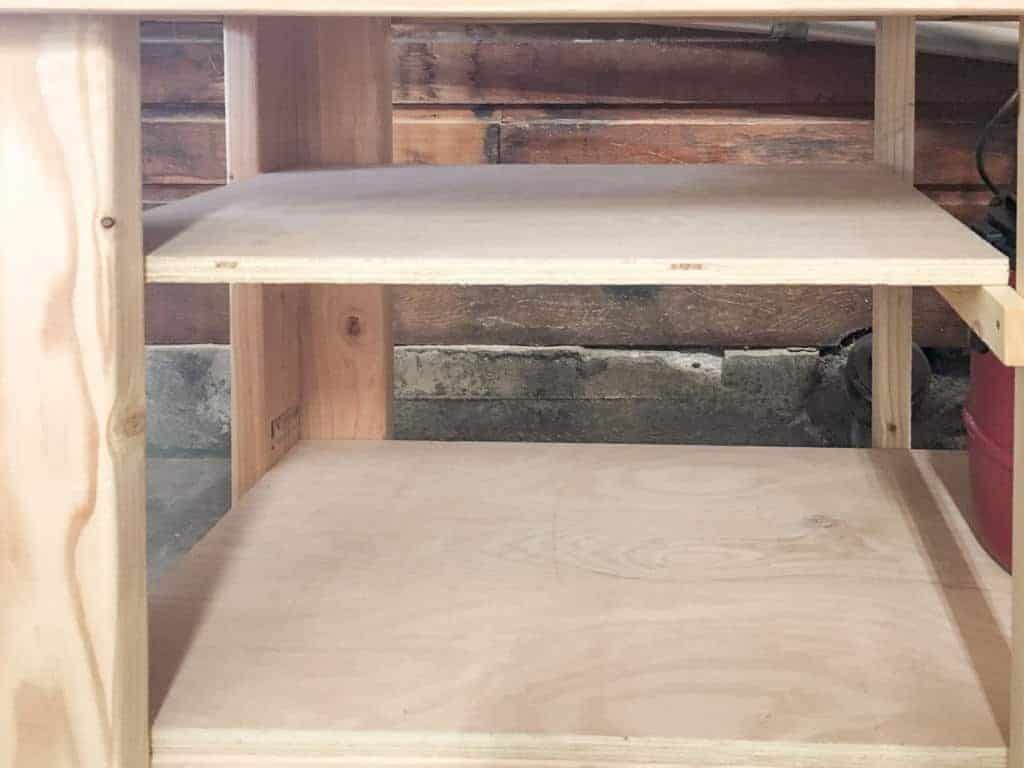
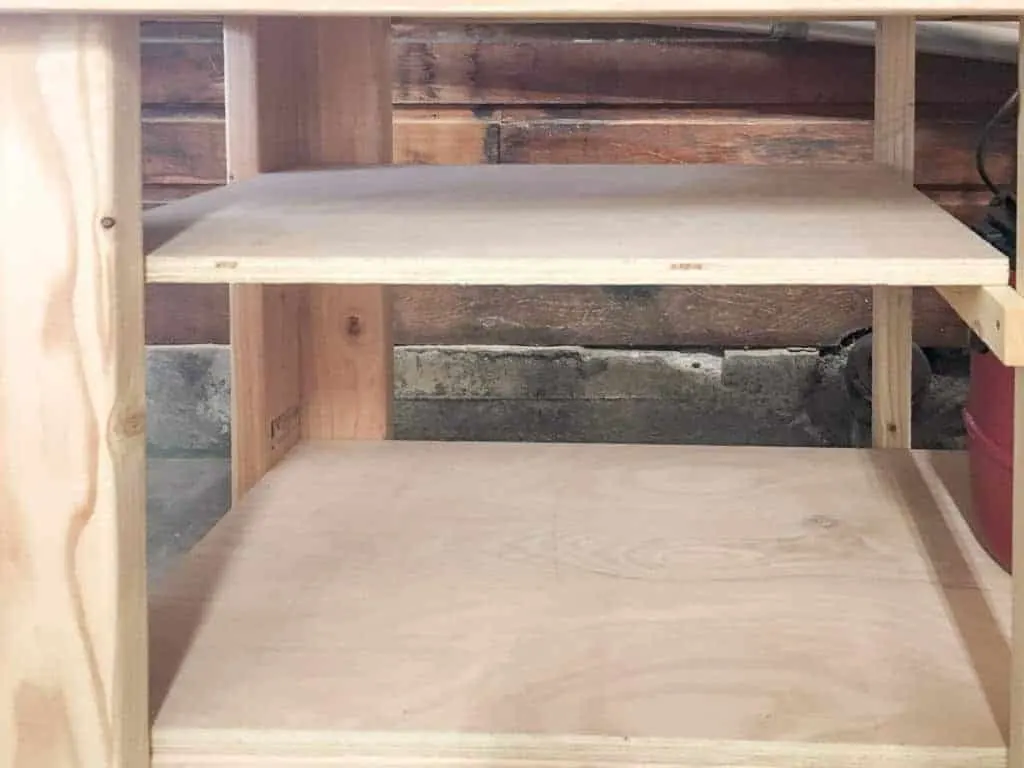
Next, measure the span from front to back of the vertical supports and between the legs at the sides, then cut the 2x2 shelf supports to fit. These pieces are installed just above the height of the tools on the bottom shelf.
Cut a piece of ¾" plywood to fit on top of the supports. I left them loose rather than nail them down, so the shelves will be easier to move if I change up the tools underneath and need more space. You can notch out the corners and make the shelves a little bigger, but I didn't want to get out the jigsaw!
Finally, it's time to load up my new DIY workbench! These plastic bins fit perfectly on the side shelves. They were quickly filled with all the random stuff that don't have a home elsewhere in the workshop.

This sturdy workbench is perfect for any garage or shed! Don't forget to download the free woodworking plans to make your own this weekend!
Check out these other workshop ideas
Greg Nowak
Monday 27th of March 2017
Hi Vineta. I am first time visitor here on hour beautiful site. I was searching for stand ideas for my own little workshop. I have to say I liked the original stand, but with thise added shelves you pimped it up even better. I am going to give it a try, although I have to admit that I am not yet as skilled as you and hope that I won't be disappointed with my result :) anyway thank you and happy cutting
Anika
Friday 10th of February 2017
Great idea Vineta!! I have a very similar workbench that holds the miter saw... it has a lot of wasted vertical space between the shelves... I should do this soon too... thanks for the idea!!
Janice@sawdustsisters
Friday 10th of February 2017
Vineta this is amazing! Shared on FB too!
Susanne
Friday 10th of February 2017
I am impressed with your skill Veneta!!! Boy I wish my hubby would let me use the power tools, lol
Toni | Small Home Soul
Thursday 9th of February 2017
This is brilliant! I need to get something like this in our garage so we can leave the saws out for easy access. I bet you will be even more productive than you already are. Great job, you continue to inspire me!
Vineta
Friday 10th of February 2017
Aw, thanks Toni! I'm looking forward to building more projects without those extra tools underfoot all the time!