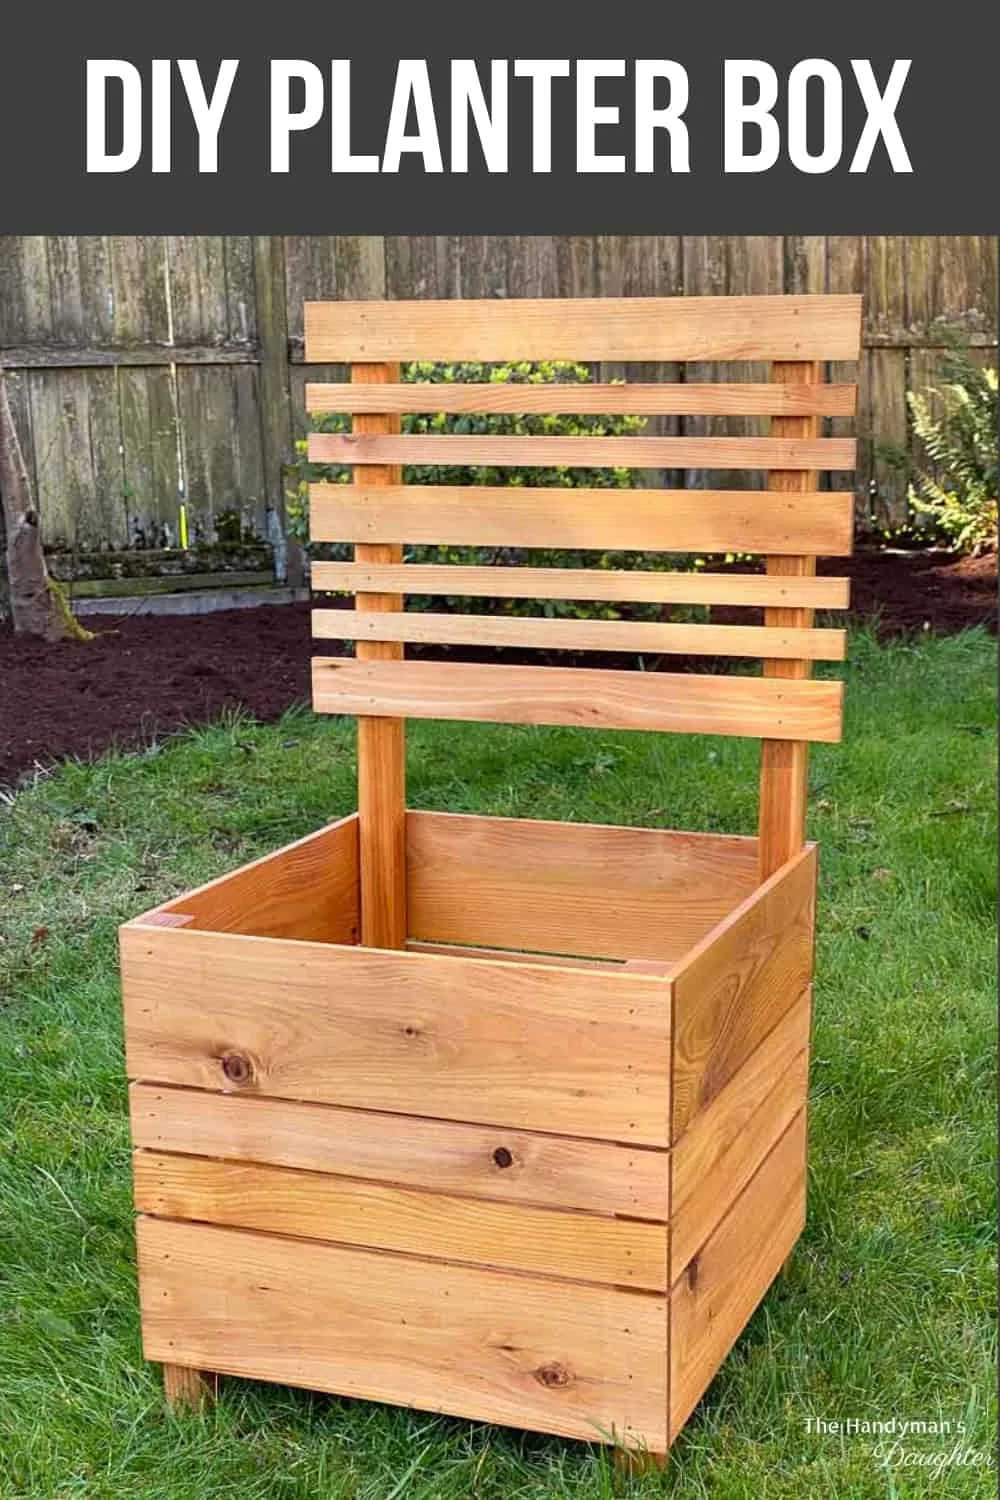
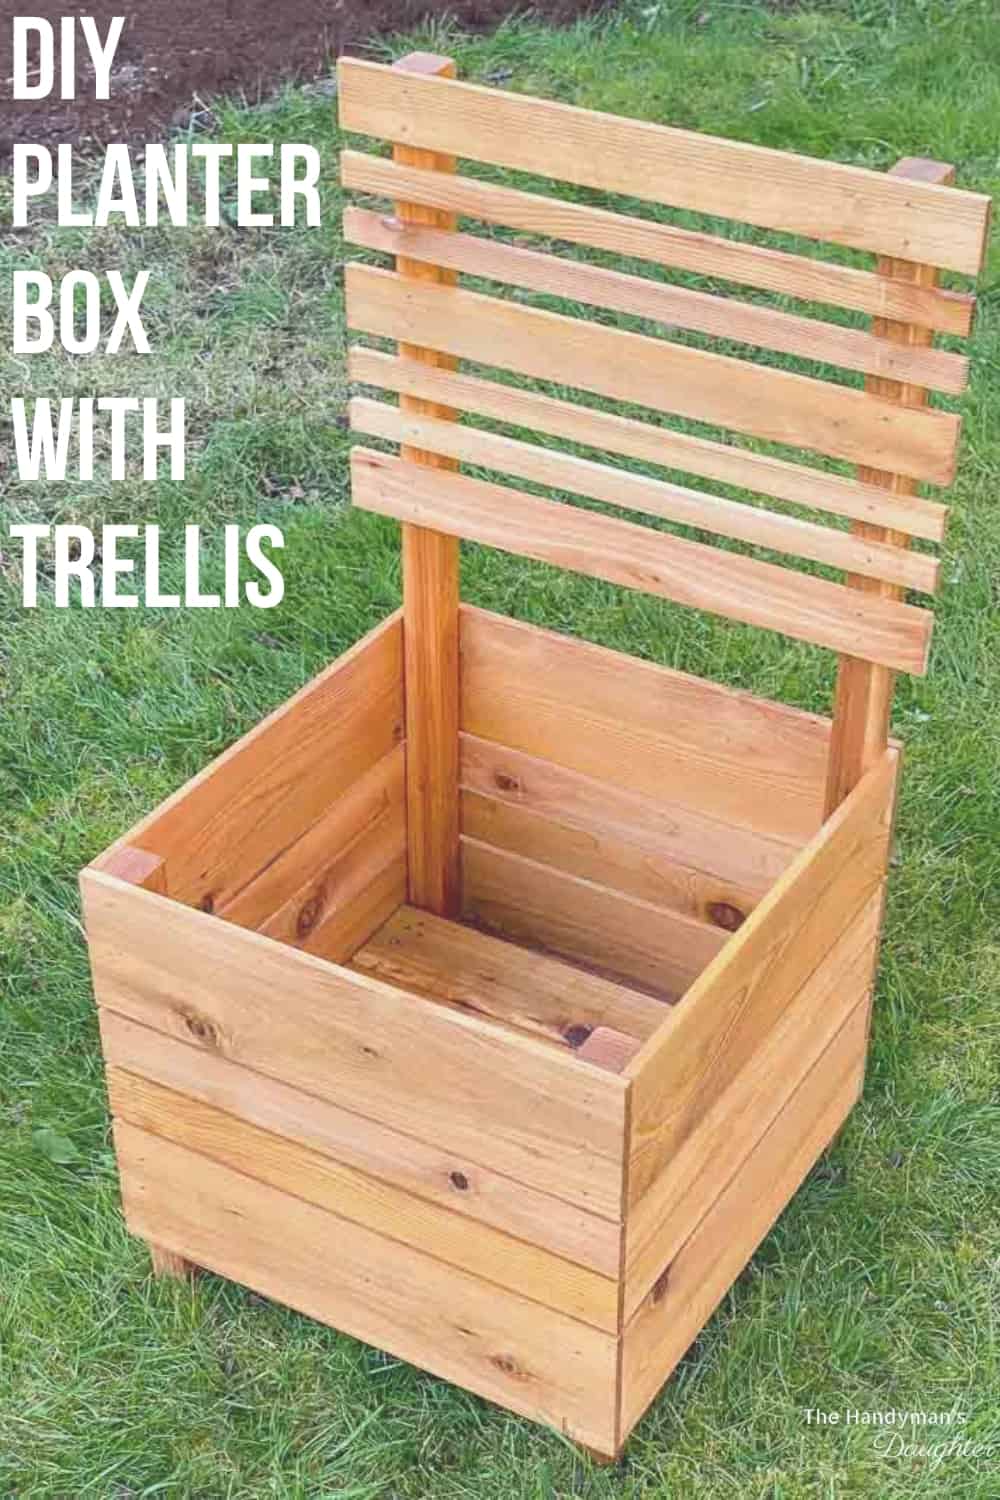
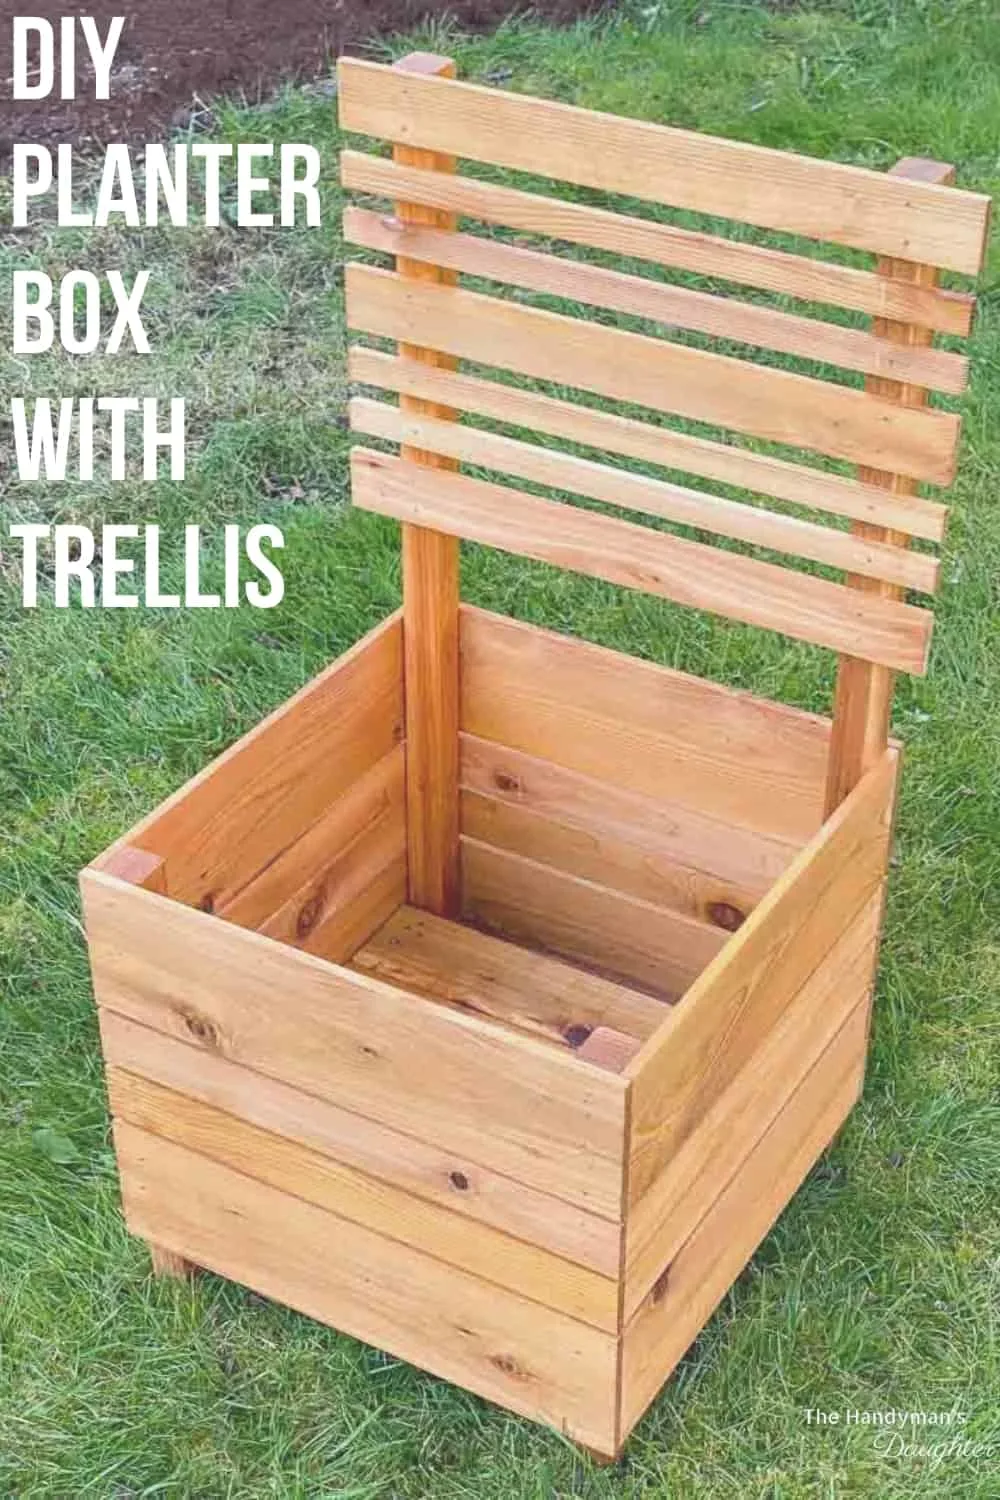
This simple DIY planter with trellis is perfect for your front porch or patio! Get the woodworking plans for this simple planter box and get building!

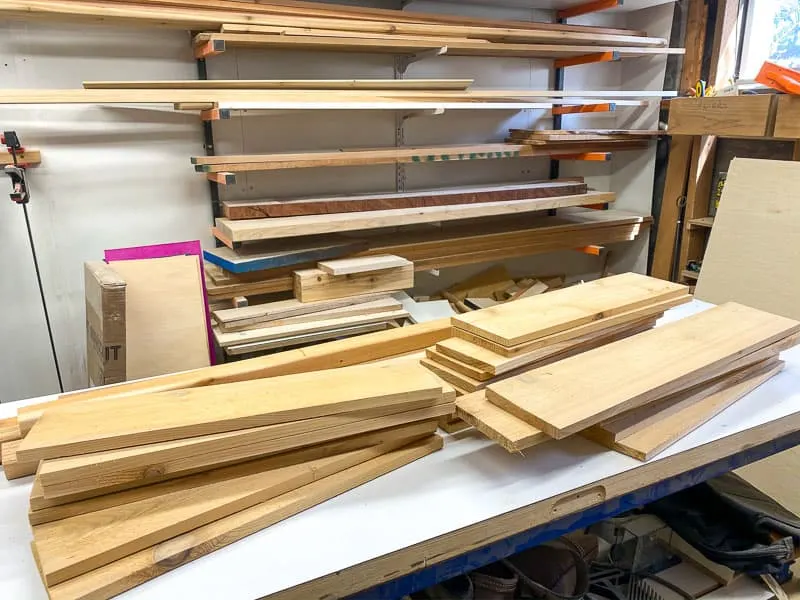
I've built a LOT of projects with fence pickets over the years (like these deck railing planters and this trellis). They're super cheap and easy to work with, but the leftover pieces have been cluttering up my scrap pile for too long!
I'm trying to use up what I already have on hand, rather than buying new materials and creating more scraps. Luckily, I had just enough cedar left over from other outdoor projects to make this DIY planter with trellis!

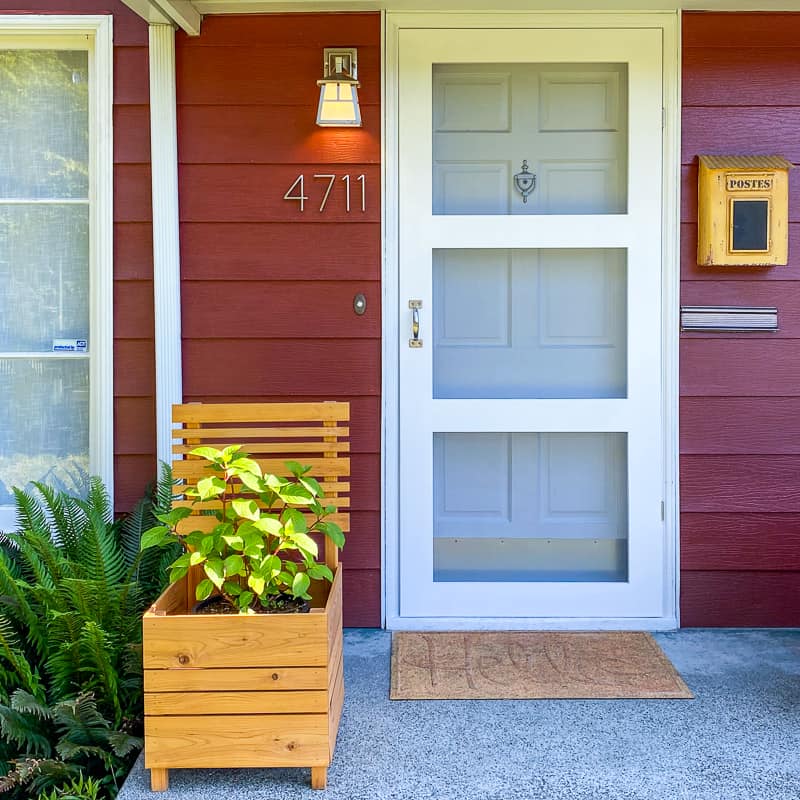
This small planter box fits perfectly on the corner of our front porch. I can't wait to see the hydrangea I placed inside in full bloom soon! (By the way, check out the tutorial for the DIY screen door too!)

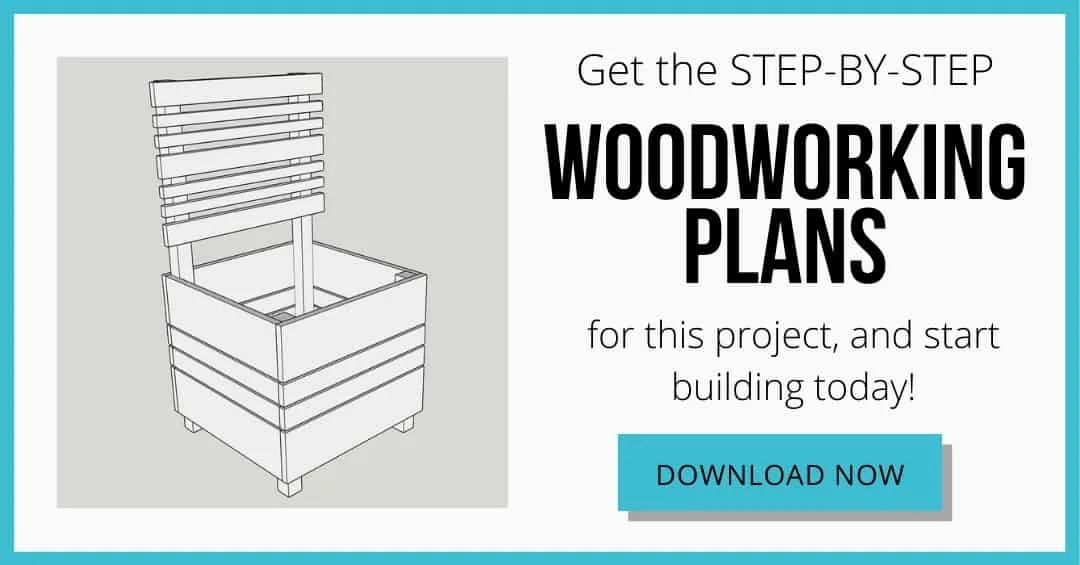
If you want to build your own planter box, download the woodworking plans by clicking the button below. I've included a cut diagram for full size cedar fence pickets, since I'm assuming you don't have a collection of end pieces like I do! 🙂

This post contains affiliate links for your convenience. Purchases made through these links may earn me a small commission at no additional cost to you. Please visit my disclosures page for more information.
Materials Needed
- 4 cedar fence pickets
- 2 2x2 cedar boards
- 1 1x4 cedar board (or use another fence picket)
- Pocket hole jig
- You can also countersink screw holes and join them together with 3" outdoor screws.
- Learn more about how to use a Kreg Jig and which one is right for you.
- 2 ½" exterior pocket hole screws
- Brad nail gun and 1 ¼" brad nails
- You can also use a hammer and nails if you don't have a nail gun handy!
- Waterproof wood glue
- Table saw or circular saw
- Use a circular saw jig to get straight cuts every time!
- Sander and sandpaper
- Clamps
- Square
- Drill
- Exterior wood stain
How to Make a Trellis Planter Box
Download the Woodworking Plans
Don't forget to download the woodworking plans first! They have a cut list, 3D models and step by step instructions to make building easier.
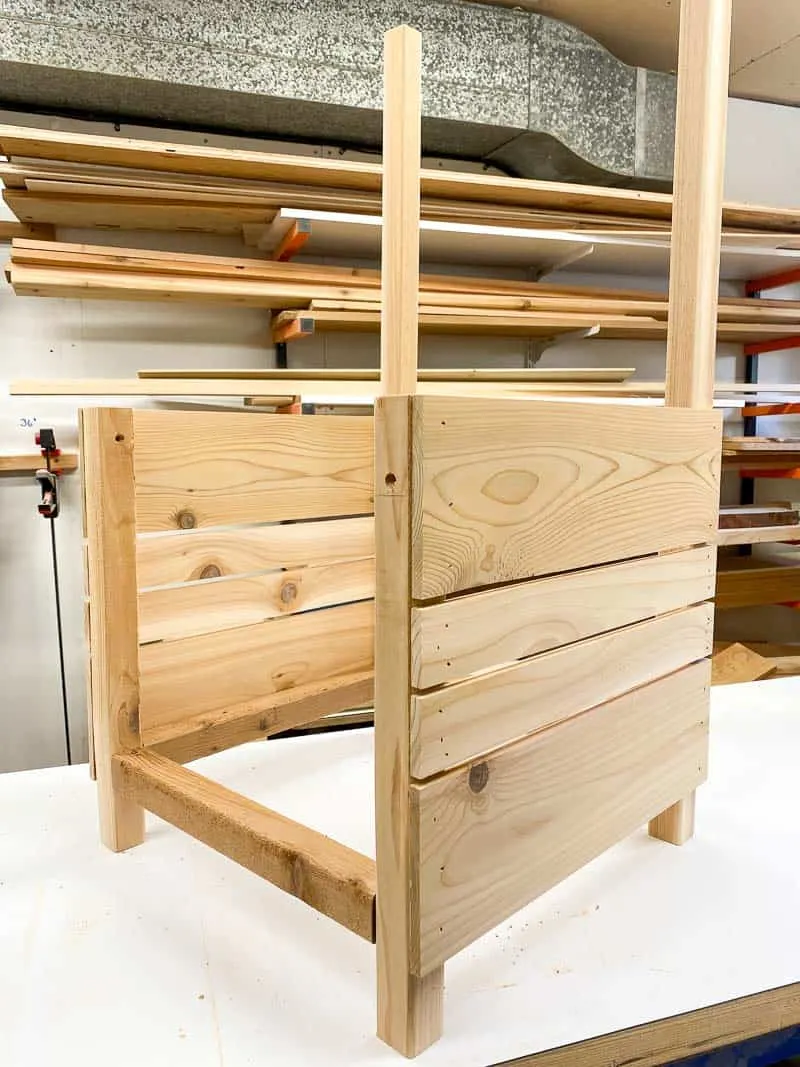
Build the Frame
I decided to make the frame big enough to fit a 2 or 3 gallon plant container, so I can switch them out with the seasons (or as they die due to neglect...) Feel free to change the dimensions to fit your needs!
Cut the 2x2 pieces as shown in the cut diagram. Then drill pocket holes in both ends of the short pieces.


Apply wood glue to the ends of the short pieces, and screw them into the legs of the planter box with 2 ½" exterior pocket hole screws. You can also predrill countersink holes in the legs and attach them with 3" exterior wood screws instead.
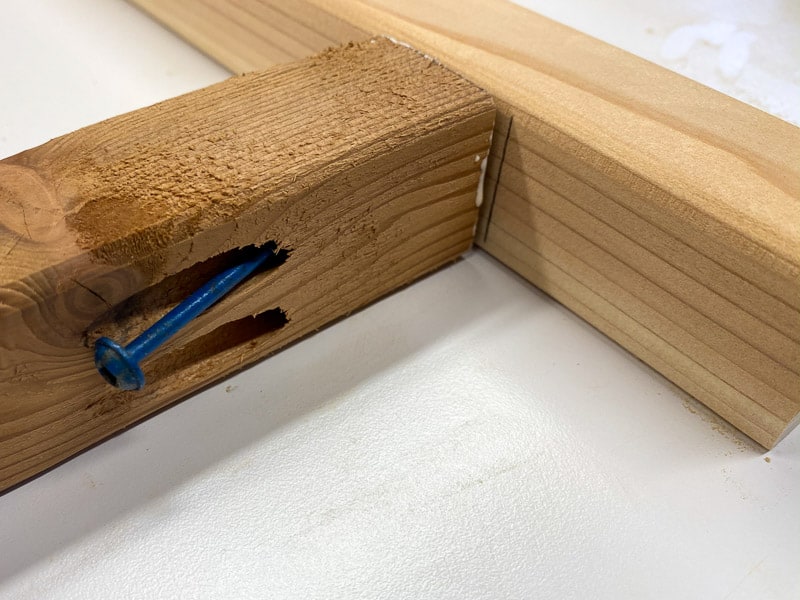
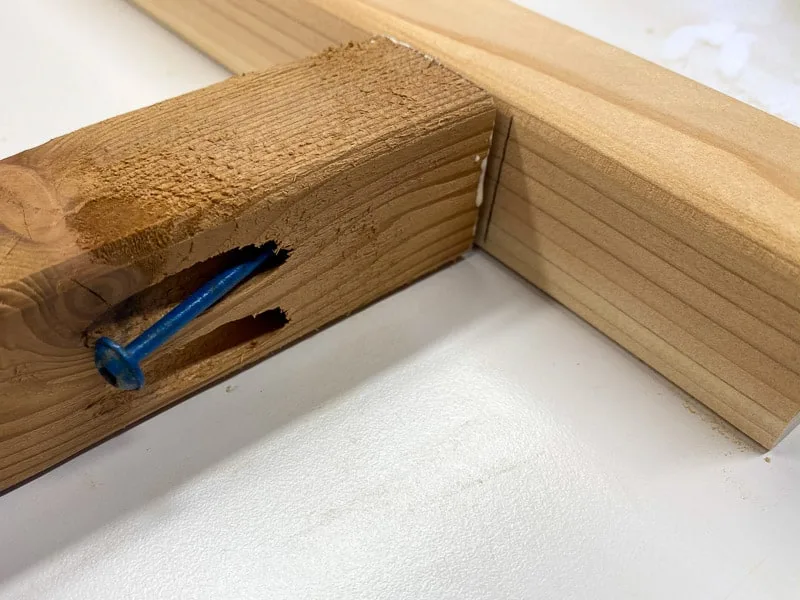
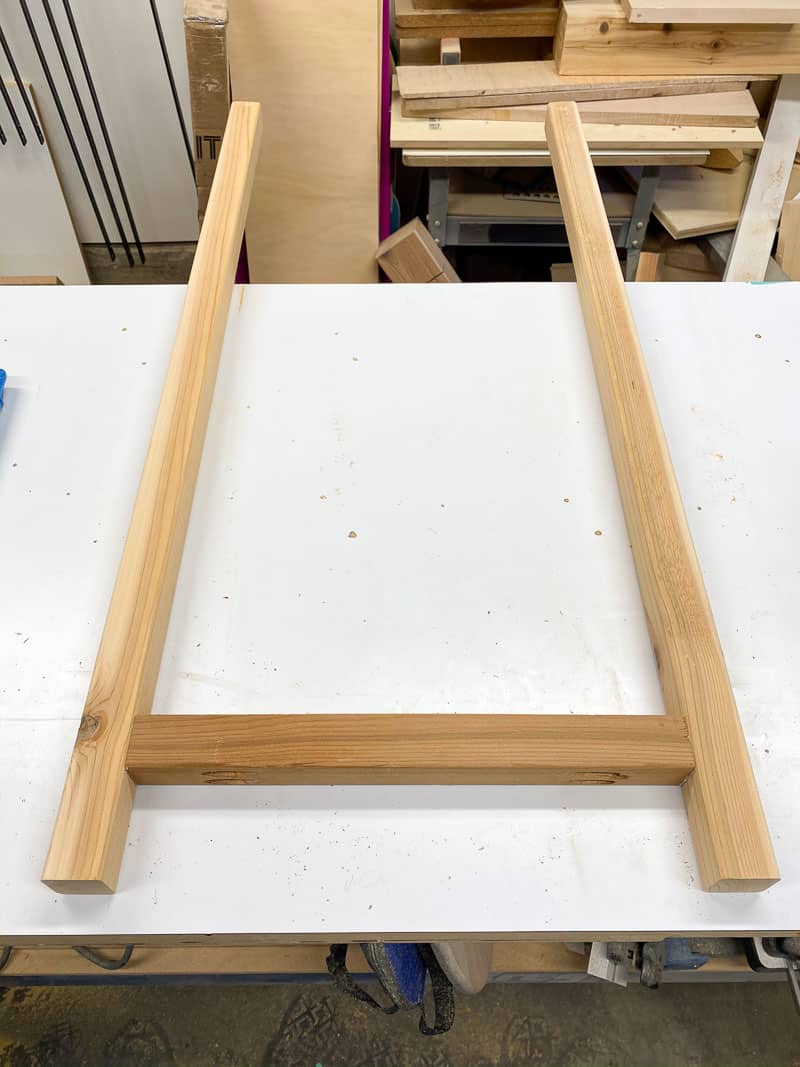
I started with the two shorter legs first, then attached the two cross braces.

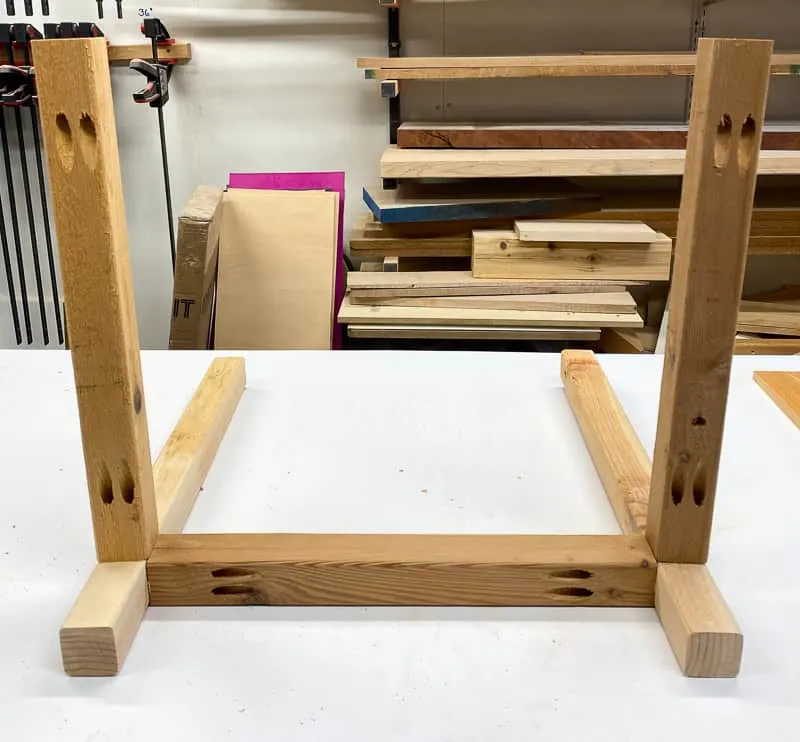
Then I repeated the process with the longer back legs. Make sure the height of the cross piece is consistent on all the legs.

If you have extra 2x2s, you can repeat the process around the top edge of the planter box, but it should be plenty sturdy once the slats are attached.
Cut and Sand the Slats
If you've been following this blog for a while, you might have noticed that the slat pattern on this planter box matches a few other outdoor projects I've made over the years. It's kinda turned into my "signature look!"
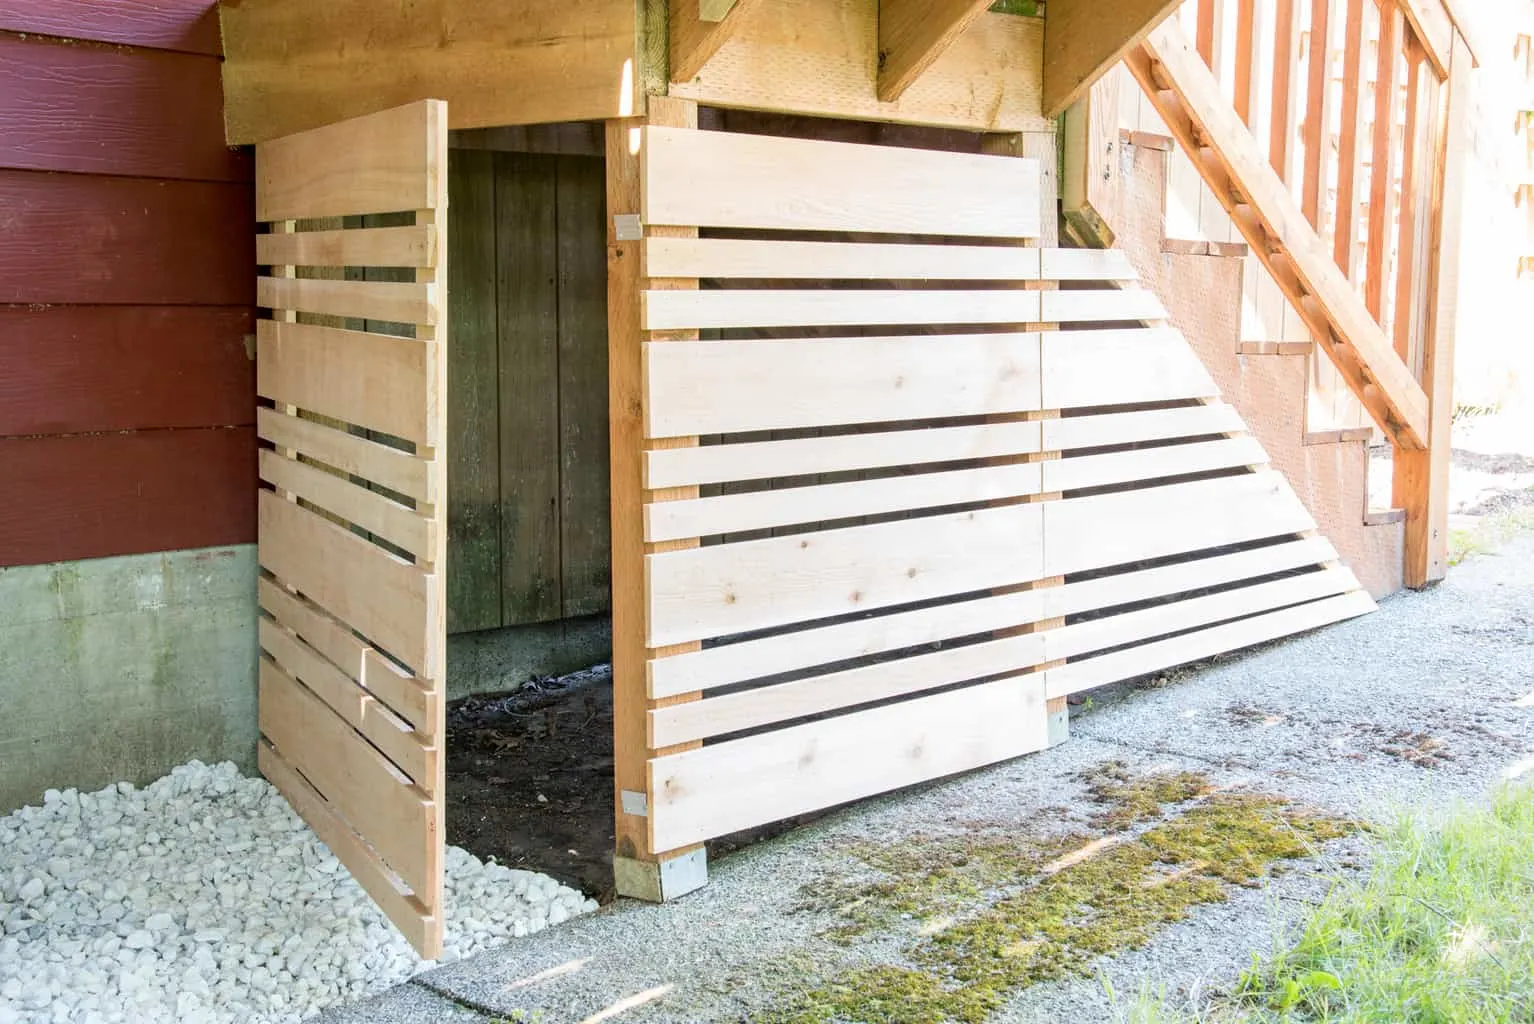
It all started when I fenced the area under our deck stairs, with a hidden panel to access the storage inside.

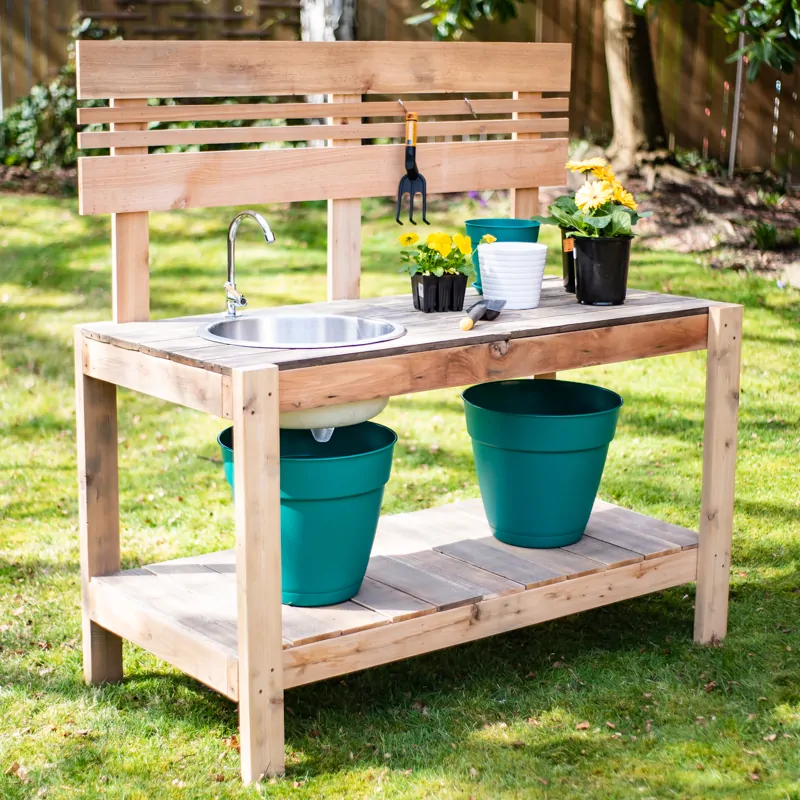
Then I repeated the pattern on the back of the potting bench...

as well as the bottom of the vertical planter wall.

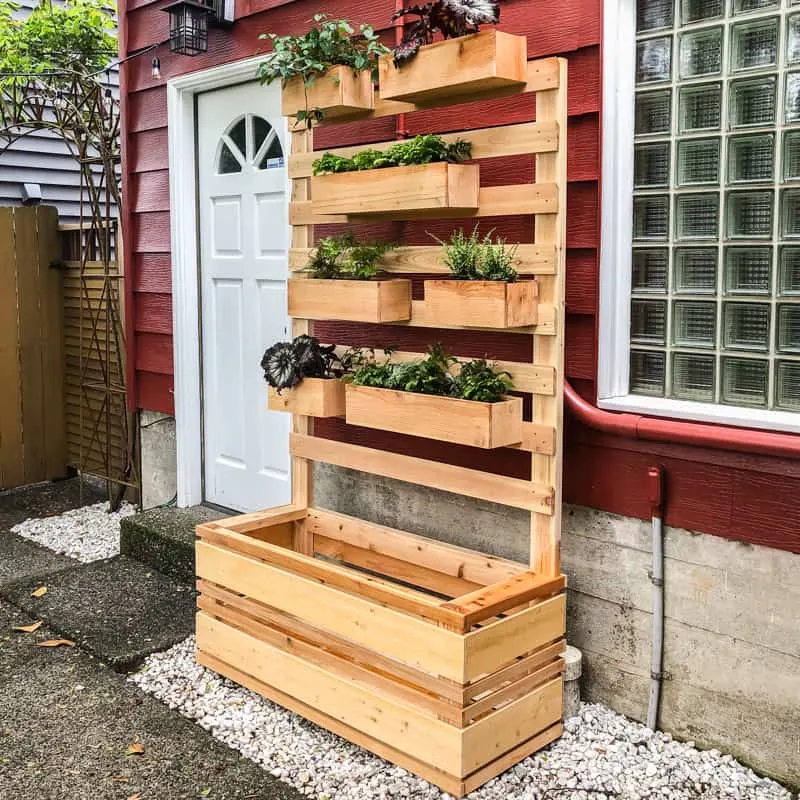
This pattern works really well with these fence pickets, and helps tie the entire yard together with one consistent look.
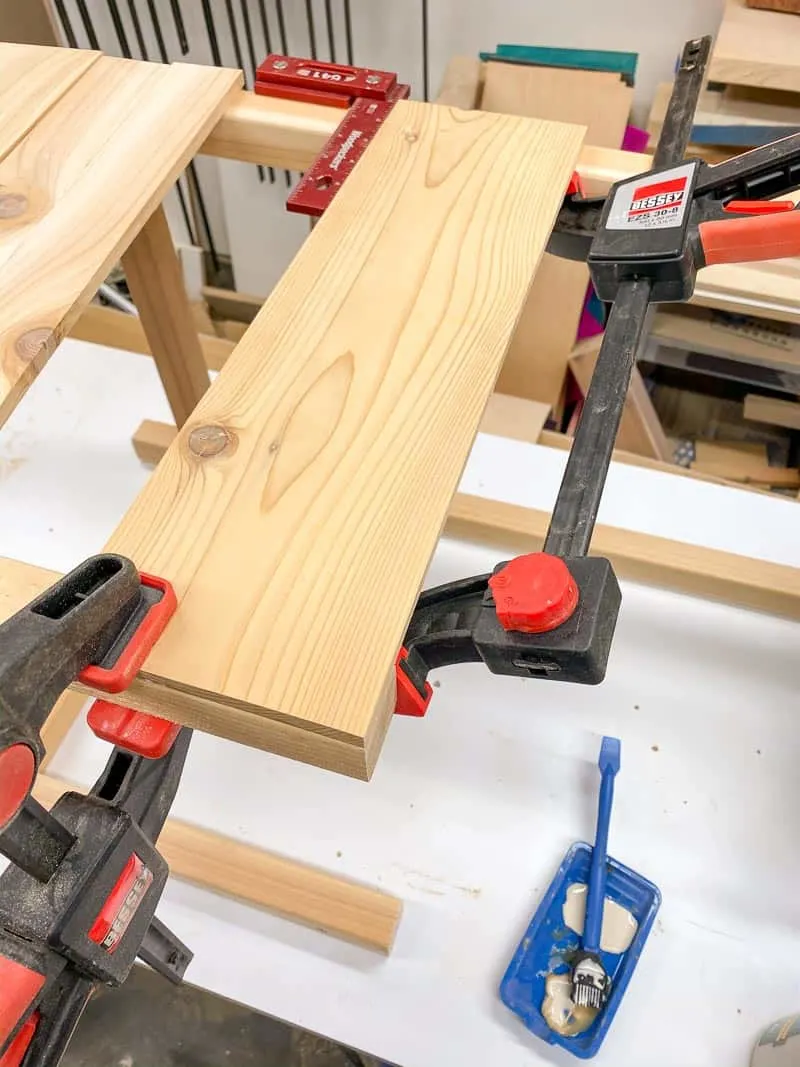
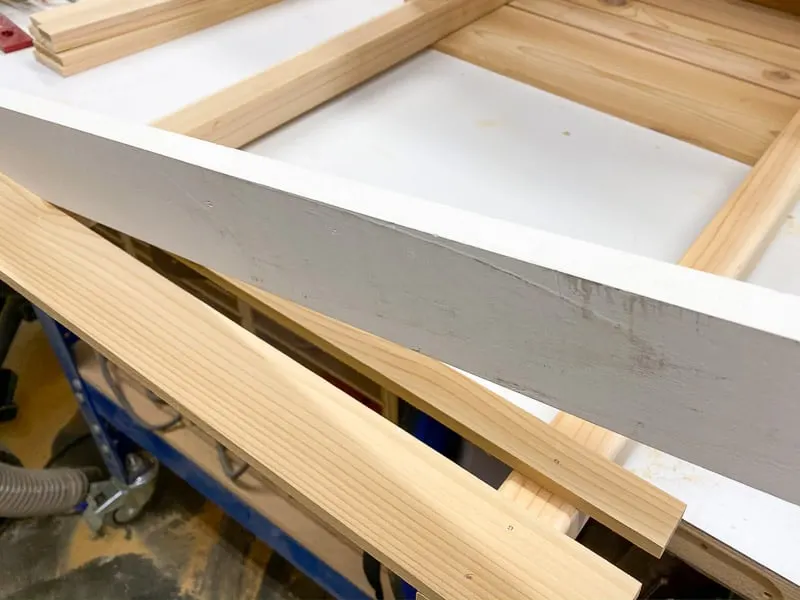
Start by cutting all the pieces to the lengths indicated on the cut list. I find that the shorter pieces are easier to work with on a table saw.
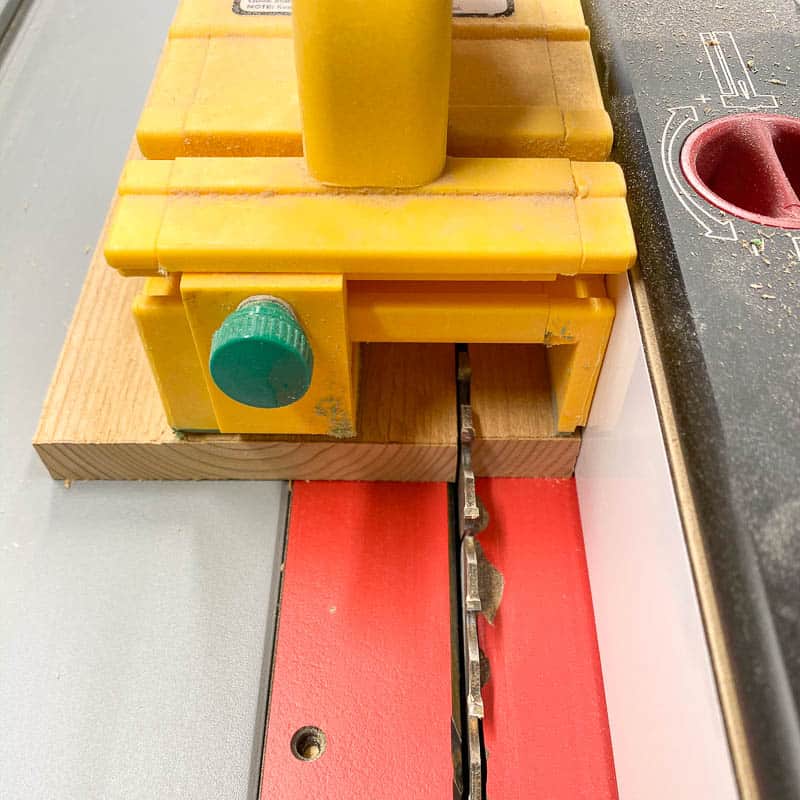
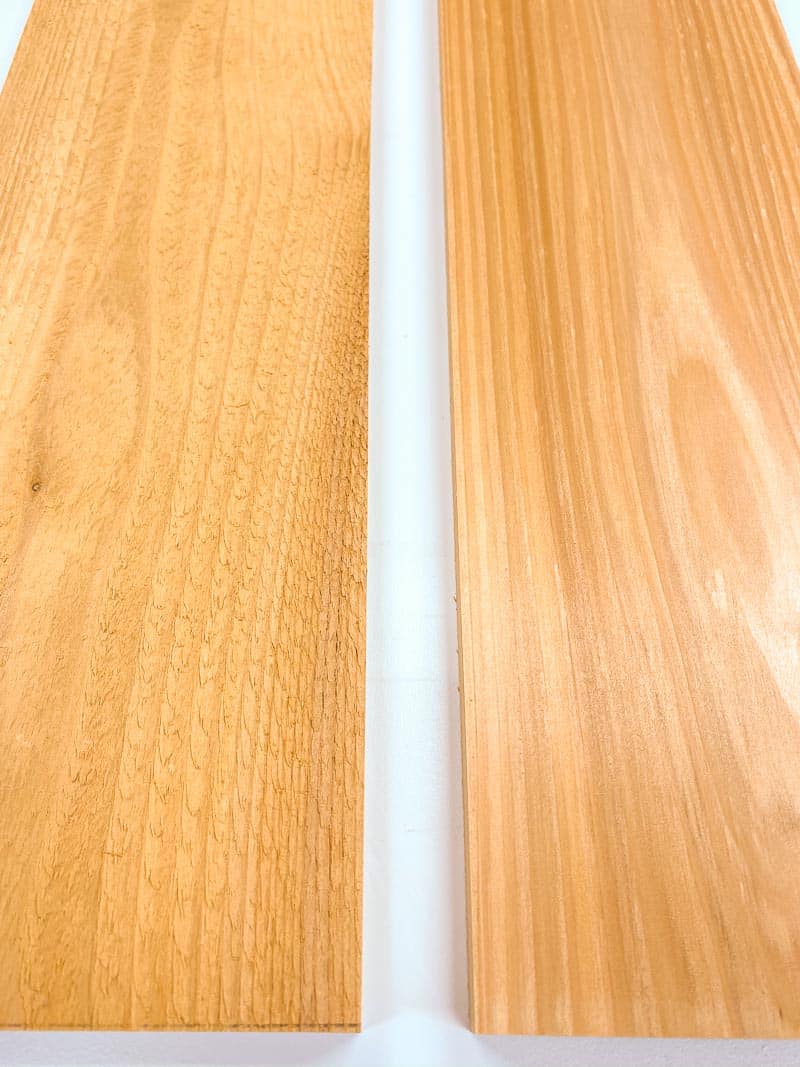
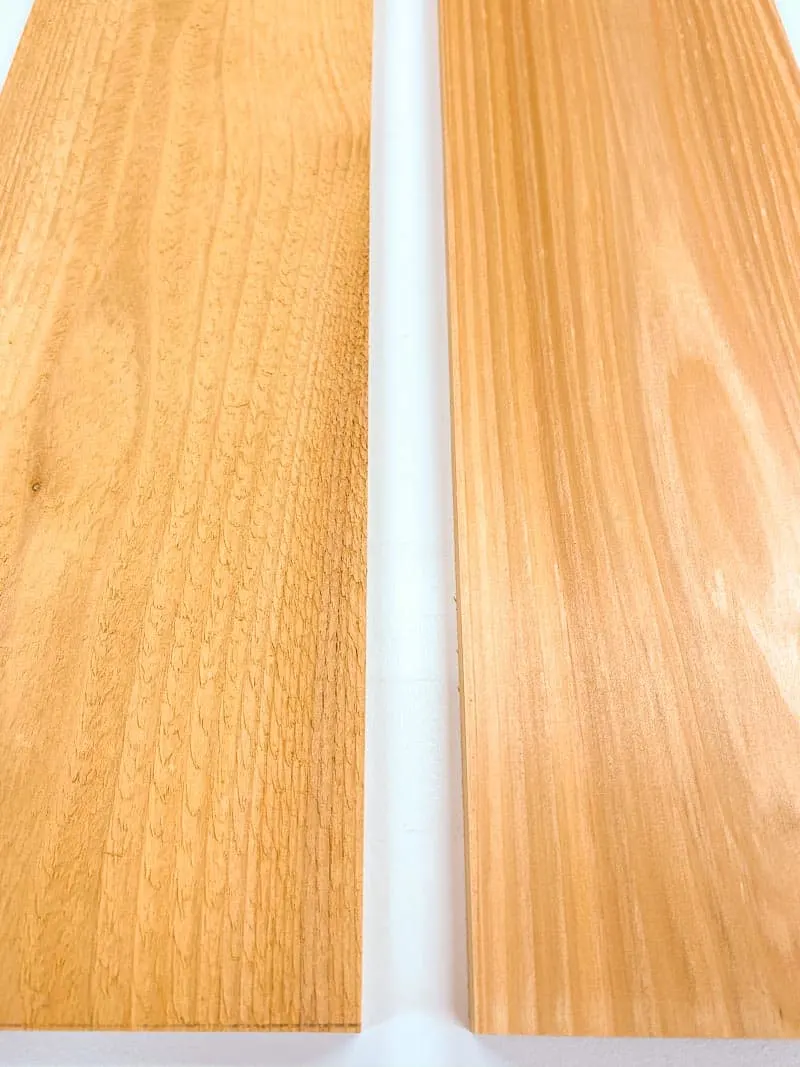
These scrap pieces already had the rough edges cut off, but you can do the same thing at the table saw or with a circular saw. Trim ¼" off each edge to create the 5" wide slats, or rip them down further into 2" or 1" slats according to the plans.
I like using the Grr-ripper as a push stick to keep the board flat and tight against the fence while keeping my hand safe from the blade.

The surface of these fence pickets is usually really rough. Even with a thorough sanding with 150 grit sandpaper, they still have a lot of texture. To save myself some time, I ran my slats through the jointer and planer to clean them up and get them flat.
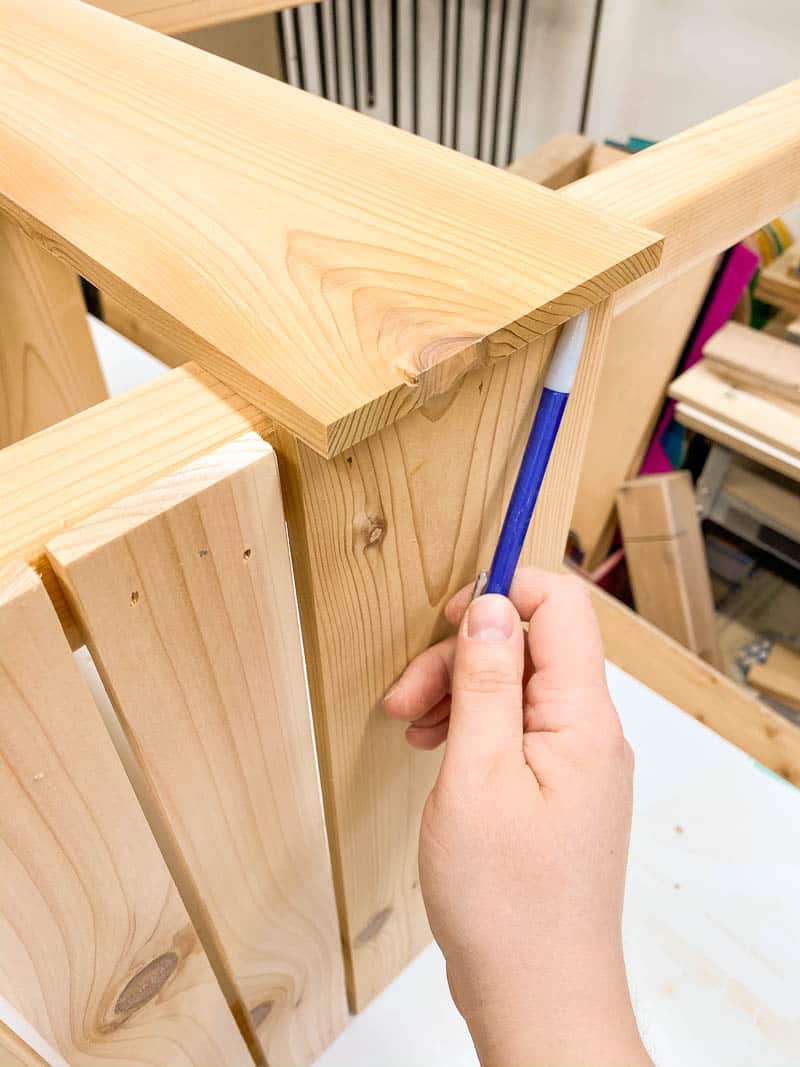
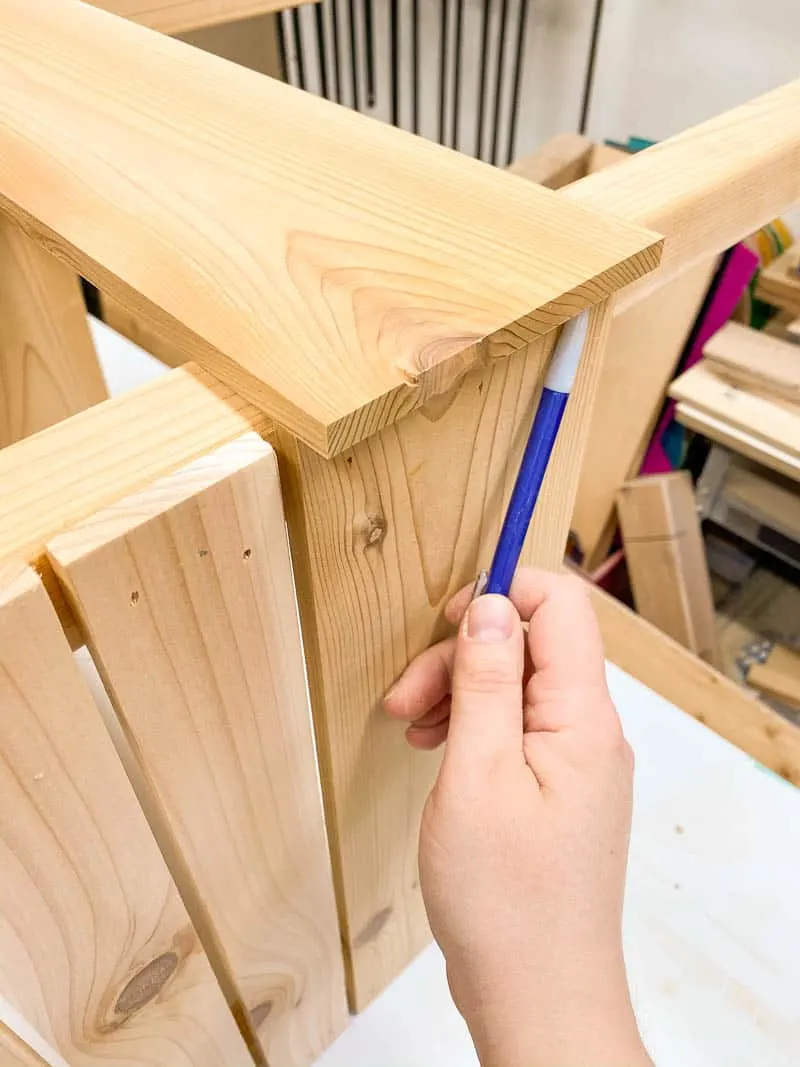
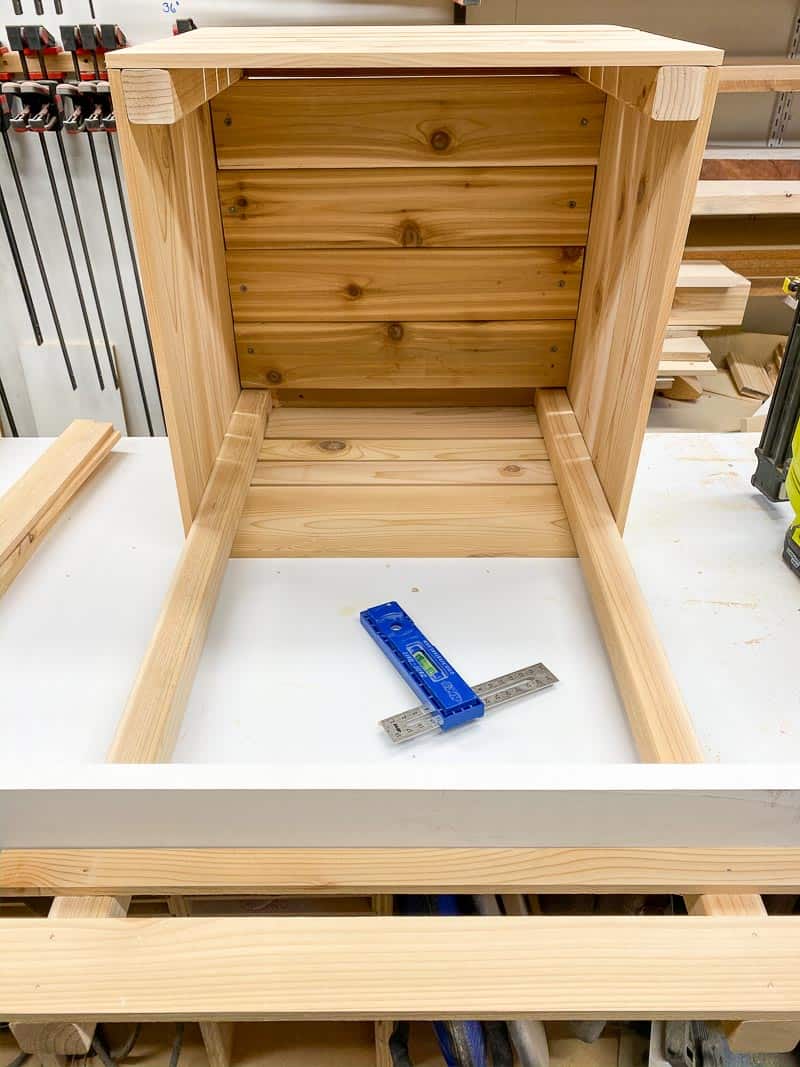
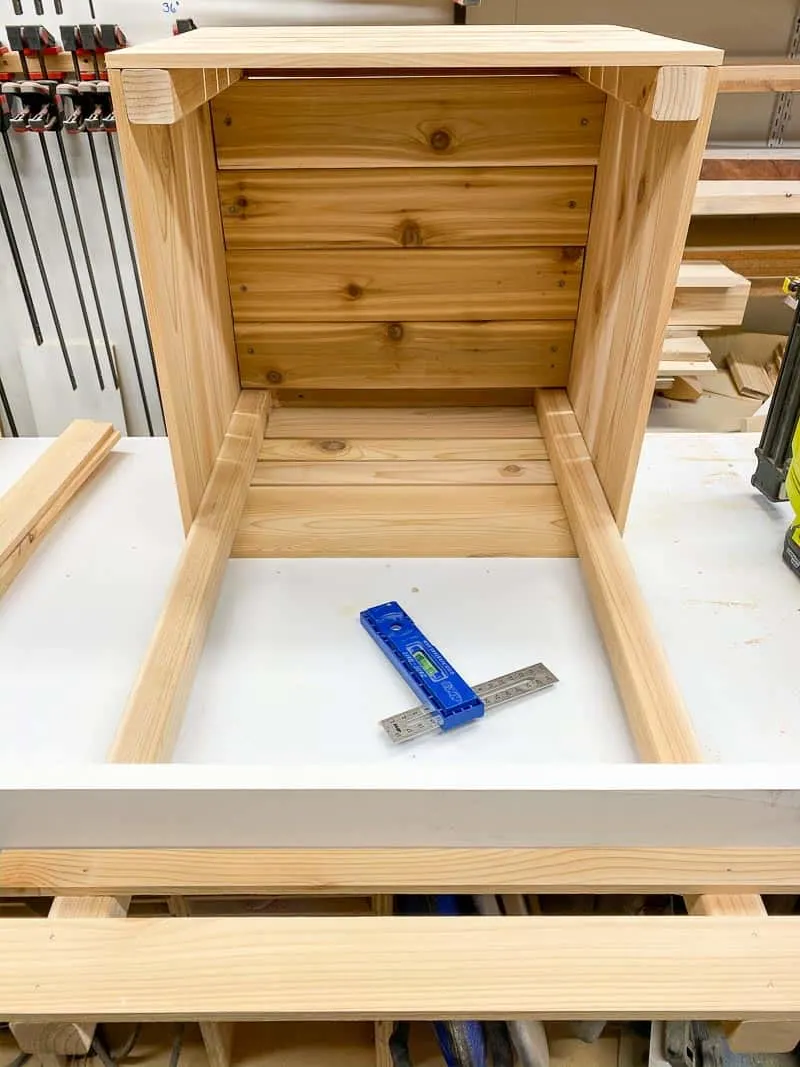
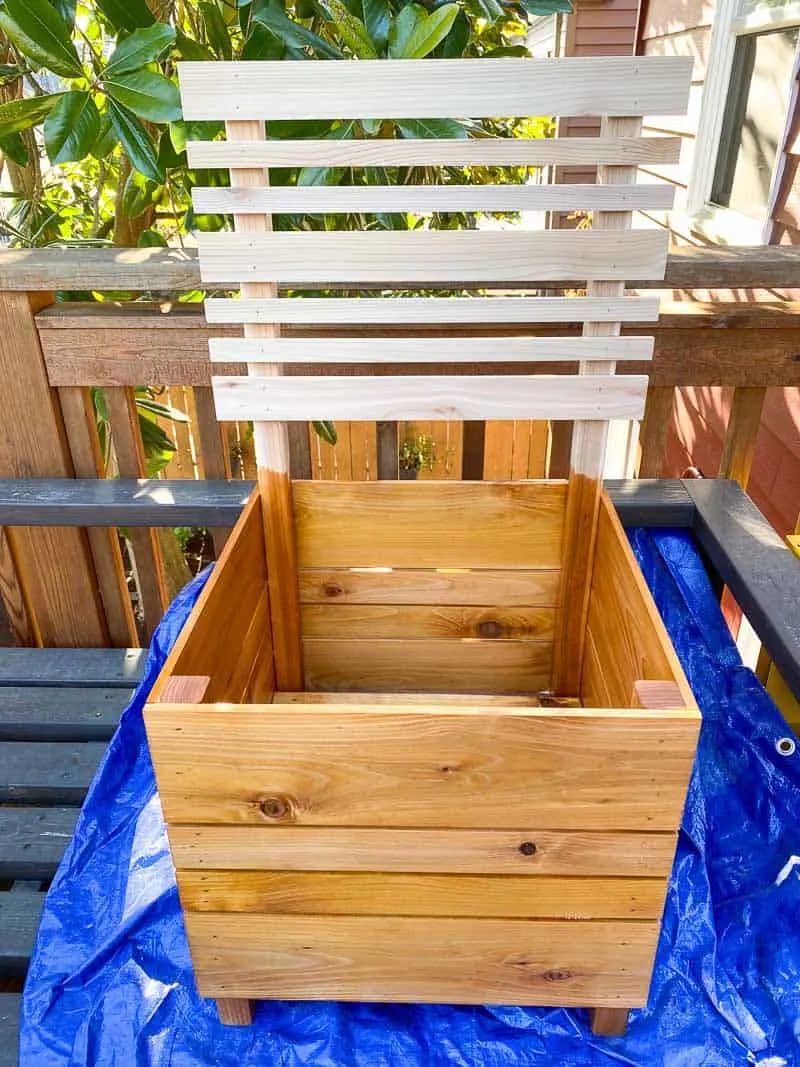
Attach the slats to the frame
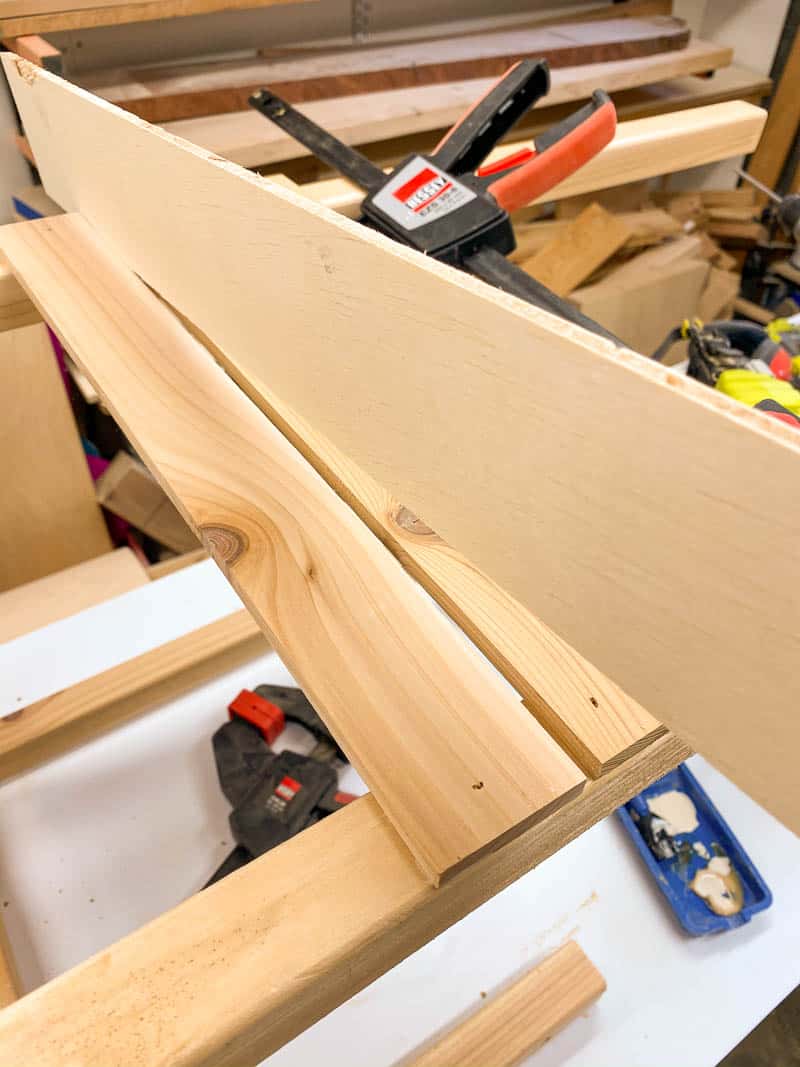
Here's where the whole planter comes together! Start with the two sides, with slats that are the exact same length as the width of the frame. I found that the legs were bowing in slightly, so I switched one of my clamps to the spreading configuration to hold them apart.
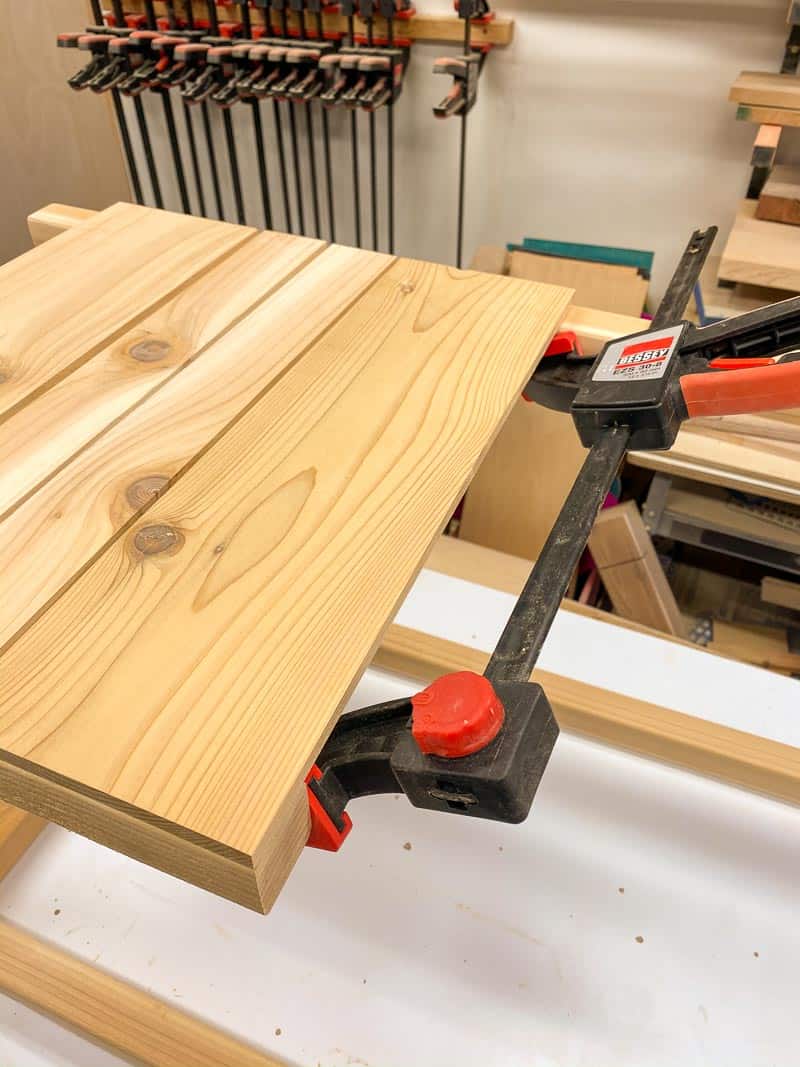
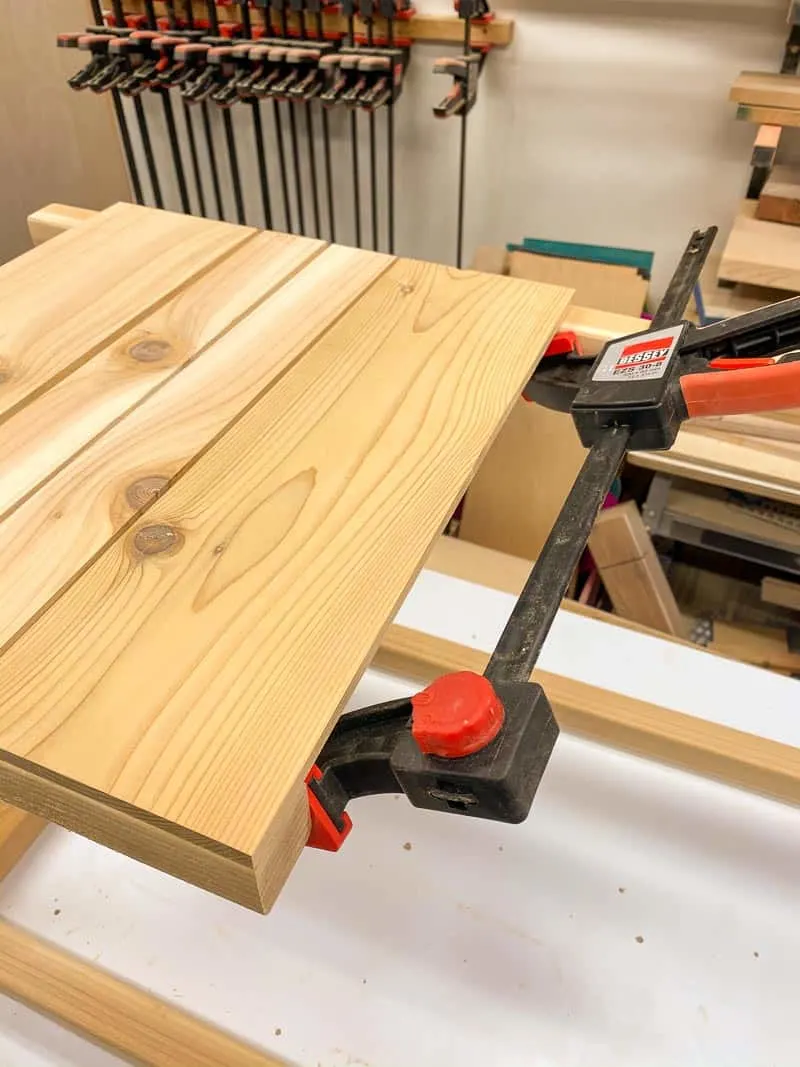
Apply exterior wood glue to the back of the top slat where it meets the legs. Then lay it across the top and clamp it into place, making sure it's square. Then secure it to the legs with 1 ¼" nails and a brad or pin nailer.

I used a scrap of ¼" plywood as a spacer between the slats. This makes it so much faster to assemble instead of measuring each one individually! Just butt the plywood spacer up to the edge of the first slat, then position the next one on the other side. Glue and nail that slat into place, then remove the spacer!
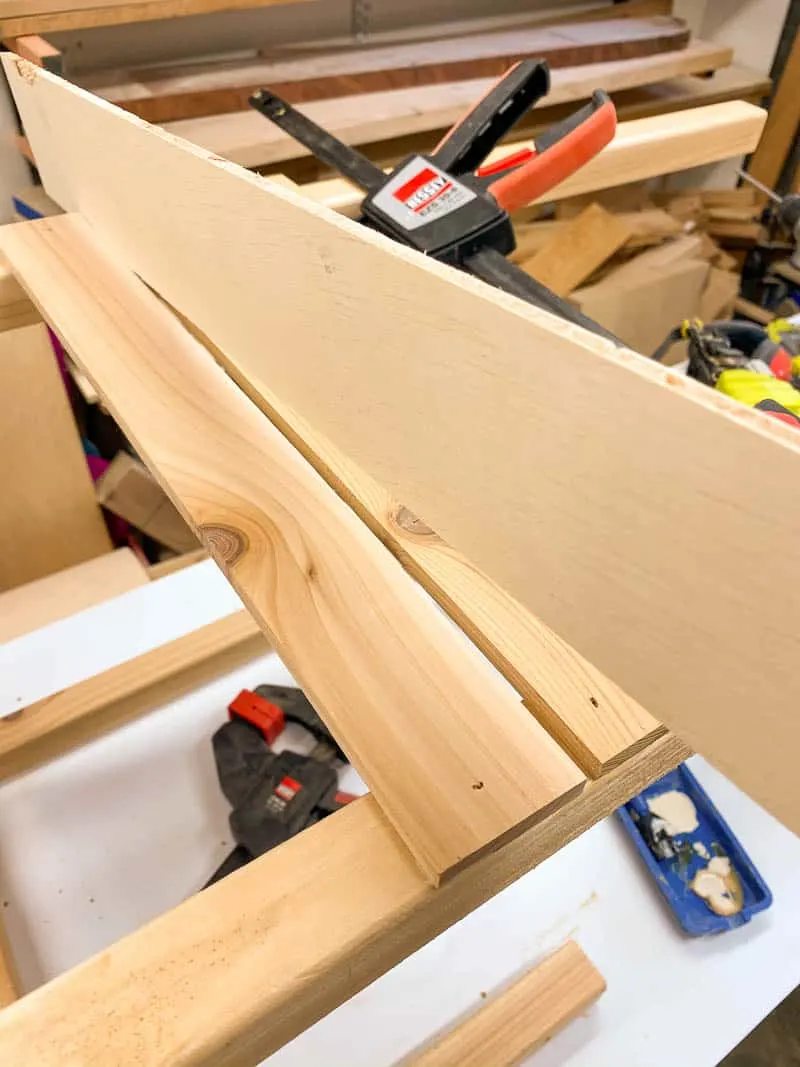
Continue down the sides of the planter box until you reach the bottom of the frame. The bottom edge of the last slat should extend slightly below the 2x2 frame to hide it.
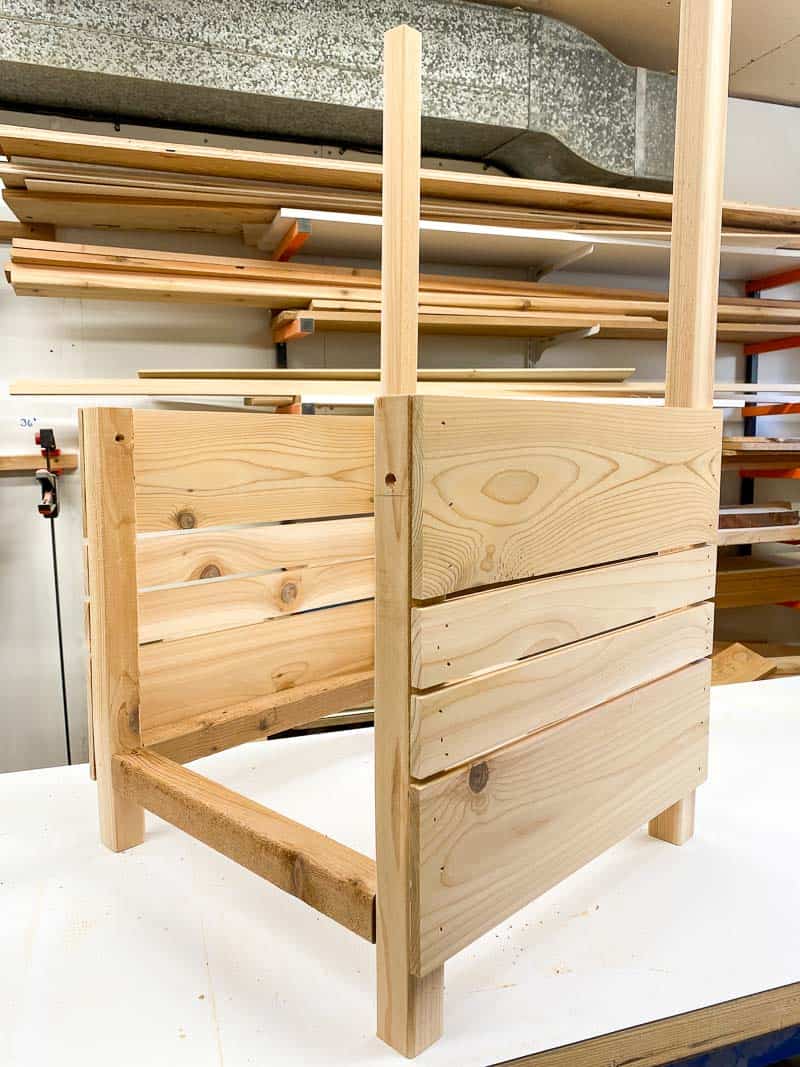
The front and back slats should cover up the ends of the side slats and match up with the top and bottom edges. I made these pieces a little long, so I could mark the exact dimensions and cut them to fit.
Repeat the process of gluing and nailing the slats on the front and back of the planter box. When you're finished, the pattern should flow seamlessly around the corners!
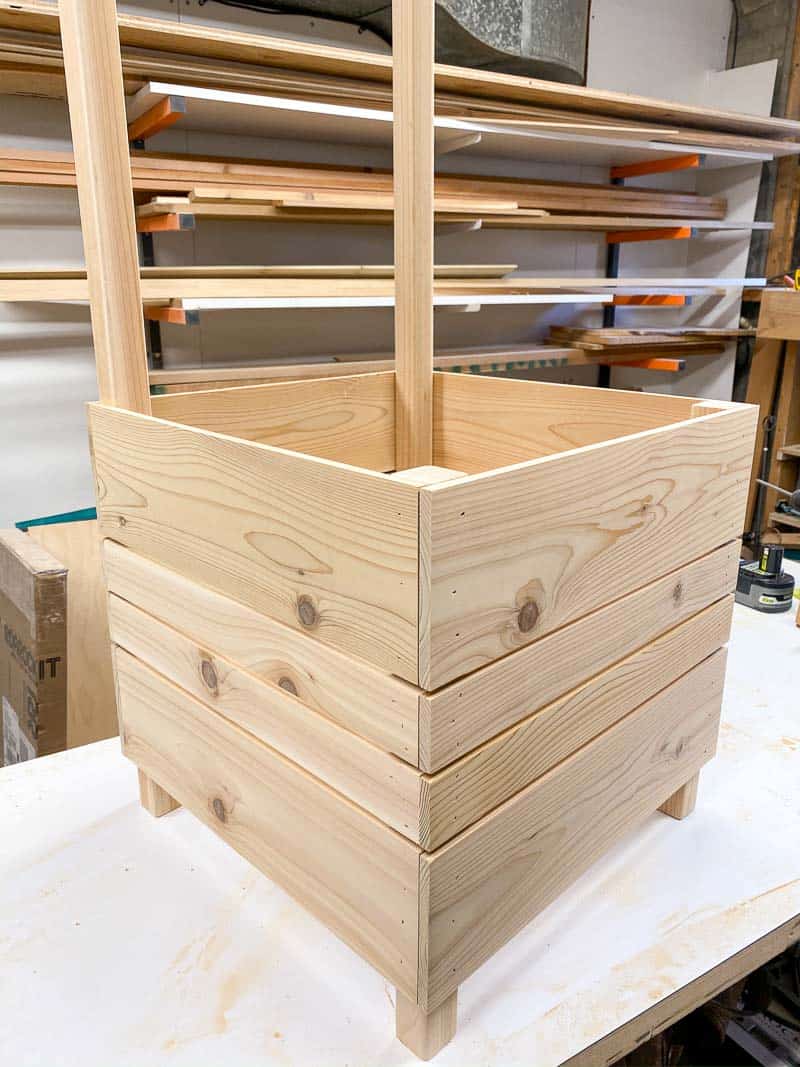

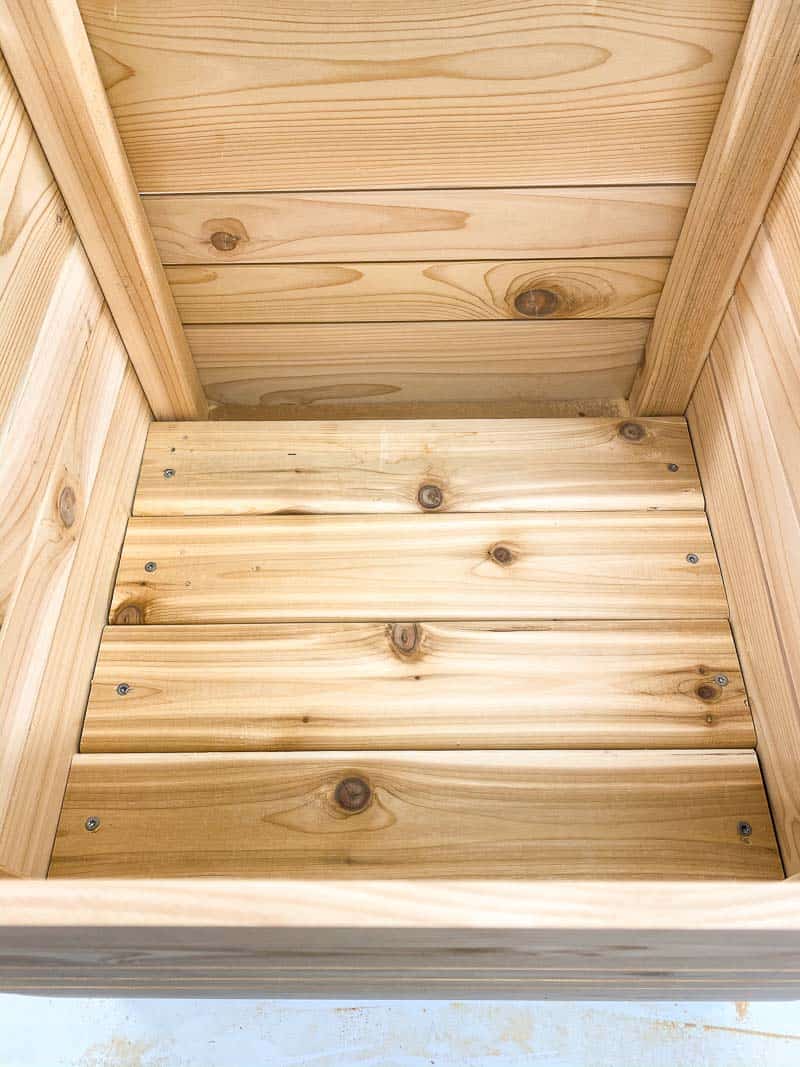
Insert the Bottom of the Planter Box
The frame also serves as the supports for the bottom of the planter box. I had almost a full 1x4 board left from my planter wall project, which will be sturdier than the fence picket I had originally planned for the bottom. It's amazing what you'll find when you dig through your lumber rack! 🙂
Measure the exact width of the inside of the planter box, and cut the boards to fit. I screwed mine down with 1 ¼" exterior wood screws, but if they fit snugly, you probably don't need to.

Attach the Trellis to the Planter Box
This planter box will go on our front steps, where plants tend to droop forward to catch the sun's rays. I wanted to add the trellis to the back so I can tie them upright and keep them looking neat. If you don't want the trellis part, you can just cut all four legs to the same length.
Attach the 2" and 1" slats the same way as the sides of the planter box, using a ¾" wide board as a spacer.

The Kreg Multi-Mark tool made it easy to keep even spacing on both sides of the trellis. Just lock in the right measurement and check both ends before nailing the slat into place.
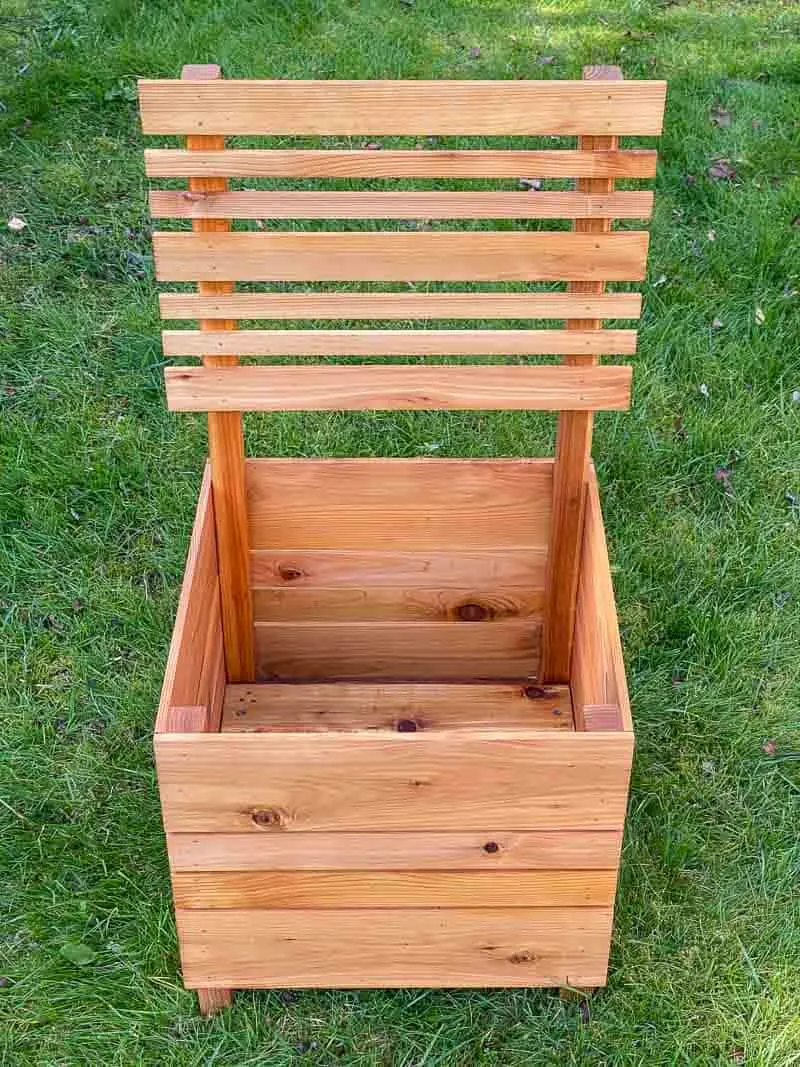
Apply Exterior Stain or Paint
While I love how cedar looks unfinished, it does turn gray and develop dark spots over time if it's not treated. I dug out some leftover deck stain in a natural cedar color to give my new planter box some protection from the elements.
Use a foam brush to work the stain in between the slats and on every surface. This particular stain goes on darker but lightens up as it soaks into the wood.

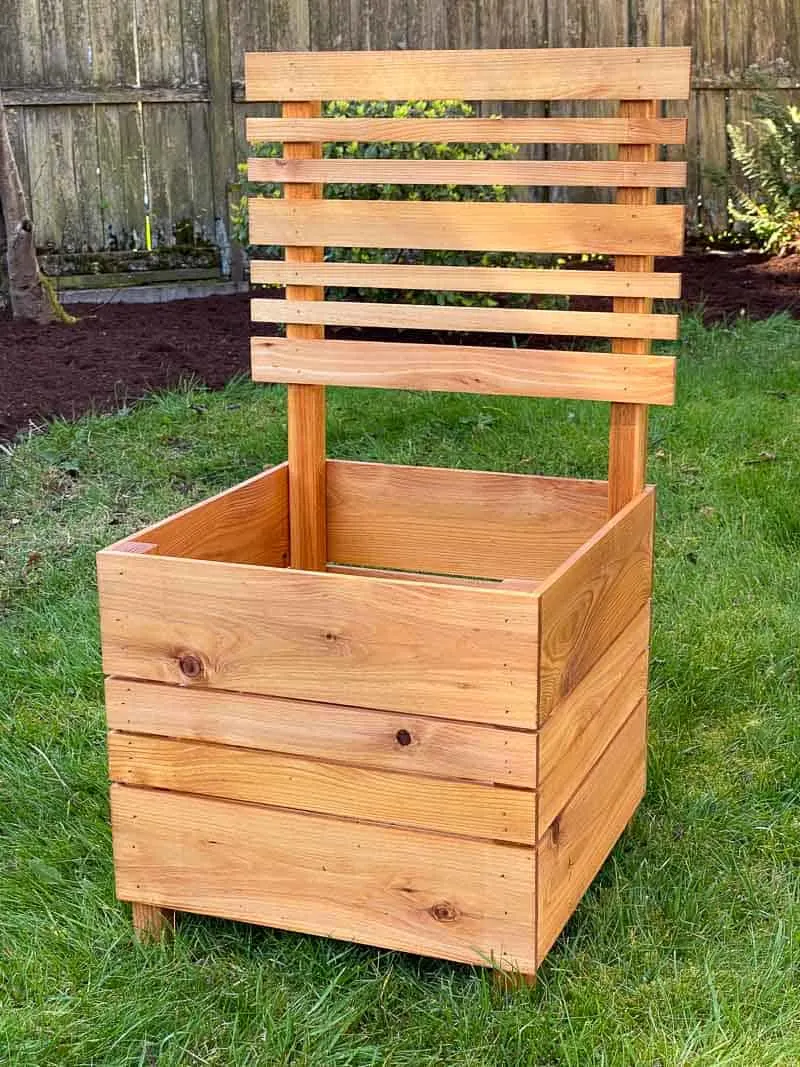
Add Some Plants to your New Planter Box!
I can't wait to be able to wander the aisles of my local garden center and pick out some new flowers for my planter box! The trellis gives support to vining plants and provides vertical interest.

I'm thinking of making a wider one for our deck to plant tomatoes and other vegetables that need support. You could easily adjust the woodworking plans to fit your space!

So what are you waiting for? Download the woodworking plans for this planter box with trellis and get building!
Check out these other planter ideas!
Steff
Tuesday 7th of July 2020
Hi! I have a pallet-made potting bench that probably has one more season left, I want this for my next one, it definitely is a lot prettier than mine. :) Also, what plant is in the box? It's gorgeous!
Vineta
Tuesday 7th of July 2020
It's an Endless Summer hydrangea, and it has decided it's not summer yet so it hasn't bloomed! Silly plant :)
Nippon
Thursday 23rd of April 2020
Enjoyed your writing, expecting some further great works!
Alexis Hernandez
Thursday 16th of April 2020
Vineta,
Thank you for showing how to create this! I like the way the planter looks and how well-made it turns out. Once the pandemic lessens, do you have any recommendations to find inexpensive wood? Regards, Alexis H.
Vineta
Friday 17th of April 2020
Thanks Alexis! The wood I used for most of the planter box is from cedar fence pickets, which are less than $3 for a 6 foot board. They're the cheapest cedar you can find, and if you dig through the pile you can find some really nice pieces! You can also check your local craigslist for people looking to get rid of old fence boards when they're upgrading. They might need some cleaning up, but they're usually free! :)
Amy
Tuesday 14th of April 2020
Love this planter box with trellis!
Denise
Tuesday 14th of April 2020
Really nice project. Just may have to attack this one myself. Enjoying your work. Thanks