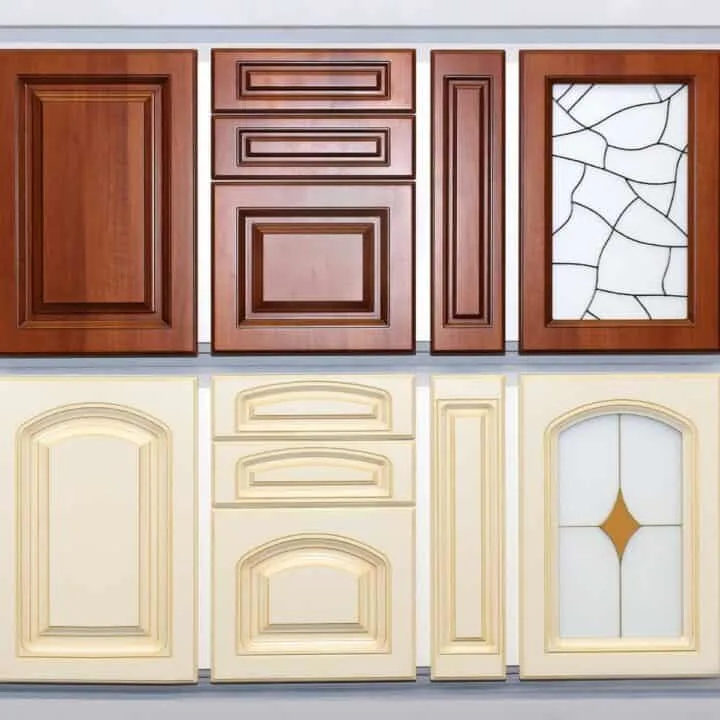
Learn how to build a wall cabinet for your kitchen, bathroom or laundry room with easy frameless construction! Save money with DIY wall cabinets sized to fit your space!

Remodeling a kitchen with custom cabinets is expensive! But you can save yourself a lot of money by making them yourself.
Building your own wall cabinets is easier than you think! The construction method is similar to building a drawer, only bigger.
I'll show you how to make a DIY wall cabinet using plywood to create the perfect storage solution for your home! Then learn how to install wall cabinets by yourself in this tutorial!
This post contains affiliate links for your convenience. Purchases made through these links may earn me a small commission at no additional cost to you. Please visit my disclosures page for more information.
Tools and Materials
- ¾" plywood
- ¼" plywood for the back
- Table saw or track saw (you could use a circular saw, but your cuts won't be as clean)
- Edge banding
- Edge banding trimmer
- Pocket hole jig and 1 ¼" pocket hole screws OR countersink bit and 2" wood screws
- Wood glue
- Clamps
- Drill
- Shelf pin hole jig
- Square
How to Build a Wall Cabinet
Measure and sketch a design
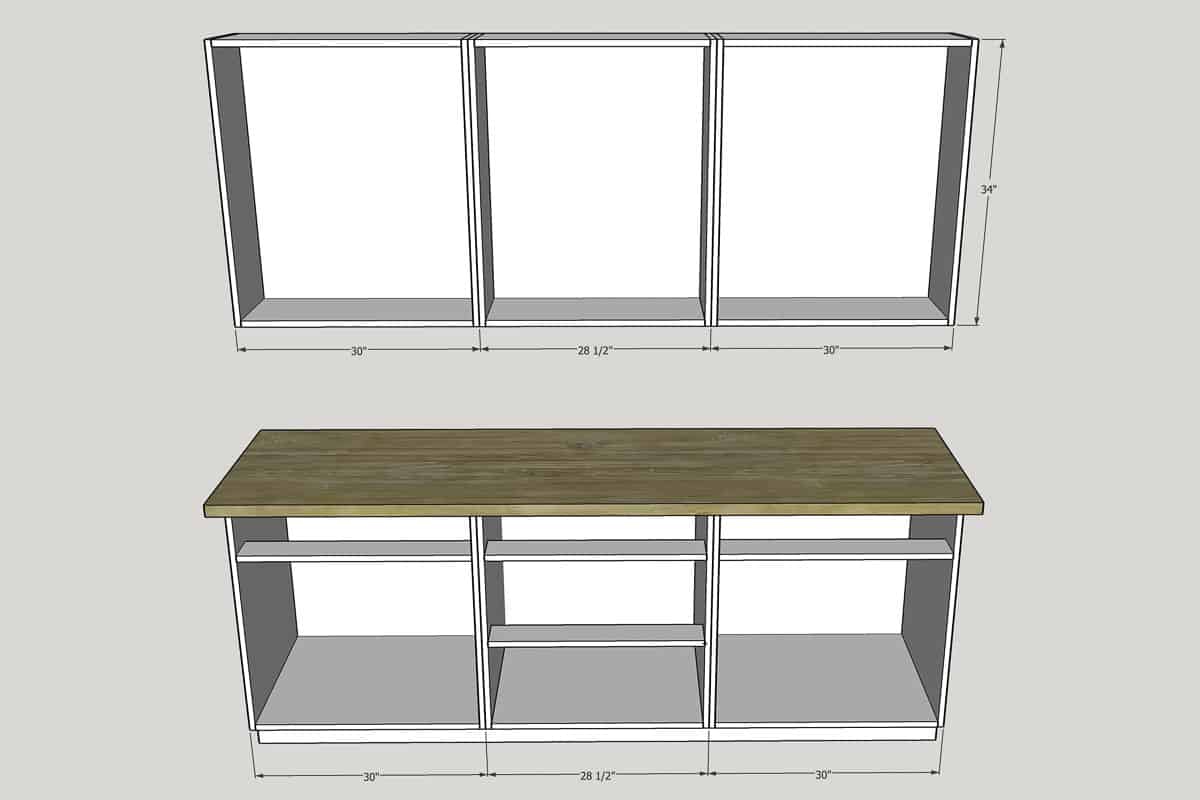
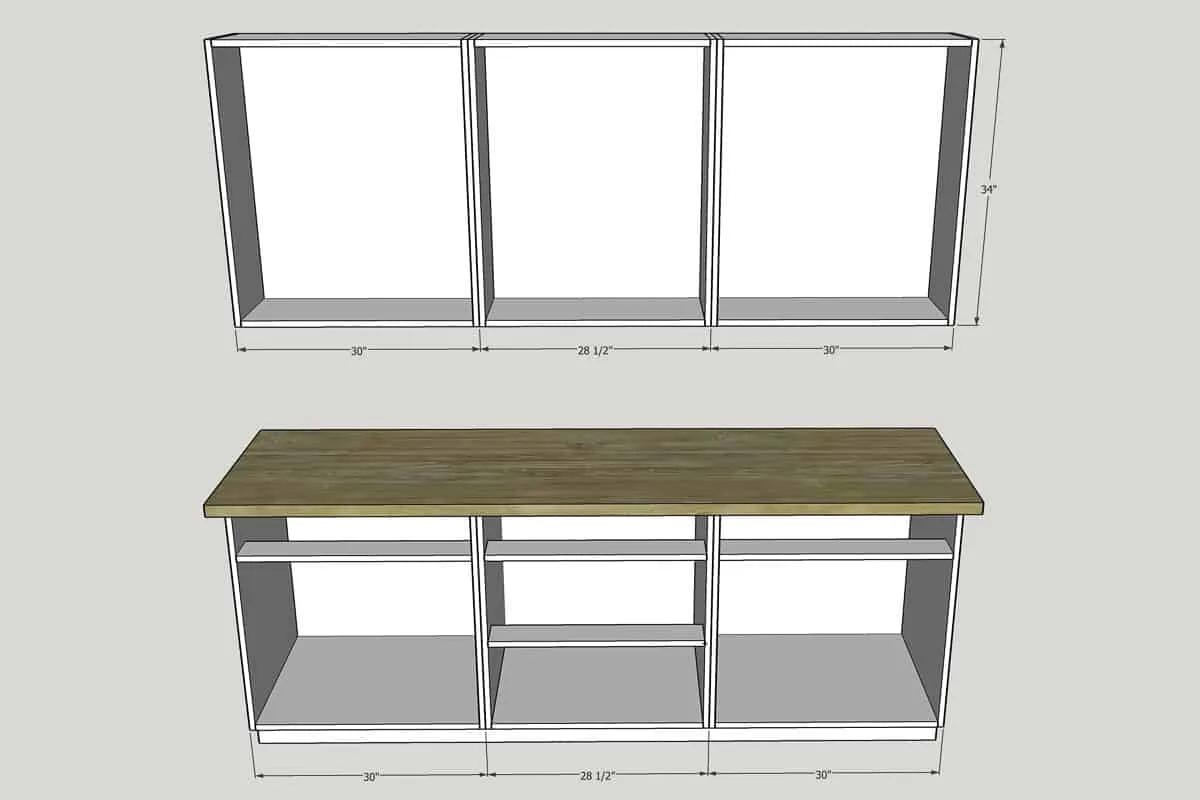
Every space is different, so it's important to take good measurements and make a quick sketch before you start building your wall cabinets. Here are a few standard dimensions that you should take into account:
- The standard depth of wall cabinets is 12-18 inches, including the doors. 12 inches is common for kitchen cabinets, so you have plenty of room to work at the countertop below. Cabinets over the fridge are typically 24" deep, and floor to ceiling pantry cabinets can vary in size depending on the space.
- Wall cabinet widths can range from 9" to 48", but you should consider keeping them under 36" wide to prevent sagging. 30" is standard for a two door wall cabinet.
- Wall cabinet height depends on your ceiling. Upper cabinets should be installed 18" above the countertop, and can range in height depending on the look you want. Take into account any crown molding or soffits you plan to install in the space.
- The top and bottom pieces should be between the sides for added shear strength. You don't want the bottom to fall out when it's full of heavy dishes!
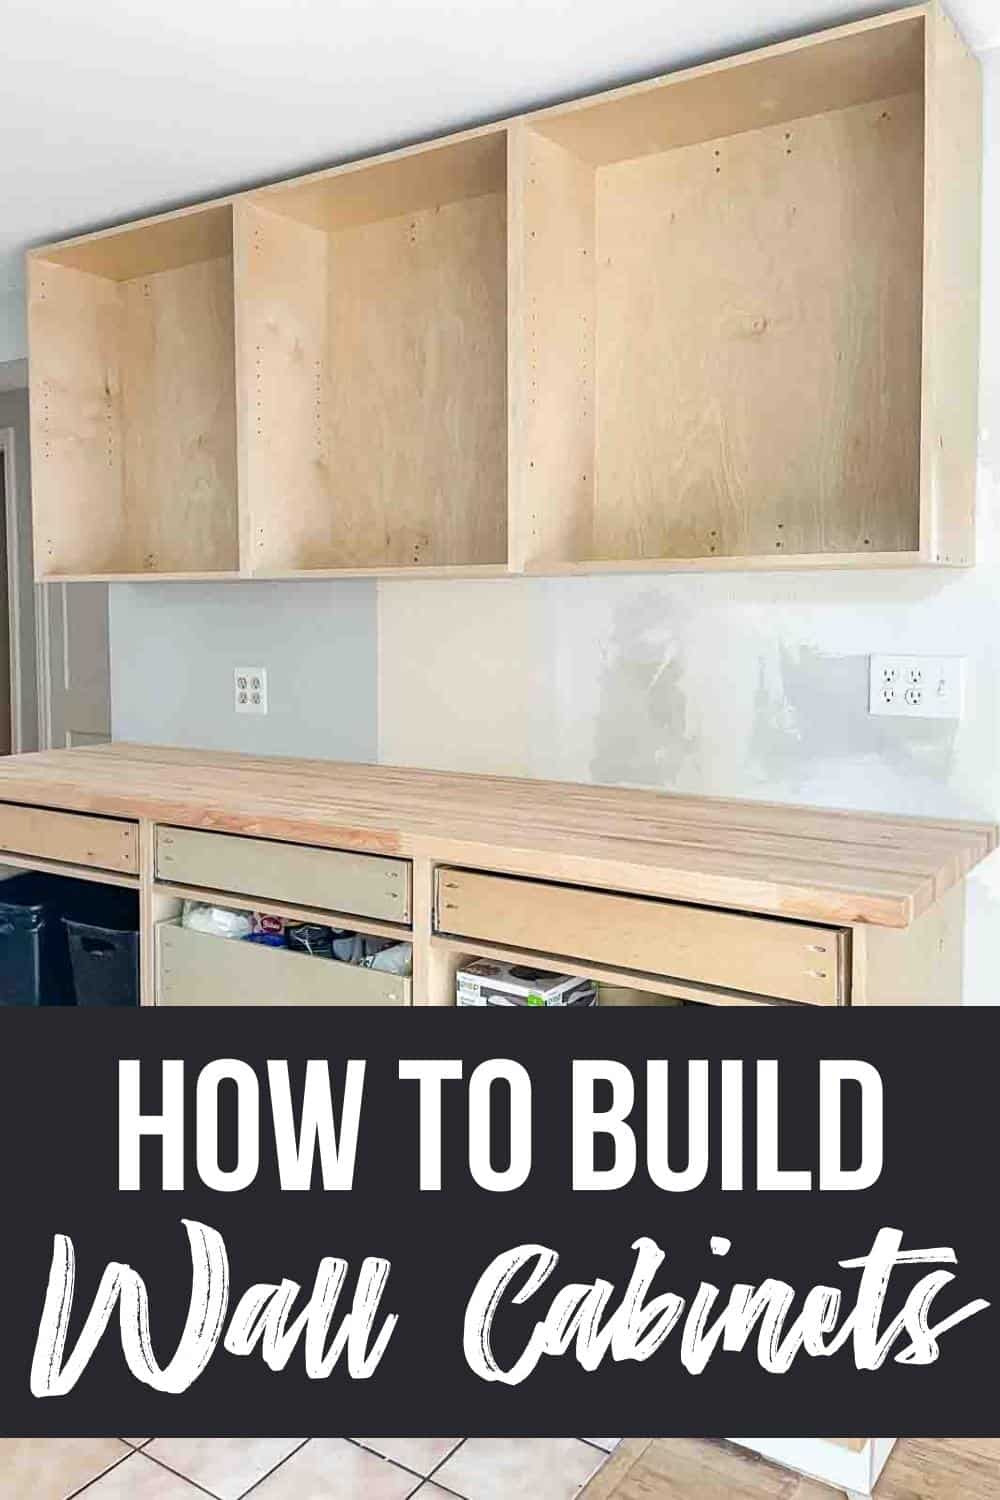
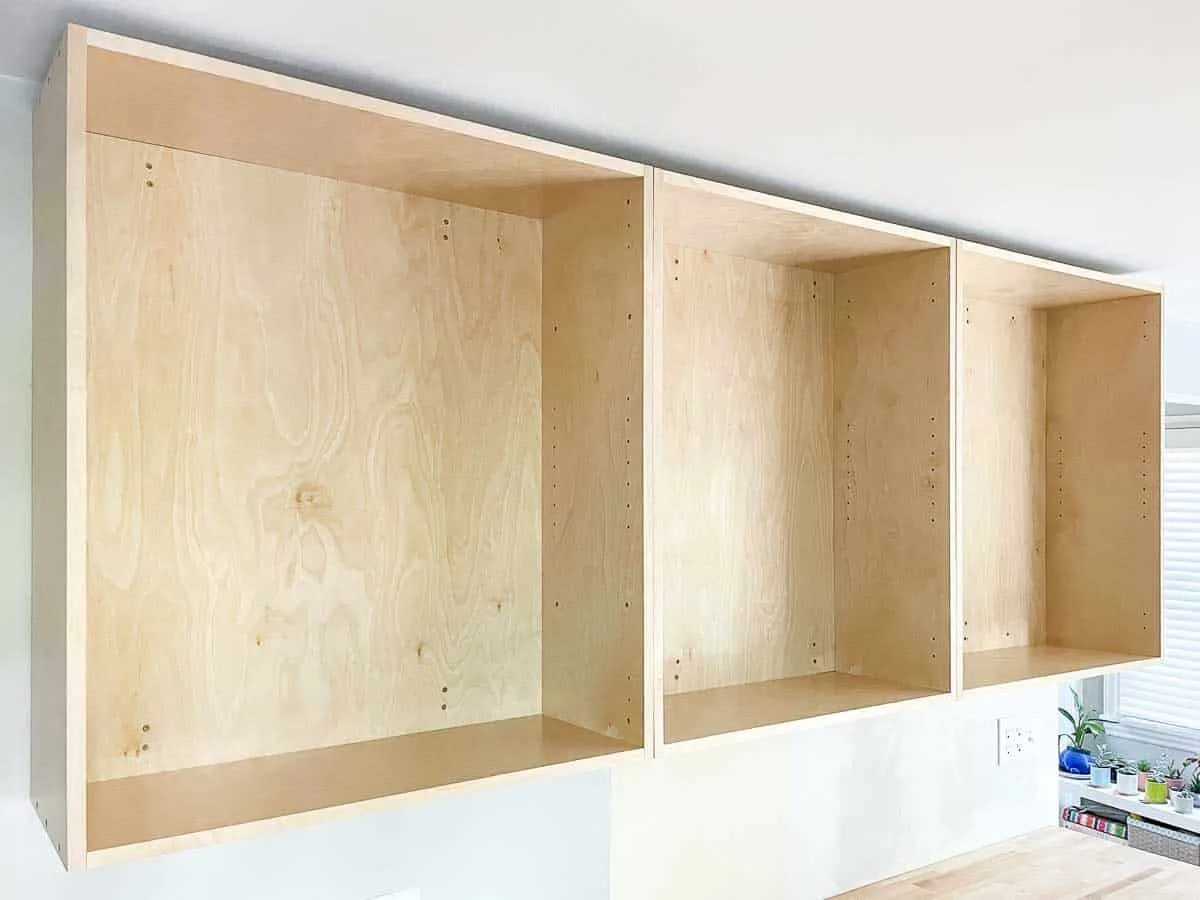
In my kitchen, I built three base cabinets to fit along one wall, and I designed the wall cabinets with the same widths. There's a 30" cabinet on both sides, with a custom sized width in the middle to fit the space. The wall cabinets are 34" tall, which leaves two inches of space between the top of the cabinets and the ceiling for trim.
Cut the plywood pieces
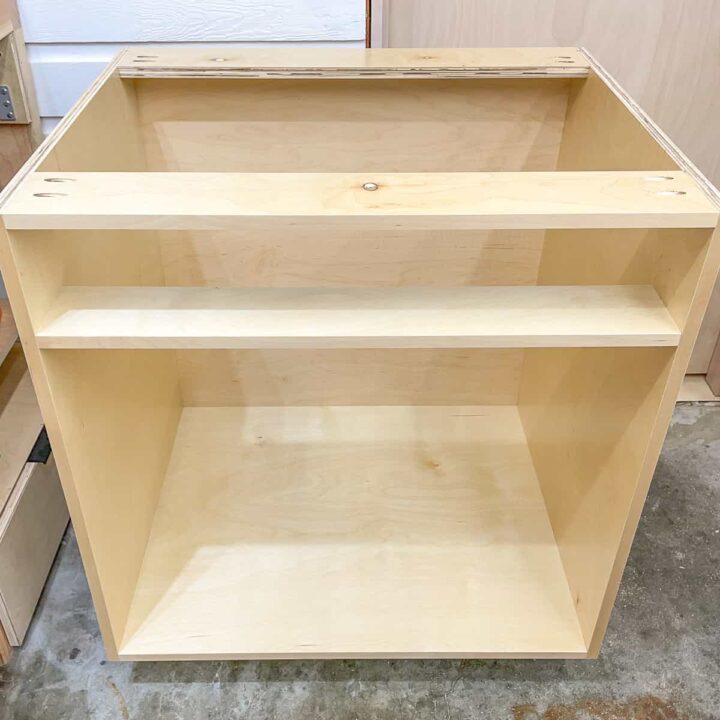
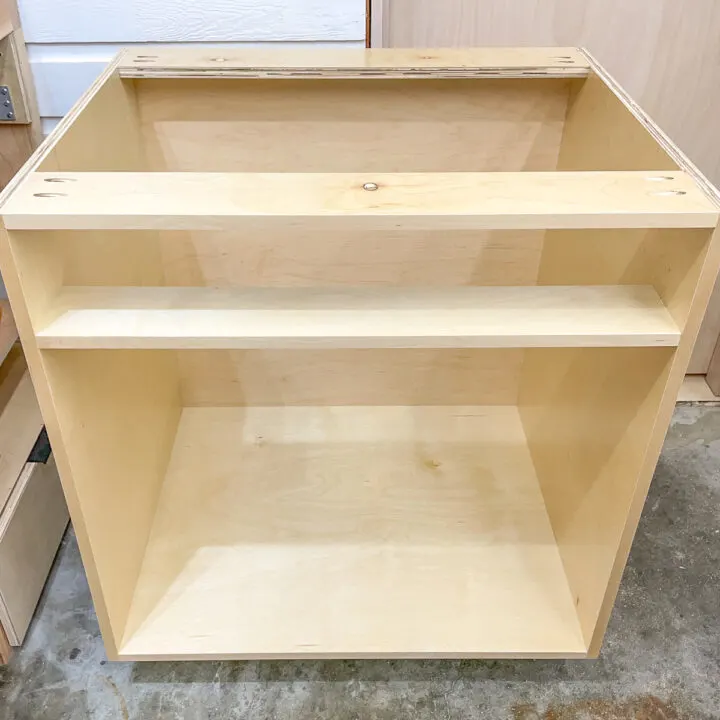
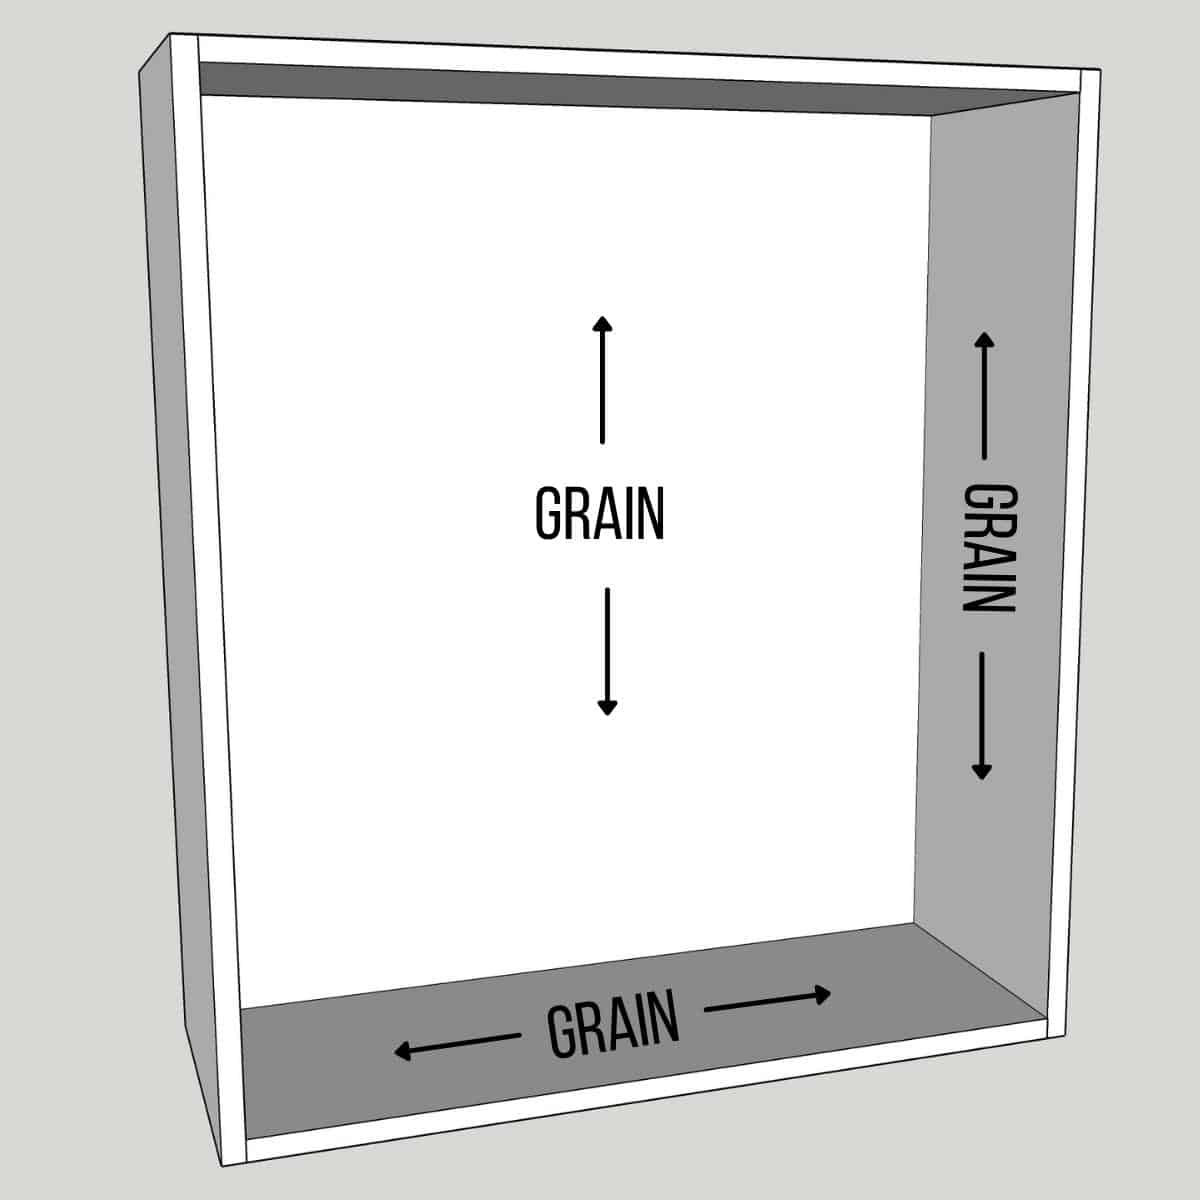
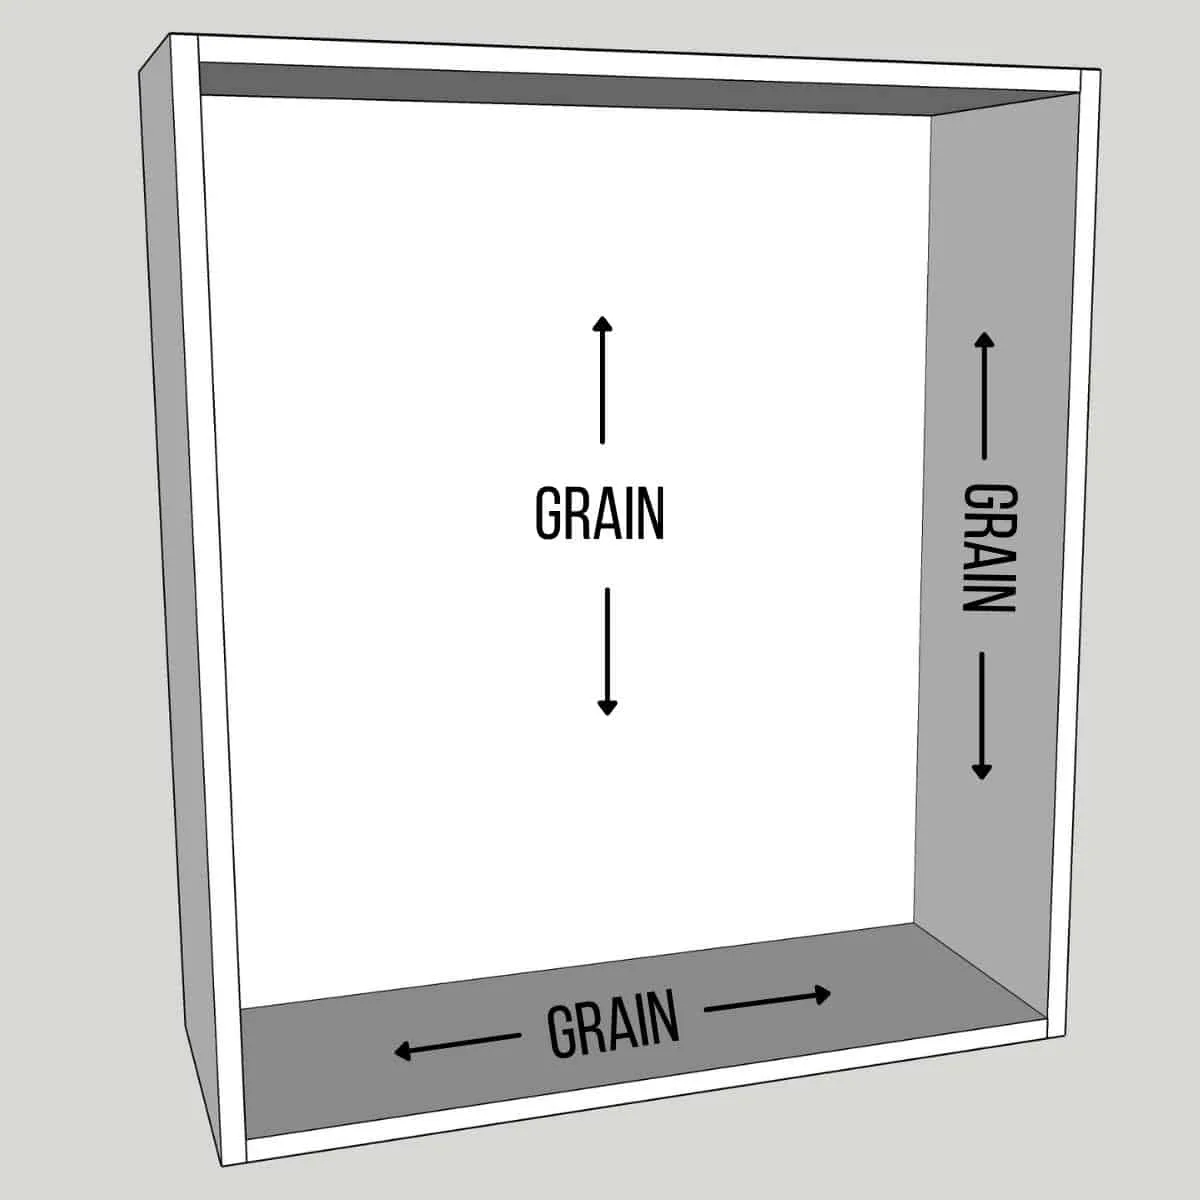
A wall cabinet is made up of two sides, a top and bottom, shelves and a back. If the back is made from thin ¼" material, there's also two strips of wood behind it to attach the cabinet securely to the wall. Check out my parts of a cabinet post for more details and diagrams.
If you're not painting the inside of your cabinets, you'll want to keep the wood grain direction in mind when making the cuts. The grain should run vertically on the side and back pieces, and horizontally for the top, bottom and shelves.
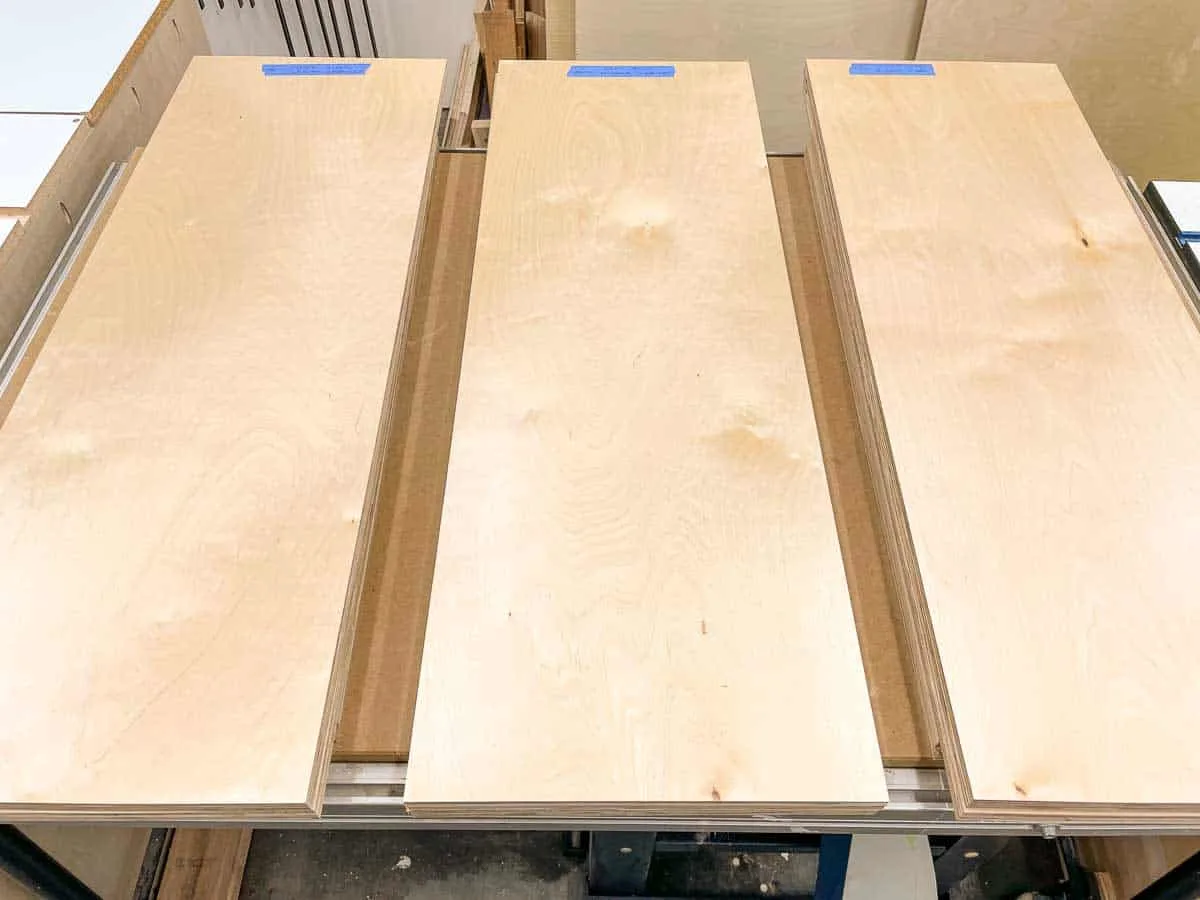
I'm using ¾" prefinished birch plywood for my kitchen cabinets, so I had two sheets cut down into more manageable sections at the lumber yard. One sheet will be the cabinet sides, and was cut into 36" x 48" pieces. The other sheet is for the tops, bottoms and shelves, and was cut into 30" x 48" sections.
Then I trimmed off 1" from the cut edges with my track saw to clean them up and get the final length for all the pieces.
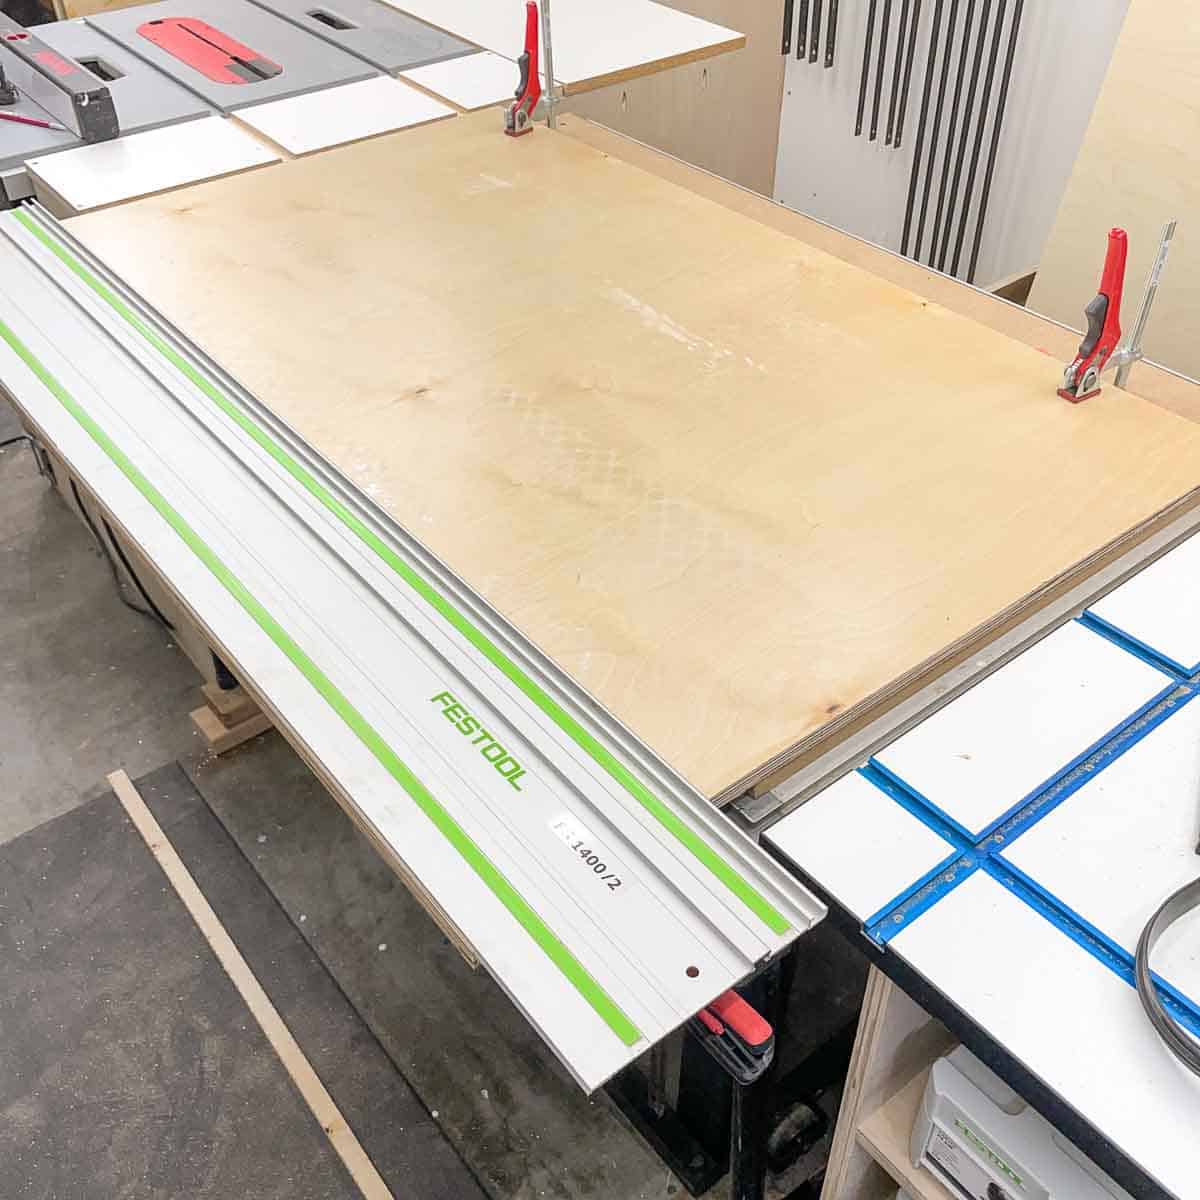
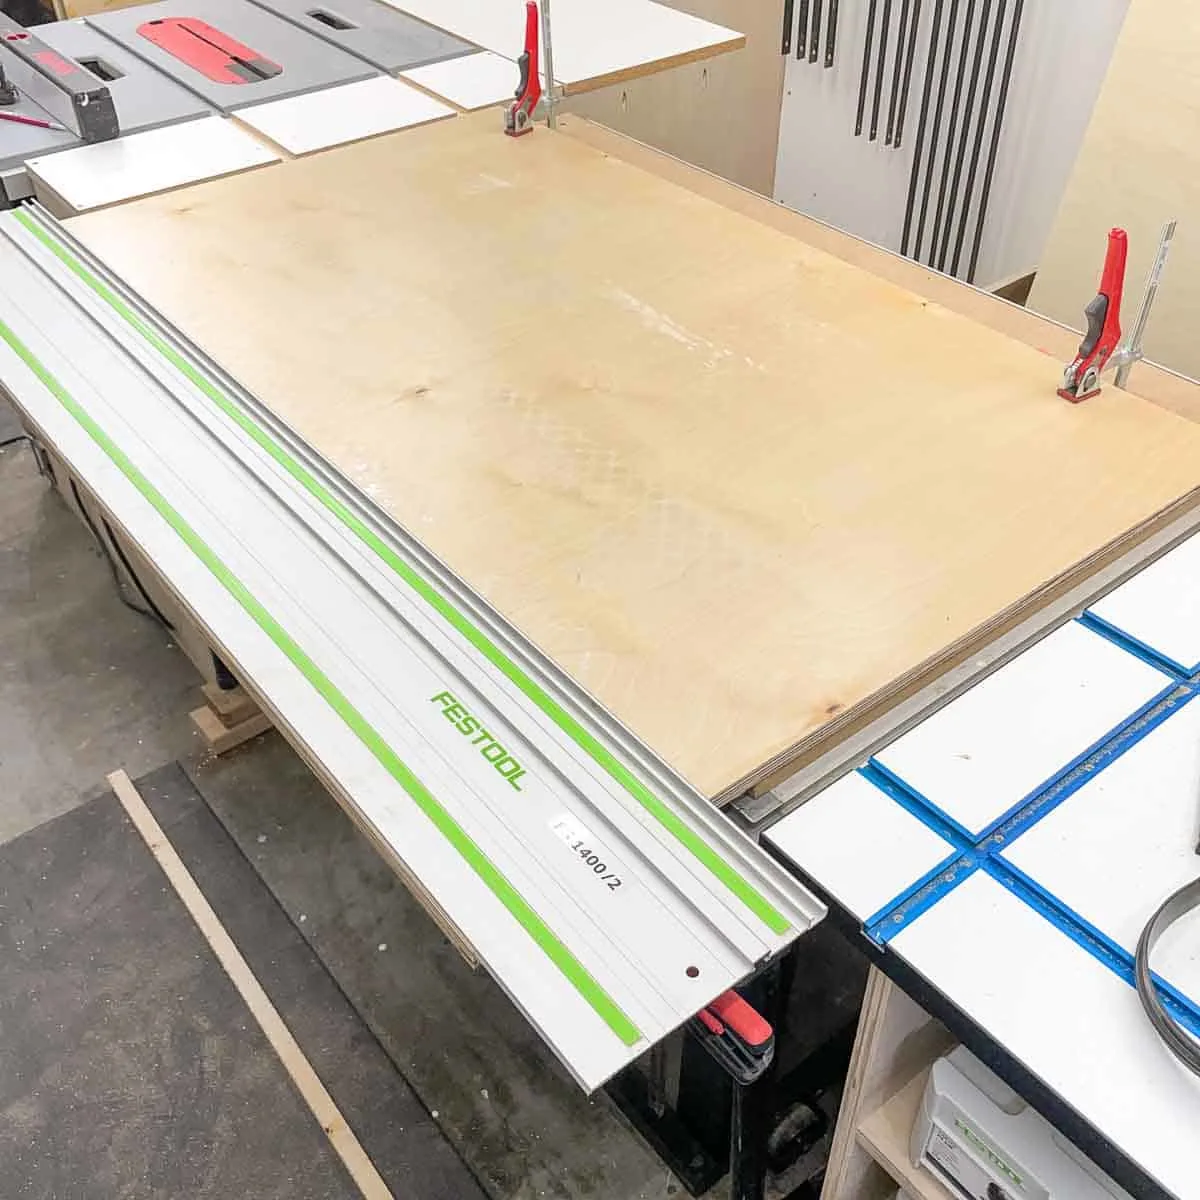
Now I can set the fence on my table saw once and cut all the sides, tops, bottoms and shelves to the same width. You could also use a track saw with parallel guides or a circular saw with an edge guide to make these repeatable cuts.
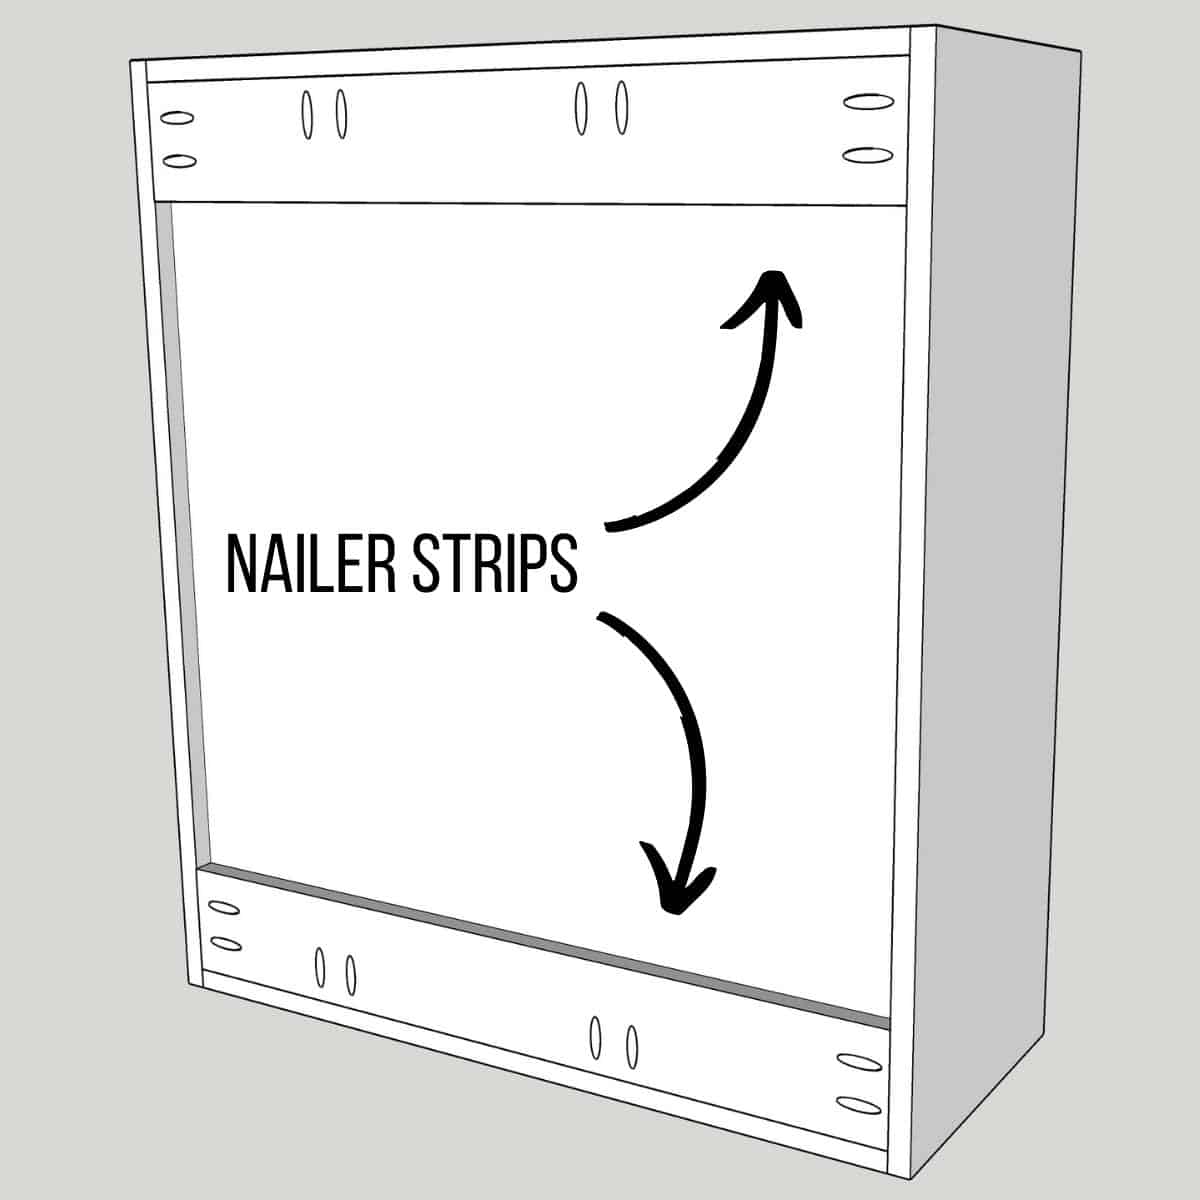
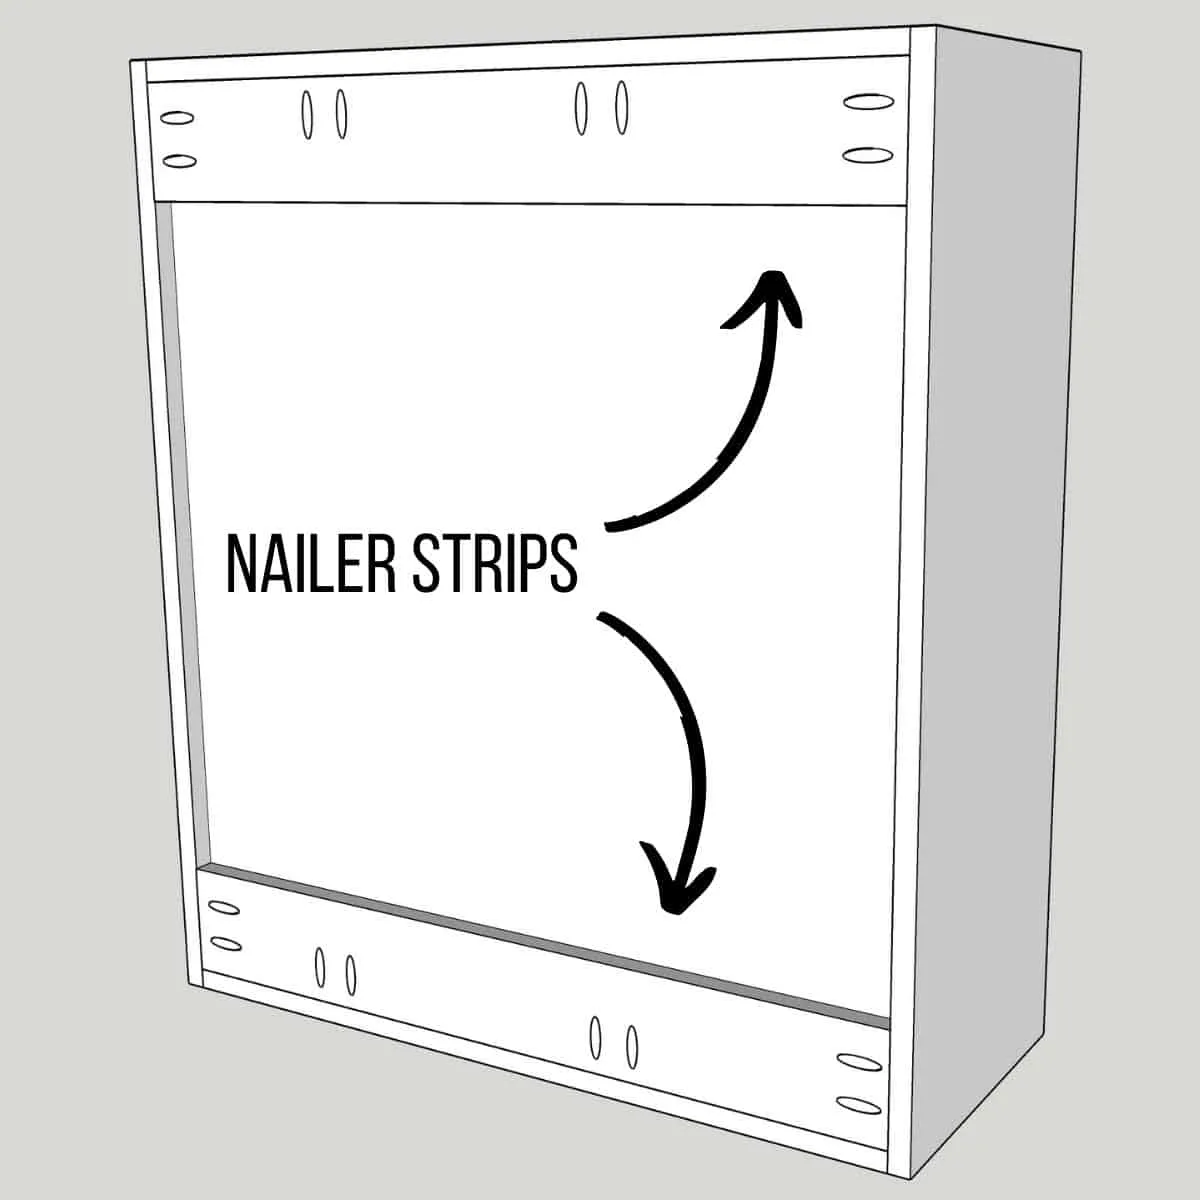
Make sure to label your parts as you go, so they don't get mixed up! I use painter's tape so I don't have to sand the markings off later. Save any leftover pieces that are at least 3" wide for the nailer strips.

Cut the groove for the back panel (optional)
There are several different ways to install the back panel on a cabinet. You can just staple the back on, but the nailer strips will be visible on the inside of the cabinet. I prefer to cut a groove in all the pieces for the back to slide into, then hide the nailer strips behind it.
You can cut this groove at the table saw, with a router, or with a circular saw or track saw (using an edge guide). I like to use a single blade instead of a dado stack, since this groove only requires two passes through the saw for the right fit.
First, set the height of the blade so it will cut at least a third of the way through the wood. I set mine for ¼" to make the math easier, but I probably should have made it closer to ⅜" so the back didn't pop out so easily.
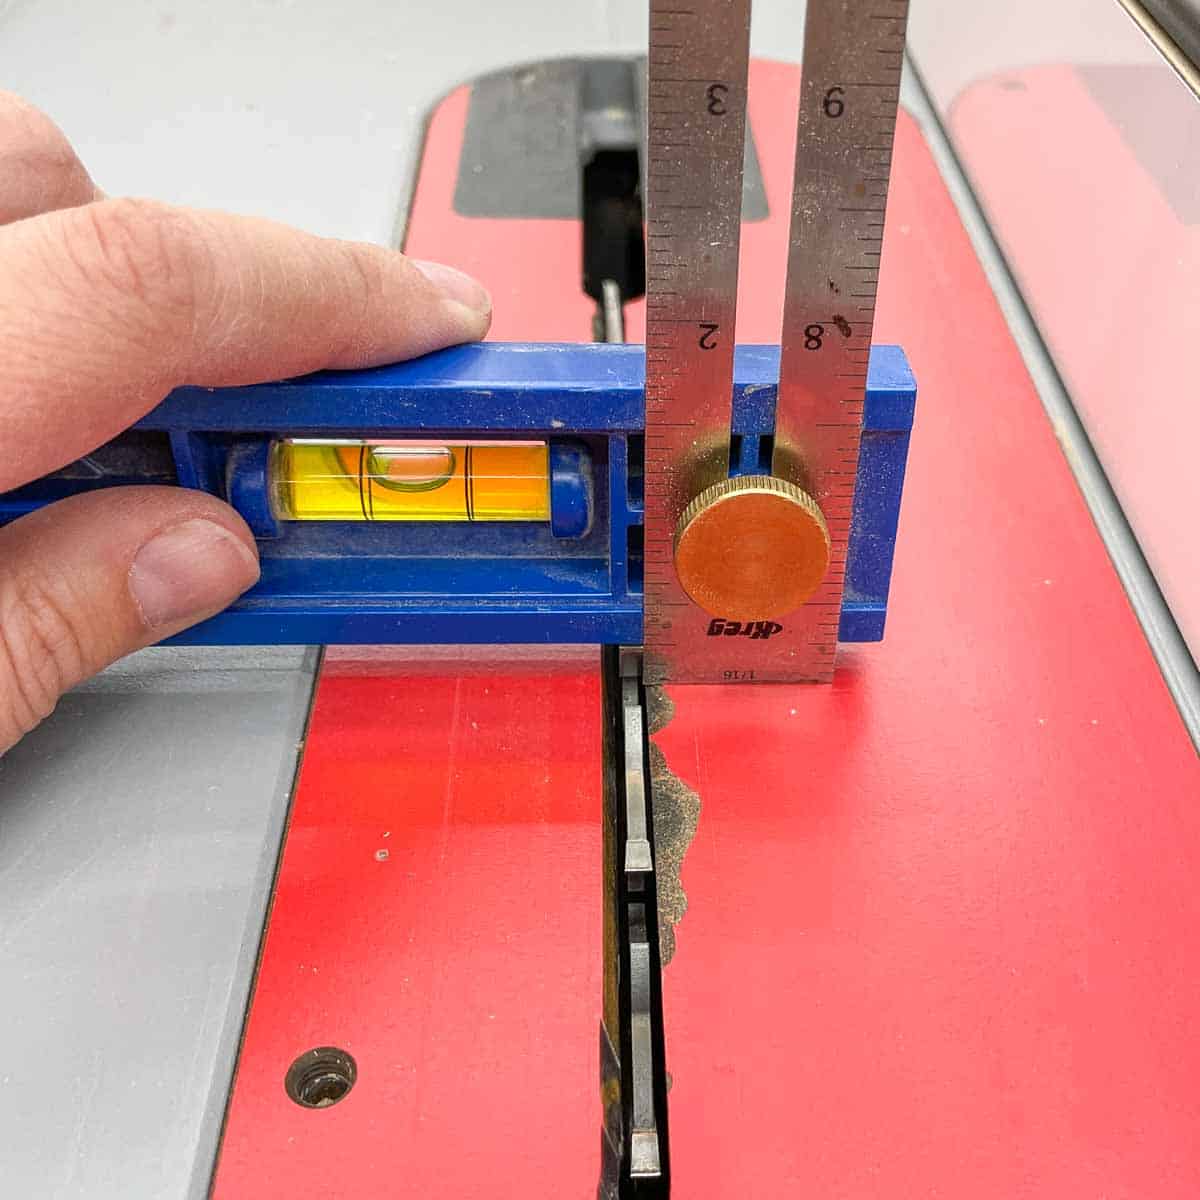
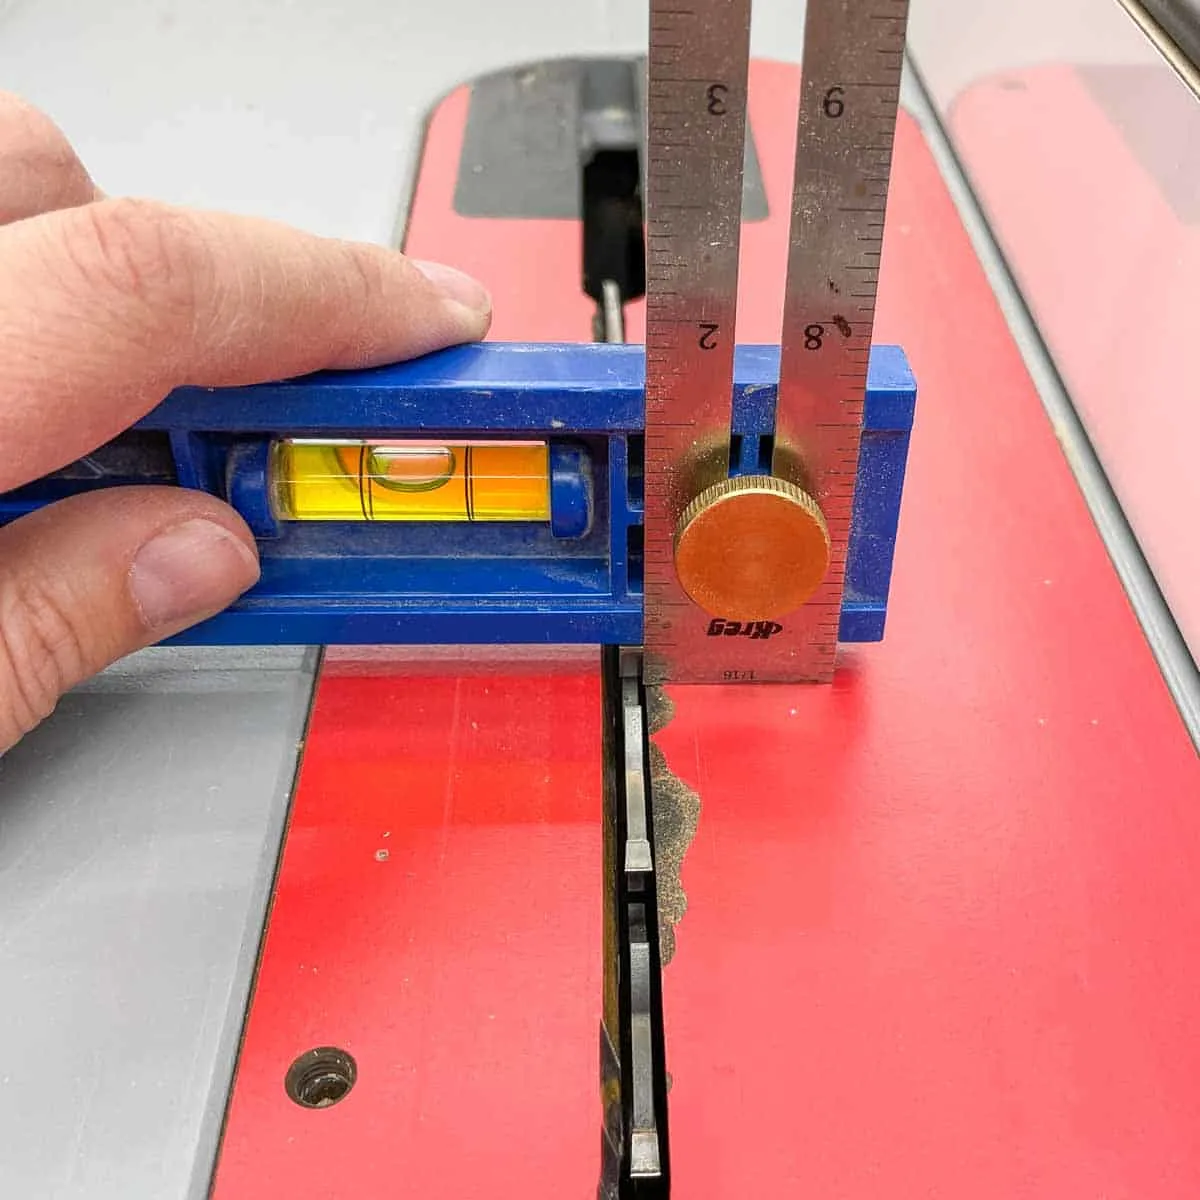
Then set the distance from the blade to the fence with a scrap of the same plywood you plan to use for the nailer strips.

Use a piece of scrap plywood to cut the first groove, then set it aside. Cut all the side, top and bottom pieces at the same setting.
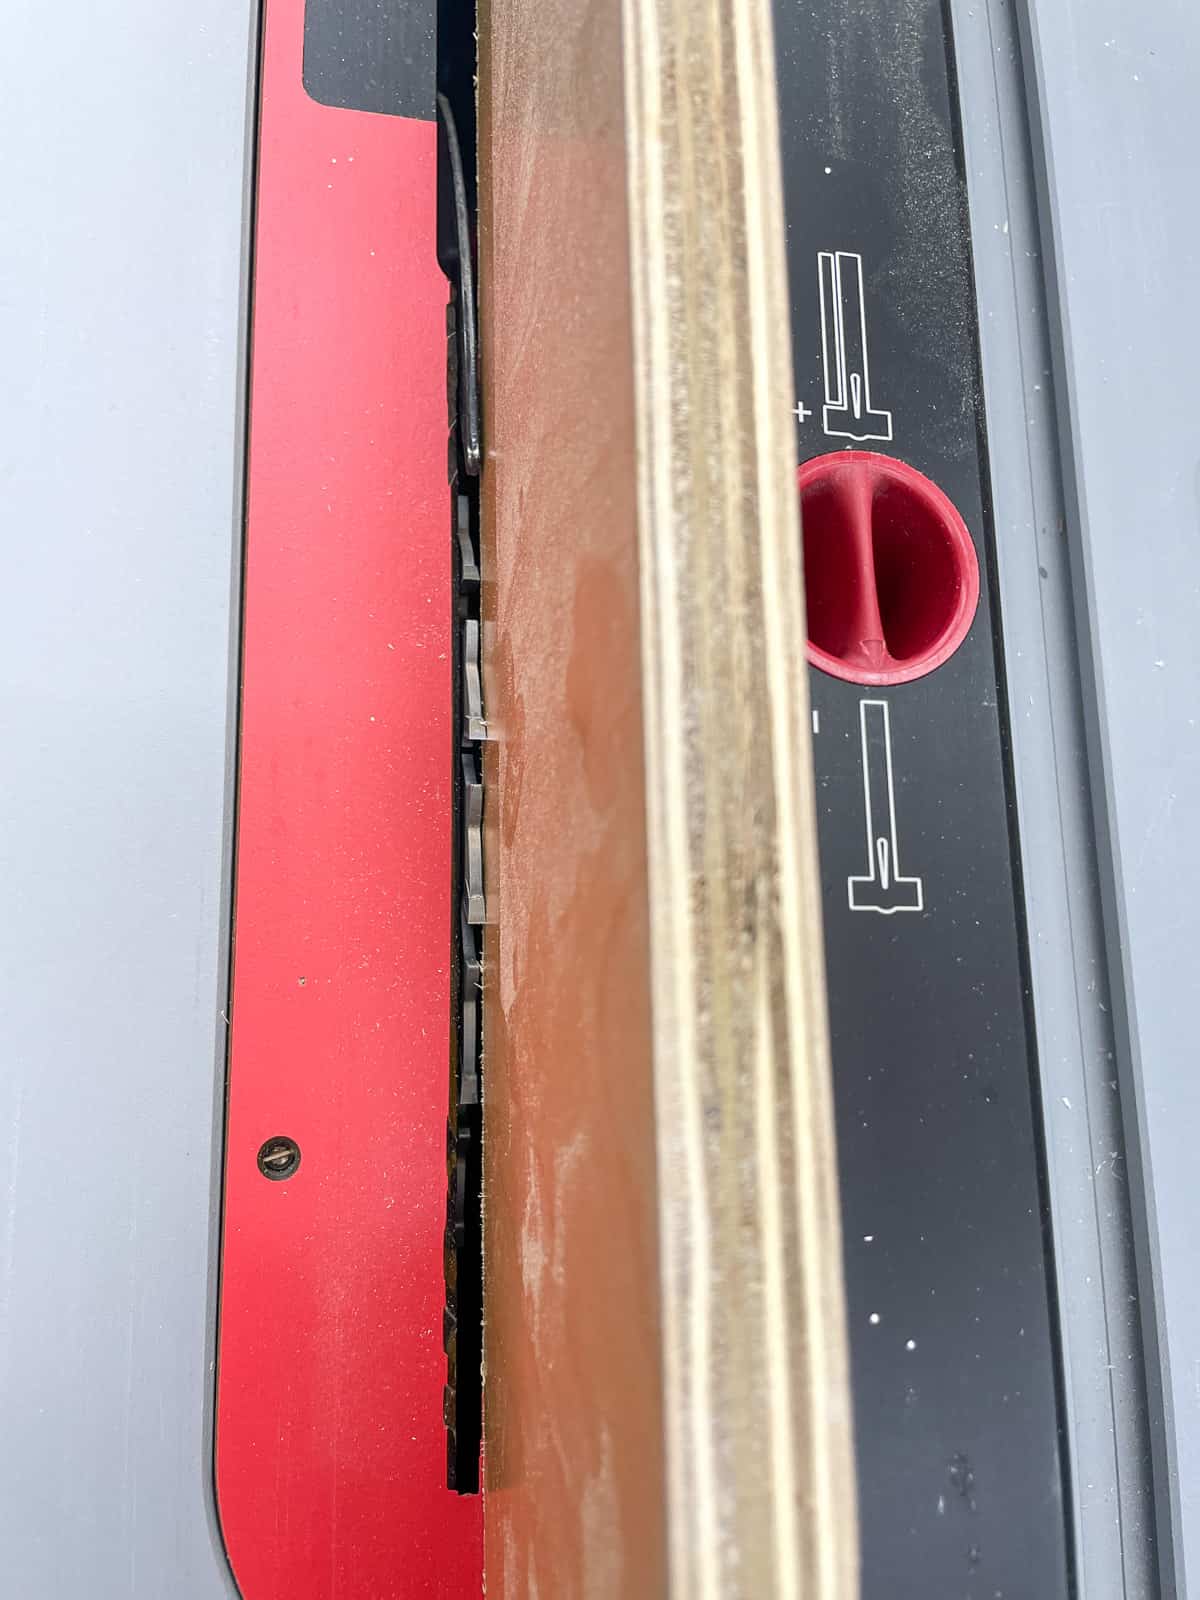
Now shift the fence to the right slightly to widen the groove. Run the test piece through the saw, and check to see if the ¼" plywood fits. Keep adjusting the spacing until it slides in without being forced but stays in place snugly.

Once you have the settings dialed in, run all the pieces through again to create the groove.
Before you move the fence, there's one more cut to make. The shelves were previously cut to the same size as the top and bottom, but now the back panel will be in the way.
You can use this same table saw setting to trim the back of the shelf so it will sit perfectly flush with the front of the cabinet! Just raise the blade so it cuts all the way through the plywood and run all the shelves through the saw.
If you're noticing that your cuts aren't coming out as clean as you like, you may need to clean the saw blade! After a lot of plywood cuts, the glue between the layers can build up on the teeth and cause burning and tear-out. It's quicker and cheaper than buying a new blade!
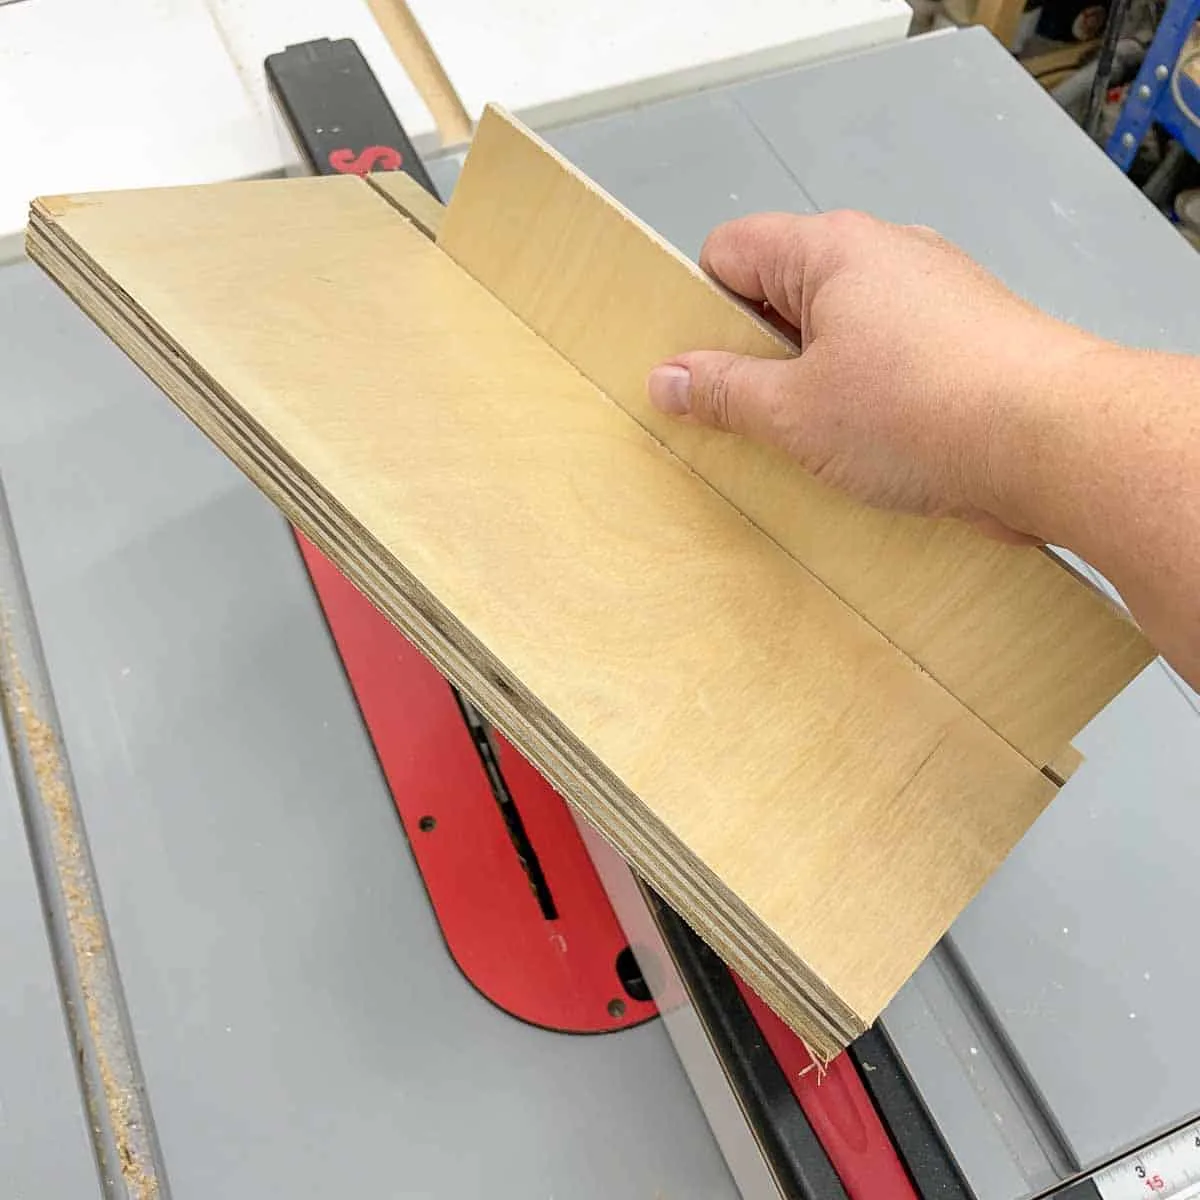
Cut the plywood back
Now that you know how deep your groove is, you can cut the plywood back to fit. It should be the size of the opening, plus the depth of the grooves on all four sides. I usually make mine a tiny bit smaller in both directions so it slides in smoothly during assembly.
Apply edge banding
These are frameless wall cabinets, so the plywood edge needs to be covered up so you don't see the layers. I have a full tutorial on how to apply edge banding, so I'll just go over the basics here.
If you're not painting your cabinet, you should choose edge banding that matches the plywood. Since I'm building these wall cabinets out of prefinished birch plywood, I used prefinished birch edge banding.
Apply the edge banding to the edge opposite the groove you just cut. Just iron it on, then cut off the excess with an edge banding trimmer.

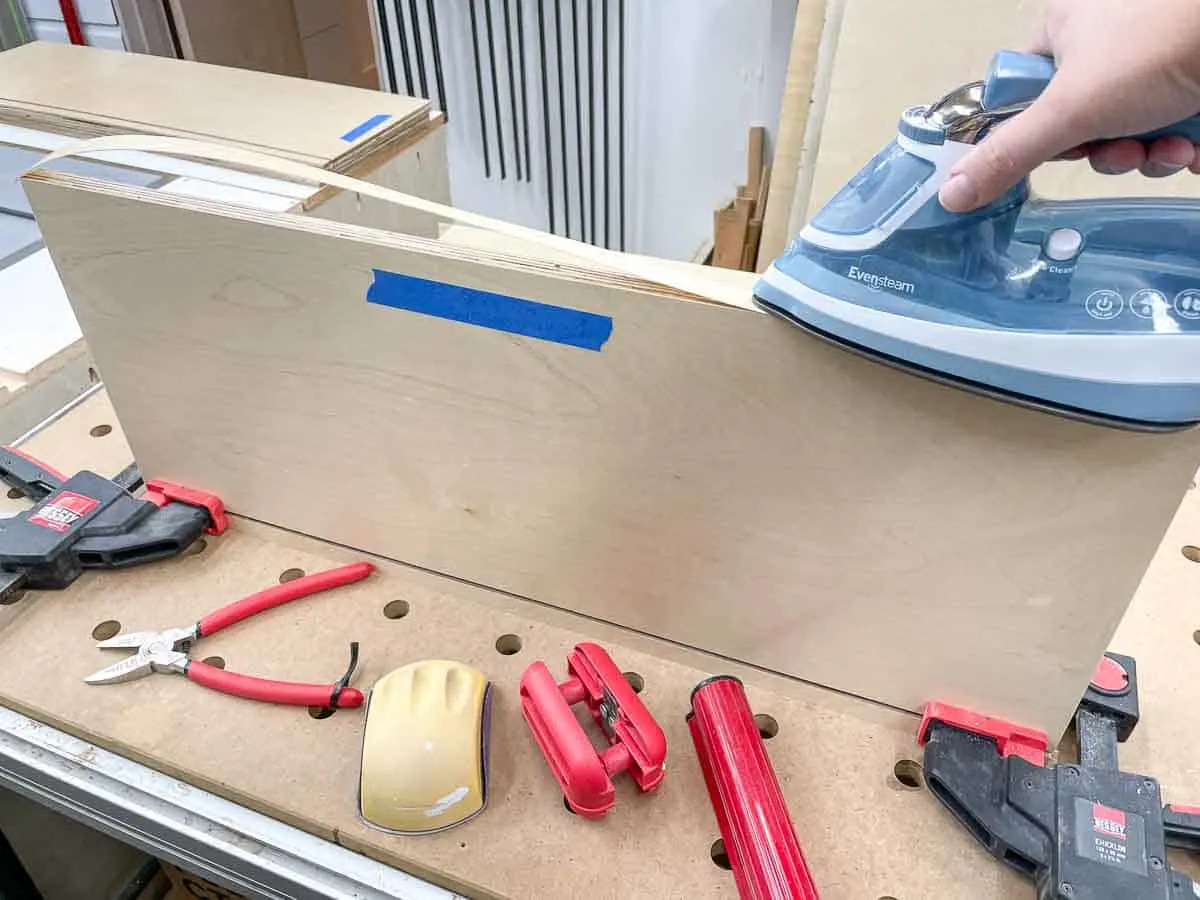
I also applied edge banding to the bottom of the side pieces because you can see the underside of these upper cabinets when you're sitting at the dining table.
Drill shelf pin holes
It's much easier to drill the shelf pin holes now, rather than after the cabinet is assembled. There are a ton of different shelf pin jigs out there that make it easy to get the right spacing with just a drill.
But I've found that the drill bit can create a ragged hole, so I opted for a router set up instead. I build a LOT of cabinets, so it was worth the investment! I'll go into more detail about this process in a separate tutorial soon.

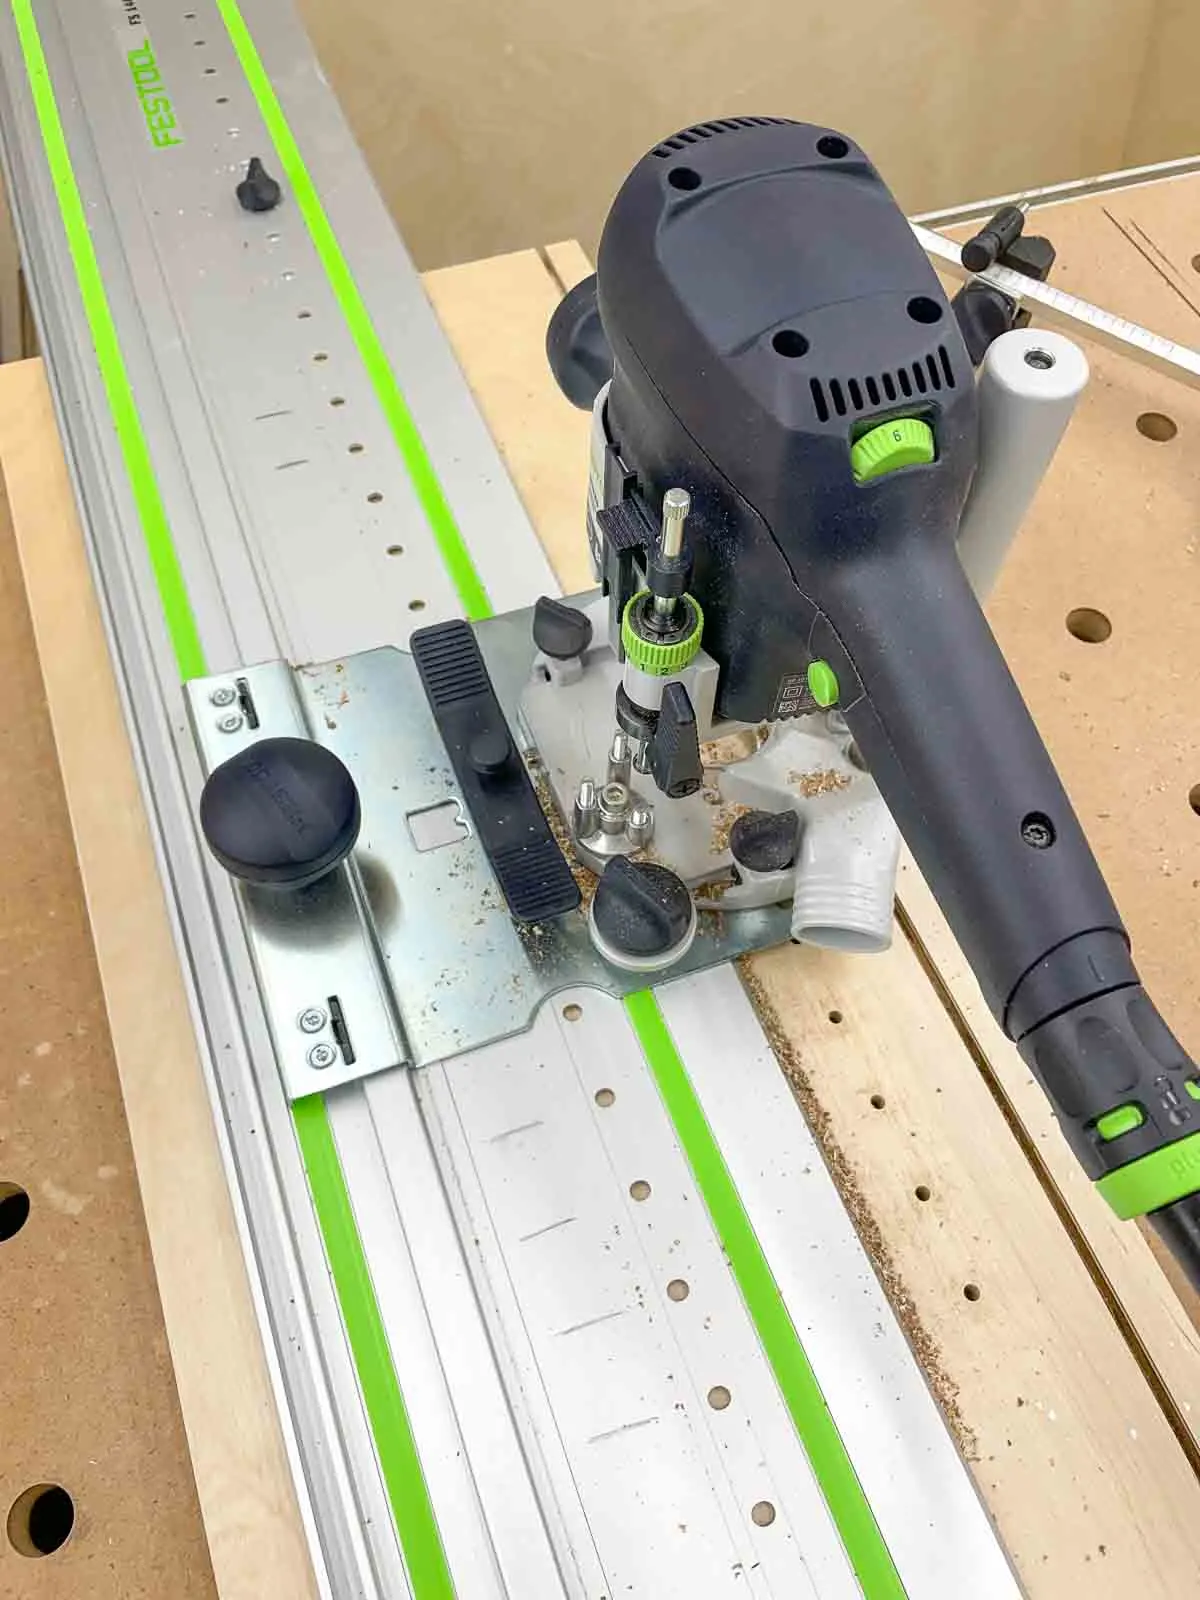
Keep in mind that you don't have to drill holes down the entire length of the side pieces. You're not going to put a shelf an inch above the bottom! Drill the first hole in the middle, then 5-7 holes in each direction from the point.
Drill pocket holes or countersink holes
If you have a pocket hole jig, you can use it to drill pocket holes along both ends of the top and bottom pieces. Make sure these holes are on the opposite face from the groove!
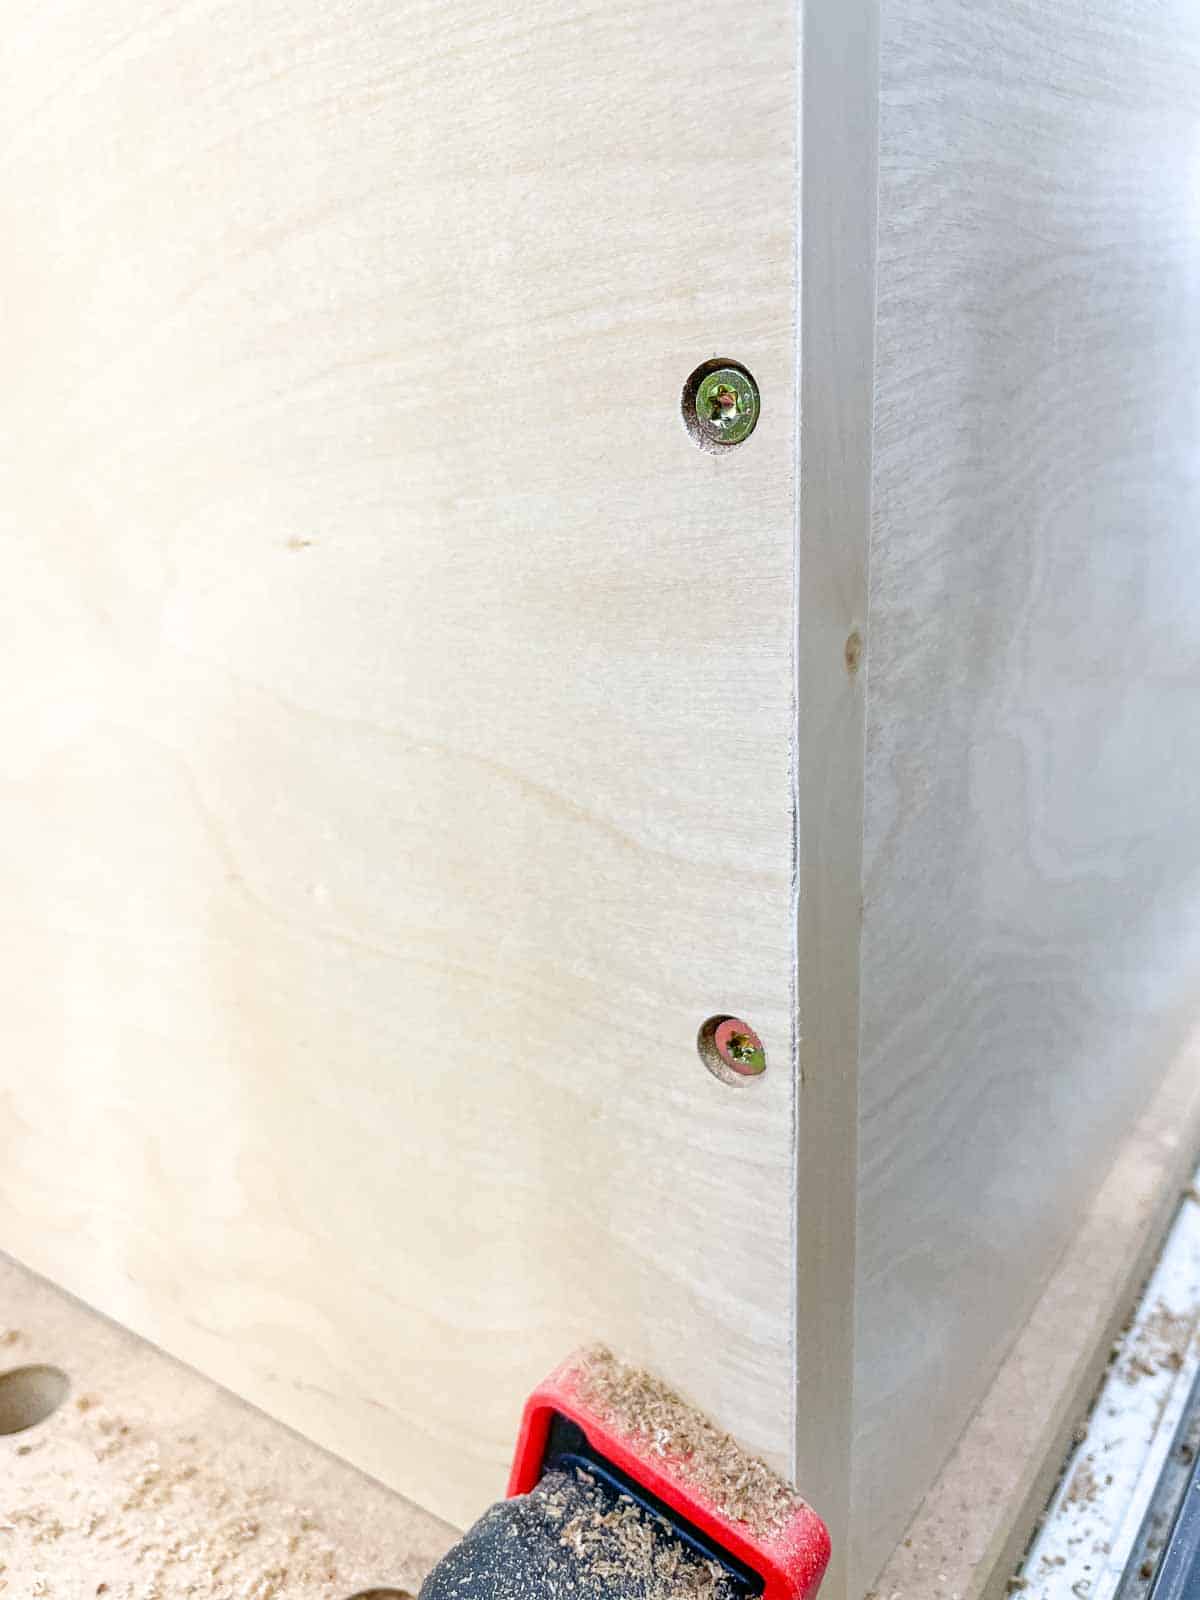
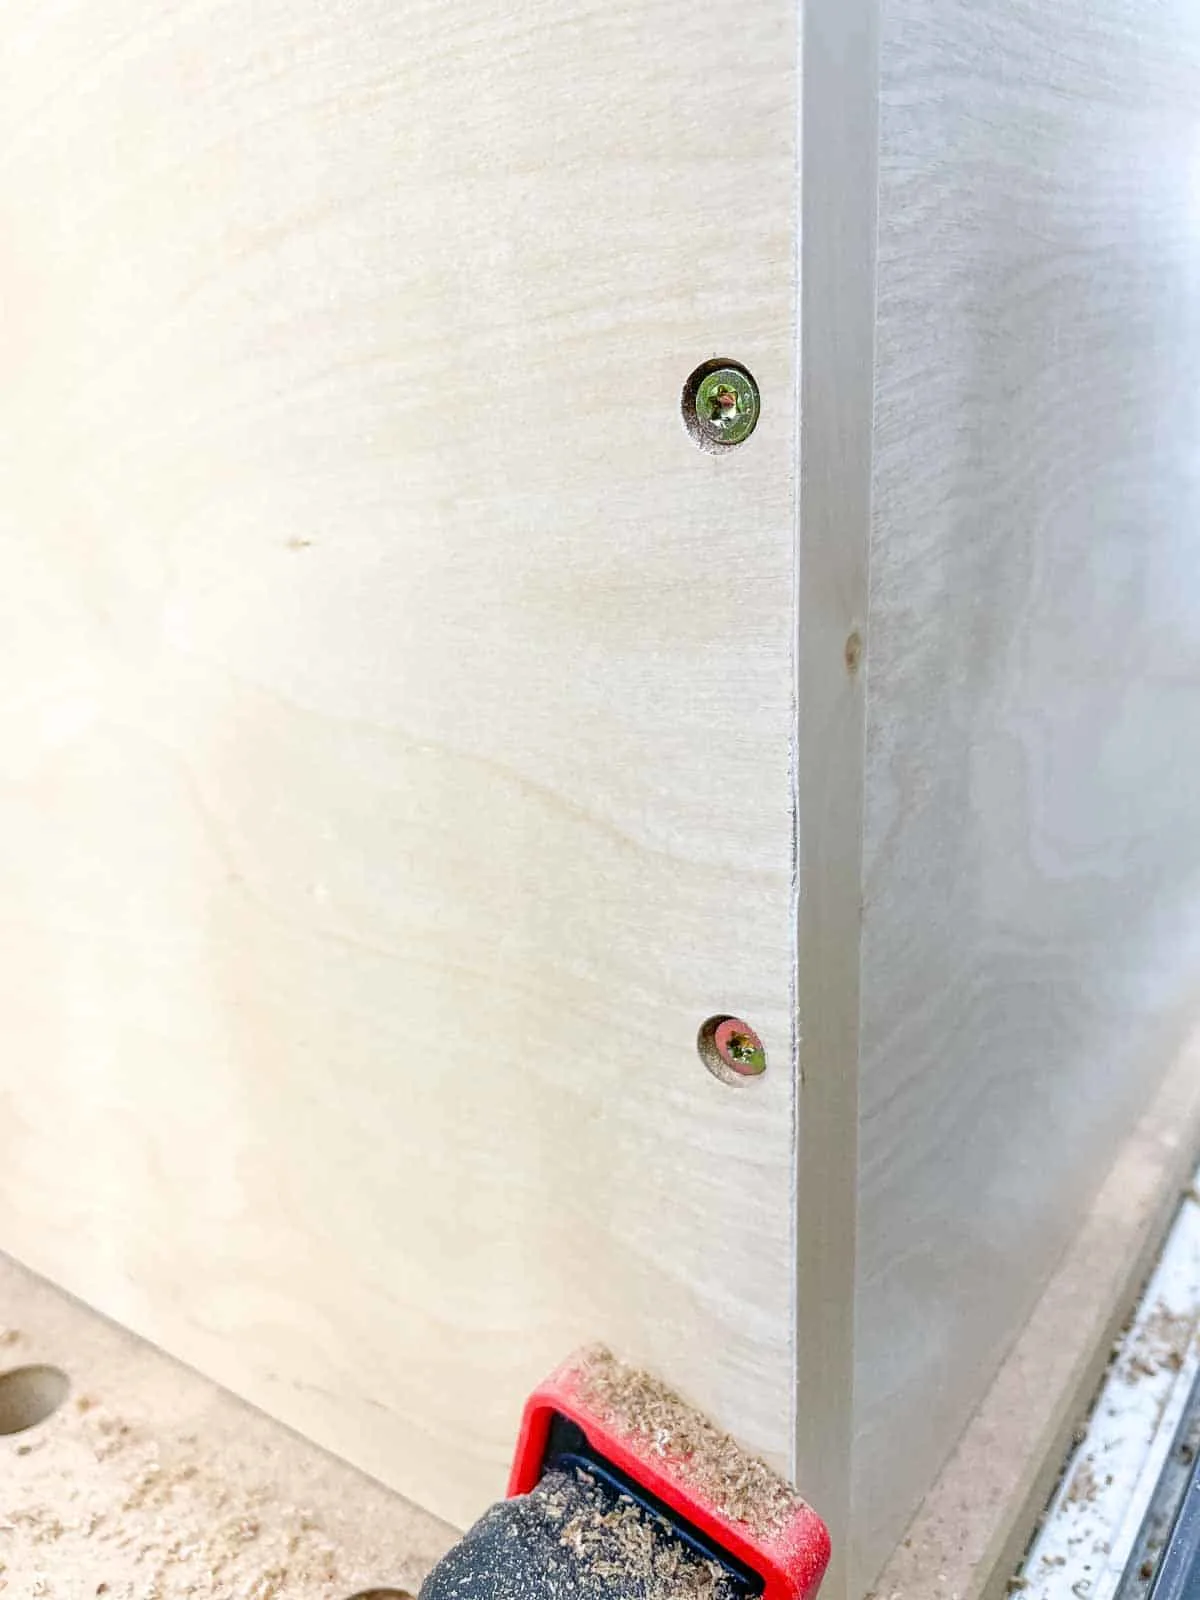
I wanted to avoid pocket holes on the underside of the cabinets, since you can see them when you're sitting at the dining table nearby. I'm planning to cover up the sides with an end panel anyway, so I decided to just drill countersink holes.
Place the bottom between the two sides with the edge banding facing up. Use clamps to hold the pieces together. Measure and mark ⅜" from the top and bottom on both sides.


Use a countersink bit to predrill the holes and create a recessed area for the screw head at each of your markings. I really like this one because it makes clean holes at a consistent depth. I have a full tutorial on how to countersink screws if you're not familiar with this technique.

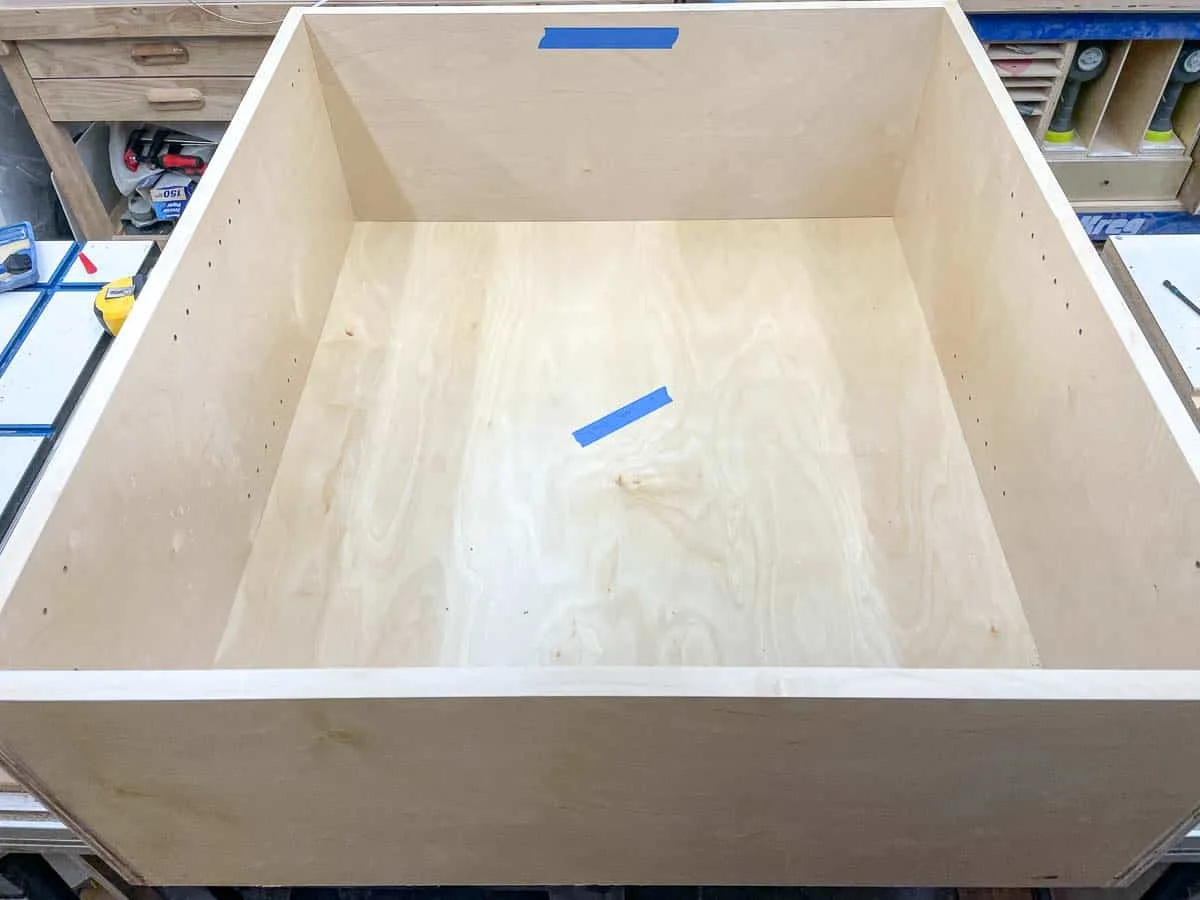
Assemble the wall cabinet parts
After all that prep work, assembling the wall cabinet is the easy part! Apply wood glue to both ends of the bottom piece. Clamp the two sides to the bottom and check for square. Then screw them together with pocket hole screws or 2" wood screws through the predrilled holes.
Don't worry about filling those screw holes. They'll be hidden between the cabinets or against the wall, or covered up with end panels.
Slide the back panel into the grooves through the top of the cabinet.

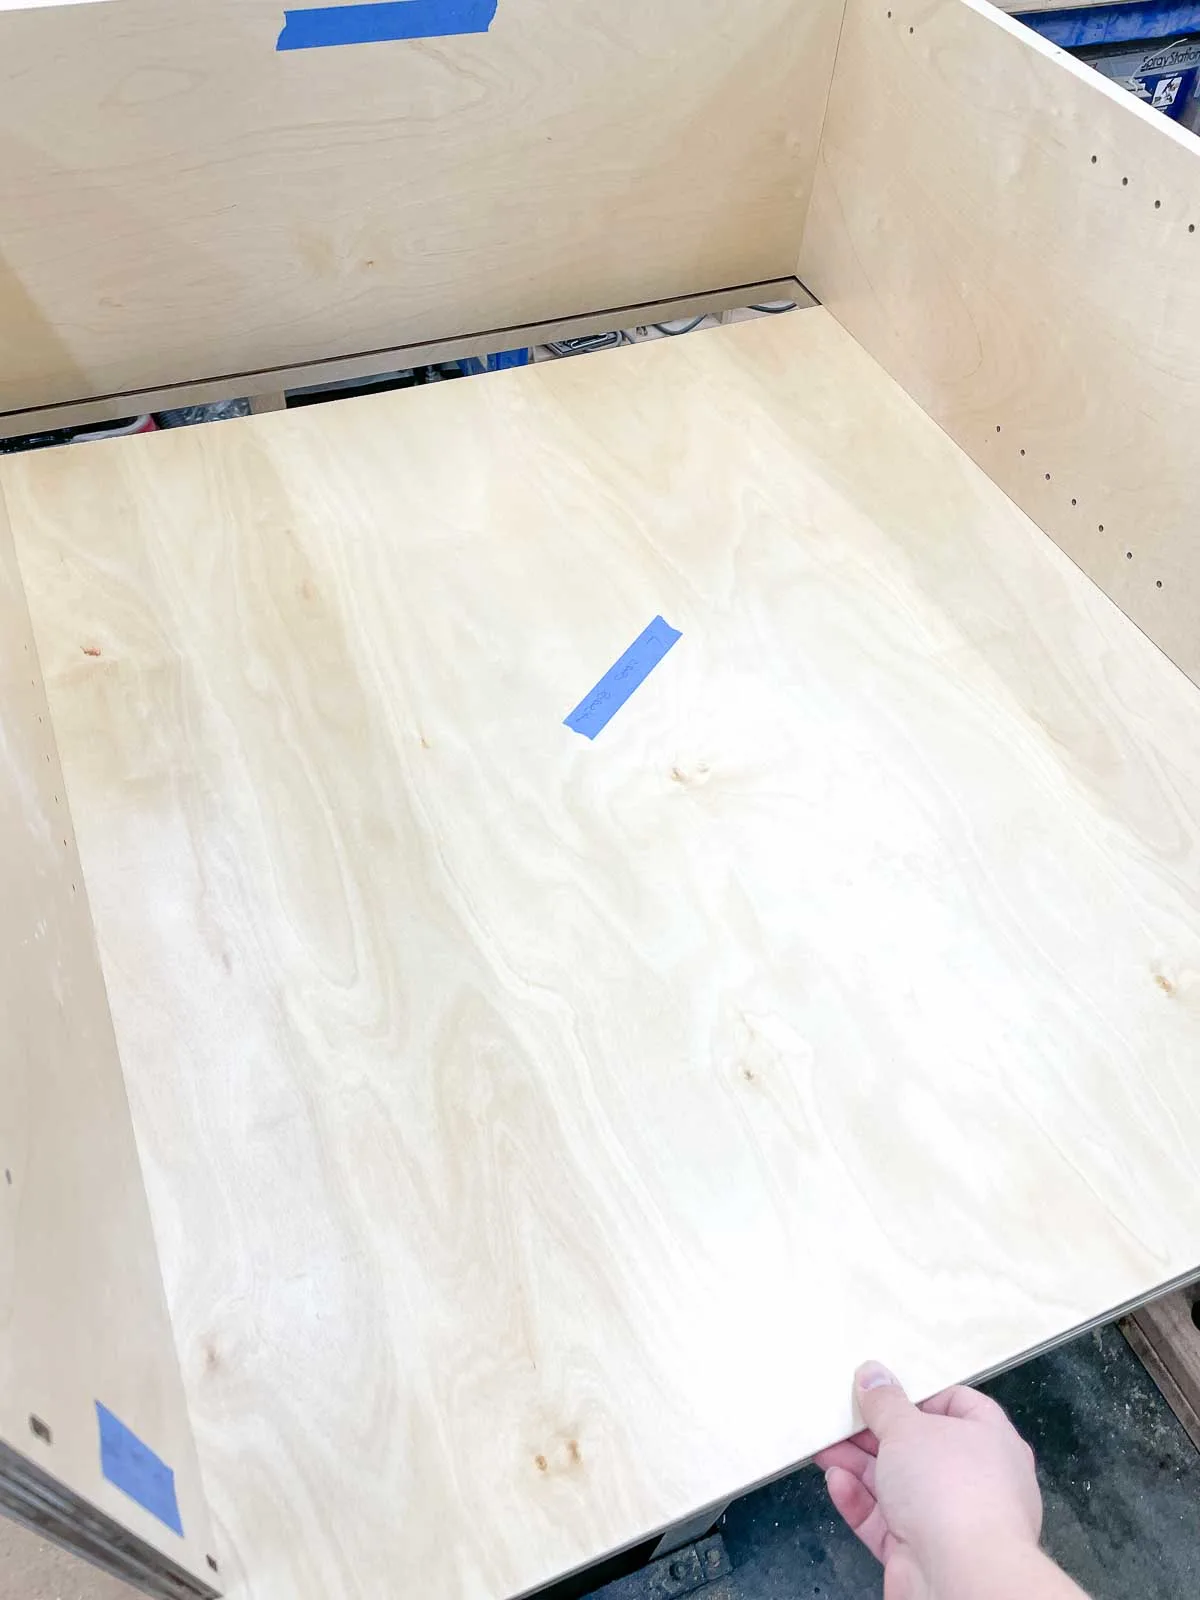
Apply wood glue to both ends of the top piece, and fit the back into the groove. Line up the top flush with the top of the sides, and screw it into place.
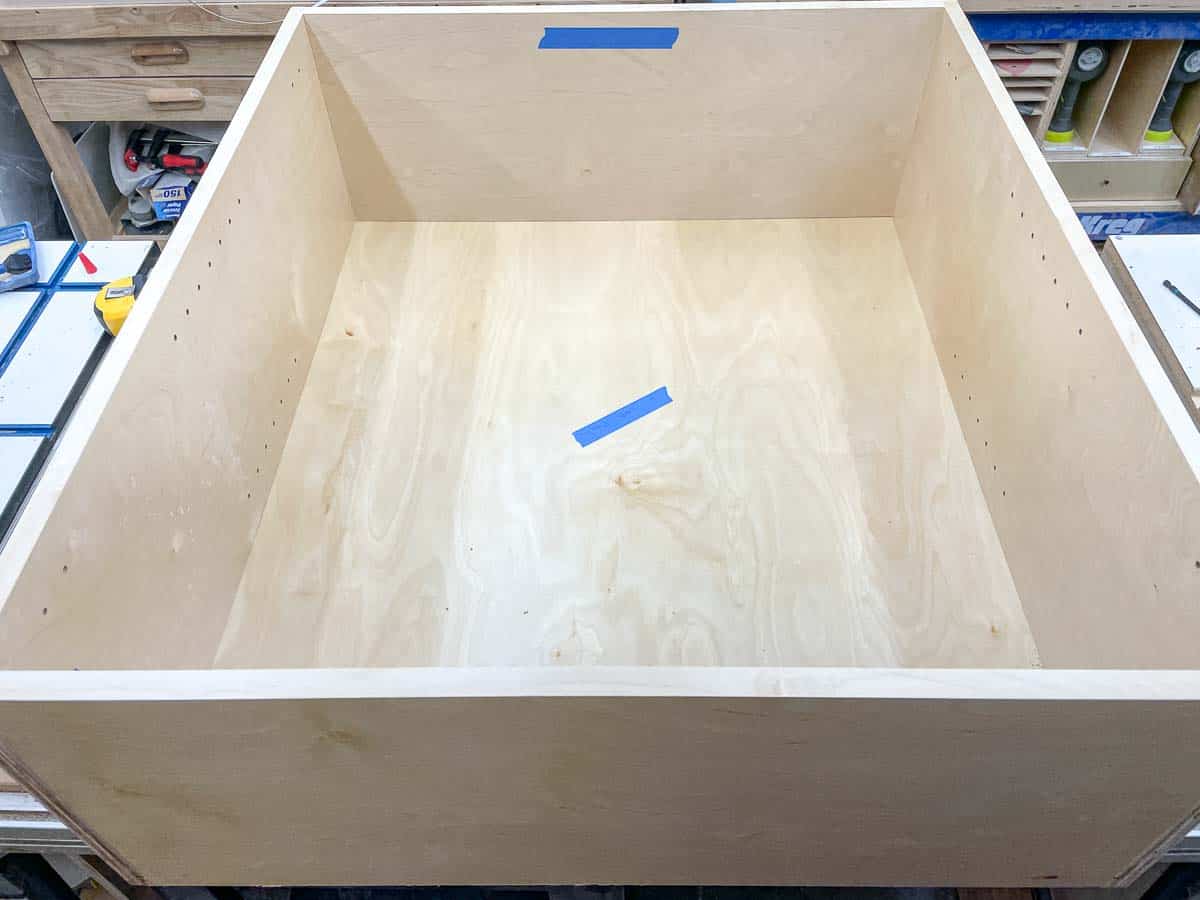
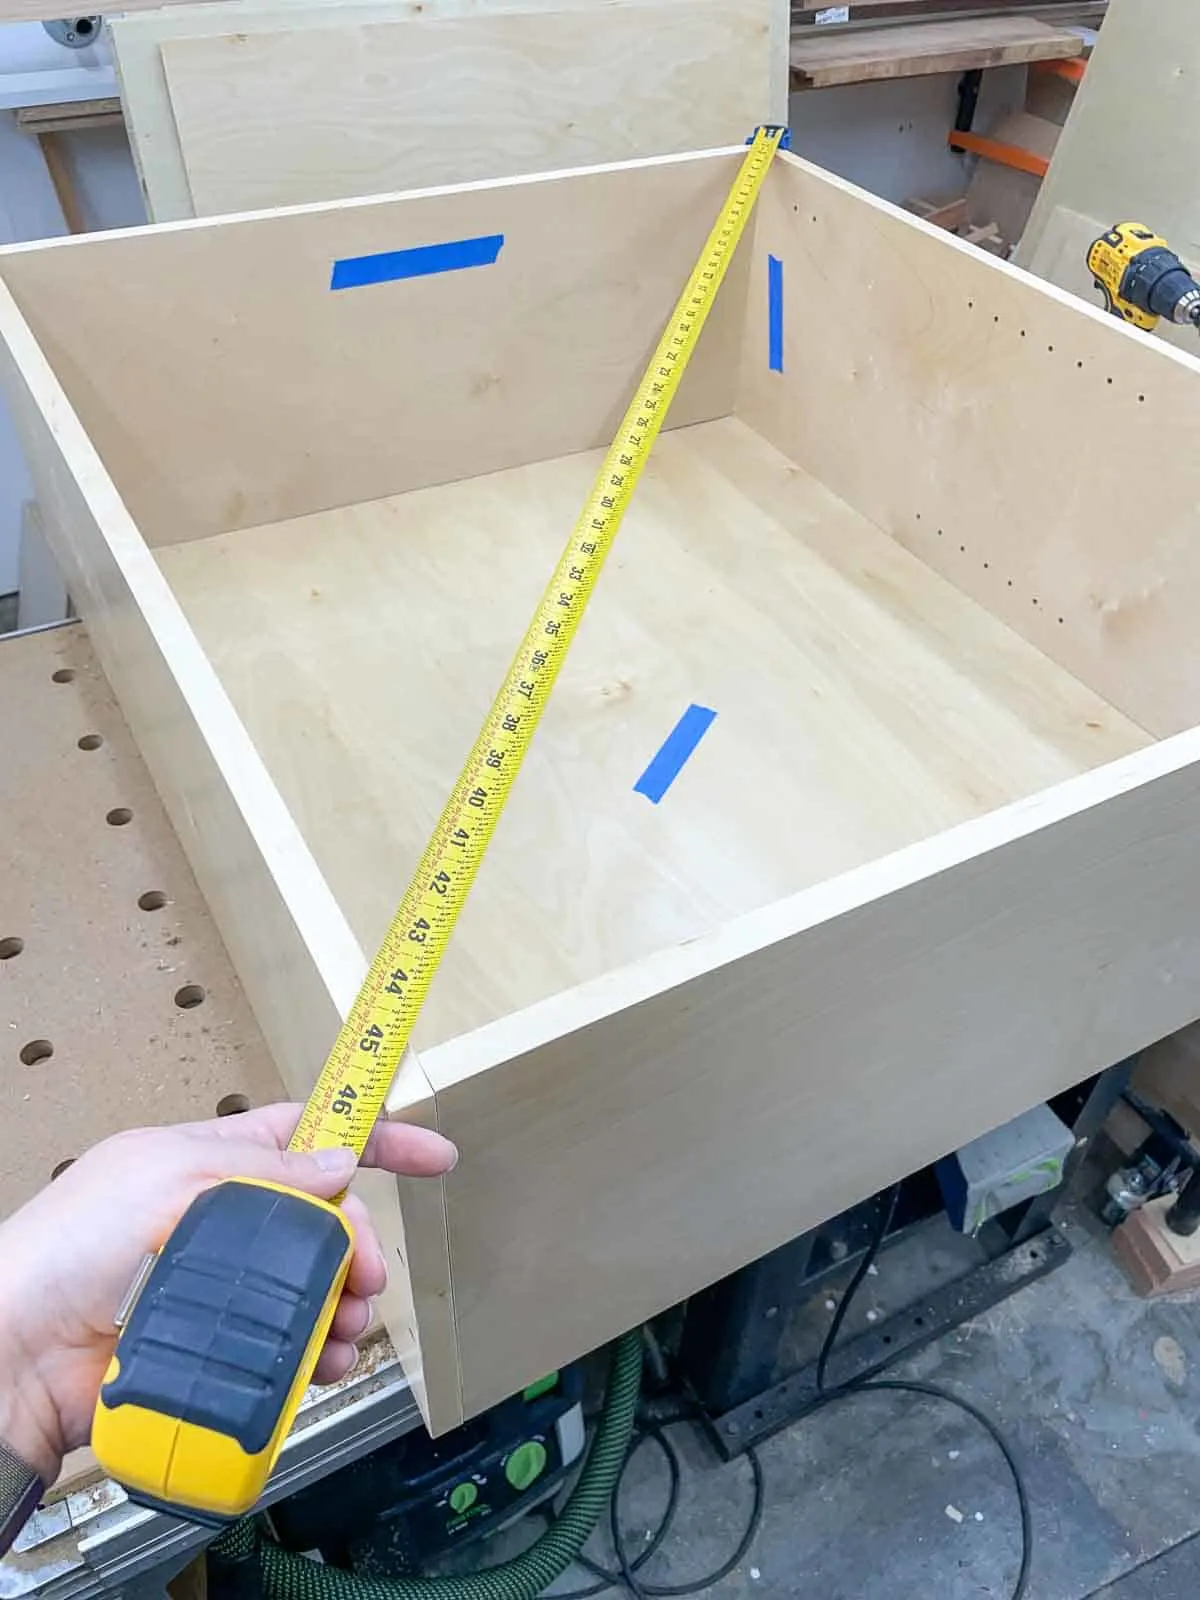
Check to see if your wall cabinet is square by measuring across the diagonal in both directions. This little gadget helps keep the tape measure in place on the corner. If the measurements are the same, it's square! If it's not, squeeze the opposing corners of the longer measurement together with a clamp to straighten it out.

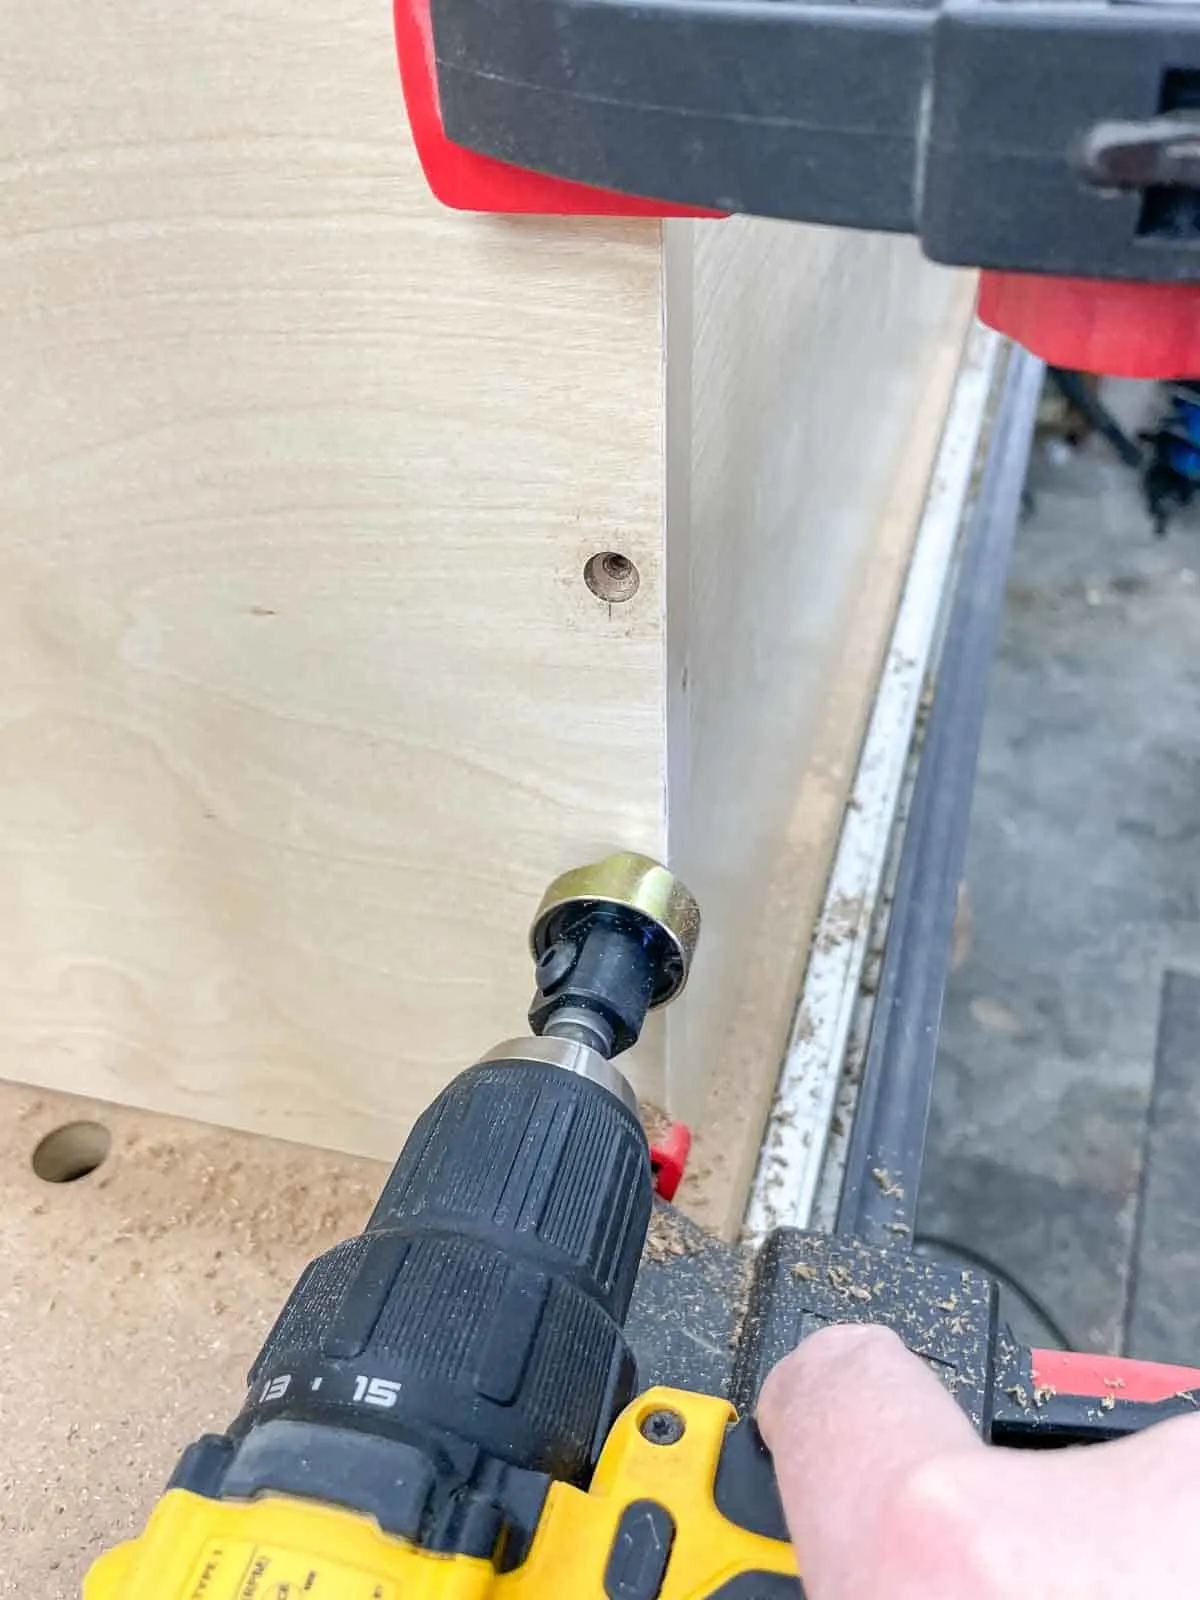
Attach the nailer strips
Remember those thin strips you saved when you cut the plywood pieces? Now you get to use them! Cut them to fit inside the back across the top and bottom of the cabinet. I used pocket holes to attach the nailer strips, but you could use the same countersink technique as above.
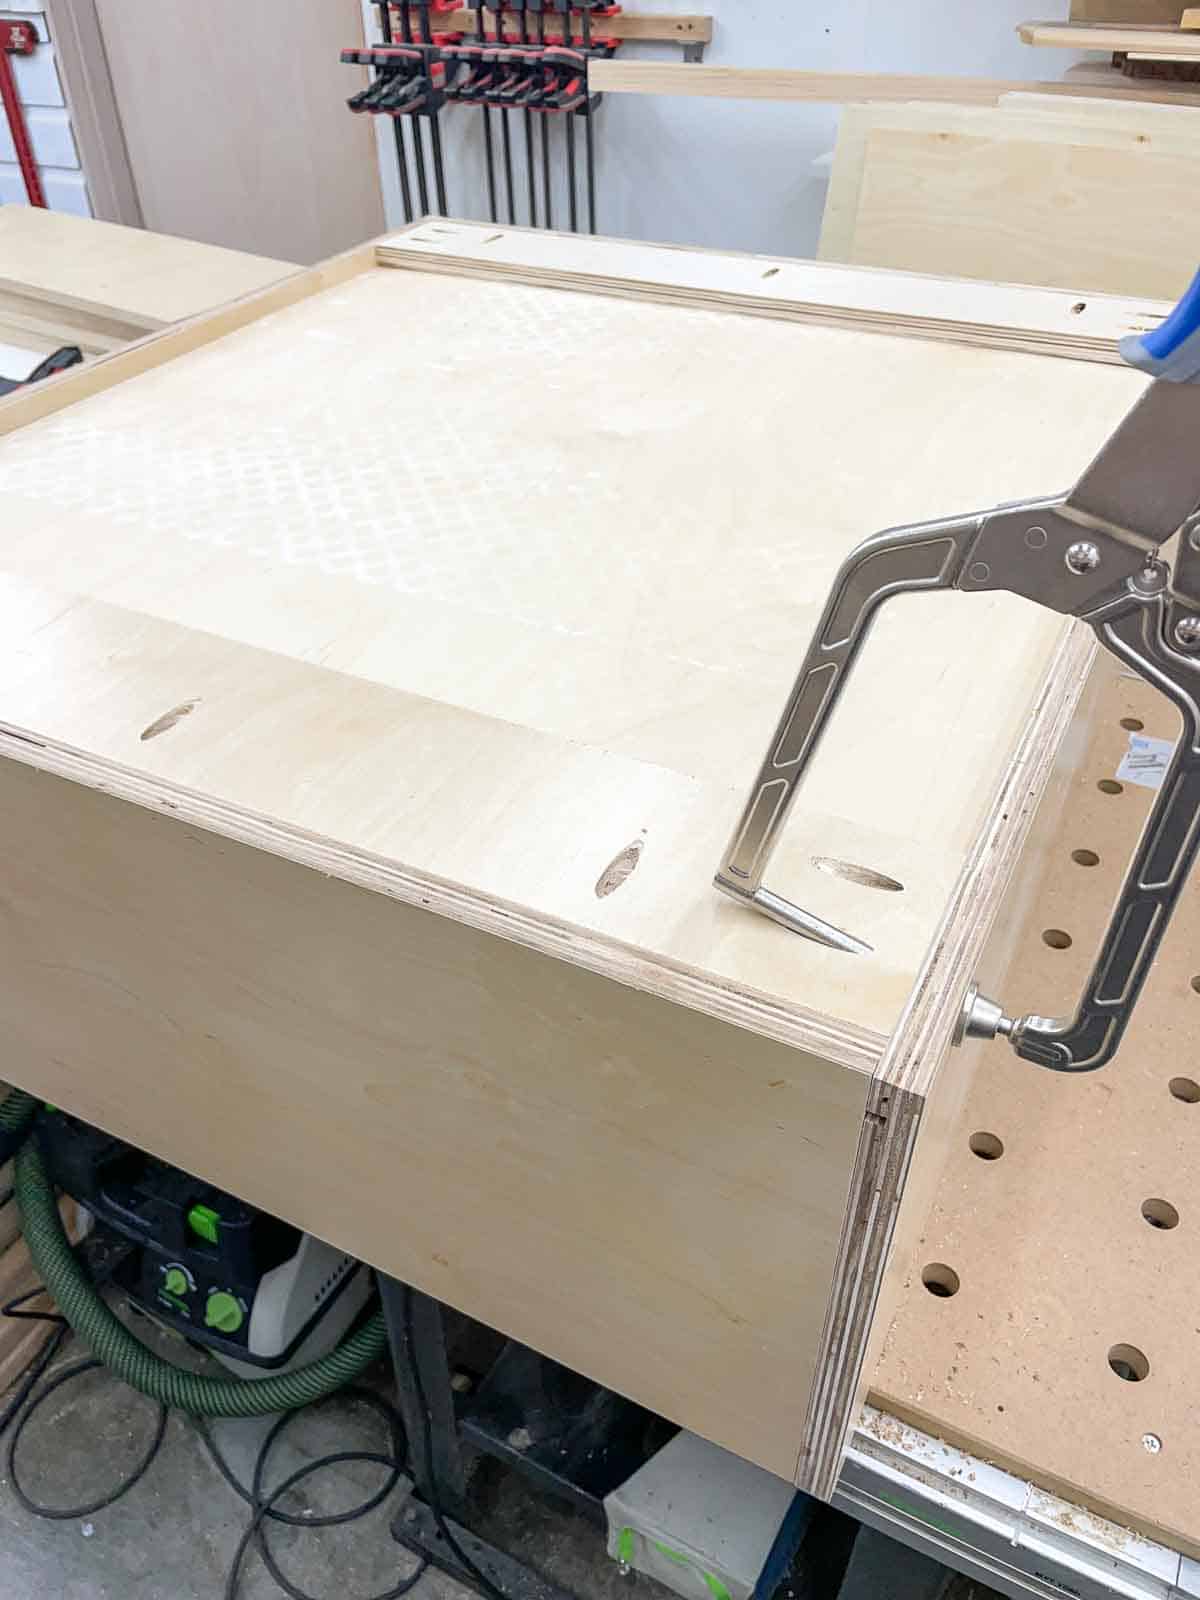

The nailer strips give you something substantial to screw through when you attach the cabinet to the wall. They also help prevent the cabinet from racking and getting out of square during installation. You can see where I drilled through the back of the cabinet and the nailer strips at the studs in the wall.
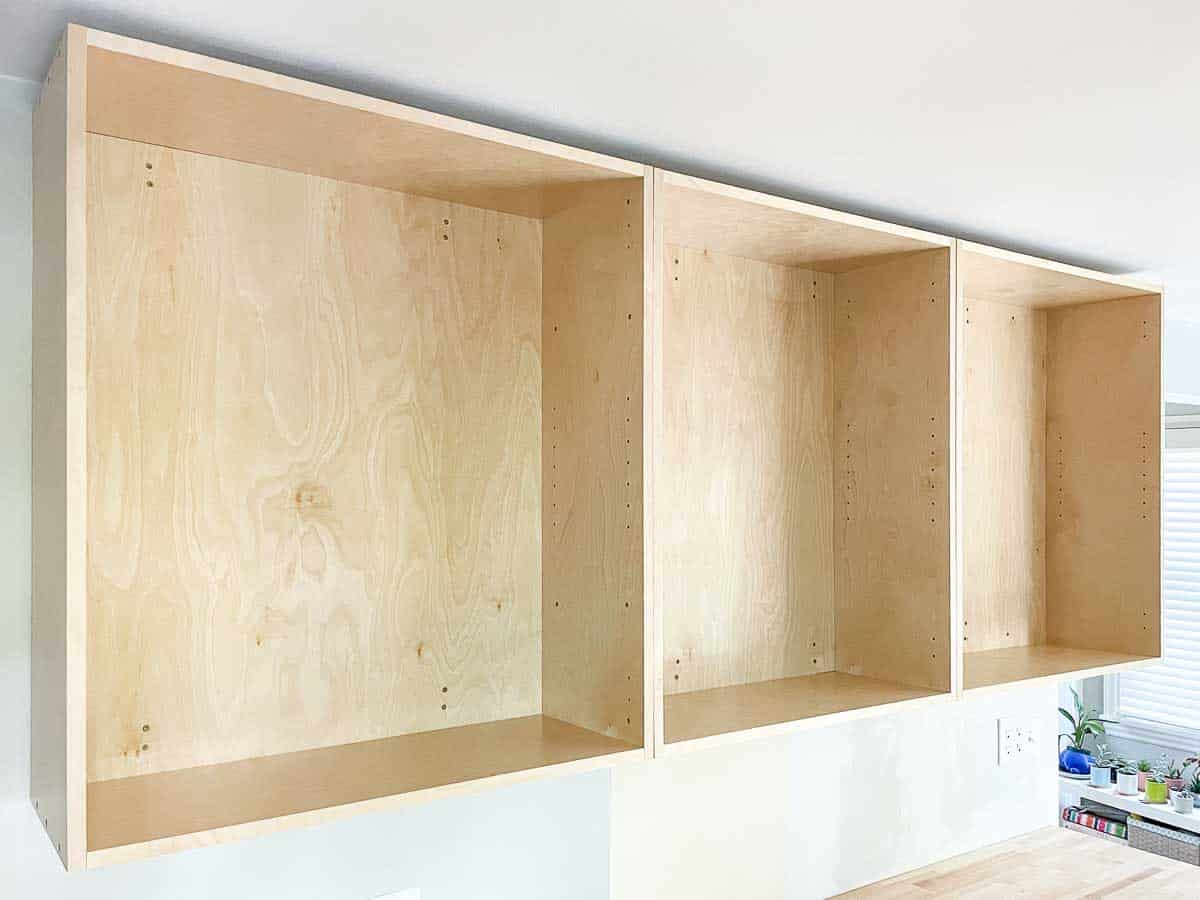
Now that you know how to build a wall cabinet, you can make all kinds of storage for your home! Laundry room cabinets, built-ins for the living room, a bar cabinet... there are so many options!
Stay tuned for more tutorials on how to measure for cabinet doors, how to build them, how to choose the right hinges and install them properly, and more!
Check out these other cabinet tutorials!