

Have a small garage or basement workshop? Get woodworking plans and tutorials for lots of workshop organization ideas here!
You don't need a giant garage to build amazing furniture! All my woodworking projects are made in a one-car garage in our basement, and I've managed to fit a LOT of tools into this small space.
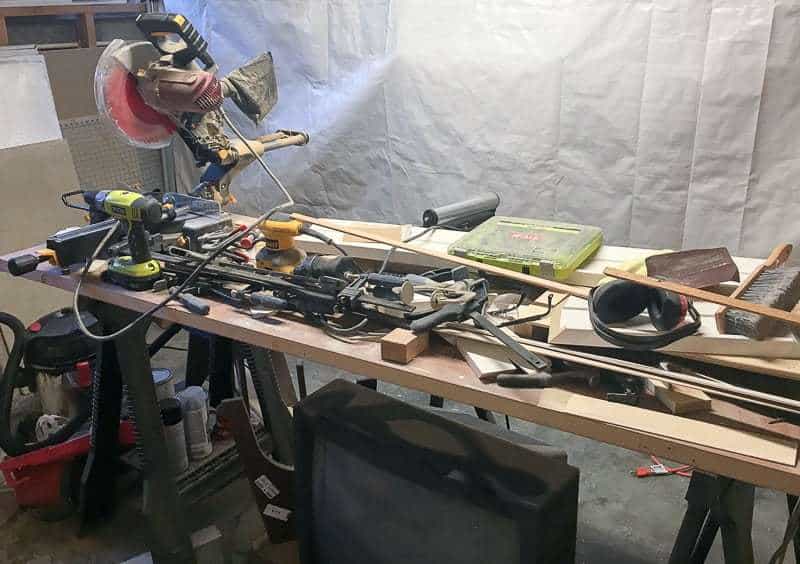
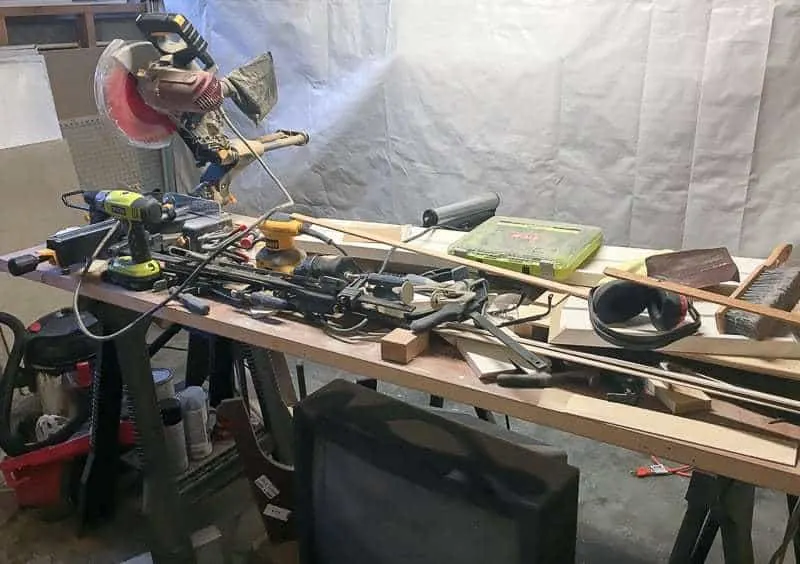
But it didn't always look this way! I started off with an old door up on sawhorses as my workbench, and a miter saw as my only power tool. After a big project, the space was a complete disaster!
Today, I'm sharing how I transformed this dark basement room into my dream wood workshop, and my tips for getting the most out of a small space. Even if you only have a small shed or a corner of the basement or garage to spare, you can make your own DIY workshop!
This post contains affiliate links for your convenience. Purchases made through these links may earn me a small commission at no additional cost to you. Please visit my disclosures page for more information.
Start with bright white walls
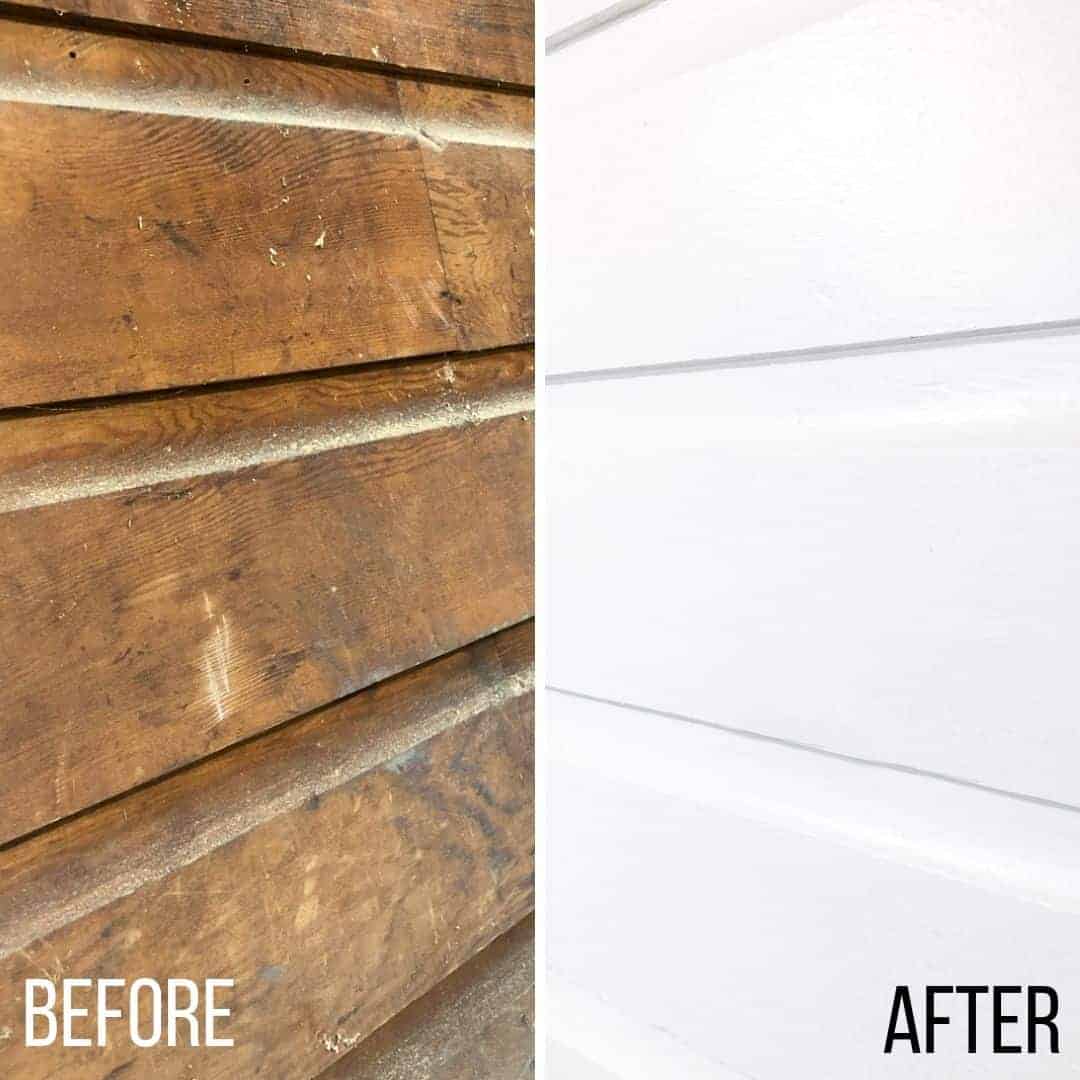
White walls are key to making a small space feel larger! This garage had dark wood paneling on two walls, and it made the entire room feel dark and dingy. Sawdust collected in the grooves, and exhaust fumes from decades of old cars stained the lower half. I painted the wood paneling on the wall behind my miter saw station, and it instantly made a huge difference!

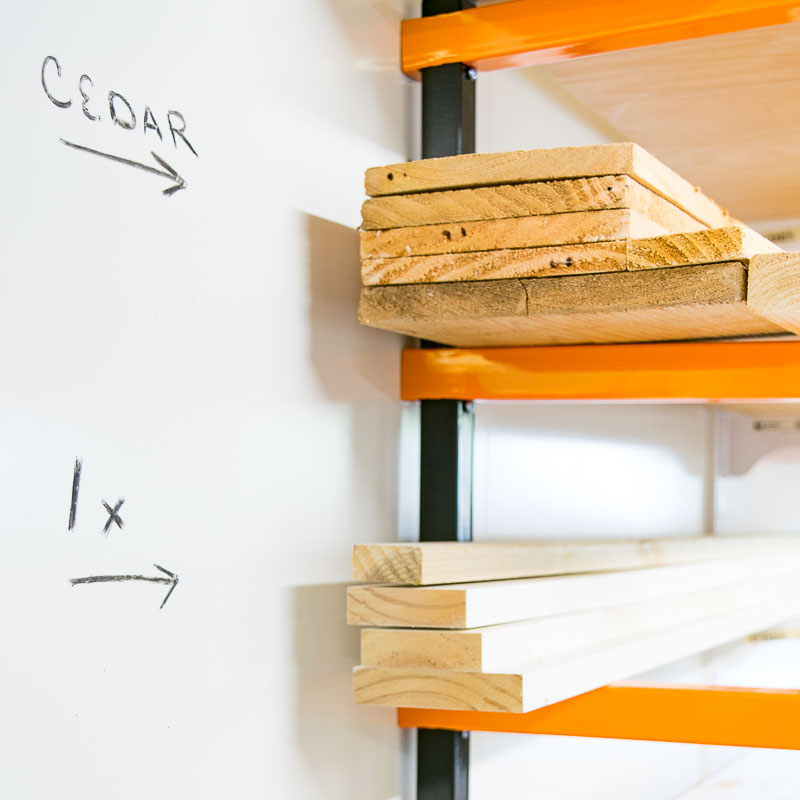
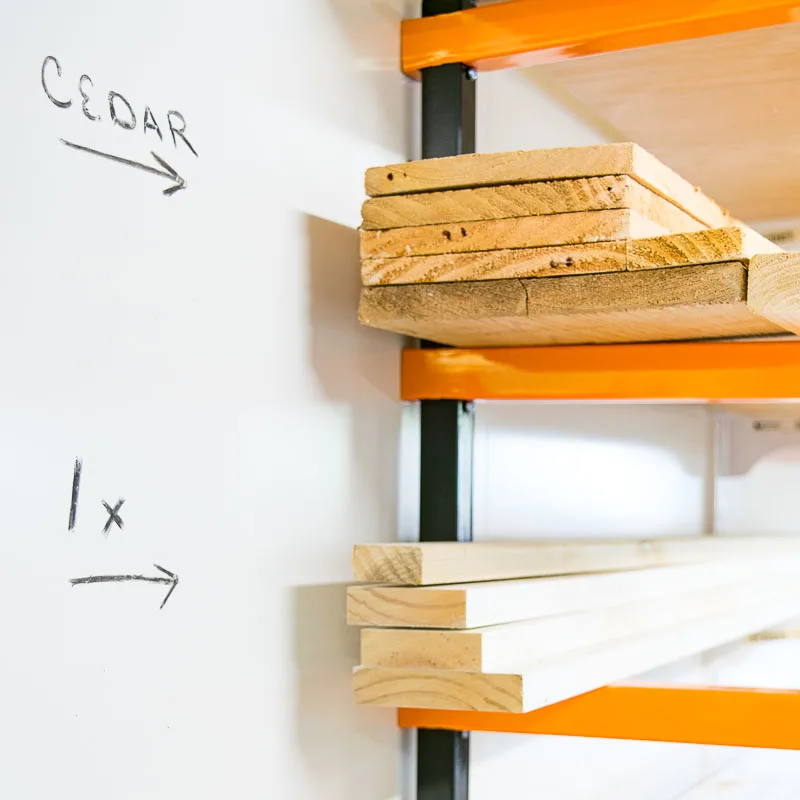
There was one giant wall next to the door that was in pretty bad shape and would take forever to paint. So I decided to cover up the entire surface with cheap laminated hardboard material to create a giant whiteboard! I mounted a lumber rack over the whiteboard, so I can write the species or size of the boards right on the wall to help keep it organized.
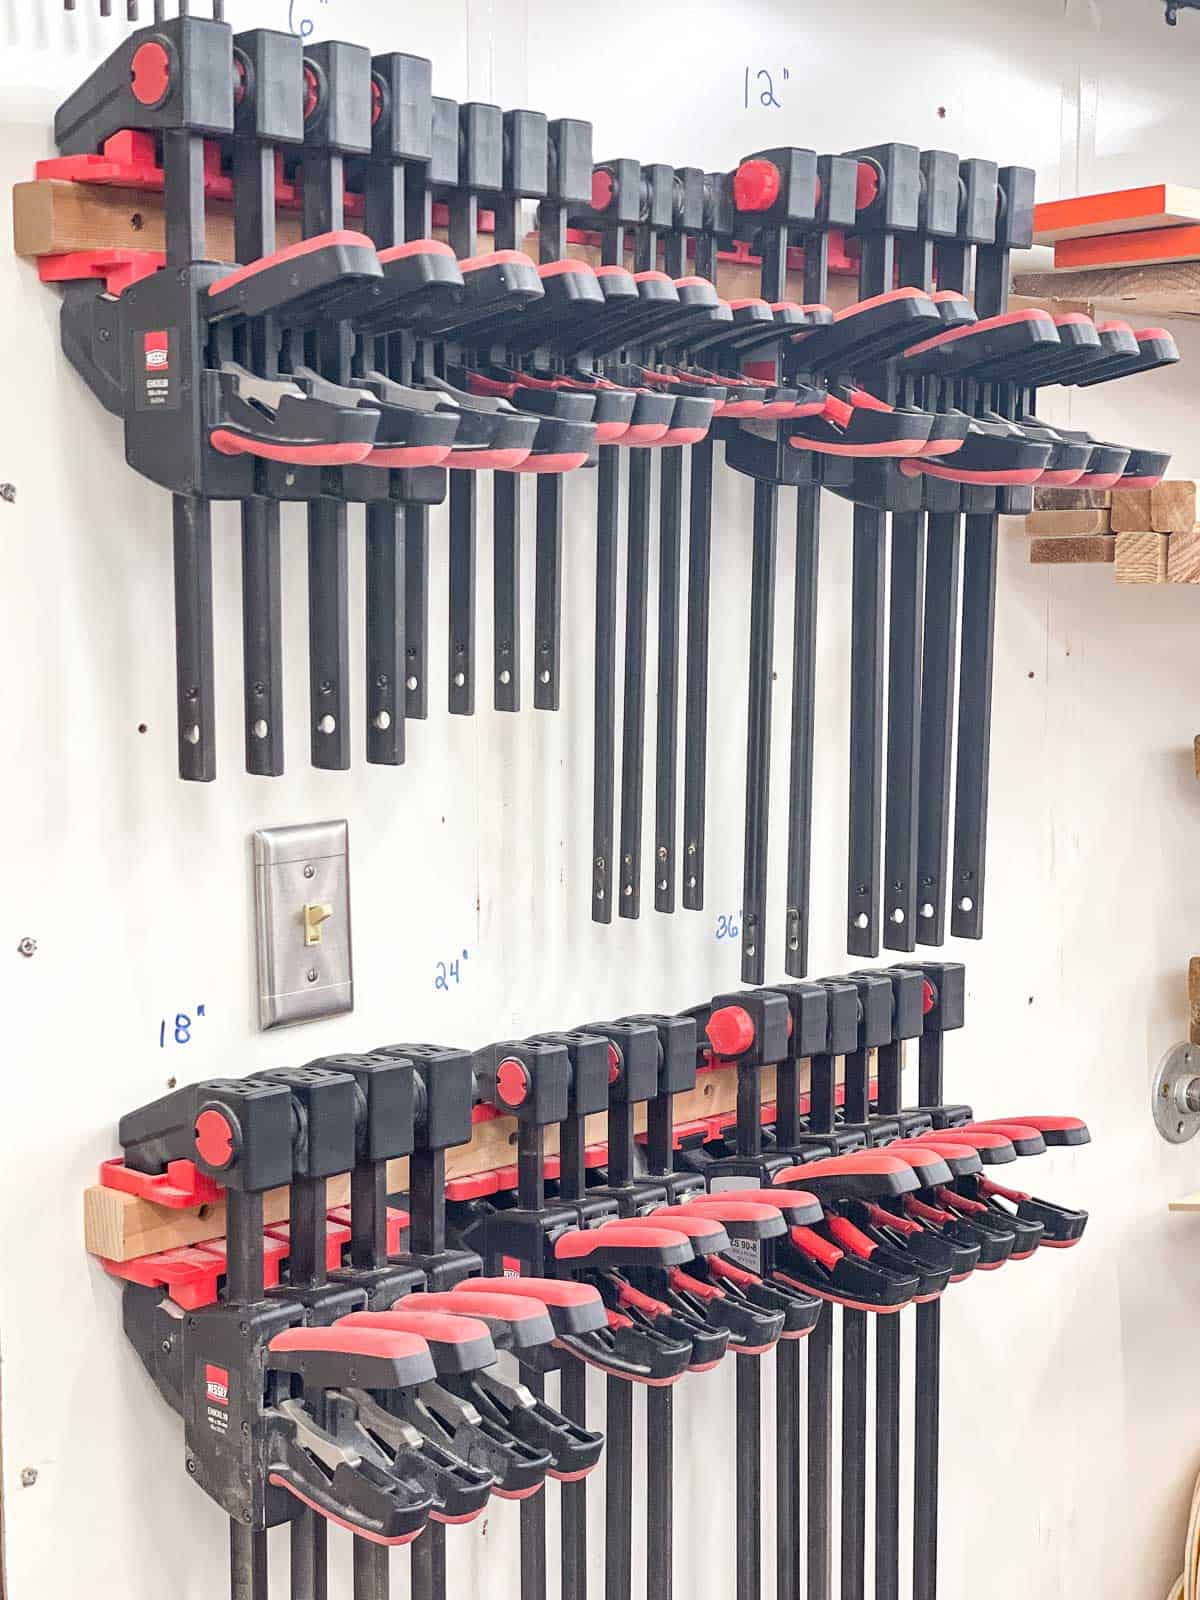
The whiteboard wall is also handy for keeping track of all my clamps! I write the length of each set on the wall above my DIY clamp rack so I know where they all go at the end of the day.
Use exposed studs for storage
This basement garage had a really steep incline, and the previous owner got so fed up with it that he walled up the garage door and filled in the slope. Now there's parking for two cars on the side of the house, and a garage-like room in the basement.
I quickly slapped together a few boxes to attach to the top of the wall under the windows, but realized there was more potential storage here.

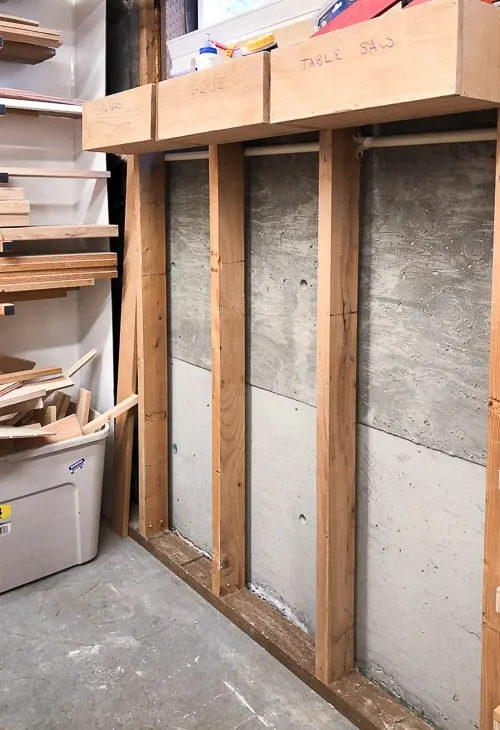
I used scrap wood to create these little shelves between the studs for storing quart and pint size paint cans, plus all the small odds and ends that didn't really have a home anywhere else in the workshop. We generally don't get below freezing here, so I haven't had any issues with the paint separating.


Keep scrap wood organized
I love scrap wood projects, and I tend to keep WAY more than I really should! The wall mounted lumber rack is helpful for storing longer boards off the ground, and plastic bins underneath hold smaller chunks. But I needed something for plywood sheets, and those pieces that are too short for the lumber rack but too long for the bins.
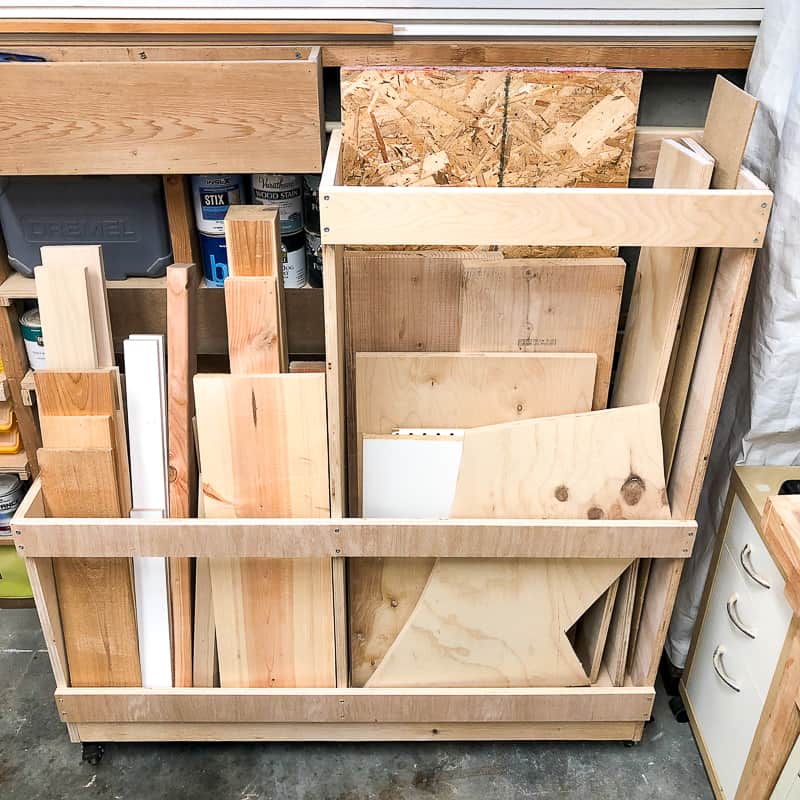
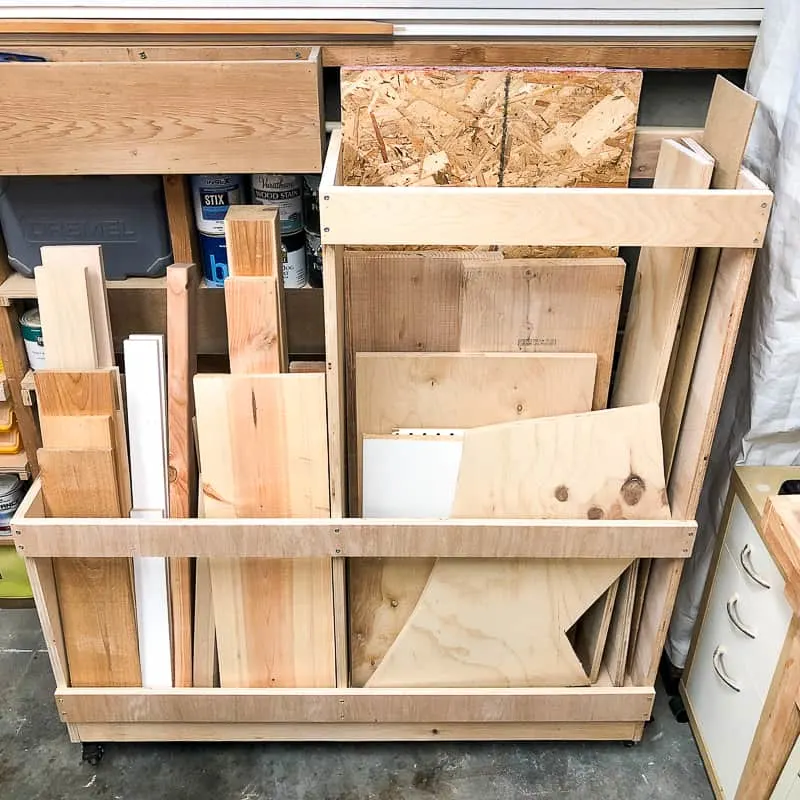
This rolling lumber cart holds half sheets of plywood on the back, plus plenty of offcuts in the two upright storage areas. It lives in front of the stud wall shelves, and I put it on wheels so I can slide it out of the way when I need to pick a paint color. You can get the woodworking plans for the lumber cart here.
Organize similar tools together
If you're constantly switching bits in your drill or need different sanders for specific tasks, you'll probably end up with multiple tools that do the same job. Keep these tools together with their accessories in one spot to make it easier to find what you need!
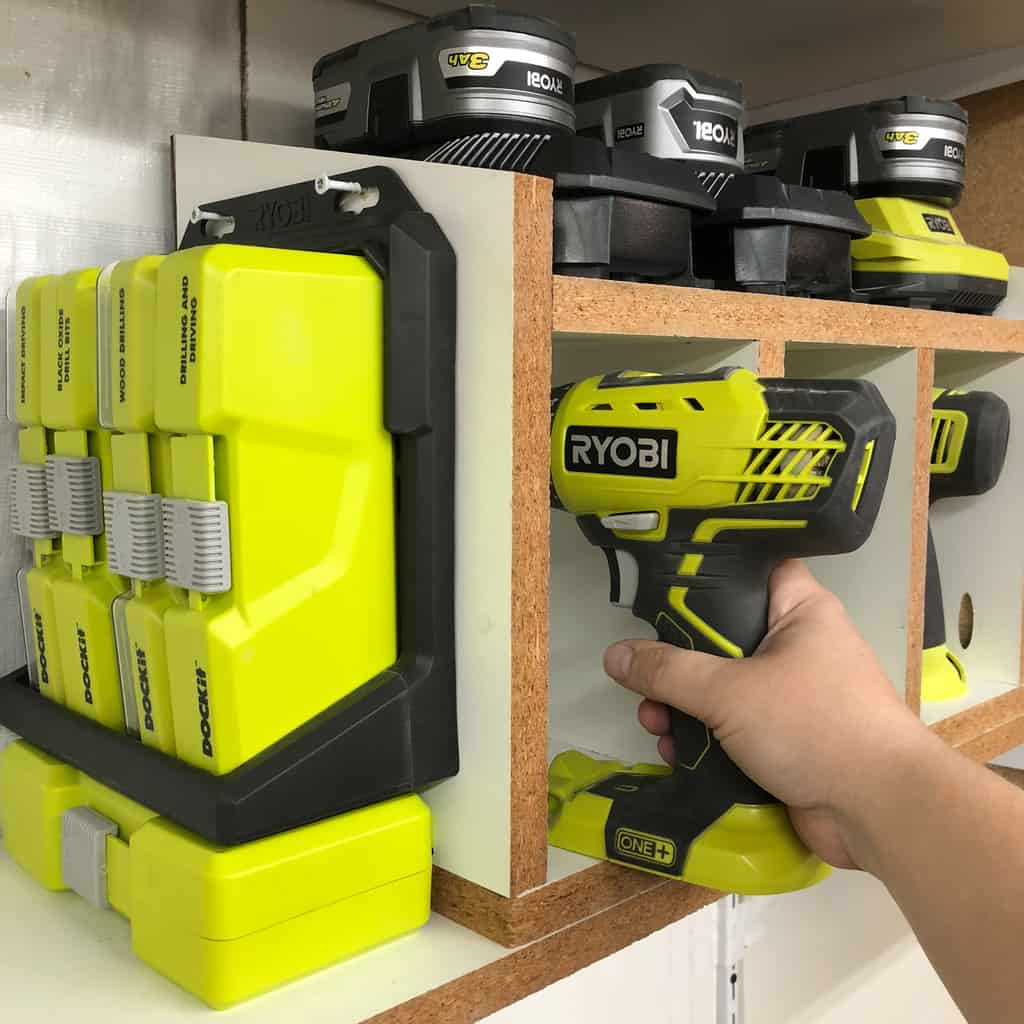
This cordless drill storage rack fits multiple drills and impact drivers, plus a shelf for battery chargers above. I mounted some drill bit storage to the side so everything is in the same compact space.

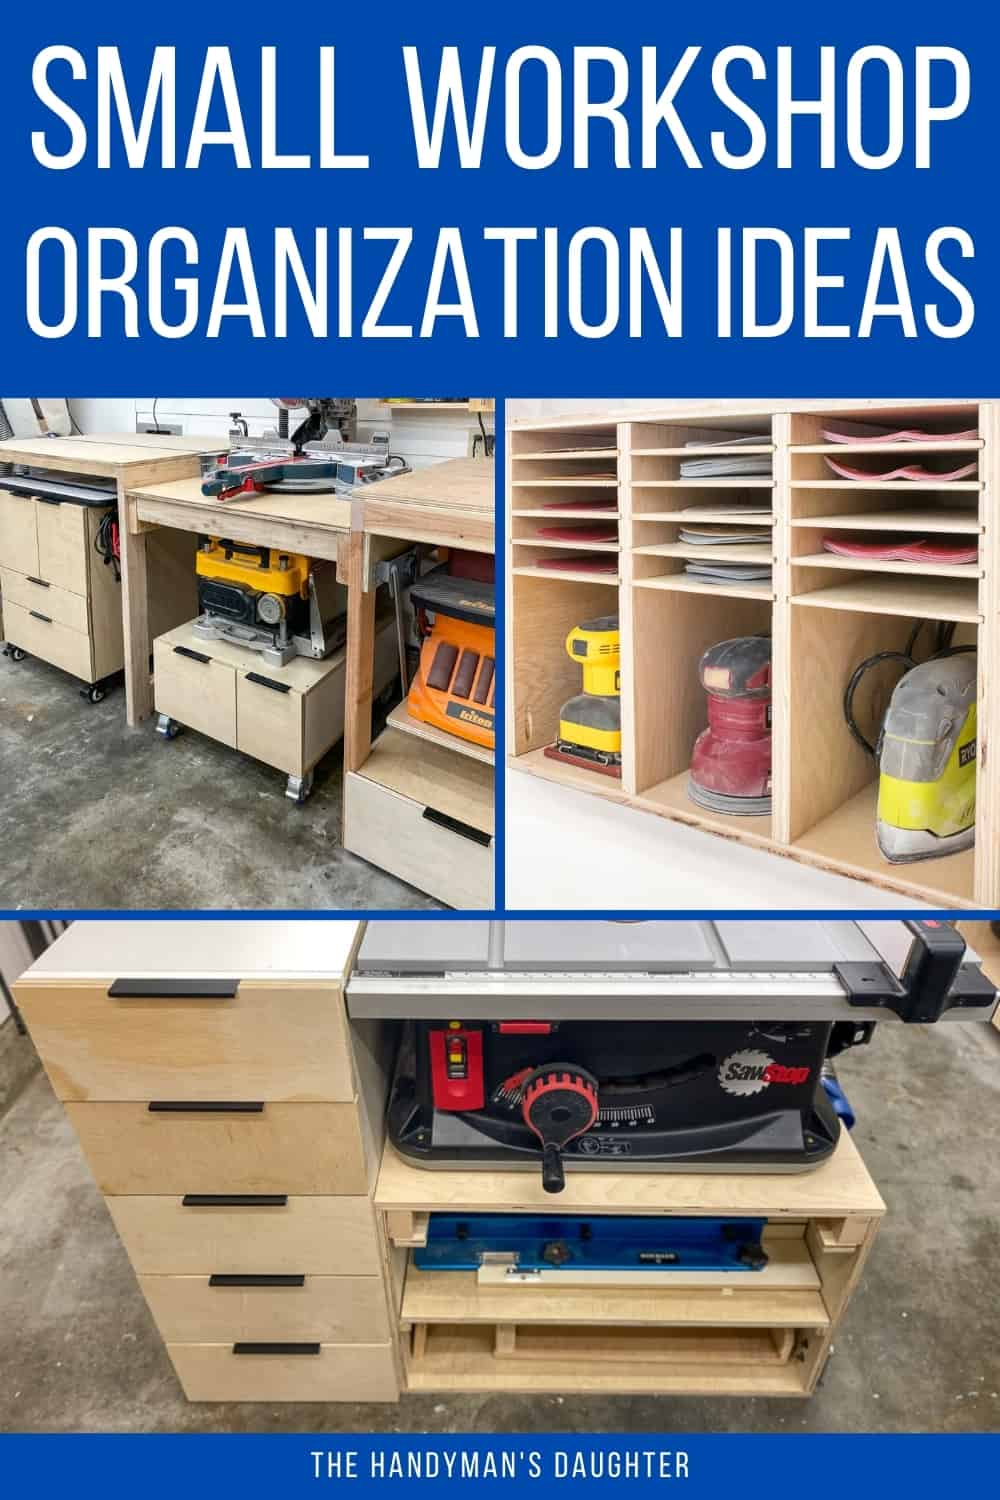
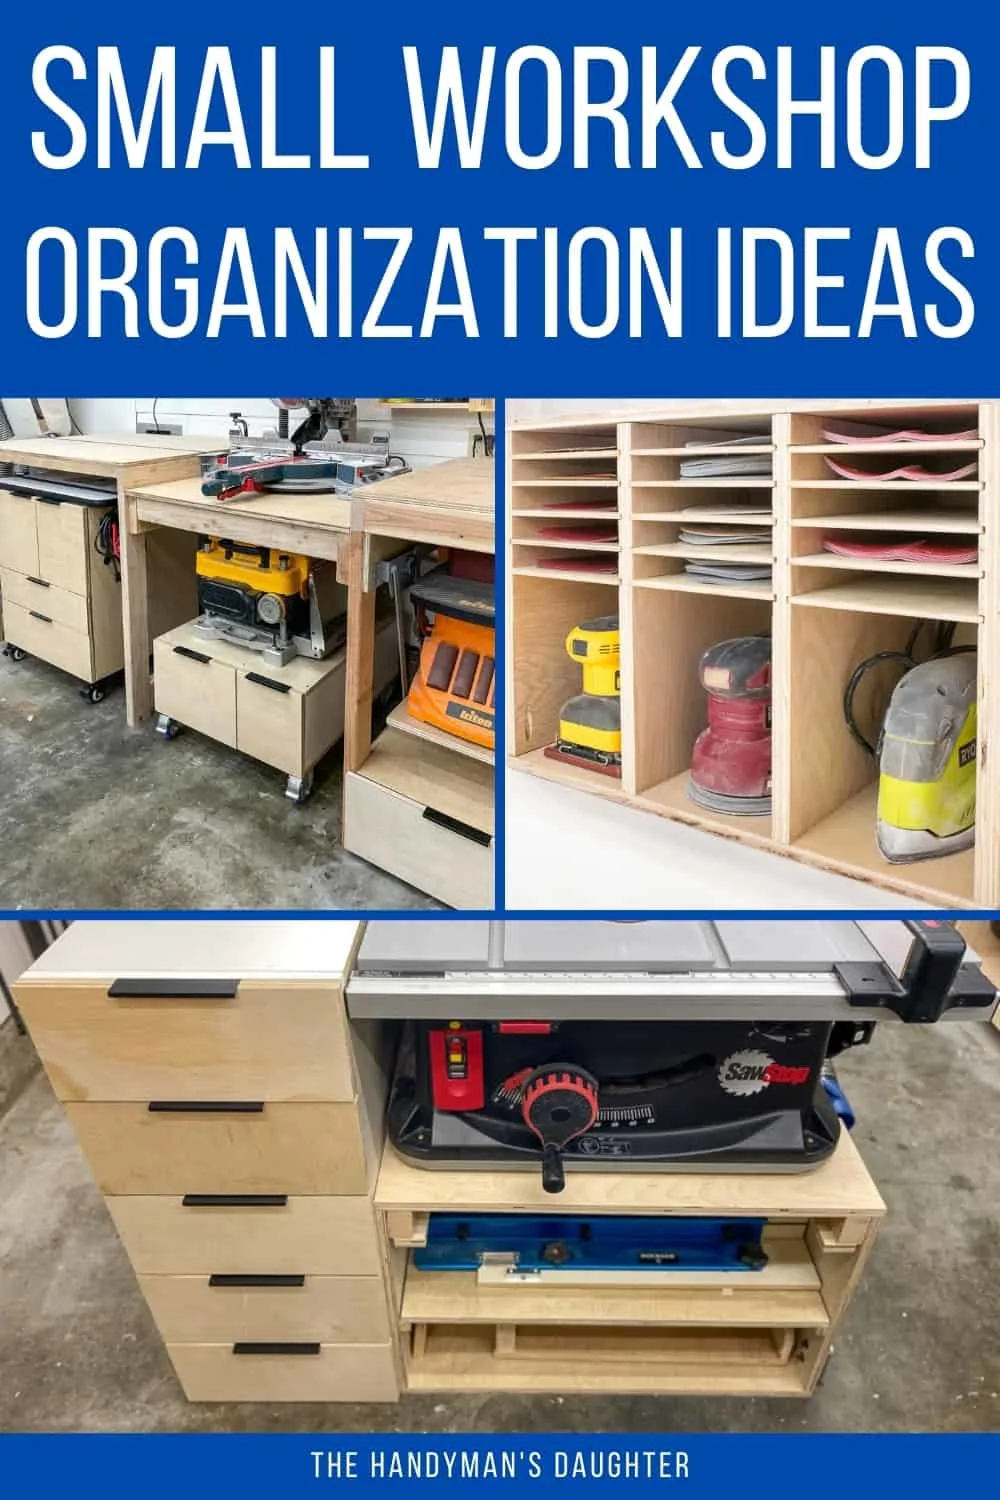
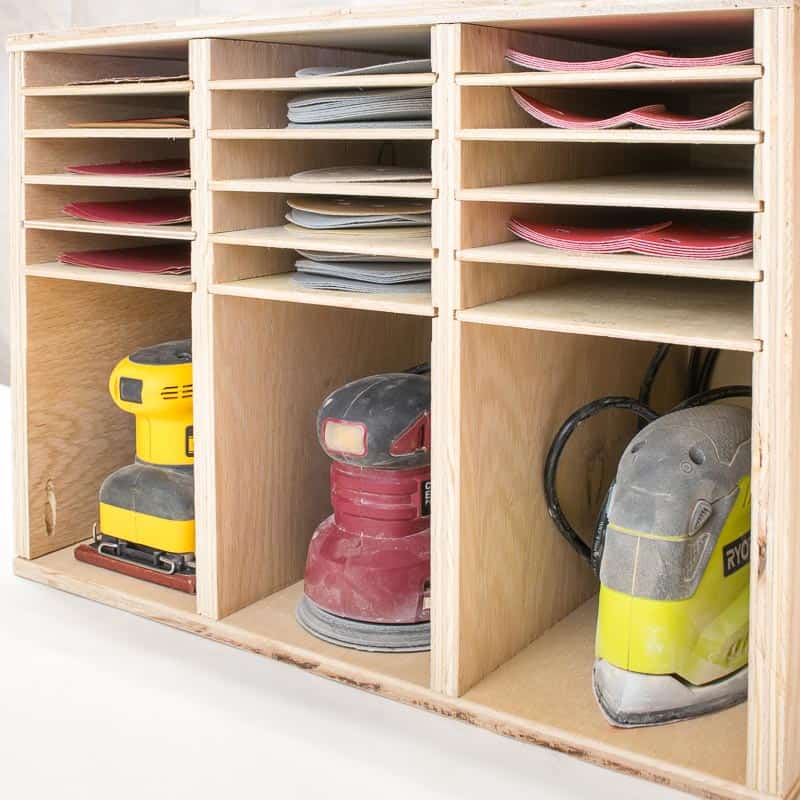
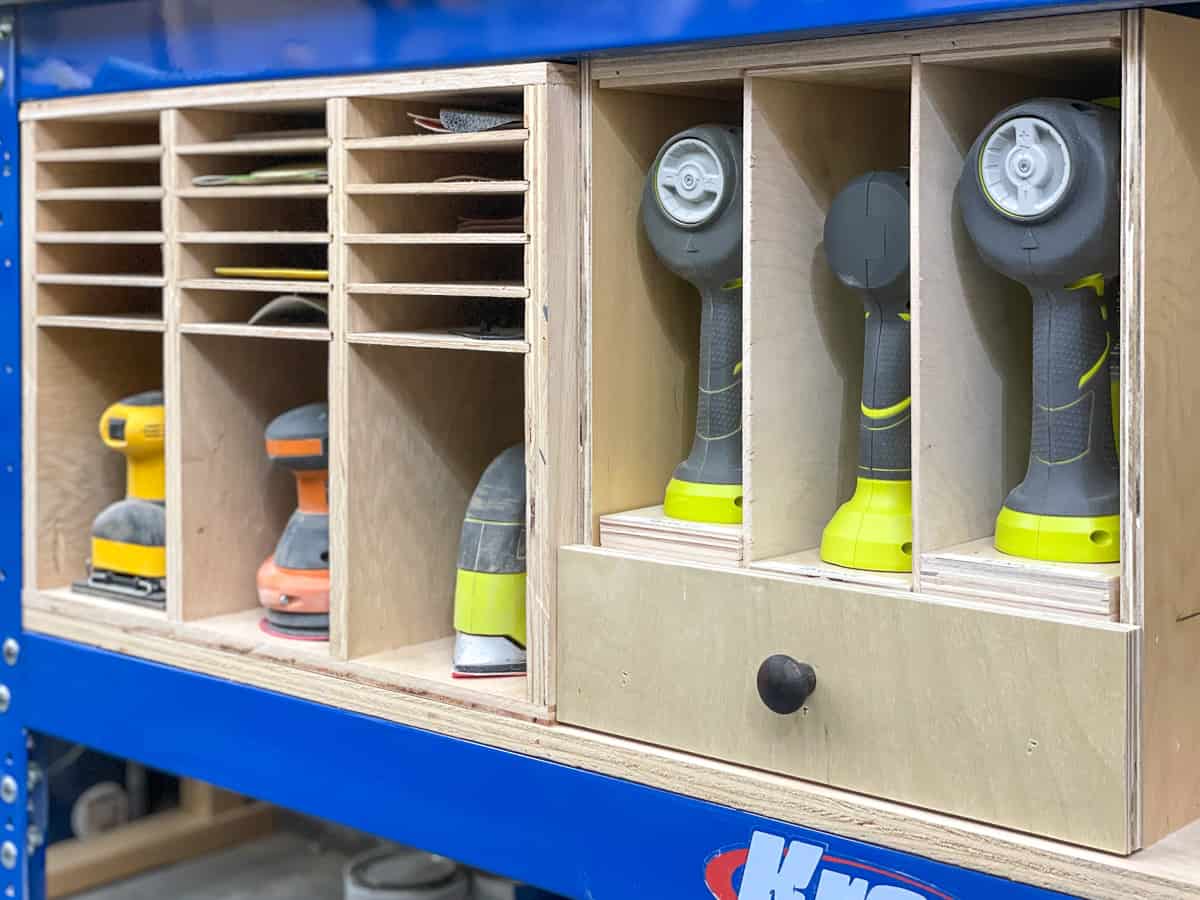
A random orbit sander, palm sander and corner cat sander all do the same job a little differently. I was tired of hunting down the specific sandpaper for each tool, so I built this sandpaper storage to house everything together. Here are some other sandpaper storage ideas if this one isn't quite what you're looking for!

All my nailers look alike, and the nails were everywhere! This nail gun organizer keeps everything contained in one compact space that fits under my workbench next to the sanders and sandpaper.

Put tools on wheels
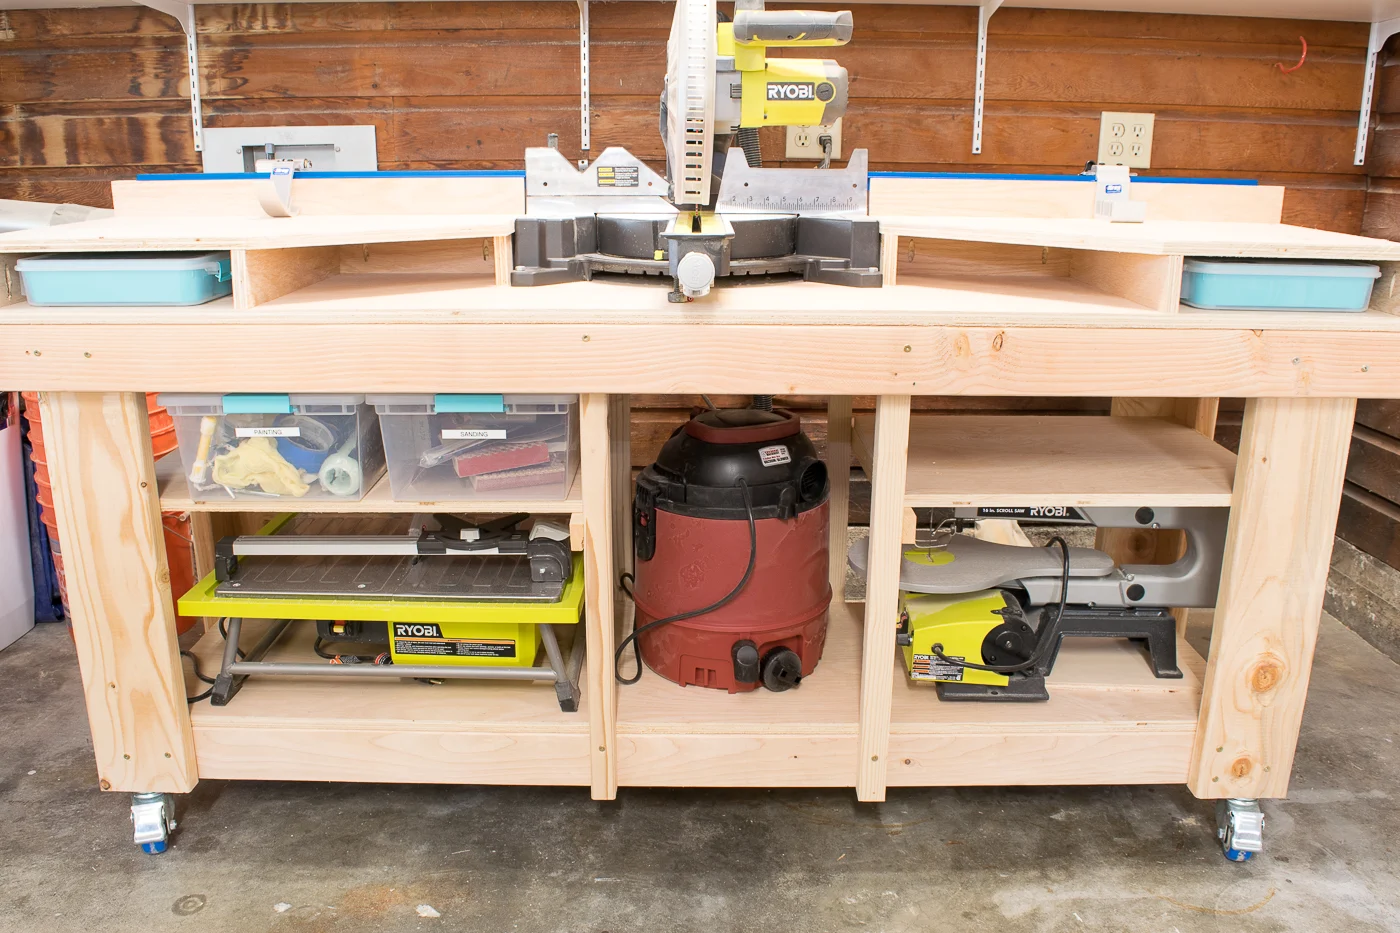
If you're just starting out, you'll need a basic workbench to build projects on. This one is made almost entirely out of 2x4s, and has extra storage shelves underneath to keep your tools organized! Here are some more DIY workbench plans if you're looking for a different solution.

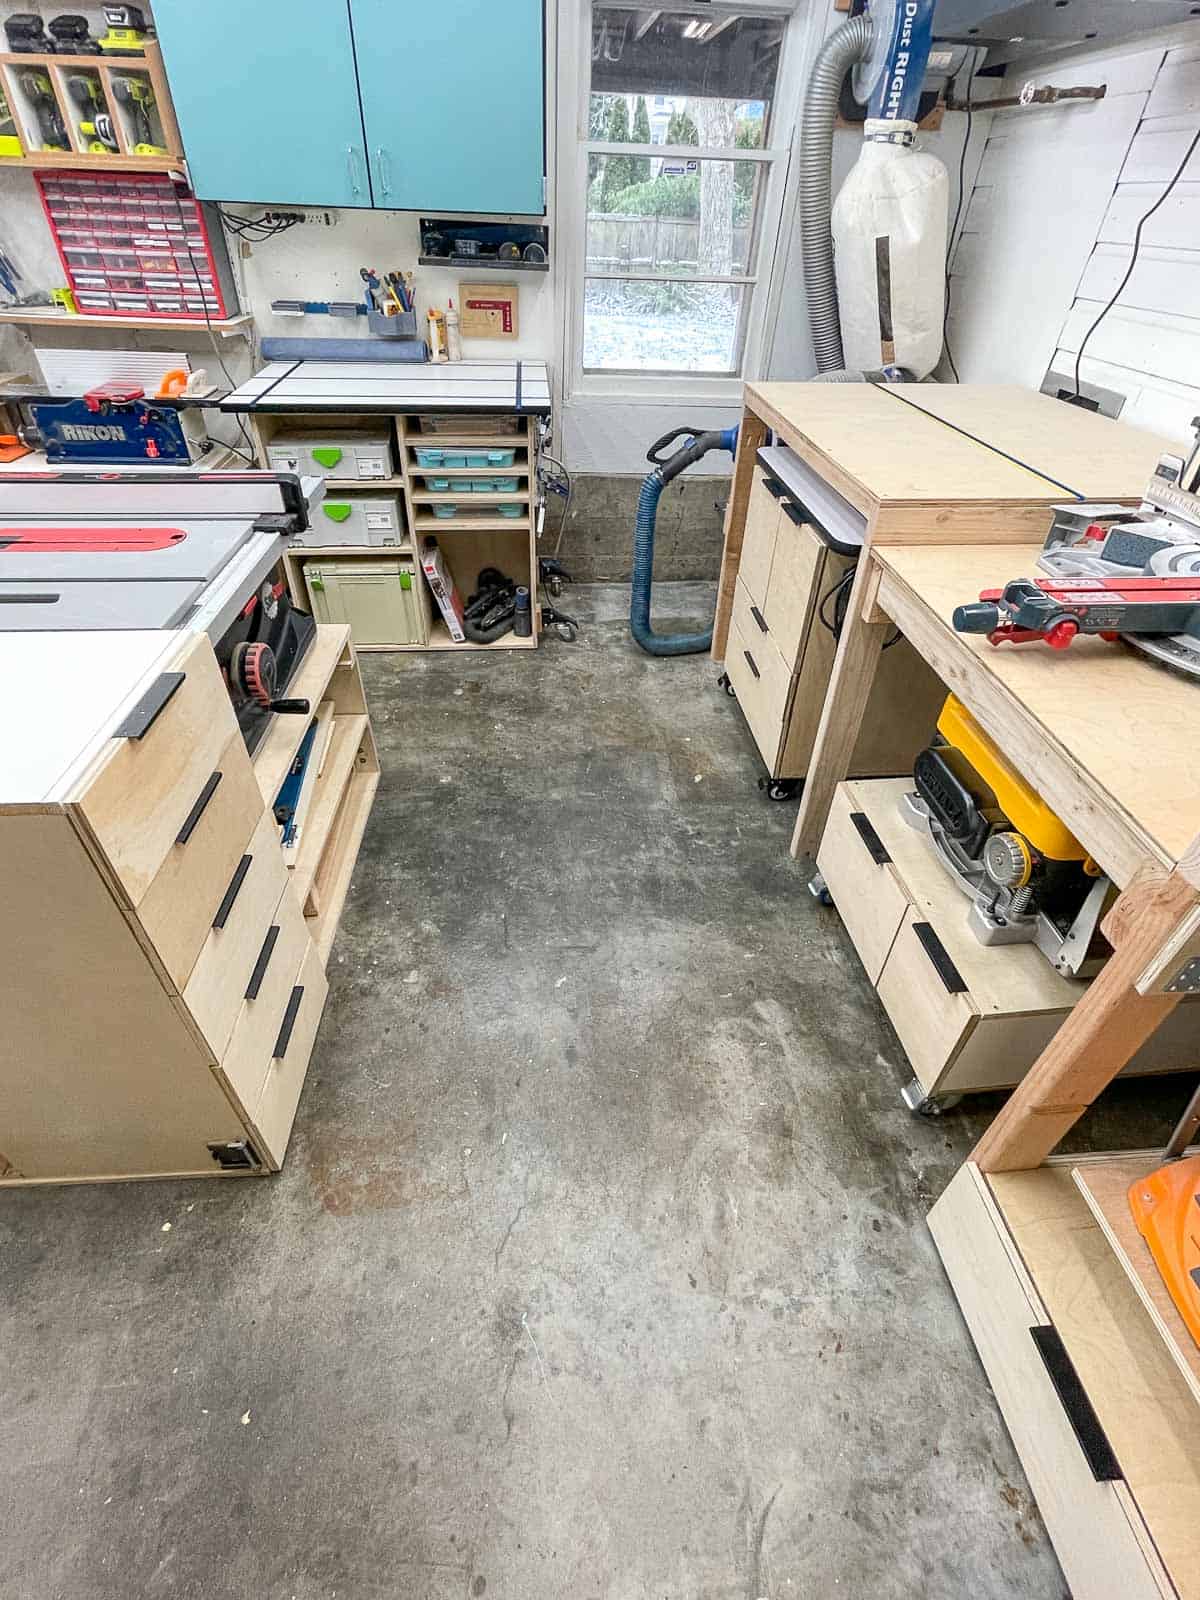
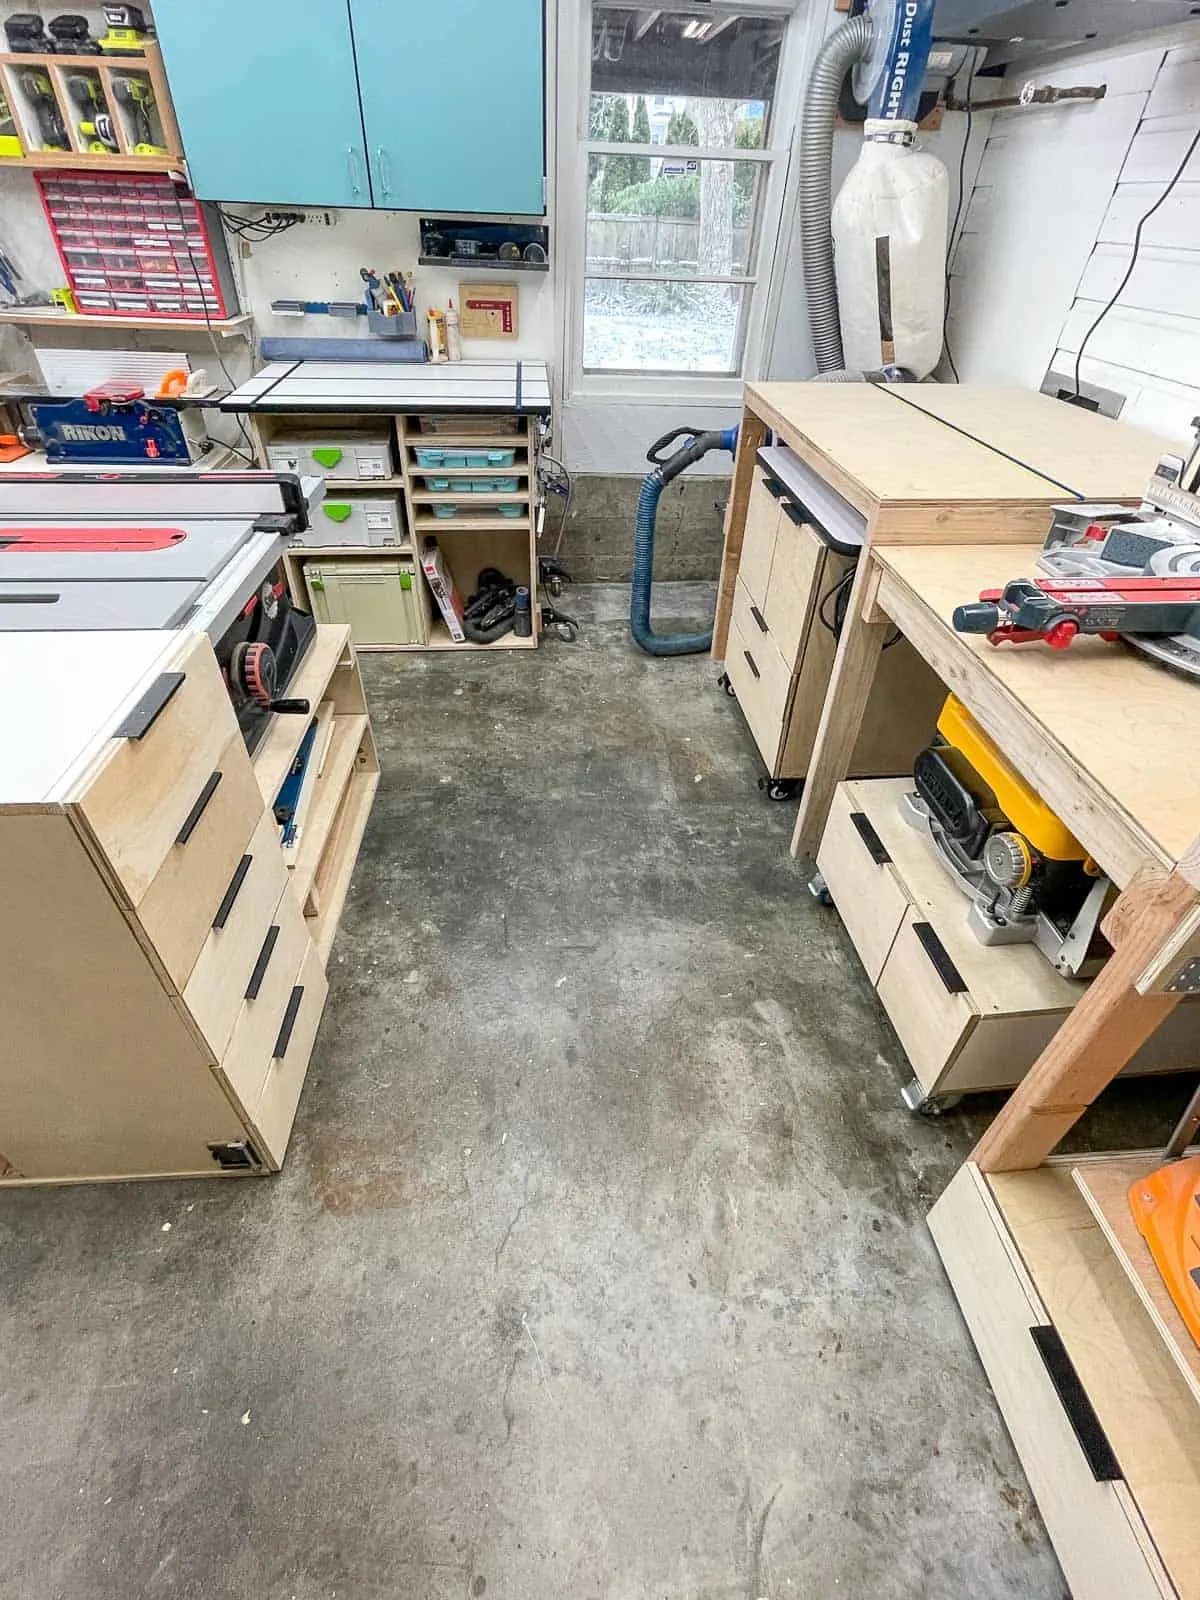
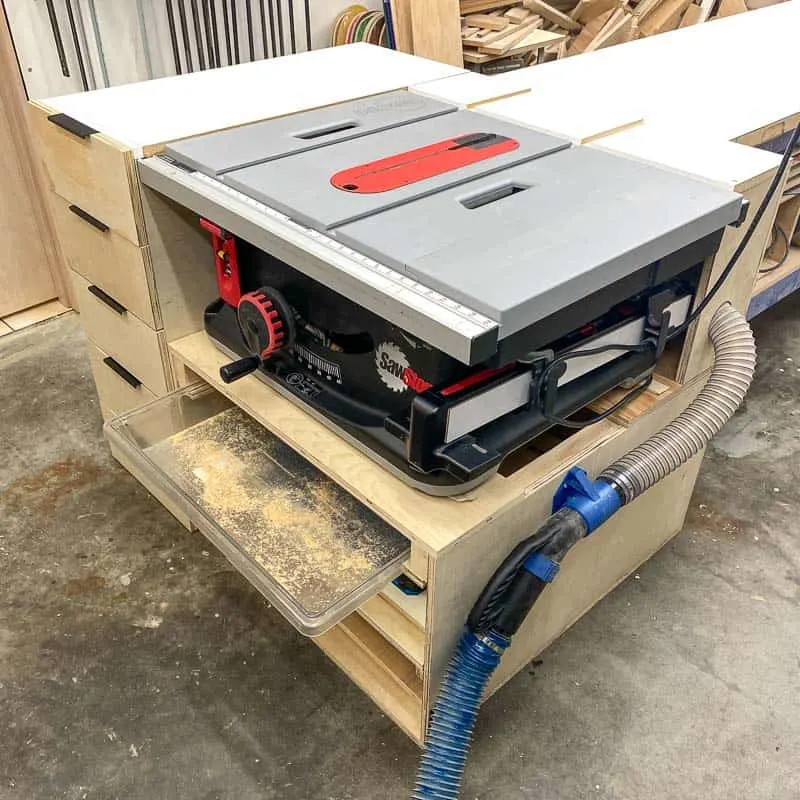
When you have a small workshop, it needs to be flexible! Everything from the workbench to the table saw stand is on wheels, so I can move things around on a moment's notice.

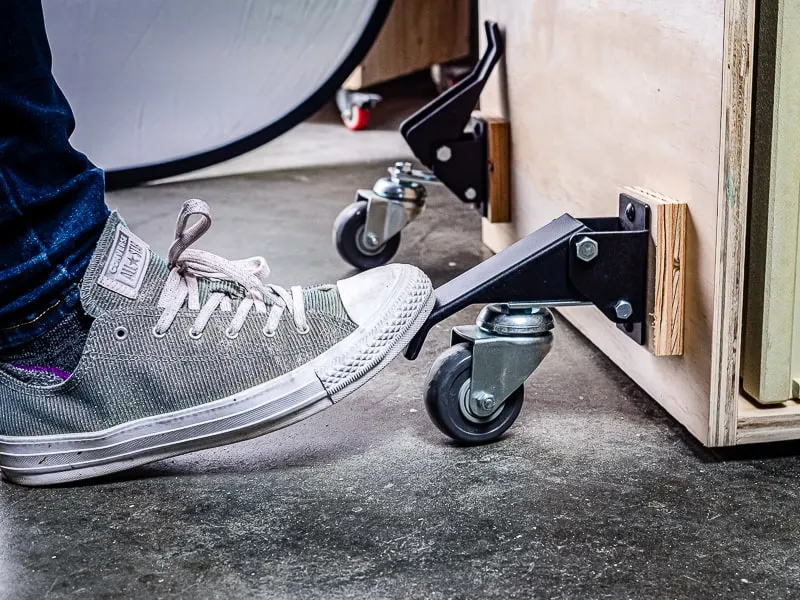
For big pieces like the t-track table that usually stay in one spot, I prefer these removable casters. They mount to the side rather than underneath, and allow the cabinet to rest flat on the ground most of the time. When it's time to move, just slide the casters into the brackets and pop it up on wheels!

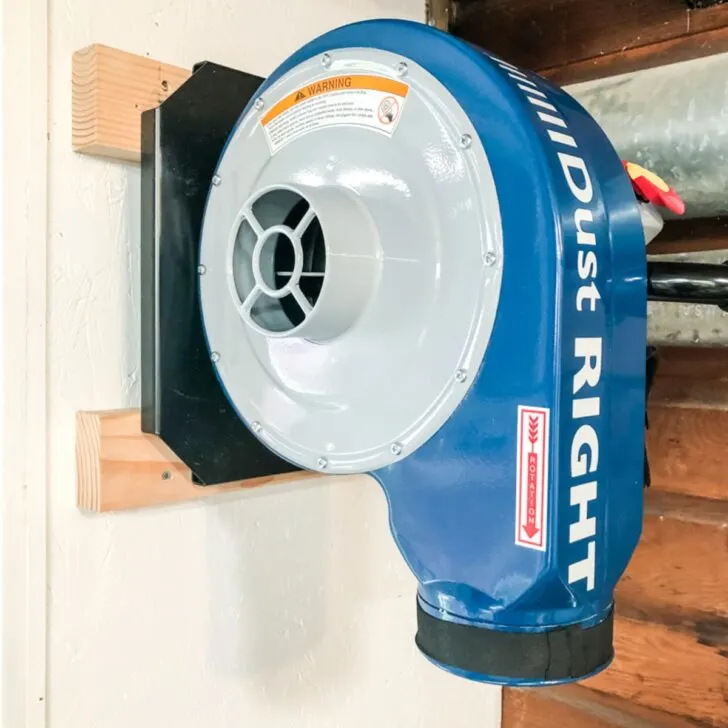
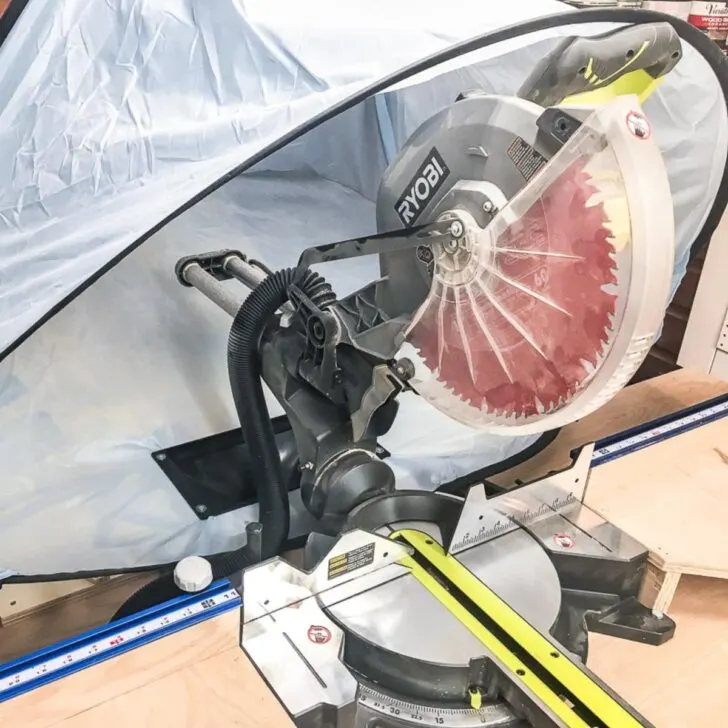
Other tools are always on wheels so I can roll them out to use them. I designed this miter saw station to fit four major tools into one compact footprint, with separate tool stands for each section. You can get the set of four woodworking plans to recreate this entire set up in your own workshop here!
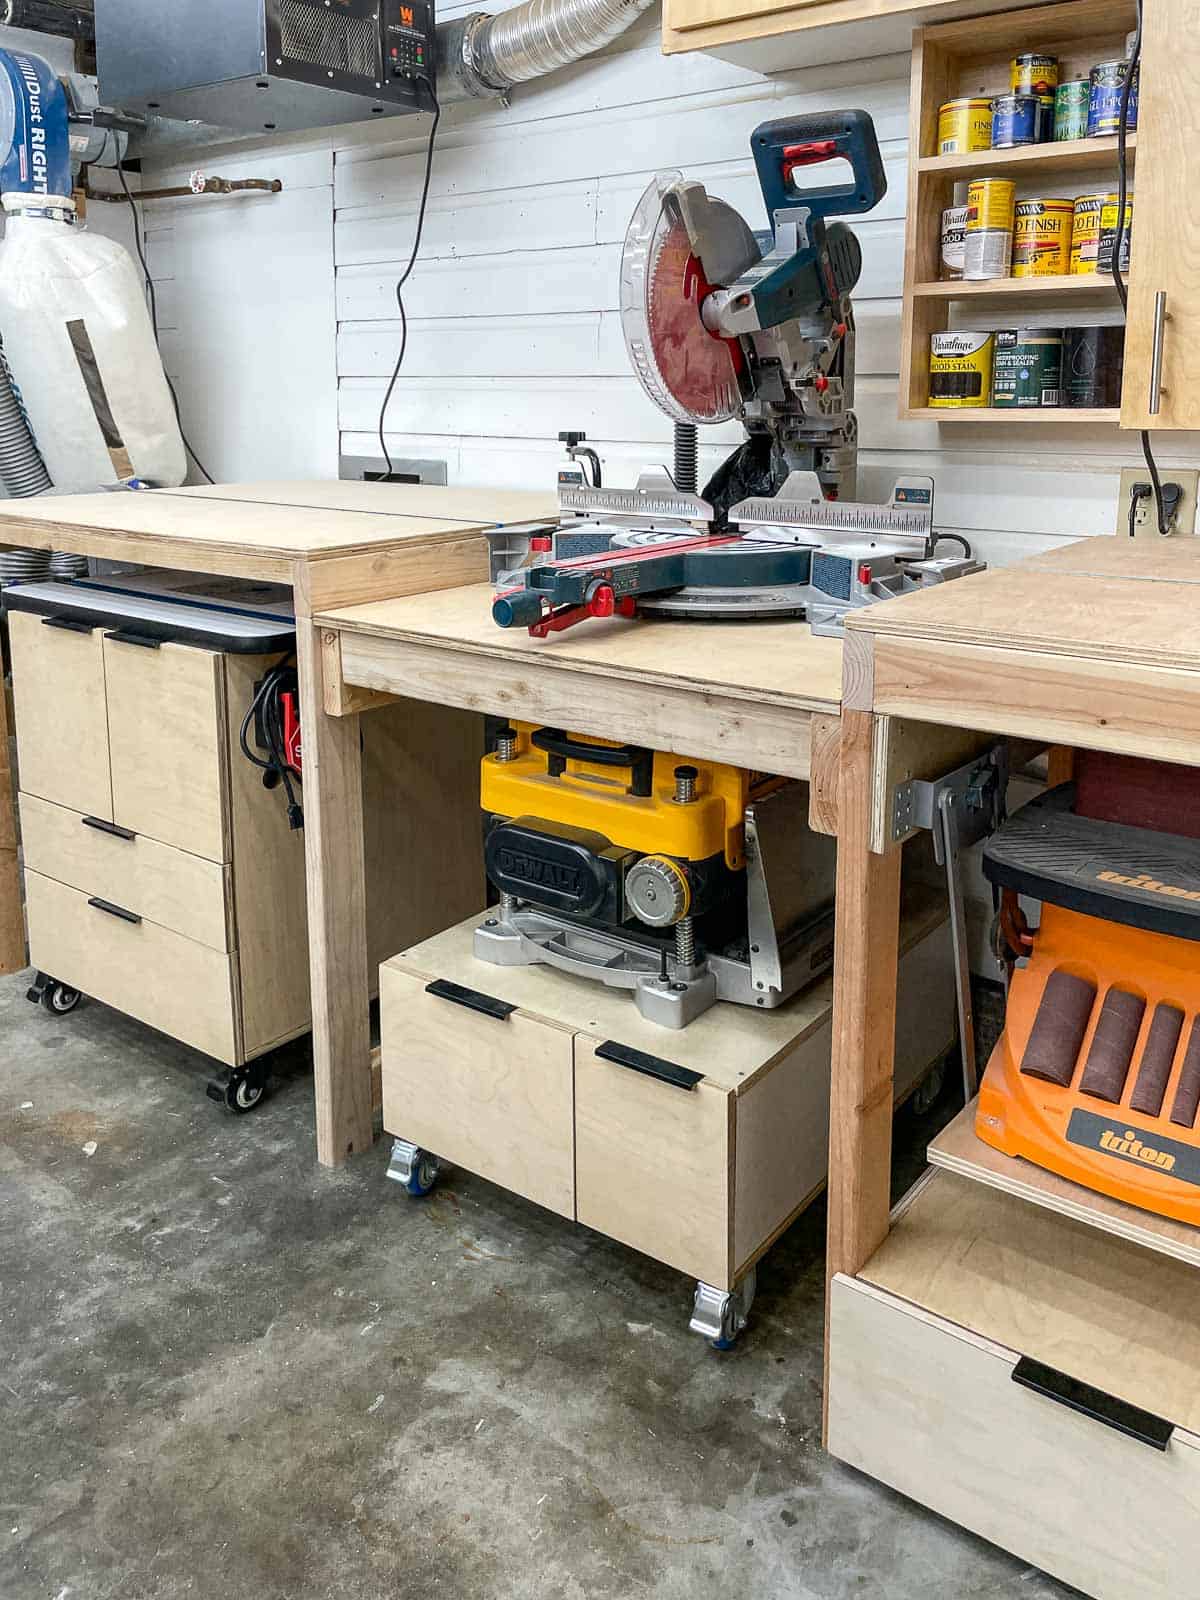

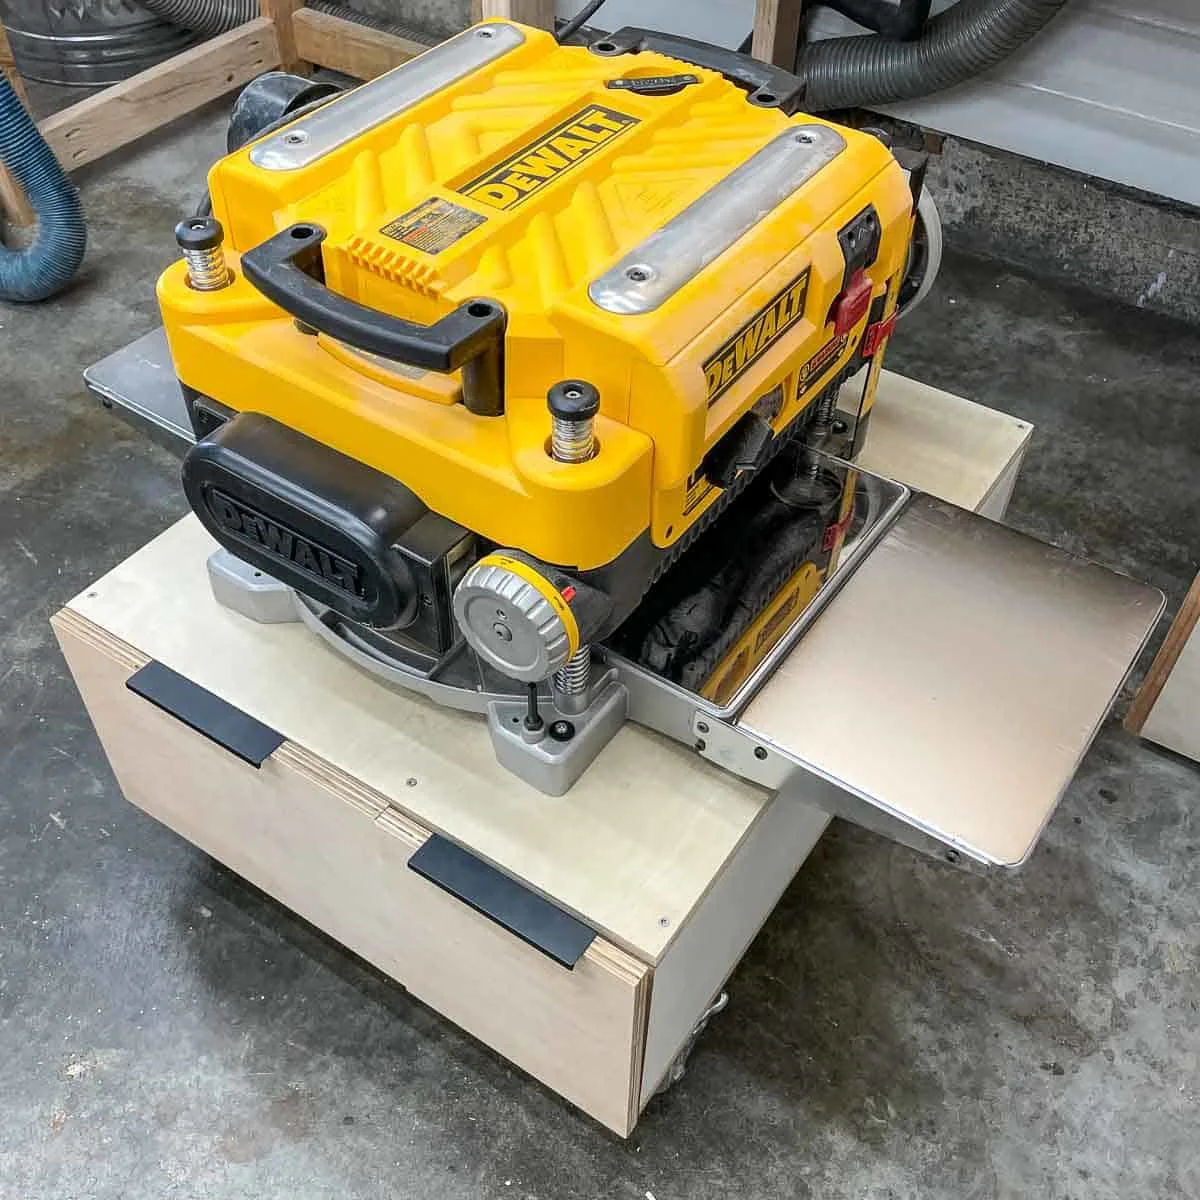
Not all tools need to be at countertop height! The planer stand fits under the miter saw section, because you're just feeding boards into one side and pulling them out on the other. It may involve a bit more bending over, but it saves a ton of space! You can get the plans for the planer stand here.
Don't know what a planer is used for? Check out this article on the difference between a jointer and a planer, and how they work together to create a perfectly flat, square board!

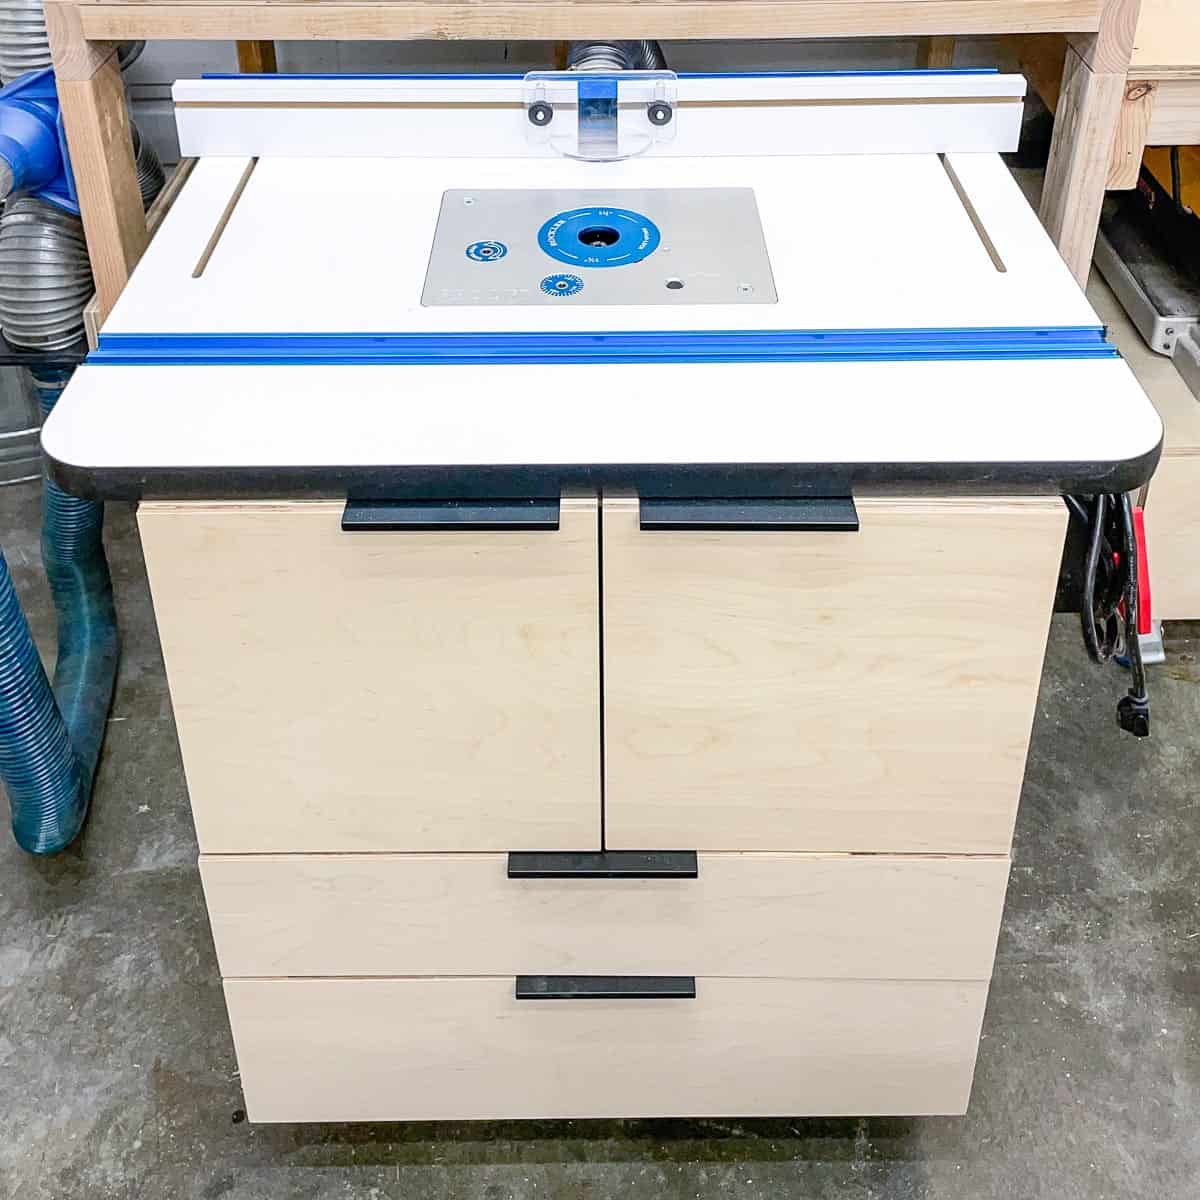
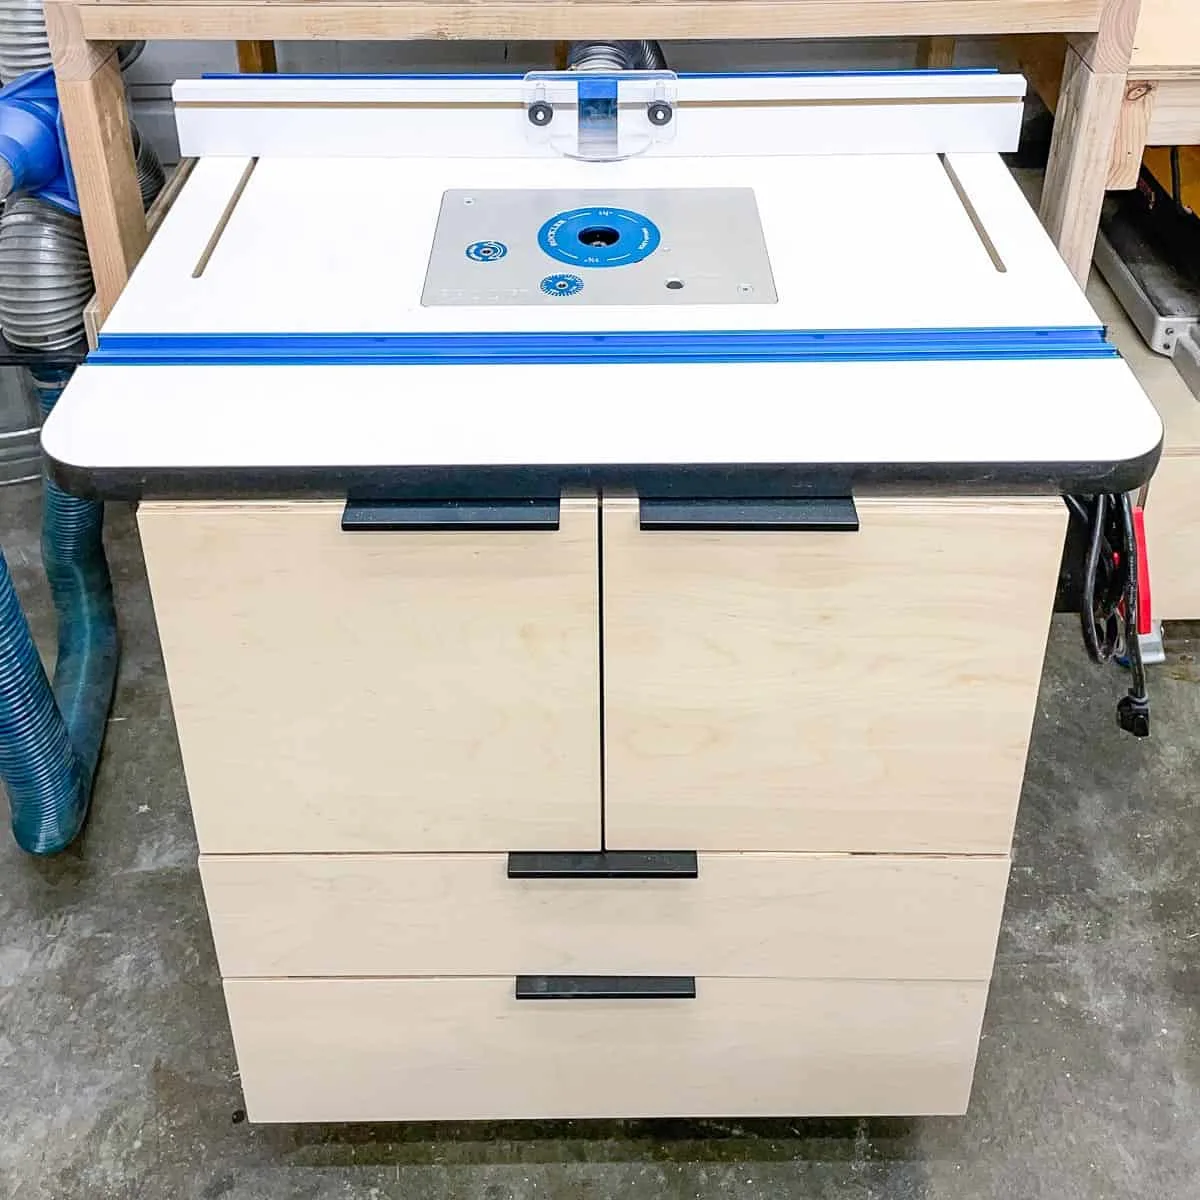
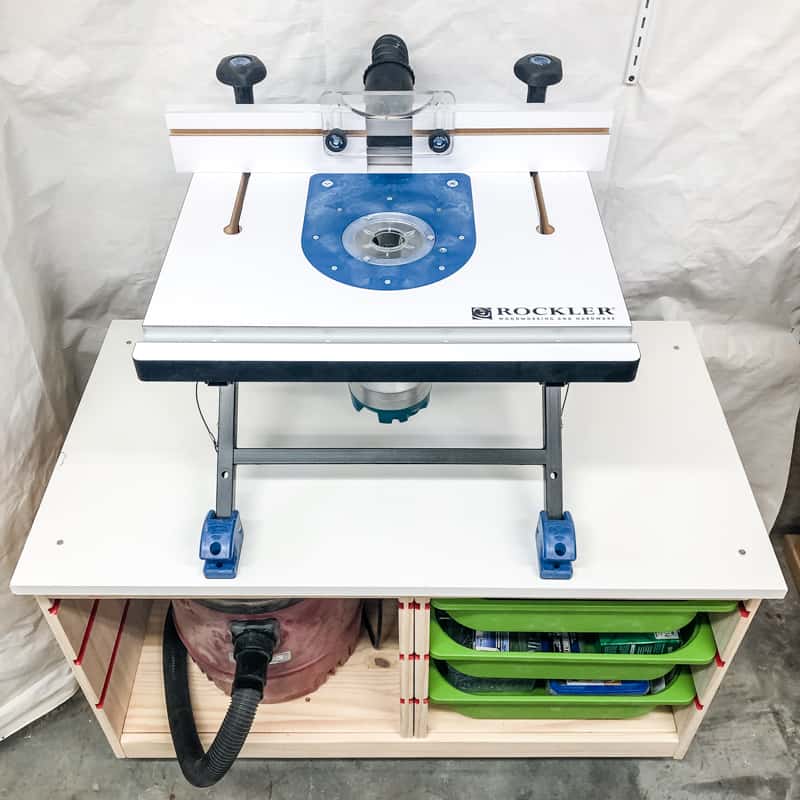
The sides of the miter saw station are raised up a few inches higher than normal so I could fit the router table underneath.
Creative space-saving solutions
Necessity is the mother of invention, and sometimes you have to get creative with your workshop storage to fit all the tools you need! I thought about making one of these flip top tool stands to house two tools in one space, but I didn't have enough room for the flipping action in this corner.

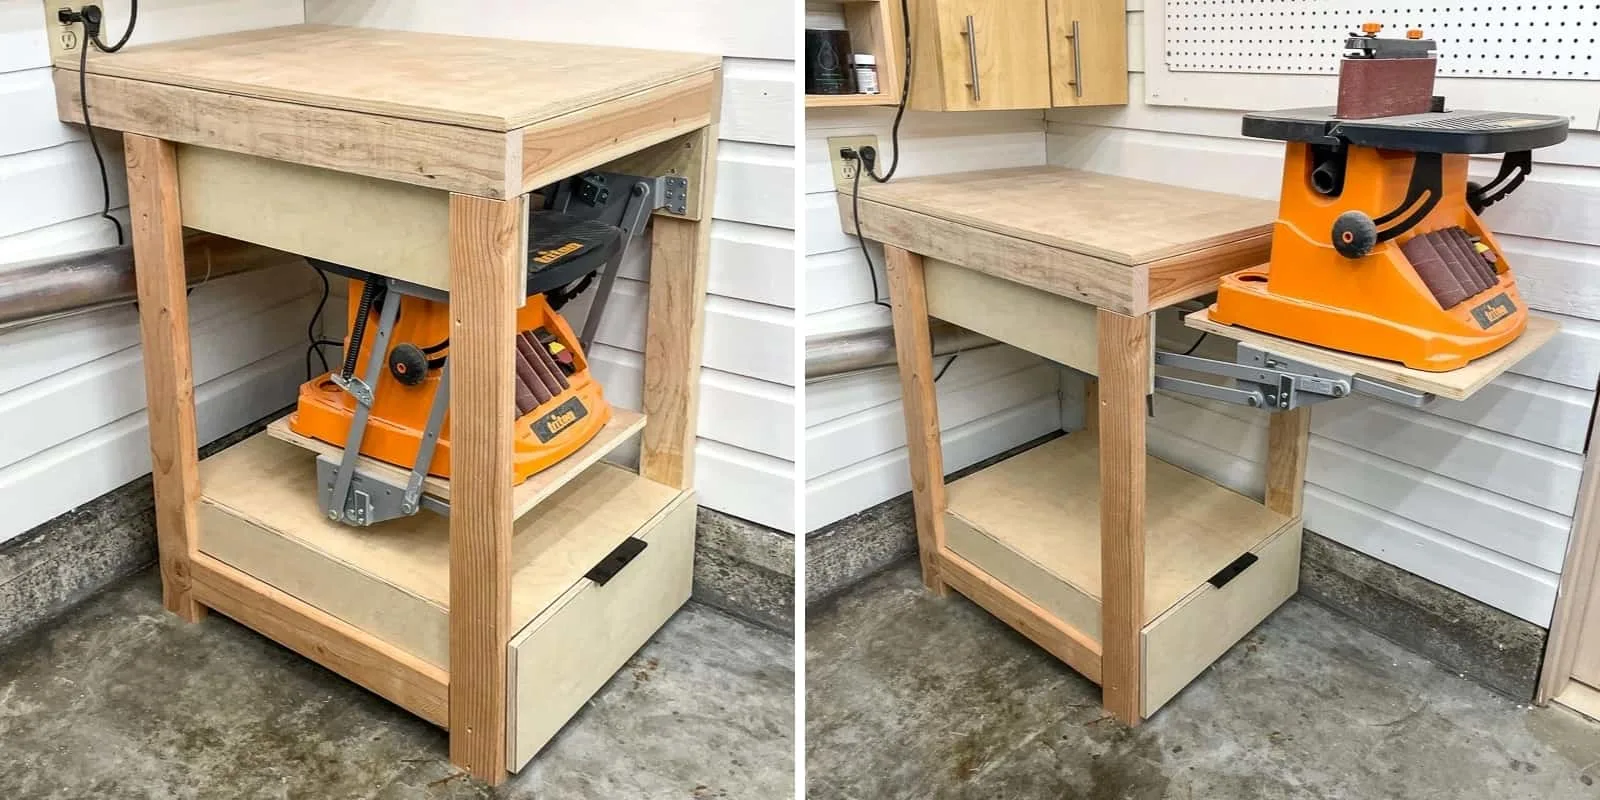
Instead of flipping the top, I decided to use a mixer lift for my benchtop sander. It raises the sander up to counter height when needed, then glides easily back underneath the workbench when I'm done! You could make this tool stand as a separate piece, or integrate it into the miter saw station like I did. The woodworking plans for the stand can be found here.
You can also repurpose other furniture pieces to use as workshop storage. Instead of donating this IKEA piece from my son's room, I reconfigured the bins so I could fit a shop vac on one side. The height is perfect for a benchtop tool stand, and it currently holds my 6" jointer (since I upgraded to the router table you saw earlier).

Use French cleats on the walls
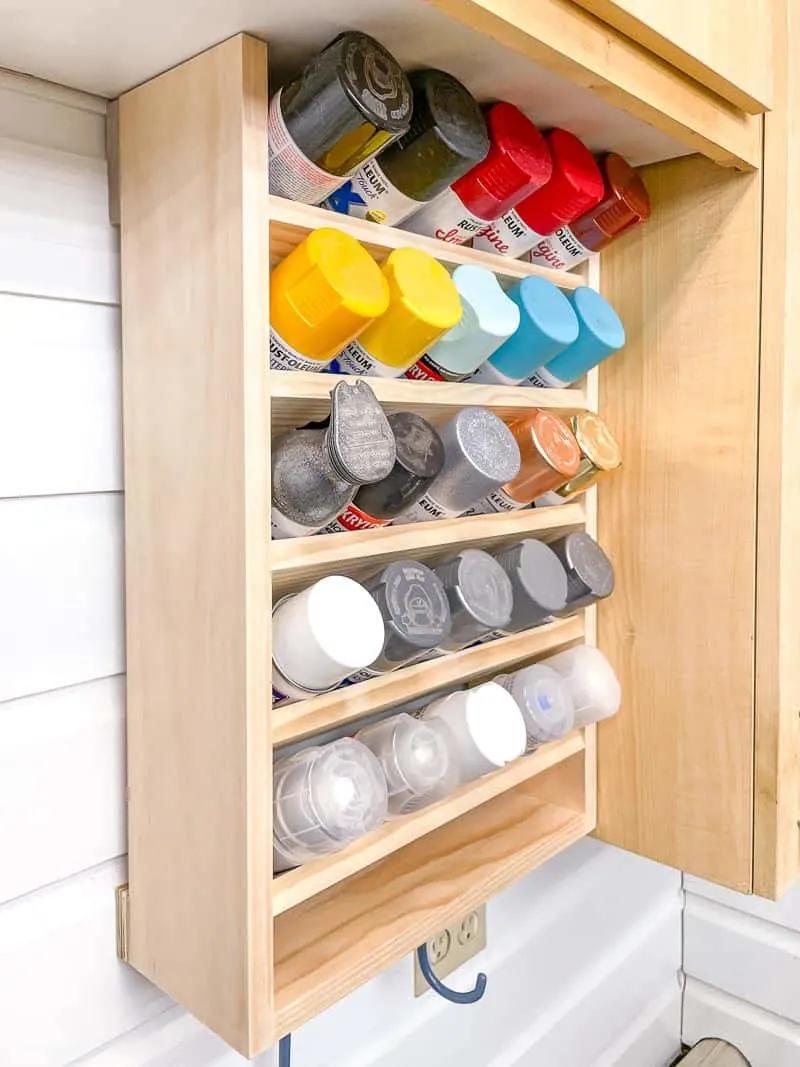
Keep your wall storage flexible with a French cleat system! These simple mounting brackets make it easy to switch out shelves and racks as your needs evolve and change. You can use a single French cleat like on this spray paint storage rack, or install an entire wall of them for all your hand tools and clamps!

I plan to add more French cleat storage behind the miter saw station in the coming weeks, so stay tuned for those tutorials!
I hope this helped give you some ideas for your own small garage or basement workshop! All these projects really help make my workshop more productive and fun to use, and it took years to sort out what I needed from the space. It's come a long way from that basic workbench on sawhorses from years ago!


Daniel
Sunday 2nd of May 2021
Thanks for sharing.Keep up the great work.
Jodie Fitz
Wednesday 19th of September 2018
We need a workshop organization :) Thanks for sharing at Reader Tip Tuesday. I can't wait to see what you have to share at this week's party. Have a great week - xo
Theresa Huse
Friday 14th of September 2018
Thanks for sharing at the #inspirationspotlight party @dearcreatives I know someone who would and should see these tips. lol thanks for the tips! Sharing ;)
Cat Like Meow
Monday 9th of January 2017
Love my Ryobi! I built the Ryobi/Ana White station and love the pull outs to hide all that stuff that may match what's behind your white wall! The miter station is the perfect height to use as an outfeed table for my Rigid Tablesaw. I will be putting melamine and turning one into an assembly table-